To avoid these ads, REGISTER NOW!

VISE REPAIR 101 all vise repairs, lubricants, sources for parts and the tricks to fix

To avoid these ads, REGISTER NOW!

bagged89s10

Well-known member
Joined
Mar 13, 2005
Messages
4,607
Location
CT
Does the swivel jaw just come out once I'm able to turn it far enough? I know on my Parker, there is a pin that goes all the way thru holding the jaw onto the vise body. ImageUploadedByTapatalk1442016325.810763.jpg
 
OP
D

drivesitfar

Well-known member
Joined
Oct 23, 2013
Messages
36,037
Location
Pacific Northwest
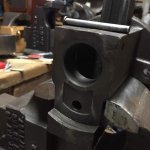
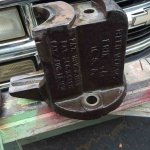
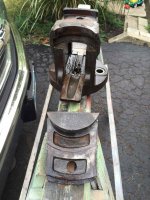
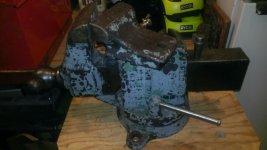
Bagged: here's my Reed 404.5 vise taken apart so you can see. you might need to use some kroil and some coaxing with a rubber or lead hammer.

good luck
 

Attachments

  • WP_20150530_022.jpg
    WP_20150530_022.jpg
    141 KB · Views: 47
  • WP_20150530_021.jpg
    WP_20150530_021.jpg
    149.4 KB · Views: 46
  • WP_20150530_020.jpg
    WP_20150530_020.jpg
    144.7 KB · Views: 45
  • WP_20150530_018.jpg
    WP_20150530_018.jpg
    142.3 KB · Views: 50
  • WP_20141229_011.jpg
    WP_20141229_011.jpg
    108.7 KB · Views: 40

bagged89s10

Well-known member
Joined
Mar 13, 2005
Messages
4,607
Location
CT
Thanks drives.

So I just soaked the swivel jaw in my acetone/transmission fluid mixture for about 2 hours. Then used a block of wood and a hammer to get the jaw moving and out.

That was almost too easy.

My advise to anyone with a stuck swivel jaw and/or swivel jaw pin is to use electrolysis first then a penetrating oil. My vise was one of the rustiest ones I've taken apart.

ImageUploadedByTapatalk1442089189.993177.jpg
ImageUploadedByTapatalk1442089201.829050.jpg
ImageUploadedByTapatalk1442089209.451081.jpg
 

bagged89s10

Well-known member
Joined
Mar 13, 2005
Messages
4,607
Location
CT
Bagged: You bet. Happy to hear your reed 404 is working now as designed. Might be hard to let that one go to auction. Keeper??
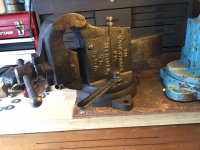

Keeper for now. I have at least 5 vises to finish for clients that are already sold or will be put up for sale before this one. The Reed is far enough down the line for me right now to have to make that call. It is nice to have a swivel jaw vise though. I'll be putting up my Parker 383-1/2 swivel jaw for sale soon. It's so clean I'm just going to clean it up, reassemble it, and maybe polish a few things on it.
ImageUploadedByTapatalk1442108076.821636.jpg
 

bagged89s10

Well-known member
Joined
Mar 13, 2005
Messages
4,607
Location
CT
Bagged: You bet. Happy to hear your reed 404 is working now as designed. Might be hard to let that one go to auction. Keeper??


Funny thing is that I just bought a reed 404 for parts. I guess I'll at least use the handles and nut off this one and part out the rest.
ImageUploadedByTapatalk1442189291.680356.jpg
 

bagged89s10

Well-known member
Joined
Mar 13, 2005
Messages
4,607
Location
CT
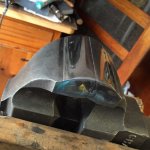
Anyone have a good technique to polish the nose on a vise handle. I was able to chuck up the handle in the lathe to polish.
ImageUploadedByTapatalk1442189342.330452.jpg
 
OP
D

drivesitfar

Well-known member
Joined
Oct 23, 2013
Messages
36,037
Location
Pacific Northwest
Bagged: use the best parts of the 404's to make one nice one. i might use the main screw and handle of the new parts vise on the other one instead of just the vise nut, but your call.

i'm not a pro at polishing yet so you'll need to contact either Kevin, Joe, Get, Autopts and a few others that make their metal shine better than it came out of the factory. check out this thread for the other guys that maybe only did one or two vises because i know there are some that are amazing. also Ritzblitz makes amazing handles so maybe he'll share how he polishes his.

BTW you did an amazing job shining up those old Parker jaws.
 

bagged89s10

Well-known member
Joined
Mar 13, 2005
Messages
4,607
Location
CT
Bagged: use the best parts of the 404's to make one nice one. i might use the main screw and handle of the new parts vise on the other one instead of just the vise nut, but your call.

i'm not a pro at polishing yet so you'll need to contact either Kevin, Joe, Get, Autopts and a few others that make their metal shine better than it came out of the factory. check out this thread for the other guys that maybe only did one or two vises because i know there are some that are amazing. also Ritzblitz makes amazing handles so maybe he'll share how he polishes his.

BTW you did an amazing job shining up those old Parker jaws.


Thanks drives. Yes when I said handles I meant main screw also.
Here are the jaws for anyone who didn't see my other post. It took lots of sanding. Still not buffed out though.
ImageUploadedByTapatalk1442193342.271424.jpg
ImageUploadedByTapatalk1442193351.059185.jpg
 

Shiftless

Well-known member
Joined
Mar 9, 2014
Messages
14,553
Location
East Bay SFO
Bagged:
If those shiny jaws are not even buffed out yet all I can say is "WOW". I'm blown away at your knowhow and skill at attaining what looks like a mirror finish on hardened steel at a stage you don't even consider quite finished!
.......................................... :bowdown: .....................................
 
Last edited:

bagged89s10

Well-known member
Joined
Mar 13, 2005
Messages
4,607
Location
CT
BAGGED
Beautiful job on the jaws!.....


Bagged:
If those shiny jaws are not even buffed out yet all I can say is "WOW". I'm blown away at your knowhow and skill at attaining what looks like a mirror finish on hardened steel at a stage you don't even consider quite finished!
.......................................... :bowdown: .....................................


Thanks. Just 1200 grit so far. This vise is like a test for me on fine tuning my polishing technique.
 

GETRIDAONE

Well-known member
Joined
May 21, 2013
Messages
1,549
Location
Auburn, GA
I bet your jaws were in better shape than ones I am working on. These were rough as a cobb and I'm not even close. If you can make those jaws look that good you should have no problem with the handle knob. I like the machined look on metal, not to say highly polished doesn't look great. I have noticed some handles & knobs shine better than others. It must be the metal is a little different.
 

Attachments

  • IMG_20150914_070740.jpg
    IMG_20150914_070740.jpg
    135.8 KB · Views: 40

bagged89s10

Well-known member
Joined
Mar 13, 2005
Messages
4,607
Location
CT
VISE REPAIR 101 all vise repairs, lubricants, sources for parts and the trick...

I bet your jaws were in better shape than ones I am working on. These were rough as a cobb and I'm not even close. If you can make those jaws look that good you should have no problem with the handle knob. I like the machined look on metal, not to say highly polished doesn't look great. I have noticed some handles & knobs shine better than others. It must be the metal is a little different.

You have your work cut out for you on those. I'm sure they looked like my Oswego jaws before you started.
ImageUploadedByTapatalk1442232261.727133.jpg
ImageUploadedByTapatalk1442232295.476439.jpg
Yeah I like a different look depending on the vise. The Reed I did a while back, I left the handle and nose in a natural worn look. It looked good on that vise.
ImageUploadedByTapatalk1442232041.776896.jpg
ImageUploadedByTapatalk1442232020.548846.jpg
 
Last edited:

Shiftless

Well-known member
Joined
Mar 9, 2014
Messages
14,553
Location
East Bay SFO
I bet your jaws were in better shape than ones I am working on. These were rough as a cobb and I'm not even close. If you can make those jaws look that good you should have no problem with the handle knob. I like the machined look on metal, not to say highly polished doesn't look great. I have noticed some handles & knobs shine better than others. It must be the metal is a little different.

Getridaone and Bagged:
As I'm sure you have realized after working on your very first restoration, the problem with polishing or even just cleaning up the handle knob is access. Unless you remove the handle itself, you just can't get into all the areas with the normal shop tools like flap wheels or Roloc disks.
If those jaws are a test, let me be among the many to assign you a grade of "A" Maybe an A+ with the final refinements.
Have any of you guys used mini Dremel attachments? If so which ones? (Unless that is classified information)
 
Last edited:

GETRIDAONE

Well-known member
Joined
May 21, 2013
Messages
1,549
Location
Auburn, GA
Getridaone and Bagged:
As I'm sure you have realized after working on your very first restoration, the problem with polishing or even just cleaning up the handle knob is access. Unless you remove the handle itself, you just can't get into all the areas with the normal shop tools like flap wheels or Roloc disks.
If those jaws are a test, let me be among the many to assign you a grade of "A" Maybe an A+ with the final refinements.
Have any of you guys used mini Dremel attachments? If so which ones? (Unless that is classified information)

I have a bunch of Dremel buffing shapes, wheels, and pads. I use mostly the little wire wheels. It might be time to buff up my pee wee vise again.
 

Attachments

  • IMG_20150914_122933.jpg
    IMG_20150914_122933.jpg
    134.8 KB · Views: 54

bagged89s10

Well-known member
Joined
Mar 13, 2005
Messages
4,607
Location
CT
THE MAKING OF A MASSIVE VISE HANDLE, REED 206.


So I bought a Reed 206 for a decent price. I've redone the vise but was hesitant putting it back together as I never really liked the homemade vise handle that it came with. Though well made by its toolmaker former owner, it lacked "balls" so to speak. The Reeds that I own have, well, huge balls. I like that feature in them so decided that this needed fixing.


The owner told me that his handle was cold rolled, seemed pretty hard to me. The ends were an elaborately lathed creation that had been bent over further abuse. It is 1 in diameter so 1 7/8 balls were in order.


I removed the ends, hacked off his lathed creation, drilled and tapped 3/8 16 holes for a stud, then attached some balls from McMAster Carr. I wanted to go with a bigger hole (McM C sells up to 1/2 hole in the 1 7/8 ball), but was just paranoid about getting it straight and the right sized holes for 3/8 tap had already been started with the previous setup. They were 10 each plus shipping, ouch.


My new to me Grizzly 3 way vise worked amazingly in my Rockwell 665 for drilling, and tapping the holes.


I then filed a flat spot at the threaded end of the ball to equal the diameter of the handle. Im sure there's a faster way, but a good sharp file gave me what I needed here. Eventually I'll Loctite and thread a stud in there. This thing is extra long and HEAVY! I better get some serious rubber grommets.


As in Kevin's statement above: don't we think alike

I used an old 1 1/8" pry bar to make my handle (24" long) for the Prentiss 98. I bought 3/8" threaded cast iron balls (1.70 each) and smoothed them down. My process was the same as yours and I added a thick rubber washer between the ball and handle for the finger saver.


Great handles scooternut and getridaone. I've been looking for 1.25" diameter threaded balls with no luck.
Any ideas where to find them?
I just I can get the 1-3/8" if I don't find them.
 

GETRIDAONE

Well-known member
Joined
May 21, 2013
Messages
1,549
Location
Auburn, GA
Here is where I found mine, their warehouse is close to me. I had to drill and tap the 3/8 hole then put it in a drill press with sand paper for smoothing it out. Picture is a square hole that I got thinking I might use it for a slip over fit. It is 1.5" dia. And fairly rough as you can see.
www.kingmetals.com.
 

Attachments

  • IMG_20150915_070838.jpg
    IMG_20150915_070838.jpg
    127.2 KB · Views: 47

Shiftless

Well-known member
Joined
Mar 9, 2014
Messages
14,553
Location
East Bay SFO
Thanks Get
I thought that the Dremel tool was just about the only way to work on those areas. I know that somewhere in my stash is a kit with some of those shapes and wire wheels. I live near a fantastic family owned hardware store that has a glass fronted cabinet with maybe a hundred Dremel attachments.
 
To avoid these ads, REGISTER NOW!

Gert

Well-known member
Joined
Feb 21, 2012
Messages
139
Location
Netherlands
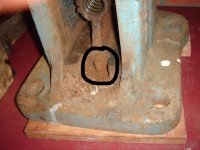
A little update for those interested and a call for help...

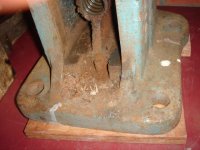
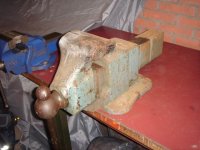
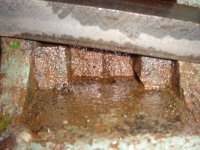
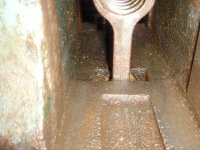
Still trying to dissassable the Reed 106. Kind of a struggle.
The main nut will not come out. There's no movement at all in the main nuts dovetail.
So far I have:
- let it soak in penetrating oil for a couple of weeks.
- heated
- cleaned and two days electrolysis
- heated
- used a kind of press with a 1-ton bottle-jack
- heated
- let it soak in rustyco rust remover for two days.
- used a kind of press with a 12-ton bottle-jack until the M12 threads
ripped off (and one of the M12 nuts flew away)
- gently hammerd on it (with a piece of hard-wood to protect the metal)
- heated again

I could just leave it like it is now, but don't want to give up so easy :willy_nil
Did anyone deal with something like this and know what else I could try?
Thanks!

Gert

McBrownie I will share a picture of the B & D Workmate later but have not found time to make a picture yet.
 

Attachments

  • DSC04783 (Small).JPG
    DSC04783 (Small).JPG
    94.4 KB · Views: 92
  • DSC04755 (Small).JPG
    DSC04755 (Small).JPG
    92.5 KB · Views: 88
  • DSC04753 (Small).JPG
    DSC04753 (Small).JPG
    111.1 KB · Views: 93
  • DSC04100 (Small).JPG
    DSC04100 (Small).JPG
    97.8 KB · Views: 98
  • DSC04083 (Small).JPG
    DSC04083 (Small).JPG
    86.8 KB · Views: 77
  • DSC04754 (Small).JPG
    DSC04754 (Small).JPG
    111.6 KB · Views: 89
Last edited:

bagged89s10

Well-known member
Joined
Mar 13, 2005
Messages
4,607
Location
CT
A little update for those interested and a call for help...

Still trying to dissassable the Reed 106. Kind of a struggle.
The main nut will not come out. There's no movement at all in the main nuts dovetail.
So far I have:
- let it soak in penetrating oil for a couple of weeks.
- heated
- cleaned and two days electrolysis
- heated
- used a kind of press with a 1-ton bottle-jack
- heated
- let it soak in rustyco rust remover for two days.
- used a kind of press with a 12-ton bottle-jack until the M12 threads
ripped off (and one of the M12 nuts flew away)
- gently hammerd on it (with a piece of hard-wood to protect the metal)
- heated again

I could just leave it like it is now, but don't want to give up so easy :willy_nil
Did anyone deal with something like this and know what else I could try?
Thanks!

Gert

McBrownie I will share a picture of the B & D Workmate later but have not found time to make a picture yet.


Looks like you have a pin holding the main but in place. Punch it out from underneath, then the main but will come right out.
ImageUploadedByTapatalk1442349921.767245.jpg
 

McBrownie

Well-known member
Joined
Mar 27, 2014
Messages
1,827
Location
Cleveland, OH
A little update for those interested and a call for help...

Still trying to dissassable the Reed 106. Kind of a struggle.
The main nut will not come out. There's no movement at all in the main nuts dovetail.
So far I have:
- let it soak in penetrating oil for a couple of weeks.
- heated
- cleaned and two days electrolysis
- heated
- used a kind of press with a 1-ton bottle-jack
- heated
- let it soak in rustyco rust remover for two days.
- used a kind of press with a 12-ton bottle-jack until the M12 threads
ripped off (and one of the M12 nuts flew away)
- gently hammerd on it (with a piece of hard-wood to protect the metal)
- heated again

I could just leave it like it is now, but don't want to give up so easy :willy_nil
Did anyone deal with something like this and know what else I could try?
Thanks!

Gert

McBrownie I will share a picture of the B & D Workmate later but have not found time to make a picture yet.

Gert, that is really frozen in there. I think I would leave it alone before I broke something that really didn't need fixing. ;)
 
OP
D

drivesitfar

Well-known member
Joined
Oct 23, 2013
Messages
36,037
Location
Pacific Northwest
Gert: like Rick posted if it's stuck in it's spot that good leave it there if the vise it working AS IS. otherwise you risk breaking either the vise nut or static or both. i might not have used a bottle jack either, but you had a nice set up and happy to see and hear it didn't break anything.

good luck.
 

jrobb316

Well-known member
Joined
May 18, 2014
Messages
1,377
Location
WI
When you say heat, what kind of heat are we talking about? If it's propane or even MAPP gas that isn't going to cut it. That is ok for sweating pipe or lighting your grill but that's about it.
 

Fretters

Well-known member
Joined
Jan 25, 2014
Messages
4,217
Location
South Yorkshire, England
Any chance of a photo from the front of the jaw, without a jack blocking the view of the nut? A vinegar soak is one thing to try. Make a dam around the nuts dovetail with glazing putty and then pour some vinegar in there. If you're going to try hammering, a punch on the bottom of the dovetail would be least likely to cause any damage, but that depends on whether you can access the dovetail from the front. Can't tell from those photo's.
 

Gert

Well-known member
Joined
Feb 21, 2012
Messages
139
Location
Netherlands
Thanks for all the replies, really appreciate it.

jrobb316 Yes, I used propane gas. I found that I could heat it to about 100 deg C / 212 deg F. It's not enough. Guess there's too much metal to heat. Will work on that.

On the other hand, when heating, the metal expands. When cooling, the metal shrinks and probably comes out more easy. I am going to put it in the freezer and see if that helps. I know that cold metal is breaking easier so I need to be careful.

Fretters Picture of the front side attached. I like the vinegar/dam idea and will try that too. I understand that when applying force (hammer/press) it needs to be as close to the dovetail as possible.

If all else fails, I will leave it like it is.
 

Attachments

  • DSC04787 (Small).JPG
    DSC04787 (Small).JPG
    112.1 KB · Views: 56

Fretters

Well-known member
Joined
Jan 25, 2014
Messages
4,217
Location
South Yorkshire, England
Cheers for that photo. :) Definitely doesn't make things any easier not being able to nudge the front bottom of that nut assembly. That's a gangly looking stem you're applying pressure to. If it was a bit chunkier, you could be a bit more forceful with it, but that looks quite frail.

It may also be worth trying putting the front jaw in from the back of the body and using the leadscrew itself to apply some pulling pressure on the nut. If you put something wide enough between the jaws so that the end of the leadscrew is only just in there far enough to gain full contact with the length of the nut, that would allow you to gradually apply pressure with the leadscrew whilst also giving the nut some taps with a hardwood block and mallet from the front. The combination of pressure and shocking it may just work. You wouldn't want to risk tightening the screw up too much or hitting too hard though, if it doesn't look like it's giving way. Better to leave that nut as it is rather than stripping the threads in the nut or snapping that nut stem.
 
Last edited:
OP
D

drivesitfar

Well-known member
Joined
Oct 23, 2013
Messages
36,037
Location
Pacific Northwest
Gert: some great ideas and advice here. like i mentioned if it was mine and it was stuck in place and working great i'd leave it there.

if you do try the vinegar method you need to make sure to rinse the vinegar off completely and dry it because vinegar will eat cast if left on it.

good luck
 

va.grouseman

Well-known member
Joined
Mar 26, 2011
Messages
4,965
Location
Southern-Central VA.
Gert,---What Drive said.---After you've cleaned and dried it, leave the little pond in place and go back with penetrating oil.---Fill the pool and let set a couple of days.

Penetrating evaporates pretty quick so you may have to monitor and add.

Your slight jacking pressure, accompanied with light tapping and the viscosity of the oil should start to make it move.---When I say light tapping, I mean very light tapping, as in baby ball peen, because all you want is the light vibration exciting the oil soaked rust, which should start giving up the ghost.

The trouble with heating or chilling a large chunk of metal with two components is that by the time you get the outside unit expanded, or the inside unit contracted, the opposing pieces have expanded or contracted simultaneously.---You broke even.---Same problem.

Good luck.:thumbup:
 
Last edited:

mdbeck1

Well-known member
Joined
Mar 7, 2010
Messages
2,297
Location
Norman, OK
I recently had good luck with a can of lubricating oil that had a cold "shock" to it. I don't remember the name (I'm at work and it's at home) but it was in the aisle with the penetrating oils. I used it on all six exhaust pipe nuts. They came off without breaking a stud.

I don't remember what it cost but it wasn't expensive.
 

Gert

Well-known member
Joined
Feb 21, 2012
Messages
139
Location
Netherlands
Thanks for all the suggestions guys.
Knowing myself, I cannot stop to try some of the solutions you suggested, although I believe it is better to keep it like it is now.
Taking my time and keep doing things gentle.
Will keep you updated.

mbeck1Something like CRC freeze off? http://crcindustries.com/auto/?s=05002. I might try that as well.
 

mdbeck1

Well-known member
Joined
Mar 7, 2010
Messages
2,297
Location
Norman, OK
Thanks for all the suggestions guys.
Knowing myself, I cannot stop to try some of the solutions you suggested, although I believe it is better to keep it like it is now.
Taking my time and keep doing things gentle.
Will keep you updated.

mbeck1Something like CRC freeze off? http://crcindustries.com/auto/?s=05002. I might try that as well.

That would be the stuff....

I would soak them down with Kroil, hit them with the CRC and then with Kroil. Wait an hour then hit them with the impact. A couple of hits forward, then backward. I did that off and on for a couple of days. It finally spun off.
 

GETRIDAONE

Well-known member
Joined
May 21, 2013
Messages
1,549
Location
Auburn, GA
It might be time for an upgrade on the E Tank. I had to do the front half and then the back would only fit at an angle. :headscrat. That front portion and rail is about 24" long and over 100 lbs.
It is a Miller Falls 7" rail vise.
 

Attachments

  • IMG_20150919_054335.jpg
    IMG_20150919_054335.jpg
    140.7 KB · Views: 80

bagged89s10

Well-known member
Joined
Mar 13, 2005
Messages
4,607
Location
CT
It might be time for an upgrade on the E Tank. I had to do the front half and then the back would only fit at an angle. :headscrat. That front portion and rail is about 24" long and over 100 lbs.

It is a Miller Falls 7" rail vise.


That's a big boy!
 

Bricago

Well-known member
Joined
Mar 2, 2013
Messages
83
Location
Chicago
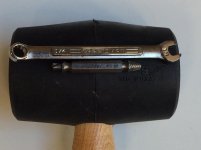
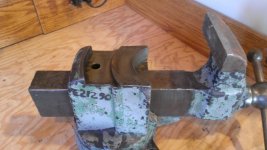
Improvised Impact Driver

My 20v drill wasn't providing enough torque to extract a stripped screw from a jaw facing. I've had good luck with a Speed Out for this situation, but my manual impact driver can't chuck up a Speed Out. This seemed like a long shot, but it worked. Recalling Get's advice on using the tools you have on hand and JRobb's warning about extractors breaking off, I proceeded with caution.

Starting with light taps, the wrench bounced in place. Gently and gradually increasing the force got the wrench turning and the screw out.
 

Attachments

  • photo 1.jpg
    photo 1.jpg
    131.6 KB · Views: 63
  • photo 3.jpg
    photo 3.jpg
    134.2 KB · Views: 91

zkling

Well-known member
Joined
Jan 23, 2007
Messages
16,939
Gert,---What Drive said.---After you've cleaned and dried it, leave the little pond in place and go back with penetrating oil.---Fill the pool and let set a couple of days.

Penetrating evaporates pretty quick so you may have to monitor and add.

Your slight jacking pressure, accompanied with light tapping and the viscosity of the oil should start to make it move.---When I say light tapping, I mean very light tapping, as in baby ball peen, because all you want is the light vibration exciting the oil soaked rust, which should start giving up the ghost.

The trouble with heating or chilling a large chunk of metal with two components is that by the time you get the outside unit expanded, or the inside unit contracted, the opposing pieces have expanded or contracted simultaneously.---You broke even.---Same problem.

Good luck.:thumbup:

:+1: You want repeated lite taps, like a low frequency vibration to get it started. I'd go easy with a brass punch and make sure you are hitting it low to prevent sticking from the 2:1 mechanics rule.

Improvised Impact Driver

My 20v drill wasn't providing enough torque to extract a stripped screw from a jaw facing. I've had good luck with a Speed Out for this situation, but my manual impact driver can't chuck up a Speed Out. This seemed like a long shot, but it worked. Recalling Get's advice on using the tools you have on hand and JRobb's warning about extractors breaking off, I proceeded with caution.

Starting with light taps, the wrench bounced in place. Gently and gradually increasing the force got the wrench turning and the screw out.

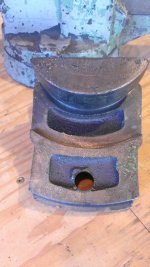
When you do that, hold the wrench in the direction you want it to go to prevent the bouncing as that takes away from the blow imparted into the screw. A prelode if you will.
 
To avoid these ads, REGISTER NOW!
Top Bottom