To avoid these ads, REGISTER NOW!

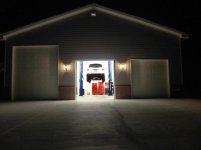
Above 1200 Sq/FT The Lone Beech Garage (60x46x16)

Wokspaces above 1200 squarefeet.
OP
S

sbosecker

Well-known member
Joined
Sep 25, 2012
Messages
3,539
Location
Peachtree City, GA
Re: The Lone Beech Garage Build Thread (60x46)

Scott,

How are the mini splits performing on the main floor?

AZpilot,

I have been extremely pleased with their performance so far. I have been told that this area of the country has had its second hottest summer on record - I think 1980 was hotter.

The main floor has two exterior units - each running two "heads" on the interior of the building. There is an additional unit running a single "head" in the Mezzanine.

I set the main floor units at 78 degrees and the Mezzanine unit at 82 degrees. I have let all these machines run constantly all summer with very little change to those settings. Occasionally I was upstairs in the Mezzanine and I would drop the temperature a bit and when the guys were installing the 2-Post Lift I dropped the temperature on the main floor to 76 degrees.

The point of all this is that I kept the air in the Lone Beech Garage conditioned during a hot summer. I wasn't out there a lot so the electric bill pretty much represents the cost of operating only the mini-splits.

My electric bill was approximately $81 in July and $76 in August. I'm very pleased with that.

Best regards,

Scott
 
Last edited:
To avoid these ads, REGISTER NOW!
OP
S

sbosecker

Well-known member
Joined
Sep 25, 2012
Messages
3,539
Location
Peachtree City, GA
Re: The Lone Beech Garage Build Thread (60x46)

Wednesday - September 14, 2016

A busy but enjoyable day in Peachtree City.


20160914-01.jpg 20160914-02.jpg

20160914-03.jpg 20160914-04.jpg

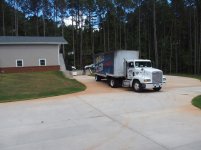
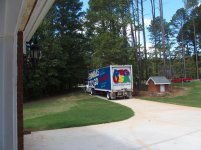
My wife had purchased some new mattresses for our bedrooms. To my surprise they came in a semi trailer. When I had planned the layout for the driveways that support the house and the Lone Beech Garage, I had imagined it accommodating a large truck; I hadn't considered a semi. The driveway layout allowed the semi to enter and leave without a fuss. I was happy to see that!


20160914-05.jpg

The folks - owner, office administrator & owner's son - that managed the building of the Lone Beech Garage dropped by with a "housewarming" gift. An Allis-Chalmers Mail Box. Ha!


20160914-06.jpg

Which allows me to segue to "What I did in my garage today."


Continued in next post...
 
Last edited:
OP
S

sbosecker

Well-known member
Joined
Sep 25, 2012
Messages
3,539
Location
Peachtree City, GA
Re: The Lone Beech Garage Build Thread (60x46)

Continued...


Today I took a break from outfitting the Lone Beech Garage to actually using it for what it was intended to do...

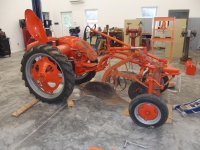
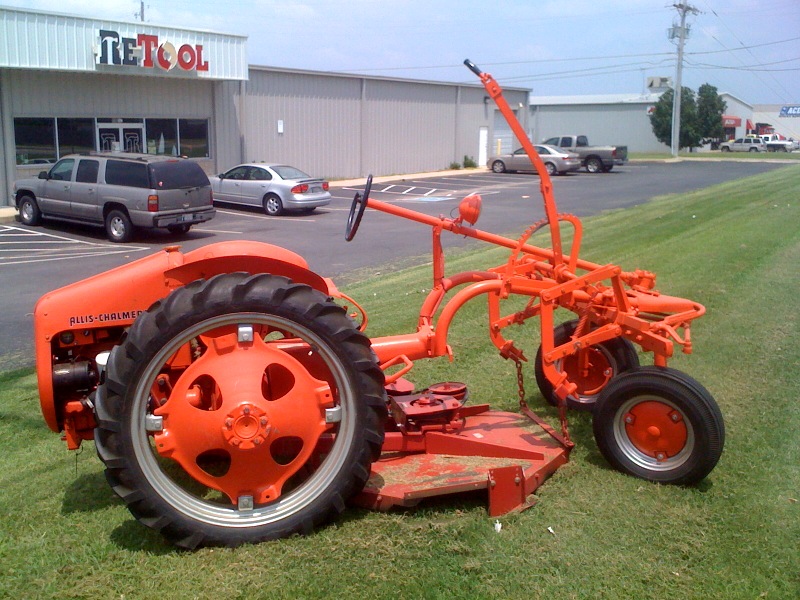
There will be a "Inman Farm Heritage Days" show about 15 minutes from my place this coming weekend. For the past few years I've taken one of my tractors over to add to the displays. For this year's show I've decided to mount a plow on one of my Allis-Chalmers Model G's for display.

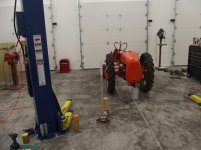
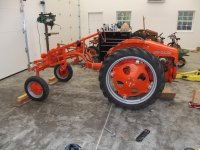
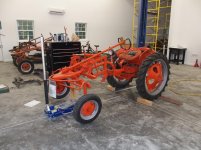
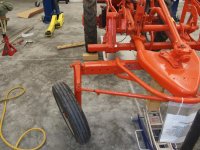
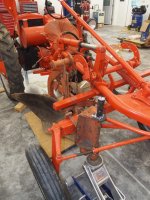
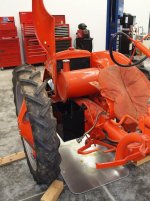
To properly plow with this tractor, the wheels have to be set up to accommodate the plowing operation. The rear wheels are set between 40 and 44 inches wide and the front wheels are set up in an asymmetric profile that calls for the right front wheel to be set wider than the left front wheel.


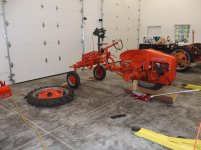
20160914-11.jpg 20160914-12.jpg 20160914-13.jpg

I started with the left rear wheel. I removed it from the axle and then adjusted how the wheel was mounted to rim. The width of the rear wheels can be adjusted from 36 inches wide to 64 inches wide depending on how the convex wheel is attached to the rim.

When I made this change in how the rims were mounted to the wheel I discovered that the bolts were only 1-1/2 inches long. The specification is for either a 1-3/4 inch bolt or a 2-inch bolt depending on the serial number of the tractor. It is not unusual to find an occasional "Easter Egg" on a 68 year old machine. I made a quick trip to the local Tractor Supply Store and got some Grade 8 bolts of the proper length.

The right side was adjusted in a similar fashion.


20160914-14.jpg

I jacked up the front of the tractor to allow work on the front end's stance.


20160914-15.jpg 20160914-16.jpg

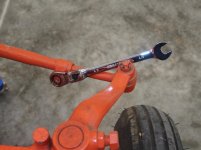
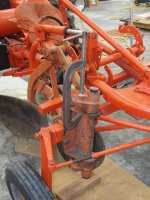
I loosened the tie rod bolt and used a dead-blow hammer to help lengthen the tie rod assembly.


20160914-17.jpg

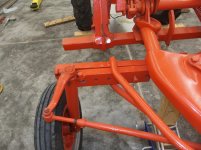
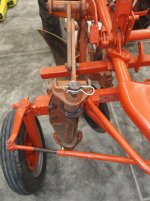
The front end's width is adjusted by aligning bolt holes on the spindle support with holes in the bar assembly. The front end's width, like the rear's, is adjustable from 36-inches to 64-inches. I used an impact tool to remove the two bolts on the front right side.


Continued in next post...
 
Last edited:
OP
S

sbosecker

Well-known member
Joined
Sep 25, 2012
Messages
3,539
Location
Peachtree City, GA
Re: The Lone Beech Garage Build Thread (60x46)

Continued...


20160914-21.jpg 20160914-22.jpg 20160914-23.jpg

The bolts on the right side were assigned new positions and the tie rod slid out longer to accommodate the wider setup. The left side was also tweaked. The last picture shows the asymmetric set up of the front end after the work was completed.


20160914-24.jpg 20160914-25.jpg 20160914-26.jpg

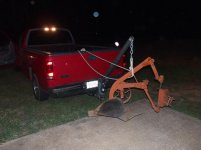
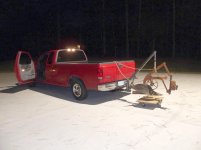
Now I needed to get the plow - in the house's basement - to the Lone Beech Garage. I elected to use the pickup truck "Hitch Crane" to accomplish this task. My son acted as a "wing walker" - following behind the pickup truck and - if needed - damping any oscillations that occurred.
This evolution was accomplished without any drama.


20160914-27.jpg

The plow was now in position to be mounted on the tractor. I will attend to that tomorrow.

An enjoyable day!


Scott
 
Last edited:

1949 caddyman

Well-known member
Joined
Oct 5, 2010
Messages
1,778
Location
Arizona
Re: The Lone Beech Garage Build Thread (60x46)

Did that big truck deliver the mail box via the loading (unloading) dock?
 
OP
S

sbosecker

Well-known member
Joined
Sep 25, 2012
Messages
3,539
Location
Peachtree City, GA
Re: The Lone Beech Garage Build Thread (60x46)

Did that big truck deliver the mail box via the loading (unloading) dock?

1949 caddyman,

Ha!

No they delivered 3 sets of mattresses and box springs. They had quite a number of deliveries to make after stopping at my place. The truck was quite full of "stuff".

While they could have used the loading dock, that would have just made for a longer trip between the drop-off point and the opposite end of the house where the bedrooms are. They swung up close to the garage doors and unloaded. The operation in the pictures was them maneuvering to leave the property.

Best regards,

Scott
 

shortykorte

Well-known member
Joined
Sep 1, 2014
Messages
8,039
Location
Tallahassee, Fl
Re: The Lone Beech Garage Build Thread (60x46)

All I want for Christmas are some jack stands to replace the 4x4. :willy_nil

After my incident with a battery pack, safety first. :thumbup:
 
OP
S

sbosecker

Well-known member
Joined
Sep 25, 2012
Messages
3,539
Location
Peachtree City, GA
Re: The Lone Beech Garage Build Thread (60x46)

All I want for Christmas are some jack stands to replace the 4x4. :willy_nil

After my incident with a battery pack, safety first. :thumbup:

shortykorte,

Yeah... I wasn't happy about that.

Two problems:

1. My Jack Stands aren't quite tall enough. That could be "worked around" by adding a foundation that results in enough height.

2. With the rear wheels set at almost their narrowest width (they were at a bit over 3 feet when I started working on them) there isn't room for both a floor jack and a jack stand.


Best regards,

Scott
 

drivesitfar

Well-known member
Joined
Oct 23, 2013
Messages
36,072
Location
Pacific Northwest
Re: The Lone Beech Garage Build Thread (60x46)

SB: heckuva housewarming gift with that mailbox and nice family picture too.

great plan if a full size semi can drive in and then turn around and head back out without driving on your grass. WELL DONE!!

love the old tractors and if you are collecting more than a few i might have to send you to Don Long's or other member's garages that really know how to pack in the cool stuff and still be able to use their big garages and shops.

keep up the great work and thanks for showing how you moved the compressor. are you putting rubber feet under the feet to keep it a little quieter before you bolt it down? or maybe buy a rubber horse mat that is 6x4x.75 and cut it in half so you can have 1.5 inches of rubber under your compressor. also the horse mats only run about $45 up here so if they have them in your area might also work for other areas you need a little floor protection.
 
OP
S

sbosecker

Well-known member
Joined
Sep 25, 2012
Messages
3,539
Location
Peachtree City, GA
Re: The Lone Beech Garage Build Thread (60x46)

SB: heckuva housewarming gift with that mailbox and nice family picture too.

great plan if a full size semi can drive in and then turn around and head back out without driving on your grass. WELL DONE!!

love the old tractors and if you are collecting more than a few i might have to send you to Don Long's or other member's garages that really know how to pack in the cool stuff and still be able to use their big garages and shops.

keep up the great work and thanks for showing how you moved the compressor. are you putting rubber feet under the feet to keep it a little quieter before you bolt it down? or maybe buy a rubber horse mat that is 6x4x.75 and cut it in half so you can have 1.5 inches of rubber under your compressor. also the horse mats only run about $45 up here so if they have them in your area might also work for other areas you need a little floor protection.

DrivesItFar,

Thanks for all the kind words!

I've got 4 of these old Model G's and, even though I plan to thin the herd to 3 at some point, their restoration will keep me busy for a while. The implements associated with the tractors also need to be restored so all this will provide me with entertainment for the foreseeable future.

I have some pads specifically made to be placed between the air compressor and the floor. I'll be using those when the time comes.

Best regards,

Scott
 
OP
S

sbosecker

Well-known member
Joined
Sep 25, 2012
Messages
3,539
Location
Peachtree City, GA
Re: The Lone Beech Garage Build Thread (60x46)

Thursday - September 15, 2016

Today being my wife's birthday, I spent some time with her in the morning. After lunch she wanted to have some maintenance done on her nails so that allowed me to do some work in the Lone Beech Garage.

I wanted to pick up where I had left off last night and get the plow attached to the tractor as well as put in a fresh battery. If I got that accomplished early enough, I would load the tractor on a trailer and move it to the grounds of the nearby farm show that starts tomorrow. I needed to be somewhat efficient with all of the above in order to have a birthday dinner with my bride this evening.


20160915-01.jpg

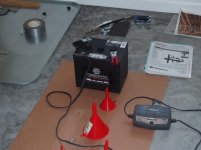
The bane of old tractor maintenance seems to be acquiring decent quality 6 volt batteries. I'm hoping this NAPA battery that I purchased earlier this week will last longer than the Exide batteries I bought at Rural King not all that long ago.


20160915-02.jpg

While it looks accessible, the battery box's location - with the rear tires set in a narrow configuration - in this tractor makes it difficult to remove and replace a battery. I've found it easiest to remove 3 bolts and pivot the right wheel guard up and then remove the bolt holding the operator's seat so that it can allow a clear path for extraction and replacement of the battery.


20160915-03.jpg 20160915-04.jpg

20160915-05.jpg 20160915-06.jpg

Attaching the plow was a bit of a fight. This was due to some hardware that should be replaced (bent carriage bolts) as well as this being the first time I had mounted a plow on an Allis-Chalmers Model G tractor.

Whatever small difficulties I had were negligible ...and the reality of it is that it was such a pleasure to be working on this machine in my new building.

I had space to work.
The workspace was very well lit.
My tools were readily available.
I had cool breezes keeping me comfortable.
I had my music playing.

Sweet.


20160915-07.jpg

In the late afternoon I got in my truck and, with the tractor following along on my trailer, made my way to Inman, GA. Upon arrival I unloaded the tractor and set up my display station next to a Model G cousin. It is supposed to be sunny and warm for the next few days so I put up a little tent over my tractor to provide a little shade.

I returned home and my wife and I went out to a restaurant to celebrate her birthday.

Another excellent day!


Scott
 
Last edited:

AZpilot

Well-known member
Joined
Sep 29, 2012
Messages
413
Location
Mesa, AZ
Re: The Lone Beech Garage Build Thread (60x46)

Scott,

Batteries. Not much run time, long storage time. equal drained battery. You can only drain a lead acid 50% or so before it will not take a charge. Try either a battery tender for the battery, or charging it up before use.
 
OP
S

sbosecker

Well-known member
Joined
Sep 25, 2012
Messages
3,539
Location
Peachtree City, GA
Re: The Lone Beech Garage Build Thread (60x46)

Scott,

Batteries. Not much run time, long storage time. equal drained battery. You can only drain a lead acid 50% or so before it will not take a charge. Try either a battery tender for the battery, or charging it up before use.

AZpilot,

Yeah... a battery tender is probably the answer. OK, several battery tenders.

Ha!

Best regards,

Scott
 
OP
S

sbosecker

Well-known member
Joined
Sep 25, 2012
Messages
3,539
Location
Peachtree City, GA
Re: The Lone Beech Garage Build Thread (60x46)

Saturday - September 17, 2016


20160917-01.jpg

A picture taken of me during the "Parade of Power" (Ha!) at the Inman Farm Heritage Show yesterday.

I'll be returning this tractor to the Lone Beech Garage either this evening or tomorrow morning.

Scott
 

1/2 Cup

Member Emeritus
Joined
Apr 28, 2012
Messages
19,283
Location
Shepparton. Victoria. Australia
Re: The Lone Beech Garage Build Thread (60x46)

Saturday - September 17, 2016


20160917-01.jpg

A picture taken of me during the "Parade of Power" (Ha!) at the Inman Farm Heritage Show yesterday.

I'll be returning this tractor to the Lone Beech Garage either this evening or tomorrow morning.

Scott

Scott, absolutely fantastic.:thumbup:

The tractor really looks the goods.:thumbup:

Regards
 

Bob Heine

ALLIANCE MEMBER
Joined
Oct 24, 2009
Messages
10,709
Location
Boca Raton, Florida
Re: The Lone Beech Garage Build Thread (60x46)

Any mower attachment for that? Nice looking tractor.
AZ, I believe Scott still has the one pictured in Post 1053 (a few pages back).
attachment.php
 

tweidman

Well-known member
Joined
Dec 1, 2009
Messages
505
Location
Ackermanville, Pa.
Re: The Lone Beech Garage Build Thread (60x46)

Nice model G. I spent many hours on my dad's model G. He also had 4 of them at one time. We nick named our first one "flash".
As you know, with only 9hp, and 3 speeds it's not very quick.
 
To avoid these ads, REGISTER NOW!
OP
S

sbosecker

Well-known member
Joined
Sep 25, 2012
Messages
3,539
Location
Peachtree City, GA
Re: The Lone Beech Garage Build Thread (60x46)

Any mower attachment for that? Nice looking tractor.

AZpilot,


H5591.JPG


Allis-Chalmers made a sickle bar mower for this tractor.


There were at least a couple of aftermarket belly mowers made for this tractor.


allis_G_2.jpg


Woods is a company that makes bush hogs and mowers for farms. The Woods Model 42G was a variant of a machine that was used on other small tractors.

A company called Sunmaster also made one called a Klipper.

I've had both at one time or another. I've sold the Klipper but still have the Woods mower. I didn't think I needed two belly mowers. Ha!

Best regards,

Scott
 
OP
S

sbosecker

Well-known member
Joined
Sep 25, 2012
Messages
3,539
Location
Peachtree City, GA
Re: The Lone Beech Garage Build Thread (60x46)

Scott, absolutely fantastic.:thumbup:

The tractor really looks the goods.:thumbup:

Regards

Nice model G. I spent many hours on my dad's model G. He also had 4 of them at one time. We nick named our first one "flash".
As you know, with only 9hp, and 3 speeds it's not very quick.

Proud owner driving his nice looking tractor. :thumbup:

Thanks guys!

I have a lot of seat time in these things so - like most folks that tinker with tractors - I have a bit of an attachment to this particular model.

Even though they didn't go very fast, that didn't keep my brother and I from "racing" them down the road as wide open as they would go. Of course we were about 12 & 11 years old when we did that. Ha!

Best regards,

Scott
 
OP
S

sbosecker

Well-known member
Joined
Sep 25, 2012
Messages
3,539
Location
Peachtree City, GA
Re: The Lone Beech Garage Build Thread (60x46)

Wednesday - September 21, 2016

Yesterday I decided to just go out to the Lone Beech Garage and piddle a bit. I had the angle iron shipping brackets from the BendPak lift still laying on the floor so I decided to get some practice with the plasma cutter by cutting them up.


20160920-01.jpg

I would cut a section of the bracket out and then I'd move outside with the piece and...


20160920-02.jpg 20160920-03.jpg

...clean up the ends with the horizontal band saw.


20160920-04.jpg

After a bit I had a small pile of cleaned up angle iron that might get used in a project some day. Ha!


Continued in next post...
 
Last edited:
OP
S

sbosecker

Well-known member
Joined
Sep 25, 2012
Messages
3,539
Location
Peachtree City, GA
Re: The Lone Beech Garage Build Thread (60x46)

Continued...


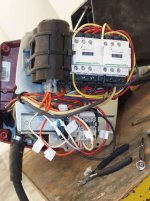
Today I decided I needed to move forward with getting the electric chain hoist switched from 120 volts to 240 volts.


20160921-01.jpg

I put the hoist on my $5 estate sale steel cabinet and started taking the cover off.


20160921-02.jpg 20160921-03.jpg

I had downloaded a manual that indicated which wires needed to be moved to what location to change the working voltage from 120 volts to 240 volts. The arrow in the first picture points to the terminal block where the wires have to be rearranged. I had to study this terminal block and the wires coming and going from it for some time. Some of the wires were labeled; some were not. I was able to figure out what was what and I labeled the wires to help keep me from goofing up the procedure. After I was done, I checked my work repeatedly to ensure that I had everything connected as the manual specified. Convinced I had it right - OK, maybe not "right" but "per the manual" - I put the cover back on the hoist.


20160921-04.jpg

My son was at work when I finished the wiring. He returned home at about 8 this evening and I asked him to assist me for about 20 minutes.
I had raised the 2-Post Lift's arms and hung a loop of rope over one of the arms. My son and I hung the hoist from the 2-Post Lift arm and hooked up 240 power to the hoist's power cord.
I pushed the control buttons on the pendant and the hoist worked flawlessly!
We powered everything down for the evening. I'll be working more on this project in the coming days.


Scott
 
Last edited:
OP
S

sbosecker

Well-known member
Joined
Sep 25, 2012
Messages
3,539
Location
Peachtree City, GA
Re: The Lone Beech Garage Build Thread (60x46)

Cut the blue wire. No, it's the red wire! Cut the red wire!:lol_hitti

shortykorte,

Ha!

Yeah... it wasn't quite that bad.

The documentation consisted of two low res drawings of the terminal block - one showing the wire arrangement for 120 volt; one showing the wire arrangement for 240 volt.

Some of the wires were labeled as per the drawings. Others were color coded via definitions in a different diagram in the manual. A couple I could find no way to determine their identity other than they were the only unidentified wire left at that location on the terminal block.

My inexperience probably played a role as well. Initially I didn't know for sure how the terminal block(s) worked and I had to dismantle those modules to see how they functioned. Once that was established, I was able to move forward with some confidence on what information the diagrams were providing.

Anyway, when it was all said & done, the power was applied and no magic smoke leaked out.


Best regards,

Scott
 
OP
S

sbosecker

Well-known member
Joined
Sep 25, 2012
Messages
3,539
Location
Peachtree City, GA
Re: The Lone Beech Garage Build Thread (60x46)

Saturday - September 24, 2016


Yesterday I attended a "garage sale" located at a fly-in community about 15 miles from my house. This was my kind of garage sale! A major part of the sale were tools located in the hanger of this property.

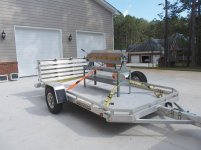
One of the items for sale was a 48-inch/16-gauge Box & Pan Brake. After some discussion, the seller and I arrived at an agreeable price. My son would be available today to help so we also agreed that I would come back this afternoon to pick up the tool.


20160924-01.jpg

We trussed up this top-heavy item on my utility trailer and brought it back to the Lone Beech Garage.


20160924-02.jpg

We used a floor jack and a dolly to move the Brake into the Auto/Metal Shop area of the building.


20160924-03.jpg

The machine had been sitting unused in the non-climate controlled hanger for a while. A bit of very light rust is on the fingers and some other non-painted areas. It should clean up without too much effort.


Scott
 

Bib Overalls

Well-known member
Joined
Dec 4, 2006
Messages
3,318
Location
Jonesboro, Arkansas
Re: The Lone Beech Garage Build Thread (60x46)

A very useful tool if you like to fabricate sheet metal. But they really hog space. I had one for a while but let it go because I really needed the space for other stuff. Fortunately I have access to a shop with a good brake if I need that capability for a project, something that does not come up all that often.
 

shortykorte

Well-known member
Joined
Sep 1, 2014
Messages
8,039
Location
Tallahassee, Fl
Re: The Lone Beech Garage Build Thread (60x46)

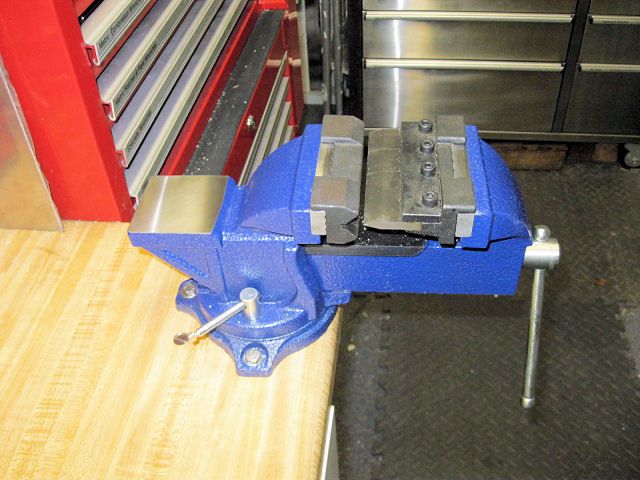
Scott, what a wonderful addition to your LBG. I'm not jealous, after all, I have a brake as well.
Vise%20Brake_zpsweozoeyp.jpg

Bob, did you sneak in and get my brake? :thumbup:

Bib, it's s new tool and its GJ, doesn't matter if we need it or not. :lol_hitti

Nice brake Scott. Outside of standard vehicle and tractor maintenance, what type of projects are in the wood and metal shop areas future?
 

Lyndon

Well-known member
Joined
Aug 11, 2014
Messages
2,535
Location
Sydney, Australia
Re: The Lone Beech Garage Build Thread (60x46)

Scott, what a wonderful addition to your LBG. I'm not jealous, after all, I have a brake as well.
Vise%20Brake_zpsweozoeyp.jpg

Bob

Ok - now you've gone and done it.......... :eyecrazy:

I resisted the urge when 1/2 first posted this. But you're pushing me now.

Now where is that H & F brochure?

Lyndon
Scot - Excuse the hijack, you're work is impeccable as usual! :thumbup: :bowdown: :bowdown:
 

drivesitfar

Well-known member
Joined
Oct 23, 2013
Messages
36,072
Location
Pacific Northwest
Re: The Lone Beech Garage Build Thread (60x46)

SB: i have to say the press brake really got my attention. i'd love to have the space and one of those in my shop. i think i have to have a piece of diamond plate bent in a couple weeks to build a new grinder and buffer bench i'm making, but i think i can get r done pretty reasonably at a local fab shop that has an 8 foot break. tell me did you fly in to the garage sale, take a peak and then drive back later with your son and cool looking trailer to pick it up?

i still haven't had a chance to read your entire thread and not sure if you own a small plane or if you just fly the big commercial jets for work. do you have a little one for yourself?

BOB: i need to get one of those small vise breaks cause looks like a handy tool.
 
OP
S

sbosecker

Well-known member
Joined
Sep 25, 2012
Messages
3,539
Location
Peachtree City, GA
Re: The Lone Beech Garage Build Thread (60x46)

Scott, what a wonderful addition to your LBG. I'm not jealous, after all, I have a brake as well.

A very useful tool if you like to fabricate sheet metal. But they really hog space. I had one for a while but let it go because I really needed the space for other stuff. Fortunately I have access to a shop with a good brake if I need that capability for a project, something that does not come up all that often.

Bib, it's s new tool and its GJ, doesn't matter if we need it or not. :lol_hitti

Nice brake Scott. Outside of standard vehicle and tractor maintenance, what type of projects are in the wood and metal shop areas future?

SB: i have to say the press brake really got my attention. i'd love to have the space and one of those in my shop. i think i have to have a piece of diamond plate bent in a couple weeks to build a new grinder and buffer bench i'm making, but i think i can get r done pretty reasonably at a local fab shop that has an 8 foot break. tell me did you fly in to the garage sale, take a peak and then drive back later with your son and cool looking trailer to pick it up?

i still haven't had a chance to read your entire thread and not sure if you own a small plane or if you just fly the big commercial jets for work. do you have a little one for yourself?

BOB: i need to get one of those small vise breaks cause looks like a handy tool.

Gentlemen:

Thanks - the brake does take up some real estate. At the moment that isn't a problem. I acquired it as I have some other tools:

It was nearby.
I could see a use for it despite the fact that it might not be that often.
It was a fair price.
It was in good condition.

DrivesItFar,
I do not own or operate a small plane. I think it would be really fun but... I haven't pulled the trigger.
I just drove over to the fellow's garage sale and then picked up the brake the next day.

shortykorte,
Routine maintenance will certainly be a mainstay of the Lone Beech Garage.


20160925-01.jpg

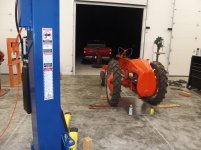
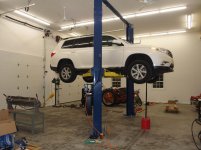
Tonight I decided to use the 2-Post Lift as a tool for the first time. Our 2013 Toyota Highlander needs an oil change.


Chest 24-9.jpg

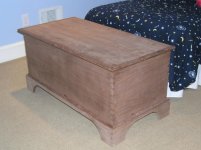
Beyond that... the biggest priority is the completion of a black walnut blanket chest for my daughter. The wood was harvested from trees that grew in the woods of the Lone Beech Melon Farm and sawn into logs at a nearby sawmill in Decker, IN. (Good luck finding that on a map - Ha!) The rough lumber was then air dried for several years in the hay loft of dad's barn.

I've gotten side tracked on that project due to the building of the Lone Beech Garage but I hope to get back to it soon.

Best regards,

Scott
 
OP
S

sbosecker

Well-known member
Joined
Sep 25, 2012
Messages
3,539
Location
Peachtree City, GA
Re: The Lone Beech Garage Build Thread (60x46)

Monday - September 26, 2016


Last night I had removed the Highlander's oil pan drain plug and allowed the oil to drain out all night. I entered the Lone Beech Garage late this morning and removed and replaced the paper element oil filter that is used by this Toyota model.

With that accomplished I moved the "dirty oil catcher" away from underneath the vehicle and attempted to lower the vehicle.

The observant reader will notice the verb "attempted". I have the vehicle sitting on the top locks. I took the vehicle up off the locks as high as it would go and then I tried to lower it. When I did this one of the safety locks would not release while the other started down slightly.

Sigh...

I brought the vehicle back up onto both locks and then again tried to bring it down. No joy.

I've called the installers and they're going to try to get to my place tomorrow to adjust my lift.


20160926-01.jpg

Meanwhile my vehicle sits suspended between heaven and earth.


Scott
 

Megadodo

Well-known member
Joined
Nov 25, 2011
Messages
199
Location
Cambridge, UK
Re: The Lone Beech Garage Build Thread (60x46)

That would have driven me over the edge! You have more patience than me (mind you, that's not difficult!).
 
Last edited:

jbmatth

Well-known member
Joined
Jun 3, 2013
Messages
5,692
Location
Northern Ok.
Re: The Lone Beech Garage Build Thread (60x46)

That would be unsettling for certain, hopefully it will be an easy fix and you will be able to get it returned to earth in short order.
JB
 
OP
S

sbosecker

Well-known member
Joined
Sep 25, 2012
Messages
3,539
Location
Peachtree City, GA
Re: The Lone Beech Garage Build Thread (60x46)

That would have driven me over the edge! You have more patience than me (mind you, that's not difficult!).

That would be unsettling for certain, hopefully it will be an easy fix and you will be able to get it returned to earth in short order.
JB

Gentlemen,

Thanks for the words of support. They are much appreciated after today's non-action by the installation company.

Having a spare vehicle allows more patience to be available than might normally be in supply. Ha!


Best regards,

Scott
 
OP
S

sbosecker

Well-known member
Joined
Sep 25, 2012
Messages
3,539
Location
Peachtree City, GA
Re: The Lone Beech Garage Build Thread (60x46)

Tuesday - September 27, 2016

I waited patiently this morning for some communication from the folks that installed my lift. Around noon I decided to make a few phone calls. I was unable to talk to anyone other than the nice phone lady at the installation company.

Not feeling the love, I decided to drag a ladder out to the Lone Beech Garage and position it next to the Safety Lock Release Handle. I thought I'd take a peek and see if anything looked amiss.

When I got to the top of the ladder I was quickly alarmed by what I saw. Even the casual observer would notice that something wasn't quite right with the safety cable.

It was rubbing on the edges of the hole it goes though as it travels to the opposite post of the lift!

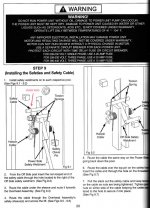
I consulted the Installation Manual and quickly saw that the safety cable had not been installed correctly.


20160927-01.jpg 20160927-02.jpg

The safety cable should be routed over the rod that is a part of the weldment; not under the rod.

EDIT: The information in red on the manual's page was added by me with a photo-editing program.

I have sent an email to the installation company with pictures of my findings and asking for an increase in management's attention to this issue.


Scott
 
Last edited:
shortykorte

Well-known member
Joined
Sep 1, 2014
Messages
8,039
Location
Tallahassee, Fl
Re: The Lone Beech Garage Build Thread (60x46)
Wow. That seems pretty easy to understand. Glad you found it and hope they correct it tomorrow.
Look forward to how you finish the chest. Looks to be a future heirloom with an interesting history.
 
To avoid these ads, REGISTER NOW!
Top Bottom