To avoid these ads, REGISTER NOW!

Above 1200 Sq/FT The Lone Beech Garage (60x46x16)

Wokspaces above 1200 squarefeet.
OP
S

sbosecker

Well-known member
Joined
Sep 25, 2012
Messages
3,539
Location
Peachtree City, GA
Re: The Lone Beech Garage Build Thread (60x46)

Wednesday - December 21, 2016


I was all set to call the Electrician this morning to find out when he might be able to finish up the electrical work on my building. Then I realized it might be best for me to become familiar with the innards of the "Black Switch Box" mounted on the 2-Post Lift Motor.


20161221-01.jpg 20161221-02.jpg

I pulled out the BendPak manual and found the section describing the electrical connections. The written detail found was very limited and these two diagrams represented the bulk of provided information.


20161221-03.jpg 20161221-04.jpg

I had done some internet research and didn't find any discussion of the "Black Switch Box" that I have. The information I found had a Switch Box that had a cover on a side different from where the Push Button was.



20161221-05.jpg 20161221-06.jpg

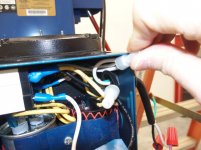
There doesn't seem to be much room inside this electrical box for additional "stuff". The incoming Line Voltage and Ground wires were a bit hard to trace but I think I've figured out how to make this work.

In the picture on the left I find the incoming Black Line Wire crimped into a bunch of other Black Wires - one of which goes to the Push Button Switch. Based on the first schematic (above) I think I need one leg of the 240 Volt incoming power to attach to that incoming black wire.
In the picture on the right I find the incoming White Line Wire crimped into a bunch of other White Wires. Based on the first schematic (above) I think the 2nd leg of 240 Volt incoming power needs to run through the Overhead Safety Switch prior to being connected to that incoming white wire.

Since there doesn't seem to be a lot of room inside the "Black Switch Box" and the wires in question are already heavily mechanically crimped, I think it makes sense to mount an additional junction box to the existing "Black Switch Box" and bring the existing "pig tails" into that to connect with incoming line voltage. We'll see what the Pro thinks when he sees it.

After that bit of analysis, I texted the Electrician and it looks like we're shooting for trying to get his work done next week.


Scott
 
Last edited:
To avoid these ads, REGISTER NOW!

Jay_mc1

Well-known member
Joined
Jan 7, 2012
Messages
81
Location
South Dakota
Re: The Lone Beech Garage Build Thread (60x46)

The Lone Beech garage build was absolutely amazing! I just finished going through all 87 pages this afternoon. I really appreciate the attention to detail that you put into your build and to documenting everything along the way. I will be using many of your details to help me when finishing my building. I have started a 50' x 80' shop with a 30' x 40' office/bathrooms/showroom attached for my business. Footings are poured, but our weather in South Dakota has not been very cooperative lately. This past Sunday was -25 before the windchill.
I hope you and your family have a Merry Christmas.
Jason
 

classicJackets

Well-known member
Joined
Sep 26, 2014
Messages
448
Location
SE Michigan
Re: The Lone Beech Garage Build Thread (60x46)

Looking good Scott! Haven't checked in here in a while but I'm glad to see the details coming together.
 
OP
S

sbosecker

Well-known member
Joined
Sep 25, 2012
Messages
3,539
Location
Peachtree City, GA
Re: The Lone Beech Garage Build Thread (60x46)

The Lone Beech garage build was absolutely amazing! I just finished going through all 87 pages this afternoon. I really appreciate the attention to detail that you put into your build and to documenting everything along the way. I will be using many of your details to help me when finishing my building. I have started a 50' x 80' shop with a 30' x 40' office/bathrooms/showroom attached for my business. Footings are poured, but our weather in South Dakota has not been very cooperative lately. This past Sunday was -25 before the windchill.
I hope you and your family have a Merry Christmas.
Jason

Jason,

Thanks so much for the kind words about my build and the documentation. Thanks for coming along for the ride!

Sounds like you will have a fantastic building when you get done! -25 is a bit rough but spring will come!

Your reference to your weather setback reminded me that about a year ago we were inundated with rain, my walls were trying to fall over and my builder had just suffered a heart attack.

Golly - how did we get through that. Ha!

Merry Christmas & Happy New Year!

Best regards,

Scott
 
OP
S

sbosecker

Well-known member
Joined
Sep 25, 2012
Messages
3,539
Location
Peachtree City, GA
Re: The Lone Beech Garage Build Thread (60x46)

Thursday - December 22, 2016

Early this afternoon my cell phone buzzed and a text appeared from my Electrician. He was wondering if I was around and, if so, could he come by to look over the what needed to be done to hook up the high voltage electrics at the Lone Beech Garage.

I replied immediately that I was on site and that I'd be pleased if he came by.

The Electrician arrived about 15 minutes later and, after a bit of laughing and scratching, we got down to business and reviewed the work that needed to be done. With a clear picture of the scope of the work, the Electrician indicated he thought he could get it knocked out around the middle of next week.

Great news! Sounds like we should have the electrical work finished before the end of the year.


Scott
 
Last edited:

250

Well-known member
Joined
Oct 16, 2014
Messages
537
Location
West of the Sierras
Re: The Lone Beech Garage Build Thread (60x46)

250,

Taken at Kootenai Lake, Glacier National Park, MT - July 2007.


Best regards,

Scott

Now we're talking. We have one of those kicking around in our camping stuff. No picture with a moose though, that was nicely done.
 

shortykorte

Well-known member
Joined
Sep 1, 2014
Messages
8,039
Location
Tallahassee, Fl
Re: The Lone Beech Garage Build Thread (60x46)

Glad you are ensuring safety first. Much progress has been made this past year and looking forward to tools filling there respective places and fine projects being produced.

May your Christmas be peaceful and filled with love and the New Year be a time of rebirth.
 
OP
S

sbosecker

Well-known member
Joined
Sep 25, 2012
Messages
3,539
Location
Peachtree City, GA
Re: The Lone Beech Garage Build Thread (60x46)

Glad you are ensuring safety first. Much progress has been made this past year and looking forward to tools filling there respective places and fine projects being produced.

May your Christmas be peaceful and filled with love and the New Year be a time of rebirth.

shortykorte,

...and a very Merry Christmas and happy, healthy & prosperous New Year to you!


Best regards,

Scott
 
OP
S

sbosecker

Well-known member
Joined
Sep 25, 2012
Messages
3,539
Location
Peachtree City, GA
Re: The Lone Beech Garage Build Thread (60x46)

Sunday - December 25, 2016


We had our family Christmas gathering yesterday. My son's exams at Georgia Tech are over. The temperature today reached the mid-70's under a high, scattered layer of clouds.

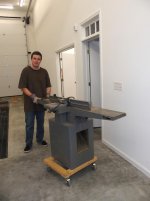
I took advantage of the confluence of the above to move some stationary tools from the basement to the Lone Beech Garage.


20161225-01.jpg 20161225-02.jpg

20161225-03.jpg 20161225-04.jpg

It would have been handy to have the Electric Chain Hoist operational for unloading of the Delta 37-315 8-inch Jointer but that isn't going to be powered until the end of next week. All the lifting was done with the Shop Crane.

The Drafting Tables will be moved out of the Woodshop in the near future.


20161225-05.jpg 20161225-06.jpg 20161225-07.jpg

The PerformaX 16-32 Drum Sander was next to migrate north to its new home.


Continued in the next post...
 
Last edited:
OP
S

sbosecker

Well-known member
Joined
Sep 25, 2012
Messages
3,539
Location
Peachtree City, GA
Re: The Lone Beech Garage Build Thread (60x46)

Continued...


20161225-11.jpg 20161225-12.jpg 20161225-13.jpg


Last tool to be moved this evening was the Delta 40-601 18-inch Scroll Saw.

A good evening's work! Maybe I'll be able to move more tools tomorrow.


Scott
 
Last edited:
1949 caddyman

Well-known member
Joined
Oct 5, 2010
Messages
1,778
Location
Arizona
Re: The Lone Beech Garage Build Thread (60x46)

Congratulations on the tools movement. You have some very nice heavy duty wood working tools!
 
OP
S

sbosecker

Well-known member
Joined
Sep 25, 2012
Messages
3,539
Location
Peachtree City, GA
Re: The Lone Beech Garage Build Thread (60x46)

Monday - December 26, 2016

As I mentioned in my previous reply to 1949 caddyman, I spend too much time looking over auctions and local Craigslist advertising and, as a result, don't get the stuff done I probably should be working on.

Today is an example. I needed to do a few chores and then I hoped to get a few more tools moved from the house's basement to the Lone Beech Garage. Since I was going to be away from the house doing the errands, I figured I might as well take a peek at Craigslist prior to departing and see if anything of interest was in the vicinity of my errands.

Sure enough I found something that looked like it could be promising. A mechanic was shutting down his shop and indicated he was selling a lot of stuff. Not a lot of detail but I figured, "What the heck, I'll drop by." Getting to the mechanic's location was going to add about an hour to my trip but that was just that much more time I could visit with my son. (We were going together to combine stuff both of us needed to do.)

The condensed version is the trip to the mechanic's shop was a bust. I didn't see anything among his tools that was of interest to me ...except for


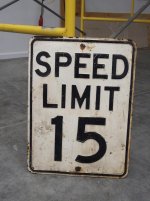
20161226-01.jpg

...this old school speed limit sign. In addition to some tools, the mechanic had an accumulation of signs (mostly small reproduction "vintage" signs & some modern highway items) laying around but this was the only one that spoke to me. It is a solid rascal with more metal in it than most of today's automobiles. Ha!

As we left the mechanic's location I realized we were close to one of the Summit Racing's storefronts (only 3 of them in the USA). Never having been inside, I thought we'd take a look today since we were very close.

45 minutes later we fought our way back home through the Day-After-Christmas traffic and the day was pretty much shot. Although I didn't accomplish much today, I did have a good time.

I'll try to avoid Craigslist tomorrow and get some actual work done.


Scott
 
Last edited:
OP
S

sbosecker

Well-known member
Joined
Sep 25, 2012
Messages
3,539
Location
Peachtree City, GA
Re: The Lone Beech Garage Build Thread (60x46)

Scott, things are starting to fall into place.:thumbup:

Looking fantastic..:thumbup:

Regards

1/2 Cup,

Thanks so much!

Once the electrical work is completed, I hope to get all of the tools from the basement to the Lone Beech Garage. That probably will be weather dependent. If we get a stretch of nice weather the first week of January maybe I can wrap up the tool migration.


Best regards,

Scott
 
OP
S

sbosecker

Well-known member
Joined
Sep 25, 2012
Messages
3,539
Location
Peachtree City, GA
Re: The Lone Beech Garage Build Thread (60x46)

Tuesday - December 27, 2016

Touched base with the Electrician today. It sounds like either he'll be able to get started here tomorrow afternoon and/or Thursday morning.

Of course setting this up with the Electrician was the cue for my employer to call and have me take a trip to Paris tomorrow night. If everything goes according to schedule I'll get back Friday evening. I called the Electrician back and he seemed to think he wouldn't need to have me around - just somebody to let him in to the building should suffice.

With the Electrician's arrival now imminent, I decided not to move any more stationary tools from the basement to the LBG. While I'd like to move forward on that, it's probably better if I don't add additional things for the Electrician to work around.

Tonight I decided to take advantage of my shop space. My 2000 Ford F150 has had some occasional hesitation when driving down the road. It's fairly random and I've been unable to pick up a reliable pattern as to when it might occur. One time it happened near a local AutoZone and I immediately stopped there and did an OBD-II scan: Nothing.

It has occurred to me that this might be a spark plug wire issue. The originals were replaced in August of 2010. I drove my truck into the middle bay and closed the garage door to eliminate the neighbor's Christmas lights from interfering with my observations. With the engine running, I opened the hood & turned off all the interior lights in the building. Then I watched the engine bay for about 5 minutes. Sure enough, I saw some dim arcing on both sides of the V6 engine. While not as impressive as the plug wire solar flares I've seen displayed on YouTube, it was still there. The driver's side was much more prevalent than the passenger's side.

I shut down the truck, opened the garage door and let things air out. I need to do a little more research to make sure what I observed in the engine compartment could cause the hesitation I've been experiencing. However, I would think what I saw isn't normal behavior.

I probably will be ordering a set of spark plug wires in the near future.


Scott
 

1949 caddyman

Well-known member
Joined
Oct 5, 2010
Messages
1,778
Location
Arizona
Re: The Lone Beech Garage Build Thread (60x46)

I would recommend replacing plugs & wires as a set. If there is any carbon tracking on eather one it can transfer to the new part. At least check closely for a black line on plug porcelain & wire boot.
 
To avoid these ads, REGISTER NOW!
OP
S

sbosecker

Well-known member
Joined
Sep 25, 2012
Messages
3,539
Location
Peachtree City, GA
Re: The Lone Beech Garage Build Thread (60x46)

I would recommend replacing plugs & wires as a set. If there is any carbon tracking on eather one it can transfer to the new part. At least check closely for a black line on plug porcelain & wire boot.

1949 caddyman,

This makes perfect sense; thanks!


Best regards,

Scott
 
OP
S

sbosecker

Well-known member
Joined
Sep 25, 2012
Messages
3,539
Location
Peachtree City, GA
Re: The Lone Beech Garage Build Thread (60x46)

Saturday - December 31, 2016

Got back from Paris late last night. Our departure from the City of Light was delayed about 2 hours by dense fog. Taxing out to de Gaulle's runway 8L at night in visibility around 300 meters was interesting and then a 10 hour flight home followed.

Despite being a bit fatigued when I got home I wanted to see what the Electrician had accomplished in my absence. I changed out of my uniform and walked out to the Lone Beech Garage.


20161231-01.jpg

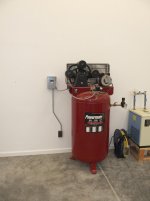
I saw that the Air Compressor had been connected to 240 volt power.


20161231-02.jpg

The 4 ceiling fans that had been on 3-foot down rods had had those down rods replaced with 18-inch down rods.

The original idea with the longer down rods had been that they were needed to allow the air movement produced by the fan to actually be felt by a person on the floor. As it turns out, these Home Depot fans produce an enormous flow of air at full power. The 18-inch down rods still allow one to be cooled by the air movement and will allow my scaffolding to be rolled around (should I desire to use it for ceiling maintenance in the future) without being impeded by the fans on the original 3-foot down rods.


20161231-03.jpg 20161231-04.jpg 20161231-05.jpg

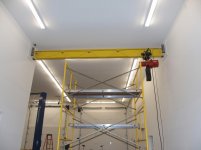
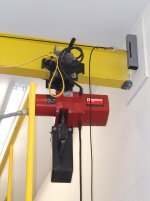
The Electric Chain Hoist had been connected to 240 Volt power. It will be great to have this tool fully operational.


20161231-06.jpg 20161231-07.jpg

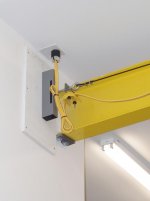
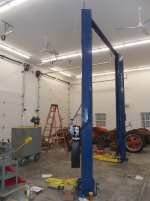
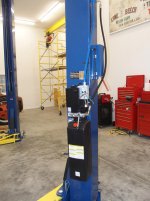
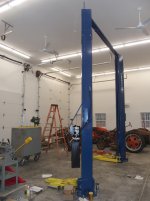
Although the Electrician had made much progress on getting the 2-Post Lift connected to power, some work remains to be done. It appears that the 2-Post Lift's overhead safety switch has been wired up and most of the conduit to supply power has been installed so it's good to have all that accomplished but the electrical cable carrying the power from the ceiling to the switch box still needs to be installed.

After I shut down my engines at gate F4 in Atlanta, I turned my phone on. Shortly after that a text arrived from the Electrician indicating he would return on Monday to finish his work.


Continued in next post....
 
Last edited:
OP
S

sbosecker

Well-known member
Joined
Sep 25, 2012
Messages
3,539
Location
Peachtree City, GA
Re: The Lone Beech Garage Build Thread (60x46)

Continued...


20161231-11.jpg

Today my son and I started changing the oil in the 2002 Corolla that he uses to commute to Georgia Tech. This car is truly a beater, not only in appearance but mechanically as well. After I purchased it I discovered that it has the oil consumption issue that plagues this 1.8 L engine series.

So we monitor the oil level and keep that situation under control. After my son finishes at Georgia Tech this spring, I intend for this car to become, for me, the equivalent of a medical student's cadaver. I am not a mechanic but after my son graduates I'm going to attempt to repair the fault that causes the oil consumption.

Here's a YouTube video that details how one person did this repair. I think this is one of the most amazing videos on YouTube. I will be using this video as a major source of information when I attempt to repair the Corolla this summer.


Scott
 
Last edited:
AZpilot

Well-known member
Joined
Sep 29, 2012
Messages
413
Location
Mesa, AZ
Re: The Lone Beech Garage Build Thread (60x46)

when using youtube I try for at least two sources. That way there is a base of info that at least seems main stream.
 
OP
S

sbosecker

Well-known member
Joined
Sep 25, 2012
Messages
3,539
Location
Peachtree City, GA
Re: The Lone Beech Garage Build Thread (60x46)

when using youtube I try for at least two sources. That way there is a base of info that at least seems main stream.

AZpilot,

Sound advice. This video is based on a DIY thread by a different author in the ToyotaNation forum. I've been studying this problem for a while and I've picked this video primarily because of it's amazingly complete detail of the entire process.

However, this approach is done with the engine in the car. I may remove the engine because:

1. I think the setup of the Lone Beech Garage allows that do be done.

2. It probably would allow easier access to the engine to do the repair.

3. I think the main rear seal may be leaking so I could take care of that as well.


Best regards,

Scott
 
OP
S

sbosecker

Well-known member
Joined
Sep 25, 2012
Messages
3,539
Location
Peachtree City, GA
Re: The Lone Beech Garage Build Thread (60x46)

Monday - January 2, 2017


Today the Electrician showed up at a bit after 8 am to finish the high voltage electrical work on the building.


20170102-01.jpg 20170102-02.jpg

20170102-03.jpg 20170102-04.jpg

All that was left was the few final details on the 2-Post Lift. The Electrician finished his work at about 11 am. I wrote him a check and he was off to his next job.


It has been raining steadily since Saturday. This morning the running total was right at 2-inches. The intensity of the precipitation has increased since the morning. I just checked the gauge again and we've gotten another 2-1/2 inches since I emptied it this morning.


20170102-05.jpg

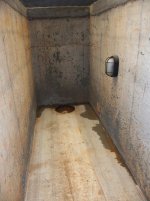
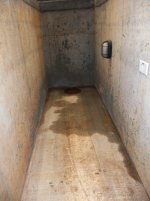
After checking the rain gauge, I decided to have a look at the Tornado Shelter. Sadly my "shrinking clay - expanding clay" theory seems to have fallen apart. Water is starting to enter the Tornado Shelter again tonight.

It appears that the infiltration had just started and, based on the water around the perimeter, it may not all be coming in around the vent pipe. This looks like at least some of it is coming in around the base of the floor.

Definitely going to have to address the drainage on the north side of the building at some point in the future.


Scott
 
Last edited:
OP
S

sbosecker

Well-known member
Joined
Sep 25, 2012
Messages
3,539
Location
Peachtree City, GA
Re: The Lone Beech Garage Build Thread (60x46)

So, Tornado shelter/hot tub?

AZpilot,

Ha!

The Tornado Shelter obviously can multi-task but I'd like to eliminate anything aquatic as soon a possible. A fix will probably have to wait until spring or later.


Best regards,

Scott
 
OP
S

sbosecker

Well-known member
Joined
Sep 25, 2012
Messages
3,539
Location
Peachtree City, GA
Re: The Lone Beech Garage Build Thread (60x46)

Tuesday - January 3, 2017


This morning the sun was shining and I found just a bit over 3 inches of rain in the rain gauge. So we got right at 5-inches of rain since it started on Saturday.


20170103-01.jpg

I peeked into the Tornado Shelter and was pleased to see that what little had gotten in since last night had, for the most part, collected in the depression I had the concrete crew put into the floor.

So it seems to be a manageable situation for the time being and I hope to come up with a permanent solution this spring/summer.


20170103-02.jpg

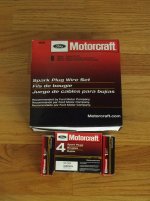
The spark plugs and spark plug wires for my truck arrived in today's mail. I was amused that the shipper managed to somehow get the package delivered to me after paying for only 12 oz. of weight. This accumulation of parts weighed almost 4 times that.

I had hoped to replace the wires and plugs in my 2000 Ford F150 tomorrow afternoon but I have some administrative work I need to do first. It may be time consuming.

In August, as previously posted here, I made a trip to Glacier National Park in Montana. While there, a rock - about the size of a golf ball - fell from a rock face adjacent to the road I was driving on and hit the roof of my rental car just above my head. This left a noticeable dent in the roof and I reported the damage to the rental car company the same day.

I thought the rental car company had decided to not charge me for the damage as I had heard nothing ...until today. I received a large envelope - mailed 4 months to the day after the incident - requesting a large check from me for the damage. I spent a reasonable amount of time today putzing with my Insurance Company and I'll spend more time tomorrow collecting similar material for my Credit Card company (rental vehicles paid with the credit card are insured to some degree).

So I don't know if I'll get to spend any time in the Lone Beech Garage tomorrow or not.


Scott
 
Last edited:
OP
S

sbosecker

Well-known member
Joined
Sep 25, 2012
Messages
3,539
Location
Peachtree City, GA
Re: The Lone Beech Garage Build Thread (60x46)

Ouch! That kinda puts a dent in the start of a new year.

shortykorte,

I was expecting the "dent" about a couple of weeks after the incident but... that's what insurance is for.

It's a bit of a paper work drill but it's better than hospital bills.


Best regards,

Scott
 
OP
S

sbosecker

Well-known member
Joined
Sep 25, 2012
Messages
3,539
Location
Peachtree City, GA
Re: The Lone Beech Garage Build Thread (60x46)

Wednesday - January 4, 2016


20170104-01.jpg 20170104-02.jpg 20161231-06.jpg

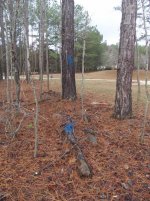
A couple of days ago I noticed some blue paint sprayed on a tree and on the ground. I was puzzled by this... until today when I found a can of blue spray paint inside the Lone Beech Garage.
I'm such a bonehead... I had been wondering where the Electrician had found blue conduit for the 2-Post Lift.


I had ordered a couple of safety stands from Northern Tool during a sale on Cyber Monday. They had been on backorder but finally arrived at the store for pickup yesterday afternoon. After I finished my Insurance paperwork drill, I drove to Stockbridge, GA and picked them up.


20170104-04.jpg 20170104-05.jpg 20170104-06.jpg

I got them inside the building and put them together. They seem pretty stout!


Scott
 

250

Well-known member
Joined
Oct 16, 2014
Messages
537
Location
West of the Sierras
Re: The Lone Beech Garage Build Thread (60x46)

...decided to not charge me for the damage as I had heard nothing ...until today. I received a large envelope - mailed 4 months to the day after the incident...

We spent a couple weeks in Italy this spring and had a very nice time. But from my reading before hand about driving in the country, moving violations detected by the traffic cameras sometimes take months to work their way back to foreigners primary residence. I'm sure I didn't obey every traffic law, but I think I did ok... most of the time. :pimpflash
 
OP
S

sbosecker

Well-known member
Joined
Sep 25, 2012
Messages
3,539
Location
Peachtree City, GA
Re: The Lone Beech Garage Build Thread (60x46)

We spent a couple weeks in Italy this spring and had a very nice time. But from my reading before hand about driving in the country, moving violations detected by the traffic cameras sometimes take months to work their way back to foreigners primary residence. I'm sure I didn't obey every traffic law, but I think I did ok... most of the time. :pimpflash

250,

I was deployed to Sicily a couple of times while I was in the Navy in the early 80's. Based on what I saw then, the fact that you "didn't obey every traffic law" allowed you to blend in. Ha!

Best regards,

Scott
 
OP
S

sbosecker

Well-known member
Joined
Sep 25, 2012
Messages
3,539
Location
Peachtree City, GA
Re: The Lone Beech Garage Build Thread (60x46)

Wednesday - January 11, 2017

I managed to get some time in the LBG today to do some minor repair and maintenance on part of the fleet.

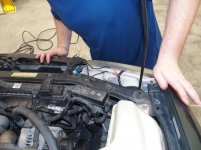
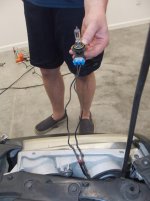
The 2002 Corolla my son uses to get back and forth to Georgia Tech has had a headlight issue for a while. The passenger side low beam was intermittent. We had attempted a repair that kept everything stock but that had not totally resolved the issue. Today we purchased an aftermarket Headlight Socket [Dorman 85813] and pulled the car into the middle bay for the repair.


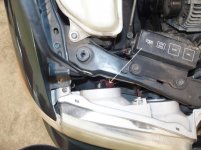
20170111-01.jpg 20170111-02.jpg

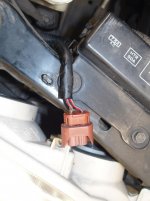
These pictures show the original location of the OEM Headlight Socket (left picture) and then we got the Socket out where we could work on it. When we did the first repair we noted that this Socket had some heat damage and there was a bit of exposed wire. Out goal at that time was to try to avoid splicing in new wires. Since this hadn't fixed the problem it was time for more extensive surgery with less concern about the cosmetic aftereffects.


20170111-03.jpg 20170111-04.jpg 20170111-05.jpg

My son amputated the original Socket and spliced in the aftermarket item. Some soldering and heat shrink tubing and the repair was complete. The headlight is working so far.


Continued in next post...
 
Last edited:
OP
S

sbosecker

Well-known member
Joined
Sep 25, 2012
Messages
3,539
Location
Peachtree City, GA
Re: The Lone Beech Garage Build Thread (60x46)

Continued...


This evening I pulled my 2000 Ford F150 pickup truck into the center bay and started the Spark Plug Wire and Spark Plug swap to attempt to fix the arcing I noted in an earlier post.


20170111-11.jpg 20170111-12.jpg

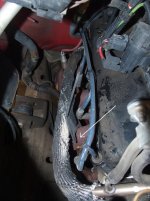
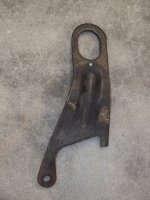
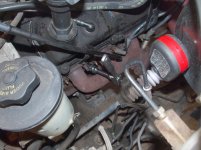
It didn't take me long to find a "surprise". I was taking pictures to document the location of the spark plug wires and discovered an additional item to be dealt with in the future. The engine lift hook on the passenger side had broken away from the engine and was resting on the exhaust manifold.

There is supposed to be a stud through the hole towards the rear of the bracket. That appears to have failed and then, after who knows how long, the vibrating bracket broke above the second mounting point. I'm astounded that this part just sat there straddling an exhaust manifold pipe.


20170111-13.jpg

I decided to remove the driver's side spark plugs first as there is more access there. I removed the #4 Spark Plug Wire from the engine. The OEM Spark Plug Wire Kit that I purchased has:
A. 1 short wire
B. 1 slightly longer wire
C. 3 wires that are longer than these first two
D. 1 very long wire.

The wire I removed from the engine was the same length as B so I used that one.

EDIT Jan 12th With the project completed I found the wires matched as follows:
Cylinder 1 - D
Cylinder 2 - C
Cylinder 3 - A
Cylinder 4 - B
Cylinder 5 - C
Cylinder 6 - C


20170111-14.jpg 20170111-15.jpg 20170111-16.jpg

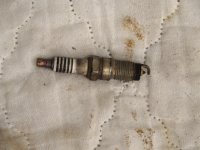
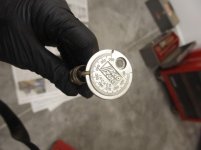
Using a ratchet with a 3-inch extension, I removed the #4 Spark Plug and examined it. It appears to be in pretty good shape but the gap is less than the specified .052 - .056 inches. I had noted the gap of the plugs I purchased was over 10 thousands less than the specified gap so I adjusted my new plug's gaps to spec. I think the previous mechanic didn't bother.

This was as far as I got tonight. I'll get back to it tomorrow.


Scott
 
Last edited:
drivesitfar

Well-known member
Joined
Oct 23, 2013
Messages
36,076
Location
Pacific Northwest
Re: The Lone Beech Garage Build Thread (60x46)

SB: i'd like to start working on our Hondas some day soon again cause my friend is almost 70 that has been taking care of them and he's moving 3 hours away.

thanks for all the detailed fixes and pictures. it really helps me and maybe a few other GJ members and lurkers that are not car guys, but could be.

are you still planning on doing the engine rebuild on your son's Corrolla after he finishes school in the spring?

cheers
 
OP
S

sbosecker

Well-known member
Joined
Sep 25, 2012
Messages
3,539
Location
Peachtree City, GA
Re: The Lone Beech Garage Build Thread (60x46)

SB: i'd like to start working on our Hondas some day soon again cause my friend is almost 70 that has been taking care of them and he's moving 3 hours away.

thanks for all the detailed fixes and pictures. it really helps me and maybe a few other GJ members and lurkers that are not car guys, but could be.

are you still planning on doing the engine rebuild on your son's Corrolla after he finishes school in the spring?

cheers


DrivesItFar,

Well I'm not a car guy but I'm trying to learn. I think this is how one starts down the path towards being a "car guy".

What an age we live in when it is possible to sit down in front of a computer, type in a few key words, and (usually) see pictures and descriptions of how another person tackled a project.

Although the investment disclaimer - Your Results May Vary - is certainly applicable, the ability to at least have an idea of what landmines may await certainly helps me to determine whether I think I've got a shot at completing the project.

As to the Corolla's engine... Yes, I hope to have a go at repairing the oil consumption issue this summer.

For someone of my level of experience, that will really be something! Ha!


Best regards,

Scott
 
Last edited:
OP
S

sbosecker

Well-known member
Joined
Sep 25, 2012
Messages
3,539
Location
Peachtree City, GA
Re: The Lone Beech Garage Build Thread (60x46)

Thursday - December 12, 2017


Last night I laid the groundwork for the replacement of the Spark Plug Wires and Spark Plugs in my 2000 Ford F150 pickup. This morning I made a cup of coffee, walked out to the Lone Beech Garage, inserted Billy Joel's 52nd Street CD into the music box and began to work on the pickup.


20170112-01.jpg

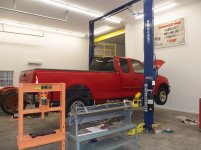
I thought I might find accessing some of the spark plugs from under the truck would make for an easier task on the driver's side. I also, based upon my research of this project, thought I might need to remove the passenger side front tire and fender liner to access the spark plugs on that side. As a result of these considerations, I prepared the 2-post lift's arms to lift the truck should I decide to do so.

As it turned out, the driver's side spark plugs were not accessible from below and the passenger's side - in my experience - were easier to get to from the top than the driver's side plugs.


20170112-02.jpg 20170112-03.jpg

Another thing I learned is that the correct body type for changing the spark plugs on this pickup is a very tall, say 6' 10" or so, knuckle dragger.

I'm 5' 8" so I couldn't reach the innards of the truck standing on the floor and the small step ladder I tried would scoot away from my feet just about the time I was within reach of a spark plug. This would then result with my hands and forearms being gouged as I was propelled into something hard with a sharp corner. I wound up looking like I had come in second place in a hatchet fighting contest.

The solution was to bring some concrete solids and a concrete block for me to stand on as I worked. By no means was this a perfect solution but it helped a lot.


On the face of it this isn't a particularly technical bit of maintenance. However, since my mechanical background is quite meager, the oddest things will slow my progress down dramatically.


20170112-04.jpg

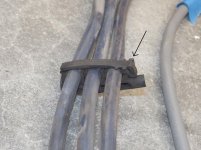
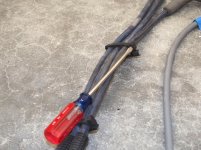
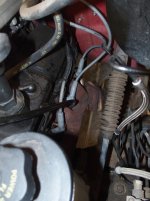
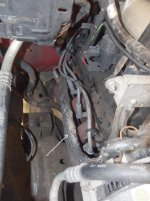
Take this little clip (white arrow) for example. I had seen some online references that described how to open them but the articles I found were showing clips that weren't attached to the engine.

As I fought for balance with my head down inside the engine compartment with both hands - one holding a small screwdriver - attempting to unlock the clip in situ, I found these clips remarkable difficult to get open.

It was only when I was nearly done with this project that I learned the clip can be removed from a stud. A friction fit on the stud is all that keeps it in place. Removing the wire with the clip still attached is a game changer.

I'll be ready next time. Ha!


20170112-05.jpg 20170112-06.jpg 20170112-07.jpg

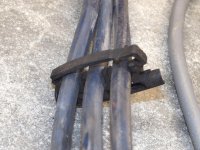
Speaking of these clips. As far as I can tell, they can only be easily opened on one end, on one side. The arrow points to a piece of plastic that blocks access to the pry point on that side.


Continued in next post...
 
Last edited:
OP
S

sbosecker

Well-known member
Joined
Sep 25, 2012
Messages
3,539
Location
Peachtree City, GA
Re: The Lone Beech Garage Build Thread (60x46)

Continued...


I used a spark plug socket and a 3-inch extension to remove all the spark plugs on the driver's side. I applied some anti-seize to the threads and then started threading the new spark plugs into position by hand. I really couldn't see where the plug needed to go but I managed to get the plug into position without trouble. I got the plug somewhat tight with a ratchet wrench and then used a torque wrench to do the final tightening. The torque specification called for 8 to 14 foot-pounds of torque. I set my torque wrench to 132 inch-pounds (11 foot-pounds)


20170112-11.jpg

I put some dielectric grease into the boots of the spark plug wires and attached them to the ignition coil and the spark plugs.


20170112-12.jpg

With the drivers side complete, I removed all the wires from the passenger's side.


20170112-13.jpg

I thought the pipe just outside the spark plugs (white arrow) would interfere with removing the plugs on the passenger's side. I did not find it to be an issue. I used two 3-inch extensions on all the plugs on this side. Installation of the plugs on this side was performed as I had done on the driver's side.


20170112-14.jpg

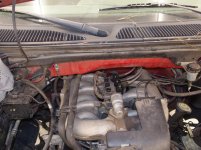
So the project was complete and I took this picture. I had started the engine a few times during this process to ensure I had gotten a particular wire hooked up correctly. Now I started it again. The engine ran well so I shut it down, came back to the engine compartment, and "tidied up" the wires a bit.


20170112-15.jpg 20170112-16.jpg

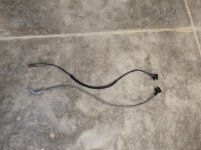
Old parts. I examined everything but I did not see anything that - to my eye - looked like it was causing trouble.

I took the truck for a road test and tried to mimic conditions that had caused the occasional missing (lower rpm's under some load). The truck ran fine.

Time will tell if this fixes my intermittent missing but I'm optimistic that this maintenance will do so.


Scott
 
Last edited:

To avoid these ads, REGISTER NOW!
Top Bottom