To avoid these ads, REGISTER NOW!

GLTHFJ60's Garage Expansion, Phase 1

OP
G

GLTHFJ60

Well-known member
Joined
Oct 31, 2013
Messages
821
Location
Durham, NC
Got all the cuts done then laid all the tile in thinset. No lines, lined everything up with the spacers and my eyeball. Lined up the first course with the existing tile via spacers, so it came out straight.

Lesson from yesterday is that you shouldn't try to cut exactly the sizes you need, cut a little bit more along the walls. Some of my gaps ended up being too tight against the wall, but I'm still very happy with how it came out. Grout tonight!

mZqB6522eg3cjs62dUfvNlPJnyp4WYKGyfw-Z8JUyefgt3Ze7EsuDmBdZ8Y8l_2ZVYs20pwkhfbSLjEAZaGDA1ne3Z_rv5w_tyUfpWZMKFqjU_XtC_NP8LSLD7m6k0cAh92CjjTUa0ftN6ra69bYz1oug-ZS6P1rN6-p7G-0wYkbgLKnM8vzciscBeBmq8OTEsmvoCh4XPIsYx7fxqqqYjEUucXvSI05F0qu3tccFFIIcW7lRe9u10tvHMxacaPUM8TrjWGJXFjhqzqe_joMUDTKmEXjJX3agaKD602mrAPLLG68Vm8Z3MpP-3xQTNqvrA5qcHzxsK6M82hAiuv6TDJ-dX259OTwi3e4Gitbwbpw9tJpvvO9qVRI00aRx1T1IWAgFnMrg0H_lXqMrxkvW7-4jWmcYrj6xdkO0ZvJzpE-K-gFiI653EhpRzcXomdL8FclwTUa6ILntZCdTVXf99FrruDWhyDwkks2u5d_kWI2xvKdZrbViVOPkUu5Rv0IpoZCblmSiwv59247KeidvuElmc-_kXz4RgRjdjSJWXSVD6rowjqbDirVwSD7W-uDx743Xt2ZMKQzeiNu045B26DANcbf2juIyiPLDlHLCfH7HLrqWA=w2699-h2003-no
 
To avoid these ads, REGISTER NOW!

drivesitfar

Well-known member
Joined
Oct 23, 2013
Messages
36,029
Location
Pacific Northwest
GLTH: i love the method of cutting tile to fit instead of hoping the molding will cover a gap. i actually like tiling and i've done a bit in the past and hoping to do more in the future along with brick work.

so just an FYI if you haven't grouted before. i can't remember off hand all the tips, but i do remember putting in a milky sort of mix in the grout to make it tougher and they sell it where you buy the grout and just don't recall it's name. also when wiping up after the grout is installed don't wipe the grooves too hard or you might get sharp edges that you can cut bare feet on or if kids are crawling around they can get injured.

you are heading towards the finish line with the laundry room so keep up the good work. ask questions if you have any and if i can't answer them maybe one of the many other talented members here that will see your question will. also if you need quick answers do searches for the threads talking about the subject and if you can't find the answer ask questions on those threads.

cheers
 
OP
G

GLTHFJ60

Well-known member
Joined
Oct 31, 2013
Messages
821
Location
Durham, NC
I thought I had done tile before but as I was doing this room I couldn't think of when it was, so I suppose this was my first solo tile job. Doing it again, I'd cut another 1/8" off of every cut to give myself more room, but I enjoyed it! Little sore today, but having a beer closeby while lying tile helped :)

I was looking at the grout additives in the store. Do they really work well? I got a grout sealer to apply afterwards, maybe I'll have to get that strengthener as well.

Thanks for the compliments and thanks for being the only one to regularly post in the thread :) The encouragement helps stay on track.

I will definitely need help creating the layout of the garage once I'm done with the laundry room, just need to use the rest of the building materials to reclaim some space!!
 

drivesitfar

Well-known member
Joined
Oct 23, 2013
Messages
36,029
Location
Pacific Northwest
GLTH: I wish i could remember the name of the strengthener, but it was maybe 8 or so years ago since i did any tile. i just did this brick planter a few months ago and you know i don't think i bought any strengthener and the mortar seemed to fall apart so i should have. it ended up ok and seems to be holding up.

i wouldn't pay extra for epoxy grout because that stuff sets too quick, but i'd definitely buy more strengthener to add to the grout mix. remember to work the sponge hard on the tiles to get excess grout out, but try to leave the seams and edges up high so don't rub as hard.

here's a few pictures of my little brick planter that really yielded some tasty cherry tomatoes a few months later. if you don't have deer eating all your veggies i'd highly recommend a garden area or at least a few planters or raised beds to grow your own tomatoes, basil, herbs and really anything you like.

BTW this little brick planter was on the TO DO list for maybe 25 years and it took 3 days to do. just saying!!

cheers and you are doing great so keep it up. also just an FYI some of the threads i've started that now have several hundred thousand views seemed like i was talking to myself for the first few months. as you post on other threads and get to know other members i bet you will get a lot more followers on the thread or your next phases. if you care about other members and help them we'll help you if possible is sort of the way of GJ.

good luck
 

Attachments

  • WP_20160519_009.jpg
    WP_20160519_009.jpg
    149.8 KB · Views: 83
  • WP_20160525_006.jpg
    WP_20160525_006.jpg
    150.3 KB · Views: 76
  • WP_20160529_007.jpg
    WP_20160529_007.jpg
    147.7 KB · Views: 79
  • WP_20160602_002.jpg
    WP_20160602_002.jpg
    150.4 KB · Views: 78
  • WP_20160602_007.jpg
    WP_20160602_007.jpg
    153.5 KB · Views: 75
  • WP_20160602_012.jpg
    WP_20160602_012.jpg
    151.9 KB · Views: 72
  • WP_20160820_014.jpg
    WP_20160820_014.jpg
    158.9 KB · Views: 76
Last edited:
OP
G

GLTHFJ60

Well-known member
Joined
Oct 31, 2013
Messages
821
Location
Durham, NC
I like those planters!! Drilled holes in the walkway for the rebar? I love how that little wall is reinforced, lol.

Planters are definitely part of the plan. Have a few more trees to take out so we have enough sunlight to grow something! I took out 15 or so trees in the front yard earlier this year and have another 7, then probably 10 that need to come out of the backyard. We'll build raised wooden planters to get started (maybe I'll spring for cedar, who knows) and build something more permanent if it turns into something we really get involved with. Tons of deer in our area that eat the hostas in front of my house, so I'm sure they'd love a garden!

Walked around Lowes last night and couldn't find any hardener additive, so I just mixed up the grout and went to work. Got the room grouted and sealed last night. Loving how it looks, although I did a pretty poor job matching the kitchen tile!! Got some tile cleaner to give the kitchen a good clean and see what color the tile really is underneath.

pqEEe4SEyo-GNTccJ2YlrXvRVNJSLT8rwmLWIWAtoYmnPXkh6BoPjW178MBg54fKYBKW7PA58yUMV0phNdvdXWt1_9JymKXToJ7Kp23fMhOIz6ejUIl2uOHCFEzKKggiM3vLt9I3SgdToL2r_-00EvwW2rSGUOTfQxvfm5QR5DNtSp1pvoyuaJiPzLG00Kv1LXwyESG7J8QJtg3Q3fehTZXO1R_z1Q6zfKnGpm9JLUpmM2nR0MSwxJg6RWkJjDO9398pwSz7FCVg63gVsPv4VCeVUmsT829s7WNhPI2s2DD8HpigYW9Iarjs7CFkrs4XOnxk9de0L7_rsSUCbD72HUPRJZjiM7EBxoZkbzqzVqA7o-fVixHDv0BDl_QqWzMYjflvu236XaAKrj2QJmhyzLJX4XNGoa_zlsM6SgvGWdlP1vxBtjVceZfwl2n1p4wOkNHnqxoASpG-4aXV1Ud0r7VLFnWj9Bx2BRRZND73L8sEERSQK8XRzhUlFhw_22RM8MyNkIS2V1VrjLVC0Be7Nk_YY-1unL6eUzg6i7dFdXfF4CEcclnuM0id9srnOJ86dQFrNqKHR8XprQe5gS6MfzpBnYtUAZ8vO-g5fQ3zv3-LSwJHQw=w2699-h2003-no


7wtL0nFRm4FX0DpWSmnc-c2xGDAWd_cw8ctk77-XzEyVbc0XGa48UctW19DBTcLip_2dsBQDmAcx6hgvvaAU5jDvwreJFsQHhWaocByNvnTfcsTwylDQjZB7XiTmzUcYKM7lAdprKNb9Yk6BY4daPhgRIvL76luoi5XNOT7XJJVnHLFRxlBDXzHkIZcIIiCw_YAdMYoBq2zru5_DJqiofMFolVApY8-jrYJRXwZRR_lZfSF_F1XlLntPUUCrWKKZl4_aYOkdSI0PbsVKNe-by-z0wcCDOb1pSBJoFItsvdDR8AyAntiAbGFieoGYUomhUQna_nqfWBDCtmAzBBLJva3y9uln4TgX7RZs1koXxJyl60iuHRr0pzwustsGdg7SHl9PUAeKQVINSWJ-rFF9fvKnCamnIl-7_W1WZ29UvlZP2Q4wt2MlVwMMntMkSLp2hW38rHAprpcfybk90QliJ2nCLpFnD5LYzBTOrLPHcOru-CNHcMgpTfdIHMtq4qZZ8VVEV4C7zTRUitTdtCPkuRFSVxyeEFVGyNe-ImOIC7sg5aq2JJe7Ic3vDPXo9mdWu1uWDoNg7CbquXlq46XEGaNgv-v8AwrIXq4gRgoszk3f83pVaQ=w2699-h2003-no


kYBYQv5nfgdNEyXdhUnFxm-YCFTwFH5z0ozaS9rH6gG1s4m_YB4Fm_O8OjJ8iREk60QZrhYPz63Y9-zqk3IHg0TJhuzHGMMueGClZtVm6J2vXQkG1TA8NTqUZeOpOwUksRLA_BLMMS6a6NmZqCukHUOvdj6dbaXkvdjeP0sgH55N1N_zAnjdKFCRITxVgANxPNM5L94lnLgRSEUWGnKIfnQkAVc76D_NOWToZNpeft5eWrtV2pcShpFD1NJVkg1Er5lYDTJ3SQeZLMv_piQvaaNzFwAaxw4kr5to3rZ_KpNsfj5r3Fa1TfMU_AIFjzkoeS3l6hibnvVVx2Wh1L8vr7cjeuVXH0nGi6NlGsyEAhoqRsDC-mTEZVKm8qYG8HRHwXxVz7rFBI6r1S9opSgUwfDYxcbmYh8Nb5drH6BO8sfak_X9jmBWNlrwB95v9mhrOYcwLeJRwe_keRWHsrMi4-0qG2zyeZ4_8Ng2AHle0cuJ7bclnUEmWgKaqabm5RaHh6qS2jQOKcM1BllDkPegtqPsTreQKbdsJ2lEvitWoqEEMLtxnUrG09q35miKJfsV-MqoglqRgRPfDx6RlxUckYjBwONEglVj8WL7PQpjTMJbTd6nxA=w2699-h2003-no


J1e6Ah_bUh6HWnEGiWwkX06uX2L9BQoDNKViuua4JOgqtihDJr6lSURtFU-UQy8GIC24yqlvEqZG5mCluTU2UHbFZjn8AXL9N83kg7hmX_V7ssUoW7l0Qqe7Tn71MKn8t9B5KMXNU1jjZL5UCA6jj_rlW1f_VSwxABNu0L0x4f8wMKFaKvtaaiIIdgjGIsIEOLFjWfKlGHD_MoTJs2AoUoxhqwvcly0BRuh0gzCVmb8lNW8hJorFcLqMgUmPO4hUMdAJFoD2vzvmqMrp7x53Q-MXmFwm-QI6G7egTZ8x20ZvXelRBY4BMEdoltlc-wYXUVhec4v8rlBkUECW1QEYrW6fb9e8_QrnALijANV2CmzbPBjAD11vpgmuaDIkAwdtvw0tt79tjLMGv3NAUxqzRzNWgS7hA2551tW8-hyzdHxOpPLOQlGJ7hYPL7C5Cx9ZWCpj09dktPMml6wJXOIuTDnkKZNMmiUPlcTZ-Le__P3BUNYmVHcr-b9hvpjdXtleg_DOvTGZdb-5aRvMcBRAqIe5_G3z5JAv9hu1N2O-Cpl-bcz-_PJF7IXCiNOGn5PGI_2kiOHEgrmuavWnLRLu1lNiDRu6N8Wzc5IRzbh829RfmfdFvA=w2670-h2003-no
 

drivesitfar

Well-known member
Joined
Oct 23, 2013
Messages
36,029
Location
Pacific Northwest
GLTH: congrats on getting the grout done and not sure why Lowes wouldn't have hardener. can't recall how long we waited for grout to dry before applying sealer, but 48 hours comes to mind so check the instructions.

good eye and i'm probably overkill a tad with 12 inch 1/2 inch rebar every 18 inches on a 10 inch brick planter. since it took me 25 years to make it i don't want to have to re do it now do I? :beer:

as far as DEER AND A GARDEN you might want to put those raised beds on your new garage's roof sort of like this member did. check his posts about 6 months ago.

http://www.garagejournal.com/forum/showthread.php?t=251805

since my wife really wants a garden moving to the country has been an issue mainly cause of the DEER issues. we've seen them climb over 6 or even 8 foot wire fencing and about the only fencing they don't try to climb over is 6 or possibly 8 foot tall wood fencing, but that of course isn't great for a garden and lighting.

you think about that and let me know what you figure out.

take care
 
OP
G

GLTHFJ60

Well-known member
Joined
Oct 31, 2013
Messages
821
Location
Durham, NC
Overhead garden, that's not at all a bad idea. It would take some engineering, but I like where you're going with this.
 
OP
G

GLTHFJ60

Well-known member
Joined
Oct 31, 2013
Messages
821
Location
Durham, NC
Got the washer and dryer hooked up yesterday and spent 5 hours doing laundry. Man did it feel good.

XfBhUxl-sEEg3xQN93UCbVOXj2BBwkQExrMFC0_UWV9h9GOLLEdSnEUa-dxY9FenLARsxYTbzIBmSpuypdyjmJXInfcpGhHWXGnRNQEenHxrOOYU5RlxDtZ46bn36qsRI_bFAyoQ9rWVWi8S-LjhYx5JIxDMTv5AQ7TFROohdDeqb62pMYy5LYtwVgfRPF03DBoA19LGnJOKfywgrbNe_fhbqywHPRgzLHT2kEqUUWXxwpj4bS7DLxBOtFOyKEd7qfAdi1aMP2Lm_OnhuPDJMtfmzxTxrsyhXWezw4lutub6fr6pJP_qMMCvbjMoGYxgo_ZTCtNvSPktz2NSLbExKeqk6tTCvV1pQ6ZLNubiIRyRPb0ISGPrdj91gHv1OQJpX7H1DFVNopQd7ckhbJy8okRCj9am8XeHIeI2vnzwYZ6wUmwU81bxCseOnWrpsPYFhZrXXQ13AilugHuyUTeD83kmR5B6VVt-7BpEFpfYeeFQsTzxxkrQzN-Vx_bq4QG0Jm12sXYVrJZmuResPbbduD_YGUKRMjyAyKhqACbYq-K7H9bWmzcJ8pyEYw-s-aW520gJZrwkRSsPl1ACvMpd_pmg4X89pU1qD6UeSeAdDCeNNZUvUA=w2699-h2003-no


Came up with a plan for shelving for my garage. I'm going to dedicate an entire 10'x20' wall of the garage to unistrut shelving. Will pick some up after work today to get started.
 

-Brent-

Well-known member
Joined
Dec 23, 2009
Messages
4,709
Location
Utah
Nice work, man. It took me about ten minutes to get out of page one because I kept looking at the details of what the heck they did. Thankfully, you straightened it out.

I completely hear you on the wiring fixes, too. I know a few guys that make decent money fixing terrible DIY work like what your previous owners left you. You doing this job probably saved a couple grand in hidden costs had you hired this out.

I've seen some hokey things over the years from shelves built from old pulled up linoleum flooring (with the sub floor still attached) to carpet stapled to floor joists to suspend vent pipes. So, while it doesn't surprise me, it amazes me that folks purchase all that lumber and stuff and walk right by 3 or 4 books on framing at the checkout.
 
OP
G

GLTHFJ60

Well-known member
Joined
Oct 31, 2013
Messages
821
Location
Durham, NC
Nice work, man. It took me about ten minutes to get out of page one because I kept looking at the details of what the heck they did. Thankfully, you straightened it out.

I completely hear you on the wiring fixes, too. I know a few guys that make decent money fixing terrible DIY work like what your previous owners left you. You doing this job probably saved a couple grand in hidden costs had you hired this out.

I've seen some hokey things over the years from shelves built from old pulled up linoleum flooring (with the sub floor still attached) to carpet stapled to floor joists to suspend vent pipes. So, while it doesn't surprise me, it amazes me that folks purchase all that lumber and stuff and walk right by 3 or 4 books on framing at the checkout.

I was gonna say, sounds like you've seen your fair share of PO mistakes :shocking: It's a good feeling that all of the **** work is now correct, at least in that section of the house :bounce:

Nice FJ!

Expansion/ reclaiming appears to be coming out good, great work.

Thanks!!
 

drivesitfar

Well-known member
Joined
Oct 23, 2013
Messages
36,029
Location
Pacific Northwest
GLTH: sounds like maybe you were just about out of underware or maybe going commando and good to hear you were able to get some laundry done. :D

i like the sound of UNISTRUT shelving and hope you are able to take a bunch of pictures. i've been lucky enough to find a bunch of commercial racking to store some of my heavy stuff and cabinets on and under, but i'm thinking of making a loft in my wife's side of the garage for extra wood and plumbing supplies.

keep thinking about that garage rooftop garden and i really think that is the way to go unless you want to build a huge greenhouse. you do have a few extra 2x12's so maybe a greenhouse foundation is already got it's materials?

cheers
 
OP
G

GLTHFJ60

Well-known member
Joined
Oct 31, 2013
Messages
821
Location
Durham, NC
I'm going to float the idea of the rooftop garden. She doesn't like heights, but maybe we can convince her it's the way to go :)

Here's the wall I'm doing with unistrut:

N8ZYNlsgVULJwekj0C4v2cRscROWUGRT55vXwITFBH7Er5PF4vuolTCqKUWWt5rthbqQPbC2os_VaTBEV4w_ktxOMcF7SSFFpHr0lsQIZtMALiLULU92mwZKuS4P4wZcJAILWpWNYgPUObj_MYdHPjOSpqUNl5Uz06TFnM6tI4xwAo9gzrLnBVa8RIpP6Wd3gAa1Lasw0gg2ltclCkqNFDDRUE5o66OygxHCEWBk20FGgX8MH7iRpGuN1JF1vCDzB5wSN07MestOLFoj8H1KaXQicU_O9mJsZv1A71G9s9ot89t8tPMOfTN89PtnOTFObwEqqp-tAzq5AC5jLHsaquLxA2V4XXVE6jgoUp8edqd0Ayrn44SMEPzvCW3W93bR6a7EWz7t3AsKTEWfsqLUQmNZBurF2958LM_rcvIX3I-6_i8_bdQ8BKRY1luHruAlXGQrnIQYG7UjvGWVj_pBz5000EnQdMIzRNe66b_lrb8sXlhvUXc4H9nU9SvH1Ua3_20LYKzQqvsqLH-RP9IkaJz9NIfy1V0qkWuDnq82G10Zt84ovagE4Gnwxnip92GYnzZDHVr-uOk12yaB1hUzbfNemJbYVD14CDald1dsdFaGrsT75A=w2699-h2003-no


Put three rows up with 1/2" lags into the studs. This stuff is strong enough to hold my fat *** in the air, so it should be plenty for the shelves :lol_hitti Hung my two HF hanging tool cabinets I saw a thread about here on GJ and while pretty thin metal, I like them!

pjKdi80-F-bYSB5o6LNP2AkgMjDks-8vAmJW5QRIdBR_0MhPUSVRzKyffdMta79KeXaXZTfD7QDXZ6DaD-oBmVW3WvYL_NQzUTP4hkUxpB7_y4fLZDFt1BHCn9rBGiaMAn0vasrX0MYGwtIxwgvjFHSmjwVgkAqsyUyuB7xqk02zfl9r_uZRkwYYMxB3HrcnFqNRIyQw5aqVnOd9vSiJrhuHIN-prxok4U6CIBp5xqNJFALRUnoVGjPH4ISQY0GRR_YeKGiJeqj6F48_4lxrdnonib6m8pPfcM19LydCIjCyexubidl0r4w29c3Uczt_PtY5GiVM9CLRo4Zh03EwuemBEoRI-kygVh0Elgmkyeyw3sXoU2BtGnCGujPTIrMmSLrlF4olS4Pt1eRO4o7As5lDInf3AkP7nTEAWbcG84PC_ZEnHBkjkUg_EcBbXkYCJMU4O6uHFUsDSLOQllGXPcUXFMJnXzu3szB_DTjgq5p73XVJAoCkpIFP5bdDCLa5IBQIzRWObZlupHUOphSXSA080EDFHjAsZtgO0UG4q8YdiZJU_KLg_v5qNWEWHgmJohDPBs2K1z20BvsReYV_FBi8FwSJiGOXvj0Qz8tBetHlbawe9g=w2699-h2003-no


Plan is to put two shelves above the hanging tool cabinets, both hung on the outside edge from the ceiling (copying the other thread of course). Should work out perfectly.
 
OP
G

GLTHFJ60

Well-known member
Joined
Oct 31, 2013
Messages
821
Location
Durham, NC
Put trim up in the laundry room last night and the better half painted it. Aside from hanging a few pictures, the laundry room is done!!!

As such, my attention will turn to the garage, first and foremost the welding table. I built this table a little over two years ago and have identified a couple of problems with it:

1. No actual shelf below = space below table became **** catcher for everything known to man
2. Not mobile.
3. Not heavy enough. The crossmember project above required some leverage and I actually lifted the table top with a large crescent wrench (by accident)
4. Top not attached to the frame
5. No place to store/mount tools (vice, grinders, bench grinder, clamps, etc.)

I found these cabinets at the local Habitat ReStore and picked both up for $50. This should help with the storage:

yCf-21REwYr-1xWhRrUFDMjdkQfoc_D9bfw=w2699-h2003-no.jpg

Problem is that the two cabinets are 35" tall and there isn't that much space between the top and bottom rail of the welding table. Time to modify and might as well use 2.5" .25" wall square tube to make the rails so I can build "hitches" that slide in.

Original:

pUa4vlwMNPimjEFE1pGYJAsOKWw7NMS_P4Q=w2699-h2003-no.jpg

Modified:

ROmvslKuJADgm_zNJ3QQtxSAPi8W9ymT5vg=w2699-h2003-no.jpg

Let's build a rack to hold those cabinets, then get them as close to the ground as possible:

NHVay0NTKXMUtwJCMy1g-ppRSWp7vjmWEqA=w2699-h2003-no.jpg

9PXsImm2hOrNxz71d14Ic35wiRm3ozQFk9Q=w2699-h2003-no.jpg

Now we're talking:

TWoBHgiA6P8jX3YIgrUz0IimLs3gNXKwNMw=w2699-h2003-no.jpg

The bars above the rack/tray will be removed and cabinets slid in. Casters will be welded to the 3/8" floor plates. Haven't decided on how I'm going to affix the top yet, but I'm thinking a few tack welds for now. Hoping that these casters will be up to the task:

gwisRrR2eGhV6vNEeQryRkO8NlJBNasJG_g=w2699-h2003-no.jpg

Should be finished up tonight!
 

drivesitfar

Well-known member
Joined
Oct 23, 2013
Messages
36,029
Location
Pacific Northwest
GLTH: love those cabinets and good price too. here's a thread i started maybe a year or so ago and i still haven't built my mobile welding bench. long story, but simple answer is i found 1000 pound table and my neighbor that does my welding made his table and then bought a cool bike and he spends all his free time on it. he's still offered to make mine, but currently no space.

that said in case you might need a few ideas before you finish up your project that went from Zero to finished overnight i put in a lot of pictures of benches i like in this thread.

http://www.garagejournal.com/forum/showthread.php?t=280441&highlight=welding+table

I also started a metal cabinet thread where i put a ton of my stuff in there and other members have theirs so it's getting a lot of cool cabinets to see in case you didn't know they all existed.

http://www.garagejournal.com/forum/showthread.php?t=305350

nice job on the laundry room and looks like your bench is almost finished too.

cheers
 
OP
G

GLTHFJ60

Well-known member
Joined
Oct 31, 2013
Messages
821
Location
Durham, NC
Laundry room is finished up:

nTtZ8dy5gqgXPo61AM9z2D5Rh1Z2G4eE6Q9CzIq_TbrHe0puqXjsde2-gO3o_kHTRFN4_u7St3XJGrPrfmm6uDsgiOnjq-uYxRjXjsfpD9uD7UAUsco-V18cp1Lwg6aUhYwo6CAR6e3OkbgrDwmIxCenMqLZ1lffOh4uu2Fj9zwggL_6-0-tu6p4wijzEr4GAs-XegcqSHiVKASJ-ZClNImd5f5rU7zqdOZ-F2biMCgb8ApQiucXyaTokkznUndBMhdoAs8CHX1WKKbw4eDALNY_62fNUIpDY-K2fkwcDtrfVnipzhe_E6AiWOODtYKckTZNqz2vNEbjtsM6saiDBeqwZxrEDYQywCMTlCHDDalstYX0lipKMHsg4Q4SI7rxN-qmk9HBH4YfFu2Kvq_h7btECoaVXqEjx1XOsggpkKgtAqUjRmkvVyAS1Xn4oZ9gg42LDRo1i8CwNBoy-Yfn3o0Xpjlee1EyeRgNzNAQEYBG9aEwmXgI4Za33o_nqI8F5ki1DznVV8AWupEn2SuGkfLzXBSa_QZTMV34MyRBInFyJgDdTeQG4d65Yo9bZ29lXiHohXQFhOdlMMVjhsm_l6dIJwRP64jhltK6efGKxlnZALkP4g=w2699-h2003-no


3b_Bn78ZpYa8n8Ie5__4WqB482SbahwwR-is0h5vD9d7GKfPLKzLiH7L3n0SiYY1qK9sZsEqqn2F1cDw2RuO-Y8Ik-IUxRS6xF0NdQmlxcqGu_Iv5iSse_ZKQ3X_SWYQw5r7Lykp8xH0Dkismek3QOCnK3P8aQJLR5iOhvaXClhKVeGy8e8s7LNmrhcJiqpgIbyB_8abC4hOB-VG6GMTdhfnUPs_D0i5XN7NVq4o68Z2TqwmoToyUDNhclPFKU9HtW_4kFQVfAhcXXIlQSYs-2bPg6aUHfLKnREZr1r-QmmZhTpSmhsFHzyd-JuAs5r-EvZq5ABdjosGncrEGgPuENxNCA8ZLOfXbaujs_JgV_Tp3GtrFL47hgpE7uBnNiymD5uFgUd75mJxlnHHKsSXXxeseNa9YBDnZ29wSGKHPdIDAUp2AmchFxvLPfCnCAsCrkoIXuOL7Mpi5pwHQKzljvCQP08GG4DP8IeCgnScJUK61ws2_JPDQsL1Y0Fae5zdcBy5ktDW4p7Hg_NNRjkYwpMU9EWFAFqtUMaCmrHAl_40Jn0i9iaztjvDmUaojSU6OxTPQ-_8QuRCHoI6ZOvNxQKpka6fPNCYH4lPSXBt1zbP5DGTrg=w2670-h2003-no


Since that's done, I got the welding table finished up as well:

fWRy6zQM_amcA1WACHphQYdgrmtf8cqvnvyiwxtoIxEzYnOEnRPsXAS-lyz8q9zGV8nTLLuKpf_4sitLgMf4yMF4tA6brKU5QBPNcTjoG4P23Gbaq_OsSNhHMOSjKB_KvagxBPvqXeEJsgGMfvjMi-mN21-AmIxt_weH3ZJ958DigqZmSGyPpocHTWczICPAfKVz_sc-1W7P_gDqqE56wODStBL8LKcvIJgvRVq3Hs3ek-wZeKifi6JSqMbW4uqM--yVW6q1XUtfQ21Ru0UsApdUlMHhFpRu_fQVOYa7DnnWK9a46xLvGK3AW1GOJrYZPG9stmTJX2IZK8pufLfr6N4YKXPaVo6nyj5zJK2QoVG6Xe7gAh7DzHIlIIIAGzu1uhR0GQTKmDov342tMoRn2cwO6RMlf3EgUvf2_DDDN88LoegBggCKsV1_vK6gGX7VpyDUeGfQKIuP00MeIDQ5BmwwHDW1aLVzOYaRIywQ5MBgq9kcINPL2IItoX_zKLGXNFmj8db8j_FS5YwcGPlEq_jkyYDv9fDAXkHe-R8bUus-IyCK64XkIP1mb9LfCgbqcY7jtx8oKbtw9Bqb6E3SrlMJN_VtOnwgD7pvg4CwzIiAHKkmvg=w2699-h2003-no


GxMBxA7R2Qk2jbN0-0aQHIYA7VYhjtcUVI63as4ACGMH5kkFbjTSi9-BGAkQkyjtFTAAvFm3MMxzLtf-AAsEjNET0TzrfGgNFslGe6TPpi78wKcex3JovLqaBoSluefIdWBsonzTnGRn-euoKi-i2_CbymgJtRElwgKiL-btSth_LZT7Jjiyk8aCcWxy1QIinxSqopKp61gg-ep01vTQXmlqvt5q9Y4V05BJU8rSTzModLrU1BVKtZhCx0el5lbXQpg4WTTRbUhdU1n8WPOkuQd7cxoTNfmz8dfDmOPI5DAZHD2Keh3RcM8lZlCEuLfooliHt32t3ZzODyyEHOWWEocK5AL79PV2IONsndadvrJ67goTqEPjJtPpT9dxG4CGCyPr9eo3b_8x5C1aYCcmADHQFjDJQO3TeU8Yxk9w1YdW_qHvg46elrQ_bCDUzajq4Pmw5NlcUjgYYnV3484Wxg47cR_Z-kS4jrYJPEqHXxByYx_5mXVrqNJ177C7G1efZkVg1h77fOtqnbEyrb2jTed9WL3nsD9J7NccuxAhSGlUdMYYs_eHRSzCAEe3NFun0s6FcErinHN962esu4xLPlGpGysHa9sVe3KcJGOsRe2cKI5nqA=w2699-h2003-no


xKSsFvd0OHI3Sxez21yYgq_McS1Pp52iRSYKpz9Byuf9rSB80-Q4Kikm_WRVAWLlmI2mjFVzqgFnGVxZgE89NKiVzZeXzAI-7tPwkf1b9O9QsK1tysHtPTzWyxpwZm3HoaadQFWTt9l77wYqo3X_WX9r0od7TzAvJnTR_vldOK1rexPj_-AaQsUiOufpIW4ZRt5Gyl1JSHLDWmUiwCahhTsy2XFFyLl4seNfm3C70B6EX0KxVxmsN5_zpWDEXKfhguoSlyN9SB_ksbFYX7nmwLmMcpt2g9g1wyqYIDY3kbm8AVDj4LbBTTJ1fLg7uNRbq0vCAF9QHo2VuQyhbjSv7hqi-eYilCBlDnYMlO_p-0r3fFB5LDLgl40qlt3GGhIMYqThkt5sPv8IWNi4oOkkfUHHVWD6yCZP_5giA5u-_BERiwoua173av6oC0JaMsW80s1EapCcIxd6tJ3khOTN745cHCTboZ_eGX8rinjDUXjyCHJl4_yKQhPS6RcztO9O0YbcB1XljCktWDmDy7A6R9rAtcDxBCNFqvkqkIX4cx73OeX-2yLnDNZH-3w-lV3upqBtUzNLuot2U6VXOyuahC5Y-wFvgwxzSSRNTElUcRiDG9Oayg=w2699-h2003-no


6NDNeabktStNjqqcgh1vi92U1bWD98_1TRJRJTyfaSf6WWbeaVegogtUIoOywPLQygKbL0e4b-Xq3K_ouRrKNPwU5sKVahfIeADjqb5QDZ_VL2-lVFZvT__S7b1O-EQyA91la8UWu_FMCgYAMlP4Cf377tygtKAsEocew6H47T5JZ1z_2Bgv7NoizD2XW_CsbsgprGZ-Zcp54cZO4XJAKUvu7zzwTOR4UiW_x_r7TL_9_BqxF9T0laxYa5ng4Wo9Fz0tfs2s0LQvdvRmNHMlVA2y_uqhzuDrWTnOH9HynwNZ3OfWAWOmp-LTIS9mSSdrvyX8n6IFyrb1EDJQZp1uJkPtxJipDB4jB6BUMaZjnJo8H2qFMNQoJKNbj0vSD7FUGnm30MIOxSSol6cOCuz-wjpcZtZVFn-Qj5mRGEstAZz0UxXVtddsjE5h45OdMJ_GNoahu28psCn7UwYCGpEChrOTkvO3QgK5eta0MkcDy8b3GpRCd61iyc_YjZ0BgmVUWwdAqMvcD5SA68ZHad27aQUBLz1M7ydQqEwnEjeSOhTT4Tob4vAA-0EYL7qMq6HtCGtqKChME4qMNeIpvfNSRFLFIpYC2tz0yTPOU_0RGjm7pMIRPA=w2699-h2003-no


The work surface height is ~45" which is a bit tall, but it's very comfortable to stand at, so time will tell. I could relatively easily drop it down to 40" by moving the casters out from underneath, but I'm not sure I want to do that at this point.
 
Last edited:

drivesitfar

Well-known member
Joined
Oct 23, 2013
Messages
36,029
Location
Pacific Northwest
GLTH: NICELY DONE. also fantastic job on the small bench with the big organizers. i know you will love it. i'm using green frog painter's tape and sharpie to label my drawers as i put stuff in them until i figure out what the best plan and location for my stuff is.

I might not get online or GJ tomorrow so wishing you and yours a very HAPPY THANKSGIVING.

is your bride smiling about the new laundry room?

maybe since you were so quick with the welding table how about a new front porch so your wife doesn't need to get through your garage and you can store stuff where a path for the laundry room door would be?

good luck
 

Terrick down Under

Well-known member
Joined
Jul 2, 2015
Messages
1,904
Location
Royalla, NSW, Aust.
Hey GLTH, that welding bench has given me a couple of ideas for my place, Thanks.
The house mods look good, if you can get your hands on any large diameter plastic pipes then slide them under the laundry floor and use as a steel store.
 
OP
G

GLTHFJ60

Well-known member
Joined
Oct 31, 2013
Messages
821
Location
Durham, NC
GLTH: NICELY DONE. also fantastic job on the small bench with the big organizers. i know you will love it. i'm using green frog painter's tape and sharpie to label my drawers as i put stuff in them until i figure out what the best plan and location for my stuff is.

I might not get online or GJ tomorrow so wishing you and yours a very HAPPY THANKSGIVING.

is your bride smiling about the new laundry room?

maybe since you were so quick with the welding table how about a new front porch so your wife doesn't need to get through your garage and you can store stuff where a path for the laundry room door would be?

good luck

Thank you sir and a belated happy turkey day to you too!

I'll be picking up a bunch of kaizen foam and schaller bins to organize these drawers. Big thanks to the NYCCNC youtube channel for the ideas :D

My bride loves the new laundry room!!! Next up by her request is to redo the master bath. It needs to be expanded and tiled among a few other things. I need to get a shed put up in the backyard, build a covered porch in the front, build a new back deck and then the Mrs would like a raised bed garden :bounce:

Hey GLTH, that welding bench has given me a couple of ideas for my place, Thanks.
The house mods look good, if you can get your hands on any large diameter plastic pipes then slide them under the laundry floor and use as a steel store.

Thanks for the compliments! It should be pretty easy to put that storage under the laundry room.
 
OP
G

GLTHFJ60

Well-known member
Joined
Oct 31, 2013
Messages
821
Location
Durham, NC
Does anyone know the best way to host pictures for this forum? The forum software won't automatically resize the pictures I take and I'm not going to manually resize every picture I take just to post it here.

I can't upload as attachments either, but I can embed with IMG tags.

All other forums I've seen and used have automatic resizing.
 
To avoid these ads, REGISTER NOW!

-Brent-

Well-known member
Joined
Dec 23, 2009
Messages
4,709
Location
Utah
I use an outside host site. I still get a few large photos in my thread. Mostly are contained within the normal width of the page. I think there are some that you can adjust the outgoing size, when linked. I haven't looked though.
 

drivesitfar

Well-known member
Joined
Oct 23, 2013
Messages
36,029
Location
Pacific Northwest
GLTH: I click on the paperclip just above where we write our posts and download pictures from my laptop mostly (some from cell too) where i have them saved sort of like attaching pictures to an email. if you can't do that i think there is a few other ways.

are you downloading pictures from cell or laptop? still having issues ask and i might be able to find a few threads to give you links for.

cheers and best of luck with the little TO DO LIST that looks like a year's work.

good luck and great job with the laundry room.
 

RoofDude

Active member
Joined
Nov 14, 2009
Messages
42
Location
Virginia
Does anyone know the best way to host pictures for this forum? The forum software won't automatically resize the pictures I take and I'm not going to manually resize every picture I take just to post it here.

I can't upload as attachments either, but I can embed with IMG tags.

All other forums I've seen and used have automatic resizing.

I resize my pics in paint. I save them all, for every project I do & keep in a folder on my pc for future reference. For forum posting, I use an outside photo host. Used to use image shack but, am using photobucket now.

btw... dig the garage project!
 
OP
G

GLTHFJ60

Well-known member
Joined
Oct 31, 2013
Messages
821
Location
Durham, NC
Thanks guys. I use Google Photos. Downloading the pics to the local computer is such a waste IMHO. Y'all will just have to deal with blown up pictures hahaha!

I've been working on the garage and am to a point where I can work in the garage instead of on it :drool:

Did a bunch of organizing (even more past these pics), hung some banners, built arms for my welding table to hold axles so I can work on them, etc. My Land Cruiser fits in the garage now!!!

RTHYPAyZi03WYlrir-to9mK927ujkLOKO3CxxzlP7ivalXaeAZX-UhABVYPBtT9RVoMR1pqldxV1pBoLzFk9Ul5A2pzNQHHZV83h3giMC13t1Z_nn62e5FQiKyRgSdfeuy7V942mqPHWWjKK_7a0rMymipAP-bNG6fz_Dy6JW-JZtssqOSxl8BvyBoxywEXw9-DXBjBrMLljoM3aBMiAeUU9aV_q4RHbqEX2hMO1V2Xb8Vbf70LV1tEOjUMxkhQlzhN-saUXHhmRLz24bpFl3k6gV-s8IsCahmibBppcnXKoX5blKN40Rm7Cl0FhsCoMBr2lsz8rpqcwwGfLg6R65crFL3k-viPBIW4kxF8ce1e5iIpqoPbYIOOwG2FnjA9Fy4zinwMmzpTZc-5dyCcAfCU4zGHHKcBd3yDnGzqxiq6pehqqecIxvbDsoS6PHu-cJUTPY2MJJ0Kp078Kyt3D5kUj8qEq5z-zLlOLOp1c-KcRQbb7f6NwqhO9jise5nqEz7FDSGorYEwRmaNc9uLEZhF2cs9-VoNh4EZCG_f3osNRsq0tg3jMJfeKIyEwyn7m86IgDASy0kgKL_erqs0WSPqczrgnt8OtazQ_ttgyZd4LrnXTxq8H4Q=w2383-h1768-no


CT5SEnTo4mipR3hVPcS_c8dittzmmZNpywqy0nrLfaserBxiFEG0F0o_nrfklUipz7yrewwegG2SCHmHMDOFGRATSqcdAhU29wKxEbcjgMg2hTzQbosCB8CV_EXFNiLNpAjGxE1D2ch0YS008MBBeShBB64IbP8bE9dNPyuJ0aL9g-UgReXCuL3eLhnrhQD3_cKiaxEXCDgLhsfHw95KpMbwT41qVjXlRwrZV7p1rSPciDy05A1AfBxvJg_sUhqWWe4UKNgcJXPndF9m_22uhzVM7tC6V5NAUe2Sldp96XURZzD2hAtfU3L2J2RpEVQ5ChsPRydsWl12K4Hpu1g0Yoh2cKsmcw-Qk7uJYZEyw7NSkSR5-3lgKcVbXQ_d4jUHfhcHL2ZmMIszdn61cbngaHMlsgtMUIOdgxIjlCRvOOLptVF3HU9Poe1X9rMY04DpaGERPJBaGlhyQ_VC5GMRXiisIAWKyeFh2RdG8OEGoBuZKTWEtvnCyrVA7sPJqQuiHzrtfsvH2D0XMcckXSHvPCcHazVTrDHZAsDNNyptWS-__bPvdk9TlkRr1onCjG_bfqaVwL8t7mmFsdEx5rZlwDH0zkgP0RwWhmHdxNUlaLPOPDWIbR6lIA=w2383-h1768-no


37ID2tzeGZCnfC9TAVWoKhSCUKWnx3YBLanBjR75aFUunP0zjt6TpL7qGQmtkPUMVkaOes5tseAhA1WffMAhc3uA9Zpq6mq2MnrbuRa1PlgOQFplTHKW1rzTHzam7S5kN1fgtBbHkAWb5iIsgboXq_1j-1nE_8mGIZdfPgUkcIGEhRlHwMXl-bEfhNhf-NtPeZQEOWsE1ecvemKhmj-ZSqn4I3XXUqyNvkckOVNdjJBBevli1LgGiTcVKoSmXAp3D3ALIeHwoKXFpHW3bmSoT86CPonDhohhG0ujagoAhLpEN69qd7OYh700qdeyuc8EO780ww4Qdxp_r3hCXxK24Cv78tMKecQp8i80ERoNupEGpRljMO6akdUu3JD6xQEEubjOtdPor3XVkPp90hx_ceIvLq-S0c0aMScyeyB3naNVLr-ShmKprzGB4LqhAYgSPSaBlbs9jA1-m6rywI3qOjbkgMN9At2MzXDcTfl1ix2ufcEmlsdfALAZaMHwH8Jx_nMvwl2kme8NtKkHrU1lJXzCzVicEF9tZW5wSZVwsKxIOyJQiS18kHdK7SGxlopZ_Sg-idVF9LUqDpLUN6ASJIlC2ZWIXyLfpFpDu8o59TLEBgT8f9pJMQ=w2383-h1768-no


m_bF3ETB9H95_WJRwtl2xdc1L9gvb6GpjwlghpxzWIsIhePnWXYjA8LXB5bzI1bUbt0mOguv6nSZ8AfaR8HFjjPLa7zeuSm5_rNzubfLxF2laW4gtVJjgjWgBk2-uAIaogR5tBh5rBW-XxUcjEnQlbJksaqKzkSfs4WaqqOMCuH1N2luHQ2ceTgsRX_8-5GZzSnIMmZHS3WiT3QVKyNHgt3k4E88FtZOz75zK5eqRtqTquLATnPBzaxs9u9xkYrlWscN0FVC4K31DA_gG0HVRVcoKne0Xb3U_JJox5TRJFL3WHpY2JJS4kqW2KWZo3M7CBsH-8J-uhqIJ8RJ0iWvKCwoq3Z_NXaIA3GzPTNM3tZW1B7uHZte4q3ZQwvTIpmxgkyLxZN3LKNbLXF9evW3B_UcRF0FI0B0uGrXSKVhYrC_U1VQNbVm0vy8Oo7mZa6jN_4SgEWrjLZVdjvLTZeOxiuzgLSaCL21DAHZ7BXKoNmg6hTE_-O2GNeROAE3HKDJbC-uZ__yrnbEOIeqRbkMBDSMhEQdUde97HUhDTwnfgMSoiHTJAKOsmBCFGnjU4Mq-uyQoIXE49IJTOUT6HmssEn-G4lkNOqf11jA3b8gpHLF8qzCbtQY9g=w2383-h1768-no


bCswuZniJgUevC81fU6tBVw5olXhyeihS23SqRh3Jlc0wZmtGXda5Pmnh7xk6Rlz-OjCNKQANFDp1_SAzZitZScXeaMVaWWTVVsiayN8SQxGpSK6se-6yDVNFChv2ywgCTYe9nEgiFQjHc2CS29beebW8LtMzvk-k5wvK6ewSFfOfNcz6tOPKcgxzLqdbPsWpIXp1VIj_zJJJKMgXS9dlk5VNkm6GQiY9C_gWwAZr4vgLNmpgzOE6BDVsJVT8ssIz1oW3qvnTdehNNVQbLE4TZhBYEl0k44zgkPEkjySXfeQgyA2ueXAEImGI724In6MQ1uGJmHRbAVSlrghfupZBKM6xgey7QJp-v4RzaM4jaFlW8JpowVRURswCHtC5dzny-CbTDHccsha3EcQanVv92ttpamrrY_W6wOLn4_xFInYxDMk_9mwHL3HKVxxiWvQFtbZzYld6rY45piTxAGyI76gayyWzZXACRKv-BQ3iR2lOpteXwiXOCPq6wIR0fYXCd7tGUxUOzsjxBK01kIVOj38svIS0w_ng0dNbU0k8R5q4kICugVchygdtkR64hRx6UfafYyle-5QXM8V24kSeKJQGNsZk2RJ2DGUH4dTb1kIUxyJiVmsow=w2383-h1768-no
 
OP
G

GLTHFJ60

Well-known member
Joined
Oct 31, 2013
Messages
821
Location
Durham, NC
Happy new year to you too!

Only what I posted above. I've just been using it! This is how the axle rack is used. Made it really easy to build this axle:


iLJuSR15aE0p-5hHbBtSIii6TxPwIYJ2-180qTIMWua8aD8nBSc7OhTFAj-kuKNO-b0MI-vNESQizfe9KwvnoJSxum59odj57iQ1OLs-z761pVHIhX2WAh2fdi2XUz_OvOCc1U3KjmzJsBkxwy_BKEjGnPxwxQMpHC8h32LgWz68WHakI5T9KJzFTCB8gNM5qdU__XAap6l1MqDWEqPx_clTcPwcdG7MfLIftqJ_ETqz1y9t0pp8YnJr4U_K2IjUAxlkU0GE0jPBsLEQIeFo_EHfXnSxjd7OTgtM_V5Jo1_PWoDJmS2fyksCh1CkXihyN7vXgxWqiCUt_v6ykqIrH1trf-3iPPPgeKKQVmIoDTkvgrvSoJxvmBeUOgygSiFlq1iyCM262ye0vsG8M6NFQ0w5vm77yKjDA7hsPJtYSlq3A2i_39Oo5w3oMTc1qkhbxz3ec_II1-dyAFBIxabK7hOOZJk6xUud3mpgOIooCM3Hw7drjWYqhoh3WW77x3m_v82gQu0tEet5pGZMPh_aVB6N6Wpe550rZ6qnc4eDM-YlaMqHwpo6Lj1OHsgqO7UJwrhdagm516H2B_KOAgrA0RR71NmiWx8OBbqTB5r2eyv8CnM-CBm2cg=w2670-h2003-no
 
OP
G

GLTHFJ60

Well-known member
Joined
Oct 31, 2013
Messages
821
Location
Durham, NC
FINALLY figured out the wiring.

Not sure I had a picture of this before, but there used to be a three-gang switchbox that had 6 romex lines coming into it in the corner of my garage. 3 way circuit for the overhead lights, 3 way circuit for the front exterior lights and a 3 way circuit for a light inside the old room we tore out. I was able to remove the 3 way circuit for the old room because I had both switches and all the wiring exposed, but could not for the life of me figure out how the other two were wired.

For the exterior lights, there was a 3 way switch in the dining room that worked with the 3 way switch on the exterior wall of the garage and two different romex runs came into the garage from the dining room. After some research and some swift multimeter work we were able to convert the interior switch to two-way and cut out the second switch in the garage. Turns out the lights on either side of the stoop are fed by a line that comes into the house from the garage, who would have thought. WIN!!

For the 3 way overhead light circuit, we beat our heads against the wall for quite a while. We cut out the second switch and wired the new outlet and single two-way switch circuit up correctly, but every time we put a load on the circuit it would trip a GFCI outlet in the garage that shared the circuit. A load plugged directly into the GFCI did not trip it, but that same load plugged into our new socket did. We opened every light socket and outlet past the GFCI outlet to make sure everything was wired correctly and it was. We used a GFCI circuit tester and it indicated proper wiring not only on the GFCI outlet but also on our new outlet, so we were confused. Finally, we pulled the GFCI outlet and found that the load side hot wires were correctly connected to the load terminals on the GFCI, but one of the load side neutral wires was connected to a line terminal on the GFCI!! ****!! Someone must have done that due to the messed up 3-way switch circuits that were put in. Finally, after fixing that incorrectly (for our new circuit plan at least) placed neutral wire, everything worked as expected and tested properly with the GFCI outlet tester :cheers: :bounce: :grinpimp:

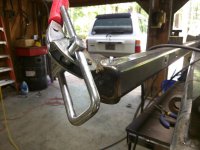
The reason we did all of this was to put an outlet in for the parts washer and put the garage overhead lights on a single switch so we could install a new light I picked up. Here's the new outlet and light switch. Garage circuit feeds the outlet, then the switch is fed by the outlet, which switches the two overhead light runs. Here's the parts washer outlet that's always on when the breaker is on:

Ki2GCa6ITcmlZI8Jh0OU3e1qSOpm8PIiDzWJyU2sAUjw4CdV4fQIPwpd6vdZ20RswgY-8JFF9YRowvSoeAm1Cl7TNLq13cvyqsEHBiS9HZfBjrIh3XBXovw41Tf4ut6AUIHbZRRDtLCZdop0yZZkEkdrFvPjEwKoHyvfCXCxstJ-OepTYMVGlRYSSI5J18keNJhXXk6jVRpdw5yK29DTRS4aOKh8sW7fBzCP2Qzz9ee2YSdz9nV3XH8hBstPy3sz_poGqhglKsMLBGtJaz1LEG0GE_UUMQa6zy1tnPKPr34BSO8hLrfoFK1_oBpzQvcA1NoFmB9xM59NbQLW-23meTTt30UgRKhbmAmrxfnzWV2oZLSfiONnotZG4FiW8QZySMLh5QcOGdi1026p-5TF0LpVlS1MBxcvAJKeL91YLiH4S-Npco2VNGBLiFHzgHUsGOPDO0btSqVrlGOaIn-V8kve4aRJagd-z9kAciQ5_4fK8S0uS5DpxajQclstdqyiPHf7ewD__6xBWJtV0iqDTKj6NBKSdLb3GOhGe4FU1Toh2o_Ys7Js6Mg0316qlfdg3dE2Pc1SfXTJxYIMJBSxpGgWWSShw1ZYc4S9eLBLRBbqvdONyj_GaQ=w2706-h2009-no


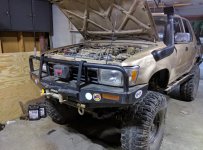
We repurposed an old wire run for what was presumably overhead lights in the back half of the garage back when the garage was built for an outlet off of the switch. Here is the new light mounted and plugged into said outlet:

MYISwfxHjJG9V4wa5Yjd5s3cphMx66oECyEVceiM1ePWYH6h9T57c8lM-upH3qH5atE1E2rD3qbJtvIc4reirJ4n-wt7n5RiGcYN2v_TNCzTyjHk0X7RfPMdYvBhe5H9pBfw--Z_f8M_TKIARMqY_5NbPWBIwHhxM1FaPFRBjG98ou63TgDZiivRdWJ5bPLizYrpTNJ-ir8zXRuf8owUN6ehEatjEPSOmuDvWkiGSKmmJk_ZWiEPOCP-HqDX2Zfmb2qn-7mGhVWtlcbBi5_1pwbK8hb52crtUp7BmObTczndJnPYmwM64zP4huNyvWfBoFbwQ-rF7-ia_2p3zuSzKieGVkOhAuGUzW8C5cxvo7SXGyuG5KeVbUCRPSoncJWClRfVmkmf9rcLUpuD3baA6bRBo7UDl5rCLx8nLd6dA0nvTQl6hsoaA9WEL-Dv9dXVNGoBjViQuSjtejZjzMkhBrt16Ymhbf1Asi4ZK-SVKgahHiasfy95u7F95PZ1BPMvw2jR6Bgwhrb8q4LdXy_69TIuGjbwUTaVOc2LDXc5mQvb_LljGGdhbNb2dNSi2vznNaY6g9hrrKUHbXrU_-idWSX365f8N4IGWH5zFOqeSFbC-vwSBrShAw=w2706-h2009-no


This is a new light by Big *** Lights, the same company that does Big *** Fans. This is their "Garage Light" and puts out 13,000 lumens. It's blindingly bright, so much so that they even package a pair of cheap sunglasses with the installation hardware :lol: The light is expensive at ~$400 shipped but it replaces a few T8 fixtures converted to LEDs based on the output, so to light a whole garage with LED, this is cheaper than T8s with LED bulbs believe it or not. Plenty of threads over in garage journal discuss lighting cost analysis if you're interested.

The effect is not as dramatic in the day as at night, but this should give you an idea. FWIW, now that this light is in place, the rest of my garage feels like a damn cave because it's so dark by comparison. I used to think I had OK lighting but it turns out my lighting before was garbage.

Light off:

eL0ueTO9UK-lPknDEIUjxbbWW3rD-_NyDjKCJDXi-IusQu88oW47GS3S_cIUaEqhZ9YtdBGXFB_cvWDXDIuVjZskBX1jf6SUFjlMtDHp4tUBkq4LdlG_EVByOk5pizm_h5b9bHSMI85wayUOycv-4y8vfAwBaouD5XlTy1qTCF75kPF7W6kD6ga0K8FGuQm8i_nH8iAvWe64Ohxu1PtNajRS3TlozVvbXLnzRzfvQVQj7LbNzFJGTi6bXq4T-aRAvqo5FW8fRAljqLpdPDA9I4Y0MOnm7c44I95AQQHuq3BDvCwNDcGi6YaJT3zXvTGIrrXyq_pV8NoJfSYmuFV2F8HVH_TXhNdpm3K7LrbvTMHwRqGafkXmew7uDSdxxlO65ndyaNwzn6hFdZAUGYhEwO4c2li4GNYsF1sIQmEM3BcW5zM7WdPHDjBXSC3wmpAQT4hmLTEV_NR1BeAY_Upb3jKLPry-d-IU5wgW4hUb8vIEv5Bylz6oRZqWrkX2H1gcAQi1bCmJB0O_7eTUBcAnJ1JTlCiwQzKmasbbo1WvxXNs-aavvCLv_lizL9_zMdfj7z6m3wbiUI2m7mwZIx-Zh2SQsXGXBOGinYrtX9ceDhg49ZaDs5xonQ=w2679-h2009-no


Light on:

_glCEJpeB082uBAaU0rqauufC5qEXpBXJdQHR8van0kk3pMea575AJlkFitzn6BaJQTCkwdVy6xQqqUjIJviBrKRxv-P9mLaKLvNly5ibYpjov7DDNScpuSVuw3Io1N-ic3iQhpevbwbfLpMF-xQmlsrOFq7tAQkeY3oNuOyOMjV4S9iVEgezRqxk5udrkc7q3ZgwgqQNfxX9ypAkRFMhd7WL7yWyhC3zyE9Jq9ZLlQrsnfLZFGmjt39GHyB-A1-6OLRo2AVWvw_tpHUk2BCtK80kDEt0IlBWrBuCoMezYcqm5YvGoXggqyz0TnQJBlz6HsKiW0-c3uTPX-OznQF5apuaC5lyxYvSvYlbYb--zfHgjJOOyZypk3YnCqHReWwAf2KOm3QvVB2gPyBDVYHI_r8ukGgDaZitMGOQNZz3caQ4acn7E8euJST-xIWwArGx31FqnqSX7WJOrhNZpZfl3uw6Rjo8cYaFnKbA3V-VbAKhgj-FgwXHa2pfEDsAwbozjEuFmvXirKafhAehfvAyMJIOsEImxq5N2-mqAqHgo8nIEeYyNHMifsFSR9F1JpTh53hAoLdX7hnygKQ4l-doha77S4ehn21D_alk7IqU8LYQV7qvTXZnQ=w2706-h2009-no


I'll be purchasing a few more of these babies to put up around the shop when I can afford them. I'm very satisfied.

Aside from a lot more drywall work to close in and insulate the ceiling, this project is officially complete :bounce: :bounce2:
 

jgregt

Member
Joined
Apr 7, 2016
Messages
20
Location
Raleigh, NC
Good looking project. As someone without in-depth knowledge of building techniques, I appreciate when folks point out errors they find when working on their homes.

I haven't seen the tankless water heater brought up in a few pages, but I had one installed four years ago and I am happy with it. My gas consumption has plummeted in the summer - 2 or 3 therms a month and there's an endless supply of hot water, which is good since I have two teenage girls.

It is true that it takes longer for the water to get hot, but it doesn't really bother me. The actual unit is about the size of a suitcase mounted to my garage wall.

It's definitely more expensive than a traditional tank water heater and it will probably take forever to recoup the difference, but I figure why burn more fossil fuels is you don't need to.
 
OP
G

GLTHFJ60

Well-known member
Joined
Oct 31, 2013
Messages
821
Location
Durham, NC
Good looking project. As someone without in-depth knowledge of building techniques, I appreciate when folks point out errors they find when working on their homes.

I haven't seen the tankless water heater brought up in a few pages, but I had one installed four years ago and I am happy with it. My gas consumption has plummeted in the summer - 2 or 3 therms a month and there's an endless supply of hot water, which is good since I have two teenage girls.

It is true that it takes longer for the water to get hot, but it doesn't really bother me. The actual unit is about the size of a suitcase mounted to my garage wall.

It's definitely more expensive than a traditional tank water heater and it will probably take forever to recoup the difference, but I figure why burn more fossil fuels is you don't need to.

Thanks for the comments!!

It's reassuring to that in the same region you do see a reduction in gas usage with tankless. I will definitely move to a tankless setup when I can afford it to gain the floor space. There does not seem to be any downsides other than initial cost.

Which one did you have installed?
 

jgregt

Member
Joined
Apr 7, 2016
Messages
20
Location
Raleigh, NC
Thanks for the comments!!

It's reassuring to that in the same region you do see a reduction in gas usage with tankless. I will definitely move to a tankless setup when I can afford it to gain the floor space. There does not seem to be any downsides other than initial cost.

Which one did you have installed?

It’s a Rinnai RL75.

My service is from PSNC. I’m on the budgeted plan, so my bill is averaged out so I pay the same amount each month. For the first three years I paid $56 a month, but when I had my annual recalculation back in July it dropped to $38/mo. I am in NW Raleigh, so I assume you’d get the same service.

Hot water and heat for the house are the only gas I use. (I turned off the pilot light for the gas logs. Installer guys said that uses about $15 a month in gas for the pilot.) House is two story 2,600 s.f. with dual zone controls. I generally keep the heat set at 67 when we are home and 64 when we are away.

Hope that helps.
 

Fast914

Well-known member
Joined
Jul 15, 2010
Messages
188
Location
Dartmouth, Nova Scotia Canada
I agree, we have oversize stackables...if that is what ya call them...but more than big enough to handle a family of four with two very busy boys. Make sure you level them front to back, side to side as they will drive ya crazy if they are not!

...Ooops, I just got through to post 96 and sure enough...your washers are in. They look great!
 
Last edited:
OP
G

GLTHFJ60

Well-known member
Joined
Oct 31, 2013
Messages
821
Location
Durham, NC
It’s a Rinnai RL75.

My service is from PSNC. I’m on the budgeted plan, so my bill is averaged out so I pay the same amount each month. For the first three years I paid $56 a month, but when I had my annual recalculation back in July it dropped to $38/mo. I am in NW Raleigh, so I assume you’d get the same service.

Hot water and heat for the house are the only gas I use. (I turned off the pilot light for the gas logs. Installer guys said that uses about $15 a month in gas for the pilot.) House is two story 2,600 s.f. with dual zone controls. I generally keep the heat set at 67 when we are home and 64 when we are away.

Hope that helps.

It does help, thank you! I'm on PSNC as well. I'd say that's a pretty good reduction in monthly cost. Just need to keep saving up for the initial cost :)

I agree, we have oversize stackables...if that is what ya call them...but more than big enough to handle a family of four with two very busy boys. Make sure you level them front to back, side to side as they will drive ya crazy if they are not!

...Ooops, I just got through to post 96 and sure enough...your washers are in. They look great!

Yup, they are and they have been working perfectly. Thanks!!
 

racer-john

Well-known member
Joined
Apr 1, 2008
Messages
1,461
Location
Newmarket, ON Canada
I know I am late to the party, but want to say that you have done a great job and I'm sure both of you are happy now that this part is done.

Quote: It's a good feeling that all of the **** work is now correct, at least in that section of the house. Quote"

Not quite: That square junction box that had a switch on it, should have been made accessable from the laundry room. If you ever have a problem, I hope you remember where the exact location is.
Up here in Ontario, the Hydro will not allow such a junction box to be covered by any permanent construction material.
Cheers :lol_hitti
 

drivesitfar

Well-known member
Joined
Oct 23, 2013
Messages
36,029
Location
Pacific Northwest
GLTH: did you start another garage thread or are you just letting this one sit for a while as you plan phase 2, 3, 4 & ...?

i just saw the BIG *** LIGHT post and looked it up and wondering if you still like yours. do you and any idea where the best place to buy them would be cause i need a nice light in my 9x15 portion of our 2 car home's garage?

here's the link for BIG *** LIGHT in case anybody else might want to check it out cause it looks like it's sun powered.

https://www.haikuhome.com/learn-mor...57.574170492.1510531698-1647477921.1510531698

cheers
 
OP
G

GLTHFJ60

Well-known member
Joined
Oct 31, 2013
Messages
821
Location
Durham, NC
I know I am late to the party, but want to say that you have done a great job and I'm sure both of you are happy now that this part is done.

Quote: It's a good feeling that all of the **** work is now correct, at least in that section of the house. Quote"

Not quite: That square junction box that had a switch on it, should have been made accessable from the laundry room. If you ever have a problem, I hope you remember where the exact location is.
Up here in Ontario, the Hydro will not allow such a junction box to be covered by any permanent construction material.
Cheers :lol_hitti

Thanks man! It's funny you mentioned that. I came across that regulation yesterday while watching home improvement shows and immediately thought of that box. I've got a picture showing the exact stud and location of the box, so I won't readily forget. Despite that, it bugs me that I missed that requirement, and you're 100% correct.

GLTH: did you start another garage thread or are you just letting this one sit for a while as you plan phase 2, 3, 4 & ...?

i just saw the BIG *** LIGHT post and looked it up and wondering if you still like yours. do you and any idea where the best place to buy them would be cause i need a nice light in my 9x15 portion of our 2 car home's garage?

here's the link for BIG *** LIGHT in case anybody else might want to check it out cause it looks like it's sun powered.

https://www.haikuhome.com/learn-mor...57.574170492.1510531698-1647477921.1510531698

cheers

Hey! I've just been using the new expanded garage for the past year. Now that I have room to work on vehicles inside, I don't think I've got for more than a week without a project in the garage :lol_hitti

The big *** lights are amazing. I've got two right now and with just two, there are some angles where I need spot-lighting. It largely depends on whether or not the garage doors are open. A few more big *** lights would be welcome, but I'm not made of money :lol:

Are are pics of some of the cars and trucks I've been able to work on since completing the garage reno. It's been a blast!!
 

Attachments

  • IMG_20170703_191800.jpg
    IMG_20170703_191800.jpg
    146.5 KB · Views: 84
  • IMG_20170527_153637.jpg
    IMG_20170527_153637.jpg
    132.1 KB · Views: 83
  • IMG_20170422_001117.jpg
    IMG_20170422_001117.jpg
    152.1 KB · Views: 85
  • IMG_20170215_200616.jpg
    IMG_20170215_200616.jpg
    139.6 KB · Views: 82
  • IMG_20170812_204029.jpg
    IMG_20170812_204029.jpg
    143.3 KB · Views: 108
  • IMG_20171111_200249.jpg
    IMG_20171111_200249.jpg
    147.7 KB · Views: 81
  • IMG_20170708_154041.jpg
    IMG_20170708_154041.jpg
    137.2 KB · Views: 82

drivesitfar

Well-known member
Joined
Oct 23, 2013
Messages
36,029
Location
Pacific Northwest
GLTH: yep at $400 each i'm not quite pulling the trigger and ordering one yet and i also need to make sure it will fit cause in my small space i also have a garage door involved that might cover it.

good to see you are keeping busy. :beer:
 
OP
G

GLTHFJ60

Well-known member
Joined
Oct 31, 2013
Messages
821
Location
Durham, NC
A friend of mine from 4BTSwaps found me on here, and in talking, I remembered that I haven't updated this thread in quite a while. Someone might find this interesting/useful, and I enjoy sharing, so here we go.

Updated my wall shelving:

FfjHDKOwvVQb7i1nTrGpkCEzJiPaZTen5IzjTjD5kLq77CkqgmaYBSr_2lhOrqqu4Cri5k5cSxxuSmcEBjbS_vtmo3JJzYnN4869dSr2zFSUC53XrGX-SVr1F0jtAw3mka3zopXx0kqsDHUQWe5nGeiSv6ITsdqaKU94fEyMNEDq3zzikBNdV-wxhOthUe7B-y6UxGbFzu4-G3yS-uPerswHRf34IOLpa_qWiFsDw4o6I5UGUA1urHOV2OewuEGM1fbEiMF4UD3yUpXRFAP_APuC_otGq20vfBQTEtgPnTFES3E7Htg20hsMvx8Hq6RgbdjrvaFxXYWYZzlaOoOWfUGUY3fxAvFKoF7lCJvzn08diLZsJdiOttW-4eNUTIMgqs1NbdoSmv_06l9EweFpxkyI4ZKmJ0faTbYUJil1ZDdsSKWCRXoxMsgUM3Til__J7kf0JqCarrorSLB9Q3GGkSa0HVRZmYBi-gisro7-SS9L0RwuaMGMuPbT-n4Ll-QImy14go0HEVOg9fasZpE9OrZZlL-WVnioDwYfKz9pBfBftJvYZVLJQ368G0jfVqNd85kCa86Wb7PVwD7vOPXPOwKSKcz8btJw0Hj7H5DKudUu_Cp9g13a-1ai9o3zT-eX4SXbprVBYn6G3sjecNTFH82l_Q=w1239-h929-no


Changed over to US General tool boxes 6 months ago. Man these things are awesome.

oAZ6fOHgayOykIXlpPydS-JMJHe4cTW5GX0g=w1239-h929-no.jpg

Removed a bunch of trees and expanded my driveway:

5E3dJdDTmBAKwHxl25Y_fkLW4x1zESaOEiXQ=w1239-h929-no.jpg

Changed out some shelving and put up more FR drywall in prep for a new tool addition.

2sWQnsRo488JQoeZlssG3XuXrcWuTXXzcWdQ=w1239-h929-no.jpg

Installed and wired up an American Rotary ADX10 to power the machines:

L-GSJDPYMU1cEebLhlNERczzByqILZkj_nk5Q=w698-h929-no.jpg

Here are the machines that prompted the rotary phase converter:

HVUpAxKGlyPQMWrGBGEHDWzKws6sRATNI2RI=w1239-h929-no.jpg

RUFgtjPVJ3HY1ceNfddPu3jrrxAGALyR9GQQ=w1251-h929-no.jpg
 
Last edited:

drivesitfar

Well-known member
Joined
Oct 23, 2013
Messages
36,029
Location
Pacific Northwest
GLTF: tell us are you planning on building a big shop since you cleared the land and have some pretty large tools already?

nice looking lathe, mill and gantry!!

don't forget to put some flowers or plants in front of the house or other stuff your bride wants to keep her smiling while you get your dream garage. just saying it's nice to have your bride on board while you are building.

cheers
 
To avoid these ads, REGISTER NOW!
Top Bottom