To avoid these ads, REGISTER NOW!

Between 485 & 705 SQ/FT A Garage Rehabbed

Workspaces between 485 and 705 squarefeet.
OP
B

-Brent-

Well-known member
Joined
Dec 23, 2009
Messages
4,709
Location
Utah
Hey Brent-

Any reason why you chose 12 gauge speaker wire?

Ed

Originally I was going to go with 14 gauge due to length of two of the runs. When ordering, it showed they were out of 14 (at the length I wanted), so I went with 12 rather than 16.

In all actuality, I probably wouldn't notice the difference between 12 and 16, especially with my components. However, I do like that there's room to grow should I ever run a higher-powered system.

Other than that, it was just a spur of the moment choice, not really a need-based decision.
 
To avoid these ads, REGISTER NOW!

jp828108

Well-known member
Joined
Jun 28, 2011
Messages
484
Location
Ohio
You are well on your way to having the ability to incorporate some BIG speakers and aggravate the neighbors if you ever want to. It's cheaper and much easier to go overkill now, and never need it. Retrofitting is no fun. In my old place I added boxes in the walls and in wall rated speaker wire for two rear channels for surround sound. Had I stayed there longer I would have added patio speakers and probably some in the ceiling in the kitchen. The retrofit was a PITA.
 
OP
B

-Brent-

Well-known member
Joined
Dec 23, 2009
Messages
4,709
Location
Utah
I got back at it, last night, after taking Tuesday night off to hang with the fam and turn in early.

First thing was pulling the speaker wire and getting the conduit in place. Again, no permanent fasteners.


I ordered a second set of speakers, too. This little place should be rocking.


I stapled up the wires in areas of the runs that needed them. I have a little more to do but it’s in areas I didn’t feel like jockeying tool boxes around.


What was left of the insulation needing to be put up. A half-hour later, the insulation pile is GONE! Finally.


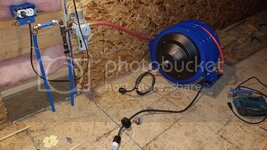
I used everything and this is the only space uninsulated. Yes, it's a mess. That's what happens when the insulation needs to be cut to fit. :eyecrazy: I’m going to use some of the foam I used in the garage door. Tonight the plan is to address this area. The holes need to be cut so the reel guides fit and then I’ll get creative with the polyiso board.
 
Last edited:

big_bake

Well-known member
Joined
Mar 19, 2014
Messages
119
Location
VA
Looking good Brent. Insulation is no fun to mess with but the end result is desirable.
 
OP
B

-Brent-

Well-known member
Joined
Dec 23, 2009
Messages
4,709
Location
Utah
Looking good Brent. Insulation is no fun to mess with but the end result is desirable.

Thanks, man! I don't mind messing with it, now that I'm done! When I did the ceiling and attic and it was hot weather - that was no fun.

With the weather breaking (although it snowed last night) and the light hanging around a bit longer my enthusiasm to get things done has been renewed. I feel like I haven't gotten all that much done but then I look around and think back and I see it.
 
OP
B

-Brent-

Well-known member
Joined
Dec 23, 2009
Messages
4,709
Location
Utah
Hose Roller Guides:

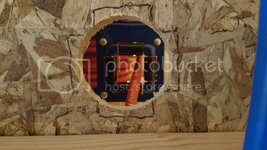
First, when I popped some holes to drop the hose and cord I didn’t get them lined up. I eyeballed them and went for it. As you can see, they’re “off.” They were large enough that it didn’t affect usage but it bugged me.

20170222_201058_zpsir8eultk.jpg


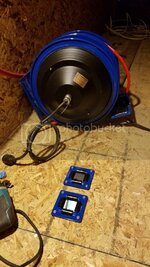
The plan was to take a piece of flat rubber, cut a slice in it and run the hose and cable through. Dan (FinallyGotIt) suggested I run a set of roller guides and it got my brain working. I was going to run them in the ceiling portion but it made sense with them placed in the flooring, too. And, what the hell, I’ve already spent a small fortune on this air line set-up (and the garage as a whole) so what’s another $30? :D

This, however, did present me with an issue. That flat rubber would have concealed my hole sawing flub. Two roller guides would definitely be “off” and it would be noticeable. I looked at the holes and then at the guides. I made a couple measurements and figured I could adjust/correct things when I cut the floor to fit the rollers. Here’s what I did:

20170223_215553_zpsknzzgvna.jpg

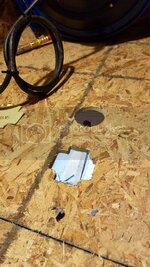
I measured and made a simple template.

20170223_215638_zpsweeuic6v.jpg

I marked the holes from the bottom and that quickly showed it wasn’t going to work. The jig saw didn’t fit. That being so, I pulled the hose reel down. Now, I have plenty of room to work but, man, it is chilly up there. The insulation is working. :D

20170223_220357_zpsocbhcobw.jpg

You can see how “off” the holes are.

20170223_220757_zpsebfvadfc.jpg

I used the line on the OSB as a guide to fix my work.

20170223_221309_zpslef0vqd7.jpg

20170223_221313_zpsctm6ygwm.jpg

A couple minutes later, the rollers fit and they’re pretty much even.

Before screwing everything down and setting the reel back up, I put some insulation in. I have some R13 fiberglass insulation in the attic, left over from the roof/ceiling insulation but instead of using that I cut a strip off the polyiso left over from the garage door. I was going to get creative and cut it in a way that the hoses would drop through but I scrapped the idea, quick, when I looked at the air line and wires I’d have to navigate. I cut the strip into four pieces and put it up.

20170223_223940_zpsgmqnnwef.jpg

You can see that the holes are still somewhat out of alignment but that’s because I made them a tad larger than my template so I had room to slide one forward and one a tad back, to meet.

20170223_223935_zpswzxkbhv0.jpg

I pulled two fasteners from each guide and ran some #8 screws into the floor.

20170223_224154_zps9idroswu.jpg

Mounted up the reel and dropped the lines through the floor. (I did have to pull the rubber stops, first.)

20170223_224732_zps82iikaen.jpg

Now, this looks pretty dang good to me.

IMG_20170223_230627_241_zpsbjlcquns.jpg

That was it for the night. When I put the ceiling in and finish it off, I’m going to stuff some of that left over R13 into the hole to slow down some heat transfer. I could feel the heat coming through the holes as I was trimming them.
 
Last edited:
OP
B

-Brent-

Well-known member
Joined
Dec 23, 2009
Messages
4,709
Location
Utah
As I’m typing this my body is thoroughly beat from working on the ceiling on Sunday. Hell, I’m looking at the pics and saying, now, “aw, that doesn’t look too bad” but man-oh-man – I’m feeling it.


First thing was getting the J-channel up. This new-looking, shiny galvanized won’t fit the look of the old stuff, so back to HCl and heat.


This is just the spray, alone. It darkens and ages best if you heat it and then spray the muriatic acid. But, do it with great ventilation. Maybe that’s another reason why I feel like I went a few rounds with Mike Tyson?


I had a few lengths of channel bent like this. It worked perfect on the shelf end of the ceiling but I could have gone without at the ceiling top. It worked, but wasn’t needed.


Here’s the shelf end I was referring too. After getting all the channel installed. It’s time to get working on the ceiling panels. It had been a long time since I had seen the panels, they’ve been sitting on my trailer since summer when I grabbed them from a gentleman whose kids pulled them from a barn for some side money.


I separated rough stuff from really rough stuff and put a bunch of full-length panels in the shop. Turns out separating and organizing turned out to be a wise move. I went outside a few times to get shorter pieces and didn’t need to dig. As you can see these pictured pieces look beat, already. At this point I was a little unsure how it was going to look. I was second-guessing a bit.


Luckily, so far, I was able to cut off the worst areas of the metal. I kept it simple as far as tools. I needed a straight edge (this 2x6) and some clamps. Question: what do you all do to keep the plastic ends on these clamps? I’d like to figure that out. I’m always picking them up off the floor and putting them back on, only to do it again the next time they’re removed.


I used this blade…


… on this Harbor Freight saw. This saw, even though it’s virtually new out of the box, is pretty bad. I wouldn’t suggest it. I picked it up for a project needing demo work but never used it. I’m glad I didn’t. It’s low quality all around, pretty much. As I’m typing I’m trying to find a positive about it. I guess the only good thing I can think of is that I didn’t use one of my good saws. From blade retention to the base plate and guard and guide notches to the adjustments it’s all bad. If you’re low on cash, buy a used well-worn circular saw instead. I’m going to give this away when I’m done with it.
Okay, moving on. :D


I managed to cut most everything straight. The one bad cut Is covered by an overlap.


First panel up and in. I went for a full run on my first piece, that was an experience! It took a few attempts but all my issues were illuminated in this piece, actually. After that I just took my time and tried my best to be smart but sometimes you have to sacrifice your body to get things done.


Maneuvering in this area has been a challenge. Thankfully, this is the last time I’ll have to do so. I’ve done this whole project without moving the engine and hoist. Haha.


This steel is easily cut. The biggest trick is getting over the mental hurdle of measuring from the top of a rib rather than an end to locate the spot to cut. My brain is set to measure from an end point. I quadruple checked myself because it was so weird/unnatural foe me to do.


This bracket got heated and the dipped in muriatic. Right after I pulled it out, I sprayed it with hydrogen peroxide. It was probably a 45-second process. This is holding the flex EMT that the notch was cut for. I didn’t snap a pic, unfortunately.


Here’s where I ended, last night. Just about the half-way point of the ceiling. There are areas I’m going to go back and rivet or screw to get it cinched tighter against a neighboring piece but it came out better than I thought it could when I was looking at the pieces.

It is rough but that’s part of the charm. The dents and divots give off neat shadows from the accent lighting. I think when it’s all done it could look pretty neat.
 
Last edited:

Duker

Well-known member
Joined
Sep 25, 2010
Messages
10,861
Location
Livingston, TX
Brent ... who knew it took so much work to look vintage! :)

It is looking great1


Sent from my iPhone using Tapatalk Pro
 

Hawk136439

Well-known member
Joined
Jan 5, 2017
Messages
117
Location
Illinois
Brent, this is turning out fantastic! I was hoping to do a similar ceiling in my basement so I can wait to see how the finished product turns out. Hope your muscles bounce back soon!
 
OP
B

-Brent-

Well-known member
Joined
Dec 23, 2009
Messages
4,709
Location
Utah
Brent ... who knew it took so much work to look vintage! :)

It is looking great1

Thanks, man. Other than folks on this forum and maybe my wife, most others wouldn't notice the details that make it look (or I hope look) cohesive.

looks great!! Love the vintage.. Its going to be awesome when you're done.. I'm following along with this one!

Thanks, I am really looking forward to the day I work IN the garage and not ON it, for sure. I appreciate the compliment.


Brent, this is turning out fantastic! I was hoping to do a similar ceiling in my basement so I can wait to see how the finished product turns out. Hope your muscles bounce back soon!

Thanks! I'm curious about how my other, more typical, ceiling is going to work out. It's new corrugated (I'll knock the shine off) but it has to be cut for the recessed lights. It'll be interesting figuring it all out so that everything fits as it should since it's not like drywall where I can mark center and RotoZip it.

That looks really good Brent. :thumbup:

GB


Thanks, GB. I appreciate it. Hopefully I'll get it finished this week.
 
OP
B

-Brent-

Well-known member
Joined
Dec 23, 2009
Messages
4,709
Location
Utah
I got two more sections up. It's getting easier/faster now. Although I was pretty tired by the time I got out there (nearly 9:30 pm) so I did my fair share of staring/day dreaming or maybe just dreaming, haha.


Here's the patina'd bracket:


Here's a shot of a bunch of tinwork together.


This is why I spend so much time knocking the galvanizing down. It blends in fairly well.


That's it for tonight. Time to shower and get some shuteye so I can do it all over, tomorrow or, that is, later today. :D
 

jbmatth

Well-known member
Joined
Jun 3, 2013
Messages
5,692
Location
Northern Ok.
That is looking great and I really do like the extra effort to make everything blend in together. It'll be a very fitting environment for working on the cars as well.
JB
 

Hawk136439

Well-known member
Joined
Jan 5, 2017
Messages
117
Location
Illinois
Hmmm as someone who has also been planning recessed light in corrugated for a little while, Could you find a spare accent ring and use it as a template? Maybe lay on a patch of painters tape conforming to the metal and then use the accent ring and spray paint to mark the hole on the painters tape patch? I hope some of that made any sense because I haven't had my morning coffee yet and will continue to watch your build and see what you come up with!
 

sublime68charger

Well-known member
Joined
Sep 9, 2014
Messages
5,415
Location
SW Wisconsin
I like that look for the ceiling!

I totally under stand this line and train of the thought process!

I got two more sections up. It's getting easier/faster now. Although I was pretty tired by the time I got out there (nearly 9:30 pm) so I did my fair share of staring/day dreaming or maybe just dreaming, haha
 
OP
B

-Brent-

Well-known member
Joined
Dec 23, 2009
Messages
4,709
Location
Utah
Looking great Brent.:thumbup:

That is looking great and I really do like the extra effort to make everything blend in together. It'll be a very fitting environment for working on the cars as well.
JB

Thanks, fellas. I do appreciate it.

Hmmm as someone who has also been planning recessed light in corrugated for a little while, Could you find a spare accent ring and use it as a template? Maybe lay on a patch of painters tape conforming to the metal and then use the accent ring and spray paint to mark the hole on the painters tape patch? I hope some of that made any sense because I haven't had my morning coffee yet and will continue to watch your build and see what you come up with!

I messed around with a scrap piece fitting it under the shelf where there's a recessed light. I think if I measure the closest point of the circle and the a side point I should be able to get the hole close. I was thinking about making a template out of some card stock so it could bend over the holes. I think it with some messing around with it, I will have a better feel for how it will all translate to getting the holes cut well. Like anything it just takes some trial and error and practice.

I like that look for the ceiling!

I totally under stand this line and train of the thought process!

I got two more sections up. It's getting easier/faster now. Although I was pretty tired by the time I got out there (nearly 9:30 pm) so I did my fair share of staring/day dreaming or maybe just dreaming, haha

I'm glad I'm not the only one! Haha.
 

drivesitfar

Well-known member
Joined
Oct 23, 2013
Messages
36,062
Location
Pacific Northwest
BRENT: i've been a little busy the last few weeks and missed a lot of your new improvements, but i really like them. the double hose arrangement coming out of your loft is AWESOME.

i hadn't thought of doing a ceiling with old rusty metal panelings and i won't let any sit in a garbage or scrap bin again without grabbing them. that is just COOL.

keep up the good work and yes it is nice to stand and DREAM too so you can maybe think of something else pretty cool to do in your garage.

cheers
 

burger

Well-known member
Joined
Jun 6, 2005
Messages
998
Location
Erf
Hey Brent,

You mentioned cutting round holes through corrugated steel (I assume with a jigsaw or a sawzall?) and that got me to thinking---- how would I make the template for such a job? So a coworker and I opened up Solidworks and figured it out. You can model the corrugated steel (kind of like a sinusoidal wave), put a hole through it, flatten out the steel, and end up with an ellipse that could be printed as a template and taped down over the curves of the steel to get your round cut out. The computer part is actually really easy (like 15 mins). The hard part would be accurately dimensioning the steel for a good model. The computer is perfect, but garbage in = garbage out. And I have an idea about how to get accurate dimensions using a picture...


Ed
 
To avoid these ads, REGISTER NOW!
OP
B

-Brent-

Well-known member
Joined
Dec 23, 2009
Messages
4,709
Location
Utah
Hey Brent,

You mentioned cutting round holes through corrugated steel (I assume with a jigsaw or a sawzall?) and that got me to thinking---- how would I make the template for such a job?

I'll pop a hole and just use my upright tin snips. For a template I have been thinking of two ways. One, actually cutting a hole and flattening out the steel. I have a hole saw I used for some remodel cans that I could use to "scribe" a rough circumference.

Or I could use the light method to transfer on the shape. Pretty much I figured I'd cut a hole in a piece of paper or wood and shine a light above it. The light provides the circle and the shadow is the outline. I've used something similar in an art class in college.

So, that's where my brain went first.


So a coworker and I opened up Solidworks and figured it out. You can model the corrugated steel (kind of like a sinusoidal wave), put a hole through it, flatten out the steel, and end up with an ellipse that could be printed as a template and taped down over the curves of the steel to get your round cut out.

I like this idea! However, there's an issue here. It assumes that the holes will fall in the same place on the ribs. At least that's what I came up with when I was fiddling with the scrap piece, last night. I need something either flexible or transferable to use so as to be able to lay it out on different portions of the ribs.

The hard part would be accurately dimensioning the steel for a good model. The computer is perfect, but garbage in = garbage out. And I have an idea about how to get accurate dimensions using a picture...

Ed

Ed, this is what I'd like to hear more of. But, like I said above my brain works in a way to make things as simple as possible (in my own head, that is) and I have no clue about SolidWorks as I've never messed with it. Still, if it could help me or someone else, please by all means share the knowledge. I do appreciate it.

Basically, when the weekend rolls around the problem will have to be solved and I'll look around and see what I've got on hand to make life easier and make it happen.

Seriously though, thanks for the comment.
 
Last edited:
OP
B

-Brent-

Well-known member
Joined
Dec 23, 2009
Messages
4,709
Location
Utah
Re: This is one of my more serious posts - be careful with CO

I was having one of those nights last night where nothing went as I expected. I went out to the garage thinking the last three widths of metal would go smoothly and I’d be in bed at a reasonable time. That wasn’t the case. It was a weird night. The more I think about it the more I have a hard time explaining what actually took place. (Edit: Please read to the end and learn from my dangerous mistake!)

It was one of those odd occasions where I mis-measured in pretty dumb but easily correctable ways. I dropped things, like nearly every little item I had in my hands: bits, screws, etc. Just to get the first run up took me well over an hour. At one point I pulled up my hooded sweatshirt to see the shirt beneath it drenched in sweat. I can’t remember a time when something like this happened. It was like no matter how hard I focused, my brain and the results weren’t jibing. It was a frustrating evening to say the least.

I could have thrown my hands up, gave up, and got a decent night’s sleep, but I am too stubborn. I was going to get done what I set out to despite whatever was going on with me! Haha, at one point I wondered what WebMD would say if I were to enter in all my “symptoms.” (More on that, below.)


One of the things I wasn’t thrilled about was the fasteners I used. I used the typical roofing sheet metal screw with the rubber insulated washer. While they would be great for new steel, they stuck out. So, I bought a pound of sheet metal screws and aged them. The reason I decided to go with these is because the metal is so haggard, the overlapped edge needs to be screwed down. When you look east-to-west you can see the overlapped edge and how it doesn’t sit tight.


Here’s the comparison of the two.


Here’s some of the overlap that doesn’t sit “tight” to the neighboring piece. Also, if you look closely some of the screws I used to tighten one edge can be seen. However, they blend in fairly well. There are lots more to do, though.


Here’s one of the runs that really gave me troubles, last night (this morning). It was, by far, one of the most worn pieces. I’d like to blame the materials but, really, it was all me. :D


Just taking my time and keeping at it, as well as continually fixing my mistakes, and it worked out. By the end of my work session (it was nearly 2 a.m.) I was satisfied and happy I didn’t give up. And, even though I was tired I seemed to be more clear-minded and awake than I was at any point previous. Weird how that works! (Not really all that weird, the heater was off!)


Like I said, there’s lots of tweaking and tightening up but I think it came out pretty good for a bunch of scrap-worthy barn roof.


At 1:30, I looked around and I was beside myself. I’d created more mess for such a little amount of work. My “bad habits” looked like they had taken over. I spent a while cleaning up and noticed I hadn’t opened the window while I was running the heater. Maybe it was carbon monoxide messing with me?

And to save you all the Internet diagnosis, I plugged in my symptoms for some levity. It looks like “tripping, stumbling, profuse sweating, clumsy, and mental errors” means I, like 22% of Americans, am facing some mental health issues or I’m going through Menopause. :D

And then signs/symptoms of carbon monoxide poisoning:
• Weakness
• Dull headache
• Dizziness
• Nausea or vomiting
• Shortness of breath
• Confusion
• Blurred vision
• Loss of consciousness

Dang! I couldn’t believe it. Here I’m making jokes about it! I’d bet a dollar the whole mess from last night could’ve been a lot more serious.

So, take this post as my personal public service announcement.
 
Last edited:

bdbecker

ALLIANCE MEMBER
Joined
Nov 18, 2015
Messages
5,583
Location
Iowa
Good PSA... $20 at Home Depot will buy you a simple carbon monoxide detector (just bought one for the house last week). It might be worthwhile considering how much you've sealed up your garage over the last few months. I plan on installing as soon as I finish insulating my space.
 

burger

Well-known member
Joined
Jun 6, 2005
Messages
998
Location
Erf
Ed, this is what I'd like to hear more of. But, like I said above my brain works in a way to make things as simple as possible (in my own head, that is) and I have no clue about SolidWorks as I've never messed with it. Still, if it could help me or someone else, please by all means share the knowledge. I do appreciate it.

I think we all approach these problems differently, based on the tools in our tool belt. Having spent the first decade and a half of my mechanical engineering career as a designer, I gravitate towards using CAD and 3D modeling to figure out measurements, spacing, etc. I used to get paid do it every day, so it's become how I figure things out. I won't even hang pictures in the house without making a quick CAD sketch so I can nail the spacing on the computer screen without putting a bunch of holes in the wall.

If you were to take a picture of the profile, trying to be as plumb and square to the material as possible, and put a tape measure in the picture to act as a scale, we could import that into Solidworks and draw curves and lines on top of that. I guess the problem is that the template for every hole would be different, as each one will align differently with the ribs. Ha, so much for that idea.
 
OP
B

-Brent-

Well-known member
Joined
Dec 23, 2009
Messages
4,709
Location
Utah
Good PSA... $20 at Home Depot will buy you a simple carbon monoxide detector (just bought one for the house last week). It might be worthwhile considering how much you've sealed up your garage over the last few months. I plan on installing as soon as I finish insulating my space.

Yeah, you're right on. Thankfully spring is almost here and I'll be done with this heater and there will (hopefully) be a mini split up on the wall come fall when heat is needed again.

I think we all approach these problems differently, based on the tools in our tool belt. Having spent the first decade and a half of my mechanical engineering career as a designer, I gravitate towards using CAD and 3D modeling to figure out measurements, spacing, etc. I used to get paid do it every day, so it's become how I figure things out. I won't even hang pictures in the house without making a quick CAD sketch so I can nail the spacing on the computer screen without putting a bunch of holes in the wall.

If you were to take a picture of the profile, trying to be as plumb and square to the material as possible, and put a tape measure in the picture to act as a scale, we could import that into Solidworks and draw curves and lines on top of that. I guess the problem is that the template for every hole would be different, as each one will align differently with the ribs. Ha, so much for that idea.

I was thinking about your comments and mine, last night, and I think we both really over thought this. This stuff is so easily manipulated I think making a couple marks and eyeballing the cut lines between each mark will probably get it close enough. And it will all be hidden when the trim is installed.

I love the CAD mock-up story for hanging photos in your home. That gave me a good chuckle. :beer:
 

burger

Well-known member
Joined
Jun 6, 2005
Messages
998
Location
Erf
I love the CAD mock-up story for hanging photos in your home. That gave me a good chuckle. :beer:

My ex-wife used to call me ****-Burger because we.. erm.. because I was really **** retentive about house projects.

Ceiling looks awesome BTW! What's the plan when you're done the garage? Back to the Ford?
 

bj383ss

Well-known member
Joined
Sep 29, 2011
Messages
3,166
Location
TX
Ceiling looks great Brent. I have seen a lot of barnwood used but this is the first for barn metal.

Bret
 
OP
B

-Brent-

Well-known member
Joined
Dec 23, 2009
Messages
4,709
Location
Utah
Ceiling looks awesome BTW! What's the plan when you're done the garage? Back to the Ford?

Thanks! The plan is to get the Samurai done so we can hit the trails this summer/fall and then the roadster. I've also got a 30 coupe that's going to be built in a mid-to-late 60s style. I'll probably have the chassis done this summer, too. That's the hope, anyway.

Ceiling looks great Brent. I have seen a lot of barnwood used but this is the first for barn metal.

Bret

Hey Bret, thanks. I'm certainly not the first but I do see why folks use the new stuff (which is more popular around the GJ). I think with a couple more hours of effort, I can get it looking like I want it.
 
Last edited:

Sighss

Well-known member
Joined
Feb 28, 2017
Messages
251
Location
Illinois
Started reading this thread and couldn't stop until I reached the end.
Great job so far and can't wait to see the finished product! :thumbup:
 
OP
B

-Brent-

Well-known member
Joined
Dec 23, 2009
Messages
4,709
Location
Utah
Started reading this thread and couldn't stop until I reached the end.
Great job so far and can't wait to see the finished product! :thumbup:

Wow, thanks Sighss! I appreciate it. I almost can't remember how some of it was nearly 9 months ago. It's such a different little place, now. The other day I was looking at the air line traps and dryer and thinking, "I wouldn't have been able to do that if I kept the window there." and for a second I actually forgot there was a window there. Haha.

Anyway, thanks for following along. I'm going to try to get a bunch done this weekend. I'm just not sure what to take on... finish the upper walls with pallet wood or do the lower ceiling with some more corrugated?
 
OP
B

-Brent-

Well-known member
Joined
Dec 23, 2009
Messages
4,709
Location
Utah
A pretty big milestone was achieved for the shop, this weekend. The upper walls are done! My goal was to finish them in one weekend. I knew I’d create a big mess and I only wanted to deal with that once.

Saturday I worked on the walls from 1pm to 3:30 am with a break for dinner and that was it. Looking back (although I’m pretty worn out right now) it was good to keep pushing on into the morning because the last board went up a little after 9 pm, Sunday. It took about an hour to clean up and I was able to get a decent night’s sleep.

I had already disassembled 60 or so pallets and organized them planks by width. They sat, covered, on my trailer since then. I do still have two stacks of complete pallets and probably 60 sq feet of left-over planks because I wasn’t sure what type of waste I would accumulate. The planks ranged in quality/looks in the stuff I did keep. I just wanted to use the best pieces possible. I figured there would be a ton of waste and there was. Even in breaking the pallets down there’s a lot that went to the dump.

Your eye for quality changes when working with pallet wood. You start to see flaws, cracks and wear as a "good" thing. There's a line that's drawn determining what's useful and what should be tossed that's much different than any other wood I've worked with. It was a weird hurdle for me mentally.

If you’re the type that likes puzzles or art you’d probably like messing with a project like this. If you love climbing up and down a ladder 300+ times, then this is really a project for you! :D

Enough blabbering, here are some pics:


This old barn wood is the only wood I purchased for the project. I got it inexpensively and imagined running a boarder on the end walls to help with the corner transition between the ends and the center. It gets rid of the issue of mismatched courses.


First wall done. I figured out a lot of things with this one. It made the second end wall go faster.


2nd end wall. I was worried a bit that the three walls wouldn’t match, at first, based on how my materials were organized and how I was using them. This turned out to be wrong. However, later, on the big wall it became less about picking a piece I liked and more about making the pieces work. There was a lot of labor on the big wall.


With the two end walls done, I had to make a choice on how I’d run the ceiling J-channel. Either I’d run the channel up the the wall or the wall planks would sit on the channel. I cut a small piece and tested it in a few critical spaces. After that, I chose to **** it against the face of the wall.


I hid a rivet at the joint.


Ready for wood.


It became quickly apparent that I was going to need to prep the planks so it wasn’t such a puzzle. It was easy to do on the small walls but with the big wall it made sense to rip a few different sizes based on what I had. After doing that, things went smoothly.

Well, that's not wholly true. My compressor started acting up... or that is acting like it was dying. Not exactly something you want at any time, especially something so expensive. I'd pretty much take most other tool dying but that one. I'm going to start a thread on it, elsewhere, because it I need to diagnose it. Anyway, I got it to limp along throughout the project.


You can see the differentiation just from these planks that came from the same pallets. I know this because some of the pallets I’d dismantle, which had a group of planks I definitely wanted to use, I taped the whole bundle together. Look at the width differences. This was the case for most of the pallet wood. After running them through the saw some would take an 1/8th and others a ¼ and others even more.


This is early on, too! That pile nearly doubled.


The first course was a mistake. It stuck out and not in a good way. This wood was really hard, which is why I wanted to use it so that if I bumped it somehow the bottom edge would take it. But I was short one wide piece. I had a few narrower pieces but I figured even with pulling a plank and attempting to make it look right, it still would look out-of-place.


I pulled them down and put in two courses. Fitting them after running other courses meant I had to modify and fit them. By now I was a pro, haha.


And that's it.

This week I'm going to tackle a few smaller items and maybe put up the J-channel for the low side ceiling.
 
Last edited:

bj383ss

Well-known member
Joined
Sep 29, 2011
Messages
3,166
Location
TX
Looks fantastic Brent. It has character and is probably just as much work as trying to get drywall sanded out and painted. I like it. Throw a couple of coats of BLO on it.

Bret
 

burger

Well-known member
Joined
Jun 6, 2005
Messages
998
Location
Erf
Looks awesome, Brent! I have the same DeWalt table saw and love using it. The dial operated fence (and corresponding accurate and square cuts) is killer.
 
OP
B

-Brent-

Well-known member
Joined
Dec 23, 2009
Messages
4,709
Location
Utah
Looks awesome, Brent! I have the same DeWalt table saw and love using it. The dial operated fence (and corresponding accurate and square cuts) is killer.

Thanks, man! Question about your table saw, is it a bear to move the fence or does yours move freely/easily?
 
OP
B

-Brent-

Well-known member
Joined
Dec 23, 2009
Messages
4,709
Location
Utah
Looks fantastic Brent. It has character and is probably just as much work as trying to get drywall sanded out and painted. I like it. Throw a couple of coats of BLO on it.

Bret

Thanks, man! Haha, Bret, you couldn't make me get back up there and put BLO on it. My legs are like Jello and my splinters have splinters. :spit: I think I'm going to hang up a couple old signs and some Model T and A sheet metal and call it done.

Seriously, though, do you think coating it with something would take away some of the rough/worn-out charm? I wish I could have captured a more true picture of how it looks but the lighting and the camera on my phone weren't getting along.
 

Duker

Well-known member
Joined
Sep 25, 2010
Messages
10,861
Location
Livingston, TX
So where are the pics of the Rod nestled below the vintage walls and roof? What a slacker...you give a guy a five minute break...... Looks great! :)

Forgot to add, if you do put a finish on it cut it really thin to take down any gloss as you want to keep the patina you have. Or if you want to age it a bit more a very lite cut of some Potassium Dichromate can do that as well.

Sent from my iPad using Tapatalk Pro
 
Last edited:
To avoid these ads, REGISTER NOW!
Top Bottom