To avoid these ads, REGISTER NOW!

VISE REPAIR 101 all vise repairs, lubricants, sources for parts and the tricks to fix

vintage nut

Well-known member
Joined
Mar 17, 2015
Messages
1,272
Location
west coast of canada
You can get the occasional thing in small packs here, just not common. I've got a tig and silicon bronze filler here, I'll play around with that on some scrap cast

Sent from my MotoG3 using Tapatalk
 
To avoid these ads, REGISTER NOW!

JZiggy

Well-known member
Joined
Dec 1, 2014
Messages
990
Location
Atlanta
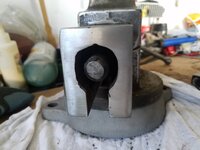
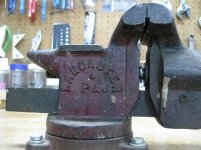
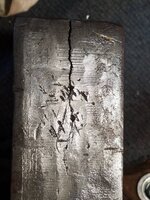
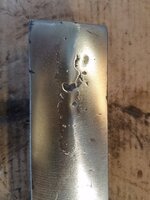
My Reed 4C was missing its adjustable nut stop so I fabbed a substitute. Looks a bit rough because I only had a belt sander, band saw, and drill press at my disposal. So far so good, though I may need to clearance it from the nut a bit and upgrade to a solid 1/4" pin.

I am still interested to get dimensions on a real Reed version of one of these so I can see what it is s'posed to look like.

IMG_1066_zps6zfftb6h.jpg

IMG_1067_zpsn0masxfs.jpg

IMG_1068_zpsviooufeh.jpg
 
OP
D

drivesitfar

Well-known member
Joined
Oct 23, 2013
Messages
36,040
Location
Pacific Northwest
ALL: great talk on how to weld cast and i'm taking notes. :thumbup:

Ziggy: WOW!! WELL DONE!! when i get my shop Organized with the new cabinets and get a flat surface ready to work on again i'll be happy to try and help. maybe in the meantime some of the other member's with a Reed vise can help.

BTW now you have a vise that might be similar sizing to your hammer in your AVATAR!! :evil:
 

vintage nut

Well-known member
Joined
Mar 17, 2015
Messages
1,272
Location
west coast of canada
A lot of vise damage seems to occur with people mistaking a bench vise for either an anvil, arbor press, or shop press...
I saw a 6" record locally missing the back jaw tower.
The story was someone else was using the hydraulic press in the shop, so he decided a vise and a 10' pipe would work for the press fit

It worked until the vise broke in half

Sent from my MotoG3 using Tapatalk
 
Last edited:

vintage nut

Well-known member
Joined
Mar 17, 2015
Messages
1,272
Location
west coast of canada
You'll love silicon bronze. If you preheat it flows just like a braze!


Sent from my iPhone using Tapatalk
I'll give it a shot! Plenty of cast iron in the form of old weight plates to practice with. Almost wish I saved some of the 700# of cast iron drainpipe I scrapped last summer. My neighbor was redoing his bathroom, and I got all the pipe. Afternoon with a splitting maul yielded 65# of lead. Well worth my time

Sent from my MotoG3 using Tapatalk
 

Shiftless

Well-known member
Joined
Mar 9, 2014
Messages
14,554
Location
East Bay SFO
jz:
Fantastic photography there!
That custom piece looks like it will do the job. Good work. :beer:
My Reed 406 just had a 1/4 inch pin as a stop...nothing adjustable. It had a slight bend in it. Does anybody know if the (older) 406 came originally with a nut adjuster like Ziggy is looking for?
 
OP
D

drivesitfar

Well-known member
Joined
Oct 23, 2013
Messages
36,040
Location
Pacific Northwest
Ziggy: most of my Reed vises just have the pin like Vintage Nut mentioned, but this one that might be a similar age to your REED 4c has the pin with adjusting piece in it. sorry for the bad picture and I don't own it any longer, but if you can use it off a Reed 104R i can see if the GJ member i sold it to still has it and maybe get a measurement.

at least now you know maybe what it looks like if you can see through the crud in my picture in case another member has a spiffed up one to post pictures of. i just found another picture of a pin a little (or a lot) cleaner and it's not my vise either.

BTW I LOVE YOUR NEW PIN and did you buy a sleeve (and from where) with a set screw and what did you use for the pin? also does the set screw go over the top of the pin/stem or do tell? it looks like it should work great, but i know you like doing things a little better than the norm so i'll try to help if i can.
 

Attachments

  • WP_20140908_014.jpg
    WP_20140908_014.jpg
    153.5 KB · Views: 43
  • WP_20140705_033.jpg
    WP_20140705_033.jpg
    78.5 KB · Views: 37
  • WP_20140703_002.jpg
    WP_20140703_002.jpg
    130 KB · Views: 39
  • 4599731554_47720a3dc1 (1).jpg
    4599731554_47720a3dc1 (1).jpg
    110.5 KB · Views: 50

Shiftless

Well-known member
Joined
Mar 9, 2014
Messages
14,554
Location
East Bay SFO
vn:
Thanks for the input.
Your story about the 10 foot pipe really made me cringe. :mad:

jz:
The part you made looks just as good as the factory piece. If it works, IIWY, I wouldn't worry about matching exact dimensions. If your roll pin seems inadequate upgrade to a solid pin once you find one. It seems to me that wouldn't be a very highly stressed piece of hardware.

drives:
Thanks for posting that pic. It really helps to have guys like you here to share goodies from their thousands of stored pics.
 
Last edited:

vintage nut

Well-known member
Joined
Mar 17, 2015
Messages
1,272
Location
west coast of canada
They had a 50 ton Dake press in the shop and he still abused the record.... I mean I'm not always that nice to my welding vise, but even it wouldn't see anything close to that... If the static casting basically breaks in half, I'd consider it beyond repair....

Apart from my pipe vise, the reed 32 (think it's the predecessor to the 1c? Maybe 2c?) Is the only one I've seen in person.. Could be they introduced the adjustable nut with the new casting style?

Sent from my MotoG3 using Tapatalk
 
OP
D

drivesitfar

Well-known member
Joined
Oct 23, 2013
Messages
36,040
Location
Pacific Northwest
VN: to help you date the REEDS a bit better your Dad's #32 (future Reed 2c) is older than the Reeds with the big ball shaped hub on the main screw and the smooshed or flattened nose on the one like Ziggy's 4c is getting up around an a bit after WWII. i don't think they changed to the vise nut adjusting pins until the early 40's with the smooshed/flat nose Reeds that also have the broken nut holding the dynamic onto the main screw.

Shift: anytime i can help and if i ever get my old pictures out of my old laptop that crashed into my new laptop i'll feel like I'll have part of my life back.

Ziggy: i just found a Reed 104 that's on a shelf in my garage if you'd like me to maybe take it out and get you some pictures of it just ask.

cheers
 

Attachments

  • 01111_hC7oKqtSro1_600x450.jpg
    01111_hC7oKqtSro1_600x450.jpg
    60.9 KB · Views: 20
  • WP_20140624_054.jpg
    WP_20140624_054.jpg
    96 KB · Views: 21
  • WP_20140824_022.jpg
    WP_20140824_022.jpg
    146.6 KB · Views: 23
  • WP_20140824_031.jpg
    WP_20140824_031.jpg
    157.1 KB · Views: 31

vintage nut

Well-known member
Joined
Mar 17, 2015
Messages
1,272
Location
west coast of canada
Those reeds sure are well made vises. About the only 4.5" vise I can possibly think of that would be more solid than that 32 (or a 2c) would be the dawn 4 1/2 sp that lives in the shed with the records.

Sent from my MotoG3 using Tapatalk
 

JZiggy

Well-known member
Joined
Dec 1, 2014
Messages
990
Location
Atlanta
I think the Reeds with the adjustable nut stop must have a bigger hole in the base for it to fit into. My 4C is the newer style and even the patent cast into the tower includes that adjustable stop, but it doesn't appear to have had one since the pin hole is just 1/4".

I think the one i made is going to work fine. I am having a devil of a time finding a basic steel dowel pin at any hardware store around here -- 1/4" by 1" or 1-1/4" long is what I need. I guess the roll pin will suffice until I can justify a McMaster Carr order :)
 

vintage nut

Well-known member
Joined
Mar 17, 2015
Messages
1,272
Location
west coast of canada
Be worth checking any local industrial suppliers, Fastenal, Grainger, independents, ect

I know KBC also sells dowel pins. I've usually just made my own from drill rod when needed

Sent from my MotoG3 using Tapatalk
 

KMScott

Well-known member
Joined
Feb 14, 2012
Messages
4,642
Location
Daufuskie Island, South Carolina
I think the Reeds with the adjustable nut stop must have a bigger hole in the base for it to fit into. My 4C is the newer style and even the patent cast into the tower includes that adjustable stop, but it doesn't appear to have had one since the pin hole is just 1/4".

I think the one i made is going to work fine. I am having a devil of a time finding a basic steel dowel pin at any hardware store around here -- 1/4" by 1" or 1-1/4" long is what I need. I guess the roll pin will suffice until I can justify a McMaster Carr order :)

PM me your address, I'll mail you a couple. Up here in Estes Park, a small mountain town our two hardware stores have the metal bins that slide out and one bin has dowell pins. You should have hardware stores with these metal slide bins out your way.
 
Last edited:

JZiggy

Well-known member
Joined
Dec 1, 2014
Messages
990
Location
Atlanta
Thank you, Dr. Scott. I will take you up on it. We used to have a hardware store of the old school persuasion but it has since been sold and turned into a restaurant. I know exactly the bins you mean, and once I find the store out here that has them I'll be a frequent customer.
 

Carla

MEMBER EMERITUS
Joined
Nov 27, 2010
Messages
672
I think the Reeds with the adjustable nut stop must have a bigger hole in the base for it to fit into. My 4C is the newer style and even the patent cast into the tower includes that adjustable stop, but it doesn't appear to have had one since the pin hole is just 1/4".

I think the one i made is going to work fine. I am having a devil of a time finding a basic steel dowel pin at any hardware store around here -- 1/4" by 1" or 1-1/4" long is what I need. I guess the roll pin will suffice until I can justify a McMaster Carr order :)

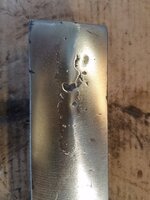
The explanation of the change from the earlier style of a simple bent pin, to the Reed adjustable nut retainer, is found in the patent number, 2127008, cast, along with the Reed logo, on the side of the fixed jaw casting. The patent was filed in 1936, and issued in 1938. If you'd like, look it up on 'Google Patent'.

cheers

Carla
 

trijeff

Well-known member
Joined
Jan 21, 2015
Messages
1,359
Location
Northern Cali
The explanation of the change from the earlier style of a simple bent pin, to the Reed adjustable nut retainer, is found in the patent number, 2127008, cast, along with the Reed logo, on the side of the fixed jaw casting. The patent was filed in 1936, and issued in 1938. If you'd like, look it up on 'Google Patent'.

cheers

Carla
Well hats off to Thorvald Petersen (the inventor) because that adjustable nut pin is fabulous ... eliminates all backlash! I like JZiggy's mod, would be an easy upgrade for other non- (or older) Reed vises.
 

Shiftless

Well-known member
Joined
Mar 9, 2014
Messages
14,554
Location
East Bay SFO
PM me your address, I'll mail you a couple. Up here in Estes Park, a small mountain town our two hardware stores have the metal bins that slide out and one bin has dowell pins. You should have hardware stores with these metal slide bins out your way.

That's what is so great about our GJ "family" helping each other out. :bowdown:
 
To avoid these ads, REGISTER NOW!
OP
D

drivesitfar

Well-known member
Joined
Oct 23, 2013
Messages
36,040
Location
Pacific Northwest
ALL: while i really like the Reed's upgrade from the pin to the one with the adjustment features i think i like the Craftsman 519x's even better. also thought i'd post a couple pictures of Balane's nicely restored Craftsman 5197 since i was in that file looking for these vise nut holders.

the split vise nut with the screw adjustment is a pretty slick idea too. these are just a couple of the reasons i really like the Craftsman 519x's and still trying to figure out who made them and where. the thread talking about it is in Vintage Tools section and here's the link if any of you might have something to add or just a few pictures of your own 519x.

http://www.garagejournal.com/forum/showthread.php?t=351100&highlight=craftsman+5198
 

Attachments

  • WP_20160117_004.jpg
    WP_20160117_004.jpg
    142.4 KB · Views: 40
  • attachment.jpg
    attachment.jpg
    135.2 KB · Views: 43
  • WP_20150213_006.jpg
    WP_20150213_006.jpg
    142.7 KB · Views: 41
  • WP_20140807_008.jpg
    WP_20140807_008.jpg
    145.4 KB · Views: 41
  • WP_20140807_007.jpg
    WP_20140807_007.jpg
    144.7 KB · Views: 43
  • attachmentFKLOMPOD.jpg
    attachmentFKLOMPOD.jpg
    143.5 KB · Views: 53
  • attachment8.jpg
    attachment8.jpg
    142.3 KB · Views: 42

vintage nut

Well-known member
Joined
Mar 17, 2015
Messages
1,272
Location
west coast of canada
I'm surprised I've never seen one of those (or any other old craftsman vises) here... See more craftsman than any other brand of hand tools, but I have yet to even see an open screw craftsman vise?
Seems to have been a weird vise market here....

Sent from my MotoG3 using Tapatalk
 
OP
D

drivesitfar

Well-known member
Joined
Oct 23, 2013
Messages
36,040
Location
Pacific Northwest
VN: i'll try to have a few Craftsman vises for you to at least see in person if you can make some time to drive down. i used to have a lot more Craftsmans, but trying to get down to 20-30 vises after owning a couple hundred sent a few of my KEEPERS out my door that are now working nicely on several member's benches. speaking of which are you ready to let go of that Rock Island swivel jaw that jumped across the boarder onto your bench anytime soon?

cheers
 

vintage nut

Well-known member
Joined
Mar 17, 2015
Messages
1,272
Location
west coast of canada
It would take quite a bit to pry that rock island off of my bench! It gets used daily.
Be hard pressed to find something I'd rather have there.

Craftsman definitely had a selection of nice vises. Including two of my favorite makes (reed and rock island). I'd have expected those to be at least in existence here. But in total I've seen about half a dozen reeds and Parker's and not one craftsman of any sort

Sent from my MotoG3 using Tapatalk
 

3baygarage

Well-known member
Joined
Sep 1, 2013
Messages
11,974
Location
SW Florida/from Buffalo,NY
Hello all.

WILTON QUESTION:

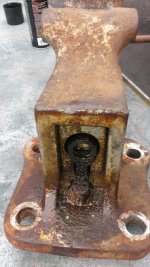
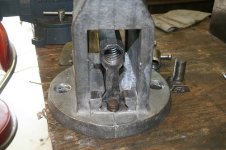
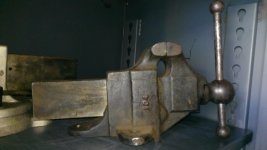
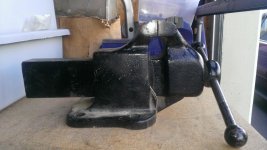
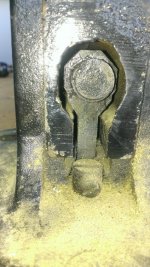
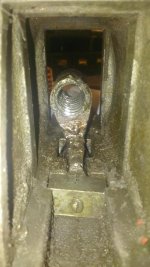
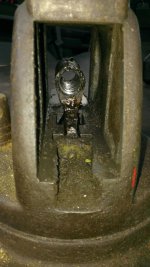
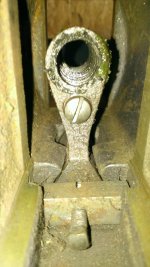
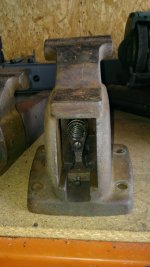
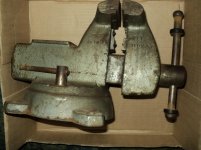
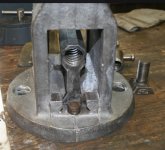
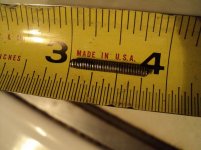
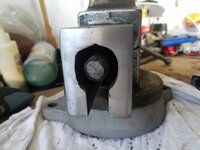
Is there a source for this retainer pin/bolt found on this 4" mechanic's vise? Not sure what to call it exactly. It looks like a stripped bolt however I don't see a head on either end. Hard to tell if it's broken in two halves.

Probably been covered before but unsure how to begin a search without a proper part number for the vise. Figured I would call on the vise experts.
 

Attachments

  • DSC01703.jpg
    DSC01703.jpg
    87.7 KB · Views: 42
  • DSC01702.jpg
    DSC01702.jpg
    89 KB · Views: 36
  • DSC01700.jpg
    DSC01700.jpg
    94.5 KB · Views: 35
  • DSC01699.jpg
    DSC01699.jpg
    77.4 KB · Views: 28

Shiftless

Well-known member
Joined
Mar 9, 2014
Messages
14,554
Location
East Bay SFO
3Bay
Why do you need to remove it anyway? Does the vise function OK as is?
One of the pics shows a pin sticking way out of the body. What's up with that? The other pic looks like the pin is flush. It looks to me that if you really need to withdraw the main screw from the slide you'll have to pull out that pin. Maybe replace it with a roll pin? Or thread it for a standard sized allen head set screw? Or even leave it alone.
Do you plan to put that vise into use on your bench or what? There are much better vises around for not much more money if you want a user or something to restore.

Just like vintage nut the Wilton mechanic's vise I have is the later model with the washer screwed in from the front like the machinist's bullet vises.
 
Last edited:

Shiftless

Well-known member
Joined
Mar 9, 2014
Messages
14,554
Location
East Bay SFO
jziggy:
I found this pic for you posted by (now inactive) GJ member Banjo Saves The Day 7 years ago.
This is his Reed 4C with the nut adjuster piece clearly visible.
 

Attachments

  • image.jpg
    image.jpg
    123.8 KB · Views: 56
Last edited:

3baygarage

Well-known member
Joined
Sep 1, 2013
Messages
11,974
Location
SW Florida/from Buffalo,NY
I'm not going to be much help. Went to look at mine, but it's the older style that screws on from the front

Sent from my MotoG3 using Tapatalk

Thanks for checking.

3Bay
Why do you need to remove it anyway? Does the vise function OK as is?
One of the pics shows a pin sticking way out of the body. What's up with that? The other pic looks like the pin is flush. It looks to me that if you really need to withdraw the main screw from the slide you'll have to pull out that pin. Maybe replace it with a roll pin? Or thread it for a standard sized allen head set screw? Or even leave it alone.
Do you plan to put that vise into use on your bench or what? There are much better vises around for not much more money if you want a user or something to restore.

Just like vintage nut the Wilton mechanic's vise I have is the later model with the washer screwed in from the front like the machinist's bullet vises.

Don't need to remove it.

The piece just falls out when tipped on its side so I pulled it out for that photo. When upright it will stay in of course, but I'd like to find out if these were a common problem and if a replacement part is available.

I just don't see how this is installed though. One set screw through the hole body? Two separate? Could it have been two roll pins, because how are they driven out?

Looking in the tiny hole on the other side of the vise(with a flashlight), that existing "pin" or screw is very recessed and does not appear to have a flat head or allen head or anything. Not sure how it is screwed in there. :headscrat
In fact I can kind of catch a glimpse of it through the spaces with the flashlight and it doesn't look threaded but I could be wrong. Wonder if they were two separate permanent roll pins ,and one sheared off and was replaced with a screw just shoved in there. That would explain all the thread wear.

No reason to remove the main screw at all, although these would have to be removed to separate the main screw from the "center ring" and whole sliding jaw body.

Could this type of main screw retention design have been eliminated due to these things breaking?

The vise, I bought for a friend who has been looking. He just went and bought a new import though.
 

Attachments

  • DSC01705.jpg
    DSC01705.jpg
    76.5 KB · Views: 17

stevelh

Well-known member
Joined
Nov 1, 2010
Messages
53
Location
Indiana
Need some advice. "Restoring" a Wilton c2 and the pipe clamp bottom pin looks like it was beat to hell and back. Looks like po used a copper tube or something as a replacement pin. What are my options other than cramming something similar back in? I will eventually paint the vise, so that can hide what ever I use to hold it in.
 

Attachments

  • image.jpg
    image.jpg
    12.2 KB · Views: 29

BrettJ74

Well-known member
Joined
Jan 8, 2017
Messages
173
Location
Vancouver Washington
Well I got the slide on my Rock Island welded up, for my first time welding on 70 year old cast iron I feel it went pretty good. 1 low spot but I decided not to mess with it anymore. Hopefully by next weekend I'll have it painted up. [emoji106] f4974b77dfb2ce1c9d41c18a9d76c9f9.jpg65392dd3cc57676c9b8a800b12a6f19f.jpg8499df1d6574301958e51f227a1ac117.jpg

Sent from my SM-G935P using Tapatalk
 

Attachments

  • f4974b77dfb2ce1c9d41c18a9d76c9f9.jpg
    f4974b77dfb2ce1c9d41c18a9d76c9f9.jpg
    82.1 KB · Views: 0
  • 65392dd3cc57676c9b8a800b12a6f19f.jpg
    65392dd3cc57676c9b8a800b12a6f19f.jpg
    76.1 KB · Views: 0
  • 8499df1d6574301958e51f227a1ac117.jpg
    8499df1d6574301958e51f227a1ac117.jpg
    59.1 KB · Views: 0
Last edited:

vintage nut

Well-known member
Joined
Mar 17, 2015
Messages
1,272
Location
west coast of canada
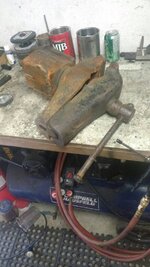
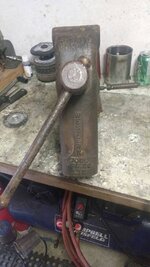
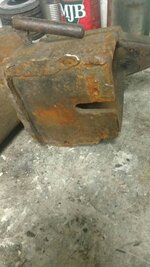
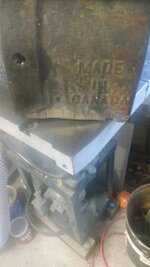
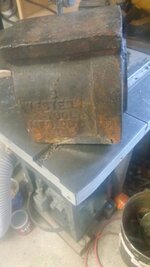
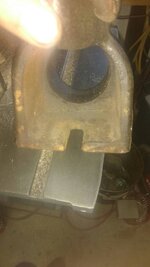
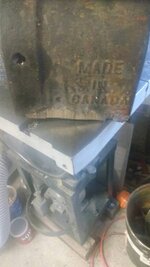
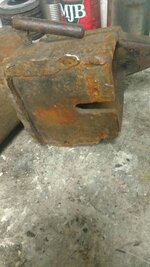
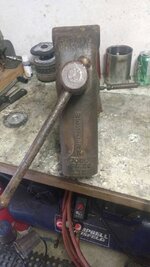
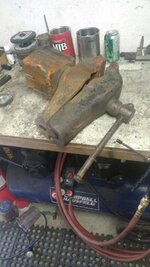
This should be an interesting one.... Pulled this western tool mfg blacksmith combination vise out of a scrap pile today. It definitely had a hard life. The handle is bent, the jaws are toast, and both mounting lugs has broken off. One had been badly brazed on, and evidently after the previous owner gave up on the other lug he brazed the vise right to what I assume would have been his workbench. Obviously it broke off of there and then he tossed it.
Other than that the castings are in great shape, and I can definitely save it.
89f24687a3e2dc023affb1adbeaf2341.jpg5b1b8e5e2ee7e8d799b04928e79eab96.jpg9b2483c2c16bb4d5514e8dc2f207b7bc.jpgec2eff9655d86b556b5adf3897174d9e.jpg
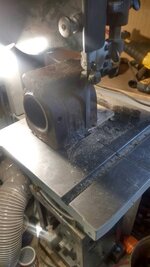
Started by pulling it apart to see what I had to work with. Overall it's in surprisingly good shape considering the abuse it must have seen. The base casting was my main worry though. Decided to start with the bandsaw to get the bulk of the braze off and see what I had to work with.
aab0c8463d37a3862a1524adac782268.jpgf2368858ded33f8dada76fd0aea25350.jpgf6beecb83927cebcf00f3cbdfc33a445.jpg
My thinking on this one is to just clean up the outside of it, take off the rest of his repair down to the level of the casting with a die grinder. If needed use more braze to build it up so I can shape it down smooth. I'm thinking rather than trying to install new mounting lugs again, I'll make a baseplate for it, and bolt it on from the inside. I think I should have enough room in there to do what I need.
Regardless this vise will never see heavy use, but I'd like to at least be able to mount it to a bench eventually
f17ebbb4b162b494026beb7ac07ed6de.jpg

Sent from my MotoG3 using Tapatalk
 

Attachments

  • f17ebbb4b162b494026beb7ac07ed6de.jpg
    f17ebbb4b162b494026beb7ac07ed6de.jpg
    42.5 KB · Views: 0
  • f6beecb83927cebcf00f3cbdfc33a445.jpg
    f6beecb83927cebcf00f3cbdfc33a445.jpg
    55.9 KB · Views: 0
  • f2368858ded33f8dada76fd0aea25350.jpg
    f2368858ded33f8dada76fd0aea25350.jpg
    50.4 KB · Views: 0
  • aab0c8463d37a3862a1524adac782268.jpg
    aab0c8463d37a3862a1524adac782268.jpg
    60.5 KB · Views: 0
  • ec2eff9655d86b556b5adf3897174d9e.jpg
    ec2eff9655d86b556b5adf3897174d9e.jpg
    77.2 KB · Views: 0
  • 9b2483c2c16bb4d5514e8dc2f207b7bc.jpg
    9b2483c2c16bb4d5514e8dc2f207b7bc.jpg
    79.7 KB · Views: 0
  • 5b1b8e5e2ee7e8d799b04928e79eab96.jpg
    5b1b8e5e2ee7e8d799b04928e79eab96.jpg
    75.8 KB · Views: 0
  • 89f24687a3e2dc023affb1adbeaf2341.jpg
    89f24687a3e2dc023affb1adbeaf2341.jpg
    70.4 KB · Views: 0
OP
D

drivesitfar

Well-known member
Joined
Oct 23, 2013
Messages
36,040
Location
Pacific Northwest
BRETT: if you have time can you tell us what kind of welding rod you used, heating prep, heating after or cool down and did you drill a hole at the end of the crack before you started welding or was it BRAZING?

looks good from my chair and sounds like you are happy with the results. I hope you can maybe find a member or somebody with pipe jaws on their Rock Island so you'll have a pattern to copy cause sounds like the guys in the shop and you have the skills to make some.

did i mention that I LOVE ROCK ISLAND VISES??

congrats on your success and thanks for sharing some pictures. if you had any more of prep and cool down feel free to post them too if you have time.

ALL: on post #5 of this thread it has LUBRICANTS. i know Bareass172 just posted up one he likes and wondering if any of you have a special favorite. if you do mention it and why and maybe a few pictures of it in it's tube and/or on your vise's parts and i'll add them to the list.

thanks
 

dragoneggs

Member
Joined
Jan 21, 2017
Messages
22
DragonEggs,

I am duly impressed! How many coats of Rosemary did you do as I've seen varying degrees of color depth. My 577 is very nicely brass/bronze welded in the same places. It looks very well done. Your jaws are super.

Thanks for posting!
ALLFAST, sorry for the delay... been gone on business. I only put a couple coats on and not as even as I would like. Never used this type or color of paint before and wanted to see how tough it is... thanks for the compliments.
 

Sawdustmaker

Well-known member
Joined
Jan 15, 2017
Messages
928
Location
Placentia, Orange Co., California
Drivesit ask me to post my pics here. I have a Champion Blower & Forge Vise, 4" jaws, light duty and does what I need it to do. I would like to clean it up, paint and be sure I use a good lubricant. I've seen Blue Marine Grease and Mobil 1 Synthetic grease mentioned. Any other suggestions? Also since I do not have a blast cabinet I will be using a wire wheel to clean it up and was plannign on using my steam cleaner (small) to remove the old internal grease, unless that is a bad idea??? Pulled and cleaned the screw and slide a bit today (wire brush and WD-40). I might get lucky and find a neighbor with a blast cabinet.
 

Attachments

  • IMG_1578.jpg
    IMG_1578.jpg
    137.2 KB · Views: 32
  • IMG_1577.jpg
    IMG_1577.jpg
    139.6 KB · Views: 34

BrettJ74

Well-known member
Joined
Jan 8, 2017
Messages
173
Location
Vancouver Washington
Drives: So my process for welding was as follows. I first magnafluxed the part to determine the end of the crack, I then drilled a 3/16" hole at the end to prevent further travel of the crack. I opened up the crack to a nice wide V with a die grinding burr bit. Then I took a few measurements of the slide and clamped the end with the crack into another vise and closed it up until it measured just a little larger than the rest of the slide, because I knew that welding would pull it together some. The welder Iused is a Lincoln Invertec V205 and the filler was Airgas 3/32" ER70S6.

"ER70S6 is a mild steel TIG welding wire that contains higher levels of manganese and silicon than other standard grades of TIG wire to produce high quality welds when used on dirty, oily, or rusty steel. The high silicon content increases the fluidity of the weld pool, thus creating a smoother bead appearance and resulting in minimal post-weld grinding. This wire is engineered to provide porosity-free, x-ray quality welds at the highest tensile strength (as welded) of all the plain carbon steel wires" . from Airgas website

I pre heated the whole slide to about 400° then began running the torch without filler to try to burn off some impurities. I then began at the hole I drilled and started welding, it was still popping and splattering but eventually started flowing pretty well. After welding I peened the heck out of the entire weld, then post heated to about 450°.
I then wrapped the slide tightly with a welding blanket. Then used another blanket to wrap the whole thing, and let it cool on a wooden pallet overnight. The next day I used a 6" sanding disk on a Makita with 80 then 120 grit to finish it off.
Sorry no prep pictures I was in a hurry and didn't even think about it.
a49574fe42ba6cac3402b9bd4adb9c35.jpg

7ae3e3fb0ae24e625034df2dfc5025fd.jpg

I as well am already loving my Rock Island!
Sent from my SM-G935P using Tapatalk
 

Attachments

  • a49574fe42ba6cac3402b9bd4adb9c35.jpg
    a49574fe42ba6cac3402b9bd4adb9c35.jpg
    145 KB · Views: 0
  • 7ae3e3fb0ae24e625034df2dfc5025fd.jpg
    7ae3e3fb0ae24e625034df2dfc5025fd.jpg
    84.1 KB · Views: 1
Last edited:

vintage nut

Well-known member
Joined
Mar 17, 2015
Messages
1,272
Location
west coast of canada
For open screws I generally just use 90wt gear oil. I find it attracts less dust and grit than a grease like product, and is easy to just squirt more on whenever needed
At least that's what I do with screw jacks and C clamps. If I had an open screw vise I'd do the same on it

Sent from my MotoG3 using Tapatalk
 
To avoid these ads, REGISTER NOW!
Top Bottom