To avoid these ads, REGISTER NOW!

Woodworking 101--Tools and Tips

R_einan

Well-known member
Joined
Aug 29, 2016
Messages
461
Location
Eastern WA
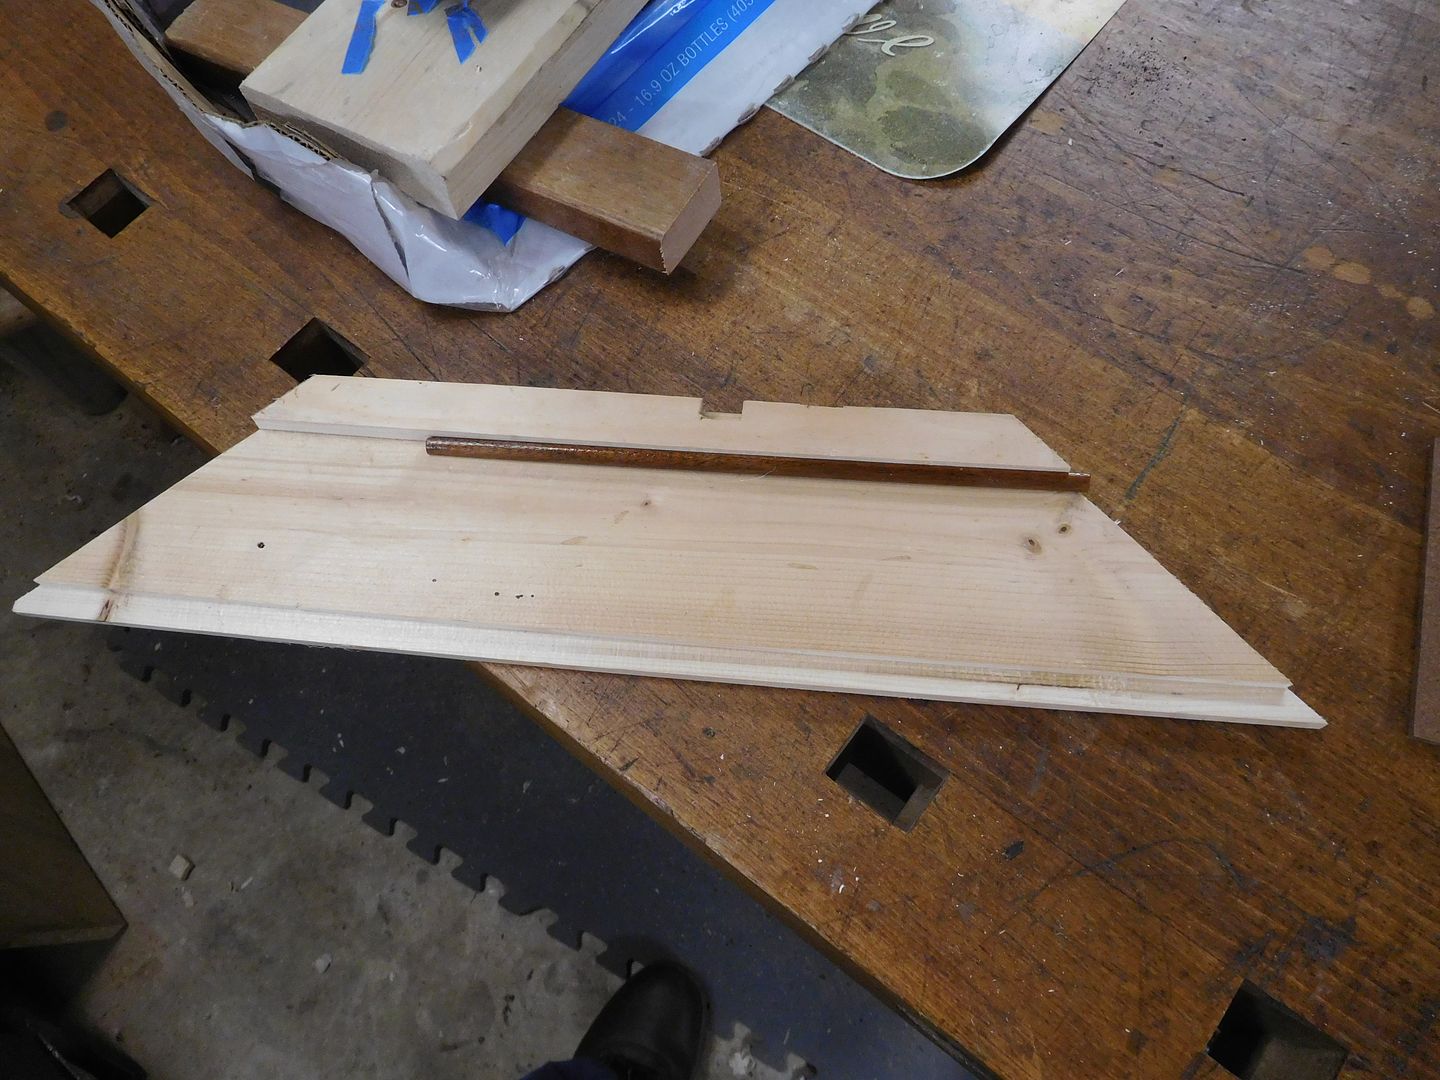
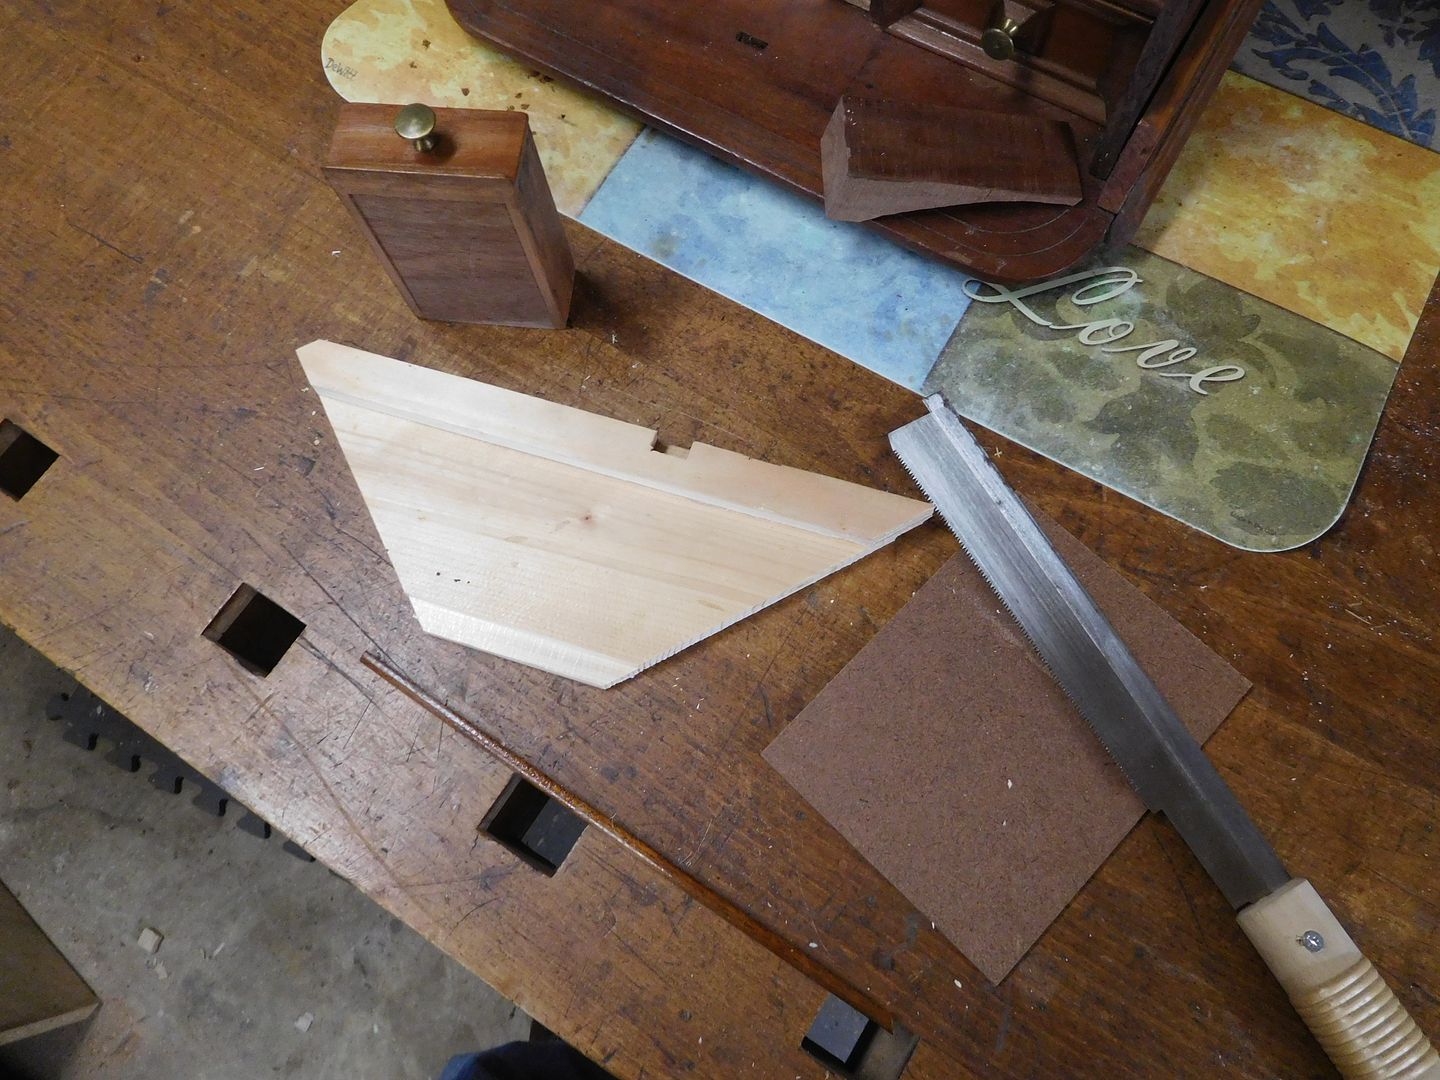
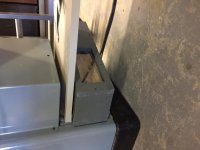
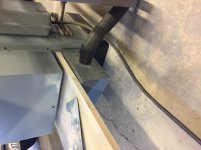
Today I build a dust collection manifold for my early 90's Unisaw. The one with the long and shallow dust chute on the bottom right under the motor. I'm waiting on a proper flange and adaptor, but for now I just made the hole big enough for a shop vac hose. I added a piece of lexan in the side so I can see if it is starting to fill up without having to remove anything.

I will open it up further for the 4" flange and hope to add a dust collector later this summer. I'm considering a 1 hp grizzly unit, either the wall mount or floor mount. If I go with the wall mount it will likely end up hung from the rafters, as I value my wall space.
 

Attachments

  • IMG_2153.jpg
    IMG_2153.jpg
    137.1 KB · Views: 68
  • IMG_2154.jpg
    IMG_2154.jpg
    135.6 KB · Views: 64
  • IMG_2152.jpg
    IMG_2152.jpg
    137.9 KB · Views: 61
To avoid these ads, REGISTER NOW!
OP
J

jimreed2160

Well-known member
Joined
Aug 7, 2016
Messages
3,589
Location
Tallahassee FL
R einan--Good move. I rarely use my TS but when I do the air fills with fine dust. Maybe I should get the shopvac involved or maybe get an air scrubber. Anyone here use an air scrubber?
 

drivesitfar

Well-known member
Joined
Oct 23, 2013
Messages
36,007
Location
Pacific Northwest
JIM: you know SCHOR mentioned a great idea to grind off the China cause that little anvil doesn't look too bad at all. does it ring when you drop a steel ball on it or hit with a hammer?

great post on the use of your RR track and yes some of the members actually do mill off the top of their RR track to almost a surface plate or anvil flat top. here's my TINKNOCKERS anvil that might be imitated for other woodworkers to copy in case they need to repair or make some hardware.

one handy guy in my area spiffed up his RR track and welded it to his homemade stand that might also work.

ALL: back to WOOD and sorry for the diversion to solve my old steel addiction.
 

Attachments

  • WP_20131024_004.jpg
    WP_20131024_004.jpg
    70 KB · Views: 59
  • WP_20131024_001.jpg
    WP_20131024_001.jpg
    145.3 KB · Views: 56
  • WP_20131024_007.jpg
    WP_20131024_007.jpg
    149.7 KB · Views: 58
  • WP_20131024_002.jpg
    WP_20131024_002.jpg
    151 KB · Views: 53
  • WP_20131024_010.jpg
    WP_20131024_010.jpg
    149.8 KB · Views: 54
  • 00q0q_jnnNZcXhhuu_1200x900.jpg
    00q0q_jnnNZcXhhuu_1200x900.jpg
    57.9 KB · Views: 64
OP
J

jimreed2160

Well-known member
Joined
Aug 7, 2016
Messages
3,589
Location
Tallahassee FL
Miter jig

I reworked the cutting jig I made for the hammer faces. It is now a miter jig for the tiny quarter round moulding.

DSCN3103.jpg


Had to take the Queen on a makeup run this morning. Now it is 90+ in the shop. And tomorrow morning is grass day. Maybe I can sneak into the shop this evening and cut a few pieces of trim for the drawers.
 

rrich1

Well-known member
Joined
Oct 7, 2015
Messages
793
Leg pieces rough cut out. Will be close to 37" tall. I'm 6'1"

51a960d5f864006147ce8ad33cb82e9f.jpg

Sent from my Pixel XL using Tapatalk
 

Attachments

  • 51a960d5f864006147ce8ad33cb82e9f.jpg
    51a960d5f864006147ce8ad33cb82e9f.jpg
    141 KB · Views: 1
OP
J

jimreed2160

Well-known member
Joined
Aug 7, 2016
Messages
3,589
Location
Tallahassee FL
Cutting the trim

I have a Japanese razor back saw that is perfect for this job. Here is the first piece of trim that I cut with the new miter jig.

DSCN3110.jpg


OUCH! The miter jig is built exactly 180 degrees off. At least it is easy enough to fix.

DSCN3111.jpg


Let me just say now that I HATE trim work. My brain does not like it. I get everything too short or 180 degrees backward.

Here is the NEW miter jig.

DSCN3112.jpg


Ahhh. At last.

DSCN3113.jpg


Well--almost. This first piece is a bit too long. Measure twice and cut a few times, then cut again. That's my motto. :willy_nil

DSCN3114.jpg


This one is much better than the camera angle shows.

DSCN3115.jpg


FINALLY! I have the three pieces cut.

DSCN3116.jpg


It is getting a little warm in the shop and these need a little adjustment before glue up. So that is tomorrow's task.

Of course, it is always better to be lucky. I will take luck over skill any day. I removed one of the drawers that needed a single trim piece. Guess what? The trim piece was in the drawer!!!

DSCN3117_1.jpg


That was easy!

DSCN3118.jpg


The replaced piece is on the left. You can see a scar in the lower left hand corner. I did that with a pocketknife. I was removing glue squeeze out and scratched the front. Ugh! That will get a shellac touch up later.
 
Last edited:

wrenchguy

Well-known member
Joined
Sep 22, 2011
Messages
4,697
Location
NW Indiana
I been working with wood 50 years now and thought i'd post a few things. 1st is a simple speedboat cradle rocker i built from plywood and african mahogany drops. I set it up for infants easy rocking left to right, and larger big radius rockers for rocking horse type action for the toddler speed boat pilots. Its shown without rockers or padded cockpit. Some you guys may seen it before as i posted on other sites. i fabbed the stainless parts as i do for my side job building cutwaters for wood boats. I advertise the rockers on my webpage and built 7 so far. cutwaters.com thanks for looking.


wrenchguy

Well-known member
Joined
Sep 22, 2011
Messages
4,697
Location
NW Indiana
heres 1 of my current projects, 1937 16' split cockpit Gar Wood inboard speedboat. In bad shape but worth it. Last pic is what it'll look like when done. 3 known to exist.

transom frame removed, note left cheek frame rotted away, using the right frame for its replacement pattern.
IMG_6792.jpg


rolling over for bottom removal and replacement.
SAM_2569.jpg


1 of the 3 known.
$_57-2.jpg
 

ztorres

Well-known member
Joined
Sep 22, 2016
Messages
195
Location
Iowa
Spent 6 hours cutting out this piece and burning the logo by hand.
e79964754718f3ad07f158d92f1988ae.jpg
ece4f25225ad269cc2be9b76273bb1e4.jpg
1072fd72e2b60d410323daa8bcdc9464.jpg
0005e084effcaba8867be98839c140f3.jpg
A coworker that I went to college with asked for this.


Sent from my iPhone using Tapatalk
 

Attachments

  • e79964754718f3ad07f158d92f1988ae.jpg
    e79964754718f3ad07f158d92f1988ae.jpg
    563.2 KB · Views: 1
  • ece4f25225ad269cc2be9b76273bb1e4.jpg
    ece4f25225ad269cc2be9b76273bb1e4.jpg
    561.3 KB · Views: 1
  • 1072fd72e2b60d410323daa8bcdc9464.jpg
    1072fd72e2b60d410323daa8bcdc9464.jpg
    516.6 KB · Views: 1
  • 0005e084effcaba8867be98839c140f3.jpg
    0005e084effcaba8867be98839c140f3.jpg
    547.1 KB · Views: 1

ez-duzit

Well-known member
Joined
Jun 24, 2013
Messages
5,096
Location
Marina del Rey
wg--Yeah, I lived on that for many years; lived aboard boats for half my 73 years. Before the Marlineer I restored and lived aboard this 1962 32' Chris Craft Sea Skiff; photo taken from the cockpit of the Marlineer.

risky-business-1_zps982d6a77.jpg
 

shortykorte

Well-known member
Joined
Sep 1, 2014
Messages
8,038
Location
Tallahassee, Fl
Jim, note to self, send you all my miter molding tasks.

The Chris Craft brings back memories. A friend had one the a previous owner painted the interior. I lived on the boat for a week, removing the paint. Beautiful wood underneath. Living on the water, great; living in a big dust bowl not so great.


Sent from my iPhone using Tapatalk
 
OP
J

jimreed2160

Well-known member
Joined
Aug 7, 2016
Messages
3,589
Location
Tallahassee FL
Jim, note to self, send you all my miter molding tasks.

Sure thing. Here is a raw stock calculator you can use:

Raw stock needed= RSN
Running length of coverage= RLC

RSN = RLC x 5

It is only a rough calculator so be sure to bring a little extra and a scrap bucket for your backyard firepit. :willy_nil
 

rrich1

Well-known member
Joined
Oct 7, 2015
Messages
793
Got the legs milled on 3 sides today. I made a mistake and made the legs 1/16" too thin to match the lamination on the top. My ocd is going to go bonkers if I don't find a way to get it to match up. a1a097cbdf6aa0d29456e99c50e8b813.jpg

Sent from my Pixel XL using Tapatalk
 

Attachments

  • a1a097cbdf6aa0d29456e99c50e8b813.jpg
    a1a097cbdf6aa0d29456e99c50e8b813.jpg
    94.3 KB · Views: 1
OP
J

jimreed2160

Well-known member
Joined
Aug 7, 2016
Messages
3,589
Location
Tallahassee FL
rrich--I feel your pain. Why don't you just glue them up and then use a handplane to square the legs? The laminated board in the middle is a good guide for depth.
 
To avoid these ads, REGISTER NOW!

wrenchguy

Well-known member
Joined
Sep 22, 2011
Messages
4,697
Location
NW Indiana
My big tiltly top tsaw for big work, using 15" blade with 3hp baldor streamcooled motor. This machine was originally lineshaft & weighs around 800lbs of cast iron, I keep it in the barn and move it to the shop with a loader tractor.


Setting up a extra long fence rail making table extension of 42".
SAM_0397.jpg


cheechi

Well-known member
Joined
Feb 29, 2012
Messages
4,384
Location
Triad, NC
Anyone in need or looking for a spare. Good price at $66.62

Freud 8 In. Professional Stacked Dado (SD208) https://www.amazon.com/dp/B0000223O9/?tag=atomicindus08-20

I have a question for any of you regarding dadoes. My saw is a Ridgid R4510 portable contractor style, in the instruction book it says use a 6" stack not an 8". The motor is a 15 amp and I intend to cut soft woods most of the time, should I take the instructions as gospel or as a guideline? I know an 8" will fit on my saw just don't know how I could stress the motor enough that it matters which size I use.

No cut I've ever made with it has bogged down the motor or caused any kickback, I work with it safely and within its parameters in every other capacity.
 
OP
J

jimreed2160

Well-known member
Joined
Aug 7, 2016
Messages
3,589
Location
Tallahassee FL
Wrenchguy--Well that TS should certainly pass the nickel test. How does it cut?

Cheechi--Mr Google says that going from 6" to 8" reduces the available HP at cutting edge by 33%. That is probably why the mfg made its recommendation. I see no advantage because dados are generally 1" or less in depth. So even a 3" stack (if such an animal exists) should do the job OK. Seems to me that 6" stack should cost less also.
 

R_einan

Well-known member
Joined
Aug 29, 2016
Messages
461
Location
Eastern WA
I have a question for any of you regarding dadoes. My saw is a Ridgid R4510 portable contractor style, in the instruction book it says use a 6" stack not an 8". The motor is a 15 amp and I intend to cut soft woods most of the time, should I take the instructions as gospel or as a guideline? I know an 8" will fit on my saw just don't know how I could stress the motor enough that it matters which size I use.

No cut I've ever made with it has bogged down the motor or caused any kickback, I work with it safely and within its parameters in every other capacity.

I don't honestly know the answer to that question. I know that my old makita 8408 contractor saw specified that only 6" dado blades would work with the saw. I would make an educated guess that a 110v 15a saw simply doesn't have the horsepower to spin an 8" dado stack. The 6" will require a lot less horsepower to spin both due to the smaller diameter and the reduction of rotating mass. I never pursued the idea of a dado blade on my makita because I would have had to run it without a throat plate, and I couldn't locate the different arbor nut. Both are discontinued parts. Considering your awareness of the limtations of your saw, I wouldn't discount the idea, only proceed with caution. That would be my take on it anyway.
 

cheechi

Well-known member
Joined
Feb 29, 2012
Messages
4,384
Location
Triad, NC
That's part of the issue, I always see sales on 8" dadoes, never on 6". I'm sure on a given day the smaller one will cost less because of it, but that's not very exciting right?

Just today I went through my router bits as I have an upcoming slab flattening to do and I do have a few straight bits specifically for ply (23/32" for example) so I am not desperately in need of a table saw dado stack, but it's something I've wanted for a while.

Speaking of router bits though, have any of you had experience with any of the 'flattening' bits available now? here is one example In the past I have just used a straight bit in my router sled but I am interested in any experiences as it could turn out to be enough of a time saver to be worth the investment.
 

wrenchguy

Well-known member
Joined
Sep 22, 2011
Messages
4,697
Location
NW Indiana
Wrenchguy--Well that TS should certainly pass the nickel test. How does it cut?

I haven't tried the test, with 8" of bearing surface should be good. I just found the fence parts last fall and only run a 4" cherry slab thru it (2 8' edge rips). nice real, nice. I'm using a new 15" hitachi thin kerf on it. Its kinda scary with the jet turbine sound coming from it. I gotta ck its tip speed next time out.
 
OP
J

jimreed2160

Well-known member
Joined
Aug 7, 2016
Messages
3,589
Location
Tallahassee FL
Cheechi--If you are careful, the 8" stack will probably be OK in your saw. Just be mindful of its limitations. Heck, I have used my TS to cut brass bars. A saw is just a saw.

And I like the smoothing router bit. I could have used those on some projects. Again, a good tool as long as you are mindful of how it works. Those bits, for example, are like flycutters and cut mostly on the edge. When used properly they are probably the bees knees. Used for plunging or hogging and they can mess you up fast.
 

Craptain

Well-known member
Joined
Apr 18, 2013
Messages
4,028
Location
Tampa Bay FL
Cheechi, I have a few 6" dado's in the shop. And seeing as you are not in a hurry I will see what I have that I could part with. Actually based on my real needs I could part with all of them. But I am thinking that you don't have to spend a new prices to find out if you really want a good dado. I also have a couple of wobble type dado's and for occasional use they are not bad.
I should be home in a week or so.

Sent from my SM-G900T using Tapatalk
 

cheechi

Well-known member
Joined
Feb 29, 2012
Messages
4,384
Location
Triad, NC
I appreciate the offer!

I have been putting off making a zero clearance and a new sled for a while now. Needing to make a dado insert might finally get those done too. With this slab and dust collection pipe everywhere there hasn't been room to set up the table in a while but I'm hoping that time is nearing an end.
 

rrich1

Well-known member
Joined
Oct 7, 2015
Messages
793
Got the legs jointed and planed today. I squared off one end and left the other end for the time being. Not sure on a height yet. I might go taller as it is easier to cut it down than add to it. Still living the subtle contrast between the two woods. b6453ac1d86f6aa33a216033d1042b49.jpgb190d054b6b0249d2874f07794e1bbcc.jpg


My 1/16" off ugh. I think the best option if I want them to match is hand plane each side of the top.
db7e67e736ee14911eb37520aa43911e.jpg
Sent from my Pixel XL using Tapatalk
 

Attachments

  • db7e67e736ee14911eb37520aa43911e.jpg
    db7e67e736ee14911eb37520aa43911e.jpg
    62.8 KB · Views: 2
  • b190d054b6b0249d2874f07794e1bbcc.jpg
    b190d054b6b0249d2874f07794e1bbcc.jpg
    82 KB · Views: 1
  • b6453ac1d86f6aa33a216033d1042b49.jpg
    b6453ac1d86f6aa33a216033d1042b49.jpg
    91.6 KB · Views: 1
Last edited:

Toolfool

Well-known member
Joined
Aug 22, 2011
Messages
4,982
Location
Tallahassee, FL
Speaking of router bits though, have any of you had experience with any of the 'flattening' bits available now? here is one example In the past I have just used a straight bit in my router sled but I am interested in any experiences as it could turn out to be enough of a time saver to be worth the investment.

I buy all my router bits here : https://www.toolstoday.com/ . Their surfacing bits with replaceable cutters work great.
 

cheechi

Well-known member
Joined
Feb 29, 2012
Messages
4,384
Location
Triad, NC
And I like the smoothing router bit. I could have used those on some projects. Again, a good tool as long as you are mindful of how it works. Those bits, for example, are like flycutters and cut mostly on the edge. When used properly they are probably the bees knees. Used for plunging or hogging and they can mess you up fast.

Upon further consideration I have another part to my original question. I linked the 2" version they make, while they have some ranging from sizes 1"-3" with several in between. If you were choosing one for yourself, what size would you go with?

Side note for my particular project. I'm going to start up with a bit more intended for slot cutting, similar to this (which incidentally is the one that Nick Offerman uses in his sled) because of just how uneven it is now, but for a smoothing step or for later projects I am still interested in one of these bigger ones. I have among others a PC 7518 so I should have enough power for sure.

I'm thinking with one big smoothing bit and one deep dado/straight bit I should be ready for any flattening job bigger than the planer can handle. I worked on the sled a bit today and should be all ready to put it together after drilling the mounting holes sometime in the coming week.

I buy all my router bits here : https://www.toolstoday.com/ . Their surfacing bits with replaceable cutters work great.
I bookmarked that thanks. When there was a Woodcraft local I would buy Whiteside bits from them, as Whiteside is local to me (about an hour away)
and their bits are always great. I have always heard good things about Amana so now that I have to order all but the most basic ones, it's good to have more resources.

The majority of bits I use are Freud, Bosch & Whiteside.
 
Last edited:
OP
J

jimreed2160

Well-known member
Joined
Aug 7, 2016
Messages
3,589
Location
Tallahassee FL
cheechi: Upon further consideration I have another part to my original question. I linked the 2" version they make, while they have some ranging from sizes 1"-3" with several in between. If you were choosing one for yourself, what size would you go with?


I would stick with the 1" or maybe the 2" myself. I think the smaller bits are easier to control.

A few years back I flattened the top of a log round and made it into a wedding cake stand for a friend's niece. The sale of oak timber financed her wedding and it seemed appropriate to have an oak round present in a prominent place. Well I shot off my mouth about my ww skills and my buddy called in some favors. Thus I was stuck in the shop gnawing away at this dirty, fungus bound piece of oak. I leveled it with three hidden feet and then built a sled on top for my router. The largest rabbet bit I had was about 3/4 to 1". I took very light passes in the end grain and gave myself plenty of breaks to settle my nerves.

Once the piece got cleaned up and coated with poly I was proud of it. But not something I would like to do again.
 

derosa

Well-known member
Joined
Oct 19, 2010
Messages
1,078
Location
Oceanside, NY
cheechi: Upon further consideration I have another part to my original question. I linked the 2" version they make, while they have some ranging from sizes 1"-3" with several in between. If you were choosing one for yourself, what size would you go with?


I would stick with the 1" or maybe the 2" myself. I think the smaller bits are easier to control.

A few years back I flattened the top of a log round and made it into a wedding cake stand for a friend's niece. The sale of oak timber financed her wedding and it seemed appropriate to have an oak round present in a prominent place. Well I shot off my mouth about my ww skills and my buddy called in some favors. Thus I was stuck in the shop gnawing away at this dirty, fungus bound piece of oak. I leveled it with three hidden feet and then built a sled on top for my router. The largest rabbet bit I had was about 3/4 to 1". I took very light passes in the end grain and gave myself plenty of breaks to settle my nerves.

Once the piece got cleaned up and coated with poly I was proud of it. But not something I would like to do again.
I have a piece that attaches to my RAS that has 3 blades on it and is meant to level a board, be interesting to know if it would work on end grain, and how good a job it could do.
At least your job was probably appreciated even if they didn't know how my effort went into the job.
 
OP
J

jimreed2160

Well-known member
Joined
Aug 7, 2016
Messages
3,589
Location
Tallahassee FL
I have a piece that attaches to my RAS that has 3 blades on it and is meant to level a board, be interesting to know if it would work on end grain, and how good a job it could do.
At least your job was probably appreciated even if they didn't know how my effort went into the job.

At least with the RAS you can get a little further back from your work. It still gives me the hives. Board smoothing is best done with a scrub plane. It is a workout but also fun and safe.

As for the hives, I have been dealing with a skin rash caused by sweating too much in the shop. It has kept me inside taking naps for the past few days. Now that it is starting to subside, I hope to sneak in some shop time on cool mornings this week.
 
OP
J

jimreed2160

Well-known member
Joined
Aug 7, 2016
Messages
3,589
Location
Tallahassee FL
Applying trim

I did manage to sneak in some shop time for the trim work.

DSCN3120.jpg


As you can see, there is lots of squeeze out.

DSCN3121.jpg


But I managed to clean it up.

DSCN3124.jpg


Here is the edge of the drawer from last week's work. I trimmed it off with a sharp chisel and now the drawer fits like a glove.

DSCN3123.jpg


Now I have to cut more trim. The larger drawer is missing a piece.

DSCN3126.jpg


It is a pretty simple profile. But the rosette on the end is a little more complex.

DSCN3127.jpg


I am missing two pieces on the other side. Time to get out the H&R planes. Stay tuned.
 

rrich1

Well-known member
Joined
Oct 7, 2015
Messages
793
@jimreed looking good.

With my youngest down for a nap I decided to tackle the top. I got the legs on and scribed a line. I used my #5 and #4 and I am much happier with the results. I'm sure they all won't be perfect when it's all done but I can live with this more than what I had before. d25ee675b33d8cf630fa2e6afe4a3ce4.jpgc03e5ecede41b9e94e076f90309008d1.jpg

Sent from my Pixel XL using Tapatalk
 

Attachments

  • d25ee675b33d8cf630fa2e6afe4a3ce4.jpg
    d25ee675b33d8cf630fa2e6afe4a3ce4.jpg
    196.5 KB · Views: 1
  • c03e5ecede41b9e94e076f90309008d1.jpg
    c03e5ecede41b9e94e076f90309008d1.jpg
    61.9 KB · Views: 1
OP
J

jimreed2160

Well-known member
Joined
Aug 7, 2016
Messages
3,589
Location
Tallahassee FL
@jimreed looking good.

With my youngest down for a nap I decided to tackle the top. I got the legs on and scribed a line. I used my #5 and #4 and I am much happier with the results. I'm sure they all won't be perfect when it's all done but I can live with this more than what I had before. d25ee675b33d8cf630fa2e6afe4a3ce4.jpgc03e5ecede41b9e94e076f90309008d1.jpg

Sent from my Pixel XL using Tapatalk

Handplanes win again! Good job. :beer:
 

Attachments

  • d25ee675b33d8cf630fa2e6afe4a3ce4.jpg
    d25ee675b33d8cf630fa2e6afe4a3ce4.jpg
    189.7 KB · Views: 1
  • c03e5ecede41b9e94e076f90309008d1.jpg
    c03e5ecede41b9e94e076f90309008d1.jpg
    61.5 KB · Views: 2
To avoid these ads, REGISTER NOW!
Top Bottom