OP
rattle_snake
Well-known member
Thanks. Wish I was working on a cool project IN my shop like you are but I'm forced to continue my overly fancy work ON my shop.Lookin' good Justin!
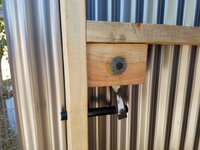
I enjoy the trim work, trying to go slow and enjoy the ride. I stained another set of boards last night and hope to finish up cabinet shelves this weekend.