I have used Eastwood manifold paint with good results. I touch them up on occasion with a foam brush while still on the car.The heat is suppose to cure it, I've used the same little can way past its self life marked on the can.

But no complaints I've never had a set of headers on any of my cars so i can't say on that.

Thanks for passing on the good news. As with all paint, preparation makes a big difference. I've never bought a set of headers, either, except those that came on a car.
I don't know if these are red-tailed or not, but we had some hawk visitors drop by the first week in September. Funny, the field mice in my garden disappeared around this time, too.
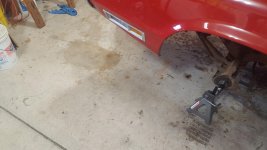
Andy, you're my hero. I spill oil, get overspray on my floor and generally make a mess in my garage. Then I read about these fine, showplace garages here in GJ and think I don't belong. Thank you!

Seeing your overspray makes me feel at home.
Someday I'll tell everyone about the slow-motion, never ending mess I made trying to fill up the oil in a Craftsman floor jack. It took an hour or more, and the mess just kept getting worse and worse, with less and less oil in the jack. I finally had to walk away. I went and found the manual online, came back the next day and did the job in 15 minutes with no mess. :tard:
Cool picture! The mice were just hiding, no rodents were harmed in the production of this thread. Hmmm, hawks are a protected bird, is it OK to starve them? A bit of a catch 22 here.
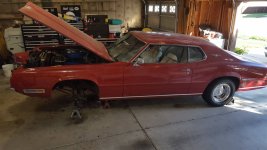
What's the red car? We really need to know...
Although this is Garage Journal, I don't actually have a garage, just two carports and a workshop. HooBoy, now I'll probably get banned.
But the workshop is for working. I try not to do things to damage the concrete, like using a cutting torch too close to the floor. Paint overspray, in my mind, just offers more protection to the concrete. I also kind of like seeing the resulting patchwork of jobs past. In the early nineties I got overspray on my car at work. Lot's of people signed up to get their car repainted but you had to look closely to see inorganic zinc on a gray car. I asked them to clean my windows so the paint would not wear out the windshield wipers, the car never corroded under the overspray dots.

OK, I'm not normal. Oblique, I guess, or I'm in a parallel universe.
Sorry, but I think we just heard about your jack refilling adventure. You need to put a link to your thread on your signature line. I'm not very computer savvy and can't find it.

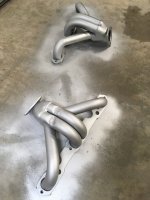
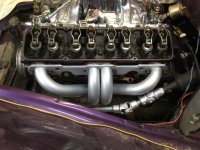
Andy, I was bored a few years ago and installed stainless headers on the [small block] '87 Corvette. Couldn't put the headers in without removing the starter. It was not too heavy when it fell to the floor but gained weight just laying there.
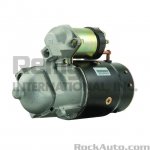
After saying a lot of bad things about how fat it got when I tried to reinstall it, I gave up and ordered a mini-starter from Rock Auto. Not the fancy aftermarket kind but a stock 1992 Corvette starter that weighs next to nothing. OK, it was still heavy but small enough to hold and start the mounting bolts one-handed.
You can buy a rebuilt big fat starter for $25 but a brand new skinny mini is about $100. One of those "less is more" things.
You're not normal either, Bob. I changed my starter singlehandedly but I used both hands. I challenge you to a contest. We'll each do it with one hand tied behind our back. See how good you are then, Bub.

Stainless headers are something. Glad I never get bored. Do they discolor?
Thanks for the tip on the mini mite starters, that looks like something I'll have to try. However in the pictures side by side at the bottom of your post, the "small" starter looks to be significantly bigger than the old standby. I'm confused.
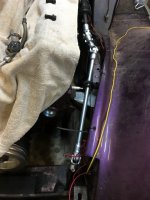
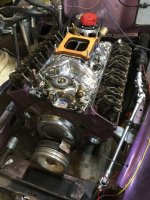
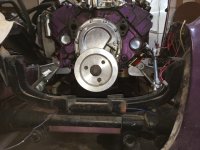
Now I need some help. I put the intake manifold on today (after going to set up a shelter for the Mannford Pharmacy booth at the Chili Cookoff). Edlebrock gaskets, did not come with the neoprene front and rear seals. Their instruction sheet said they recommend using gasket maker sealant. So I did.
For the price of their gaskets you'd think they could provide the rubber pieces.
Now I need some help. Got the manifold carefully torqued down and put the engine on #1 TDC compression stroke. Lined up rotor bug (rotor beast in these distributors) and slipped the distributor in. I got that far before I realized I have no idea how to static time it. There are no points to watch open. How does everybody else do it? I suppose I can hook power to the distributor and hook up a timing light as I turn the engine. Is there a better way?
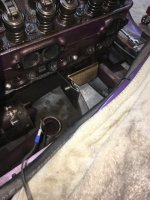
At least it's starting to look like an engine again.
Thanks for the visits!!