To avoid these ads, REGISTER NOW!

Above 1200 Sq/FT The Lone Beech Garage (60x46x16)

Wokspaces above 1200 squarefeet.
OP
S

sbosecker

Well-known member
Joined
Sep 25, 2012
Messages
3,539
Location
Peachtree City, GA
Thursday - November 29, 2018


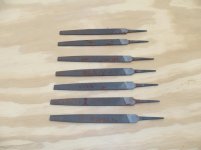
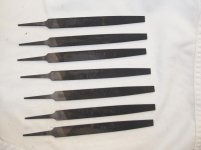
Last weekend I bought a box of Files at an Estate Sale for a buck.


20181129-01.jpg 20181129-02.jpg

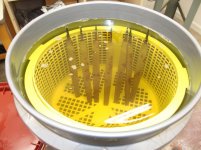
There were 7 Nicholson 6-inch ******* Cut Flat Files in the box, unused and wrapped in paper. Unfortunately some water had infiltrated the box at some point and the files had some rust on them. I had discovered this prior to my purchase - hence the one dollar price.



20181129-03.jpg 20181129-04.jpg

I'm going to soak the files in EvapoRust and see if that will take care of the corrosion. I put them in at 11:00 am today and will pull them out tomorrow morning.


20181129-05.jpg

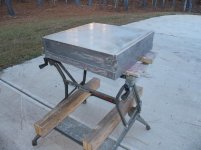
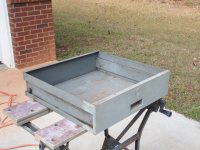
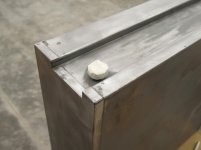
I now turned my attention to one of the LYON Table's drawers. I took it outside to give it some love.



20181129-06.jpg 20181129-07.jpg

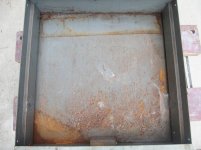
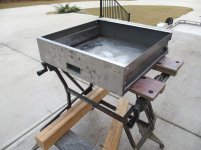
Working with various abrasives, I got the drawer ready for priming and painting. I covered the drawer rollers with some masking tape.


Continued in next post...
 
Last edited:
To avoid these ads, REGISTER NOW!
OP
S

sbosecker

Well-known member
Joined
Sep 25, 2012
Messages
3,539
Location
Peachtree City, GA
Continued...


20181129-11.jpg

I have decided to only do the exterior of the drawer today. As positioned in the next pictures, I can reach all the exterior surfaces with the paint without having to move the drawer.


20181129-12.jpg 20181129-13.jpg

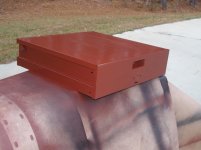
The normal drill for this project - primer followed by black paint.

I think I may have gotten a defective can of primer. Either the nozzle is malfunctioning or the can was undercharged with propellant.

I did manage to get the primer onto the drawer but that was such a fight that when I started using the "normal" black paint I was getting too much paint on the project. It came out like a fire hose compared to the can of primer!


20181129-14.jpg

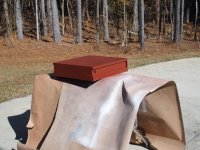
We've had hard freezes the past two nights and it is chilly outside. I brought the drawer into the LBG to allow the paint to cure properly.

I intend to paint the interior of the drawer gray. This should make it a little brighter inside the drawer to help find "stuff".

Another exciting day at the Lone Beech Garage... soaking stuff and watching paint dry!


Scott
 
Last edited:
OP
S

sbosecker

Well-known member
Joined
Sep 25, 2012
Messages
3,539
Location
Peachtree City, GA
Friday - November 30, 2018


20181130-01.jpg

I pulled the files out of the EvapoRust this morning. It seems to have worked.


20181130-02.jpg

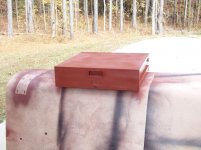
The paint on yesterday's drawer project had dried enough to put into the LYON Table to see how it was going to look. I had considered painting the exterior of the drawers a dark gray to offer a little contrast in the LYON Table but I think I'll be happier with keeping it all black.


Continued in next post...
 
Last edited:
OP
S

sbosecker

Well-known member
Joined
Sep 25, 2012
Messages
3,539
Location
Peachtree City, GA
Continued...

I had just enough time this afternoon to work on another drawer before I ran out of daylight...


20181130-11.jpg 20181130-12.jpg

This one's interior was a little rougher than the first one.


20181130-13.jpg 20181130-14.jpg

Prep completed well enough to paint.


20181130-15.jpg 20181130-16.jpg 20181130-17.jpg

Same poop; different day.

It is supposed to rain here tomorrow so I won't be doing a prep work on the other 2 drawers. I'm sure I'll find something interesting to do instead.


Scott
 
Last edited:

drivesitfar

Well-known member
Joined
Oct 23, 2013
Messages
36,077
Location
Pacific Northwest
SB: while I like the ALL BLACK you might consider ORANGE drawers cause isn't that the color of your tractors or are they RED? in any case you've put a ton of work in on your Lyon bench and it does show.

just curious what are you using to grind or sand off the rust and old paint while you are prepping the drawers and your Lyon bench?

i've got this old Milwaukee 7.5 inch with a cup wire wheel and i've got a Delta with a different cup wire wheel for the big stuff and i'm looking for options for the little stuff and i'm pretty sure I might own the tools unless they are air powered cause i haven't graduated to them yet cause i don't have enough room for a nice compressor.

have a great weekend!!
 
OP
S

sbosecker

Well-known member
Joined
Sep 25, 2012
Messages
3,539
Location
Peachtree City, GA
That's a good 'end of the story' with the lathe gear. Much better than what it could have been.

250,

Thanks for stopping by!

Yes I was pretty discouraged when I opened the box and found the broken gear. I wish it hadn't happened but I think this is a workable solution.


Best regards,

Scott
 
OP
S

sbosecker

Well-known member
Joined
Sep 25, 2012
Messages
3,539
Location
Peachtree City, GA
SB: while I like the ALL BLACK you might consider ORANGE drawers cause isn't that the color of your tractors or are they RED? in any case you've put a ton of work in on your Lyon bench and it does show.

just curious what are you using to grind or sand off the rust and old paint while you are prepping the drawers and your Lyon bench?

i've got this old Milwaukee 7.5 inch with a cup wire wheel and i've got a Delta with a different cup wire wheel for the big stuff and i'm looking for options for the little stuff and i'm pretty sure I might own the tools unless they are air powered cause i haven't graduated to them yet cause i don't have enough room for a nice compressor.

have a great weekend!!


DrivesItFar,

More Seattle weather here today! It's been raining pretty steady since early morning.

The correct paint color for my era of Allis-Chalmers tractor is Persian Orange #1. Ha!
It's kind of a "pumpkin orange". Allis-Chalmers switched to Persian Orange #2 in the late 50's(?). It has more red in it. I think it's a good looking color and my best looking tractor was painted that color (incorrectly) by the fellow that did the refurbishing of it. I'll deal with that at some point in the future.

The LYON Table has taken a lot of time for something that's going to be used as a work table. However, it was in such rough shape that it needed some touching up. Once one starts down that path... By no means is my work all that great ...paint runs and such are present. At least it won't be shedding chips of paint and the drawers are structurally in MUCH better condition.


20181201-01.jpg

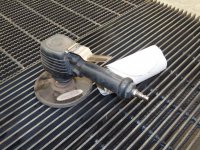
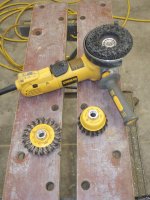
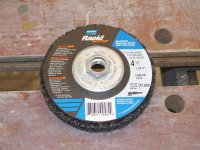
This D/A Sander is used with 80 grit paper. I use it for prepping bigger flat areas. I also use it to provide a little "tooth" after I've cleaned an area with a Rapid Strip disc mounted on the angle grinder.


20181201-02.jpg 20181201-03.jpg

This 4-1/2 inch Angle Grinder is used a LOT. The Rapid Strip disc is my go-to abrasive. They work great but they're not cheap and they don't last as long as I would like.


20181201-04.jpg

This Wire Brush Kit from Harbor Freight is surprisingly useful for the work I've been doing on the drawers. At $5 I wasn't expecting much - if you have a 20% off coupon they're only $4!


In the corners I used some 150 grit sandpaper backed up by scrap pieces of wood that fit the situation.

The drawers get a good wipe down with Acetone to remove the oily residue that seems to be on pretty much every surface but particularly around the drawer's slides.


Best regards,

Scott
 
OP
S

sbosecker

Well-known member
Joined
Sep 25, 2012
Messages
3,539
Location
Peachtree City, GA
Saturday - December 1, 2018


It's Saturday night in PTCGA! (Peachtree City, GA)

WoooHoooo!

So after helping my wife - a bit - with the start of holiday decorating, I watched plucky little Alabama beat UGA. Then I went out to the LBG to watch some more paint dry.


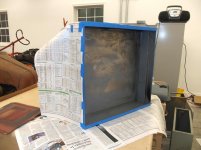
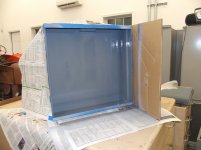
20181201-05.jpg 20181201-06.jpg

The exterior of the first LYON drawer was painted black over 48 hours ago and I should be able to mask off the exterior without fear of damaging the paint.

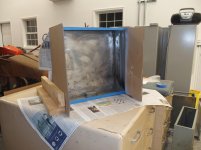
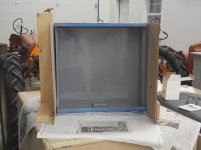
I spent about 45 minutes masking, priming & painting this drawer. I used Rustoleum gray primer and the a color coat of Rustoleum Dark Machine Gray. I could see the difference between the primer and the color coat when I was painting but it really didn't look much different on the pictures I took.

I'm trying to make the drawer's interior somewhat light and I thought the gray primer would be better than the red primer to achieve that. Maybe it wouldn't matter.

I'll watch the rest of the B1G football championship while this paint is drying. When that game is over the paint should be dry enough to remove the masking tape and see if I missed any holes in the drawer that allowed the interior paint to blow out on the black paint.

Scott
 
Last edited:
OP
S

sbosecker

Well-known member
Joined
Sep 25, 2012
Messages
3,539
Location
Peachtree City, GA
Table is looking really nice and will be a nice addition. Inside of the last drawer, there was a lot of surface rust. Besides sanding, did you use anything else to get it ready for priming?

shortykorte,

Apparently all the excitement that happens in Peachtree City on a Saturday night caused me to miss your post last evening... Ha!

Use of the RapidStrip, sanding & wire brushing all came into play. Pretty much all the stuff I posted in the response to DrivesItFar.

Best regards,

Scott
 
OP
S

sbosecker

Well-known member
Joined
Sep 25, 2012
Messages
3,539
Location
Peachtree City, GA
Sunday - December 2, 2018

Went out to the LBG before church this morning and removed the masking materials from the drawer I painted last night.


20181202-01.jpg

I'm happy with the way that turned out. I think I missed hitting one side of the handle pull on the interior with color. I've left the masking tape inside the pull (a couple of gaps there) until I can touch up that spot in the interior with some additional paint.


20181202-02.jpg 20181202-03.jpg

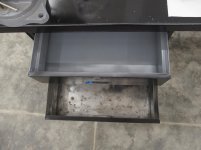
After lunch I placed the (almost) completed drawer into LYON Table and compared it with the next drawer in line for interior paint. It looks like overspray on the top edge of the finished drawer but it's reflection of the overhead lights.


20181202-04.jpg 20181202-05.jpg

This evening I pulled that next drawer out and repeated last night's procedure.


The weather is supposed to be sunny and 0% chance of rain for most of this coming week. I hope to use that situation to finish the last two drawers.


Scott
 
Last edited:
OP
S

sbosecker

Well-known member
Joined
Sep 25, 2012
Messages
3,539
Location
Peachtree City, GA
Tuesday - December 4, 2018


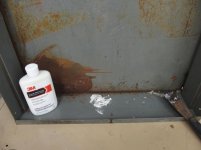
I was hoping to get started removing paint from the last two LYON Table drawers yesterday but ran into a setback...


20181204-01.jpg 20181204-02.jpg

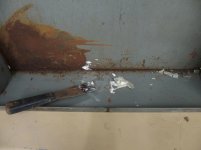
I had not noticed that one of the remaining drawers had some clear caulking globbed on its interior. I needed some time for the caulk remover to work its magic. Today I was able to remove the caulk without any trouble.


20181204-03.jpg 20181204-04.jpg

I managed to get the paint removal completed on the two remaining drawers before I ran out of daylight.

I hope to get the exteriors of both drawers painted black tomorrow.


Scott
 

drivesitfar

Well-known member
Joined
Oct 23, 2013
Messages
36,077
Location
Pacific Northwest
SB: funny you mention the CAULK in the corner of one of the drawers on your Lyon cause I'm getting ready to prep an old small job box i'm going to use on my little trailer and the seams are starting to separate.

while caulking might not be a terrible idea I think JB Weld or Devcon or some sort of epoxy might be better.

are you just going to paint over the gap since it's going to be inside your garage and no danger of leaking?

you are doing an outstanding job on the LYON and wish you were closer cause i've got plenty of other cool old things you can spiff up now that you are a pro.

cheers
 
OP
S

sbosecker

Well-known member
Joined
Sep 25, 2012
Messages
3,539
Location
Peachtree City, GA
That's a new one on me, does it work well?

Ole Slewfoot,

I've only used it a few times. I applied it more liberally to this most recent effort and it worked better and faster than my previous experiences.

The first couple of times I used it I didn't put that much on the caulk and it did work but it required a few applications.

Best regards,

Scott
 
To avoid these ads, REGISTER NOW!
OP
S

sbosecker

Well-known member
Joined
Sep 25, 2012
Messages
3,539
Location
Peachtree City, GA
SB: funny you mention the CAULK in the corner of one of the drawers on your Lyon cause I'm getting ready to prep an old small job box i'm going to use on my little trailer and the seams are starting to separate.

while caulking might not be a terrible idea I think JB Weld or Devcon or some sort of epoxy might be better.

are you just going to paint over the gap since it's going to be inside your garage and no danger of leaking?

you are doing an outstanding job on the LYON and wish you were closer cause i've got plenty of other cool old things you can spiff up now that you are a pro.

cheers


DrivesItFar,

Thanks for the kind words!

The caulk - installed by a previous owner - was a "Poor Man's" attempt to add drawer dividers. Most of the dividers were gone when I acquired the LYON Table but the evidence was clear... globs of cured caulk directly across from each other with a vertical groove where the divider had been.

I just wanted to remove the caulk to be able to prep the interior of the drawers for painting.

Close or not - you'd have to get in line with your cool old things. I've got plenty of my own in front of yours. Ha!

Best regards,

Scott
 
OP
S

sbosecker

Well-known member
Joined
Sep 25, 2012
Messages
3,539
Location
Peachtree City, GA
Wednesday - December 5, 2018


A beautiful late fall day here today in metro Atlanta! The only problem was it was pretty chilly - highs in the 40's - and every once and while a stiff breeze would hit us.


20181205-01.jpg 20181205-02.jpg

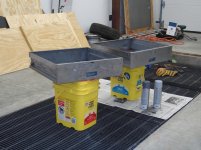
While not optimal conditions, I could individually paint each of the two drawers pretty quickly and then bring the finished drawer into the LBG to cure in a climate controlled area.


20181205-03.jpg

...and that's what I did. I finished the painting around 1:30 pm. This was not the greatest job of painting... the occasional wind caused my paper "drop cloths" to blow up and touch the wet paint and the bright sun was either in my eyes or causing a shadow when I was painting.

Some touchup will be necessary in a couple of days when the paint is fully cured.


20181205-04.jpg

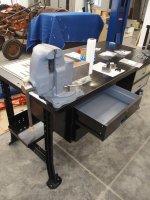
After about 5 hours the paint was dry enough to handle. I placed the last two drawers into the LYON Table just to see - despite the flawed paint - how this project was coming along.

We're almost home!


Scott
 

shadyluke

Well-known member
Joined
Oct 3, 2014
Messages
267
Location
SE Pa
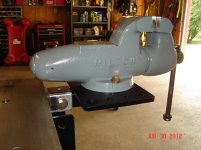
Looks like a Yost 33C vice sitting there. I got a couple of those 96 lbs beasts waiting for me to build a table

Sent from my SM-G950U using Tapatalk
 
OP
S

sbosecker

Well-known member
Joined
Sep 25, 2012
Messages
3,539
Location
Peachtree City, GA
Your table looks a treat Scott:thumbup:

1/2 Cup,

Thanks! From a galloping horse at a hundred yards it looks pretty good. Ha!

Definitely an improvement from when I got it. However, it is a work horse and not a show horse so I'll start using it as a tool soon and that will take some of the gloss off the paint pretty quick. Ha!

Best regards,

Scott
 
OP
S

sbosecker

Well-known member
Joined
Sep 25, 2012
Messages
3,539
Location
Peachtree City, GA
Nice little chunk of iron to place on it. Just for looks or final resting place?

At the moment trying to decide what to do with my vises...

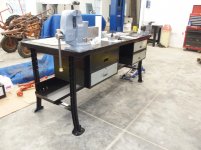
I've got a 4-inch Standard Vise (thought to be made by Morgan) sitting on the other end and the Yost 33 in the foreground.

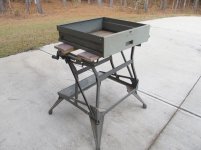
Probably one vise per table is plenty. I acquired another LYON table in the past few weeks. It too is in rough condition and will require some work. Acquiring the most recent LYON table was the motivation to get cracking on refurbishing the original acquisition.

To answer your question, probably one vise per table and which one goes on which table is yet to be decided. I had considered putting the Yost on a future built 48"x34"x1/2" welding table but maybe it would be best to keep that surface clear of obstructions.

Best regards,

Scott

Looks like a Yost 33C vice sitting there. I got a couple of those 96 lbs beasts waiting for me to build a table

shadyluke,

You are correct about the Yost 33C!

I got that a few years ago from a Craigslist ad. Among other issues, it was missing the handle so I've got some steel rod with rubber walking cane tips on the ends for the moment.

Best regards,

Scott
 
Last edited:

drivesitfar

Well-known member
Joined
Oct 23, 2013
Messages
36,077
Location
Pacific Northwest
SB: your table looks great from my chair and i'm sure once you start using it and filling up the drawers and top of it you'll be happy you spent the extra time spiffing it up.

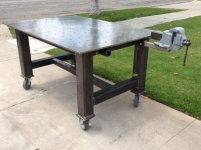
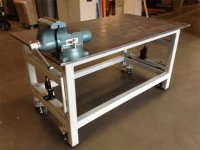
for your welding table you might want to build one like this for your big shop that can move around pretty easily on these casters that raise and lower with the jack.

also check out the vise and grinder stands thread for ideas on how to hitch mount your vises or build a stand for the big ones that move around. here's the link and a couple pictures of my favorite ones.

https://www.garagejournal.com/forum/showthread.php?t=252799

keep up the great work and hope you enjoy your weekend.
 

Attachments

  • top hitch type drop in mount.jpg
    top hitch type drop in mount.jpg
    13.1 KB · Views: 73
  • welding table with cool bench seat 1.jpg
    welding table with cool bench seat 1.jpg
    30.4 KB · Views: 69
  • welding table with hitch mounts.jpg
    welding table with hitch mounts.jpg
    65.7 KB · Views: 78
  • lista box in bench with hitch mounts 1.jpg
    lista box in bench with hitch mounts 1.jpg
    123.8 KB · Views: 73
  • welding table with hydraulic jacks 2.jpg
    welding table with hydraulic jacks 2.jpg
    51.3 KB · Views: 73
  • welding table with hydraulic jacks 1.jpg
    welding table with hydraulic jacks 1.jpg
    89.8 KB · Views: 79
  • welding table with hydraulic jacks.jpg
    welding table with hydraulic jacks.jpg
    97.1 KB · Views: 89
OP
S

sbosecker

Well-known member
Joined
Sep 25, 2012
Messages
3,539
Location
Peachtree City, GA
SB: your table looks great from my chair and i'm sure once you start using it and filling up the drawers and top of it you'll be happy you spent the extra time spiffing it up.

for your welding table you might want to build one like this for your big shop that can move around pretty easily on these casters that raise and lower with the jack.

also check out the vise and grinder stands thread for ideas on how to hitch mount your vises or build a stand for the big ones that move around. here's the link and a couple pictures of my favorite ones...

...keep up the great work and hope you enjoy your weekend.


DrivesItFar,

Thanks for the kind words regarding the LYON Table!

Great pictures of ideas for the welding table. For my situation the hitch receiver mounted vertically caught my eye. That may be an approach I use in my table.

I had a great weekend. I made a quick trip to the Lone Beech Melon Farm in southern Indiana and visited with my dad. While there he let me know his Makita 2040 wood planer had suffered a catastrophic failure of a drive shaft. He was all ready to head into town to buy a new Dewalt planer from Lowes.

I didn't want him to waste his money on that ...and I have a Makita 2040 myself. [Dad was so impressed with mine back in the 1980's that he bought one.] I suggested that he could use mine until I was able to fix his. Of course this means a 16 hour drive (round trip) to make that happen.

Just what I need at Christmas time... a road trip. Ha!

At least that kept him from spending money on another planer for the time being.


Best regards,

Scott
 
OP
S

sbosecker

Well-known member
Joined
Sep 25, 2012
Messages
3,539
Location
Peachtree City, GA
Thursday - December 13, 2018


I don't want to sound like Scrooge but there's nothing like Christmas to **** the oxygen out any time in the shop. Ha!

Yesterday I was finally able to break away from various Christmas activities (Christmas cards, Christmas decorating, etc.) and get some time in the LBG.

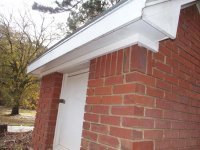
The first item on the list was some time in the Woodshop. Quite a few years ago the roof on the Well House had developed a leak that caused me to replace the roof. The molding one side of the structure was also damaged and I removed it as well. While I had replaced the roof, I hadn't done anything about the missing molding.

Recently I had noticed that a rodent had gotten inside the Well House and damaged the insulation. I needed to get that molding installed to keep out the critters.


20181212-01.jpg 20181212-02.jpg 20181212-03.jpg

The Miter Saw Station and my Pneumatic Brad Nailer allowed me to make pretty quick work of this long overdue repair. Hopefully that will keep the varmints out.

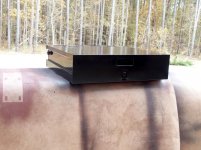
I now turned my attention to the two remaining LYON Table drawers.


20181212-04.jpg 20181212-05.jpg

Same stuff; different day. The good news is that this is the last of the "big" painting.

I still have some touchup to do...


20181213-06.jpg

I dropped by Home Depot today and got a small can of black paint and some small brushes. I will try to get to paint touchup soon.


Continued in next post...
 
Last edited:
OP
S

sbosecker

Well-known member
Joined
Sep 25, 2012
Messages
3,539
Location
Peachtree City, GA
Continued...


20181213-11.jpg

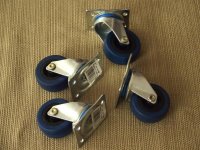
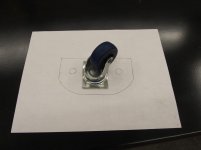
While I was out getting the paint I dropped by a Harbor Freight and picked up four 2-inch casters. I want to have the ability to temporarily put casters on the LYON Table if and when I want to move it.


20181213-12.jpg 20181213-13.jpg 20181213-14.jpg

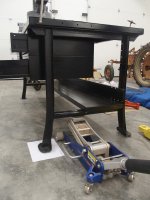
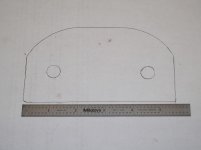
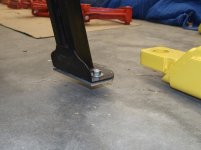
I jacked up the LYON Table and slid a piece of paper under one of the feet. I made a tracing which I intend to use as a template for my caster supports.


20181213-15.jpg

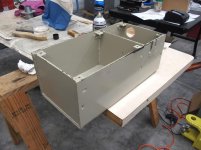
This roughly 7"x7"x12" steel item comes from a Lenox Pulse Furnace that was removed from our house a couple of years ago. The steel is 3/16" thick and I plan to use this material for my caster supports.

I hope to work on this tomorrow.


Scott
 
Last edited:
OP
S

sbosecker

Well-known member
Joined
Sep 25, 2012
Messages
3,539
Location
Peachtree City, GA
Friday - December 14, 2018

This morning I made myself a cup of coffee, went outside to a dreary, raw Georgia December morning and poured 4 tenths of an inch of water out of the rain gauge.

I made my way over to the shop and turned on the lights.

Today's goal was to make caster pads for the LYON Tables.


20181214-01.jpg 20181214-02.jpg 20181214-03.jpg

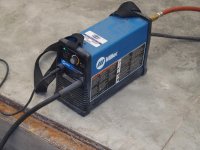
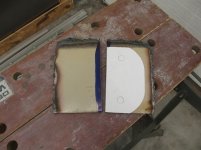
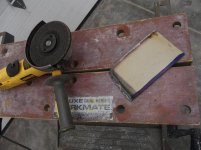
I got out my plasma cutter, removed some paint from the "victim" with an angle grinder, attached the ground & cut a couple of pieces out of the steel furnace box.


20181214-04.jpg 20181214-05.jpg

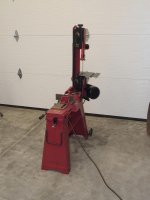
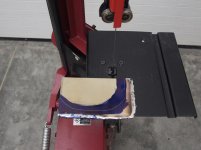
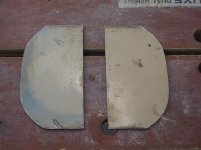
I set up the Harbor Freight Horizontal Band Saw into Vertical mode and cut one of the steel pieces into two parts. The paper template shows what I hoped to make from each piece.


20181214-06.jpg

I should have done this earlier but I now used an angle grinder to remove the blobs left behind by the plasma cutter.


20181214-07.jpg

The steel now flatter, I returned to the Band Saw to cut the steel into the shape I wanted.


Continued in next post...
 
OP
S

sbosecker

Well-known member
Joined
Sep 25, 2012
Messages
3,539
Location
Peachtree City, GA
Continued...

20181214-11.jpg

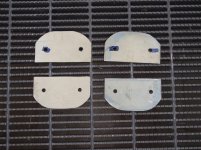
After a considerable amount of time at the Band Saw, I had two of the four pad blanks made. I spent a bit of time dressing the edges with a metal file after the band saw work.


20181214-12.jpg 20181214-13.jpg

I marked the location of the necessary bolt holes and, using a 3/8-inch drill bit at the drill press, made the holes.


20181214-14.jpg

I got a couple of 3/4-inch long 3/8-inch bolts, washers & nuts and attached the pads to one end of the Lyon Table. It looks like the pads should work as I hoped.


20181214-15.jpg

Having established with the first two pads that the plan was going to work, I returned to the Band Saw and made the second set of pads.


Continued in next post...
 
Last edited:
OP
S

sbosecker

Well-known member
Joined
Sep 25, 2012
Messages
3,539
Location
Peachtree City, GA
Continued...

Now it was time to fasten the casters to the steel pads.


20181214-21.jpg 20181214-22.jpg

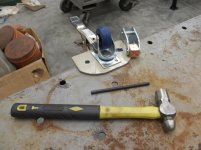
I positioned the caster on the steel pad by eye. I used a spring clamp to hold the caster and a 1/4-inch Transfer Punch to locate the center of the first two holes. I then drilled 3/16-inch holes into the pad.


20181214-23.jpg

A Counter Sink Bit was then used on the holes to allow the #10 Flat Head Screws to be flush to the surface of the steel pad.

With the first two holes prepared, I fastened the caster to the pad using those two holes. I then used the transfer punch again to locate the center of the two remaining holes.


20181214-24.jpg 20181214-25.jpg

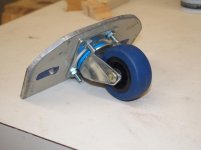
With all the holes drilled, the caster was attached to the pad. It looks like the 3/4-inch long screws was overkill...


20181214-26.jpg 20181214-27.jpg

With the 4 Caster Pads functionally completed, I attached them to the LYON Table. I was pleased that the table could now be moved easily.

I'll remove the Caster Pads in the next few days and give them a coat of paint but - for all practical purposes - they are ready for prime time.

Despite the chilly & dreary weather, a good day in the LBG!

Scott
 
Last edited:
shortykorte

Well-known member
Joined
Sep 1, 2014
Messages
8,039
Location
Tallahassee, Fl

drivesitfar

Well-known member
Joined
Oct 23, 2013
Messages
36,077
Location
Pacific Northwest
SB: I may have missed this, but do your casters lock on your Lyon table legs you made for it?
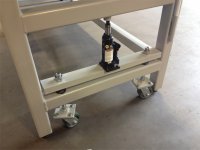
I'm not sure I read everything so if the lock great otherwise even if your garage floor is perfectly flat you might be chasing after your table while working on it.

great stuff at the LONE BEECH going on today and thanks again for taking the time to take the pictures, talk us through all the details of how stuff gets fixed or made.

have a great weekend!!
 
OP
S

sbosecker

Well-known member
Joined
Sep 25, 2012
Messages
3,539
Location
Peachtree City, GA
OP
S

sbosecker

Well-known member
Joined
Sep 25, 2012
Messages
3,539
Location
Peachtree City, GA
SB: I may have missed this, but do your casters lock on your Lyon table legs you made for it?

I'm not sure I read everything so if the lock great otherwise even if your garage floor is perfectly flat you might be chasing after your table while working on it.

great stuff at the LONE BEECH going on today and thanks again for taking the time to take the pictures, talk us through all the details of how stuff gets fixed or made.

have a great weekend!!


DrivesItFar,

The idea behind the LYON Table casters is they are to be used only if I wanted to move the table(s) to a new location. Normally the table will be sitting on the floor without the casters mounted.

With that as the design criteria, I didn't get locking casters.

Thanks for the kind words!

Best regards,

Scott
 

drivesitfar

Well-known member
Joined
Oct 23, 2013
Messages
36,077
Location
Pacific Northwest
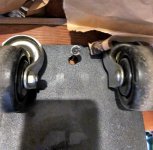
SB: sorry i thought those casters were bolted on and permanent. not sure how easy it will be to take them on or off, but you've probably got that figured out.

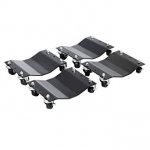
I use car dollies similar to these that I picked up 4 of them from an old guy that used to move his Model T around his small garage into a corner when he wasn't going to be driving it.

always fun checking in to see what you've got going on so keep up the great work and the pictures are also great.

how do you like those KANT TWIST CLAMPS?
 

Attachments

  • car dollies.jpg
    car dollies.jpg
    10.1 KB · Views: 35
  • modified long spider bit screws to hold 4 dollies 1.jpg
    modified long spider bit screws to hold 4 dollies 1.jpg
    148.1 KB · Views: 41
  • modified long spider bit screws to hold 4 dollies 2.jpg
    modified long spider bit screws to hold 4 dollies 2.jpg
    147.2 KB · Views: 41
OP
S

sbosecker

Well-known member
Joined
Sep 25, 2012
Messages
3,539
Location
Peachtree City, GA
SB: sorry i thought those casters were bolted on and permanent. not sure how easy it will be to take them on or off, but you've probably got that figured out.

I use car dollies similar to these that I picked up 4 of them from an old guy that used to move his Model T around his small garage into a corner when he wasn't going to be driving it.

always fun checking in to see what you've got going on so keep up the great work and the pictures are also great.

how do you like those KANT TWIST CLAMPS?

DrivesItFar,

Thanks for all the positive feedback!

Writing this from a Crowne Plaza next to JFK airport . San Francisco tomorrow then back to JFK the day after. Get home late Friday and then I'm done for the year!

The Kant-Twist clamps work well!

Zoro.com had a 25% off Cyber Monday coupon if you bought enough "stuff" so I acquired a few of them with that order. Zoro's base price was - based on my research - competitive so the coupon deal was pretty attractive.

Still need to work with them some more but my initial review is very favorable.

Merry Christmas!

Scott
 
To avoid these ads, REGISTER NOW!
Top Bottom