To avoid these ads, REGISTER NOW!

Above 1200 Sq/FT The Lone Beech Garage (60x46x16)

Wokspaces above 1200 squarefeet.
OP
S

sbosecker

Well-known member
Joined
Sep 25, 2012
Messages
3,539
Location
Peachtree City, GA
Wednesday - June 19, 2019


By Sunday afternoon I had gotten two coats of paint on the part of the wall that had some damage from the Air Handler leak. It was time to get the LYON work table back into position.


20190616-01.jpg 20190616-02.jpg 20190616-03.jpg

I rolled the table back into position, jacked up each end and removed the casters. Good to have that back in place.


20190616-04.jpg

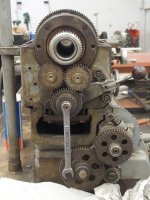
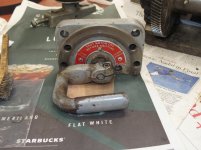
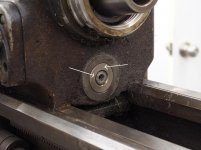
Folks who have followed this thread are probably aware I have a couple of Rockwell/Delta 11-inch metal lathes; neither of which are fully operational. Rockwell Sr. - built in 1956 & Rockwell Jr. - built in 1966. Above is a picture of Rockwell Sr's Drive Selector. This handle should select the lathe's spindle modes: "Direct Drive" "Loose Spindle" "Locked Spindle" "Back Gear Drive".



20190616-05.jpg 20190616-06.jpg

When I purchased Rockwell Sr. I was aware that the Drive Selector had some issues. It was very difficult to manipulate the Selector and it wasn't clear that the various modes were actually engaging. Since the acquisition. the Selector had gotten easier to move but it was now clear it wasn't working right. Sunday I cleaned off the area (just under the spindle) that indicates where the eccentric shaft is positioned. The mark at 12 o'clock is stationary and the mark on the shaft (should) move from 12 o'clock counter-clockwise to about 6 o'clock as the Drive Selector is moved through its positions.

Rockwell Sr's eccentric shaft indicator is frozen in position.


Continued in next post...
 
Last edited:
To avoid these ads, REGISTER NOW!
OP
S

sbosecker

Well-known member
Joined
Sep 25, 2012
Messages
3,539
Location
Peachtree City, GA
Continued...


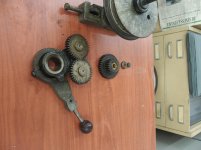
I took the Drive Selector off and started looking for what was causing my the issues inside the Headstock.


20190619-01.jpg 20190619-02.jpg 20190619-03.jpg

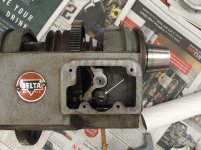
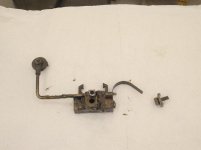
This device, when working properly, protects the machine from operator error. It was in the way of me seeing what might be the problem.


20190619-04.jpg 20190619-05.jpg

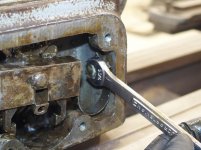
The Drive Selector engages a shaft with a gear on the opposite end. That gear engages a gear on the eccentric shaft which (should) rotate the eccentric shaft. As I was trying to engage the slot in the shaft with a screwdriver to see if I could rotate the eccentric shaft, I pushed the gear/shaft assembly out the opposite side.

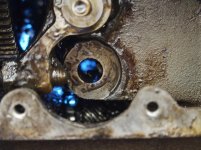
I wasn't expecting that. The shaft should be held in position by a retaining ring. If you look closely at the first picture, there is a damaged retaining ring stuck in the grease around the shaft hole.


20190619-06.jpg

Using a telescoping magnet, I eventually managed to persuade the gear/shaft assembly to drop down into the place the motor lives. What a greasy mess!


20190619-07.jpg

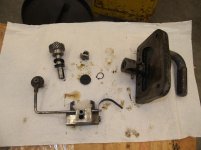
I placed all the items I had removed so far (except the Drive Selector) into the parts washer and got them cleaned up.


Continued in next post...
 
Last edited:
OP
S

sbosecker

Well-known member
Joined
Sep 25, 2012
Messages
3,539
Location
Peachtree City, GA
Continued...


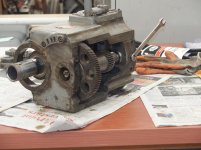
There was no way to get that Gear/Shaft assembly back into position without removing the Headstock. Following the manual, this is a somewhat involved procedure.


20190619-11.jpg

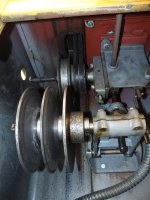
The large belt from the motor to the Reeves Drive is removed. The motor is rotated up to allow this.


20190619-12.jpg

There is a second large belt that goes from the Reeves Drive to an upper Double Belt Shaft. The second large is removed by adjusting the speed selector which moves the Reeves Drive upward allowing the second large belt to be removed.


20190619-13.jpg 20190619-14.jpg 20190619-15.jpg

The Reeves Drive is cranked back down to allow access to a bracket that supports the upper Double Belt Shaft. The two bolts (white arrows) are loosened - but not removed. The lower bolt (black arrow) is then completely removed. This allows the entire bracket to be moved up and towards the person trying to remove it. Once it is off the two loosened bolts, the two belts can be removed from their pulleys and the bracket removed.


20190619-16.jpg 20190619-17.jpg

The next step is to loosen a bolt which will allow the intermediate gear bracket to swing counter-clockwise out of the way.


Continued in next post...


KEYWORDS: Rockwell Delta 11-inch Metal Lathe Headstock Removal
 
Last edited:
OP
S

sbosecker

Well-known member
Joined
Sep 25, 2012
Messages
3,539
Location
Peachtree City, GA
Continued...


20190619-21.jpg 20190619-22.jpg

20190619-23.jpg 20190619-24.jpg

The Reversing Gear Selector is removed next.


20190619-25.jpg

The screws for the bracket holding the electric switch mast are removed.


20190619-26.jpg 20190619-27.jpg

There are hold-downs on each end of the Headstock. These were removed.


Continued in next post...
 
Last edited:
OP
S

sbosecker

Well-known member
Joined
Sep 25, 2012
Messages
3,539
Location
Peachtree City, GA
Continued...


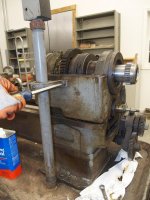
The Headstock is now free and could be lifted off. However I am working by myself. I thought I could probably lift & move the heavy Headstock from the lathe to a table but I wasn't sure what kind of excitement might ensue when the belts started dragging through the machine as I did this.


20190619-31.jpg 20190619-32.jpg

I moved my work table under the Electric Chain Hoist and ran a bit of light rope through the Headstock.


20190619-33.jpg 20190619-34.jpg

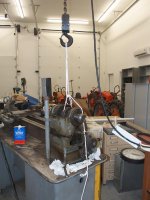
The Electric Chain Hoist nicely lifted the Headstock off the lathe. I positioned it over the table and let it down.


20190619-35.jpg 20190619-36.jpg

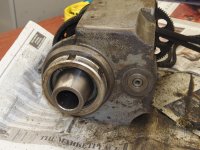
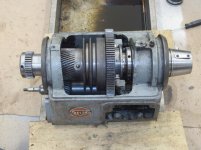
White arrow points to the gear that drives the eccentric shaft. I cleaned that area up some and then it was time to quite for the evening.


Scott
 
Last edited:
OP
S

sbosecker

Well-known member
Joined
Sep 25, 2012
Messages
3,539
Location
Peachtree City, GA
Thursday - June 20, 2019

This morning I went out to the LBG to continue a bit of work on Rockwell Sr. I didn't want to get too involved as my employer had assigned me a "Short Callout" situation. In other words if Delta Airlines called I would need to drop everything, grab my suitcase and head for the airport ASAP.


20190620-01.jpg

So I was going to just try to clean this filthy machine a bit more and not get too involved in anything mechanical. I did some cleaning and then I decided to exercise an exposed set screw. As I leaned on my wrench a bit to persuade the reluctant set screw to brake free I was pleasantly startled that the "frozen" eccentric shaft started moving also.

I had squirted penetrating oil in various places last night so maybe that - and a little torque - did the job. The eccentric shaft now seems to be moving freely.

I had other chores to do today that were a better use of my time due to my "short call" status so I departed the battlefield flush with victory.


20190620-02.jpg

I did grab the Retaining Ring that had suffered permanent structural deformation and headed to the Hardware Store. A 1/2-inch item was obtained for 40 cents and I returned home with it.

I need to get some advice from others who have worked on these machines to see what other housekeeping I should do while I have the Headstock off. Obviously there is a lot of ancient grease & goo that needs to be cleaned up but I'm sure there are unknown unknowns that should be addressed as well.


Scott
 
Last edited:

shortykorte

Well-known member
Joined
Sep 1, 2014
Messages
8,039
Location
Tallahassee, Fl
Ah, the days of maintaining a mobility bag. Probably shows how lazy or attached I am, mine is up in the shop mezzanine, still packed after 27 yrs.
Great job documenting the tear down. Are you going to do some restoration (paint, polish) or is this just maintenance?


Shorty Korte
Always remember quality in QST

Sent from my iPhone using Garage Journal
 
OP
S

sbosecker

Well-known member
Joined
Sep 25, 2012
Messages
3,539
Location
Peachtree City, GA
...Great job documenting the tear down. Are you going to do some restoration (paint, polish) or is this just maintenance?

Shorty Korte
Always remember quality in QST

Shorty Korte,

Thanks for the kinds words! I don't think it's either really... I suppose it's an evaluation to determine the future of the machine. If the Drive Selector - Eccentric Shaft issue can be returned to full operation - and right now I think a 40 cent Retaining Ring and a good cleaning will accomplish that - then I think this machine goes from being a source of parts to a functional lathe. As a functional lathe it will be in a run-off with Rockwell Jr for who gets to stay vs. who gets voted out of the Lone Beech Garage.

While I've got it apart I do want to clean things up but I don't think - at this time - I'm going to do a full-on gleaming clean up of the shiny bits and paint.

Best regards,

Scott
 
OP
S

sbosecker

Well-known member
Joined
Sep 25, 2012
Messages
3,539
Location
Peachtree City, GA
Friday - June 21, 2019


20190621-01.jpg

I know it probably doesn't really look like it but I had worked on cleaning the Headstock for quite a while this morning before I took this picture. What a grimy thing!


20190621-02.jpg 20190621-03.jpg

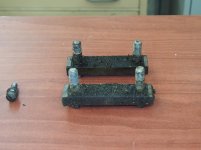
In the last picture in POST 3004 of this thread, the state of the Headstock Hold-downs immediately after they were removed is on full display.

I let them soak in Mineral Spirits for several hours. Even then it took more than one wire-brush scrubbing and re-soaking to get them somewhat clean. A lot of the gunk in & on this lathe is similar to solid tar. It is REALLY reluctant to breakdown and be scrubbed away.


20190621-04.jpg

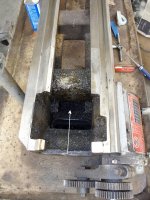
I worked a bit on the ways (where the Headstock had been sitting). That gunk sitting on the crossmember in the foreground is a good inch shorter than it had been. I managed to scrap some of that away after it had some solvent dribbled on it.


20190621-05.jpg

Here too I have worked for a while. It is cleaner than it was but good grief! It still needs a lot of scrubbing.

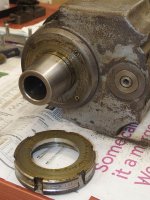
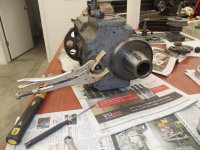
One thing I'm trying to remove for a good cleaning is the "Locking Ring" that is around the Spindle. There is a very large Retaining Ring around the base of the Spindle and I don't have a large enough Snap Ring Pliers to get it out.


20190621-06.jpg

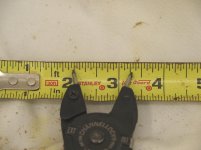
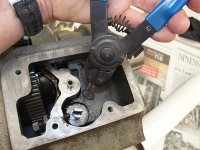
I'll have to see if I can acquire a tool that can deal with that Retaining Ring. The picture is of the Snap Ring Pliers I have at max width - 1-1/4 inches. I'm probably not able to get quite that much spread when I try to remove the large Retaining Ring.


Scott
 
Last edited:
OP
S

sbosecker

Well-known member
Joined
Sep 25, 2012
Messages
3,539
Location
Peachtree City, GA
Saturday - June 22, 2019

Not a lot of shop time today...


20190622-01.jpg

Spent some time brightening Rockwell Sr.'s Tumbler Gears but that was it. I hope to make a lot more headway in the next few days.


I did do quite a bit of searching on the Internet trying to pin down which tool to purchase to remove the large Retaining Ring on the nose-side of the Spindle.

If anyone has thoughts or opinions on this, please share them.


Scott
 
Last edited:

shortykorte

Well-known member
Joined
Sep 1, 2014
Messages
8,039
Location
Tallahassee, Fl
Long nose needle nose pliers. If you don’t have an old pair, check yard sales, flee market or pawn shop so you grind down to fit.


Shorty Korte
Always remember quality in QST

Sent from my iPhone using Garage Journal
 

matt_i

Well-known member
Joined
Mar 14, 2008
Messages
10,753
Location
SE Michigan
If anyone has thoughts or opinions on this, please share them.

Hi Scott, I'm a fan of the Knipex system of snap ring pliers. Not exactly cheap but after acquiring them a snap ring went from a sweaty nervous situation where I usually damaged something to a non-event. There's more info over in the Tools section of this site. They do make a forged and a music-wire version and there's discussion of the differences.

Also, just to glance into the future, with a good set of snap ring pliers one can now use them more readily in their designs, it just takes a lathe tool of the appropriate width, these are available to purchase or hand-grind HSS toolbits.

Key is to attempt to measure the pin holes in the snap ring itself, I suggest using drill bit shanks (if you have a 115pc set) as go/no-go gages to get close enough. Otherwise Mig welding wire (or any craft or other wire for that matter, copper or steel) would be suitable as a gage. Just something you can easily mic or dial-caliper.

In that headstock, think you've found out what my friend likes to refer to as: 50 Year Grease :bounce: Sounds like you're getting closer to picking the lathe which will remain as the workhorse in your shop!
 
Last edited:
OP
S

sbosecker

Well-known member
Joined
Sep 25, 2012
Messages
3,539
Location
Peachtree City, GA
Long nose needle nose pliers. If you don’t have an old pair, check yard sales, flee market or pawn shop so you grind down to fit...


shortykorte,

I did try to remove the retaining ring using this method but it didn't work. Probably need to invest in a proper tool for this one.

Best regards,

Scott
 
OP
S

sbosecker

Well-known member
Joined
Sep 25, 2012
Messages
3,539
Location
Peachtree City, GA
Hi Scott, I'm a fan of the Knipex system of snap ring pliers. Not exactly cheap but after acquiring them a snap ring went from a sweaty nervous situation where I usually damaged something to a non-event. There's more info over in the Tools section of this site. They do make a forged and a music-wire version and there's discussion of the differences.

Also, just to glance into the future, with a good set of snap ring pliers one can now use them more readily in their designs, it just takes a lathe tool of the appropriate width, these are available to purchase or hand-grind HSS toolbits.

Key is to attempt to measure the pin holes in the snap ring itself, I suggest using drill bit shanks (if you have a 115pc set) as go/no-go gages to get close enough. Otherwise Mig welding wire (or any craft or other wire for that matter, copper or steel) would be suitable as a gage. Just something you can easily mic or dial-caliper.

In that headstock, think you've found out what my friend likes to refer to as: 50 Year Grease :bounce: Sounds like you're getting closer to picking the lathe which will remain as the workhorse in your shop!

matt_i,

"...I suggest using drill bit shanks..."

Palm to forehead - of course! I'm a *****. I've been trying to figure out how to measure the holes in the Retaining Ring.

7/64th drill bit is the largest that will fit into the hole.

I'm thinking the Knipex 46 11 A3 would be appropriate but there appears to be a Knipex 46 11 A3 SBA... I'm trying to figure out what the difference is between these tools.

Best regards,

Scott
 

Bob Heine

ALLIANCE MEMBER
Joined
Oct 24, 2009
Messages
10,709
Location
Boca Raton, Florida
Scott, I found the answer here: https://germantoolblog.com/2013/04/...t-number-how-to-decipher-knipex-part-numbers/

"If you’re shopping for Knipex Pliers you have probably seen some part numbers with the suffix of SBA. We get questions about this from time to time and it simply means the tool will come in retail packaging... It also means you will pay $1 extra for the tool. Knipex offers some tools with or without the SBA packaging but many tools are only available one way or the other."

I have only recently invested in Knipex tools. I have to say they really are worth the extra money, especially when you have a really difficult job. My favorite Knipex tool is their 7101200 8-Inch Lever Action Mini-Bolt Cutter. I had to cut up some reinforcing mesh to get it to garbage can size and it was like cutting butter. Spent an hour cutting that stuff up and my hand said thank you for the rest of the day.
 
OP
S

sbosecker

Well-known member
Joined
Sep 25, 2012
Messages
3,539
Location
Peachtree City, GA
Scott, I found the answer here: https://germantoolblog.com/2013/04/...t-number-how-to-decipher-knipex-part-numbers/

"If you’re shopping for Knipex Pliers you have probably seen some part numbers with the suffix of SBA. We get questions about this from time to time and it simply means the tool will come in retail packaging... It also means you will pay $1 extra for the tool. Knipex offers some tools with or without the SBA packaging but many tools are only available one way or the other."

I have only recently invested in Knipex tools. I have to say they really are worth the extra money, especially when you have a really difficult job. My favorite Knipex tool is their 7101200 8-Inch Lever Action Mini-Bolt Cutter. I had to cut up some reinforcing mesh to get it to garbage can size and it was like cutting butter. Spent an hour cutting that stuff up and my hand said thank you for the rest of the day.

Bob,

Thank you for that very useful post. Knipex is underestimating the up-charge for packaging when they indicate $1 more for SBA. HA!

Best regards,

Scott
 

AZpilot

Well-known member
Joined
Sep 29, 2012
Messages
413
Location
Mesa, AZ
Scott,

You have so much space it makes me jealous. You do great work though. With awesome attention to detail. I wish I had the space you do.
f9bf26bbdfa89f6031c14560e3a0b142.jpg


Sent from my iPhone using Tapatalk
 

Attachments

  • f9bf26bbdfa89f6031c14560e3a0b142.jpg
    f9bf26bbdfa89f6031c14560e3a0b142.jpg
    310.2 KB · Views: 4
OP
S

sbosecker

Well-known member
Joined
Sep 25, 2012
Messages
3,539
Location
Peachtree City, GA
Scott,

You have so much space it makes me jealous. You do great work though. With awesome attention to detail. I wish I had the space you do...

AZpilot,

Thanks for stopping by and the very kind words.

Yes the space is a blessing but since I'm an idiot it doesn't seem to matter how much space I have. All of it seems to get used ...and then some. Ha!

Best regards,

Scott
 
OP
S

sbosecker

Well-known member
Joined
Sep 25, 2012
Messages
3,539
Location
Peachtree City, GA
Wednesday - June 26, 2019


A tool arrived in today's mail.


20190626-01.jpg

Knipex 4611A3 Retaining Ring Pliers...


20190626-02.jpg 20190626-03.jpg

...which made short work of the Spindle Nose Nut's Retaining Ring. It is always amazing how the correct tool can solve a problem with a machine.


20190626-04.jpg

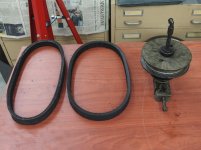
Last night I located the correct V-Belt part number for the V-Belts in Rockwell Sr. While I have the Headstock off it is a good time to replace these belts. Since they are going to be replaced the old ones can be terminated with extreme prejudice.


20190626-05.jpg 20190626-06.jpg

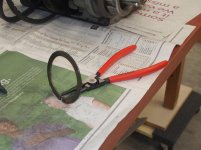
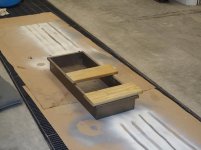
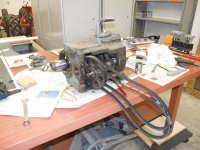
I had this large heavy gauge metal tray available and I decided to put it to work in cleaning up Rockwell Sr.


20190626-07.jpg

A few cans of Brake Cleaner later, the Headstock is starting to look more like a precision machine than a grease trap.

After using all that Brake Cleaner inside the LBG this evening I'm seeing a bunch of paisley unicorns running around Rockwell Sr. I think I'll quit for the night.


Scott
 
Last edited:
To avoid these ads, REGISTER NOW!

drivesitfar

Well-known member
Joined
Oct 23, 2013
Messages
36,076
Location
Pacific Northwest
SB: isn't it great to have the right tool for the right job? speaking of that I hope you have bought a good hazardous chemical breathing mask cause all these chemicals we breath while cleaning up our stuff isn't in any way shape or form good for us to breath. take care and stay safe!!
 
OP
S

sbosecker

Well-known member
Joined
Sep 25, 2012
Messages
3,539
Location
Peachtree City, GA
Thursday - June 27, 2019


This morning I took one of the two no-longer-infinite-but-bounded V-Belts and laid it out on the floor.


20190627-01.jpg 20190627-02.jpg

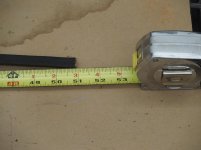
The tape measured what I was expecting and I put in an order for a couple of AX49 V-Belts. They should be here soon.


This evening I decided to see if my recent efforts had fixed the problems with the Drive Selector and the Eccentric Shaft.


20190627-03.jpg 20190627-04.jpg

The Drive Selector Shaft/Gear assembly was inserted into position and held in place with a length of wood. White arrow points to the shaft oriented for Direct Drive.


20190627-05.jpg 20190627-06.jpg

The 1/2" snap ring was installed on the Drive Selector Shaft.


20190627-07.jpg

The Drive Selector was installed back on the Headstock.

I then exercised the Drive Selector, rotating it through all its positions. It seems to work!

Video of the test may be found HERE.


More to do but things are looking up.


Scott
 
OP
S

sbosecker

Well-known member
Joined
Sep 25, 2012
Messages
3,539
Location
Peachtree City, GA
Friday - June 28, 2019


20190628-01.jpg

A couple of Gates AX49 V-Belts arrived today a bit over 24 hours since I ordered them. What an age we live in...


20190628-02.jpg

I had noticed a few greasy places still existed inside the Headstock. I dosed those areas with some more brake cleaner.


20190628-03.jpg 20190628-04.jpg

This is the Safety Lockout Assembly. It is designed to prevent the operator from using the Drive Selector when the motor is running and damaging the innards of the machine. After I had cleaned it the Retainer Pad (round item) fell out of its "holder". The Retainer Pad can rub against the pulleys - and the wear from doing that shows in the second picture.

I'm trying to determine the best way to reattach the Retainer Pad to its "holder". Any thoughts on what adhesive would be best - or any other advice would be welcome.


20190628-05.jpg

I was fishing around down in what appears to be similar to the La Brea Tar Pits (white arrow) trying to clean some of this gunk out. Among some wonderful filth I found...


20190628-06.jpg

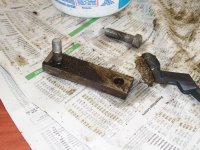
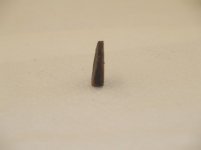
A piece of ground 5/16" tool steel. When I pulled it out of the darkness I thought it was a piece of wood. I did not realize it was metal until I cleaned it up. Profiles are ground on each end of this item.

According to the Internet, the LXX stamped on the side indicates it is T1 High Speed Steel made by Allegheny Ludlum Steel Corp. If I ever get this lathe spinning I may have to see what kind of chips this tool will make.


Scott
 
Last edited:
OP
S

sbosecker

Well-known member
Joined
Sep 25, 2012
Messages
3,539
Location
Peachtree City, GA
SB: isn't it great to have the right tool for the right job? speaking of that I hope you have bought a good hazardous chemical breathing mask cause all these chemicals we breath while cleaning up our stuff isn't in any way shape or form good for us to breath. take care and stay safe!!

DrivesItFar,

I had missed your post until just now. I wasn't wearing a mask but I did put on a full face shield. I didn't put on my particulate mask as I didn't think it would do anything regarding the chemicals. I should do as you advise and get something appropriate.

...I will miss the paisley unicorns though.


Best regards,

Scott
 
Last edited:
OP
S

sbosecker

Well-known member
Joined
Sep 25, 2012
Messages
3,539
Location
Peachtree City, GA
Saturday - June 29, 2019


Well today let's see if we can get those two new V-Belts installed in Rockwell Sr. It is not the most straightforward process.

Per the manual...


20190629-01.jpg 20190629-02.jpg 20190629-03.jpg

Remove the shoulder bushing.


20190629-04.jpg

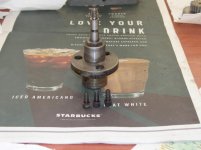
Remove the Spindle Nut. It should be noted that there is a small brass plug under the set screw that is removed. The manual suggests using caution so that the plug is not lost.


20190629-05.jpg

Remove the Gear.


20190629-06.jpg

Remove the Spacer.


20190629-07.jpg

Remove 4 screws from Bearing Housing.


Continue in next post...
 
Last edited:
OP
S

sbosecker

Well-known member
Joined
Sep 25, 2012
Messages
3,539
Location
Peachtree City, GA
Continued...


20190629-11.jpg 20190629-12.jpg

Two 3/8-16 bolts are inserted into existing threaded holes to assist in removing the Bearing Housing.


20190629-13.jpg

Remove a bolt from the bottom of the Headstock that secures a "Bearing". That's what the manual calls it; a Bearing. Looks like a Bushing to me.


20190629-14.jpg 20190629-15.jpg 20190629-16.jpg

Remove the "Bearing". This was probably the most challenging part of this procedure. The Bearing wasn't that interested in moving. I used a large Brass Punch and a hammer to drive the Bearing out a bit. Then, since the Brass Punch was too large to use past this point, I used a smaller steel punch and a hammer. Once I could get a purchase on the Bearing with a Vise-Grip, I grabbed the Bearing and pulled it out. That was a bit of a fight but it did come out.


20190629-17.jpg

I'm not really sure what is accomplished by this but the manual indicates that the set screw in this collar needs to be loosened.


Continued in next post...
 
Last edited:
OP
S

sbosecker

Well-known member
Joined
Sep 25, 2012
Messages
3,539
Location
Peachtree City, GA
Continued...

20190629-21.jpg

Now the manual says, "Slide the shaft as far to the right as necessary..."
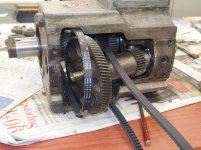
There's a bit of trick to that as there is a gear on the right end of the shaft (not visible in this picture) that seems to interfere with the Headstock. This interference occurs just as the end of the shaft on the left is almost clear enough to allow the V-Belts to be installed. Almost but not quite. However after moving things around a bit, the gear on the right does enter the hole in the Headstock and there is now enough clearance - barely - to install the new V-Belts.


20190629-22.jpg

A V-Belt is inserted through the hole where the Spindle Bearing Housing was.


20190629-23.jpg

That V-Belt is pulled all the way into the Headstock.


20190629-24.jpg

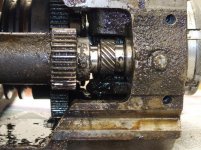
Pulling the V-Belt past the Back Gears...


20190629-25.jpg

As they say in France: Voila!


Scott
 
Last edited:
OP
S

sbosecker

Well-known member
Joined
Sep 25, 2012
Messages
3,539
Location
Peachtree City, GA
Thursday - July 4, 2019


I've been flying the past few days but today I was able to get out to the shop with my son.


20190704-01.jpg

We positioned his 2008 Pontiac Vibe (Toyota Matrix Clone) over the Tornado Shelter. The Serpentine Belt on this vehicle has been periodically squealing and today we would replace it.

Placing the Vibe over the Tornado Shelter allowed access from above and below. An advantageous situation for this procedure. A breaker bar with a 19mm socket was applied to the Belt Tensioner and rotated allowing the belt to go a bit slack.

The old belt was removed and the new one was installed. As expected, both two sets of hands and access from top and bottom helped expedite completion of the installation.

My son entered the car and started the engine. Quite unexpectedly the new belt screamed like a banshee. My son shut the engine off and we both examined our work ...it all seemed to be in order.

Started the car again and the new belt was still making quite a bit of noise. Shut down the engine and went to the house to do some research on the internet. I was wondering if we had gotten the correct serpentine belt to replace the old one.

A bit of research confirmed that the belt was correct fitment for the Vibe. Now the following query was entered into the Google search engine: "Noise after serpentine belt replacement."

One of the possible causes revealed by this query was insufficient tension. My son and I returned to the LBG and the Breaker Bar was repositioned on the Belt Tensioner. A bit of torque was applied and the tensioner moved in the direction that would tighten the Serpentine Belt - something the tensioner should have done on its own.

My son started the Vibe. The belt was dead quiet. Cool.

...still I suspect we have treated the symptom but not the disease. My guess is that the Belt Tensioner is failing and it won't be long until it fails completely.

A proactive solution would be to replace the Belt Tensioner soon.


Scott
 

BajaScout

Well-known member
Joined
May 1, 2011
Messages
4,608
Location
San Diego, CA
Thursday - July 4, 2019


I've been flying the past few days but today I was able to get out to the shop with my son.


20190704-01.jpg

We positioned his 2008 Pontiac Vibe (Toyota Matrix Clone) over the Tornado Shelter. The Serpentine Belt on this vehicle has been periodically squealing and today we would replace it.

Placing the Vibe over the Tornado Shelter allowed access from above and below. An advantageous situation for this procedure. A breaker bar with a 19mm socket was applied to the Belt Tensioner and rotated allowing the belt to go a bit slack.

The old belt was removed and the new one was installed. As expected, both two sets of hands and access from top and bottom helped expedite completion of the installation.

My son entered the car and started the engine. Quite unexpectedly the new belt screamed like a banshee. My son shut the engine off and we both examined our work ...it all seemed to be in order.

Started the car again and the new belt was still making quite a bit of noise. Shut down the engine and went to the house to do some research on the internet. I was wondering if we had gotten the correct serpentine belt to replace the old one.

A bit of research confirmed that the belt was correct fitment for the Vibe. Now the following query was entered into the Google search engine: "Noise after serpentine belt replacement."

One of the possible causes revealed by this query was insufficient tension. My son and I returned to the LBG and the Breaker Bar was repositioned on the Belt Tensioner. A bit of torque was applied and the tensioner moved in the direction that would tighten the Serpentine Belt - something the tensioner should have done on its own.

My son started the Vibe. The belt was dead quiet. Cool.

...still I suspect we have treated the symptom but not the disease. My guess is that the Belt Tensioner is failing and it won't be long until it fails completely.

A proactive solution would be to replace the Belt Tensioner soon.


Scott


If you are going through the hassle of replacing a timing belt or chain, replacing the tensioner is good practice.


Sent from my iPhone using The Garage Journal mobile app
 
OP
S

sbosecker

Well-known member
Joined
Sep 25, 2012
Messages
3,539
Location
Peachtree City, GA
Absolutely.

We just bought a silver '09 Vibe for our son at college.

If you are going through the hassle of replacing a timing belt or chain, replacing the tensioner is good practice.

DynoDave & BajaScout,

He's had the car for a little over a year. It has served him well so far.

Just ordered a replacement Belt Tensioner.

When I checked out a couple of YouTube videos I was a bit startled to find that the bolt that fastens the Belt Tensioner to the engine cannot be removed without unbolting the passenger side motor mount and jacking up the engine an inch or so. If the engine isn't moved, the bolt can be unscrewed some but then runs into a structural member before it can be removed.

NICE...

Sure enough, when I checked the OEM Service Manual, the procedure dictates moving the engine. This seemed to catch the YouTubers by surprise so it's nice to have that bit of information in hand prior to starting the Belt Tensioner replacement.


Best regards,

Scott
 
Last edited:
OP
S

sbosecker

Well-known member
Joined
Sep 25, 2012
Messages
3,539
Location
Peachtree City, GA
Friday - July 5, 2019


I was sitting in my house the afternoon, reading a bit of information on the Rockwell Metal Lathe I'm working on, when the phone rang. It was my wife...

She was at the local Walmart and, having finished her shopping, she had returned to our 2013 Toyota Highlander and it wouldn't start. She was now standing out on the sinking hot asphalt parking lot melting in the Georgia July afternoon sun.

So much for working on the lathe today.

I assumed the battery had failed and grabbed a few metric wrenches from the LBG before driving over to Walmart. I assumed I'd be buying a new battery from Mr. Walton's family shortly.

I arrived and turned the key. Instrument lights illuminated but the starter just gave a single, faint click.

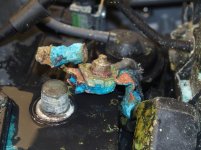
I opened the hood and I could see some blue corrosion visible under the plastic Positive Battery Terminal Cover. I pulled the cover out of the way and saw not only the corrosion but that the Positive Battery Terminal had broken.

The Highlander was parked next to a Cart Corral. The battery was on the side next to the Corral. I couldn't get close enough to the Highlander with my pickup to jump the Highlander with my Jumper Cables.

I used the one of the Jumper Cable Clamps to clamp the broken terminal to the Battery post. My wife turned the key and the Highlander started.


20190705-01.jpg

My wife drove the Highlander home and into the LBG.


20190705-02.jpg 20190705-03.jpg

I needed to get the old Positive Battery Terminal removed to see what I needed to order to fix this problem. It wasn't that easy to get the damaged piece removed as the Flange Nut was "electro-chemically welded" to the threaded post. I used a Crescent Wrench to hold the damaged part and was finally able to get enough torque applied to remove the nut.

The good news: Looks like I only need a new Positive Battery Terminal. I should have that delivered on Monday.

The bad news: I didn't get anything accomplished on the Rockwell Lathe today.


Scott
 
Last edited:

gilr

Well-known member
Joined
Jul 26, 2008
Messages
300
Location
Richmond, VA
Scott,

Just my .02, but I would buy a new positive battery cable as opposed to just replacing the terminal. In my experience, the replacement terminal will fail soon enough due to residual corrosion left in the old cable, leaving you know who stranded again....

Gil
 

DynoDave

Well-known member
Joined
Mar 25, 2005
Messages
1,685
Location
Michigan
Sure enough, when I checked the OEM Service Manual, the procedure dictates moving the engine. This seemed to catch the YouTubers by surprise so it's nice to have that bit of information in hand prior to starting the Belt Tensioner replacement.

Good to know. :beer:
 
OP
S

sbosecker

Well-known member
Joined
Sep 25, 2012
Messages
3,539
Location
Peachtree City, GA
Scott,

Just my .02, but I would buy a new positive battery cable as opposed to just replacing the terminal. In my experience, the replacement terminal will fail soon enough due to residual corrosion left in the old cable, leaving you know who stranded again....

Gil

Gil,

I will look into this - thanks for the heads up!

...although the spouse gives me no bonus points for failures that are prevented. Hmmm...

Ha!
Best regards,

Scott
 

shortykorte

Well-known member
Joined
Sep 1, 2014
Messages
8,039
Location
Tallahassee, Fl
Scott,

Just my .02, but I would buy a new positive battery cable as opposed to just replacing the terminal. In my experience, the replacement terminal will fail soon enough due to residual corrosion left in the old cable, leaving you know who stranded again....

Gil


I concur. Recently I was having starting issues. Replace battery terminal, still problems. Cutting back cable I was amazed at how far up the sheathing the corrosion and oxidation had gone. New cable, check.


Shorty Korte
Always remember quality in QST

Sent from my iPhone using Garage Journal
 
OP
S

sbosecker

Well-known member
Joined
Sep 25, 2012
Messages
3,539
Location
Peachtree City, GA
I concur. Recently I was having starting issues. Replace battery terminal, still problems. Cutting back cable I was amazed at how far up the sheathing the corrosion and oxidation had gone. New cable, check.
Shorty Korte
Always remember quality in QST


shortykorte,

I've been trying to track down the part number for the Positive Terminal Battery Cable for a 2013 Toyota Highlander. Online this has been a royal pain. The parts pages on the Toyota websites I have accessed so far are categorized & compartmentalized. So on the page that shows the battery and associated stuff (hold-downs, etc.) the end of that world is the Positive Battery Terminal. I did eventually find a page that has "Wires" but they are all listed in isolation and at resolutions that defy enlargement to a size that might reveal the individual parts identity.

I shall endeavor to persevere.

Best regards,

Scott
 
To avoid these ads, REGISTER NOW!
Top Bottom