To avoid these ads, REGISTER NOW!

Above 1200 Sq/FT Ford garage - 40X60X20

Wokspaces above 1200 squarefeet.

sean Buick 76

Well-known member
Joined
May 7, 2013
Messages
3,221
Location
Edmonton Alberta
Engineering company said to totally clean the incorrectly poured footing, put concrete adhesive on, dry properly then pour remaining concrete to proper thickness.

We went a step further and drilled/epoxied in bent rebar every foot so that we had new rebar all the way the length of the mistake with additional rebar tied in cross wise. Wasn't necessary (as per engineering company) but they said it wouldn't hurt so we did it.

Smart move!!!
 
To avoid these ads, REGISTER NOW!
OP
V

vrinner

Well-known member
Joined
Aug 29, 2006
Messages
1,078
Location
Placentia, CA
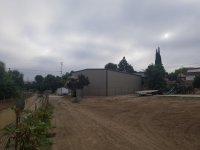
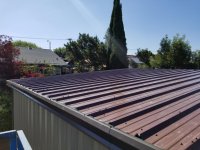
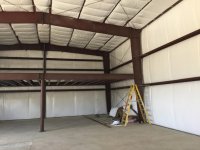
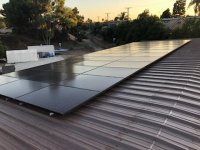
Building and roof complete.
Solar is currently being installed and still need to get the roll up doors.
 

Attachments

  • 20190702_071336.jpg
    20190702_071336.jpg
    108.6 KB · Views: 286
  • 20190702_092830 1.jpg
    20190702_092830 1.jpg
    151.7 KB · Views: 289
  • 20190703_184508.jpg
    20190703_184508.jpg
    148.3 KB · Views: 306
  • Inside.jpg
    Inside.jpg
    120.6 KB · Views: 355

don long

Well-known member
Joined
Mar 31, 2012
Messages
8,856
Location
southern california
Good morning vrinner
I just ran across your build thread and read through it.
Congrats. on getting your building up.
I,m kind of a mustang guy with 3 mach 1s one is a green one like your old one
that I'm working on with my grandson for his sixteenth birthday.

I was my own contractor when I built my steel building and it is a process going through the hoops with the city.

I'll be following along to see what goes on in your big box

Don
 
OP
V

vrinner

Well-known member
Joined
Aug 29, 2006
Messages
1,078
Location
Placentia, CA
Good morning vrinner
...
I,m kind of a mustang guy with 3 mach 1s one is a green one like your old one
that I'm working on with my grandson for his sixteenth birthday.

I was my own contractor when I built my steel building and it is a process going through the hoops with the city.

I'll be following along to see what goes on in your big box

Don

What a great project for you and your grandson.

This build has certainly been a learning experience. Hope to get to start moving things in soon.

Also...your garage...wow! Something to inspire all of us.
 
OP
V

vrinner

Well-known member
Joined
Aug 29, 2006
Messages
1,078
Location
Placentia, CA
Did the floor sealing/waxing last weekend. Not supper happy with the finish but at least it's sealed properly and has some shine to it.

We power washed and scrubbed with a broom to get all the dirt out. I didn't bother trying to get rid of any tire marks or other blemishes from construction.

Used the HD40. 1st coat took a long time and really soaked in. Took almost 3 gallons. Applied 3 more coats (4 coats total) that took remainder of the 5 gallon container, burnished, Cherry wax (2 coats), burnished.

Was hoping it would look smoother but I guess the finishing that the concrete guys did wasn't as smooth as I'd hoped. Oh well...good enough for me though.
 

Attachments

  • 20190727_144515.jpg
    20190727_144515.jpg
    124.4 KB · Views: 309
  • 20190727_144534 1.jpg
    20190727_144534 1.jpg
    128.4 KB · Views: 336
OP
V

vrinner

Well-known member
Joined
Aug 29, 2006
Messages
1,078
Location
Placentia, CA
So planning out the mezzanine. 1-1/8" T&G @ $43.90 each is more than double the cost of 3/4" T&G @ $18.34 each. I need 25 for the 20X40 mezzanine so thats $1100 vs $500.

I'm also going to run the 4X8 sheets lengthwise like the picture. The floor joist things are 2' apart. I'm going to use the Simpson Strong-Drive TB Wood-to-steel screws.

I'm guessing it's well worth the extra cost to go with the 1-1/8". Thoughts?
 

Attachments

  • Subfloor Layout_V2.jpg
    Subfloor Layout_V2.jpg
    120 KB · Views: 155

meathooker

Well-known member
Joined
Dec 10, 2013
Messages
254
Location
Iowa
So planning out the mezzanine. 1-1/8" T&G @ $43.90 each is more than double the cost of 3/4" T&G @ $18.34 each. I need 25 for the 20X40 mezzanine so thats $1100 vs $500.

I'm also going to run the 4X8 sheets lengthwise like the picture. The floor joist things are 2' apart. I'm going to use the Simpson Strong-Drive TB Wood-to-steel screws.

I'm guessing it's well worth the extra cost to go with the 1-1/8". Thoughts?

Just did my house with 1,125” and tgi spaced at 19.2”. My FIL house is .875” with 24” spacing. While mine is stiffer I’m not sure it’s worth it. Especially for a loft

When I do my loft I’ll do .75” or .875”
 

TurboMustang370

Well-known member
Joined
Jan 17, 2010
Messages
289
Location
Central, New Jersey
I know it is not an apples-to-apples comparison, but I built a 20'x20' clean room in my pole barn using wood framing. The joists, I used 2"x12"x20', 16" OC and floor is 23/32" (3/4) sheathing plywood (not T&G).
I use it for seasonal storage and car parts storage, no issues walking around up there.
I would check with your lumber supplier to see which they would recommend with the 24" OC spacing.

And I have no idea why GJ made the word storage into an advertisement link
 
OP
V

vrinner

Well-known member
Joined
Aug 29, 2006
Messages
1,078
Location
Placentia, CA
Got my solar installed, signed off and am now producing power. It's 36 LG Neon 2 panels for a total of 11.52kWp. Plenty for what I'm using between the house and now garage. Going to run a few months to see how we actually do compared to our bills but I've planned it to be able to put at least a mini-split into the mezzanine area once sealed up.

Last month my average daily usage was 48.79kWh and my system is producing about 65kWh average for the last couple of weeks so I'm sure I'll be fine with the net metering.

Now I'm starting to rough in my electrical.
 

Attachments

  • 20190902_152320.jpg
    20190902_152320.jpg
    96.8 KB · Views: 184
  • IMG_9780_1566339970441.jpg
    IMG_9780_1566339970441.jpg
    31.3 KB · Views: 178
  • IMG_9784_1566339971264 1.jpg
    IMG_9784_1566339971264 1.jpg
    12.8 KB · Views: 175
OP
V

vrinner

Well-known member
Joined
Aug 29, 2006
Messages
1,078
Location
Placentia, CA
So in running my electrical I wanted 2 120 circuits going along the long and short wall and alternated each box on those two breakers.

I ran two separate 12/2 MC cables the entire length, wired them all up and they worked.

Being proud of my handy work I told my next door neighbor who is a contractor and he said, good job, but...you could have run a single 12/3 cable.

Oh well...live and learn.
 

Attachments

  • 20190902_152332.jpg
    20190902_152332.jpg
    124.1 KB · Views: 190
OP
V

vrinner

Well-known member
Joined
Aug 29, 2006
Messages
1,078
Location
Placentia, CA
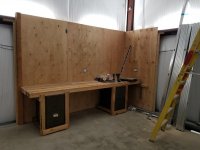
For various reasons I’ve had a rather large pile of trash sitting outside my new garage for a while. So I decided to put some of the wood that came with the building when it was delivered to good use.

A **** load of big wood that I figure I could make my first workbench out of. Put some vintage steel cabinets in the bottom. It’s rock solid.


Next I’ll break out the hand planer and get the top more level. Only cost me a box of screws.
 

Attachments

  • 20191005_212533.jpg
    20191005_212533.jpg
    136.8 KB · Views: 187
  • 20191005_212522.jpg
    20191005_212522.jpg
    115.5 KB · Views: 174
  • 20191005_112557.jpg
    20191005_112557.jpg
    154.7 KB · Views: 167

Bruce 993 SEA

Well-known member
Joined
Oct 22, 2016
Messages
1,033
Location
La Conner, WA
you could have run a single 12/3 cable.

I had to look this one up...yes you could have and saved maybe 20% in wire cost. But the circuits would have to be on a tandem breaker to pick up both legs of the 220V service, one for each 110V circuit. That way the neutral is alternating so the load on it is OK.

What you did was simple and little chance of confusing someone down the line.

Your shop is looking great!
 
OP
V

vrinner

Well-known member
Joined
Aug 29, 2006
Messages
1,078
Location
Placentia, CA
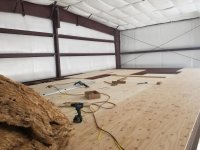
Getting the flooring of the mezzanine screwed in.

1- 1/8" T&G is heavy. Getting it up there without stairs took three of us.
 

Attachments

  • 20191021_201733.jpg
    20191021_201733.jpg
    132 KB · Views: 174
To avoid these ads, REGISTER NOW!
OP
V

vrinner

Well-known member
Joined
Aug 29, 2006
Messages
1,078
Location
Placentia, CA
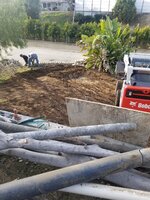
Finally got the concrete driveway put in.

The pad at the front of the garage will be finished off with some of those pavers that you grow grass in between. Something to make it look a "little" less industrial. LOL

20220115_103817.jpg
20220115_125619.jpg
20220115_124359.jpg
 
OP
V

vrinner

Well-known member
Joined
Aug 29, 2006
Messages
1,078
Location
Placentia, CA
That's going to be alot of water running down that driveway when it rains.
Concrete looks good.
Do you know my neighbor? LOL.

There is drainage at the top of my property that already puts most all of the water into a v-ditch drain. Then towards the bottom, it is all angled to go into a drain that goes into the same v-ditch drainage. But yeah...I get it.
 
OP
V

vrinner

Well-known member
Joined
Aug 29, 2006
Messages
1,078
Location
Placentia, CA
Now that I can finally get some projects up and down to my garage, I have started working on some long overdue projects.

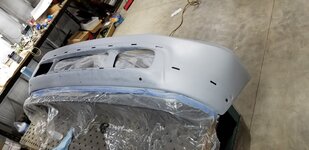
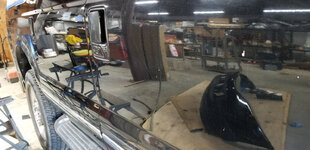
Started with the Ex...time for some minor cleanup. The front bumper has had some corosion at the corners, I think it's from the batteries at some point in it's life maybe. Pulled the pumper off, sanded and painted and clear coat with sine 2K clear. Gotta wait a couple days to wet sand and buff. Hopefully turns out good as I have already started prepping one of the rear quarters for the same treatment adding in some spot blender.20220130_141237.jpg
20220130_141248.jpg
20220130_201008.jpg
 
OP
V

vrinner

Well-known member
Joined
Aug 29, 2006
Messages
1,078
Location
Placentia, CA
Before paint

BumperBefore.jpg

After paint
AfterPaint.jpg
Polished door vs non polished. Now time to do the entire truck I guess. I'm gonna need a bigger buffer. LOL
PolishedDoor.jpg
 
OP
V

vrinner

Well-known member
Joined
Aug 29, 2006
Messages
1,078
Location
Placentia, CA
So...when I first build my shop, I have a friend that also had a Bendpak in-ground scissor lift. I was originally going full on and was going to get the lift put in however circumstances delayed that decision that then lead into me thinking do I really want to spend all that money to put in a lift that I would probably rarely use at this point. Temporarily I have it filled in with just a bunch of lumber so I can easily drive stuff over it.

1665426467950.png

Then comes this weekend I went over to said buddy's place to work on my project car and we had the car up on the lift...man was it nice working that way! Unfortunately those lifts seem to have really gone up in price since when I first was looking at them (should have gotten it pre-divorce...LOL). I may end up just going with a 4 post lift to cut costs. Anyone have pro/cons with scissor lift vs 4 post? I can just build something permanent over the existing cut-out if I go the 4 post route. I don't really want a two post lift.


1665426606998.png
 

Paul_VR6

Well-known member
Joined
Dec 27, 2012
Messages
301
Location
Oxford, Pa USA
One of my favorite things about the 4 post is not having to go on the ground. Drive on, lift it up, position bridge jack, jack car, get to work. Bonus on the 4 post is parking under if you are space limited. That was a big thing for me, and I'm still cramped! You don't seem to have that issue.
Downsides I have found on the 4 post are getting a cherry picker in you need to have that positioned just right from the front and takes more space than I have to do it easily. Also fwd transmission removal is a bit cramped with the ramps in the way, but workable if the car is high enough. Rwd would be just fine. Suspension work is cake.
Edit, I forgot I posted a review thread of my lift, may be helpful https://www.garagejournal.com/forum/threads/atlas-8000-ext-4-post-lift-adventure.471197/
 
Last edited:
OP
V

vrinner

Well-known member
Joined
Aug 29, 2006
Messages
1,078
Location
Placentia, CA
Been working on a couple of glass project commissions. Making projects for people that have a lot of meaning behind them is a very important part of how I work. I enjoy making projects that are specific to my clients and have a meaning and story behind them and love to learn the story so that I can put my energy and those thoughts into the piece as I make them. Tell me about the people, the animals (I get a lot of those), the reasons why you want the piece made. It's kind of quirky but it does help me through some of these tougher projects like these.

TJ's urn
This is an urn for TJ, was 27, he was so funny, positive and encouraging to everyone he met. He was always for the under dog, he came home lots of times with no jacket or shoes because a homeless person needed them more. He would do anything for anyone, even if it wasn't good for him. He loved family, dogs, ocean, astronomy, video games, lights and always dressed very nice when leaving home.

1666114395833.png


Air Force suncatchers
These suncatchers were made for a small community of military spouses at Cannon AFB in Clovis, NM whose active duty service members are part of the Air Force 27th SOW. ( special operations wing). The image in the center is the base’s emblem with the New Mexico Zia symbol. They are farewell gifts as they are getting reassigned to their next base. After this client received the pieces, she sent me back a challenge coin.


1666114717799.png

Stained glass Window (in progress)
University of Alabama and Georgia flag in progress. My client sold his house and wanted to gift this glass piece for a window for the new owners.

1666114575841.png 1666114594831.png


Memorial Suncatcher
This one is super simple but the client had a very (ok...very very) limited budget to work with and wanted a piece of stained glass of the last picture her sister took with her husband. She was retired and loved to travel and hike with her husband. She had a strong Catholic faith, was an avid volunteer, was one of 8 kids from a large, loving family and loved nature.

1666115534590.png
 
OP
V

vrinner

Well-known member
Joined
Aug 29, 2006
Messages
1,078
Location
Placentia, CA
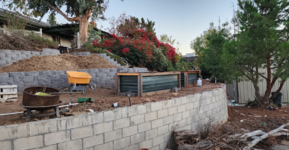
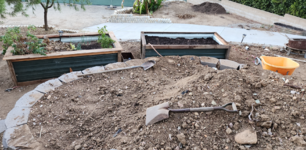
Continued to work on future garden stuff. Just about went through my pile of scrap wood and left over metal siding and got a second planter built. The only "new" items in the latest box are the screws. I was hoping that the planter box would require more of the dirt on that second tier but looks like I'll have plenty to build more planters or move that dirt somewhere else on the property. Shoveling dirt a scoop at a time really *****.

1667846017093.png

1667846250422.png
 
OP
V

vrinner

Well-known member
Joined
Aug 29, 2006
Messages
1,078
Location
Placentia, CA
Kind of ***** when your brain doesn't work right.

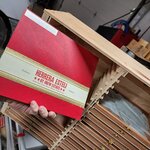
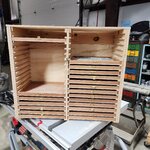
I picked up a bunch of cigar boxes to make some thin easy storage for smaller pieces of scrap glass, they take up a lot less room this way I figured.
The ***** part is I drew out my plans, counted the number of boxes and lids (I used the tops and the bottoms for shelves) and still ended up building it twice as big as I needed. On my paper I wrote down 19 boxes and figure I'd keep one extra box as a spare so I based it off of 18 boxes. So ended up I only had 10 boxes. I could have sworn I had 19, looked through all the other boxes I got and nada. Oh well...maybe it's time to take up cigar smoking to fill this cabinet.


20221120_182956.jpg
20221120_182946.jpg
 
OP
V

vrinner

Well-known member
Joined
Aug 29, 2006
Messages
1,078
Location
Placentia, CA
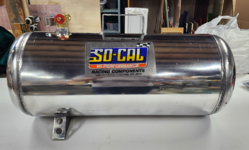
I had this aluminum tank laying around for years after I dropped it off the trailer and broke the manifold. I've been trying to get more organized and figured I'd fix it and polish it up. Now I gotta figure out what to do with it.

Before
1673393567766.png
After
1673393584163.png
1673393749923.png
 
OP
V

vrinner

Well-known member
Joined
Aug 29, 2006
Messages
1,078
Location
Placentia, CA
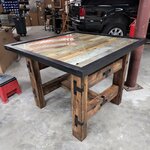
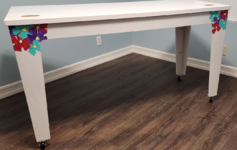
My girlfriend wanted an art table built (she does acrylic and water color painting mostly). I had a few old desk tops left over just laying around so I figure this would be a good project for me to get back into a bit of wood working and use my new table saw more. Wanted to do something other than just straight 2X4 legs so I made it from some 1X6 and made a little jig to rip at an angle. She of course had to put some artist flare into the finishing touches.
1674494902490.png
1674494937663.png
 
OP
V

vrinner

Well-known member
Joined
Aug 29, 2006
Messages
1,078
Location
Placentia, CA
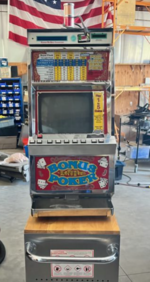
My gardener (and long time friend) picked up a couple of old slot machines and wanted me to check them out to see if I can get them working again. Sure...why not. The first one is a Bally's machine that I have started tearing apart. The second is a video poker machine...that one is next.

1675355451536.png

1675355479990.png

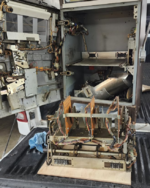
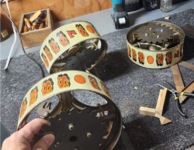
Got it opened up and pulled the wheels out as they were all gummed up and one of them spun fine but the other two were slow to spin.
1675355616851.png1675355688825.png

So now I can get the arm to "almost" pull but it gets stuck. When the arm is pulled all that cylinder looking thing moves to the right and those black arms on the lower right rotate up. That one gear with the arrow just needs a nudge and then it fires off and the wheels spin. I'm thinking I just need to do some adjusting maybe to that spring tension part.

1675355856886.png
 
To avoid these ads, REGISTER NOW!
Top Bottom