To avoid these ads, REGISTER NOW!

Between 265 & 485 SQ/FT Nick's Two-Car Detached Vdub Garage

Workspaces sized between 265 and 485 squarefeet.
OP
N

nicholam77

Well-known member
Joined
Dec 18, 2016
Messages
2,671
Location
Minneapolis, MN
Looks like you had a good weekend Nick. Sometimes it feels almost as good to get rid of stuff as it does acquiring stuff.

Bret

Absolutely it does :)

---------------------------------------------------

Somehow another week has already passed, so I guess it's time for another small update.

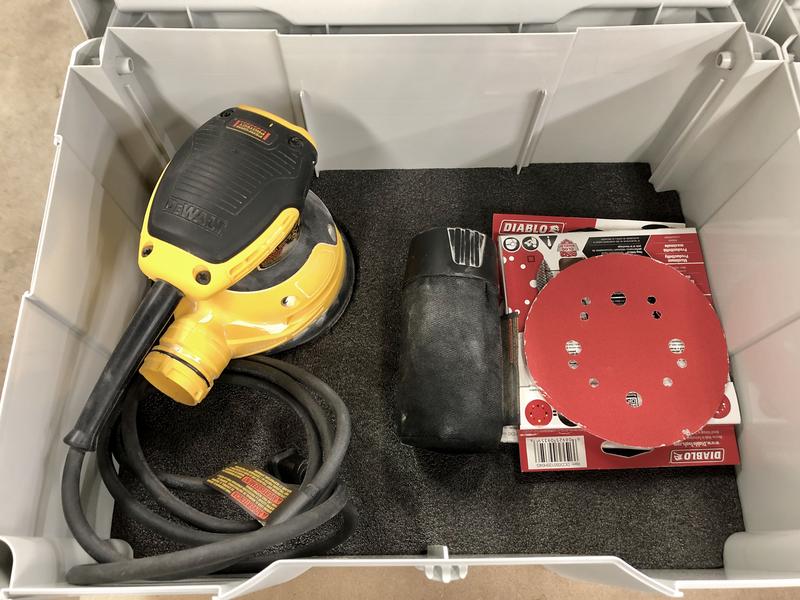
I attempted to do Kaizen foam Systainer inserts for my sander and plate joiner. I say attempted, because it did not really meet my expectations. The Kaizen foam is a lot harder to peel and pluck than I imagined. I had even watched some YouTube videos ahead of time, and still struggled with it ripping a bit.

Nevertheless, the tools are held in place, so that's what really matters.
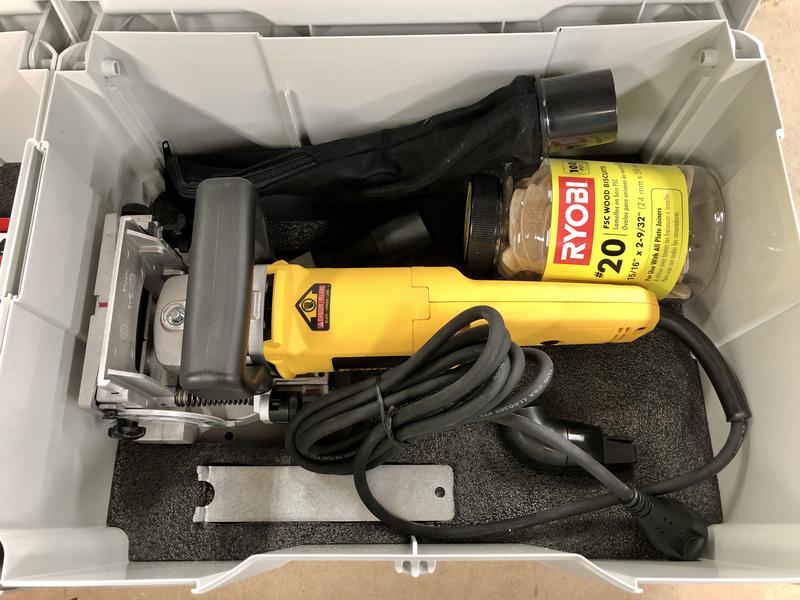
252E6B8E-B422-4256-B4CE-2D76D888E1F2.jpg


4FB55FF0-9B50-43A1-A219-5D30B24E925E.jpg


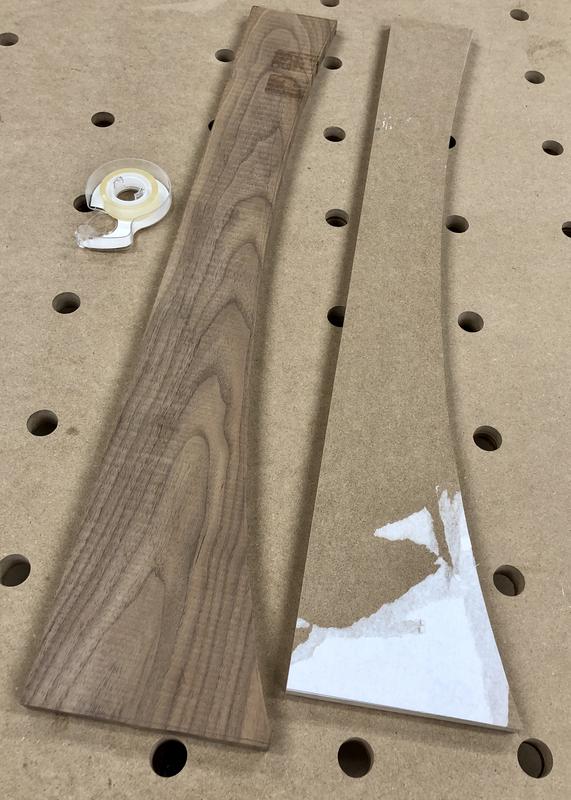
During nap time on Saturday I quickly cut the shelf for my vanity. Still going to fix the front drawer... just skipping around a bit here, as I tend to do. I had a walnut board from Rockler and had previously made an MDF template, so I just needed to make the walnut match the template.

I started by trimming the ends with the tracksaw. I had measured from the actual floating cabinets and the crosscuts needed to be slightly out of square for a perfect fit.
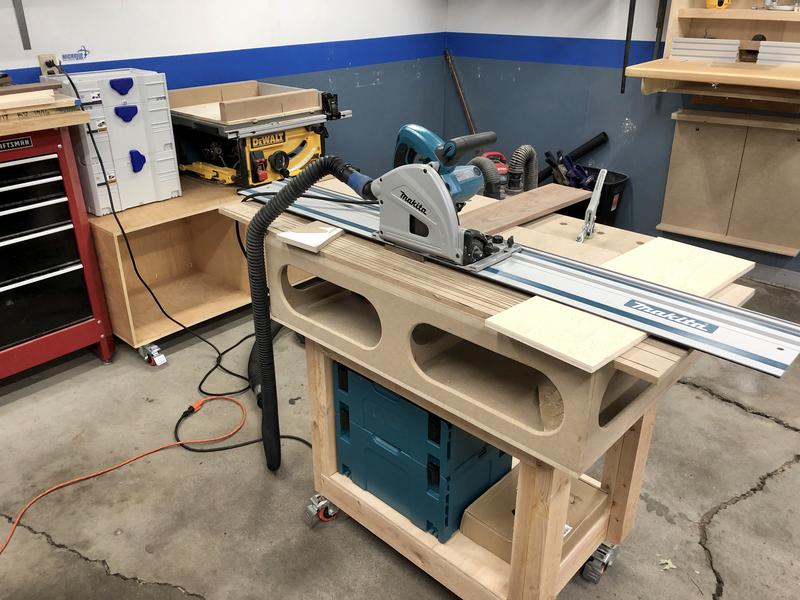
8C55E370-F9DA-4EEF-9030-7719C62E09CC.jpg


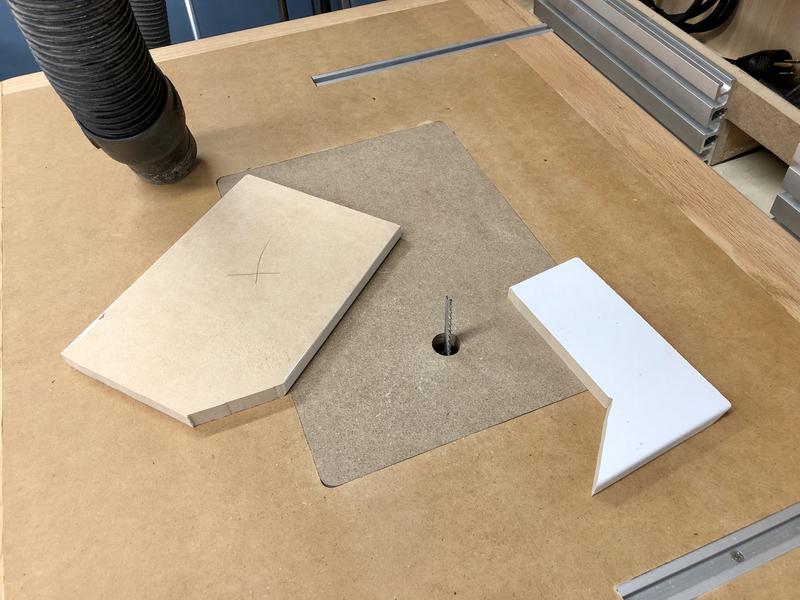
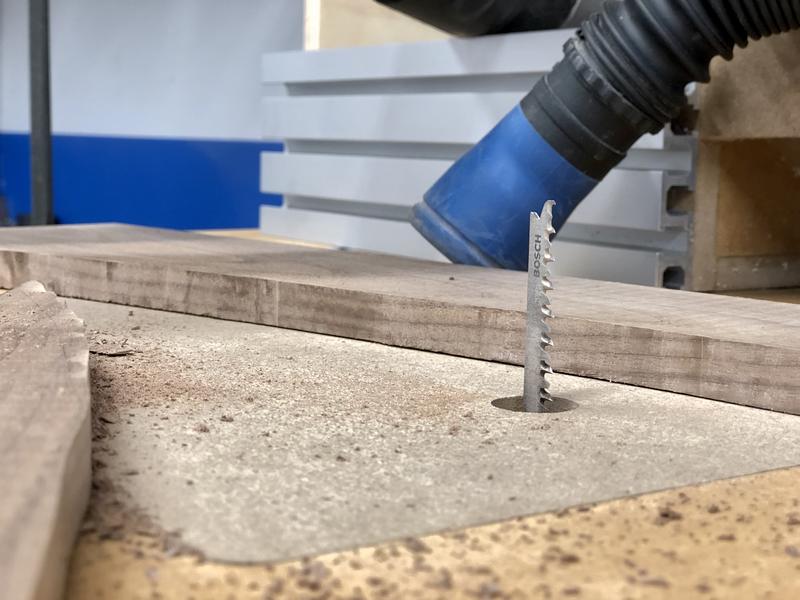
Next I used the inverted jigsaw to cut slightly outside my template line:
06162B2B-9D0E-4C7E-8A4D-D95A3D18834C.jpg


139423EA-D08F-4184-BA2D-1DCECDF8BEDA.jpg


Then stick them together with some double-sided tape:
803A998D-B261-4679-AD04-03F1B08506B2.jpg


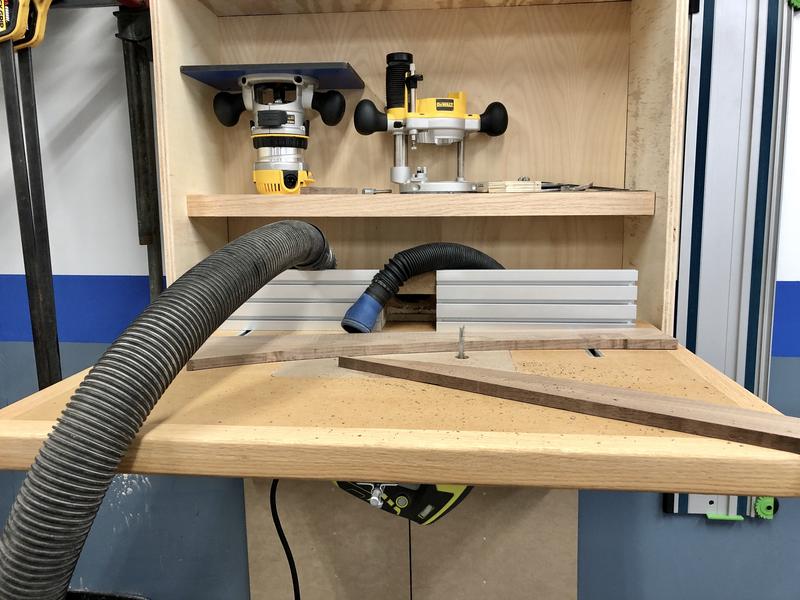
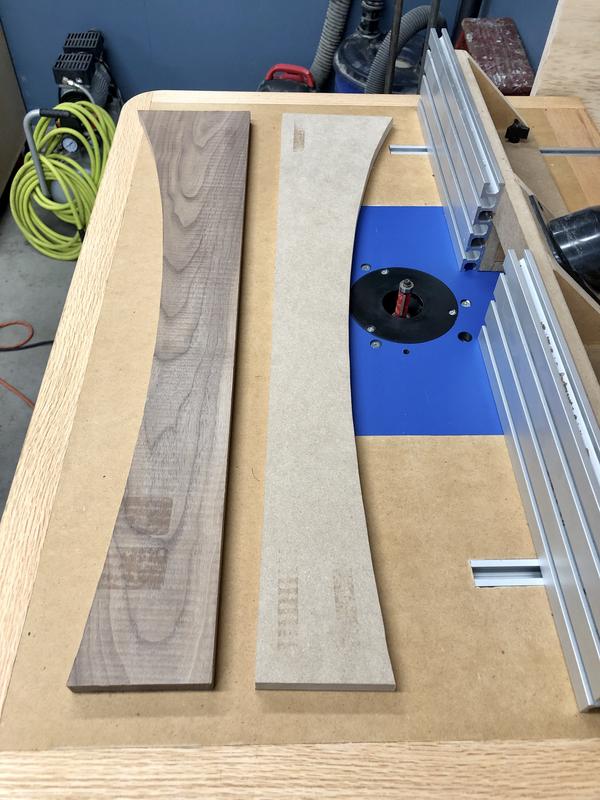
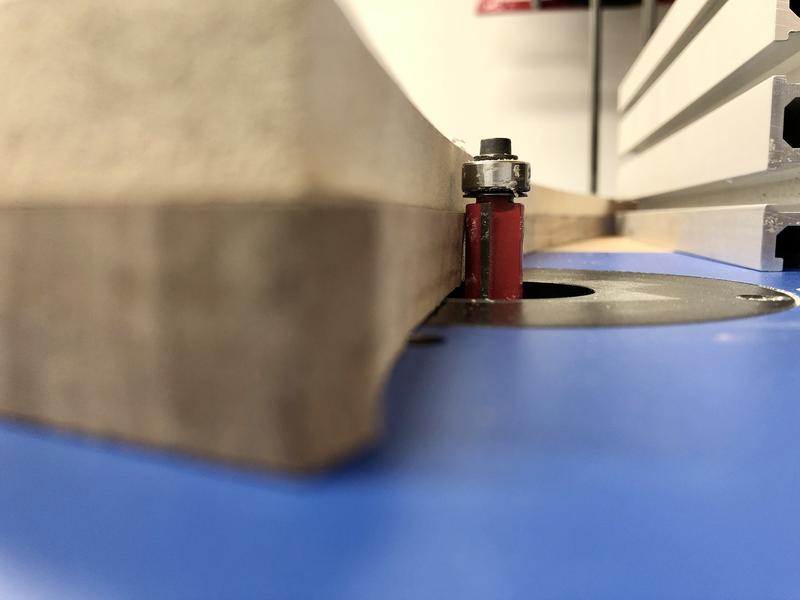
With the walnut board sized just slightly larger than the template at this point, I am ready to flush trim on the router table.
0A78A7DD-7110-4254-B091-3E3E1911A5FB.jpg


And now I have a perfect copy:

E97B2B55-04D4-4D3E-A2B5-B43CE707DA51.jpg


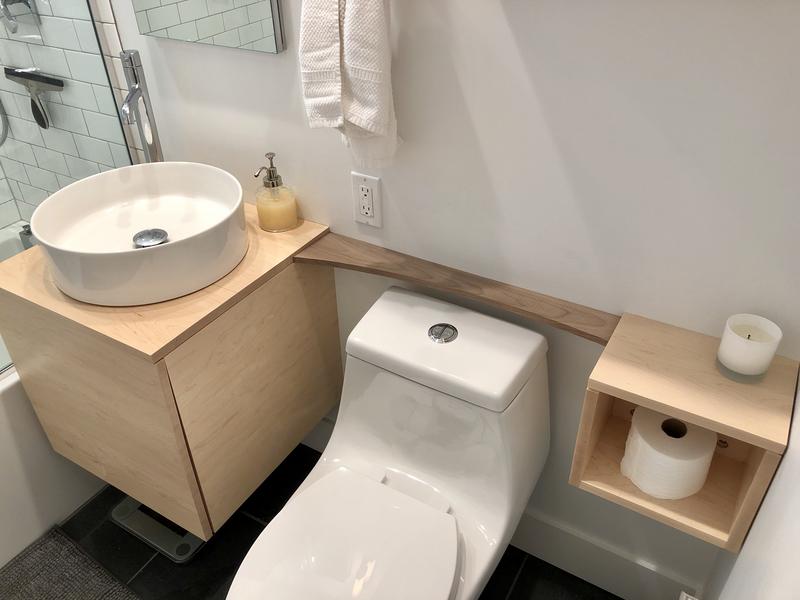
I gave it a slight hit with the orbital sander to get the tape residue off and clean up the grain, and set it in place.
660871D5-01EF-4345-AEC2-504C51D8E688.jpg


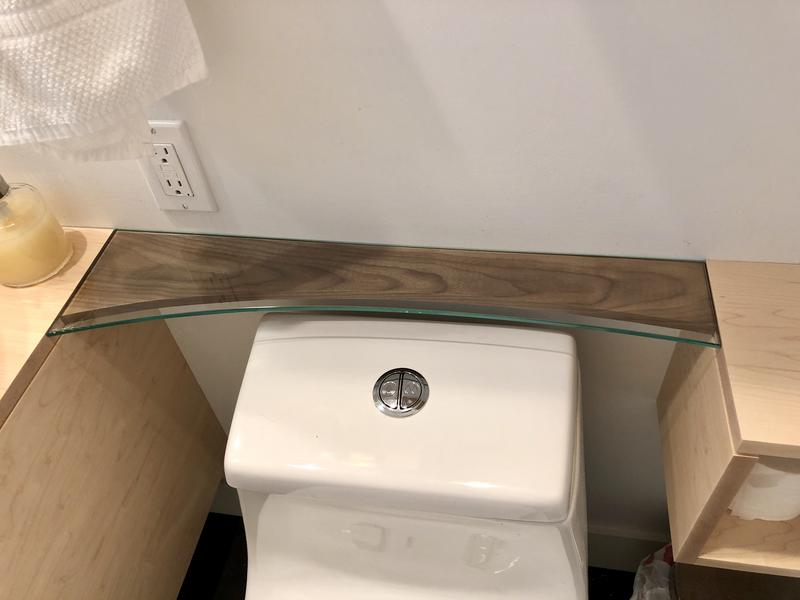
It will sit 1/4" recessed, with a 1/4" piece of glass sitting on top, following the same contour but extended about an inch and a half so there is a transparent glass lip. I'm hoping it will turn out like I have in my mind.

I'm still figuring out how to attach to the cabinets. For sure a cleat on the wall in the middle. Was either going to do some cleats for it to rest on attached to each cabinet, or attempt to use biscuits. Any suggestions welcome. And in terms of wood expansion and contraction, what's best here? Allow it to float so it can move? I am a bit worried it might do something like the drawer front (twist, warp, shrink) if not fastened down well, but I don't want it to crack, either.

Sunday was a dark and rainy day here, and for once I did nothing. Nothing at all. During my daugher's nap, I also took a nap. :thumbup: I think that's the first time I've done that since she's been born. I'm always trying to make use of every second since there is so little time available and I want things to move forward, and I don't like being idle. But it felt really good.

We lit up a fire in the evening since the temps dropped a bit. Winter is around the corner, I can feel it.
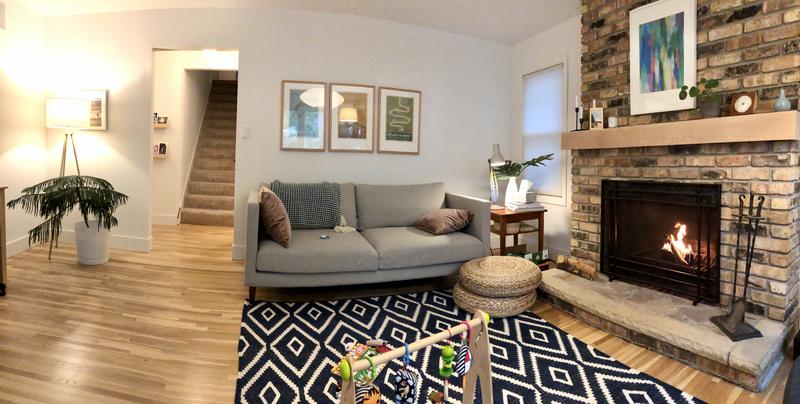

1733B485-F9F0-4819-9BE2-F5595249A78A.jpg


957B42B3-A2E9-4C2D-8D53-25EA342DDAF6.jpg


I think I'm going to get some glass doors for the fireplace to help seal it off in the winter.

:beer:
 
Last edited:
To avoid these ads, REGISTER NOW!
OP
N

nicholam77

Well-known member
Joined
Dec 18, 2016
Messages
2,671
Location
Minneapolis, MN
Lol, what?!? This 39" Makita Guide Rail I had been planning on picking up somehow dropped to only $13.19 on Amazon today with Prime shipping.

Screen-Shot-2019-10-04-at-11-58-26-AM.png


:spit:

I bought it instantly. Normally it's $80, and a few weeks ago it dropped to $50, and I had been wavering back on forth on whether to grab it at the lower price even though I don't need it immediately. But for $14, hell yeah! We'll see if they actually ship it to me or what.

Intention is to use it with a future MFT cart build, slightly shorter rail for crosscuts.
 
OP
N

nicholam77

Well-known member
Joined
Dec 18, 2016
Messages
2,671
Location
Minneapolis, MN
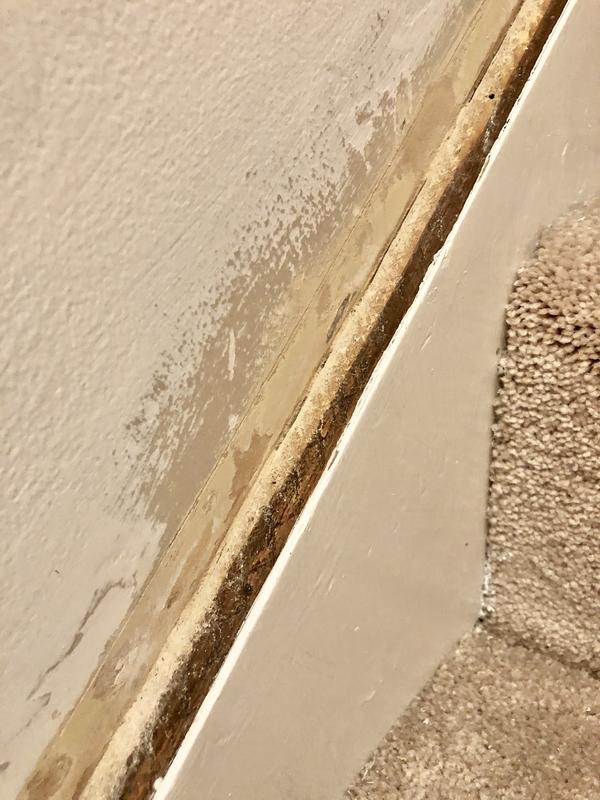
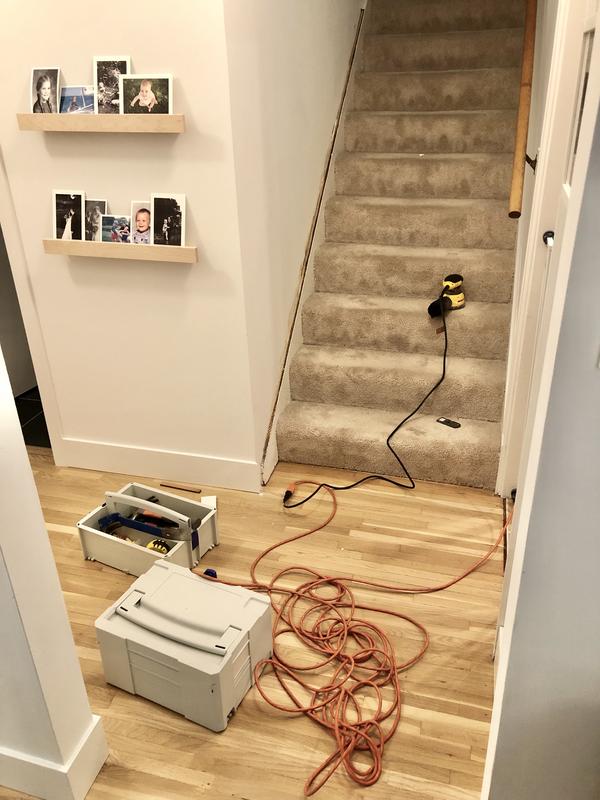
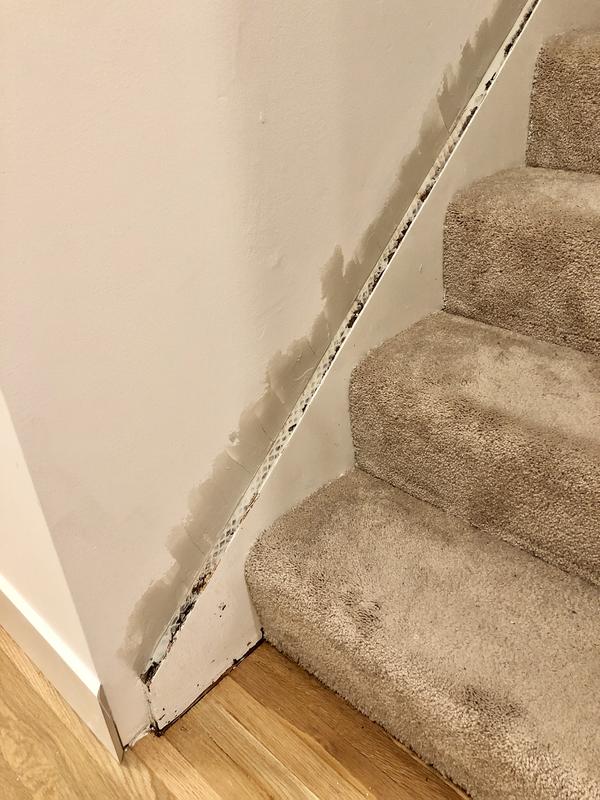
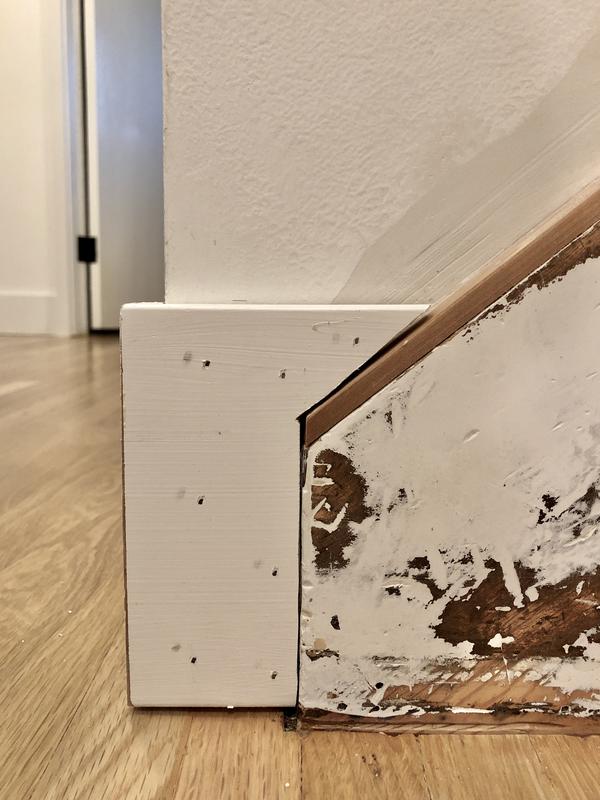
Not a ton done this weekend, but continued working on the staircase baseboard corner, which has morphed into more work because of me wanting to remove the quarter-round from the wall string. I popped more of it off:

E5EFCD92-396D-4660-A910-F31CE7171063.jpg


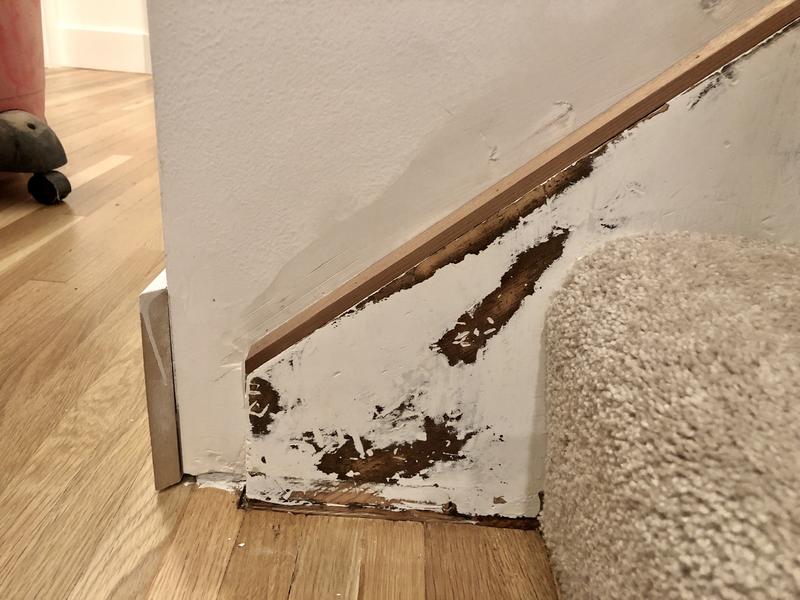
The wall string is some sort of veneered particle board **** (of course it is!), and despite being as careful as possible my prybar chipped it in a few areas, and the quarter round took some of the veneer with it. So it can't be painted as-is. Also, the wall is wallpapered underneath the paint and removing the quarter-round left an uneven surface at the base of the wall.

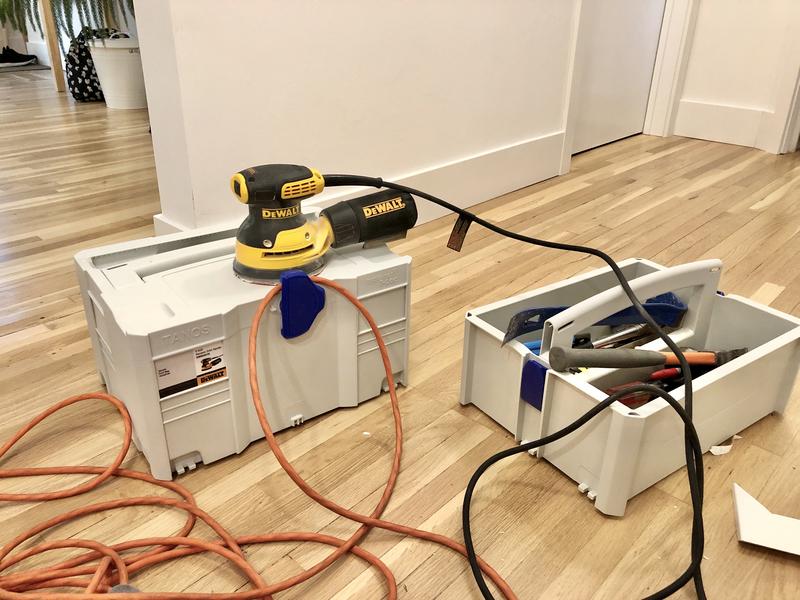
To combat this I sanded the wall at the base with the RO sander to get it as smooth as possible:

6E41AB19-611C-494E-8830-1B48B65DE1B3.jpg


Obligatory Systainer shot, helping me keep my tools contained :)

A70517B5-D15A-40F8-8819-0E6DB7B34E76.jpg


Then skim coated with some joint compound.

9AA0F361-B373-4E07-B396-219C99BAE035.jpg


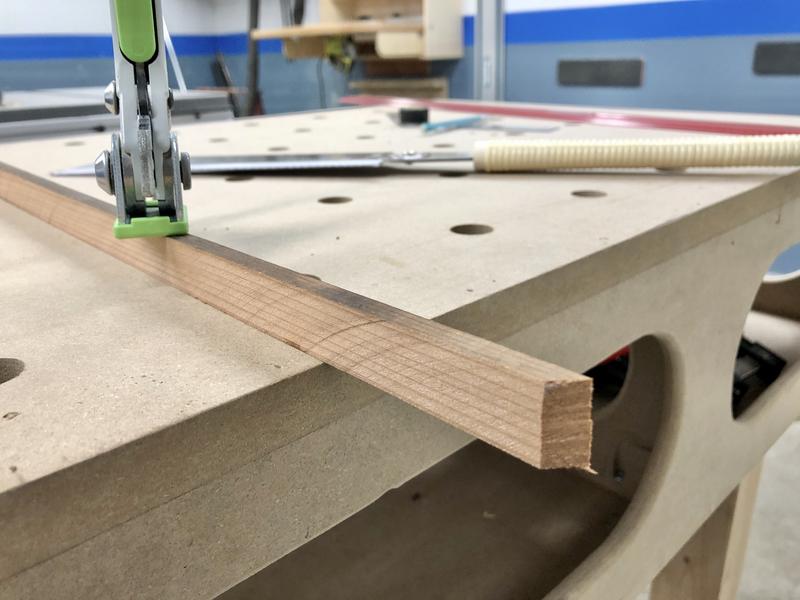
To fix the top edge of the wall string I decided to cap it with some 1/4" thick x 3/4" wide wood. I didn't have time to go to the store and our small cars don't transport long materials very well anyways, so I grabbed an old board in my garage rafters. No idea what kind of wood it is, but I ripped it down on the table saw to the above dimensions in 8' lengths.

Cut the bevel / miter at the end where it meets the vertical at the bottom of the staircase with a flush cut saw.

07AE960E-2F03-4755-B989-9BA02AB8B2FC.jpg


Lastly, I cut an odd-shaped piece of MDF baseboard that is what completes the wrap around the bathroom wall corner:

458666C2-9C57-4908-8A67-5FB481F8AAE4.jpg


It's a little goofy but my plan is to tack the wood strip on top of the wall string, flush it up with the RO sander, place this weird looking part at the bottom, and then caulk to hide any oddities and paint the whole thing.

It's my daughter's 1st birthday next Saturday and I'd like this wrapped up before we have family over :willy_nil

I have to say, I have not missed doing this finicky sort of trim work!
 
OP
N

nicholam77

Well-known member
Joined
Dec 18, 2016
Messages
2,671
Location
Minneapolis, MN
Nice work. As a side note, I can't get over how good your wood floors turned out. They seem to be holding up well.

Thanks! I'm surprised by how they turned out, too :bounce:

Makes you wonder who thought dark-stained parquet was more attractive than white oak, but styles and trends change I guess.

If you look closely, the boards are far from perfect. I did a lot of damage removing the parquet so there are quite a few spots with filler. Not too noticeable unless you're looking for it, though. And being 80 yrs old, original to the house, they have some gaps and whatnot, and some creaky areas. In the hallway (the Systainers are conveniently covering it in the above photo) there is a seam where a former wall was. That's my biggest pet peeve. But yeah, overall really happy with them. The bundles are much more varied in color and lightness than the new stuff I've had put in the house, which I like.
 

isonic

Well-known member
Joined
Aug 1, 2018
Messages
213
Location
Ham Lake, MN
Thanks! I'm surprised by how they turned out, too :bounce:

Makes you wonder who thought dark-stained parquet was more attractive than white oak, but styles and trends change I guess.

If you look closely, the boards are far from perfect. I did a lot of damage removing the parquet so there are quite a few spots with filler. Not too noticeable unless you're looking for it, though. And being 80 yrs old, original to the house, they have some gaps and whatnot, and some creaky areas. In the hallway (the Systainers are conveniently covering it in the above photo) there is a seam where a former wall was. That's my biggest pet peeve. But yeah, overall really happy with them. The bundles are much more varied in color and lightness than the new stuff I've had put in the house, which I like.

All of that sounds like character to me :) I know how you feel though, I also have 80 year old original flooring that looks very similar to yours, just a bit darker. I would love to get mine refinished at some point. Gotta love the creaking in the floors, real great when you get the kiddo asleep and then walk out into the hallway only to have the floors making all kinds of noise! That is how it is at my house anyway!
 
OP
N

nicholam77

Well-known member
Joined
Dec 18, 2016
Messages
2,671
Location
Minneapolis, MN
All of that sounds like character to me :) I know how you feel though, I also have 80 year old original flooring that looks very similar to yours, just a bit darker. I would love to get mine refinished at some point. Gotta love the creaking in the floors, real great when you get the kiddo asleep and then walk out into the hallway only to have the floors making all kinds of noise! That is how it is at my house anyway!

Oh 100%. One of the creaky spots is in our hallway, too, not far from the baby room. Definitely have to tread lightly...

:lol_hitti

The refinishing makes a huge mess, but can really change the look depending on the finish, at least it did for me. The old exposed hardwood areas in our house were a very rich, yellow-y, glossy tone. I far prefer the mostly matte, mostly clear, water-based finish we went with. Much less '70s. :)

I agree with you on the "character". Sometimes things don't have to be perfect. :thumbup:
 
OP
N

nicholam77

Well-known member
Joined
Dec 18, 2016
Messages
2,671
Location
Minneapolis, MN
Thanks to a certain presidential rally occurring right next to my place of work today, I got to work from home! :bounce:


Grandma still wanted to do daycare, so of course I got some things done around the house [emoji106]


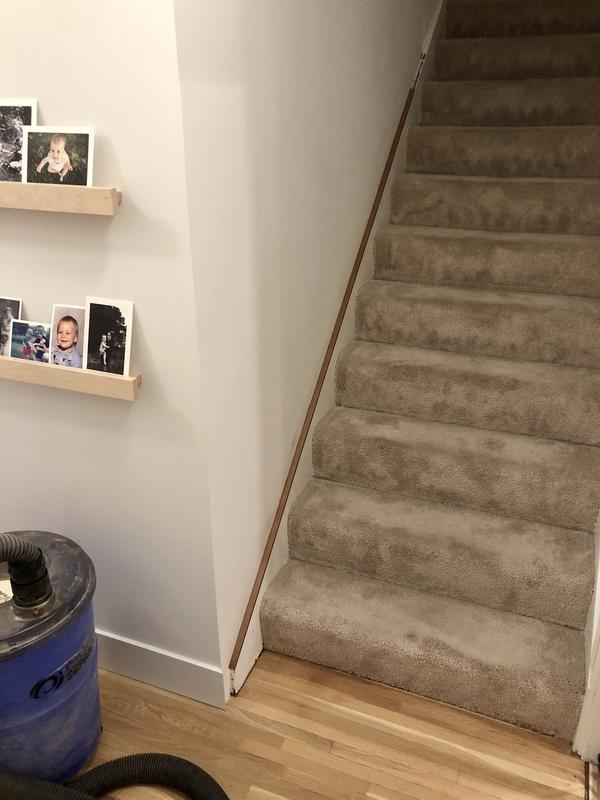
Continuing with the staircase baseboard, I tacked the capping strip onto the wall string.


35282096-8425-43DD-8084-12BD5894EA35.jpg


CB82C65C-660A-4F30-8FF8-DC33CA88C0D8.jpg


It only goes part way up the staircase because that's how long I cut it. It's gonna look crappy and mismatched until I can find time to do the rest of the job.


I hit the edge with the RO sander again all the way up to make sure it was flush. This ended up taking some of the old paint with it.


A3E763FF-BAD1-44B1-A495-F49E60B3AC4B.jpg


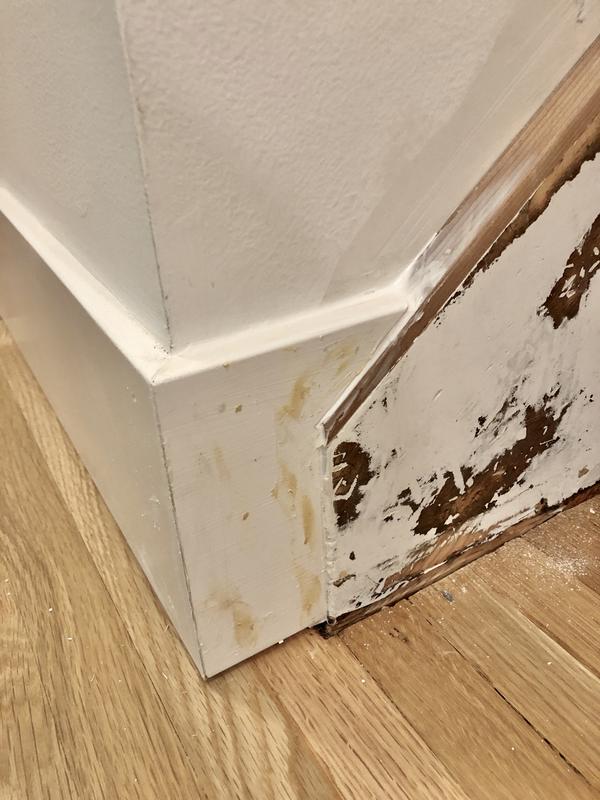
Placed and shimmed the MDF piece.


77561762-87B6-43B9-AD98-5A16ADA8561F.jpg


At this point I was so satisfied with the fit and way it looked I decided to call it a job well done! :spit:


JK! Caulk to the rescue!


331733CF-FFD7-4BC9-8060-AC506B1DF0B5.jpg


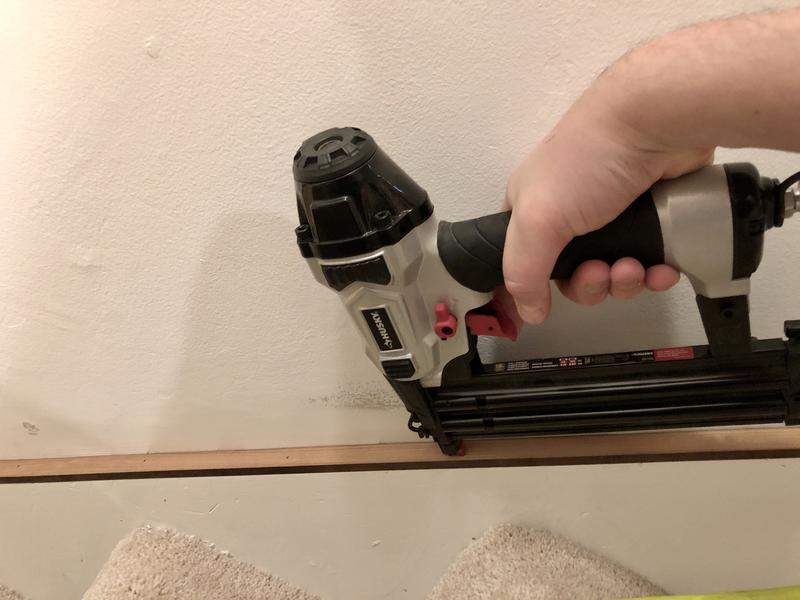
And filled the brad holes as well.


I also got around to priming and painting it, but the sun was down and too dark to take a pic, so I'll post the final result tomorrow.


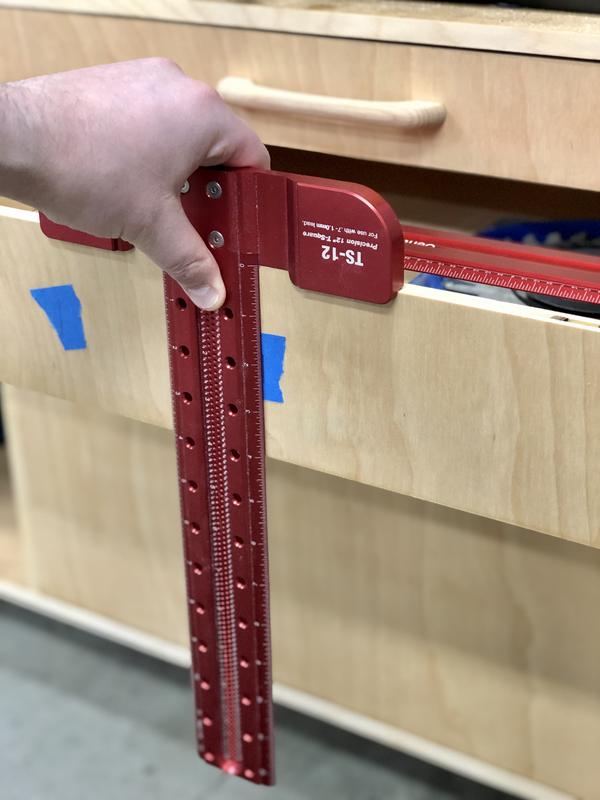
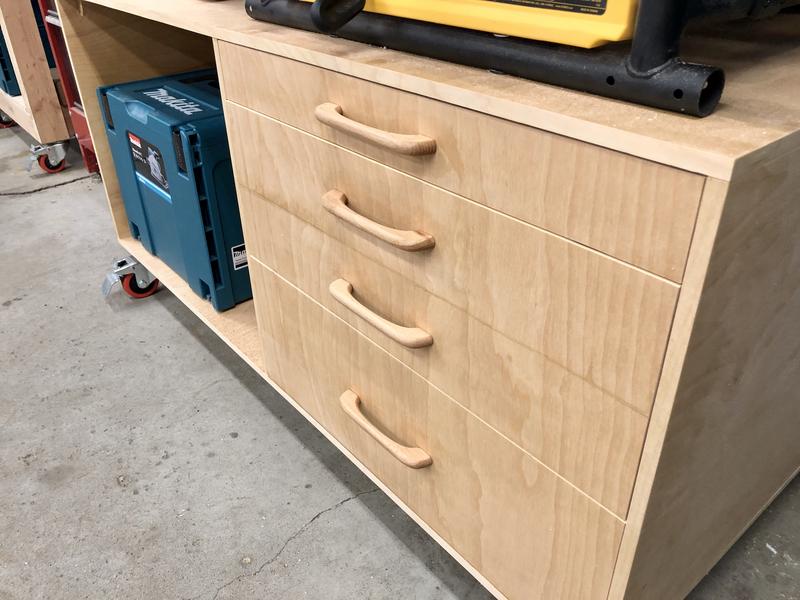
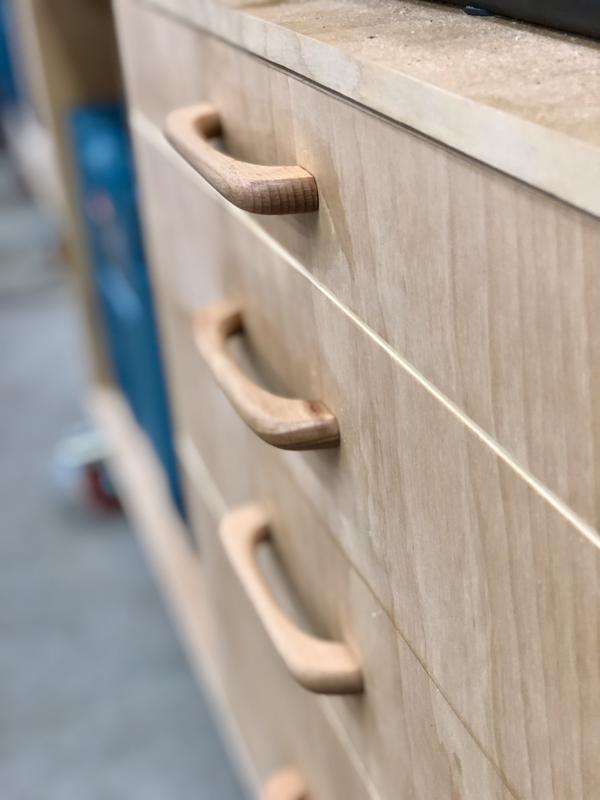
In the garage I attached these wooden drawer pulls I ordered on Amazon. Would have liked to make my own and learn how to do something new, but you know, limited time, baby baby baby, blah blah blah.


58A8F0DA-398A-47B7-937E-58FB37538285.jpg


T-Square and Center Rule made laying out the holes very accurate and easy.


7C6C9321-EF6D-4B39-AA6E-074B138405EC.jpg


0EAFE5D7-852E-434D-84C3-B951F5035A81.jpg


8EAD32CA-7838-4BB5-B9D8-83286207EE7C.jpg


I have to say, for 10 bucks and 20min of my time, I'm pretty happy with them. Wiped some MinWax poly on, same as the drawers.


[emoji481]
 
Last edited:

Matias

Well-known member
Joined
Feb 28, 2015
Messages
616
Location
Finland
Would have liked to make my own and learn how to do something new, but you know, limited time, baby baby baby, blah blah blah.
[emoji481]

This!

Good work on the staircase baseboard, it's always nice to get things checked off the todo list. And the handles seem like they belong there. nice!
 

wasfast

Well-known member
Joined
Apr 10, 2014
Messages
874
Location
San Diego CA
Large gaps with caulk always shrink back once fully dried. For paint grade wood like this, polyester body filler ("Bondo") is great on wood. Cures quickly, doesn't shrink and doesn't soak up paint. Food for thought.
 
OP
N

nicholam77

Well-known member
Joined
Dec 18, 2016
Messages
2,671
Location
Minneapolis, MN
This!

Good work on the staircase baseboard, it's always nice to get things checked off the todo list. And the handles seem like they belong there. nice!

Thanks! Crossing stuff off the list is great!

Large gaps with caulk always shrink back once fully dried. For paint grade wood like this, polyester body filler ("Bondo") is great on wood. Cures quickly, doesn't shrink and doesn't soak up paint. Food for thought.

Great suggestion. Never used Bondo before but interesting idea.

Great job matching up the grain on those drawers!

Thanks! It's just plywood but I figured why not! Still need to adjust the drawer slides a bit as some drawers poke out more than others. If I ever make furniture with inset drawers for the house I'm definitely going to invest in adjustable slides like Blum. Would be so much easier to get good alignment.


-----------------------------------

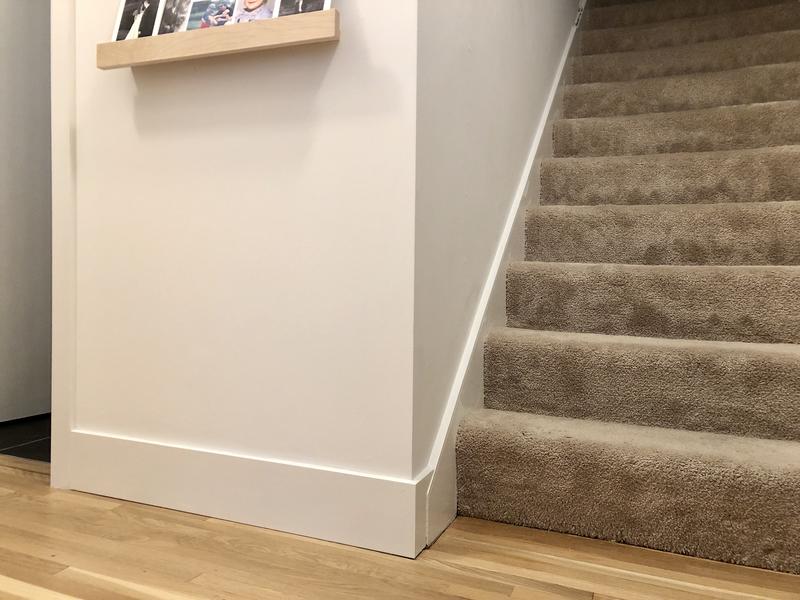
Here's the final result if anyone's curious:

9E10EEAD-0C63-41C3-AEB3-026ABED917C6.jpg


53EC21D7-1530-4615-8DE6-B011DD42D426.jpg


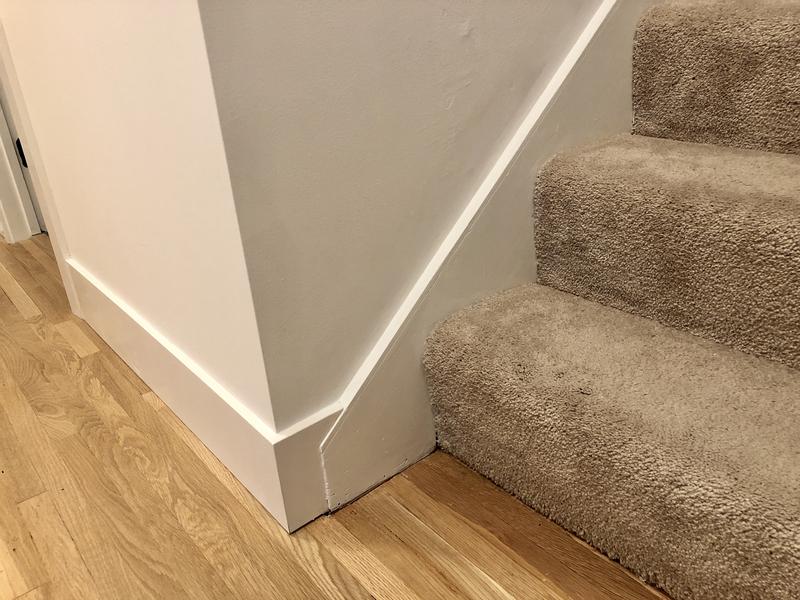
To be honest I'm not that pleased with it... the baseboard being taller than the bottom of the stair wall string is awkward. The corner of that wall was not 90º so I favored a tight miter and it doesn't intersect the staircase completely straight. The bottom of the wall string is beat up and I don't like how it only protrudes a *little*, I think it looks like a mistake. Sometimes I wish I had went with shorter baseboard all around.
 

Deezler

Well-known member
Joined
Nov 1, 2011
Messages
240
Location
Southeast MI
Ha. Let it go, you have more important things to worry about now. It turned it just fine. The reality is that no one who visits your house will ever notice or comment on it. Spend an hour cuddling your family instead of doing it over again. :)
 

dangle

Well-known member
Joined
Mar 7, 2011
Messages
66
Location
MD
Run the baseboard into the stairs and have the stair wall stringer land ontop of it?
 

Odinson

New member
Joined
Jan 30, 2018
Messages
2
Location
St. Louis Park, MN
Ha. Let it go, you have more important things to worry about now. It turned it just fine. The reality is that no one who visits your house will ever notice or comment on it. Spend an hour cuddling your family instead of doing it over again. :)

This!

My dad was a cabinet maker for 30 years and would drive himself mad worrying over little details no one else would notice. It looks good, down the road when projects are low (i'm assuming that happens eventually) you can take the time to correct it
 
OP
N

nicholam77

Well-known member
Joined
Dec 18, 2016
Messages
2,671
Location
Minneapolis, MN
Maybe use a little wood filler putty to smooth out that line where the two pieces meet?

Not a bad idea, thanks!

Ha. Let it go, you have more important things to worry about now. It turned it just fine. The reality is that no one who visits your house will ever notice or comment on it. Spend an hour cuddling your family instead of doing it over again. :)

This!

My dad was a cabinet maker for 30 years and would drive himself mad worrying over little details no one else would notice. It looks good, down the road when projects are low (i'm assuming that happens eventually) you can take the time to correct it


You guys are right. There's no way I was considering redoing it, not even sure what I'd do differently, but thanks for the reality check, anyways. I do often obsess over the details, perhaps too much. It's not so much that I'm worried what other people think (I realize 99.9% of people would never notice or care what my baseboard looks like :) ). It's more of an internal thing. Unfortunately, to me, the little things are important in the overall picture, even if invisible to others. One mediocre component that I'm unhappy with stands out like a sore thumb in my mind, and affects my perception of the whole space. Really at the end of the day the work I'm doing on the house is purely for myself (and my family), not for resale value or anyone who might come over as a guest, so it's to me these details matter the most. But as you said, perspective is important, and I think I should just "let it go" more often. Seems less stressful. :D

On that note, I don't have anything new to report from this weekend. It was my daughter's 1st birthday (in shock how fast a year went :shocking:), and we had family over for presents and cake. It was a good time. No one commented on the baseboard. :spit:
 

sawduststeve

Well-known member
Joined
Oct 7, 2016
Messages
2,139
Location
Havering-Atte-Bower,London/Essex boarders, England
Nick, nice finish to the stairs, :thumbup: its the little jobs that i really find difficult to get motivated for some times, but they have to be done or the list just keeps growing.
I personally would finish the joint between the skirting and the string just as you have, it's two different timbers doing two different jobs, a little step is perfect , even preferable.
As a rule I try not to finish two timbers flush because if there is a little movement it opens a black joint that looks worse than it is, but with a shadow line, it's not so noticeable.

Happy birthday to the little one, wow time flies, our girls first birthday party was in the garage, where else, it was the only room we could fit everybody into. She's ten this weekend. :shocking:

Steve:beer:
 
To avoid these ads, REGISTER NOW!
OP
N

nicholam77

Well-known member
Joined
Dec 18, 2016
Messages
2,671
Location
Minneapolis, MN
Thank you, Steve. Agree on not having the boards flush. I almost wish there was even more of a step in the joint to accentuate that they are two separate pieces coming together, like you said. Great idea to have a birthday party in the garage! It did get a bit cramped in our relatively small house with ~15 people. Never had that many over before. Wow, ten yrs old! Can't even imagine but I'm sure it will be here for us before we know it. Happy birthday to yours and take care,
-Nick
 

Rockcam

Well-known member
Joined
Jan 16, 2010
Messages
256
Location
Grand Rapids
So did you get the $14 track saw guide? Incredible deal. I’m thinking about the Makita as well since heavy into the LXT platform.
 
OP
N

nicholam77

Well-known member
Joined
Dec 18, 2016
Messages
2,671
Location
Minneapolis, MN
So did you get the $14 track saw guide? Incredible deal. I’m thinking about the Makita as well since heavy into the LXT platform.


I did :)

I thought Amazon might email me and say there was a pricing error but once it shipped I knew I was good to go.

The Makita is a great saw. I’m sure I’ve mentioned that before on here haha but it is genuinely one of my favorite tools. I’ve favored DeWalt for some of my bigger tools, but for the track saw I wanted to be on the same track extrusion platform as the Festool / Makita / Triton since most aftermarket accessories are designed around that. The Festool has a few extra tricks up its sleeve like a riving knife if you’re cutting hardwoods and an additional splinter guard, but unless you’re already bought into their system or plan to cut a lot of hardwoods, the Makita seems like the sweet spot to me. My first tool from them but I am impressed.


Sent from my iPhone using Garage Journal App
 
OP
N

nicholam77

Well-known member
Joined
Dec 18, 2016
Messages
2,671
Location
Minneapolis, MN
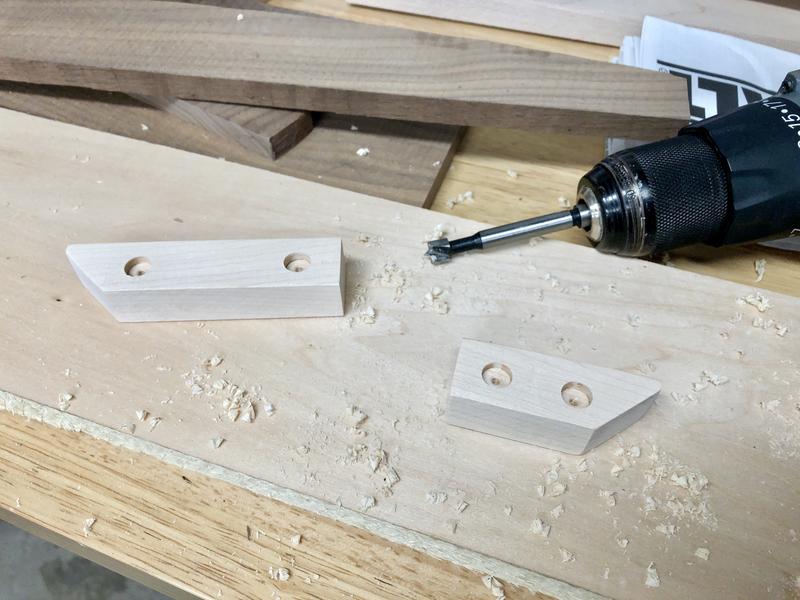
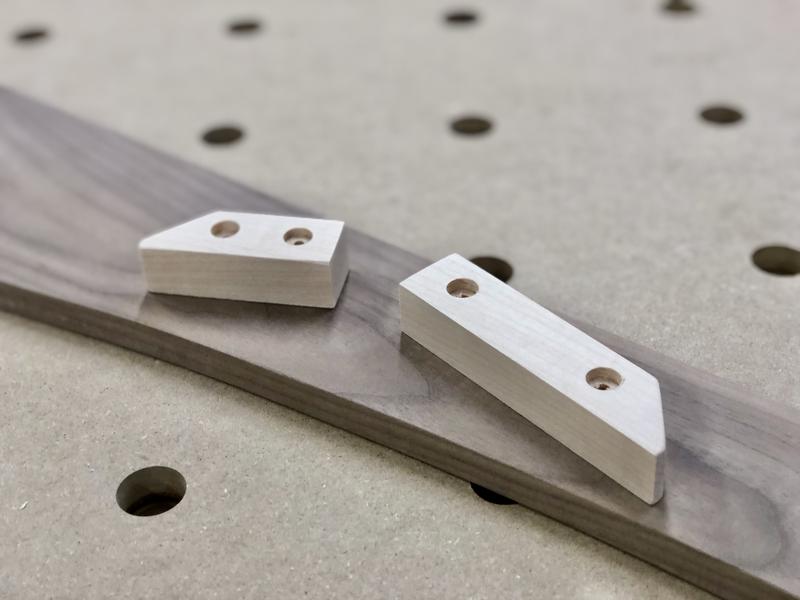
Last night I cut some small support pieces for the vanity shelf. Roughly 3/4" x 7/8" maple. Yes, it's been over a year and I'm still working on the bathroom. :spit:

FB1A39F3-8983-463B-8228-1859733C9DFC.jpg


Moments like this make me wish I had a small benchtop drill press.

4B639A78-81D9-4ED3-BEAA-2B1217E41337.jpg


7E011932-922F-48D5-B734-42DF7EBA6E4D.jpg


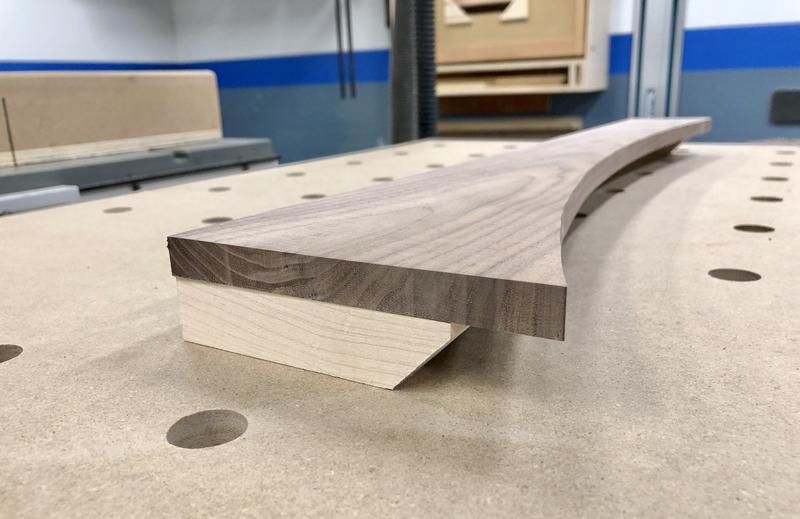
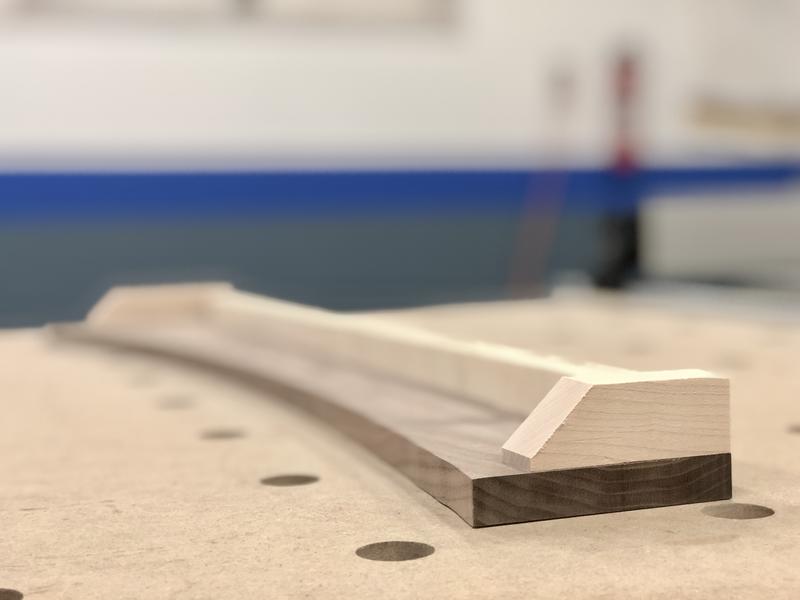
They'll screw to the sides of the floating vanity boxes and the shelf will sit on top like this:

DB65AF5F-CC02-4AF9-9619-1F748D04455C.jpg


And a 3/4" strip of plywood along the entire back (the whole unit is upside down in the below pic):

63BFCE5B-16D3-490B-8A2D-A9243F8825D1.jpg


When viewed from above you won't be able to see any of the supports.

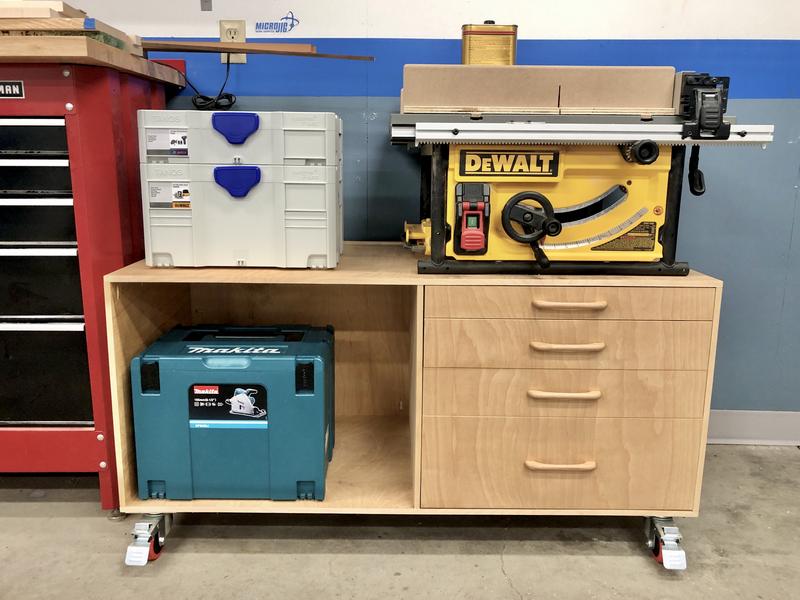
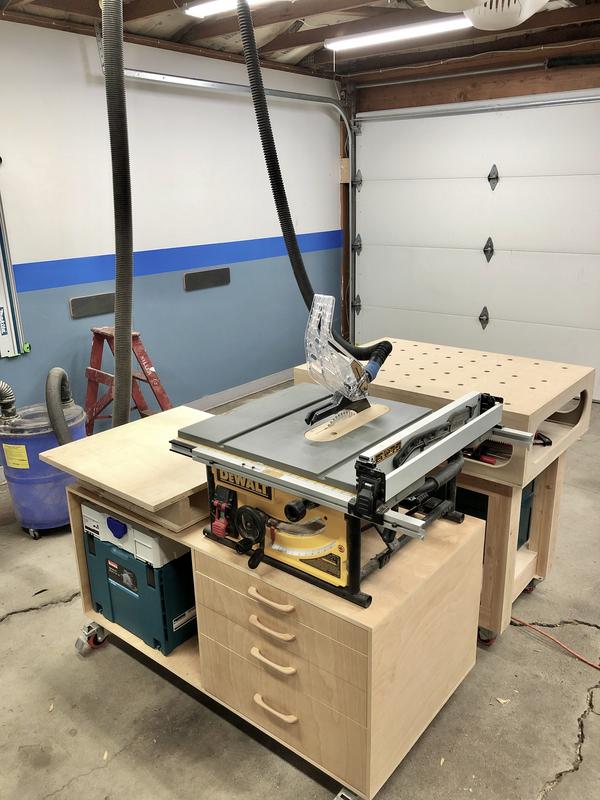
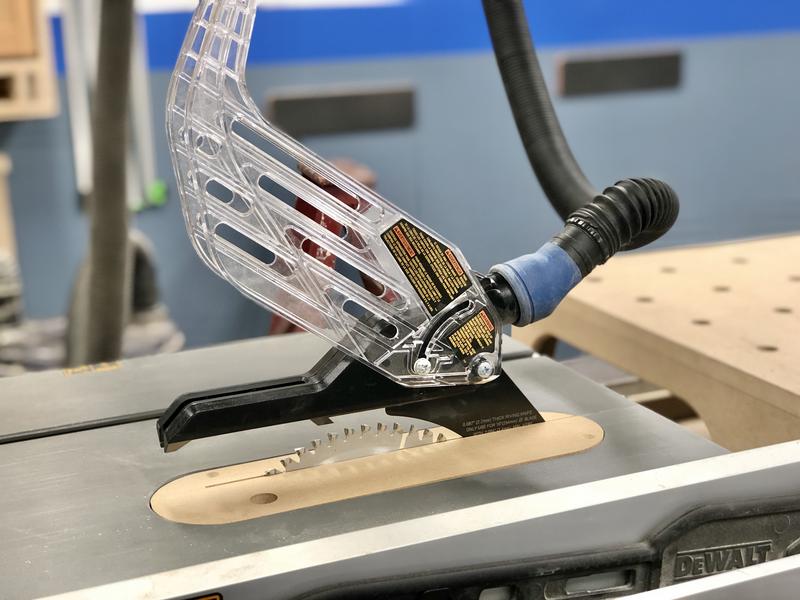
I also tried a new dust collection option with the blade guard that came with my saw. I normally connect the shop vac to the main outlet but dust still gets all over the surface of the cart and table saw itself so I wanted to see if this would help.

D8DBA09B-C233-4DED-8831-A0C504255DEC.jpg


D004585F-B3FF-4C8E-B738-DA3075CCAC7A.jpg


Unfortunately it did not, and I was not impressed. It looks cool, but somehow dust still ended up on top, and the blade guard is prohibitive for thin rips. I also don't like how it's harder to see where the blade is, and I can't pop crosscut sleds on and off without removing it.

I had some custom glass made for the shelf which was way more $$$ than I wanted it to be, but if I have time to put some finish on these wood bits this weekend I should be able to present the grand reveal soon.

:lol_hitti
 
OP
N

nicholam77

Well-known member
Joined
Dec 18, 2016
Messages
2,671
Location
Minneapolis, MN
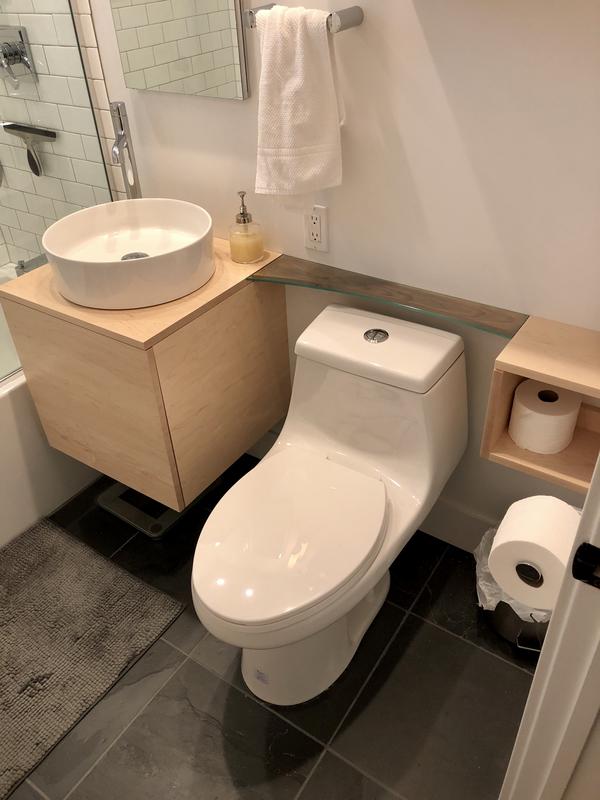
Well, it's finally done.

5A9F303C-274F-4E62-9783-BC8C8C730DBC.jpg


F15C4A71-50BC-4F58-B987-0EFE65E097EA.jpg


Not a lot of usable space but handy for small items.

09D1E616-F5F3-41D9-814C-EA9EB4E61B39.jpg


Sorry for the not-so-great-photos, it's really hard to get a good pic at night in there without natural light. I'll try to get a better pic later.

I guess I'm done with this bathroom for now :thumbup:

(I'll still fix the drawer front someday but don't have the energy for that at the moment).

Slate tile, glass at toddler level, a window in the shower, no full-length curtain for water containment, and wood everywhere.

I guess I've ended up with a bathroom that's highly moisture resistant and kid-friendly!

OH wait...

:lol_hitti
 
Last edited:

Mr. Roboto

Well-known member
Joined
Dec 11, 2012
Messages
2,160
Location
New Hampshire
Looks great! You made good use of the space while still creating something very unique - one of a kind for sure! Is this your main bathroom in the house?
 
OP
N

nicholam77

Well-known member
Joined
Dec 18, 2016
Messages
2,671
Location
Minneapolis, MN
Looks great! You made good use of the space while still creating something very unique - one of a kind for sure! Is this your main bathroom in the house?

Thanks! I would say it's the main bathroom, yes. Definitely at the moment. It's one of several things I don't like about the place. We have a half bath with no shower off our master bedroom upstairs, but it's also quite small and the roofline cuts into it. In the basement there is a larger full bathroom with shower, but it is very dated in its current form and located at the opposite corner of the house and down two flights of stairs from our master, so it doesn't really get used. So we decided to renovate the main floor one first since that's closer and what people will see the most. Unfortunately, it makes the most sense for guests to use as well which is not ideal, although we really don't have people over very often.
 
OP
N

nicholam77

Well-known member
Joined
Dec 18, 2016
Messages
2,671
Location
Minneapolis, MN
*long post with lots of images, please don't quote the whole thing*

Had a great weekend! Beautiful day on Saturday and my MIL took the kiddo for part of the day so I was actually able to do some much needed yard work. We are in peak fall color now.

IMG-8061.jpg


I spent the morning and afternoon raking and bagging leaves from our 3 giant Silver Maple trees.

IMG-8058.jpg


IMG-8060.jpg


They always are a bit late to fall and we have many more leaves to come. Kinda wondering if they will beat the first snow that sticks around.

After raking I mowed the lawn for one of the last times this season. Will have to winter prep the mower soon.

IMG-8065.jpg


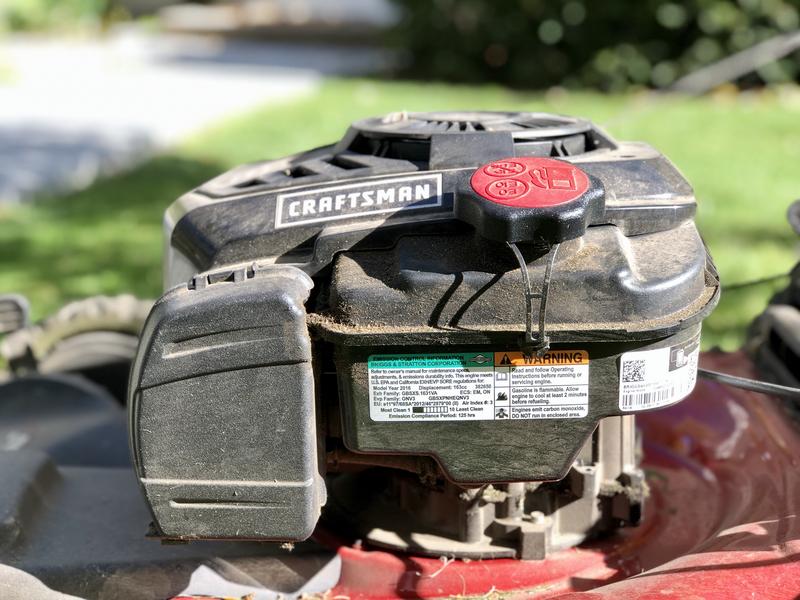
Speaking of that, what does everyone do for small gas engines over winter? I've always added some Seafoam and run it dry for storage. But lately it's been sputtering when I add the Seafoam, and some visible exhaust. Kind of a pulsing sound. It smoothed out a bit after 15min or so but maybe this is the wrong approach?

IMG-8064.jpg


Our little crab apple turned color:

IMG-8063.jpg


Then I washed the front and rear windows on the exterior of the house and cleaned the bug screens with a hose. My daughter watched from the inside, and then started licking the inside of the windows while I squeegee'd the outside.

IMG-8073.jpg


So I guess in a way we were both washing the windows. #chores #teamwork

:thumbup:

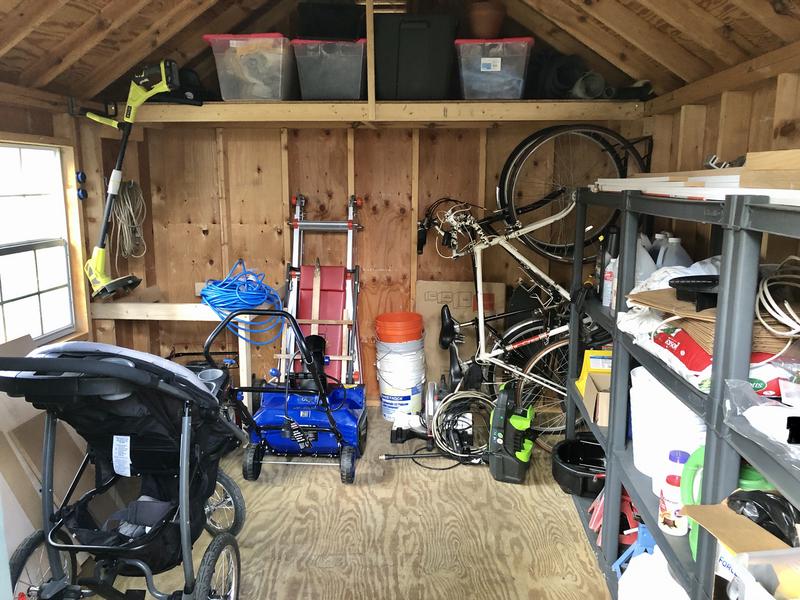
More of an update from a while ago than from this weekend but I've managed to bring some order to our lawn tools shed.

IMG-8084.jpg


Still a ways to go but if you look closely you may see I've added an electric snowblower. :bounce:

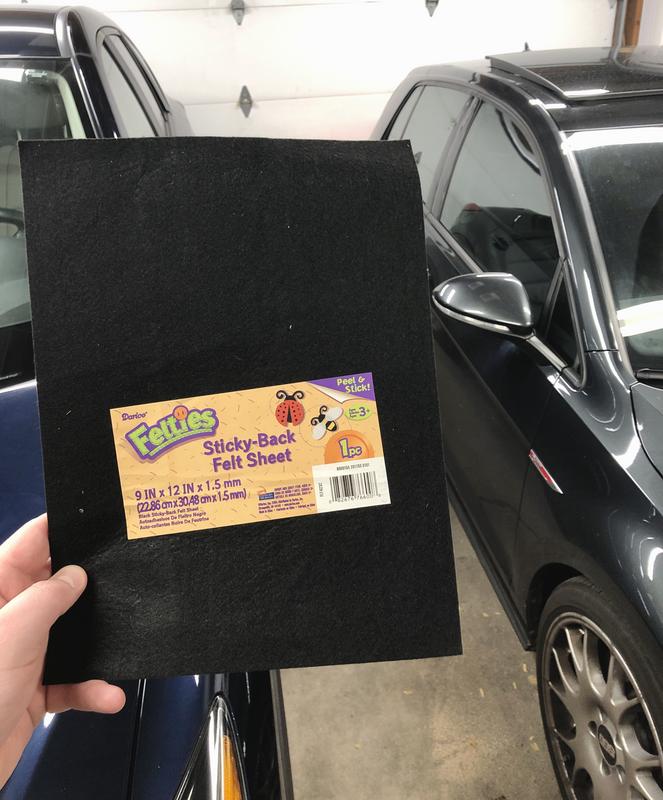
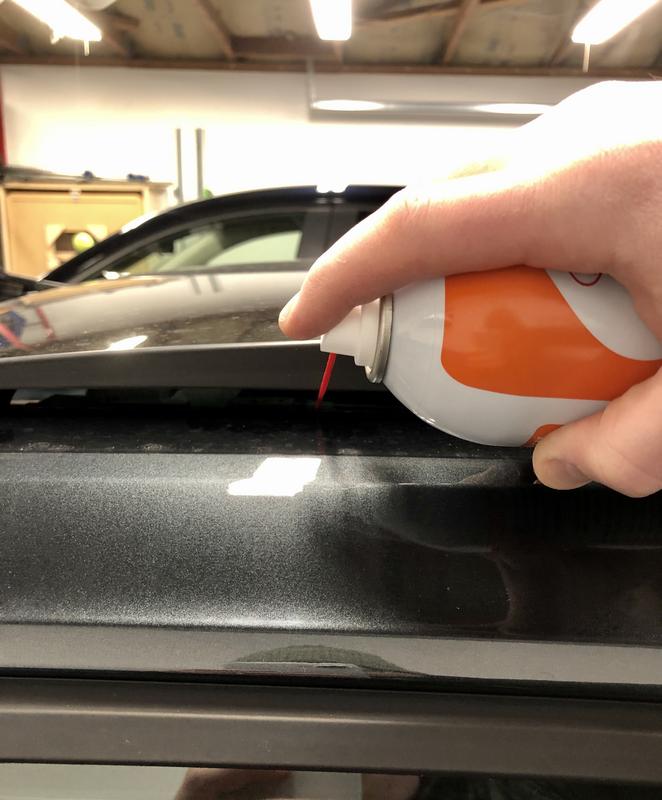
Something that's been driving me NUTS as it's gotten colder out is the squeaking sunroof in my car. Did some research and found adding some strategically-placed adhesive felt strips might solve it. So I did that and lubricated the seals.

IMG-8100.jpg


IMG-8107.jpg


No more squeak!

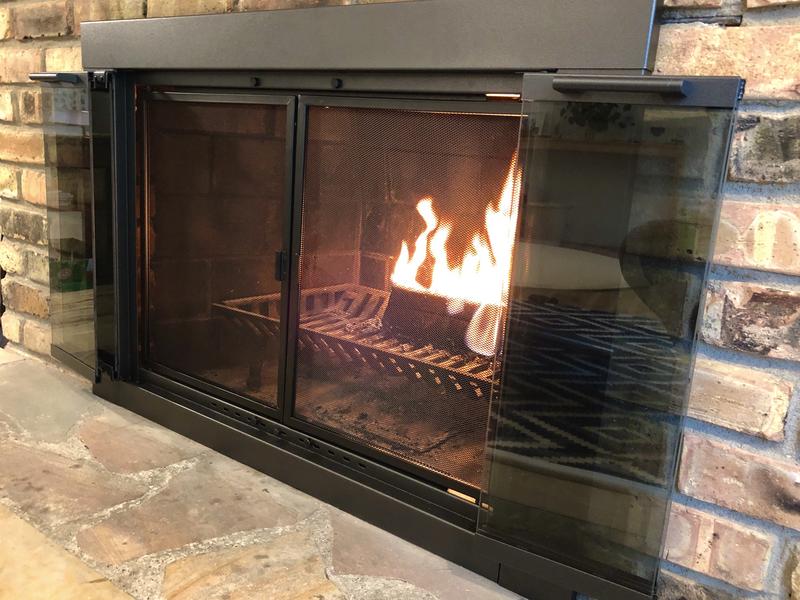
On Sunday we squeezed in a fire, featuring new glass bi-fold screen doors:

IMG-8019.jpg


And carved her first pumpkin in the evening:

IMG-8118.jpg


Hope everyone had an enjoyable and/or productive weekend!

:beer:
 
OP
N

nicholam77

Well-known member
Joined
Dec 18, 2016
Messages
2,671
Location
Minneapolis, MN
The bathroom looks great! I also love that 45 degree sled! Now I want one.

Thanks, Unruh!

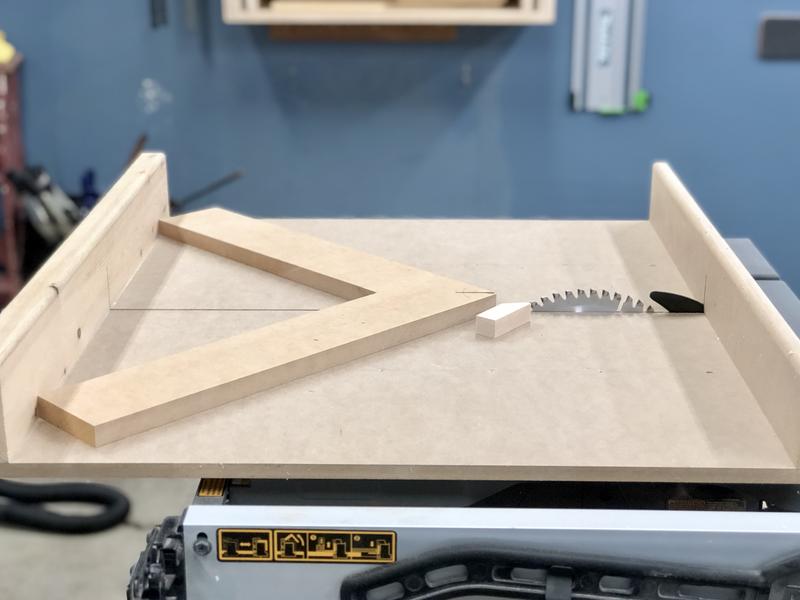
It might need some tweaking with your sled design, or maybe only able to cut on one side of the blade, but the design is from this William Ng video:


If nothing else it's pretty genius as far as getting perfect 45's and might give you some ideas. If I remember correctly it requires a properly squared crosscut sled to make, but you already have that. The thing I liked about it is the mitering piece is removable so you don't have to have a dedicated sled for that.
 

jonshonda

Well-known member
Joined
Jul 17, 2017
Messages
4,747
Location
Wisconsin
What I typically do for my small engines is add stabil to the gas can rather then the tank on the machines. It's easier for me to calculate the ratio for a gallon rather then the amount in the tank.
My guess is you are adding too much seafoam which might make it run rough?

I don't run the gas out of the tank, and never use gas with ethanol. Knock on wood, but I never have issues with my small engines (I have 7 of them if that matters!!).
 

isonic

Well-known member
Joined
Aug 1, 2018
Messages
213
Location
Ham Lake, MN
Speaking of that, what does everyone do for small gas engines over winter? I've always added some Seafoam and run it dry for storage. But lately it's been sputtering when I add the Seafoam, and some visible exhaust. Kind of a pulsing sound. It smoothed out a bit after 15min or so but maybe this is the wrong approach?

Personally, I just fill the tank all the way to the top (minimize amount of air in tank) with non-oxy fuel and put the cap on. I have never had issues starting back up in the spring.
 

mmsheb

Well-known member
Joined
Mar 30, 2008
Messages
365
Location
Wisconsin
I use Stabil in the gas can starting late in the season and then run the push mower and riding mower out of gas. Also, only gas without ethanol in my mowers. I think it is a belts and suspenders approach. Maybe overdoing it, but it works for me.
Mike in WI
 
OP
N

nicholam77

Well-known member
Joined
Dec 18, 2016
Messages
2,671
Location
Minneapolis, MN
What I typically do for my small engines is add stabil to the gas can rather then the tank on the machines. It's easier for me to calculate the ratio for a gallon rather then the amount in the tank.
My guess is you are adding too much seafoam which might make it run rough?

I don't run the gas out of the tank, and never use gas with ethanol. Knock on wood, but I never have issues with my small engines (I have 7 of them if that matters!!).

Personally, I just fill the tank all the way to the top (minimize amount of air in tank) with non-oxy fuel and put the cap on. I have never had issues starting back up in the spring.

I use Stabil in the gas can starting late in the season and then run the push mower and riding mower out of gas. Also, only gas without ethanol in my mowers. I think it is a belts and suspenders approach. Maybe overdoing it, but it works for me.
Mike in WI

Thanks for the input everyone. Yeah, I've heard it both ways, leaving the gas in or running it dry. Is there a rational for one or the other? I get the no air thing but then in the next season is that full tank of gas that sat all winter still good to go?

I do only use non-oxy gas, although I have such a small yard to do, a 1 gallon container usually lasts the summer. Should I be buying gas more frequently during the season so it's fresh? I will try adding stabilizer to the gas can instead of the fuel tank, that makes good sense to me. :thumbup:

And yes, I'm guessing I probably put too much seafoam in the mower tank and got a bad ratio.
 

bj383ss

Well-known member
Joined
Sep 29, 2011
Messages
3,166
Location
TX
I do the same here. Stabil in my gas cans and I also put it in the Caprice and 64' Truck. It is really hard to get no ethanol gas in my area but I have never had any problems. I have never run my mower dry.

The shed looks very organized and I bet you are one of the only guys with a baby stroller in the shed. :D

Another way to eliminate squeaks on your car is put on a louder exhaust or turn the radio up! :)

Bret
 
OP
N

nicholam77

Well-known member
Joined
Dec 18, 2016
Messages
2,671
Location
Minneapolis, MN
Staying busy! thanks for sharing

No problem, thanks for stopping in. Wow your garage is really clean! :bowdown:

I do the same here. Stabil in my gas cans and I also put it in the Caprice and 64' Truck. It is really hard to get no ethanol gas in my area but I have never had any problems. I have never run my mower dry.

The shed looks very organized and I bet you are one of the only guys with a baby stroller in the shed. :D

Another way to eliminate squeaks on your car is put on a louder exhaust or turn the radio up! :)

Bret

Those are some great tips, Bret :)

Better a stroller in the shed than in the garage, I say.


Thanks, Kriesel. Sounds like the majority of you guys keep the tank full so I'll give that a shot this winter and add some stabilizer. Much easier than running it dry anyways :thumbup:
 

Kriesel

Well-known member
Joined
Mar 25, 2014
Messages
138
Location
Afton, Minnesota
The explanation I learned many years ago is that the inside of a gas tank can condensate with the presence of air. So, if the fuel tank is filled to the brim to remove as much air as possible, this reduces the amount of condensation that can happen. This happens more with ethanol fuel.
 
To avoid these ads, REGISTER NOW!
Top Bottom