Rehabbed my Reed 203-1/2
Couple of years back, I bought a Reed 203-1/2 vise (swivel base, 3-1/2" jaws, 38#) for cheap, relatively clean by Coastside standards, very little rust. I thought it was ready to use as it worked ok after giving it a bit of lube. Mounted it to an existing cabinet, with an extra layer of 3/4" plywood under the top for added strength. Didn't use or abuse it much, cutting metal shapes, PVC pipe etc, no real stress on the vise.
But, it seemed like every time I wanted to use it for a large opening job, the mechanism was sticky, so I'd put a drop or two of oil on it, in a couple of spots, and it would be fine, until the next job. I had joined Garage Journal a while back, and took advantage of the accumulated expertise. Took the vise apart, but had to wait for a Drag Link Socket to get the swivel apart, probably the toughest part of the job. While the outside of the vise looked reasonably clean and happy, the inside was gross. I think the previous owner lubed it regularly while it was in use, but never cleaned out the accumulated crud beforehand. After I took the slide out and exposed the screw, I was using a cold chisel to scrape goo off that had the consistency of soft asphalt, or old roofing tar. Similarly with the swivel and the main nut, lots of dried grossness.
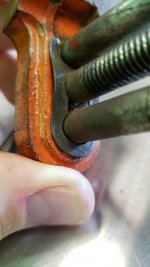
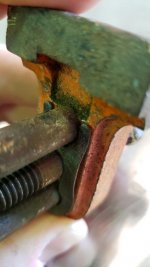
Once it was all apart, I soaked it in Simple Green, piece by piece, until everything was reasonably clean. The black paint had bits of red under it, and a more uniform coat of grey paint under that, guessing the original color. Couple of pieces got an initial soak to clean up the gross underside, and subsequent soaks of the whole piece weren't enough to remove the ring where the air liquid interface was. Kinda bummed about that, as I didn't plan on repainting it, but simply giving it a quick coat of Boiled Linseed Oil.
The back end of the slide had been hammered on at various times in its previous life, so I took a few passes with a couple of different files to even out the dings, remove some sharp edges, etc., but I didn't try to take it back to new smoothness. It has a production date of 157 (older than me), stamped on both jaws, and an E and L stamped into the fixed and moving jaws respectively, but no idea what they mean.
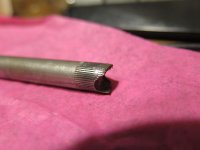
The main handle was bent into a shallow S, the swivel into an old style J. Got them both straight enough, but not quite perfect.
The whole thing, except for mating surfaces (where the jaw slides, or the swivel pivots), all got BLO, even the innards, to prevent rust in my oh so dry environment. I used a pair of 500W halogen lamps, and a portable hot air source to warm things up post SG bath, and pre- and post-BLO application to try to speed the drying process.
Things I learned from this thread included removing the retaining collar for the main screw with a small punch, using Simple Green as a paint remover, types of grease to use, how to safely straighten handles, and other fun goodies. Also that my existing little Craftsman 4" vise is a joke, but I suspected that already.
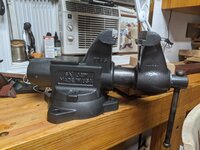
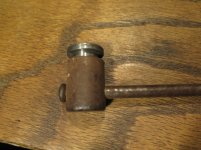
Here is a before pic
And here is an after, not much visible difference. But it works with one finger through the whole 6" + opening, both opening and closing. The dynamic jaw wiggles a bit over the throw, but not too bad.
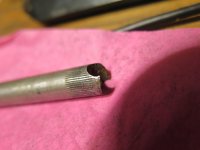
The biggest disappointment (bigger than the bathtub ring) is the finish on the main screw handle, and the swivel lock system. I suspect they may have been chromed at some time in their life, but the resulting surface after cleaning was disappointing. I tried various Dremel wire wheels, which resulted in minimal improvement, as did Simichrome. I may try cold gun bluing later if it still bugs me.
For those who want the details on all the grossness that was cleaned out, check out the interim pix.
https://kirkhmb.smugmug.com/Mechanic-Tools/Reed-2035-Vise-Rehab/i-gsfqbzh
Total time for this project, under 2 months. Total working hours? Let's not talk about that in polite company please. Thanks for all the help on this.


")