Saturday - January 11, 2020
Thursday evening I spent some time at the drafting table in the LBG's upper room.
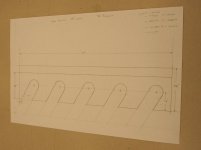
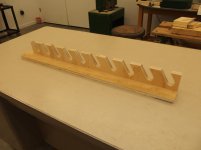
I was working out the details for a Pipe Clamp Rack. I borrowed heavily from Steven D. Johnson's Horizontal Pipe Clamp Rack.
Friday I attended a couple of Estate Sales...


In an outbuilding was an ancient, homemade grinding wheel setup. I had walked past it once and then returned for a final look-around before departing for home. That's when I noticed the motor driving the contraption. It was a 1/3 HP Kingston-Conley. I was aware that Walker-Turner used Kingston-Conley motors (rebranded with Walker-Turner livery) to power many of their machines. I discussed the contraption with the folks running the Estate Sale, got a slightly lower price and left with it.
I think this motor is probably from the early to mid 40's. I suspect at some point I will come across a vintage machine that needs a vintage, somewhat low power, motor to power it.
Note the shiny silver bolt in the motor's left mounting hole in the first picture. The motor had been bolted to a workbench and I could not get that bolt free - no matter how I tried to line up the bolt-head's flats with the motor.

This morning I got out my Pneumatic Cutting Wheel and cut the bottom of the bolt off. Now the bolt could be removed.
The rest of the day in the shop was spent working on bring the Pipe Clamp plans to life...
...well, at least I got started on that project today.

I had a scrap piece of 3/4-inch plywood that would provide most of the working material for the project. I cut it down to a more manageable size and then started ripping 2-3/4-inch strips of plywood.
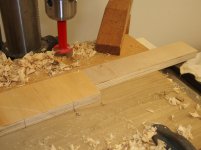

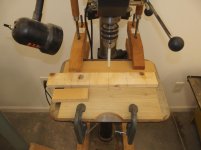
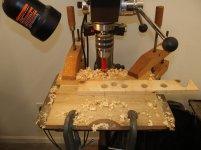
A lot of the work was going to be done at the Drill Press with a 1-1/8-inch Forstner Bit. I made some rough jigs to help make the holes repeatable in the several pieces of plywood I was going to be chewing up.
I marked the starting point with a "1" and made a jig to locate that position. I also marked the location of the center of the Forstner Bit. I would place a piece of plywood in this jig and mark the center point on the side of the plywood. Then I removed the plywood and marked 3-inch increments from the first mark.
Continued in next post...
Thursday evening I spent some time at the drafting table in the LBG's upper room.
I was working out the details for a Pipe Clamp Rack. I borrowed heavily from Steven D. Johnson's Horizontal Pipe Clamp Rack.
Friday I attended a couple of Estate Sales...
In an outbuilding was an ancient, homemade grinding wheel setup. I had walked past it once and then returned for a final look-around before departing for home. That's when I noticed the motor driving the contraption. It was a 1/3 HP Kingston-Conley. I was aware that Walker-Turner used Kingston-Conley motors (rebranded with Walker-Turner livery) to power many of their machines. I discussed the contraption with the folks running the Estate Sale, got a slightly lower price and left with it.
I think this motor is probably from the early to mid 40's. I suspect at some point I will come across a vintage machine that needs a vintage, somewhat low power, motor to power it.
Note the shiny silver bolt in the motor's left mounting hole in the first picture. The motor had been bolted to a workbench and I could not get that bolt free - no matter how I tried to line up the bolt-head's flats with the motor.
This morning I got out my Pneumatic Cutting Wheel and cut the bottom of the bolt off. Now the bolt could be removed.
The rest of the day in the shop was spent working on bring the Pipe Clamp plans to life...
...well, at least I got started on that project today.
I had a scrap piece of 3/4-inch plywood that would provide most of the working material for the project. I cut it down to a more manageable size and then started ripping 2-3/4-inch strips of plywood.
A lot of the work was going to be done at the Drill Press with a 1-1/8-inch Forstner Bit. I made some rough jigs to help make the holes repeatable in the several pieces of plywood I was going to be chewing up.
I marked the starting point with a "1" and made a jig to locate that position. I also marked the location of the center of the Forstner Bit. I would place a piece of plywood in this jig and mark the center point on the side of the plywood. Then I removed the plywood and marked 3-inch increments from the first mark.
Continued in next post...
Last edited: