To avoid these ads, REGISTER NOW!

Above 1200 Sq/FT The Lone Beech Garage (60x46x16)

Wokspaces above 1200 squarefeet.
OP
S

sbosecker

Well-known member
Joined
Sep 25, 2012
Messages
3,539
Location
Peachtree City, GA
Saturday - January 11, 2020


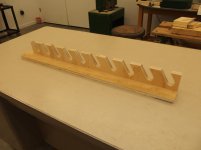
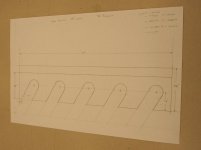
Thursday evening I spent some time at the drafting table in the LBG's upper room.


20200110-01.jpg

I was working out the details for a Pipe Clamp Rack. I borrowed heavily from Steven D. Johnson's Horizontal Pipe Clamp Rack.

Friday I attended a couple of Estate Sales...


20200110-02.jpg 20200110-03.jpg

In an outbuilding was an ancient, homemade grinding wheel setup. I had walked past it once and then returned for a final look-around before departing for home. That's when I noticed the motor driving the contraption. It was a 1/3 HP Kingston-Conley. I was aware that Walker-Turner used Kingston-Conley motors (rebranded with Walker-Turner livery) to power many of their machines. I discussed the contraption with the folks running the Estate Sale, got a slightly lower price and left with it.

I think this motor is probably from the early to mid 40's. I suspect at some point I will come across a vintage machine that needs a vintage, somewhat low power, motor to power it.

Note the shiny silver bolt in the motor's left mounting hole in the first picture. The motor had been bolted to a workbench and I could not get that bolt free - no matter how I tried to line up the bolt-head's flats with the motor.


20200111-04.jpg

This morning I got out my Pneumatic Cutting Wheel and cut the bottom of the bolt off. Now the bolt could be removed.


The rest of the day in the shop was spent working on bring the Pipe Clamp plans to life...

...well, at least I got started on that project today.


20200111-05.jpg

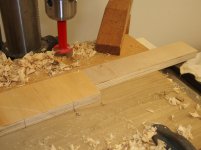
I had a scrap piece of 3/4-inch plywood that would provide most of the working material for the project. I cut it down to a more manageable size and then started ripping 2-3/4-inch strips of plywood.


20200111-06.jpg 20200111-07.jpg

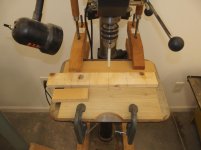
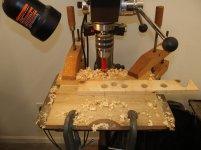
A lot of the work was going to be done at the Drill Press with a 1-1/8-inch Forstner Bit. I made some rough jigs to help make the holes repeatable in the several pieces of plywood I was going to be chewing up.

I marked the starting point with a "1" and made a jig to locate that position. I also marked the location of the center of the Forstner Bit. I would place a piece of plywood in this jig and mark the center point on the side of the plywood. Then I removed the plywood and marked 3-inch increments from the first mark.


Continued in next post...
 
Last edited:
To avoid these ads, REGISTER NOW!
OP
S

sbosecker

Well-known member
Joined
Sep 25, 2012
Messages
3,539
Location
Peachtree City, GA
Continued...


20200111-11.jpg 20200111-12.jpg

The plywood now marked out, I would return to the Drill Press and drill the holes after lining up the marks on the plywood with the Center Location.


20200111-13.jpg

I used a Combination Square set to 30 degrees to draw cutout lines on the plywood.


20200111-14.jpg 20200111-15.jpg

The Band Saw was used to cut out the slots for the pipe clamps. Note the Magnet Base IKEA LED project on the band saw!


20200111-16.jpg

The Oscillating Spindle Sander cleaned up the slots.


20200111-17.jpg

A piece of plywood was clamped to the Miter Saw Station to act as a stop to get the plywood strip to a length of 15-inches.


Continued in next post...
 
Last edited:
OP
S

sbosecker

Well-known member
Joined
Sep 25, 2012
Messages
3,539
Location
Peachtree City, GA
Continued...

20200111-21.jpg 20200111-22.jpg

This is a 30-inch long Pipe Clamp Rail using two completed slotted plywood pieces. If one looks closely the line where the two pieces meet is visible in the middle. The piece of plywood the slotted pieces are sitting on will be 30-inches long and will give the slotted rail a way to be mounted to the studs behind the drywall.


20200111-23.jpg 20200111-24.jpg

I'll be adding some triangular gussets at the top, middle and bottom of the slotted rail. I just put some blocks I had into those positions to show the positioning of the gussets.

This was as far as I got with the shop-time I had available today. I need to make at least 5 more of these 30-inch rails.


Scott
 
Last edited:
OP
S

sbosecker

Well-known member
Joined
Sep 25, 2012
Messages
3,539
Location
Peachtree City, GA
Sunday - January 12, 2019


20200112-01.jpg 20200112-02.jpg

Measure, drill, draw lines, saw, sand, saw, repeat.

It was an hour or so of repetition followed by...

...an unexpected neighborhood issue that kept me out of the shop the rest of the afternoon.

I had hoped to finish this project today.

Sigh.


Scott
 

Pressingonward

Well-known member
Joined
Mar 9, 2016
Messages
522
Location
SW WA
Hi Scott,

Nice work on the task light adaptor! That turned out great, and it does look like a perfect project to learn on.

Sounds like you need a set of machinist's parallels for setting your work in the vise at the right height: https://www.amazon.com/PROLINEMAX-Precision-Parallel-Mechanist-Parallelism/dp/B07SFTZ7TK/ref=asc_df_B07SFTZ7TK/?tag=hyprod-20&linkCode=df0&hvadid=385172629843&hvpos=1o2&hvnetw=g&hvrand=8723696792961650797&hvpone=&hvptwo=&hvqmt=&hvdev=c&hvdvcmdl=&hvlocint=&hvlocphy=9033566&hvtargid=pla-837503009268&psc=1&tag=&ref=&adgrpid=73789135410&hvpone=&hvptwo=&hvadid=385172629843&hvpos=1o2&hvnetw=g&hvrand=8723696792961650797&hvqmt=&hvdev=c&hvdvcmdl=&hvlocint=&hvlocphy=9033566&hvtargid=pla-837503009268

(Link is just an example of a generic set by an unknown Chinese brand...it was the first one that popped up, so this is not a recommendation for that particular set)
 
Last edited:

shortykorte

Well-known member
Joined
Sep 1, 2014
Messages
8,039
Location
Tallahassee, Fl
Nice work on your clamp rack.

I just got this from Amazon. It’s a LED sewing machine light. Magnetic base. IMG_9330.jpgIMG_9331.jpgIMG_9336.jpg


Shorty Korte
Always remember quality in QST

Sent from my iPhone using Garage Journal
 
OP
S

sbosecker

Well-known member
Joined
Sep 25, 2012
Messages
3,539
Location
Peachtree City, GA
Hi Scott,

Nice work on the task light adaptor! That turned out great, and it does look like a perfect project to learn on.

Sounds like you need a set of machinist's parallels for setting your work in the vise at the right height: https://www.amazon.com/PROLINEMAX-Precision-Parallel-Mechanist-Parallelism...

(Link is just an example of a generic set by an unknown Chinese brand...it was the first one that popped up, so this is not a recommendation for that particular set)

Pressingonward,

Thanks for the kind words! It was a very good "teaching moment" project!

Thanks for the referral for the Parallels but I did use a set in my vise. Perhaps I'm missing something?

Thanks for stopping by!

Best regards,

Scott
 
OP
S

sbosecker

Well-known member
Joined
Sep 25, 2012
Messages
3,539
Location
Peachtree City, GA
Nice work on your clamp rack.

I just got this from Amazon. It’s a LED sewing machine light. Magnetic base.

Shorty Korte
Always remember quality in QST

Shorty Korte,

Thanks for the kind words regarding the clamp rack.

That Sewing Machine Light looks like a great value and a useful task light! Thanks for sharing the information on that item.

Best regards,

Scott
 
OP
S

sbosecker

Well-known member
Joined
Sep 25, 2012
Messages
3,539
Location
Peachtree City, GA
Monday - January 13, 2020

Continued working on the Pipe Clamp Rack today...


20200113-01.jpg

I did a little trigonometry and figured out the angle I needed to cut on the end pieces and the gussets. Got all the pieces cut and, one at a time, started gluing up the racks.


20200113-02.jpg 20200113-03.jpg

While the first rack's glue was setting I marked out the location of the studs and established a level horizontal reference line.


20200113-04.jpg

I got the first rack secured to the wall and continued to glue up racks.


20200113-05.jpg

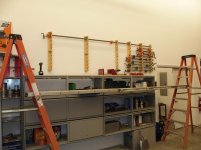
At the end of the day I had all the Pipe Clamp Racks fastened to the wall. I put a few clamps on the racks that had glue that should be pretty well cured. I hesitated to add any more clamps to the opposite end. It seemed prudent to give the glue time to cure by waiting until tomorrow morning.


Scott
 

Pressingonward

Well-known member
Joined
Mar 9, 2016
Messages
522
Location
SW WA
Pressingonward,

Thanks for the kind words! It was a very good "teaching moment" project!

Thanks for the referral for the Parallels but I did use a set in my vise. Perhaps I'm missing something?

Thanks for stopping by!

Best regards,

Scott

Hi Scott,

I think I'm the one who missed something. I thought you were using a piece of plywood as a spacer. I'll have to go back and figure out where I veered off course. Anyways, back to our regularly scheduled broadcast lol
 
OP
S

sbosecker

Well-known member
Joined
Sep 25, 2012
Messages
3,539
Location
Peachtree City, GA
Hi Scott,

I think I'm the one who missed something. I thought you were using a piece of plywood as a spacer. I'll have to go back and figure out where I veered off course. Anyways, back to our regularly scheduled broadcast lol


Pressingonward,

Ahh...

I used a vise - and parallels - to dimension the raw stock but I don't have a vise on the Rotary Table.

The Rotary Table work was indeed a cobbled together setup using some plywood under the part to keep it clear of the Rotary Table for milling.

Would parallels work without a vise?

Best regards,

Scott
 

AZpilot

Well-known member
Joined
Sep 29, 2012
Messages
413
Location
Mesa, AZ
I don't like the phrase "unexpected neighborhood issue" sounds bad. Hope the event was resolved and nobody was hurt.
 

Pressingonward

Well-known member
Joined
Mar 9, 2016
Messages
522
Location
SW WA
Pressingonward,

Ahh...

I used a vise - and parallels - to dimension the raw stock but I don't have a vise on the Rotary Table.

The Rotary Table work was indeed a cobbled together setup using some plywood under the part to keep it clear of the Rotary Table for milling.

Would parallels work without a vise?

Best regards,

Scott

Well, I feel a bit stupid now - of course you know what parallels are - you've got a mill after all.

I went and looked back at your setup and I see why you did it that way. You can use parallels without a vise if you have something to square them up against on the side, but in your situation I probably would have done about the same setup as you had, but maybe with a block of Delrin or aluminum instead of the plywood - but we have Delrin and aluminum blocks lying around...you might not.

Really it looks like you could use a second vise to put on your rotary table :bounce:
 

drivesitfar

Well-known member
Joined
Oct 23, 2013
Messages
36,211
Location
Pacific Northwest
SB: keep on making stuff with your new machines and pretty soon you will be able to make almost anything. speaking of that have you made anything on your lathe yet or still getting that up to speed?

I'm hoping your neighborhood issue was maybe helping a neighbor fix a flat tire or eat some of their homemade pie cause in our part of the world it could be a number of other things that are not worth mentioning.

how's the weather in Atlanta these days? snow day here, but only a couple inches that should be gone in a day or two as it's supposed to get back up above freezing soon.

cheers
 
OP
S

sbosecker

Well-known member
Joined
Sep 25, 2012
Messages
3,539
Location
Peachtree City, GA
Well, I feel a bit stupid now - of course you know what parallels are - you've got a mill after all.

I went and looked back at your setup and I see why you did it that way. You can use parallels without a vise if you have something to square them up against on the side, but in your situation I probably would have done about the same setup as you had, but maybe with a block of Delrin or aluminum instead of the plywood - but we have Delrin and aluminum blocks lying around...you might not.

Really it looks like you could use a second vise to put on your rotary table :bounce:


Pressingonward,

One should never assume that just because one has the means to acquire "toys" that that person has any idea how to use it. I may well be the poster child for that. HA!

However, in this case, I did know what parallels are.

I looked around for something other than the plywood but the bits of material that I had would have needed some preparation in order to make them suitable for the task. The plywood was flat, the right size and ready to go.

As to needing a vise for the rotary table ...I like the way you're thinking. HA!

Best regards,

Scott
 
OP
S

sbosecker

Well-known member
Joined
Sep 25, 2012
Messages
3,539
Location
Peachtree City, GA
I don't like the phrase "unexpected neighborhood issue" sounds bad. Hope the event was resolved and nobody was hurt.

SB: keep on making stuff with your new machines and pretty soon you will be able to make almost anything. speaking of that have you made anything on your lathe yet or still getting that up to speed?

I'm hoping your neighborhood issue was maybe helping a neighbor fix a flat tire or eat some of their homemade pie cause in our part of the world it could be a number of other things that are not worth mentioning.

how's the weather in Atlanta these days? snow day here, but only a couple inches that should be gone in a day or two as it's supposed to get back up above freezing soon.

cheers


Thanks for stopping by guys. Regarding your concerns about the neighborhood issue...

It is a time-consuming thing but that's it... think diplomacy or politics and you're closer to what's going on than the other concerns.

I really need to get the lathe operational. It is really close ...and then I got distracted.

As to the weather here... it is moist. We've had a lot of rain and more is on the way.

Best regards,

Scott
 
OP
S

sbosecker

Well-known member
Joined
Sep 25, 2012
Messages
3,539
Location
Peachtree City, GA
Tuesday - January 14, 2020


About noon I figured the glue on the Pipe Clamp Racks had cured long enough. I went to the basement and started moving them to the LBG.


20200114-01.jpg

The bad thing about something being disorganized is one doesn't realize how disorganized it is until one tries to organize it. I thought I had done a proper inventory when I was designing the racks. When I started moving the Pipe Clamps to the LBG I realized I had missed a couple during the count.

I think I can add some sort of little "horns" to the top of each rack and put the really long clamp up there. That will make room for the 2 extras.

Scott
 
Last edited:
To avoid these ads, REGISTER NOW!

250

Well-known member
Joined
Oct 16, 2014
Messages
537
Location
West of the Sierras
It's been quiet a while since I've stopped by, I like the addition of the powermatic stuff, bit partial to them myself. You'll like the 141.
 

Jayman17

Well-known member
Joined
Feb 6, 2017
Messages
3,844
Location
Seattle, Wa
Scott, nice job on the magnetic base work light. Now that that's done when are you going to get that lathe spinning? :bounce:

Jay
 
OP
S

sbosecker

Well-known member
Joined
Sep 25, 2012
Messages
3,539
Location
Peachtree City, GA
“You can never have too many clamps” Norm Abrams , New Yankee Workshop

1949 caddyman,

HA!

I must admit, as I was sliding the Pipe Clamps into their new home, I was repeating that phrase to myself over and over again.

I'm not sure I totally believe it.

You may not be able to have too many clamps but, perhaps, it is possible to have too many of a particular type of clamp.


Best regards,

Scott
 
OP
S

sbosecker

Well-known member
Joined
Sep 25, 2012
Messages
3,539
Location
Peachtree City, GA
It's been quiet a while since I've stopped by, I like the addition of the powermatic stuff, bit partial to them myself. You'll like the 141.


250,

Thanks for stopping by!

I have a question about the Powermatic 141...


20200118-01.jpg

The blade on mine isn't centered - not even close - in the table's "blade hole".

Is this normal? … I would think not but what would be causing that?

Best regards,

Scott
 
OP
S

sbosecker

Well-known member
Joined
Sep 25, 2012
Messages
3,539
Location
Peachtree City, GA
Scott, nice job on the magnetic base work light. Now that that's done when are you going to get that lathe spinning? :bounce:

Jay

Jay,

Thanks for the kind words!

The lathe is on my short list ...but for a short list, it's pretty long.

HA!

The start of the year always has a bunch of "stuff" to knock out. In addition to my day job, I'm CEO of a small non-profit corporation and there's an annual report to write... I try to hook up with some old Navy buddies in early February and do some snow skiing.

The yearly elephant in the room... taxes.

This year is particularly cluttered as I decided last summer to try and organize a reunion of Aviation Officer School Class 23-79. The class was commissioned as Naval Officers on Leap Day (February 29th) 1980 so we're coming up on 40 years.

That seemed like a good reason to try to get together. The reunion will be in Pensacola FL on February 29th of this year.


20200117-01.jpg

So the past few days I've been trying to reproduce our class's Guidon & Streamers. I was in JoAnn's Fabrics yesterday...

I was a stranger in a strange land. HA!

...but there were some helpful ladies there and I'm making progress. Only 4 more streamers to go!

...then I need to find a Guidon Pole.


Best regards,

Scott
 
Last edited:

250

Well-known member
Joined
Oct 16, 2014
Messages
537
Location
West of the Sierras
There is some lateral adjustment of the upper wheel, on my 143 they are big allen head bolts (set screws) right behind the upper wheel. If the blade is out of the alignment with the guides as well (though it doesn't look to be in the picture) I'd look there. Its also possible that the wheels have new tires put on that are too thick, but this would lead to the blade having issues with the guides as well.

If the blade seems aligned appropriately to the other parts of the saw, I'd look at the mounting of the table trunnions to the table itself. I can see this easily being caused by some misalignment there.
 
OP
S

sbosecker

Well-known member
Joined
Sep 25, 2012
Messages
3,539
Location
Peachtree City, GA
There is some lateral adjustment of the upper wheel, on my 143 they are big allen head bolts (set screws) right behind the upper wheel. If the blade is out of the alignment with the guides as well (though it doesn't look to be in the picture) I'd look there. Its also possible that the wheels have new tires put on that are too thick, but this would lead to the blade having issues with the guides as well.

If the blade seems aligned appropriately to the other parts of the saw, I'd look at the mounting of the table trunnions to the table itself. I can see this easily being caused by some misalignment there.


250,

Thanks - I'll check all of this out.

Best regards,

Scott
 
OP
S

sbosecker

Well-known member
Joined
Sep 25, 2012
Messages
3,539
Location
Peachtree City, GA
Tuesday - January 21, 2020


20200120-01.jpg 20200120-02.jpg

Last evening, I grabbed some of the triangular scrap plywood from the Pipe Clamp Rack project and dehorned one point with the Band Saw. I then glued those pieces on top of the Pipe Clamp Rack Rails.


20200121-03.jpg

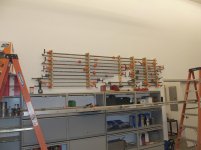
This morning the glue had cured and I moved the really long Pipe Clamp to the top and put the two homeless Pipe Clamps into the space that resulted.

Done!


Last Friday I became aware that JET was offering 10% off of Woodworking Machinery & Accessories. Dust collection machinery was included in this promotion. I placed an order.

I was supposed to get a phone call before the day of delivery and another phone call when they delivery was heading towards my house.

At about 1:30 pm the phone rang. I looked at the phone and there was no Caller ID information. I've been getting Robo-Calls like no tomorrow and I almost didn't answer but...

"Hello?", I answered.

"Is this Scott", came the reply.

Sigh... "May I ask who's calling?"


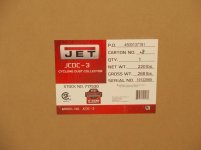
20200121-04.jpg

"This is Central Freight Lines. I'm in front of your house with your delivery"

Good grief! I really wasn't ready for a delivery.


20200121-05.jpg

I got my Pallet Jack and inserted it into the bottom of the box.


20200121-06.jpg 20200121-07.jpg

Then I drug it into the LBG, signed some paperwork and the driver was gone.

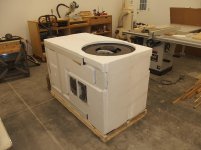
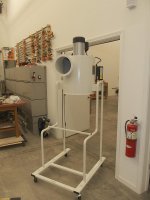
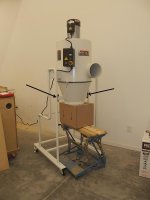
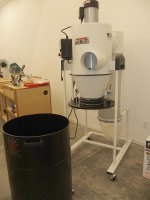
My JET JCDC-3 3HP Dust Collector had arrived!


Continued in next post...

KEYWORDS: JET JCDC-3 UNBOXING
 
Last edited:
OP
S

sbosecker

Well-known member
Joined
Sep 25, 2012
Messages
3,539
Location
Peachtree City, GA
Continued...


Time to unbox this rascal...


20200121-11.jpg 20200121-12.jpg

I got the cardboard off the large box.


20200121-13.jpg

These frame parts was integrated into the Styrofoam packaging.


20200121-14.jpg

Hardware & the Instruction Manual were stored here.


20200121-15.jpg 20200121-16.jpg
20200121-17.jpg

I continued to peel the layers of this onion away until everything in the big box had been removed.


Continued in next post...
 
Last edited:
OP
S

sbosecker

Well-known member
Joined
Sep 25, 2012
Messages
3,539
Location
Peachtree City, GA
Continued...


Time to start putting this guy together...


20200121-21.jpg

Casters were mounted onto the frame. There were two locking swivel casters and two regular swivel casters. I thought about where the locking casters should go for a bit. Once the motor assembly was on the frame, changing the casters position was going to be problematic. I decided to put the locking casters on opposite corners - taking care to be sure I'd have access to both after the Dust Collector was positioned against the wall.

It should be noted that the fasteners included with this machine are quite odd. The fasteners that are used to assemble the frame have a 12mm hex head with a 5/16"-18 thread.


20200121-22.jpg

A couple of uprights and a cross-brace were added to the frame assembly.


20200121-23.jpg

Casters were mounted to the chip bin. There is a 12mm hex between the casters thread and the caster. The hex is so thin that a regular open end wrench cannot tighten the caster all the way to the bottom of the chip bin. The hardware bag that comes with the dust collector contains a thin, stamped metal 10mm/12mm wrench. That provided wrench will allow one to fully tighten the casters to the chip bin.


20200121-24.jpg

This is how the chip bin and the frame assembly will live together.


20200121-25.jpg

Now came the tricky part - for a one-man operation - mounting the motor assembly onto the frame. I slid the motor assembly from its pallet onto a dolly.


20200121-26.jpg 20200121-27.jpg

I positioned the motor assembly under the Electric Chain Hoist. The motor assembly has a couple of small lifting eyes but I was concerned that, with the motor located above the lifting eyes, things might be exciting as I started lifting. It turned out my fears were unfounded and the motor assembly went aloft without issue.

The motor assembly was now positioned such that the 6 mounting bolts could be installed.


Continued in next post...
 
Last edited:
OP
S

sbosecker

Well-known member
Joined
Sep 25, 2012
Messages
3,539
Location
Peachtree City, GA
Continued...

Sadly I managed to induce an issue.


20200121-31.jpg

While the lift did occur without major problems, the motor assembly didn't go up perfectly level. While installing the mounting bolts I managed to get one cross-threaded (black arrow).


20200121-32.jpg

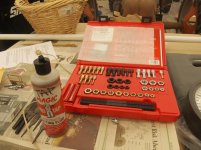
I got out my Thread Restorer Kit. I successfully cleaned up the bolt and then attempted to chase out the thread on the frame. I could not get the tool started into the hole.


20200121-33.jpg

Fortunately I had access from the rear. I was able to chase the threads from the inside out and that did the trick.

I was feeling pretty good that I had been able to rescue the cross-threaded bolt. I undid the rope I had used to lift the motor assembly and stored the Electric Chain Lift.

Now my concern was this top-heavy frame/motor combination. How tippy was that going to be? I carefully pushed the frame towards the Woodshop.

Stability seemed solid. I have skinned this cat!


20200121-34.jpg

Then reality smacked me in the face. The frame/motor combination was about 4-inches too tall to go through the Woodshop's double door.

Dooh!

I quit for the night.

I think the solution will be to get two more people to steady the frame as a third person tips it to an angle that would allow passage under the doorframe and into the Woodshop.


Scott
 
Last edited:
OP
S

sbosecker

Well-known member
Joined
Sep 25, 2012
Messages
3,539
Location
Peachtree City, GA
Wednesday - January 22, 2020


This afternoon I had a realization that maybe I didn't need to have some helpers to get the JET Dust Collector through the Woodshop's door.


20200122-01.jpg 20200122-02.jpg 20200122-03.jpg

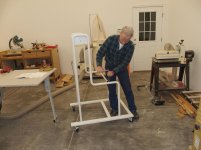
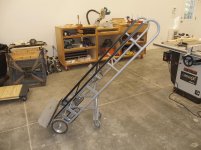
I thought maybe my Appliance Dolly, since it had outrigger wheels, might do the trick. I had to mount the Dust Collector to the Dolly from the side, which I was concerned might be more sporting. I strapped the Dust Collector to the Dolly and pulled the handles towards me.

It wasn't as steady as I would have liked but it was good enough to get the Dust Collector under the obstruction and into the Woodshop.


20200122-04.jpg

Here's where I expect the Dust Collector to live when it is operational.


20200122-05.jpg 20200122-06.jpg

Here was an opportunity to check and see if the motor actually worked before more assembly was completed. I pulled the Miter Saw Station away from the wall to access a 220 Volt outlet. The cord on the Dust Collector is just barely long enough to access the outlet. (Something to be dealt with in the future.) I reached up and pushed the green ON button.

...nothing happened. I pushed the reset button and hit the ON button again.

Nothing happened.

Well shoot... I checked the Instruction Manual and it stated that the red OFF button needed to be pulled out to allow the ON button to work.

I pulled the red OFF button out and pushed the ON button and...

...a mighty wind filled the Woodshop.


Continued in next post...
 
OP
S

sbosecker

Well-known member
Joined
Sep 25, 2012
Messages
3,539
Location
Peachtree City, GA
Continued...

20200122-11.jpg

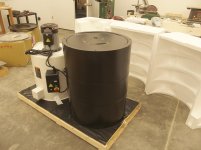
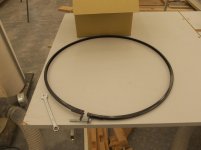
Next item on the installation checklist was attaching the Cone to the Motor Assembly. This Ring Clamp is used to attach the two components to each other.


20200122-12.jpg 20200122-13.jpg

I used a WorkMate on its lowered level and some cribbing to get the Cone aligned with the Motor Assembly. Once that was achieved I was able to fasten the two components together.

The black arrows point to a couple of flanges that some hardware associated with the Chip Barrell is mounted to. This is not a Scott-proof operation. I had watched a video of a 1-1/2HP version of the JET Dust Collector and that guy had initially installed the cone rotated 180 degrees from where it needs to be to access the soon-to-be-mounted hardware. Watching that made me aware of that issue.


20200122-14.jpg 20200122-15.jpg

Last item I was able to get to this afternoon was attaching the trim pieces to the frame.

I have a social event this evening and that is as far as I got today.

Scott
 
Last edited:
OP
S

sbosecker

Well-known member
Joined
Sep 25, 2012
Messages
3,539
Location
Peachtree City, GA
Thursday - January 23, 2020

Today it was time to open the second, smaller box of the JET Dust Collector package.


20200123-01.jpg

The Filter Assembly was extremely well packaged; double boxed and plenty of packing material.


20200123-02.jpg

The instructions called for the handle to be attached to the axle at the top of the Filter Assembly. The handle had a set screw to tighten against a flat on the axle. In my case the flat happened to be facing the Filter Assembly inlet and needed to be turned in order to allow the handle to be installed properly in a "down" position. To turn the axle I installed it with the handle up so I could turn the axle about 90 degrees.


20200123-03.jpg 20200123-04.jpg

However, when I loosened the set screw and tried to remove the handle by pulling it up, the handle initially pulled the whole axle up and out of the support in the bottom. Try as I might, I could not get the axle back into that support.

The solution was to unscrew the support's screws a couple of turns to allow the support to drop enough to get the axle back into the hole in the support.


20200123-05.jpg

All better.


20200123-06.jpg 20200123-07.jpg

I needed a little platform to hold the Filter Assembly in position as I fastened it to the Motor Assembly. I used a 5 gallon bucket, some 3/4-inch wood and a couple of boxes to position the Filter Assembly properly. Then I hopped on top the Workmate and tightened everything down.


Continued in next post...
 
Last edited:
OP
S

sbosecker

Well-known member
Joined
Sep 25, 2012
Messages
3,539
Location
Peachtree City, GA
Continued...

20200123-11.jpg 20200123-12.jpg

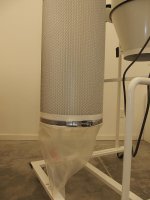
Foam tape was used to act as a seal between the Filter Assembly and a Dust Bag.


20200123-13.jpg 20200123-14.jpg

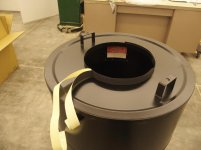
Foam tape was used to act as a seal on the Cone and the Chip Barrel Lid.


20200123-15.jpg

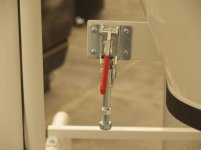
I installed the two Quick Release Levers.


20200123-16.jpg

The "Hose" was pulled onto both the Barrel Lid and the bottom of the Cone. Hose clamps were tightened down to secure the Hose to the Lid & Cone.

Getting the Hose onto the Lid & Cone was a bit of a fight. Trying to pull the Hose over the foam tape on the Lid and the Cone was somewhat challenging but eventually accomplished.


20200123-17.jpg

...and that's the way it is supposed to work to remove the Barrel when one wants to empty it.


Continued in next post...
 
Last edited:
OP
S

sbosecker

Well-known member
Joined
Sep 25, 2012
Messages
3,539
Location
Peachtree City, GA
Continued...


Now came the biggest PITA of the whole assembly...

...the Bag Frame.


20200123-21.jpg 20200123-22.jpg

3 hoops and 8 pieces of thin flat metal fastened together with extremely small machine screws & nuts. I've got pretty small hands: I can't imagine a guy with big mitts trying to do this. It was a magnificent pain. The assembly got a little easier as the frame got more elements fastened together but...

I watched a few YouTube videos of people assembling other JET Dust Collectors. I recall one fellow stating that he didn't use the Bag Frame. My guess is that he gave up trying to put it together and violently threw it in the trash bin.


20200123-23.jpg

Finished!


20200123-24.jpg 20200123-25.jpg

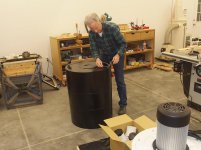
Insert the Bag into the Chip Barrel and then put the Bag Frame into the Bag.


20200123-26.jpg

That's it! The Dust Collector is pretty much located where I think it will be living but I want to take a few days of working in the Woodshop before I start installing ductwork. I need to find out if I should tweak the location of the Dust Collector or if I'm good to go.

I also need to order some 8-inch pipe & fittings. The adapter (single 8-inch to three 4-inch) that is currently on the Dust Collector will be removed in the future.


Scott
 
Last edited:

LutzTD

Well-known member
Joined
Dec 31, 2011
Messages
3,673
Location
Lutz, Florida
nice, great job on the assembly.

Did Jet give a reference design for the collection pipe system? I was wondering your/their thoughts behind duct size and distance and how the branches are laid out for best performance.
 
OP
S

sbosecker

Well-known member
Joined
Sep 25, 2012
Messages
3,539
Location
Peachtree City, GA
nice, great job on the assembly.

Did Jet give a reference design for the collection pipe system? I was wondering your/their thoughts behind duct size and distance and how the branches are laid out for best performance.

LutzTD,

No... I don't think JET provides design services for ductwork. It is my impression that some duct supply services do. I'm probably being foolish but I've got it laid out roughly in my mind..

The Woodshop has such a weird ceiling due to the "Upper Room" above half of it. Ceiling is 16 feet tall in one half and about 11 feet in the other. I've got ceiling fans and ceiling mounted fluorescent fixtures and I don't want ductwork hanging from wires so that, coupled with the dust collector's location pretty much drive the duct's location.


20200125-01.jpg

Green shows location of Dust Collector & proposed ductwork.

I'm thinking 8-inch diameter duct going up the wall from the dust collector then branching north and south on the east wall into two 6-inch horizontal ducts about 10 feet off the floor. The branch going south would go over the east wall's man door, make the corner and go west to service the 20-inch planer and 16/32 Performax Sander.

The second branch will head the opposite direction on the east wall and branch again at the center of the east wall. One branch will go west, (attached under the I-Beam supporting the Upper Room) down the centerline of the woodshop. That branch will service the Table Saw, Jointer and Wood Lathe. The remaining branch will continue north on the east wall and service the drill press. At that point that branch will hit a corner and turn west on the north wall and service the band saw and miscellaneous equipment located on the north wall.

I am thinking 4-inch pipe servicing most of the machines but 5-inch going to the planer. I plan on blast gates at the bottom of each service leg.

I've got a friend that spent most of his working life doing industrial ventilation ductwork and filtration. I'm going to reach out to him for advice.

Best regards,

Scott
 

LutzTD

Well-known member
Joined
Dec 31, 2011
Messages
3,673
Location
Lutz, Florida
LutzTD,

No... I don't think JET provides design services for ductwork. It is my impression that some duct supply services do. I'm probably being foolish but I've got it laid out roughly in my mind..

The Woodshop has such a weird ceiling due to the "Upper Room" above half of it. Ceiling is 16 feet tall in one half and about 11 feet in the other. I've got ceiling fans and ceiling mounted fluorescent fixtures and I don't want ductwork hanging from wires so that, coupled with the dust collector's location pretty much drive the duct's location.


20200125-01.jpg

Green shows location of Dust Collector & proposed ductwork.

I'm thinking 8-inch diameter duct going up the wall from the dust collector then branching north and south on the east wall into two 6-inch horizontal ducts about 10 feet off the floor. The branch going south would go over the east wall's man door, make the corner and go west to service the 20-inch planer and 16/32 Performax Sander.

The second branch will head the opposite direction on the east wall and branch again at the center of the east wall. One branch will go west, (attached under the I-Beam supporting the Upper Room) down the centerline of the woodshop. That branch will service the Table Saw, Jointer and Wood Lathe. The remaining branch will continue north on the east wall and service the drill press. At that point that branch will hit a corner and turn west on the north wall and service the band saw and miscellaneous equipment located on the north wall.

I am thinking 4-inch pipe servicing most of the machines but 5-inch going to the planer. I plan on blast gates at the bottom of each service leg.

I've got a friend that spent most of his working life doing industrial ventilation ductwork and filtration. I'm going to reach out to him for advice.

Best regards,

Scott

sounds good, I am planning to run 4" and 6" plastic ducts for my collector, but it is quite a bit smaller than the Jet you planned. I think the key must be to keep the velocity in the duct high enough to carry the dust, so small dust will need less velocity and big dust more, but I dont have a feel for what machine makes what size dust or how slow is too slow, and there are likely things like dead spots that can cause issues, so please dont be afraid to elaborate in the theory and design. I will most definitely be watching as this is very interesting to me on a mathematical level. HERE is an interesting summary
 
Last edited:
To avoid these ads, REGISTER NOW!
Top Bottom