To avoid these ads, REGISTER NOW!

Between 265 & 485 SQ/FT Nick's Two-Car Detached Vdub Garage

Workspaces sized between 265 and 485 squarefeet.
OP
N

nicholam77

Well-known member
Joined
Dec 18, 2016
Messages
2,671
Location
Minneapolis, MN
Those photos are "Groovy" Nick. I wonder if the pine wall planks in the Master Bedroom are still there behind dry wall. That would be some very good wood if it came from the 60's.

Bret

Haha, yes, very Groovy! I wondered the same thing at first, but I think the paneling was probably removed. I didn't see any evidence of it when redoing the floors and baseboards. Same in the living room.
 
To avoid these ads, REGISTER NOW!
OP
N

nicholam77

Well-known member
Joined
Dec 18, 2016
Messages
2,671
Location
Minneapolis, MN
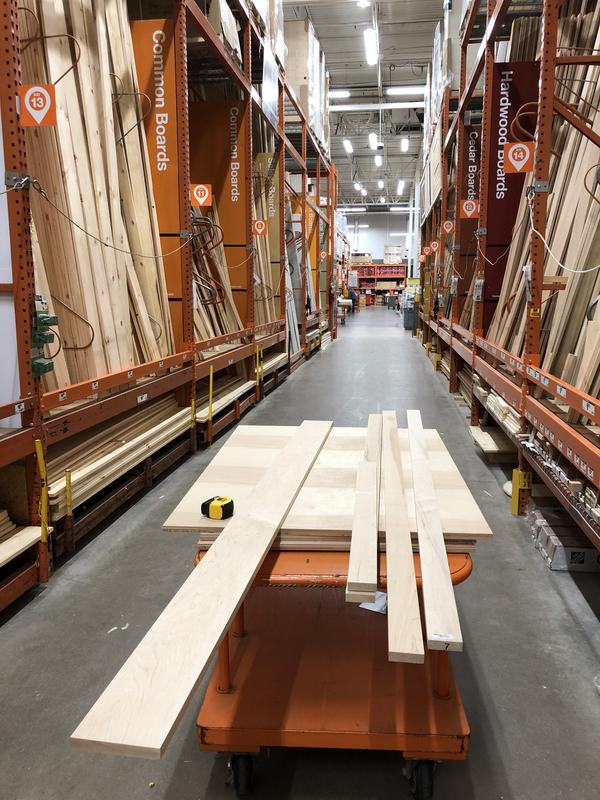
New Years Day I had off and managed to steal away to Home Depot for an hour to get some birch plywood. Getting 4x8 sheets is a real challenge for me these days. I used to use my dad's truck but he got rid of it, and both our cars are compact. I ended up having the guy strategically cross cut oversized pieces on their panel saw.

6BCD9D65-BDCA-4A50-AB79-028F90EAD57E.jpg


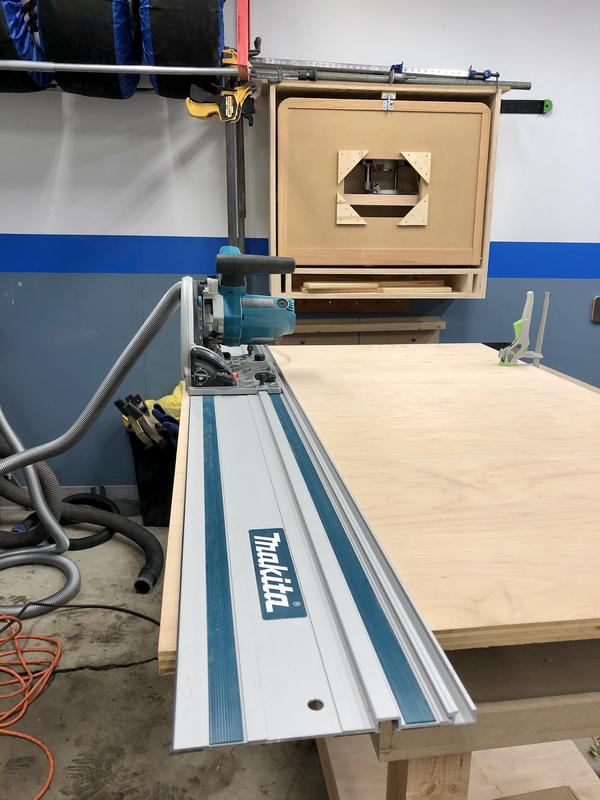
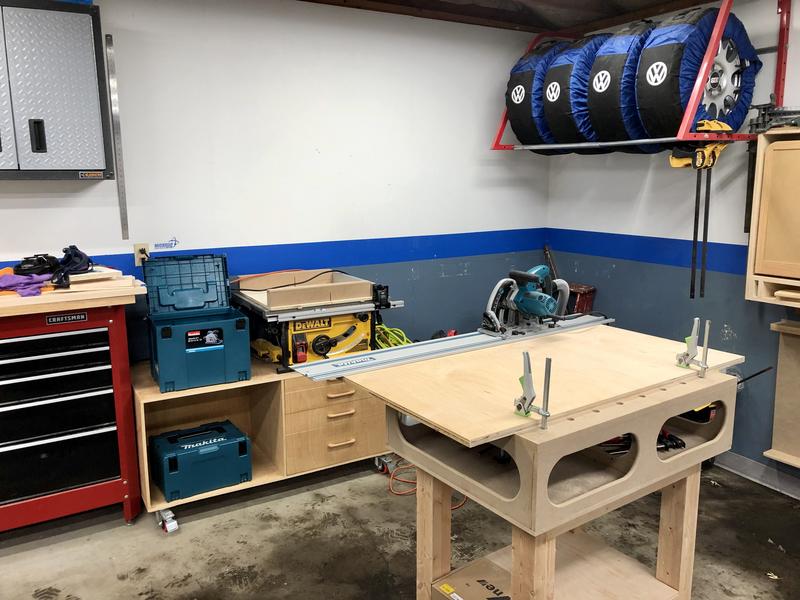
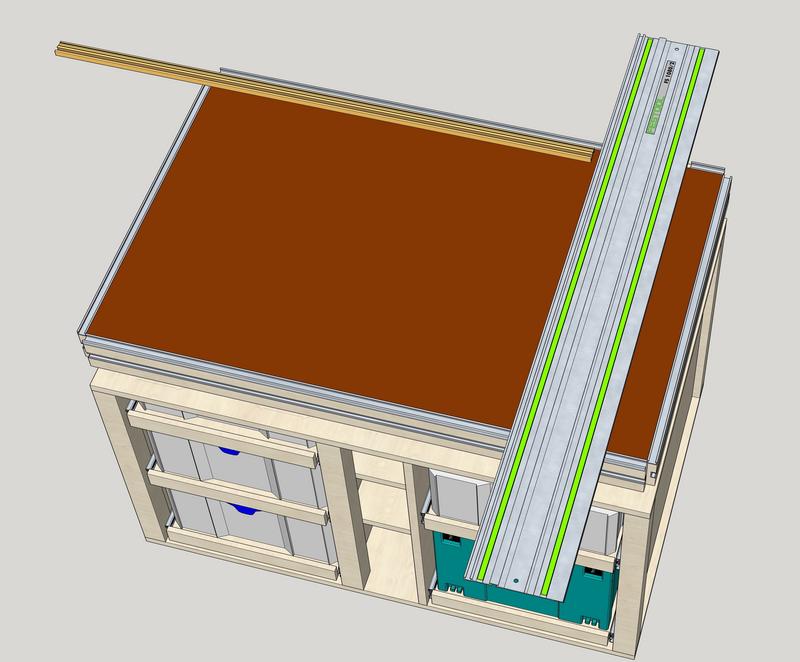
I had a goal to build a project over winter, but so far it hasn't happened. I'm going to try and do a little bit here and there in the evenings when I can. I'm trying to make a track saw workbench. Kind of like my mini-paulk-MFT cart, but bigger and way better. With a removable fence, vertical clamping, systainer storage below, etc. More details later, but so far I cut the top and bottom to size:

731CDA34-37E8-4ABF-8D25-DB4AB21F19B9.jpg


12BDADF5-BCD2-4EFA-9296-D6BE2A14B7F5.jpg


A major reason for building it is to make accurate 90 degree cuts with the tracksaw. Measuring and marking pencil marks and lining up the track works ok, but still prone to error. This track saw station will double as an assembly table and outfield table, and hopefully the foundation of many sheet-goods-based builds to come.

Man it felt good to make some sawdust again, even if briefly. It's been too many weeks!

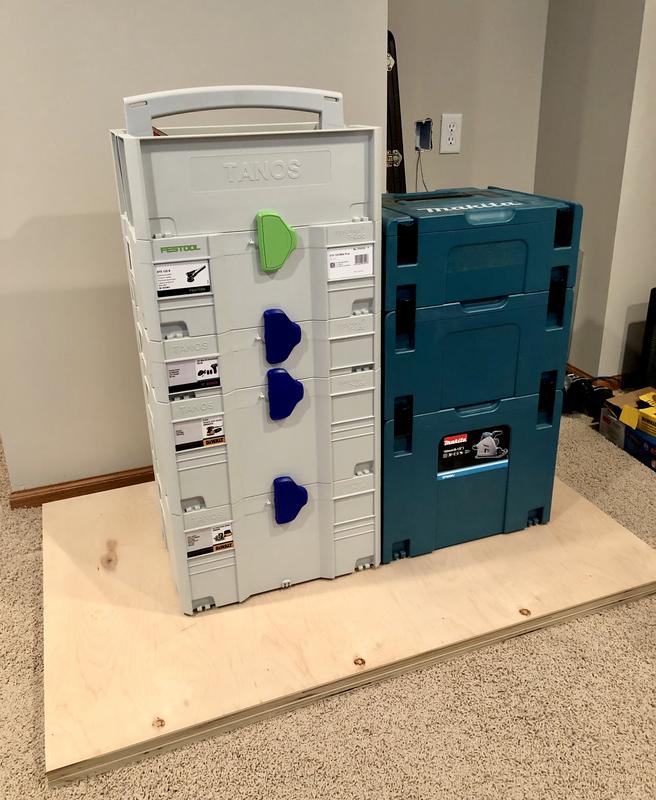
We had a cold spell a bit ago and I've since brought some of my tool indoors to the basement. The Makita box latches are prone to sticking if warped in temperature changes so I'm trying to take better care of them. Easy to carry outside when needed anyways.

300CEC3D-B33D-472E-88EA-881DCC30B25D.jpg


Today I was supposed to receive the refrigerator and gas range. My daughter LOVES big trucks and waved at the delivery truck as it pulled up, super excited.

BF472328-D573-42E1-AE8C-6501855EA500.jpg


Benefit of MN winters is I just put all our refrigerated food outside while the swap happened.

50DCB0BD-E9A4-4A1D-A26D-0F970B716107.jpg


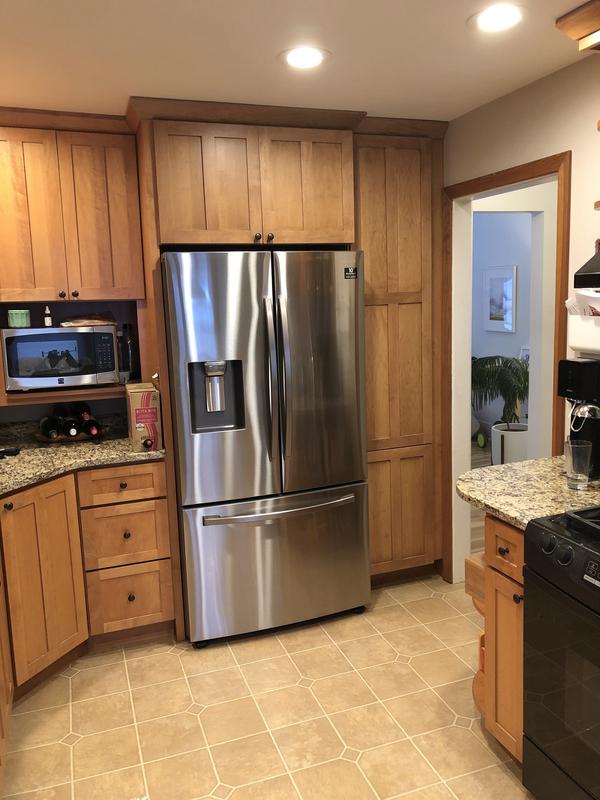
New fridge:

A6B8A87D-EB45-4E34-898C-5FE5C968066A.jpg


Seeing it in context the wife is already putting the pressure on to get the floors going.

Sadly the range got turned away as I screwed up and didn't realize our current one is dual-fuel and 220V 30 amp whereas the new gas only needs a 110V 20 amp connection. :mad: Now I need to get an electrician convert it.

Both the fridge and the forthcoming range are compatible with SmartThings. Not why I chose them, but kind of a cool perk I guess since I use that platform.

:beer:
 

old-air-performance

Well-known member
Joined
Mar 2, 2014
Messages
187
Location
Belgium
Hi Nick,

I have had the same plan to build a tracksaw expansion for my fab table for making accurate 90° cuts and a hinge for easy use, but it didn't turned out as i hoped for ( to much movement in the hinge) so it was relocated to the scrap bin.
So i'm curious whats solution you come up with :)

And wifes that put on pressure to get things done in the house, i guess we all can relate to that.:bounce:

Best wishes for 2020

Toon
 

bdbecker

ALLIANCE MEMBER
Joined
Nov 18, 2015
Messages
5,574
Location
Iowa
...For Christmas I received a book I had wanted as a present, a profile of David Salmela's architectural work. He lives and works out of Duluth MN, and the majority of his projects are Modernist and located in the upper Midwest. A few lines stuck with me when I was reading it yesterday:

"Design is about making great things happen in any situation, regardless of the constraints."


I really like that quote. Which book did you get? I see there are a couple on Amazon. Not sure why I'm asking, I'll probably just get both. Anyway, thanks for turning me onto this architect, I really like his work from what I've seen on his website.

Also, I notice you have an ISU meat lab bag - any connection to the best university in the Midwest, or just coincidence?
 
OP
N

nicholam77

Well-known member
Joined
Dec 18, 2016
Messages
2,671
Location
Minneapolis, MN
Hi Nick,

I have had the same plan to build a tracksaw expansion for my fab table for making accurate 90° cuts and a hinge for easy use, but it didn't turned out as i hoped for ( to much movement in the hinge) so it was relocated to the scrap bin.
So i'm curious whats solution you come up with :)

And wifes that put on pressure to get things done in the house, i guess we all can relate to that.:bounce:

Best wishes for 2020

Toon

Hey Toon, I am likely not going to build my own hinge for that reason. It definitely needs to be accurate and I don't trust myself to create that with off the shelf parts, and probably don't have the time, either. I will either get the stock Festool hinge and support from their parts catalogue, or this one by Right Angle Design.

The Festool parts require a custom track profile, like the actual MFT profiles. If going that route I'd do something similar to what Guy Dunlap has done for his table here.

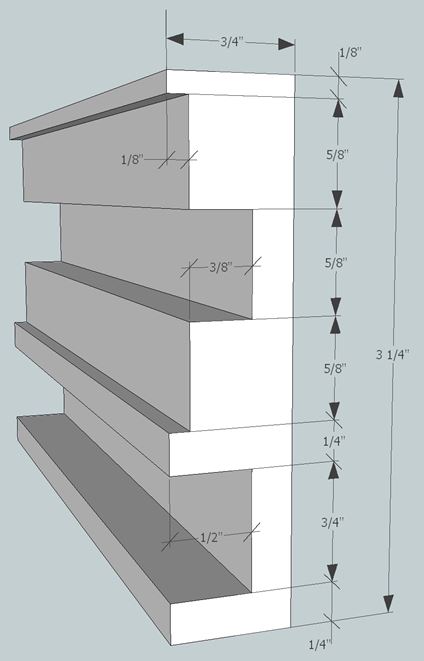
Details for his custom profile are in the pic below as well as forum post on FOG:

Rail-Profile.jpg


https://festoolownersgroup.com/festool-jigs-tool-enhancements/custom-mfttable-saw-extension-table/

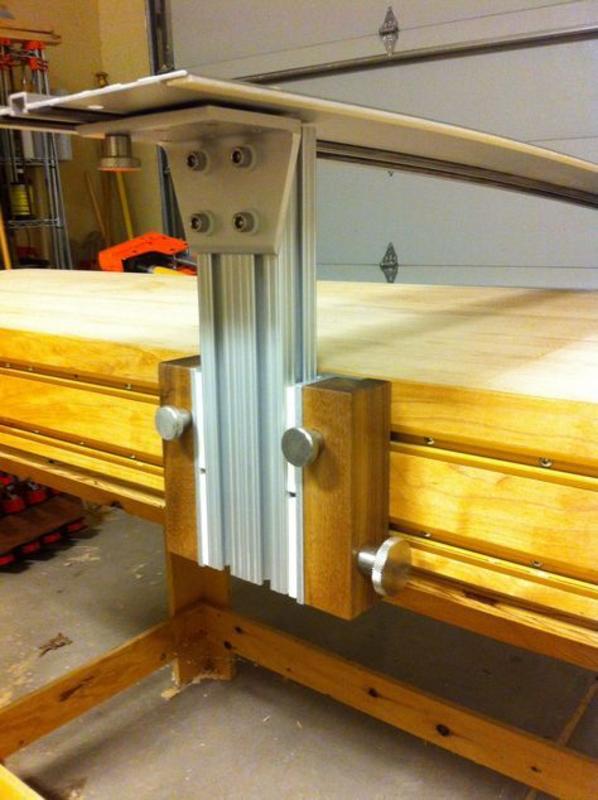
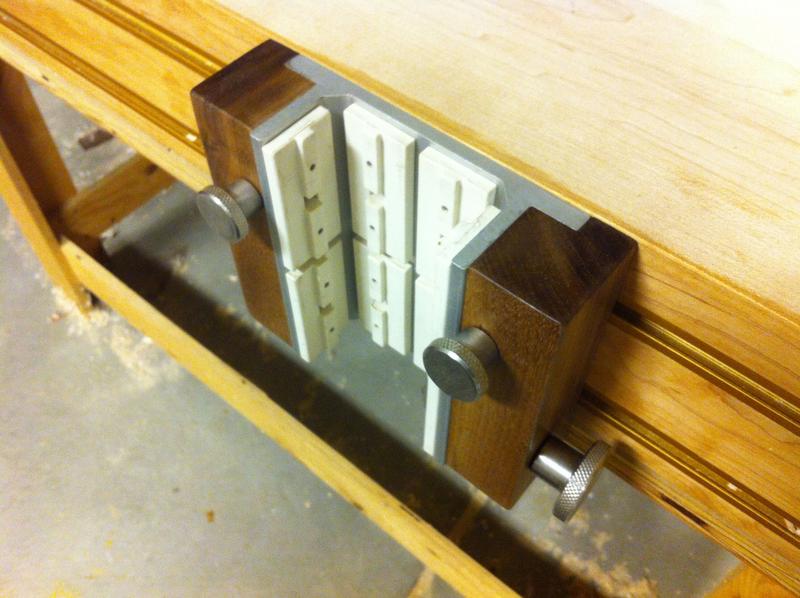
I've also read of people using an 8020 linear bearing which is about $80. No hinge on this one but maybe you could find some appropriate 8020 parts:

c30kUF0W.jpg


9u-thxM_.jpg


4KIKowb5.jpg


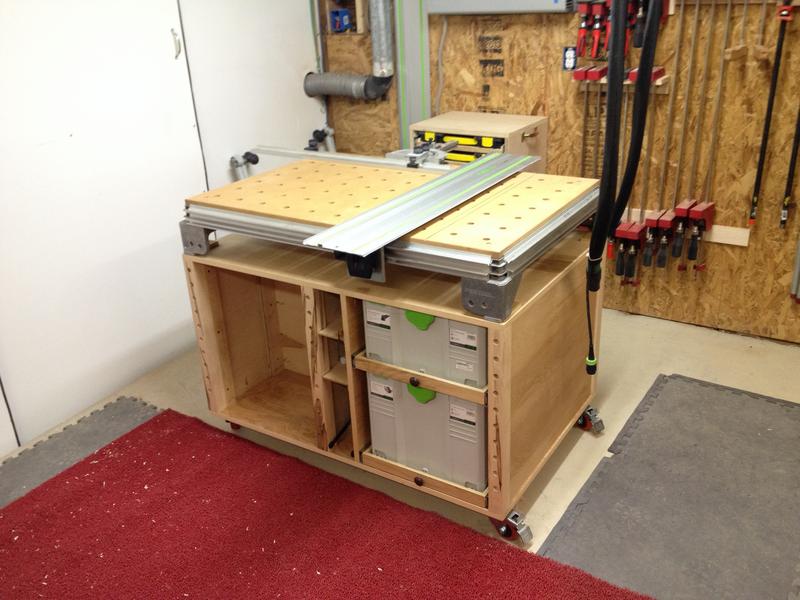
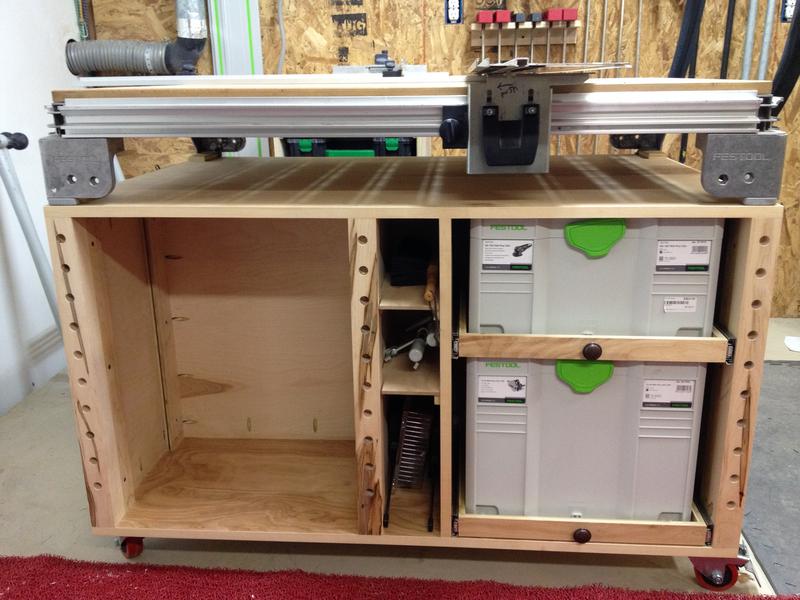
For rough design of the overall bench I am going to heavily copy this one I found on FOG:

IMG_1360.jpg


IMG_1364.jpg


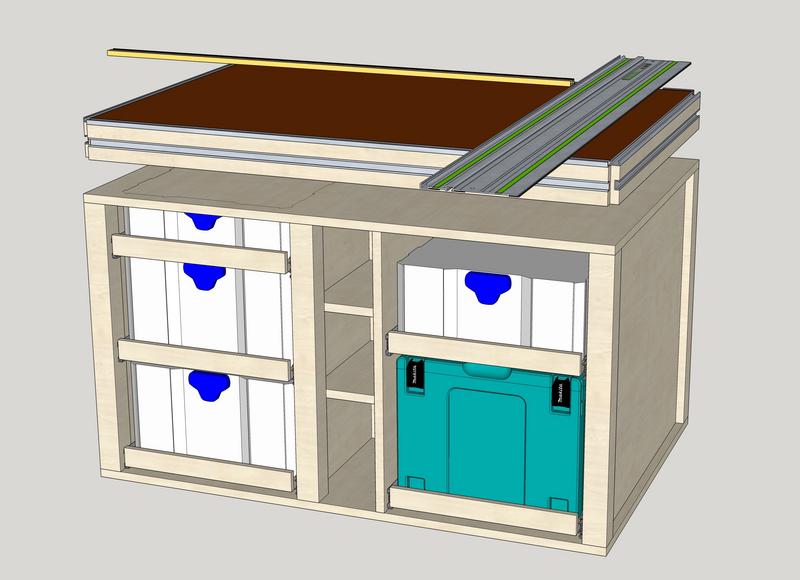
Except instead of an MFT the top will be custom, kind of like the Guy Dunlap video. I have a work-in-progress model that's missing some components but will give you the general idea, here:

Miter-MFT-TS-1.jpg


Miter-MFT-TS-2.jpg


As you can tell I'm still ironing out some details, but hopefully that gives you some ideas anyways.

Cheers, and happy 2020!


I just received the same fridge minus the door water feature as we purchased a separate cold/hot water cooler.

Sweet! I like it a lot. Outside water was pricier but my wife said she didn't want guests to have to open the fridge to get water. We rarely have guests. :lol_hitti

It also has a "Cool Select Pantry" drawer for chilling white wines. Nice :thumbup:

I really like that quote. Which book did you get? I see there are a couple on Amazon. Not sure why I'm asking, I'll probably just get both. Anyway, thanks for turning me onto this architect, I really like his work from what I've seen on his website.

Also, I notice you have an ISU meat lab bag - any connection to the best university in the Midwest, or just coincidence?

I got the one called "The Invisible Element of Place: The Architecture of David Salmela". It's actually the 2nd book about him by the same author I think. The first one (which I do not have, but discovered my dad does) has a lengthy feature on the woodsy compound he designed for renowned wildlife photographer Jim Brandenburg. I've since been thinking about picking up that book, too. The one I got has lots of large, quality pics.

Ha! My wife's extended family is mostly from Ames. Her parents grew up there, grandparents still live there, two of her brothers went to ISU. I don't personally have a connection with the University but I've walked around campus a number of times. We go down there for a long weekend around Xmas once a year. Not sure why exactly the meat lab bag, but must have been how we acquired it.

:beer:
 

bj383ss

Well-known member
Joined
Sep 29, 2011
Messages
3,166
Location
TX
Looking good Nick. I myself will be getting a new fridge this year and I can't wait.

Bret
 

Unruh

Well-known member
Joined
Aug 12, 2017
Messages
1,431
Location
Silverdale, Washington
Nick, some great work! Hey I’ve been watching a Youtuber from your area. Matt Cremona does urban lumbering and some amazing projects. I messaged him how I made wands for my class and he sent me an amazing piece of walnut. I think he sells lumber out of his shed, you may be able to get some nice stuff for your projects. You should check him out!
 
Last edited:
OP
N

nicholam77

Well-known member
Joined
Dec 18, 2016
Messages
2,671
Location
Minneapolis, MN
Looking good Nick. I myself will be getting a new fridge this year and I can't wait.

Bret

Thanks, Bret. I never thought I'd get excited about a fridge, but I'm really liking the side-by-side French door layout. About the same storage space/volume as the old one but everything is much more visible and easier to get to.

Nick, some great work! Hey I’ve been watching a Youtuber from your area. Matt Cremona does urban lumbering and some amazing projects. I messaged him how I made wands for my class and he sent me an amazing piece of walnut. I think he sells lumber out of his shed, you may be able to get some nice stuff for your projects. You should check him out!

Very cool. I've seen a few of his videos a long time ago I think, but now I'll have to check out more. Did not know he was in my area, but definitely seen the name pop up here and there online (YouTube, Instagram, etc). Will check it out!
 
OP
N

nicholam77

Well-known member
Joined
Dec 18, 2016
Messages
2,671
Location
Minneapolis, MN
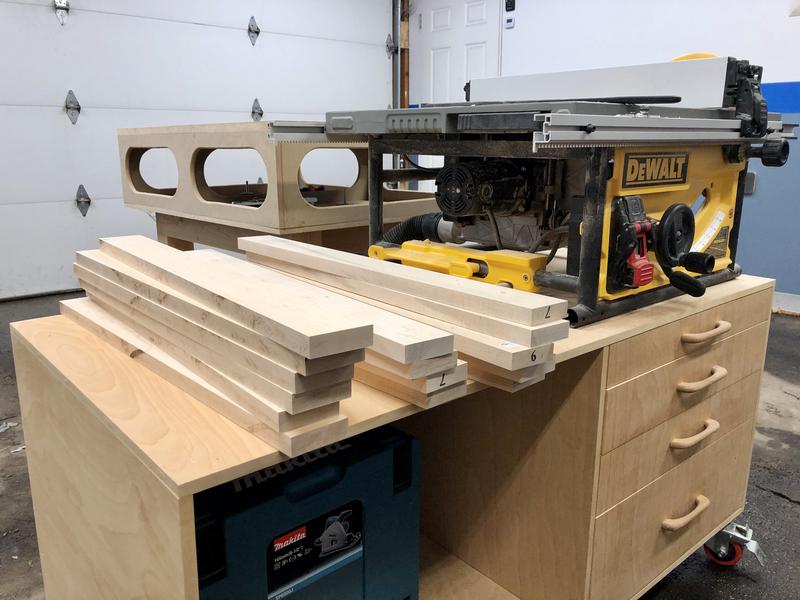
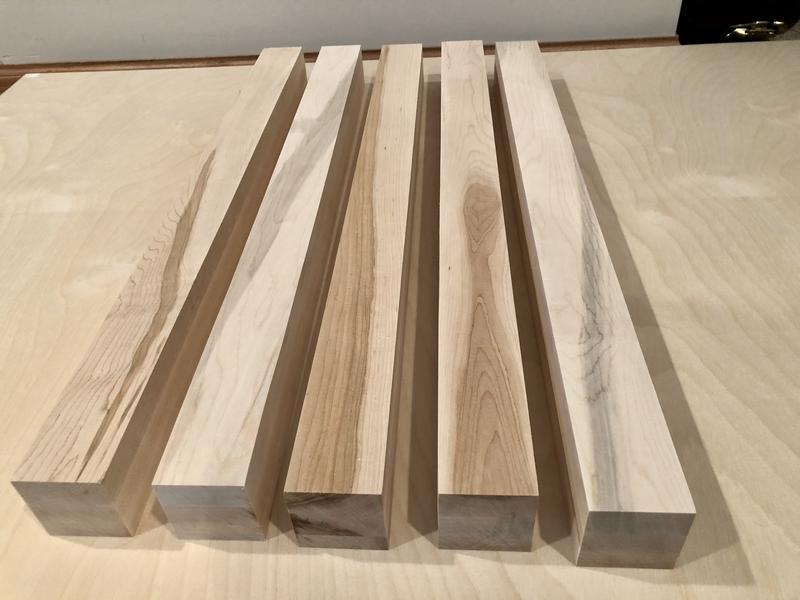
Last night my wife had a work party to attend, so after I put the baby to bed I went out to the garage for a few hours. I trimmed up another plywood panel for the track saw bench, and cut all of these maple boards:

CE9E2143-F356-4BE8-82C2-21E1F9EC2F0D.jpg


Instead of getting thicker lumber I got these 1x3's at Home Depot when I got the plywood. They are for the legs of the bench, and my plan was to laminate three together to form one leg, and then trim the whole thing to 2" square.

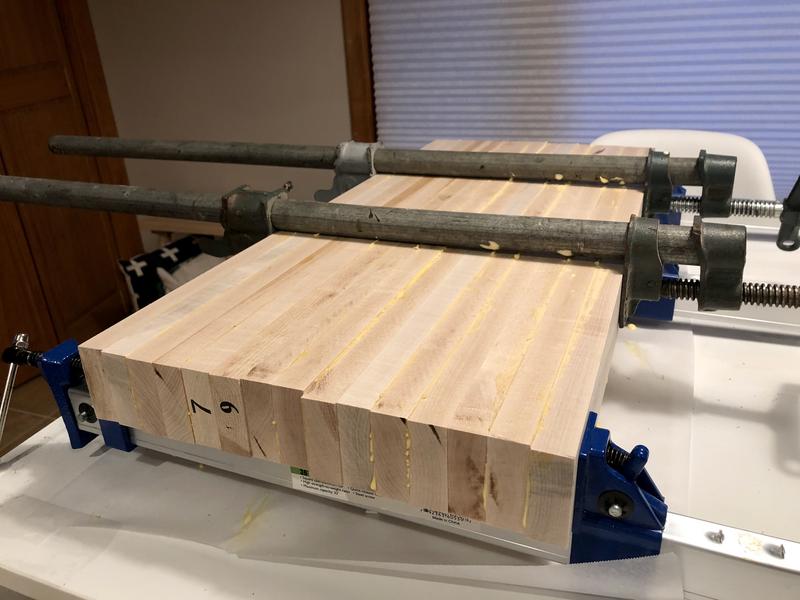
Used my kitchen table as a glue up table:

80281DA0-F2C7-484F-BE40-A0F4D91997A6.jpg


I glued them all up at once (not putting glue between separate legs), thinking this would be easier than using smaller clamps and having to do one at a time.

Well I didn't use any cauls and my stupid harbor freight clamps tend to flex and some of the boards slid out of alignment, leaving me with more of a lip here and there than I can sand. Now I need to find some way to flush them up and square them up again. And since I pre-ripped to size, I'll probably end up with less than 2" width for the final like I had wanted. I should have just got some 4/4 lumber from a wood place. :wtf:

The kitchen range is proving to be a huge pain in the ***. I got an electrician to come change the circuit over to 120V/20A, but then I realized the gas line is in the wrong spot for the new range. They definitely installed these cabinets around the existing range, because the gas shutoff **** is protruding into a cutout in one of the cabinets! I went out to Warner's Stellian to look at a floor model of the new one and confirm what the back looks like and it won't work. Pretty much with any new oven. So now I'm looking into getting a natural gas plumber to move the supply about 6-8 inches, which I'm sure will cost a pretty penny, on top of the electrician, and the original install and permit fees which were quite hefty. We also need the granite counters cut back which they are charging extra for. :mad: :mad: :mad:
 

bj383ss

Well-known member
Joined
Sep 29, 2011
Messages
3,166
Location
TX
Ahh the elusive glue up. Everything seems like it is going to work just fine until the glue goes on and you knee deep in it. I have been there. I am sure you will figure it out. Have you made a jointing jig to go on your table saw? Or you could just rip one side flush with your track saw before you rip the whole slab apart.

I have seen people using sugar in between joints to keep them from moving when the clamps go on. I haven't tried it myself yet.

Kitchen remodels always have unexpected turns. You will figure it out and in the end it will make it that much better that you accomplished all the twisted turns.

Bret
 
OP
N

nicholam77

Well-known member
Joined
Dec 18, 2016
Messages
2,671
Location
Minneapolis, MN
Thanks Bret, you always offer good advice and encouragement. Funny you mention the sugar trick, I had seen Paoson woodworking on YouTube often uses salt, and was going to try that but forgot! I do have a table saw jointing jig, but I made it in a pinch last year and the clamping mechanism is not good, especially for pieces this tall.

I ended up using the router and flush trim bit to get one side reasonably close:

3D84A0DF-AD58-4037-9875-CB301A262C2E.jpg


Then stacked them together and did some brief sanding:

C0BEEC59-0A77-4FC8-A474-169A6F83DD82.jpg


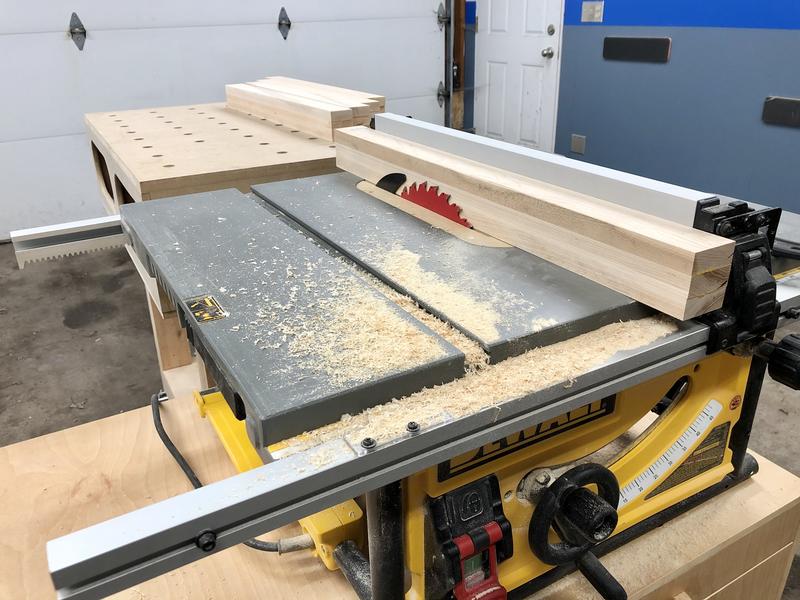
At that point each leg had one side that was looking pretty decent, definitely good enough to run through the table saw, so I just ripped the other side straight, in two passes, flipping it over. The height of these edges were 2 1/4" so that's a tall order for my job site saw when it's maple.

6C3173E0-1BCA-4115-B404-A8F4128F818D.jpg


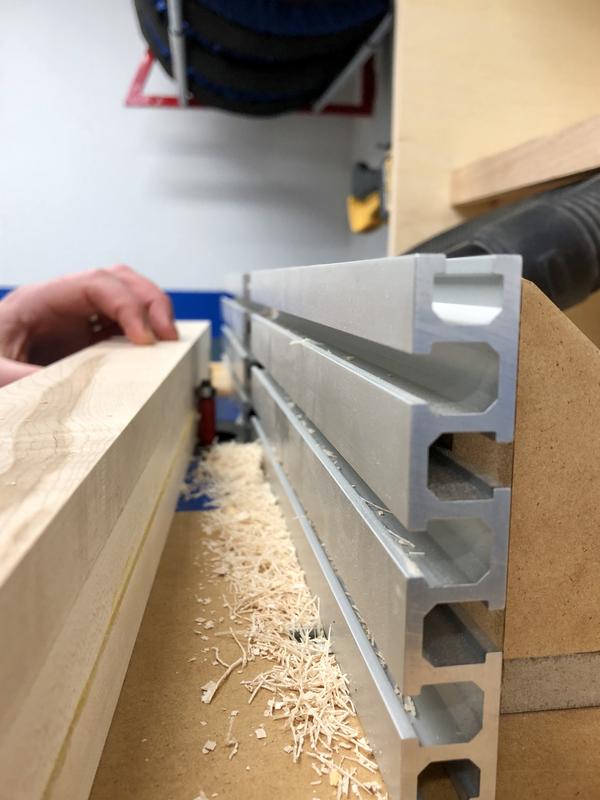
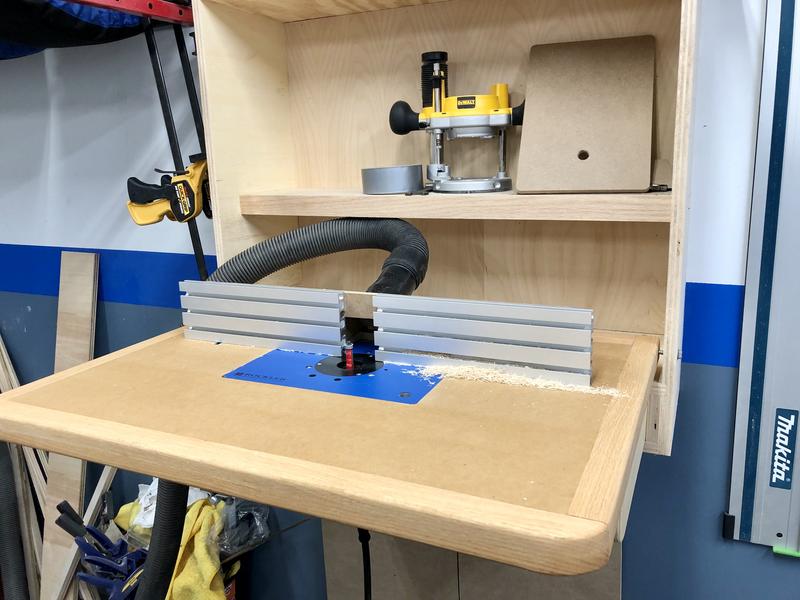
From the flip-over and essentially resawing on the table saw, there was still a slight lip so I then ran that side through the router table.

0744797E-B0F9-49B5-A812-B3B53F3A545C.jpg


4D04EF81-9246-40D9-AD65-6539918E5EC6.jpg


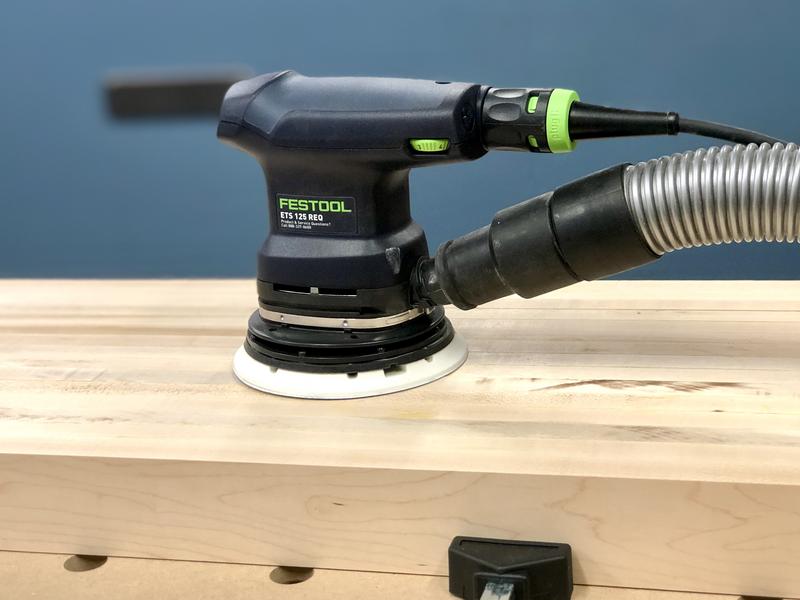
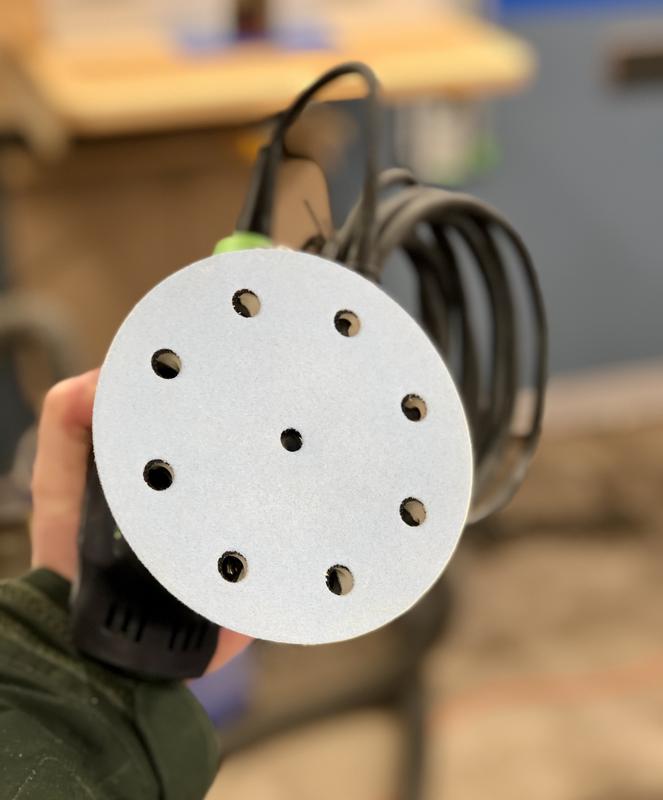
Then I could sand each piece individually. A few notes on the Festool sander, my first time using it outside of a quick test...

- it's hefty, and not quite as ergonomic as I'd hoped (might be personal preference)
- it jumps around the workpiece a bit, skittish, not that steady. Could be my technique. I tried various speeds and none were quite as smooth as my DeWalt. I wondered if it was the orbit pattern or their special sandpaper. Only 1 sheet came with the sander, 120 grit. If anyone has this model and has advice I'm all ears, essentially what I mean is it feels hard to control.
- the finish it leaves is very good
- takes a while to remove material... almost feels under powered
- dust collection is truly excellent. Better than the DeWalt. I didn't really notice any dust at all. And after 30min of sanding the sandpaper still looks brand new.

388850D2-320F-4FEE-B8ED-7475702AE870.jpg


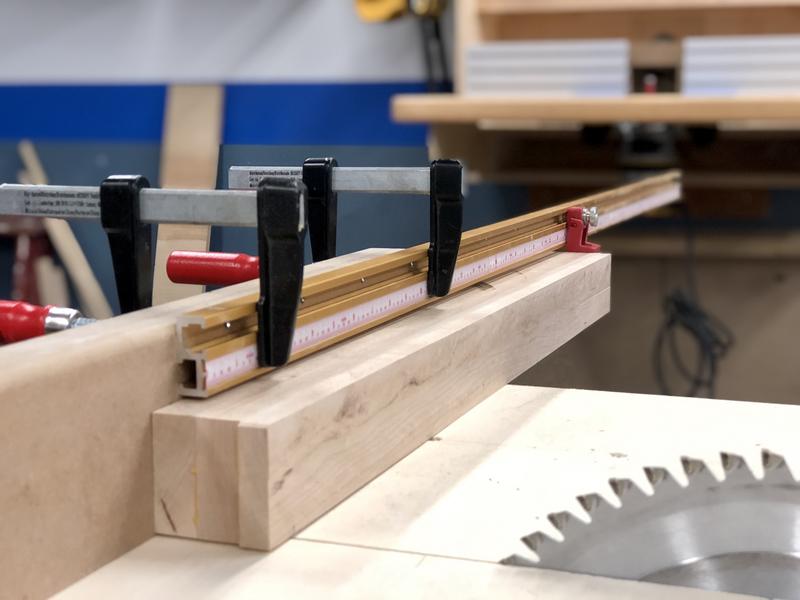
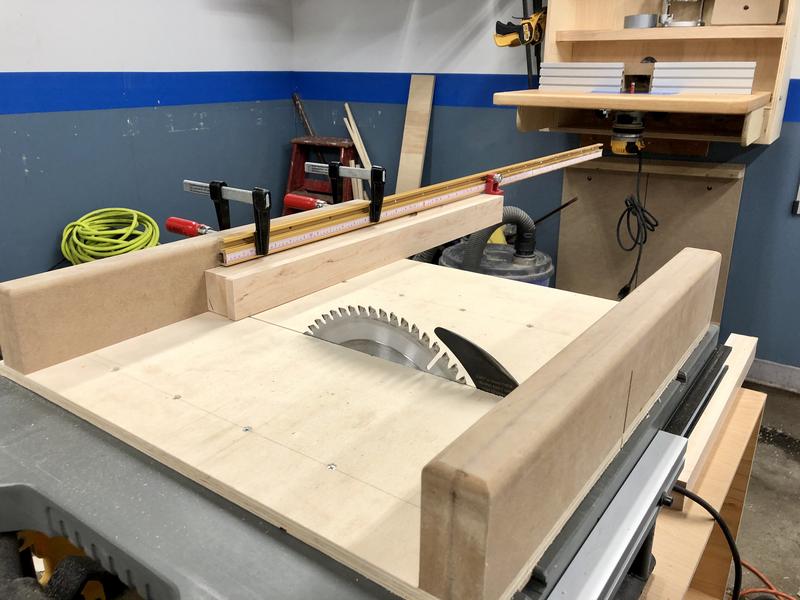
Finally I cut all the legs to length. To do this I clamped a 48" length of Incra TT+ and stop to my little crosscut sled. I bought it for the fence for this tracksaw station, and it's been sitting around since the beginning of the summer. I can't believe I've never thought to use it on the sled before. Helped keep the leg heights extremely accurate and consistent.

81AEFCB2-9B00-454E-96AC-3331513EAB08.jpg


And allows for plenty of length of repeatability!

6420123D-7279-44A0-95BB-1DBCFEDA092F.jpg


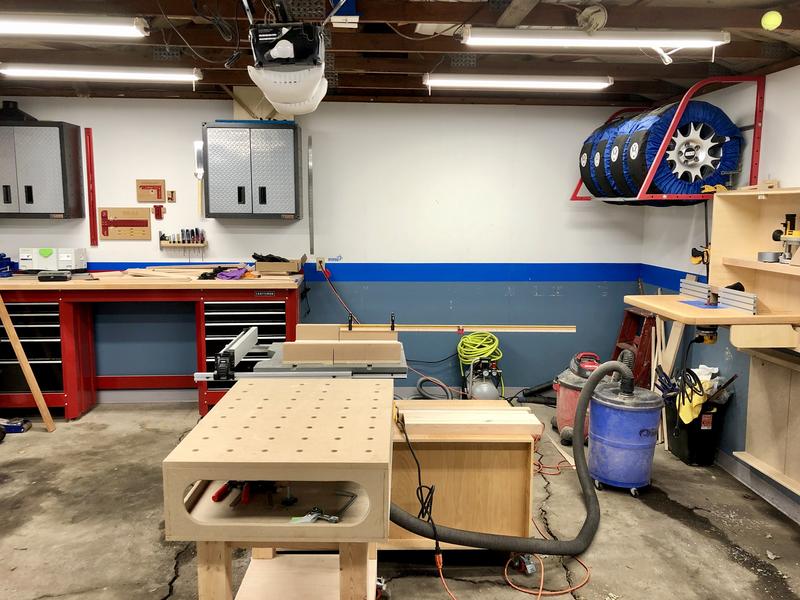
Overall pic of the shop for fun, it was about 30 F out there this morning!

08030016-17F8-4F76-8967-372543D55E6A.jpg


In the end I ended up with 5, relatively square legs. Measuring 1 7/8" x 2" instead of 2" x 2" like originally planned, but not a big deal.

1D22EA7B-A4C0-4F6D-8B88-415802D98264.jpg


So far this project seems to be moving along, hopefully I can keep the momentum going!
 
Last edited:

Mr. Roboto

Well-known member
Joined
Dec 11, 2012
Messages
2,160
Location
New Hampshire
Just getting caught up on your progress now - you've been busy!

Too cool on all of the old photos. They really showcase how far the house has come. definitely a nice piece of history to have for your house as well to look back on. The previous owners of my house didn't do a thing aside from laying hardwood floors in my house, so if I ever uncover any old photos, they'd probably look just like it did the day I closed on it hahaha.

That is a bummer on the range. There is a lot going on in a kitchen, and it makes renovating things a challenge. Just a thought on the range. Not sure what it's currently piped in with, but if it's all threaded black pipe, could you disassemble your piping back into the basement to where there is probably an elbow that turns up to pass through your floor? Remove that, and replace it from that point onward with a flexible appliance supply line that you can then run up through the floor at a location that makes sense for the new stove.

Also a bummer about the movement during your glue up. You were only 1/8" off from your desired final dimension, so you should be able to work around that! In the past when I glue up assemblies like that, I end up gluing them together, clamping, and then running a few screws in through all of the pieces to hold it all together if I have a face that will not be seen once assembled. I think you could have done that here, since it looks like the backside of the legs will not be visible once your bench is assembled. Just a thought for the future.

Merry late Christmas and happy new year!
 
OP
N

nicholam77

Well-known member
Joined
Dec 18, 2016
Messages
2,671
Location
Minneapolis, MN
Just getting caught up on your progress now - you've been busy!

Thanks Roboto! Merry late Xmas to you and your family as well! You are correct about the piping. Unfortunately I did not have time to DIY it or figure it out to save the money. I had a big job at work this week and was getting home late, no opportunity to research. Without an oven or cooktop we were getting anxious to just get it solved. In the end Warner Stellian coordinated with one of their plumbers to move the piping with extension, new fittings, etc. For a cost of course. :mad:

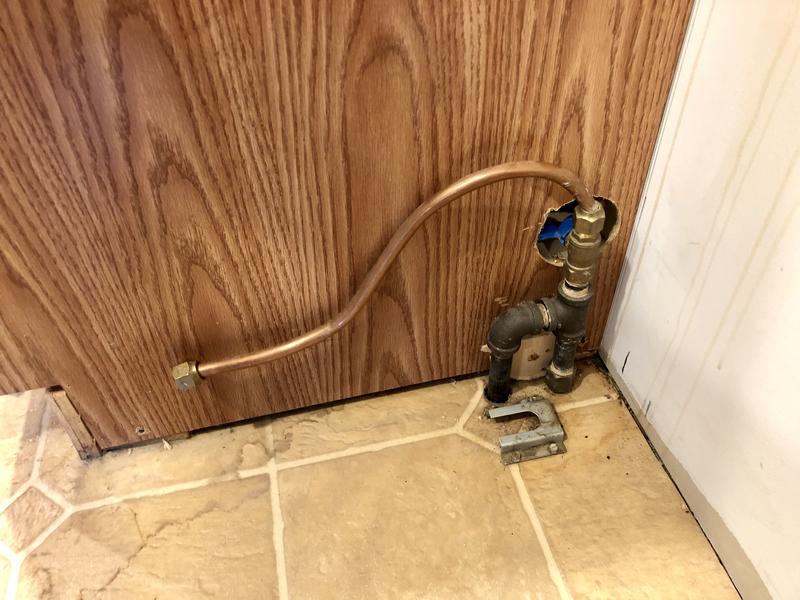
This was the old connection:

3-F6-F138-C-EB45-4-B6-B-B2-F1-793-EBCA2-D8-FD.jpg


I'll upload a pic of what they did later.

In the end the new range was delivered yesterday and the granite was cut back. It had 1/16" or less clearance on the cabinet face frames. Yikes! Just squeezed in there!

E8024539-77AE-47D4-A98F-488E3F72D3B6.jpg


Haven't cooked anything with it yet but tested everything and it seems nice! It had damn better be because when you add everything up it cost almost as much to get it installed as the range itself!

I'm leaning towards the Marmoleum for the floors but might hit a few more flooring stores this weekend and make sure there's not a better option out there.
 

ricketycricket

Well-known member
Joined
Jan 28, 2019
Messages
57
Location
Saint Louis
I renovated my kitchen about two years ago and making the decision to get a slide in range over a free standing was the best call I made. It looks so much better without the power panel behind the burners.
Any plans for a back-splash? The reason I ask is because we have gotten some splatter on ours when cooking on the burners in the back. The back-splash made it a lot easier to clean.

BTW, I have to admit, of all the garages, builds, and projects on here, I almost always log-in hoping to see one of your updates. Your projects and ideas are just so similar to mine. When they aren't, they inspire me to think outside the box. So....hat tip to you sir!
 

Mr. Roboto

Well-known member
Joined
Dec 11, 2012
Messages
2,160
Location
New Hampshire
Thanks Roboto! Merry late Xmas to you and your family as well! You are correct about the piping. Unfortunately I did not have time to DIY it or figure it out to save the money. I had a big job at work this week and was getting home late, no opportunity to research. Without an oven or cooktop we were getting anxious to just get it solved. In the end Warner Stellian coordinated with one of their plumbers to move the piping with extension, new fittings, etc. For a cost of course. :mad:

This was the old connection:

3-F6-F138-C-EB45-4-B6-B-B2-F1-793-EBCA2-D8-FD.jpg


I'll upload a pic of what they did later.

In the end the new range was delivered yesterday and the granite was cut back. It had 1/16" or less clearance on the cabinet face frames. Yikes! Just squeezed in there!

E8024539-77AE-47D4-A98F-488E3F72D3B6.jpg


Haven't cooked anything with it yet but tested everything and it seems nice! It had damn better be because when you add everything up it cost almost as much to get it installed as the range itself!

I'm leaning towards the Marmoleum for the floors but might hit a few more flooring stores this weekend and make sure there's not a better option out there.

I hear ya man.. there just aren’t enough hours in the day, or days in the week sometimes! I struggle with it every day haha. The unexpected cost was a bummer I’m sure, but the end result looks great!
 

Unruh

Well-known member
Joined
Aug 12, 2017
Messages
1,431
Location
Silverdale, Washington
We are getting a new range as well. We only have electric, but I’m pretty sure it is the same model as yours only electric. Hopefully they last both of us a long time!
 

bj383ss

Well-known member
Joined
Sep 29, 2011
Messages
3,166
Location
TX
New range looks good Nick. It's always nice to get new upgraded appliances. Most homes come with the cheapest thing the builder could buy .

Bret
 
To avoid these ads, REGISTER NOW!
OP
N

nicholam77

Well-known member
Joined
Dec 18, 2016
Messages
2,671
Location
Minneapolis, MN
I renovated my kitchen about two years ago and making the decision to get a slide in range over a free standing was the best call I made. It looks so much better without the power panel behind the burners.
Any plans for a back-splash? The reason I ask is because we have gotten some splatter on ours when cooking on the burners in the back. The back-splash made it a lot easier to clean.

BTW, I have to admit, of all the garages, builds, and projects on here, I almost always log-in hoping to see one of your updates. Your projects and ideas are just so similar to mine. When they aren't, they inspire me to think outside the box. So....hat tip to you sir!

Really appreciate that! There's a few of those threads for me on here. In a sea of a million threads I guess there's hopefully a thread for everyone can identify with!

Agreed on slide-in ranges. Looks built-in and sleeker. Never made sense to me to have controls in the back and reach over the food / flame. No plans for a backsplash currently -- I'd be open to it, just within the footprint of the range to the vent hood, but I'm not sure I'll be able to convince the wife. She's pretty against anything that has the potential for trendiness and becoming "outdated", like tile, so we often settle on relatively simplistic designs and finishes. I think there's a way to do it without the risk of that, but it will be a conversation when we get around to the counter tops. Again, this is where Sketchup really comes in handy to pre-visualize designs.

We are getting a new range as well. We only have electric, but I’m pretty sure it is the same model as yours only electric. Hopefully they last both of us a long time!

Nice! Super happy with it so far. Sadly the appliance sales person told me most appliances have a shelf life of 7-10 yrs these days. Far from the days of old when a fridge might last 15-30 years. A lot more plastics now to keep costs down. And usually the thing that goes out is the logic board / control panel. So much more electronics in appliances now, and generally I think they are cost prohibitive to repair if they break. Sure they keep costs down with cheaper materials... but the consumer has to buy twice as often and twice as many appliances go in the landfill. It's all about profits, really. :headscrat

I hear ya man.. there just aren’t enough hours in the day, or days in the week sometimes! I struggle with it every day haha. The unexpected cost was a bummer I’m sure, but the end result looks great!

New range looks good Nick. It's always nice to get new upgraded appliances. Most homes come with the cheapest thing the builder could buy .

Bret

Thanks, guys!

loved the whole garage build into woodworking. :bowdown:

Cool, thanks for reading! And me too... hopefully it continues down that path!

:bounce:
 
OP
N

nicholam77

Well-known member
Joined
Dec 18, 2016
Messages
2,671
Location
Minneapolis, MN
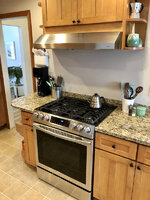
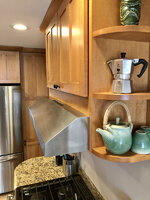
This past weekend I was able to install the new range hood. It's non-ducted, just got a cheap one.

IMG-8945.jpg

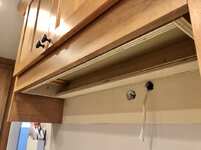
The old one was 9" tall, and the upper cabinets seemed to have been designed around it. The new one is only 6" tall (that's all I could find at an affordable price). Originally I was going to just mount it higher and have some gap at the bottom.
IMG-8946.jpg

But I remembered the PO's left some extra kitchen bits in the attic, and sure enough I found a 3/4" x 3" pre-finished filler strip board. So my new plan was to mount the bottom of the range hood flush with the bottom of the cabinets, and attach the filler strip in the gap above.

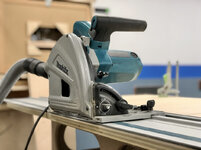
Mounting the range hood 3" lower than the cabinet bottom required making a plywood frame. I broke down some 3/4 maple plywood I had with the mighty tracksaw.

IMG-8948.jpg

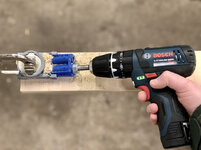
And assembled with pocket screws, using the new Bosch 12v hammer drill my in-laws got me for Xmas:

IMG-8949.jpg

IMG-8952.jpg

Honestly it was a bit low on power for drilling the pocket holes, but I do love these 12V drivers. Nice for woodworking and around-the-house duties do to their size and weight. Can accomplish most things.

IMG-8953.jpg

Then I cross cut the filler strip to length and drilled some pocket holes in that. Attaching to the cabinets with pocket screws on the back side only, no glue.

IMG-8958.jpg

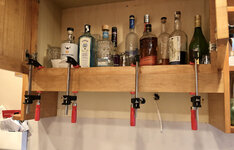
Now you know where I hide my booze-o-hol. :bounce:

Pocket screwed the frame in from below:

IMG-8960.jpg

And bing-bang-boom it's almost like it was meant for the opening!

IMG-8965.jpg

IMG-8968.jpg

:beer:
 
Last edited:

Mr. Roboto

Well-known member
Joined
Dec 11, 2012
Messages
2,160
Location
New Hampshire
That looks great! Very fortunate you had some cabinet scraps to use. Looks like it was built that was from the beginning, nice work. Doesn't look like you'll even have to touch up the paint on the wall either - win!
 
OP
N

nicholam77

Well-known member
Joined
Dec 18, 2016
Messages
2,671
Location
Minneapolis, MN
Nice, that turned out really great!

Thank you!

That looks great! Very fortunate you had some cabinet scraps to use. Looks like it was built that was from the beginning, nice work. Doesn't look like you'll even have to touch up the paint on the wall either - win!

Very true about the paint. I don't have any of that color left over from the PO's, either. We are going to repaint it in the next few months I think, when the the floors come together, but at least no eyesore until then.

Amazing woodworking skills. I could only dream....

I think you're being too kind to my abilities, but thanks! :)

I am proud that it only took 3-4 hours to install including the woodwork and problem solving. A few years ago it probably would have taken me the day.
 
OP
N

nicholam77

Well-known member
Joined
Dec 18, 2016
Messages
2,671
Location
Minneapolis, MN
I wanted to make some progress on my tracksaw bench last night, but it was far to cold to be out in the garage.

IMG-8971.jpg


So I brought my work inside :)

The worksurface of my MFT cart disconnects so I just took it into my basement where I am storing the plywood pieces for the bench, and my Systainer tools.

IMG-8980.jpg


As an added bonus this way I can have a glass of wine and listen to Spotify. My kind of woodworking! :thumbup:

IMG-8981.jpg


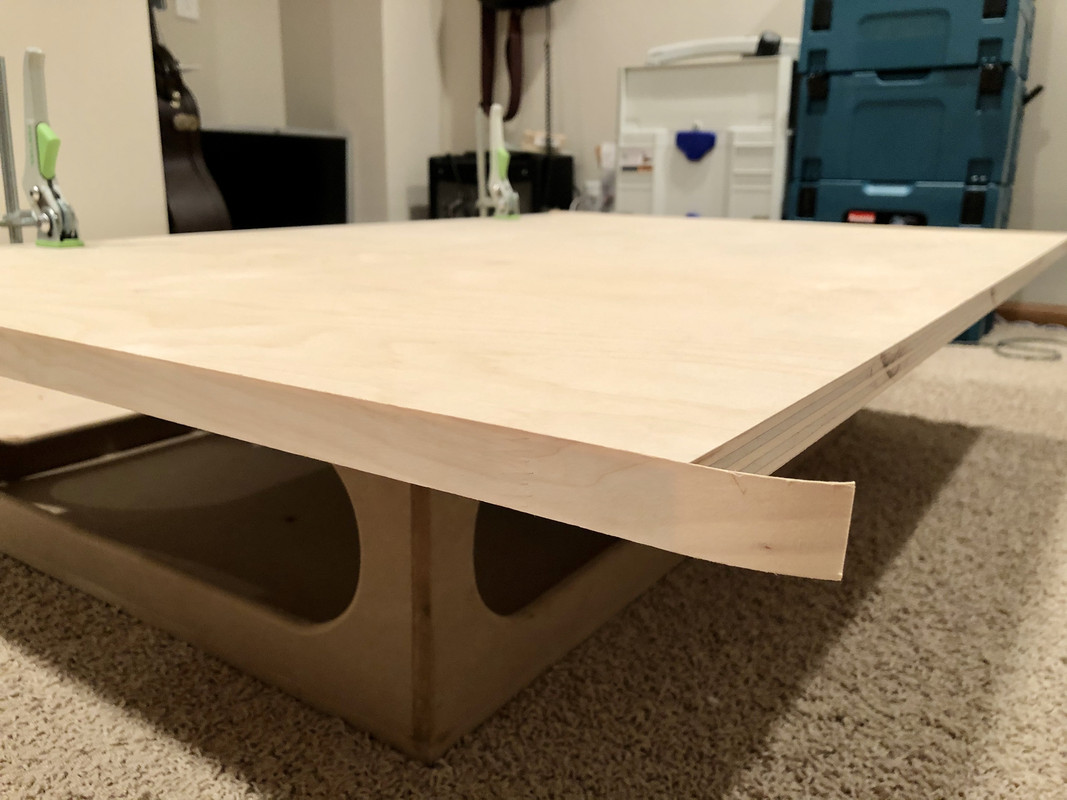
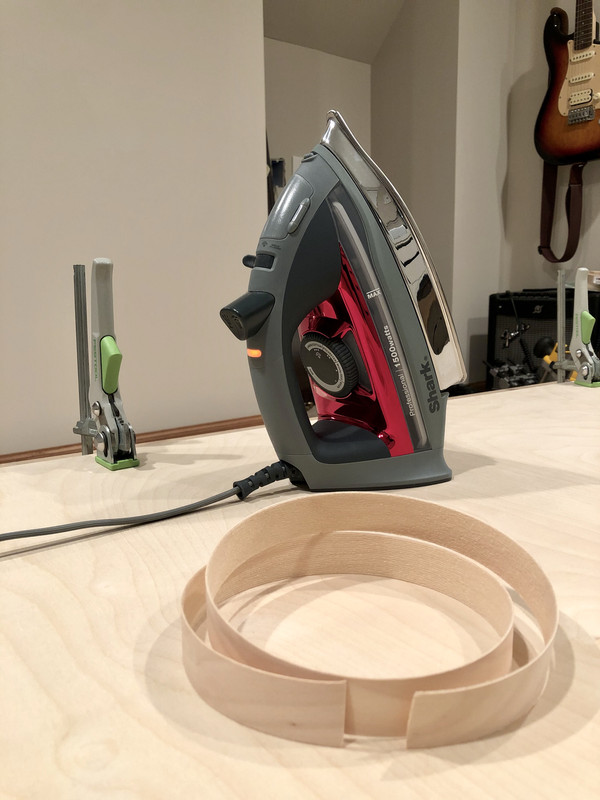
My goal was to put edgebanding on the top and bottom plywood pieces of the carcass.

IMG-8984.jpg


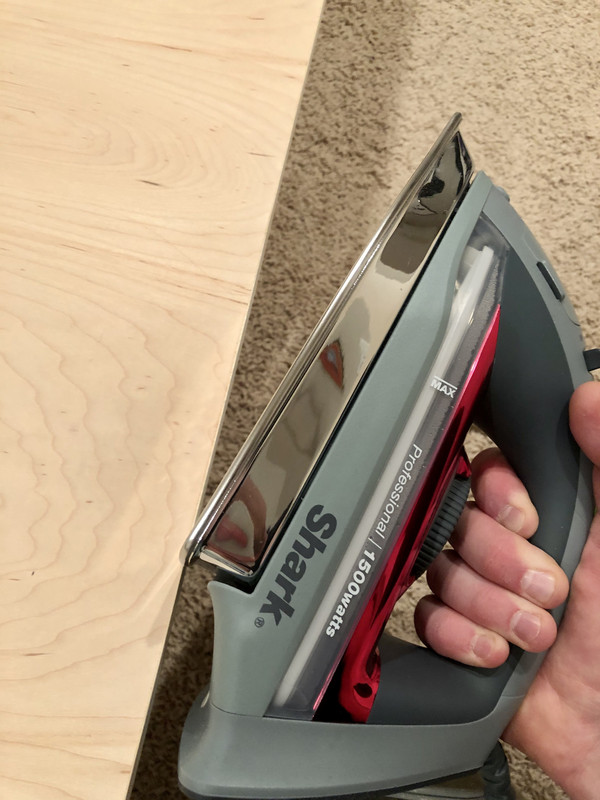
I haven't ever found the need to use a pressure roller. Sometimes I use the heel of the iron if I need to add some extra pressure.

IMG-8987.jpg


IMG-8985.jpg


A trick I learned for trimming the ends is to lay the piece vertical on a workbench and hit the backside of the edgebanding with a chisel. This works really well, is clean, and involves no specialty tools.

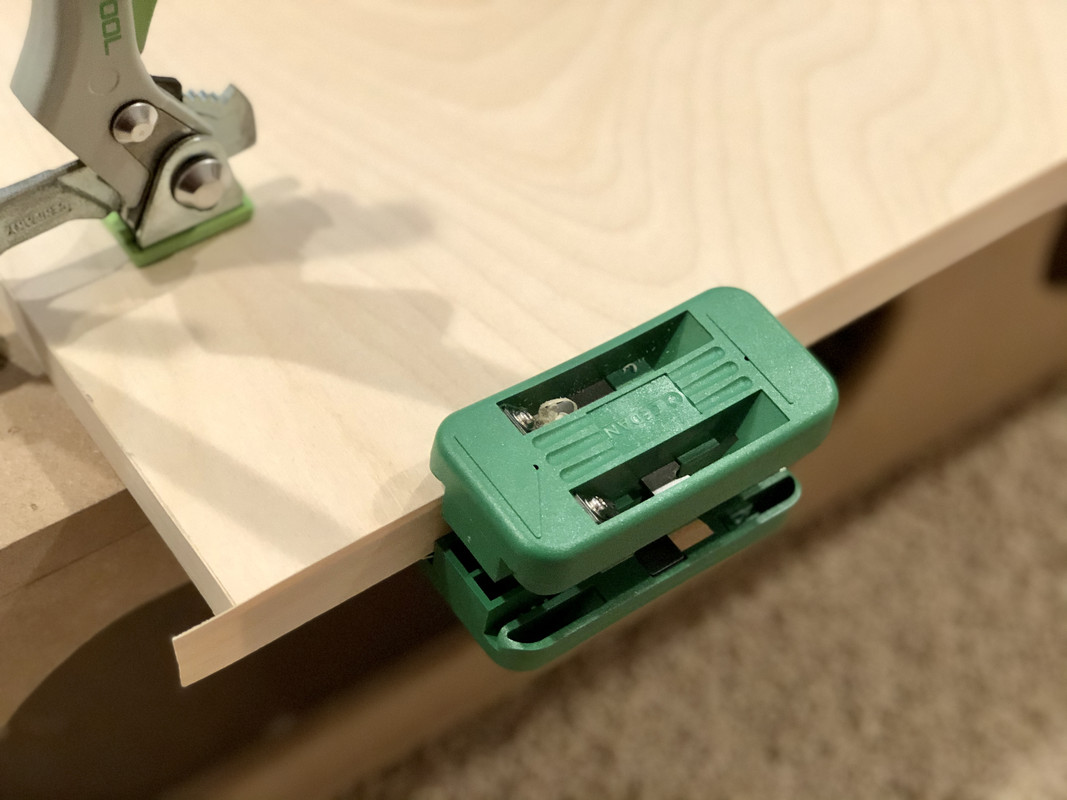
Trimming the sides I had some issues last time when I made the table saw cart. For the sections I couldn't get on the router table I free-handed with a flush trim bit and the bit scored the plywood surface here and there. This time I decided to try a razor blade edgebanding trimmer:

IMG-8993.jpg


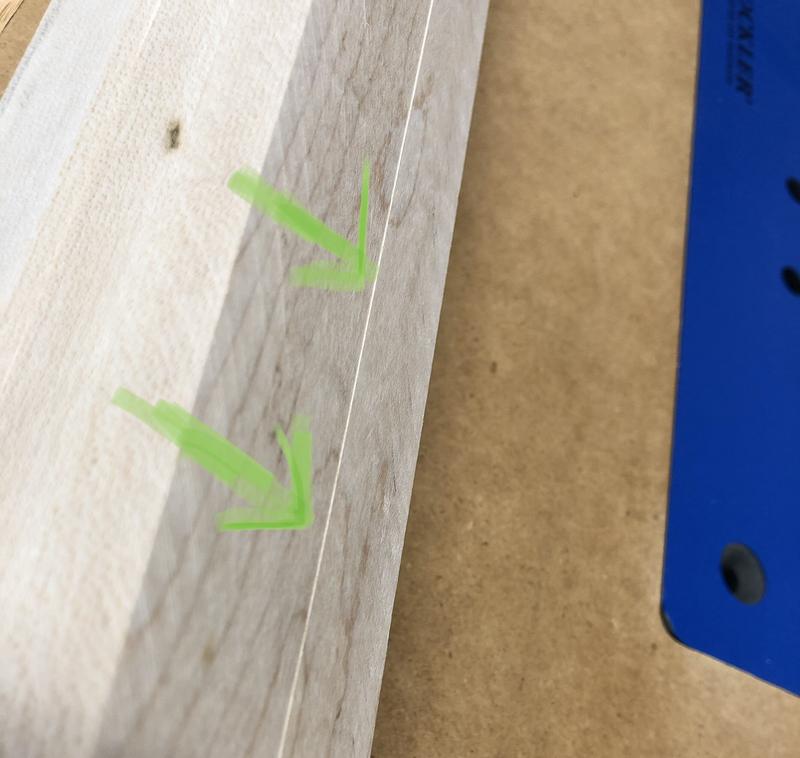
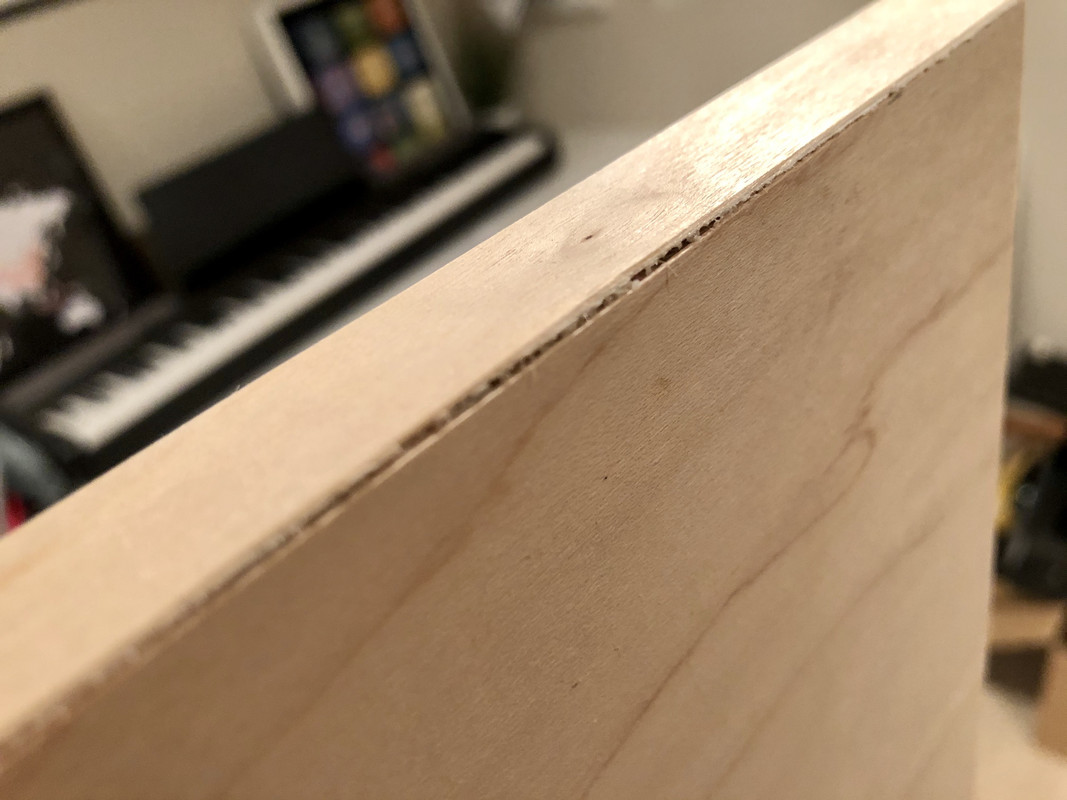
I wasn't happy with it. It cuts both sides at once, and you are supposed to go with the grain to avoid tear out. Well... if the grain goes diagonal like it was on most of my pieces, one side will always be cutting the wrong direction with two cutters. For the most part it worked, but I got a few sections with less than stellar results:

IMG-8986.jpg


I did think ahead and prioritized the grain direction of the "top" edge that will be more visible. Not a big deal for this shop furniture, but I have some projects in mind for the house that will use edge banding. Anyone have a recommendation on how to trim it that isn't a pain and ruin the edges?

I am realizing this tracksaw station build is going to be a lot more involved than I thought. My goal is to get it done by the time nicer weather rolls around this Spring. Then hopefully this summer I can knock out a few real projects now that my daughter is a little older.
 

sawduststeve

Well-known member
Joined
Oct 7, 2016
Messages
2,139
Location
Havering-Atte-Bower,London/Essex boarders, England
I am proud that it only took 3-4 hours to install including the woodwork and problem solving. A few years ago it probably would have taken me the day.

Ha ^^^thats what having kids does for you.

Nick,lovely work with the cooker hood, :thumbup: also nice to give the tools a little work out.

Wine and woodworking, I'll give that a go tomorrow, I'm finishing off a loft space flooring job, for a client, what could possibly go wrong.:lol::lol::lol:

wow, thats quite some snow, we had 14c here today, really quite warm for the time of year.

Have a good weekend
Steve:beer:
 

bj383ss

Well-known member
Joined
Sep 29, 2011
Messages
3,166
Location
TX
Great work Nick. I am leaning towards a new top for my workbench and those MFT style are calling my name.

Bret
 
OP
N

nicholam77

Well-known member
Joined
Dec 18, 2016
Messages
2,671
Location
Minneapolis, MN
I am proud that it only took 3-4 hours to install including the woodwork and problem solving. A few years ago it probably would have taken me the day.

Ha ^^^thats what having kids does for you.

Nick,lovely work with the cooker hood, :thumbup: also nice to give the tools a little work out.

Wine and woodworking, I'll give that a go tomorrow, I'm finishing off a loft space flooring job, for a client, what could possibly go wrong.:lol::lol::lol:

wow, thats quite some snow, we had 14c here today, really quite warm for the time of year.

Have a good weekend
Steve:beer:

Hey Steve, you sure are right about having kids around. Got to be fast, lean, and efficient!

Sorry for the delayed response but I hope the wine helped your flooring install!! :lol:

The snow pile is growing. This weekend we got another 5-6". You'll see in the next update. :bounce:

Thanks for reading

Great work Nick. I am leaning towards a new top for my workbench and those MFT style are calling my name.

Bret

Thanks, Bret! For assembly and clamping options I find the MFT hole grid so useful. I know there are other ways to achieve this with t-track, hold fasts, etc, but it's worked for me.
 
Last edited:
OP
N

nicholam77

Well-known member
Joined
Dec 18, 2016
Messages
2,671
Location
Minneapolis, MN
Weekend update:

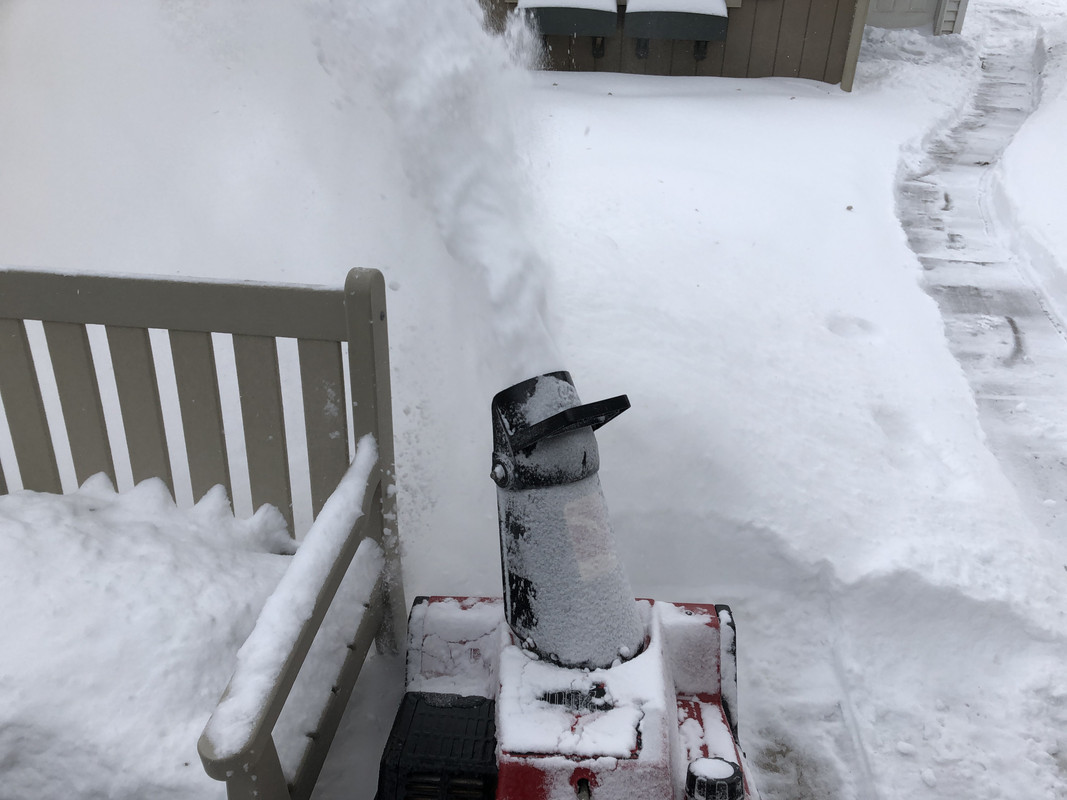
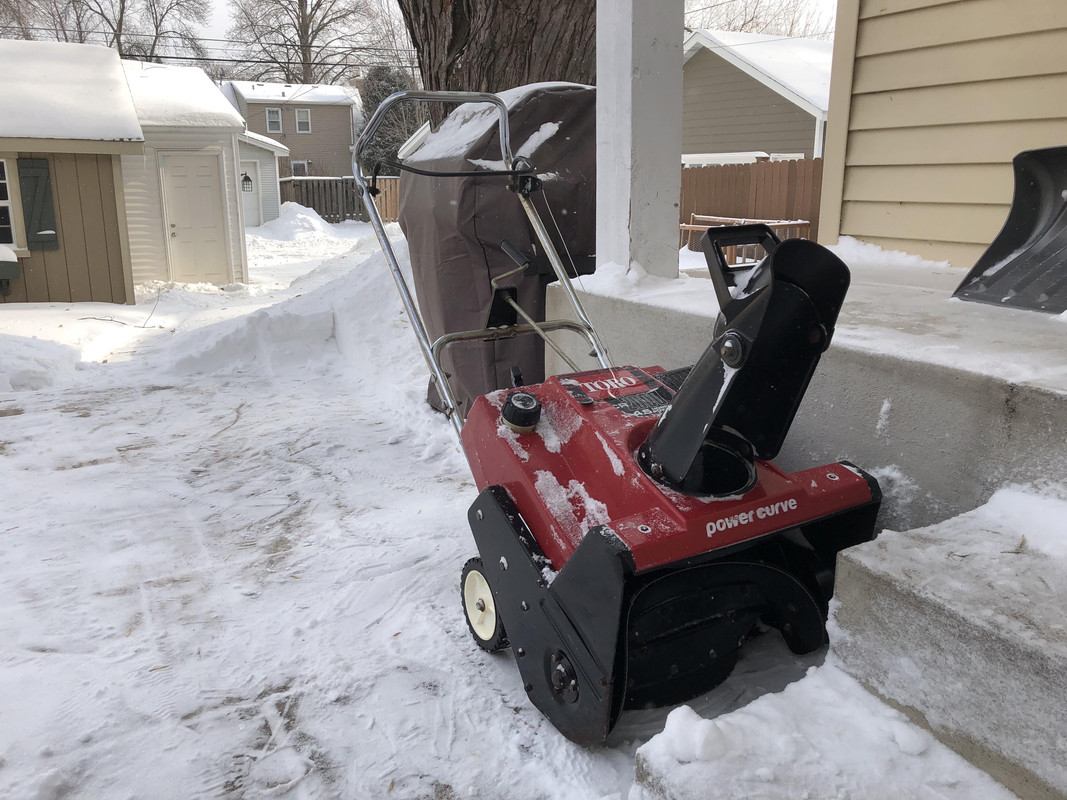
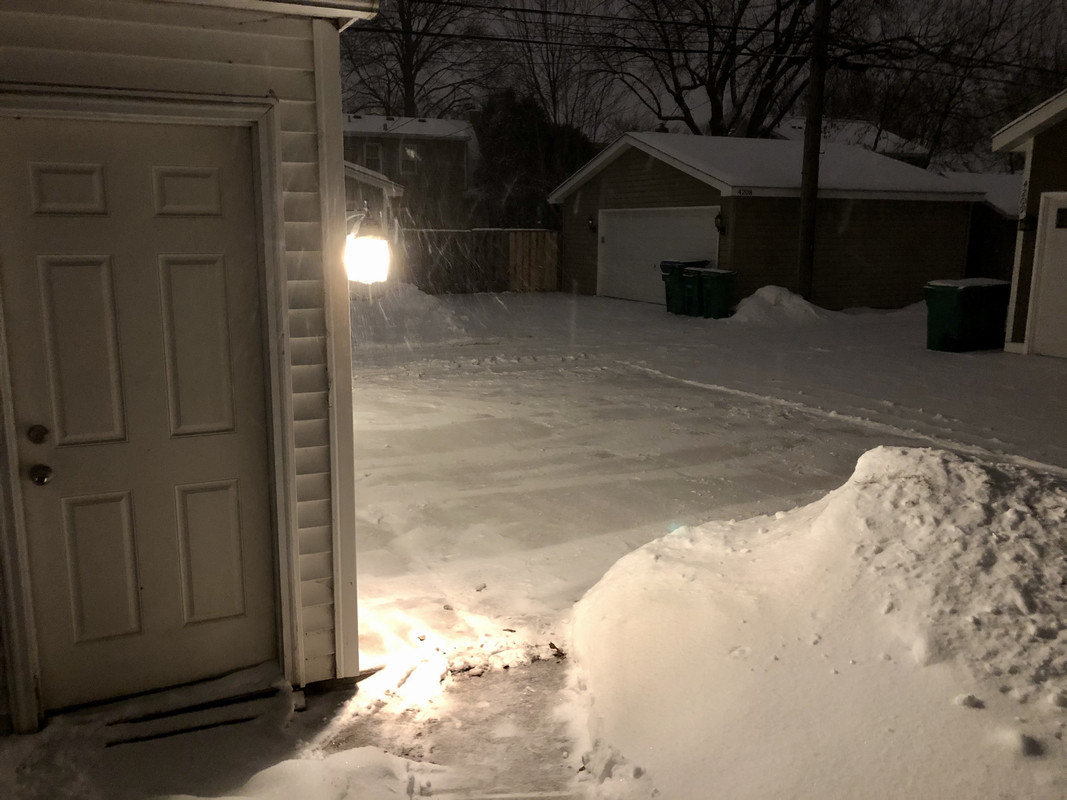
We got about 5" of snow Friday night, so Saturday morning I spend clearing it. My dad got a new snowblower and offered me his old one, so I accepted to test out on this snow storm.

It's an old Toro PowerCurve. Not sure but at least 20 yrs old.

IMG_9031.jpg


IMG_9046.jpg


It did an excellent job of clearing my deck and driveway. Then I made the mistake of shutting it off. I couldn't get it to start again (it's been finicky for a long time), and I think I flooded it. Later I got it started but wouldn't stay on. Later that evening my wife said it smelled like gas outside and sure enough it was sitting in a puddle of gas. So... I guess it has a leak now. No wonder my dad wanted to get rid of it :lol:

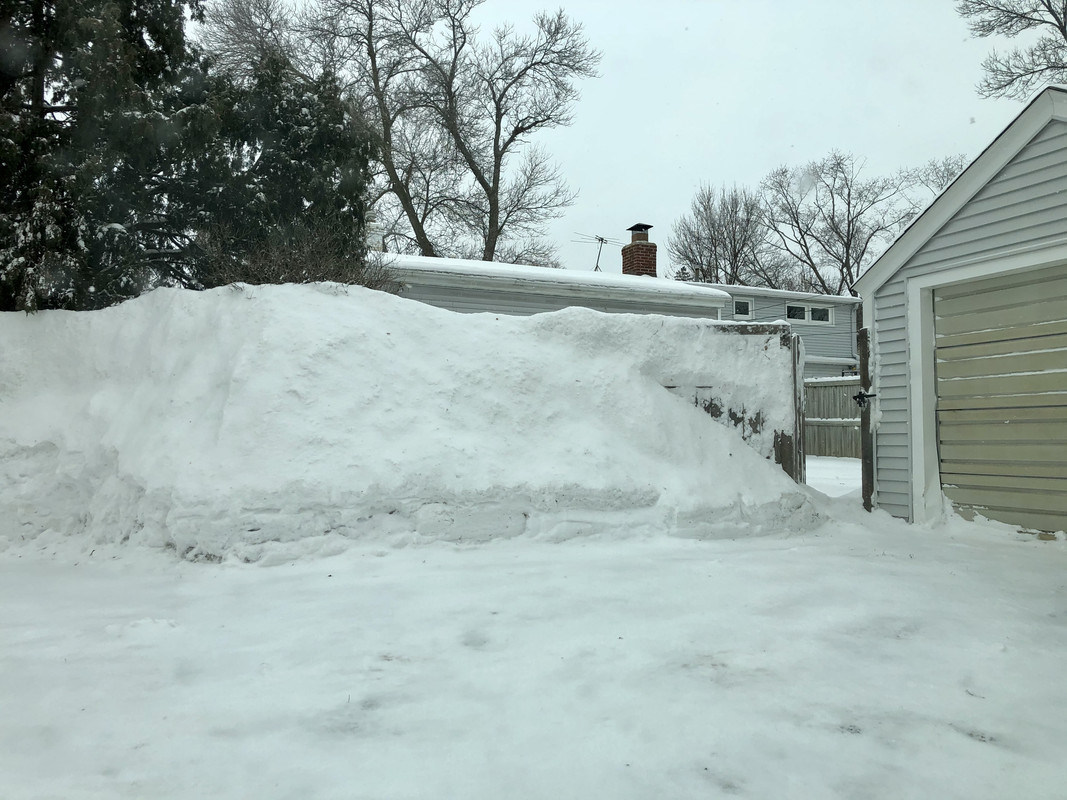
But the gas engine worked so well compared to my electric SnowJoe I am tempted to invest in a new one that isn't broken. When it really snows here, snow removal can be quite the chore, especially in an alley space. Here's a pic of a neighbors fence from Saturday:

IMG_9067.jpg


And a pile 2x as high as my car from the plows at Home Depot parking lot:

IMG_9066.jpg


Add in 40mph winds and windchill around -25 F and you'll start to realize why I brought my tools inside :lol_hitti

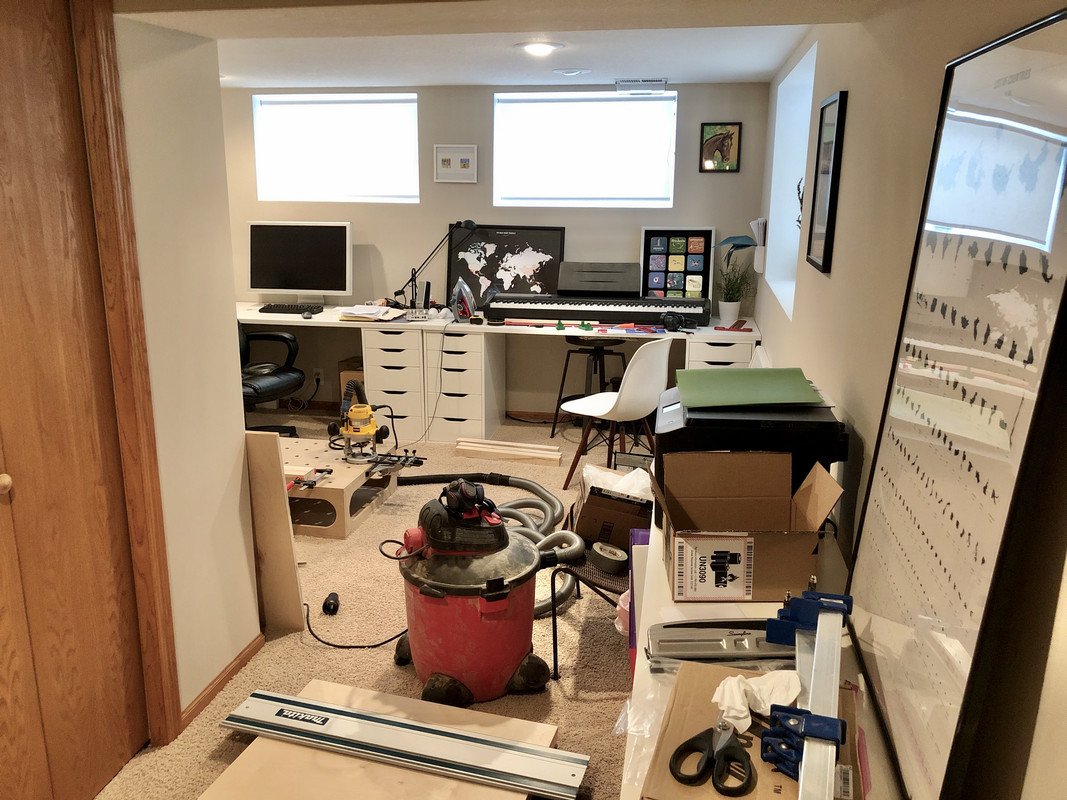
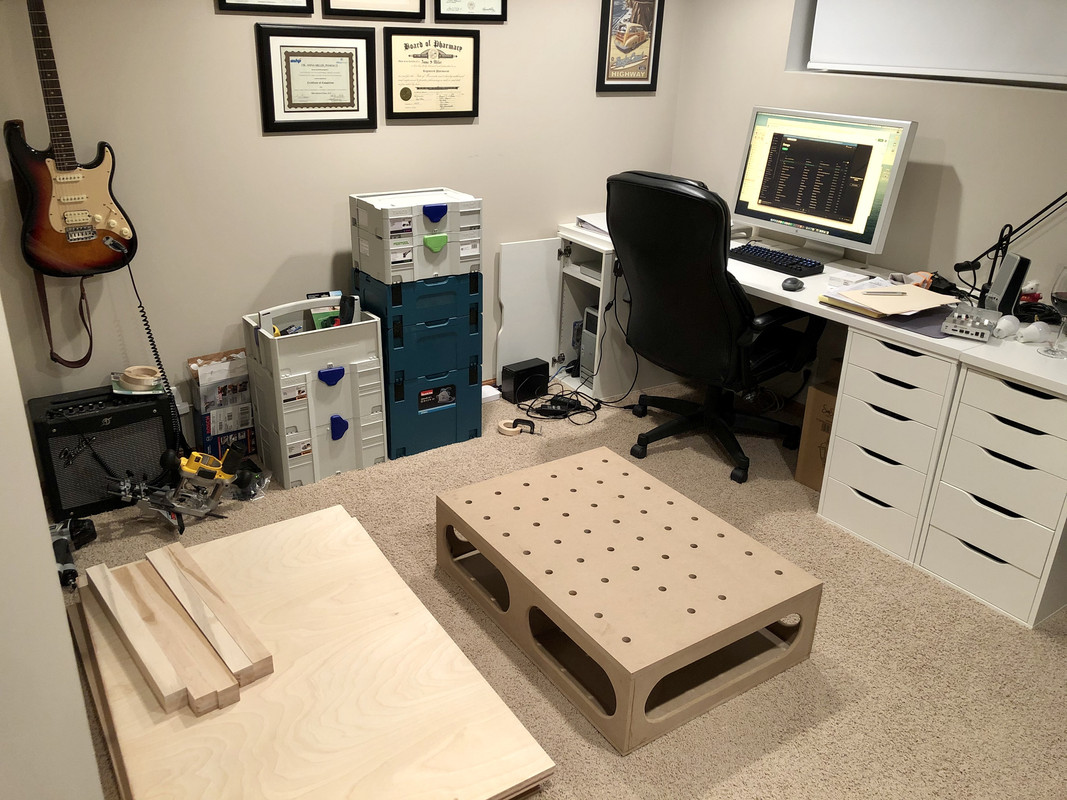
Speaking of which they have taken over my basement "office".

IMG_9083.jpg


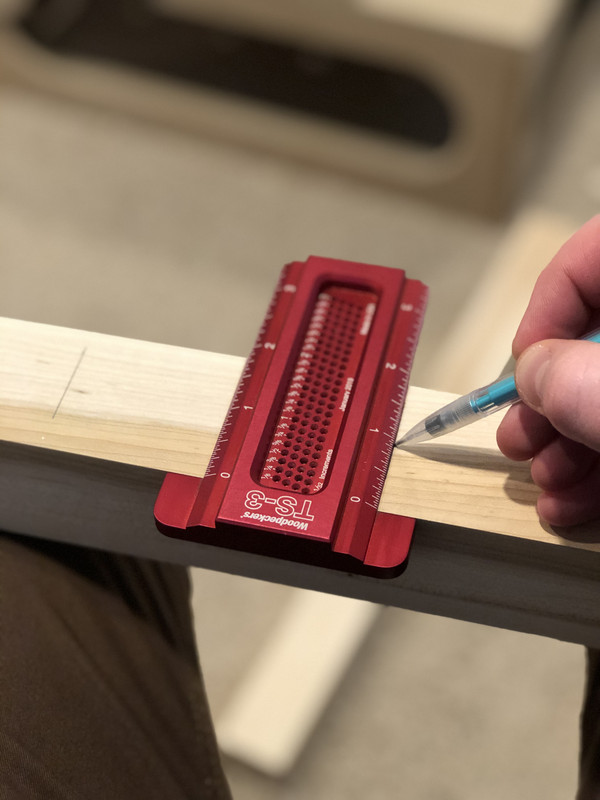
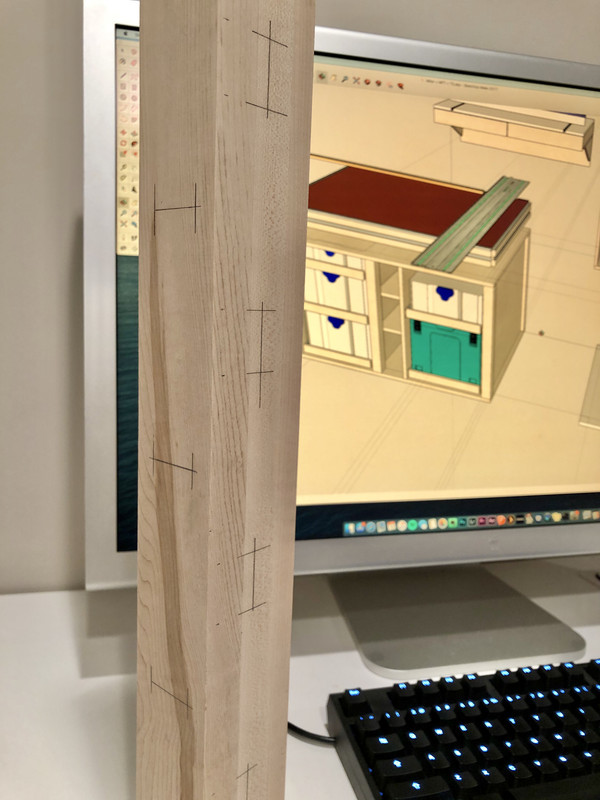
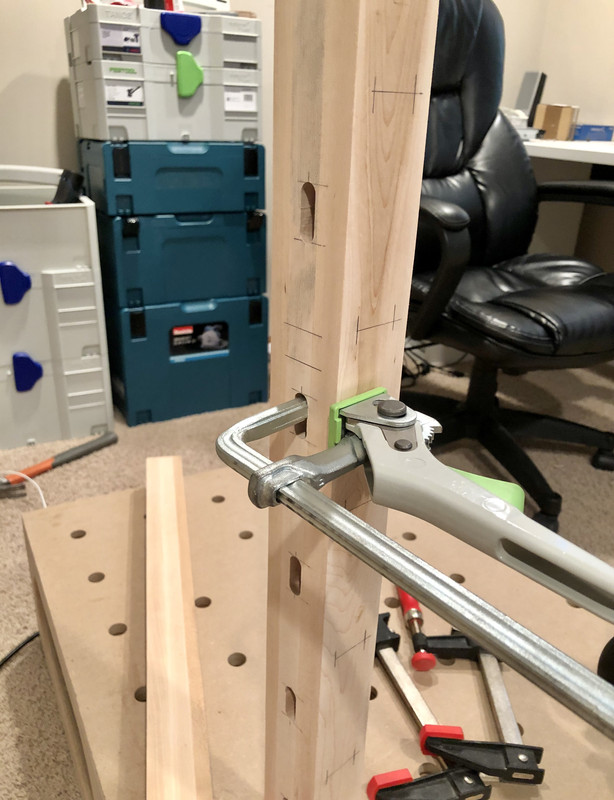
Earlier in the week I laid out 50 mortises for the tracksaw bench legs. Each one has a start line, stop line, and center line:

IMG_9050.jpg


IMG_9058.jpg


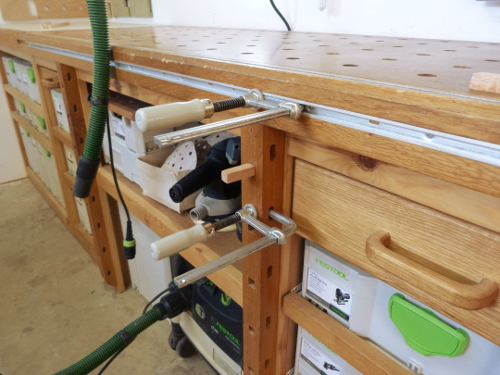
Woodpecker TS-3 made this a breeze. Essentially instead of holes, I'm emulating Timothy Wilmots "System Workbench", in which he made these mortises for clamping options with the Domino. (Yes, Bret, you were right I like his style!). :thumbup: Example below:

sysport3.jpg


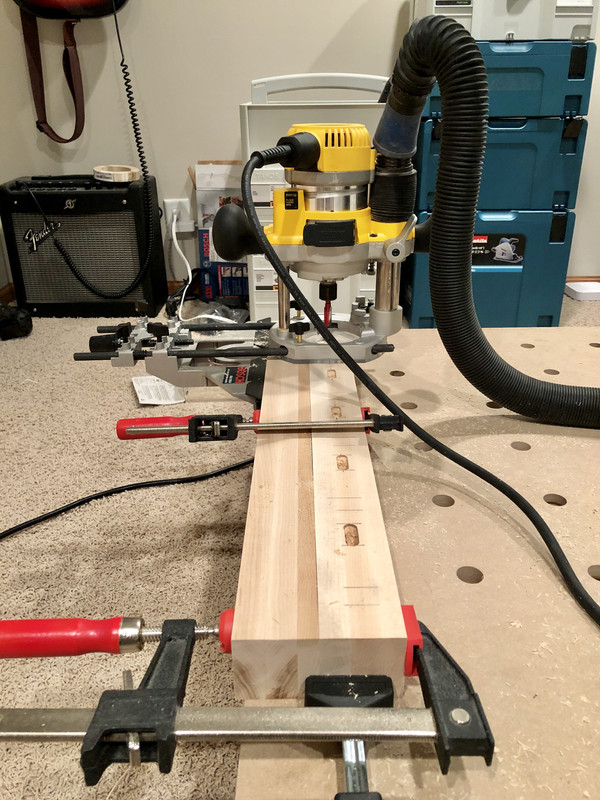
To do this I used my plunge router with edge guide:

IMG_9096.jpg


Each mortise will be 1" deep so I did each one in 4 passes.

IMG-9081.jpg


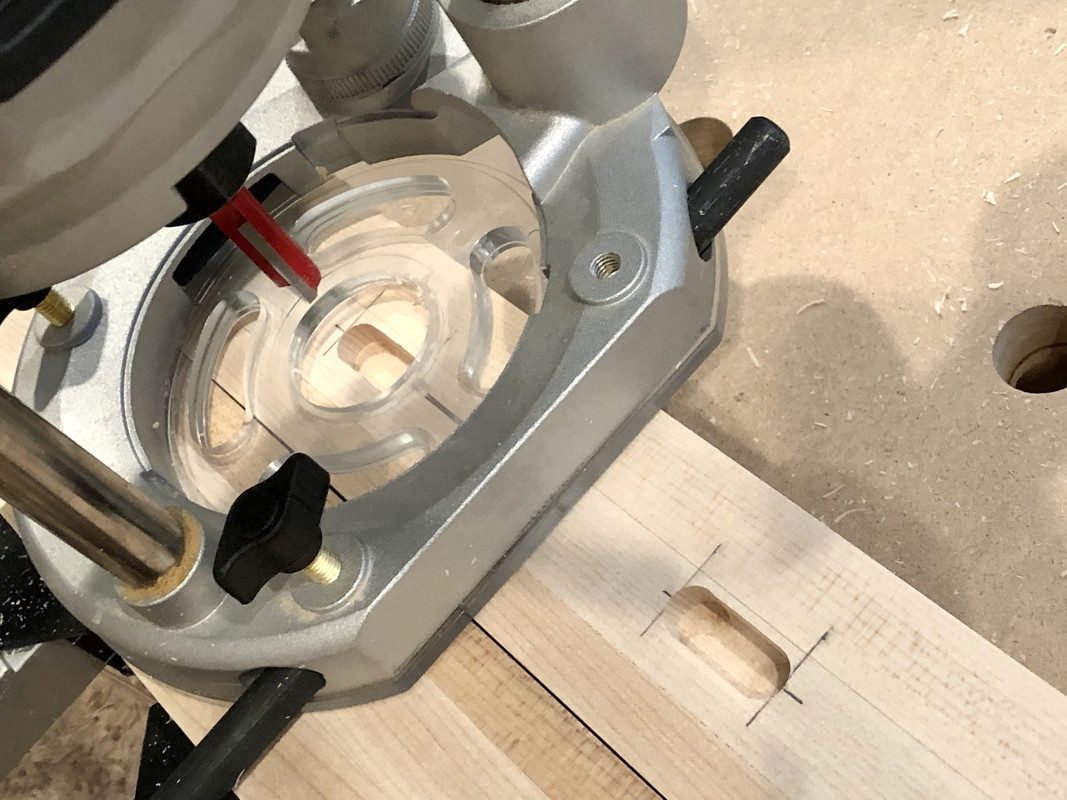
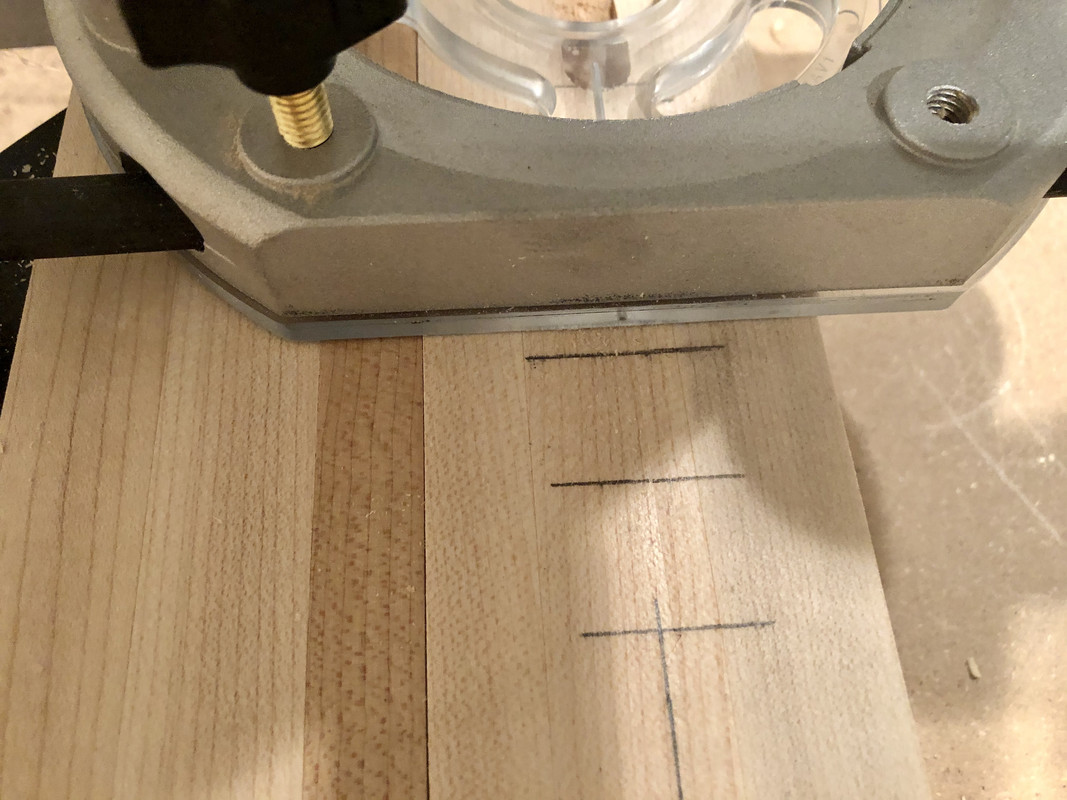
Because of the depth and it being tricky to know when I'm at the start or end of each pass, I quickly resorted to drawing start and stop lines in pencil on the first pass so I could re-align the base and make sure not to travel too far. Wouldn't want the bit accidently grabbing into an inch of material.

IMG_9092.jpg


Proof of concept:

IMG_9088.jpg


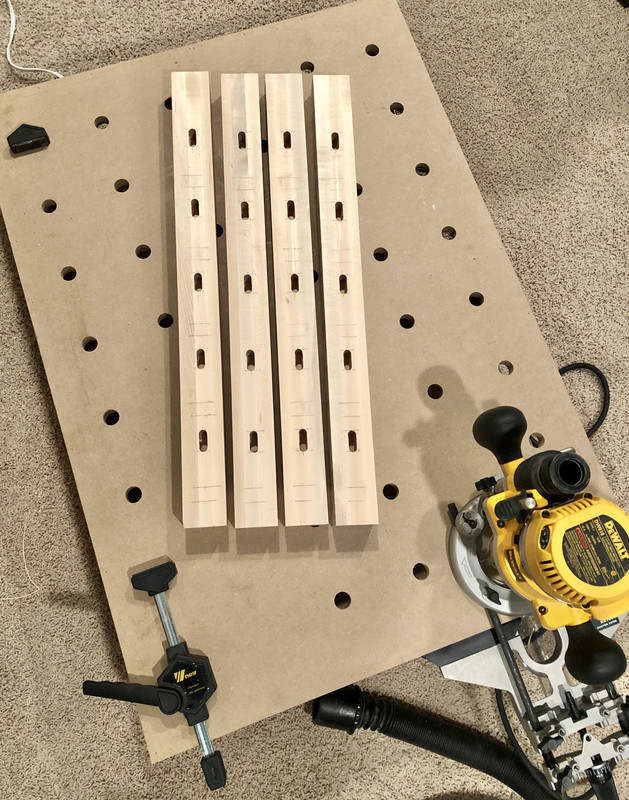
All the vertical mortises finished:

IMG_9098.jpg


Now I need to do the 30 horizontal mortises on the fronts. Will have to take a bit different approach for this.

I will say dust collection worked quite well on the plunge base, but still a lot of fine dust in the air. I've been putting off an air cleaner because it's such a boring purchase, but I don't think I can afford to go without one any longer. Probably gonna need to cut the rest outside... despite the cold.

:beer:
 
Last edited:

bdbecker

ALLIANCE MEMBER
Joined
Nov 18, 2015
Messages
5,574
Location
Iowa
...But the gas engine worked so well compared to my electric SnowJoe I am tempted to invest in a new one that isn't broken...

Sounds like a sticky float. You can try cleaning the carburetor if it is serviceable (some aren't) or you can probably track down a replacement carburetor online. A few screws and some hose clamps and you could be back in business.

Also, while I'm not sure how much square footage you have to clear on your property, if you are thinking of spending the money on a single stage snowblower, I'd encourage you to look at a two stage snowblower with electric start instead. Single stages machines work great in certain conditions, but a two stage works when you really need it the most. Doesn't have to be the biggest or the best - I've moved mountains of snow over the last 10 years with my 24" MTD. The electric start makes all the difference in the sub-zero temps.
 
Last edited:
OP
N

nicholam77

Well-known member
Joined
Dec 18, 2016
Messages
2,671
Location
Minneapolis, MN
Sounds like a sticky float. You can try cleaning the carburetor if it is serviceable (some aren't) or you can probably track down a replacement carburetor online. A few screws and some hose clamps and you could be back in business.

Also, while I'm not sure how much square footage you have to clear on your property, if you are thinking of spending the money on a single stage snowblower, I'd encourage you to look at a two stage snowblower with electric start instead. Single stages machines work great in certain conditions, but a two stage works when you really need it the most. Doesn't have to be the biggest or the best - I've moved mountains of snow over the last 10 years with my 24" MTD. The electric start makes all the difference in the sub-zero temps.

Thanks for the advice. I think I am going to try to get it fixed. Ordinarily this is something maybe I'd research and give a it a go if it seemed simple enough. But lately I've been a lot more judicious with my time on these sorts of things. It's simply too dark, too cold, and I'd rather spend my available time playing with my daughter these days. :D I did call a small motor shop near me and they said similar to what you were saying... sounds like it could be a carburetor issue. I think I'm going to take it in and see what they estimate for repairs and a once over/tune up. I watched a few YouTube vids on this model and they seem to be generally a good machine so maybe a real tune up will breath some life back into it and make it easier to start as well. I hate to throw a piece of good machinery in the land fill when it could still see some use...

If the estimate comes back too high where it doesn't make sense to repair, I'll consider what you said about 2-stage, although to be honest I don't have a large property to do. That's why I've always been on the fence about owning, maintaining, and storing a blower, but it's the 4-5 times a year we get a large amount that makes shoveling really ****. Don't get me wrong, I definitely covet a big 2-stage, I mean they just look badass and fun to use, but in terms of cost and space to store I'll have to think that over if I could justify it.
 
OP
N

nicholam77

Well-known member
Joined
Dec 18, 2016
Messages
2,671
Location
Minneapolis, MN
Not much of an update to give on my projects, but my wife and I were in Oahu all last week. It was a much-needed vacation from the grind of daily life. The week before we left, a norovirus stomach bug ripped through our whole family including my wife, daughter, myself, both our parents and siblings. Everybody puking, missed days of work, not fun. Getting sick right before we left was just about the breaking point for me. Work has been super busy and I feel like I've been operating at 110% pretty much since we bought this house and I started this journal, but especially the past year. As my interests have transitioned to the larger house projects it's sort of taken over everything and become stressful. Some of it is self-induced I think. Before our kid, it used to be spending every weekend in the summer, or up late after work, at midnight sometimes, trying to keep things moving. And even when I'm not working on stuff, I'm always thinking about it, which can be equally draining. I have this mentality that nothing is promised in life and I don't want to wait until the ideal moment to do something like renovate our house, 15-20 yrs down the road, because who knows where we will be or what will happen. I've always felt it's important to be actively working towards my goals now. But between spending time with my daughter, my job, and fitting in "projects", I've sort of been trying to do it all. Which can get exhausting and overwhelming. :willy_nil Certainly not complaining here, but it sure was nice to get some time away in the sun and "reset".




IMG-9228.jpg


IMG-9299.jpg


IMG-9272.jpg


Spectating Volcom Pipe Pro 2020 surf competition at Bonzai Pipeline:

IMG-9232.jpg


IMG-9235.jpg


Hawaiian Monk seal resting on the beach:

IMG-9285.jpg


Rainbow Eucalyptus tree:

IMG-9300.jpg


The most delicious curry Udon I've ever had:

IMG-9311.jpg


Lot's of sunsets, big waves, Mai Tai's, and good food.

Ok, now back to the kitchen flooring and building my track saw bench!! And 6 more picture frames... because we brought some art back with us. :lol::lol::lol:
 
Last edited:

dubber

Well-known member
Joined
Dec 31, 2012
Messages
5,326
Location
Canada's Capital
Well done taking a break. I completely understand your mentality and can appreciate it whole heatedly. That was me last year when we went to Mexico. Take care man!
 

Arclitgold

Well-known member
Joined
Dec 20, 2017
Messages
317
Becoming a parent is hard. My son is only 18 months but since he was born we sold a house, bought a house, moved, etc. you’re doing a great job with all of the projects. I haven’t accomplished anything since my son was born


Sent from my iPhone using Tapatalk
 

Matias

Well-known member
Joined
Feb 28, 2015
Messages
616
Location
Finland
Reading the thread, that break was well deserved! I've tried to kick back a little since the new year, especially trying not to do much stuff after 9pm. I do not watch tv or anything, so usually I just get stuff done all the time. That's the hardest part, as usually that's the only time off without the kids. Now they are a little older, they can cope more without me being there all the time.

That said, I'll still be waiting for some updates ;)
 
OP
N

nicholam77

Well-known member
Joined
Dec 18, 2016
Messages
2,671
Location
Minneapolis, MN
Well done taking a break. I completely understand your mentality and can appreciate it whole heatedly. That was me last year when we went to Mexico. Take care man!

Thanks! It was a great vacation! We did a lot of traveling pre-baby, but it was usually fast-paced, packing in the activities and sights. This time we didn't really set an agenda. Operated on Island Time so to speak. Laziness + tropical weather = the best type of vacation in my book. :D

Becoming a parent is hard. My son is only 18 months but since he was born we sold a house, bought a house, moved, etc. you’re doing a great job with all of the projects. I haven’t accomplished anything since my son was born


Sent from my iPhone using Tapatalk

Yes it is, haha. :bounce: I LOVE being a dad and cherish every minute I get to spend with her, but I think the hardest part for me has been the side effect that there is very little (if any) time to do stuff outside of that, for myself, or even together with my wife. Mine is ~14 months so not too much younger than yours, I will say it is a very fun age now!

Moving houses is a huge job, I can't imagine going through that with a baby.

Reading the thread, that break was well deserved! I've tried to kick back a little since the new year, especially trying not to do much stuff after 9pm. I do not watch tv or anything, so usually I just get stuff done all the time. That's the hardest part, as usually that's the only time off without the kids. Now they are a little older, they can cope more without me being there all the time.

That said, I'll still be waiting for some updates ;)

I have to say I am guilty of watching TV in the evenings (well, Netflix/streaming rather). Since after 8-9pm is the only time available like you said, I'm usually too tired and wiped out to start a woodworking project or operate power saws. Plus it's generally not too hard to convince myself to stay inside when it's freezing out. :bounce: But it is a goal of mine this next year to take advantage of the evenings more, especially once it warms up again.

And don't worry, more updates will be coming :)

Thanks for following along :beer:
 
OP
N

nicholam77

Well-known member
Joined
Dec 18, 2016
Messages
2,671
Location
Minneapolis, MN
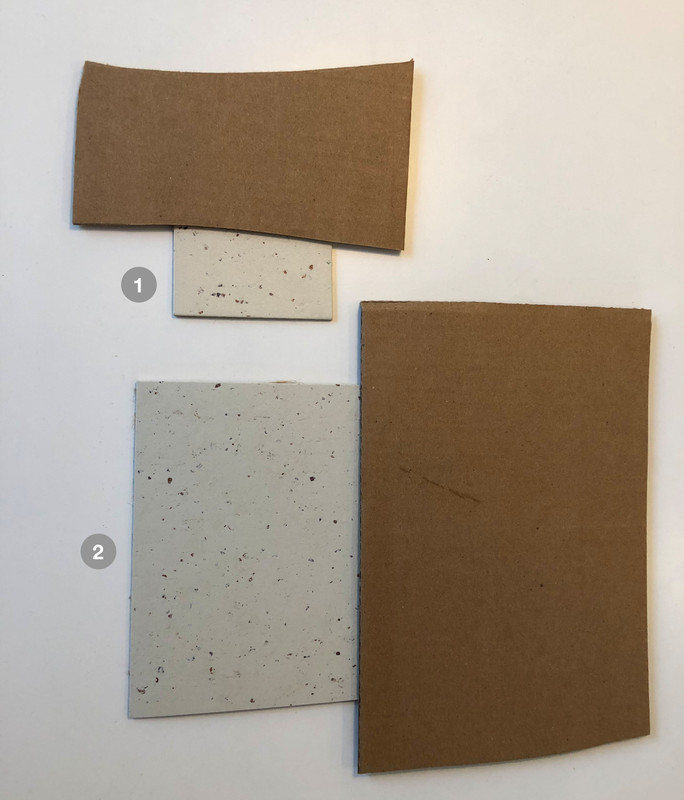
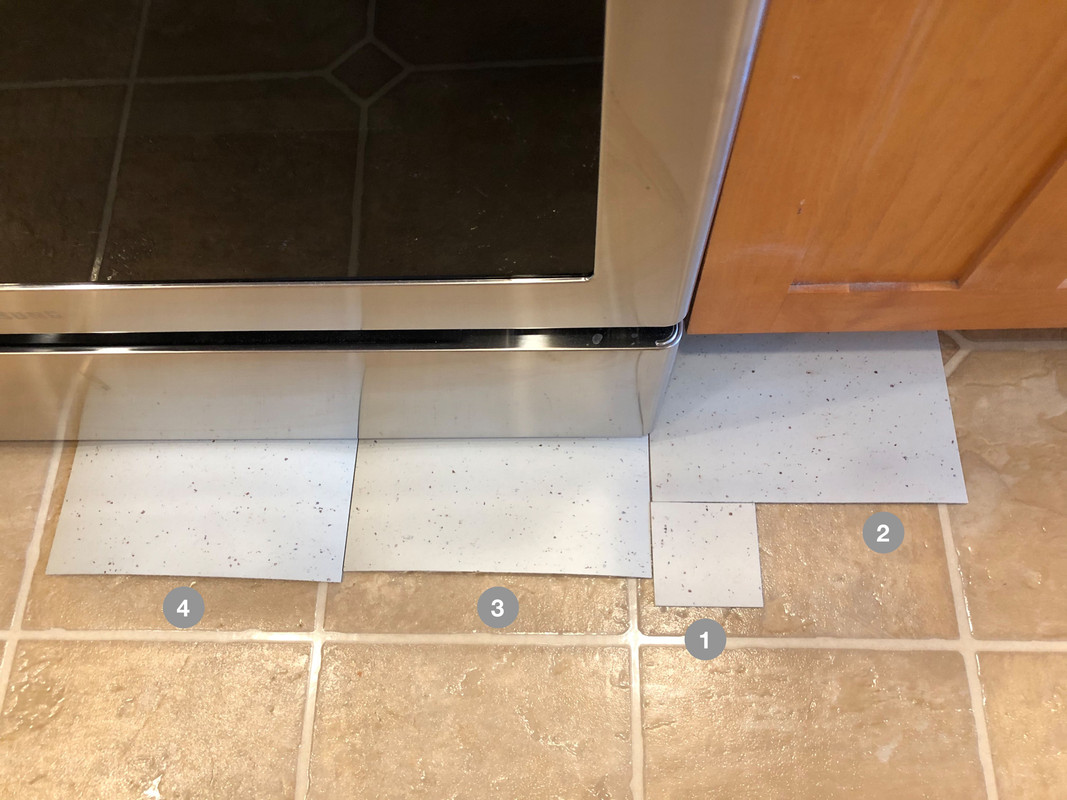
I've been going back and forth with the flooring store salesperson quite a bit about the Marmoleum for the kitchen. I've ordered a lot of samples from the manufacturer, and they vary quite a bit in color:

Flooring-orig-samples.jpg


I am happy with the sample labeled #1, the warmer one. The #2 is way too blue for our orange-y cabinets I think.

Flooring-day.jpg


I am trying to see what can be done regarding requesting a warmer "dye lot" and/or approving a sample before placing an order. With this much variability in the product I don't want to roll the dice on what we end up with. If we can figure out a solution, the floors might be happening fairly soon. If not, it might be back to the drawing board. :mad:

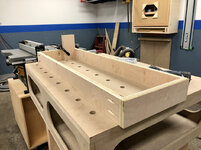
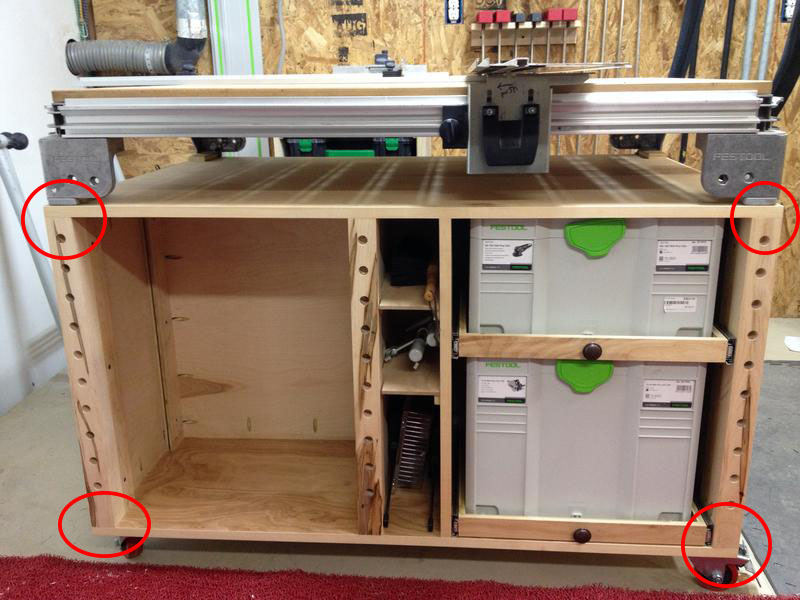
Switching topics, any woodworkers out there have a suggestion on how to attach the legs in the below workbench to the plywood top and bottom (I'm pretty much copying this design)? I will be using biscuits and pocket screws for the plywood-to-plywood connections but wasn't sure how to connect the legs. The one below doesn't seem to have any visible screws or dowels or anything.

IMG-1364-circles.jpg


Thanks!
 
To avoid these ads, REGISTER NOW!
Top Bottom