To avoid these ads, REGISTER NOW!

Between 265 & 485 SQ/FT Nick's Two-Car Detached Vdub Garage

Workspaces sized between 265 and 485 squarefeet.
OP
N

nicholam77

Well-known member
Joined
Dec 18, 2016
Messages
2,669
Location
Minneapolis, MN
Did the new air filtration help??

Yes and no, with that specific task. I think overall it is helping clean the cloud of fine dust in the air that can hang around after cuts on the table saw, especially.

But routing this 3/4" MDF was just too much. I had the shop vac attached to the router fence but it just wasn't close enough or getting very much collected. The new filtration unit is currently hanging above the router table, and the filter got completely covered while routing, so much so that I had to shop vac it clean afterwards. But also due to the positioning it was pulling the dust right up past my face, and with no good way to do dust collection there was still a lot of dust expelled into the air. More than it could capture. I really needed a downdraft box on the router table.

So, totally not a replacement for collecting at the source, but it's not supposed to be anyways, and yes, overall the filtration helps keep the air cleaner out there.
 
To avoid these ads, REGISTER NOW!
OP
N

nicholam77

Well-known member
Joined
Dec 18, 2016
Messages
2,669
Location
Minneapolis, MN
Yesterday when I went out to my car in the morning to put my daughter in the back for daycare, her door was stuck shut. Eventually I realized there was a clear, syrupy goo on the door that had seeped into the door seals making it sticky. Then I noticed it was also on the roof, sunroof, part of the windshield, ALL over my hood and random drips on both sides of the car. Picture maple syrup but clear and somewhat frozen. I have not gone through any puddles, and park in a ramp at work. I have NO idea what could have caused it. I googled it and apparently throwing corn syrup on cars is a funny prank kids do? The only times I had it out were in front of my house when working on the track saw bench, parked downtown for an hour while we went to dinner Saturday, and in my ramp at work. It's so bizarre, but I don't see how this amount of super sticky stuff could have been accidental.

Anyways, pissed, and I took it through the car wash last night. You know, the kind that rubs steel wool rollers on your car, grinding in the re-used road salt water. :lol:

I kid, but normally I only do touchless washes... or simply don't wash it at all. :)

IMG-9722.jpg


But parking a clean car in the garage for the first time all winter made me want to snap a pic. Featuring my beautiful concrete.

:lol_hitti

The other thing that morning when I walked out to the car, the "man door" to the garage was open. Like wide open. It's a piece of **** door that is ill-fitting and warped, and if I forgot to lock it it's totally possible it popped open on its own. But it did make me think for a split-second... did someone enter my garage overnight and splash my car with some syrup gunk? I quickly dismissed that, but I do have a Wyze Cam on the way from Amazon I intend to try out in there for peace of mind. So future post on that.
 
OP
N

nicholam77

Well-known member
Joined
Dec 18, 2016
Messages
2,669
Location
Minneapolis, MN
The Wyze cam showed up and works reasonably well. Can't complain for $25. I just set it on my workbench for now, but I'll have to get it mounted proper.

At night with the door closed and IR filter on:

IMG-9769.jpg


During the day with door closed and IR filter on. You can see how awful the gaps are around the garage door and floor! I really need to get them sealed off.

IMG-9765.jpg
 
OP
N

nicholam77

Well-known member
Joined
Dec 18, 2016
Messages
2,669
Location
Minneapolis, MN
Weekend Report:

Got another couple hours on the track saw bench and some minor setbacks.

I continued working on the Systainer drawers. I cut the plywood "drawer" to size, pop it in the jig, and mark in pencil where the cutouts will be. Then I remove most of the waste by drilling out the corners with a Forstner bit:

IMG-9787.jpg


IMG-9788.jpg


And connecting the dots with the jigsaw:

IMG-9802.jpg


Connected the jigsaw to dust collection for the first time... works mediocre.

IMG-9803.jpg


IMG-9804.jpg


With most of the waste removed I pop the drawer in the jig and flush trim with bearing bit.

IMG-9789.jpg


IMG-9791.jpg


Then I'm left with a nice accurate cutout that fits the Systainer tightly.

IMG-9794.jpg


IMG-9792.jpg


Here's were I goofed. I made the drawers 13" deep, and got 13" drawer slides. What I forgot to account for was the 3/4" front pull I planned to attach, and that to open the lid of the Systainer fully it really needs to slide out more like 14". I only have 14" depth to work with on the bench, so new plan is to only do a 1/2" pull on the front, that doesn't overlap the drawer slides, and do 14" slides. It's going to be a really tight fit, and not how exactly how I wanted it, but I've put so much work into it so far I'm not sure of another solution.

While I was routing the shelves I went ahead and made a few extra in case I add more drawers later, or somewhere else in the shop.

I also cut the other two 3/4" divider pieces to size, so as soon as my new drawer slides show up I should be able to start putting things together.

IMG-9806.jpg


Another looming project... a place to store my damn cutoffs. I keep stacking stuff on the bench which is super annoying.

IMG-9807.jpg
 
OP
N

nicholam77

Well-known member
Joined
Dec 18, 2016
Messages
2,669
Location
Minneapolis, MN
Kitchen flooring is a go. I arranged for the flooring manufacturer to send a cutoff of the material we'll get for "dye lot" (color) approval. I received that a few days ago and have been scrutinizing it.

IMG_9828.jpg


It's a really interesting material... it definitely is a shape shifter and appears different in different lights and angles, which can even be seen in these two photos. Sometimes it looks far too green to me, but other times it looks just about right. I wish I was 100% confident, but my wife really likes it so I've taken the leap and committed.

IMG_9815.jpg


Install is about a month out, in the meantime I will have some trim removal to do, and make some transition/threshold pieces out of wood, which I will document here.

:thumbup:
 

topcok88

Well-known member
Joined
Jun 3, 2013
Messages
660
Really looking to what you pull off in the kitchen. And hopefully it warms up so you can get back to the projects in the garage!


Sent from my iPhone using Garage Journal
 
OP
N

nicholam77

Well-known member
Joined
Dec 18, 2016
Messages
2,669
Location
Minneapolis, MN
Really looking to what you pull off in the kitchen. And hopefully it warms up so you can get back to the projects in the garage!


Sent from my iPhone using Garage Journal

Thank you! I hope it turns out how I envision it. It's getting warmer... 30F - 40F, which is plenty warm to work in the garage. I've been chipping away at my current project slowly, was out there last night in fact!

IMG-9855.jpg


Added the middle dividers, one edge-banded, one attached to "3rd front leg"

IMG-9856.jpg


I'm REALLY hoping these Systainers are going to fit with the drawer slides, I hope I did my math right. I know it's going to be tight.

Almost ready to put the top on, install drawers, and move on to the MFT portion.

Nick are you doing the flooring yourself?

Bret

Hey Bret, I am not doing them, and honestly I am glad I am not. There is a certified Marmoleum installer that will do it. It's a sheet product that comes in 6 ft wide rolls, so there will be a few seams. When done properly they are not really noticeable. That's one reason I want a professional. The other is they are doing the demo of ripping out the old vinyl and plywood, which will be a huge task, as well as simply time savings. They are asking 4 days to turn around the whole thing. With my extremely limited time it would likely take me weeks on weeks, and being that it is the kitchen and appliances will need to be moved out... there is just no way we could do that.

I will be doing some "work" though... moving the appliances, removing and resetting all of the baseboard and toe kicks, and making some transition pieces where the Marmoleum will meet the white oak hallway, back door, and basement staircase. I also have some kitchen projects in mind unrelated to the floors that will surface at some point.

:beer:
 
OP
N

nicholam77

Well-known member
Joined
Dec 18, 2016
Messages
2,669
Location
Minneapolis, MN
Hope everyone got their toilet paper :D

IMG-9918.jpg


But seriously, hope everyone is healthy. Neither my wife or I are able to work from home yet due to the nature of our jobs (although my company is working on a solution).

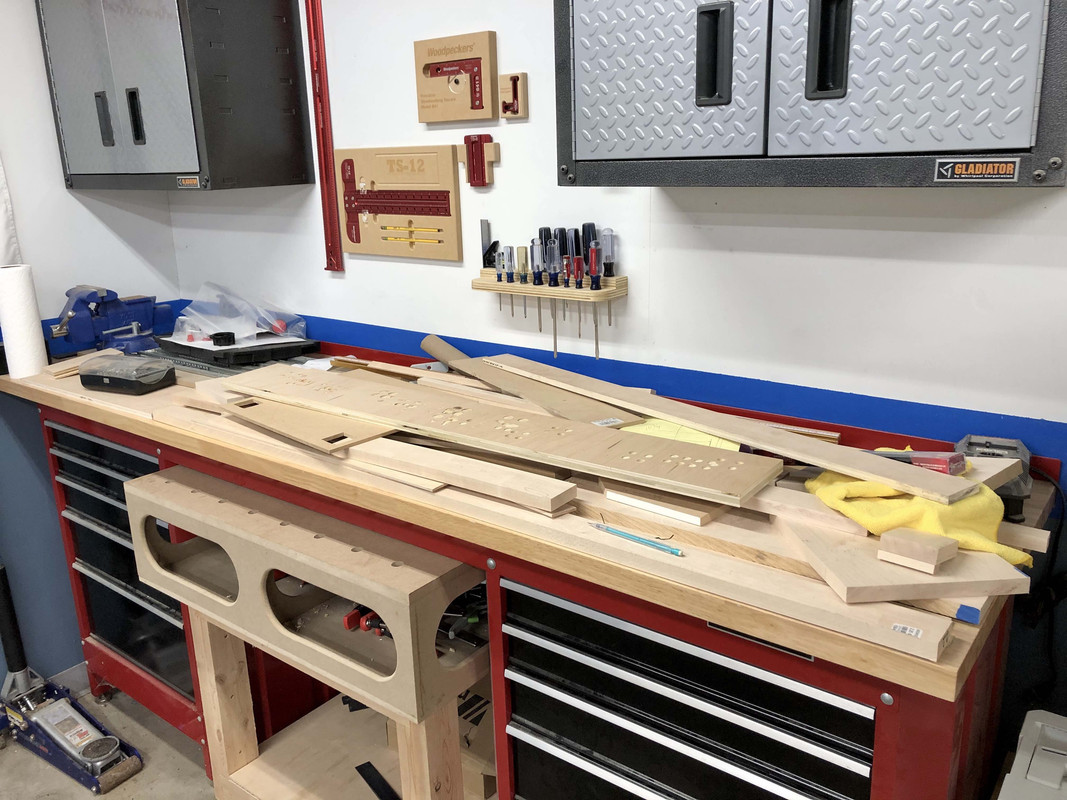
Despite that, I've been busy!
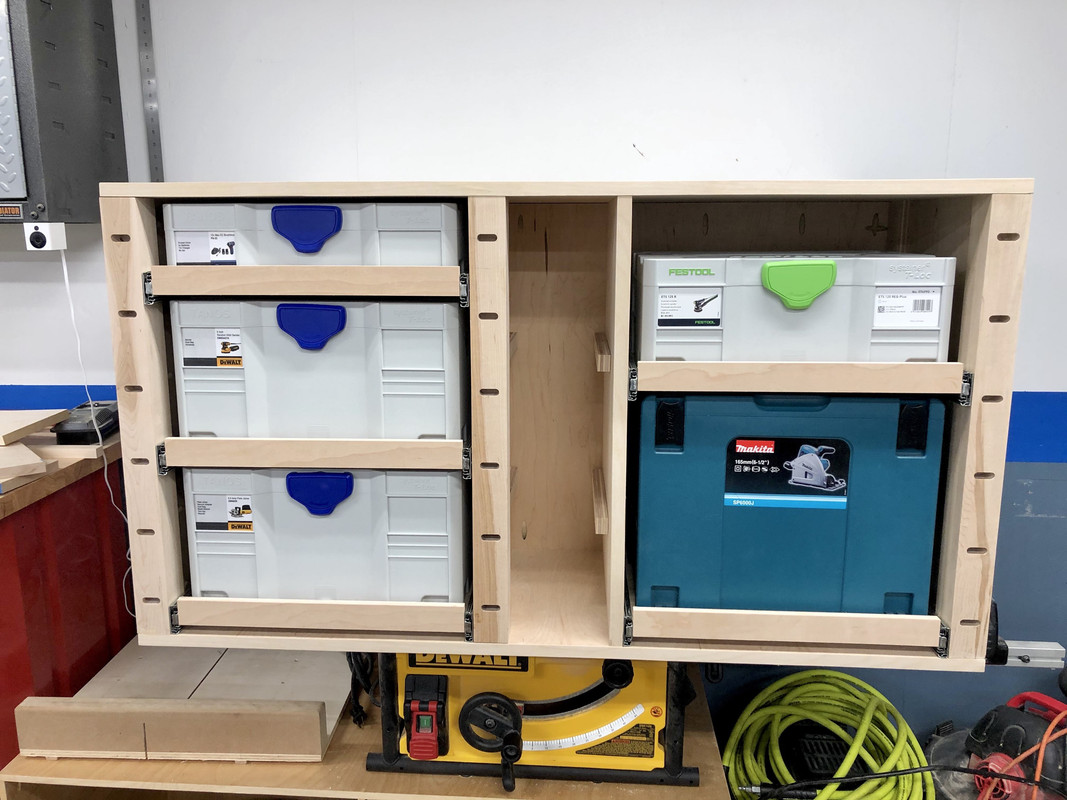
BOOM!

IMG-9933.jpg


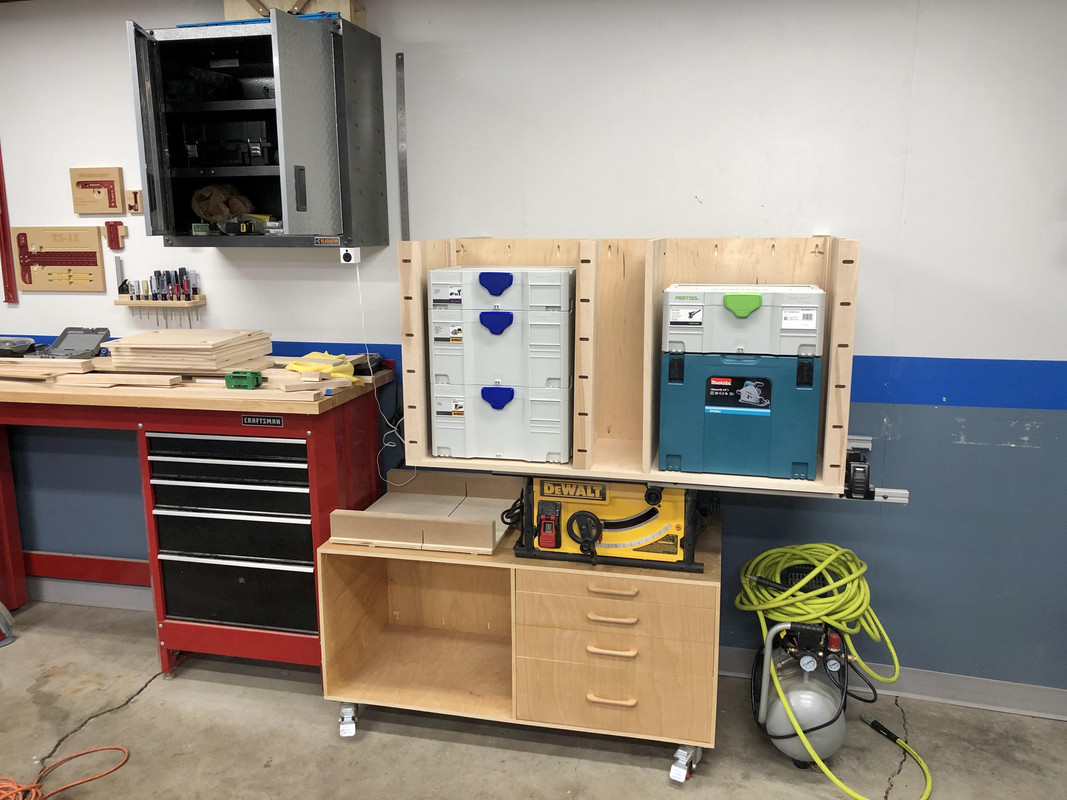
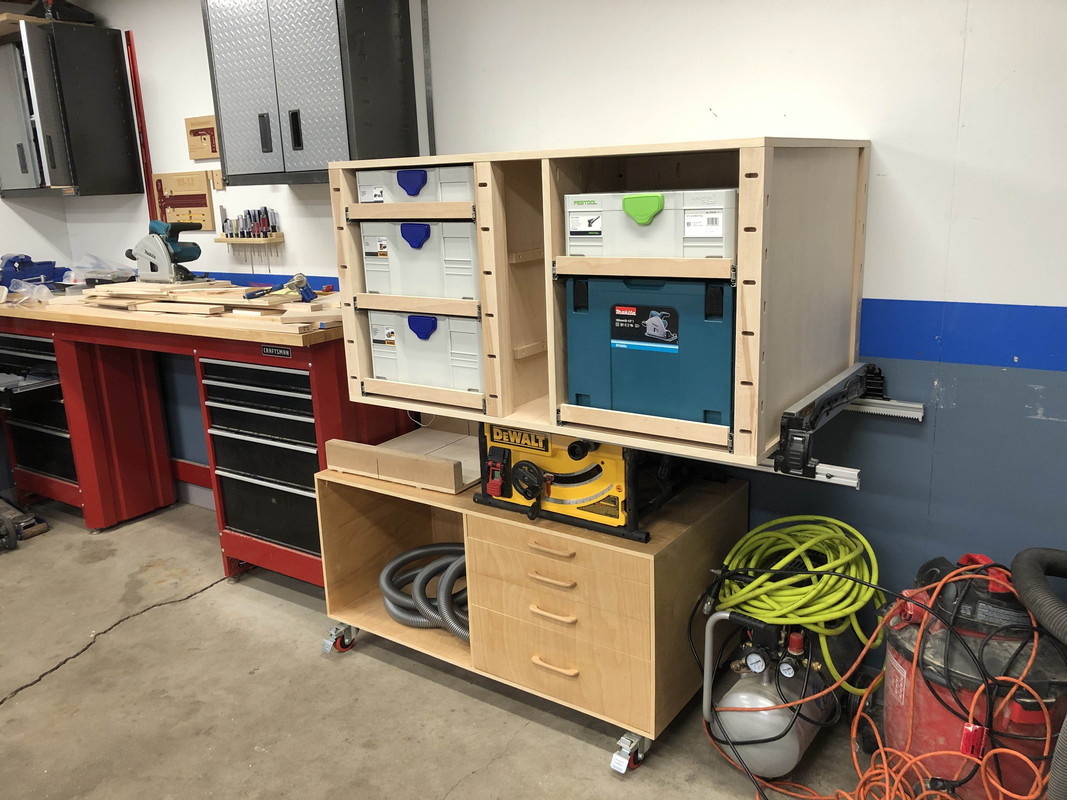
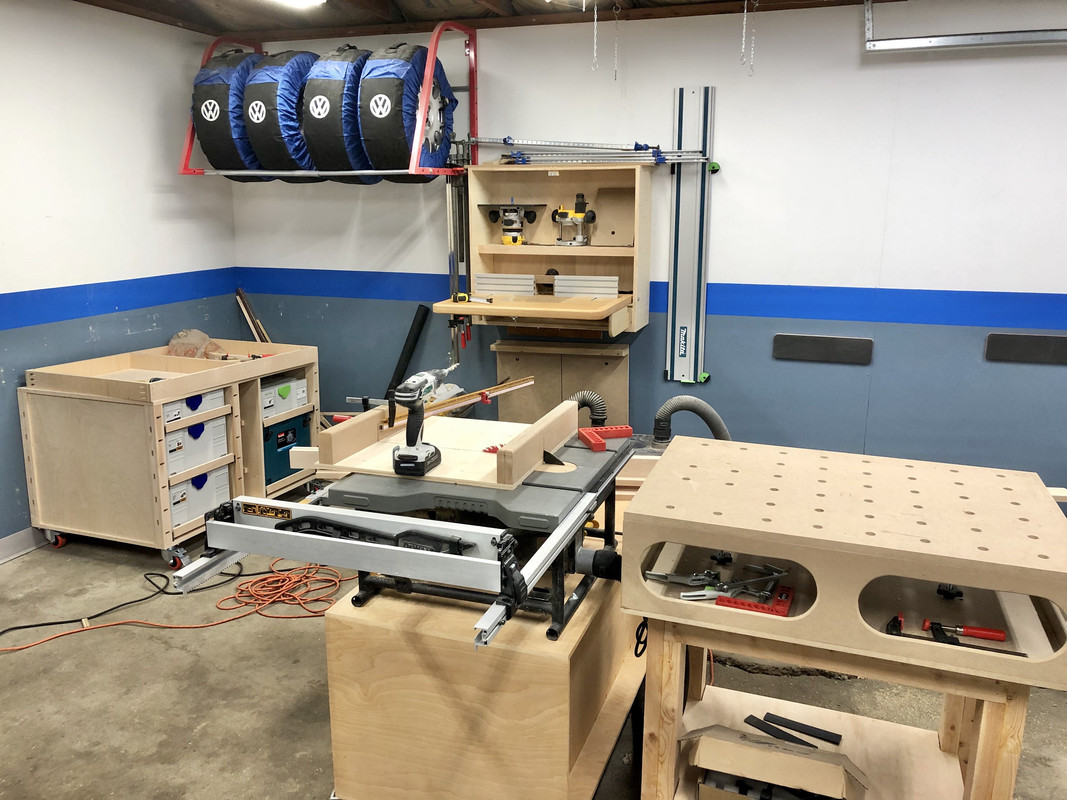
I've been able to get the top on, and get all the drawers mounted. After a LOT of repetition and steps, this feels like a big accomplishment to me. I still have a ton left on this build but looking back I can hardly believe I've made this thing during evenings and nap times.

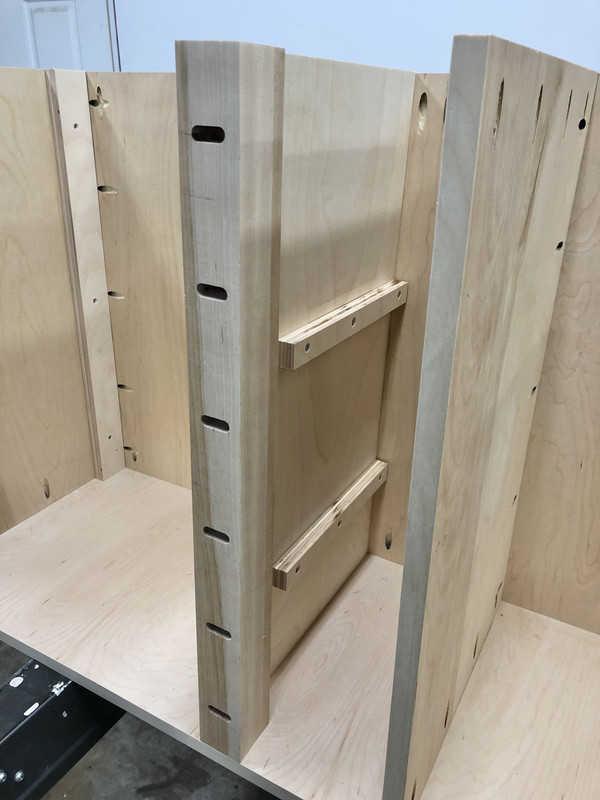
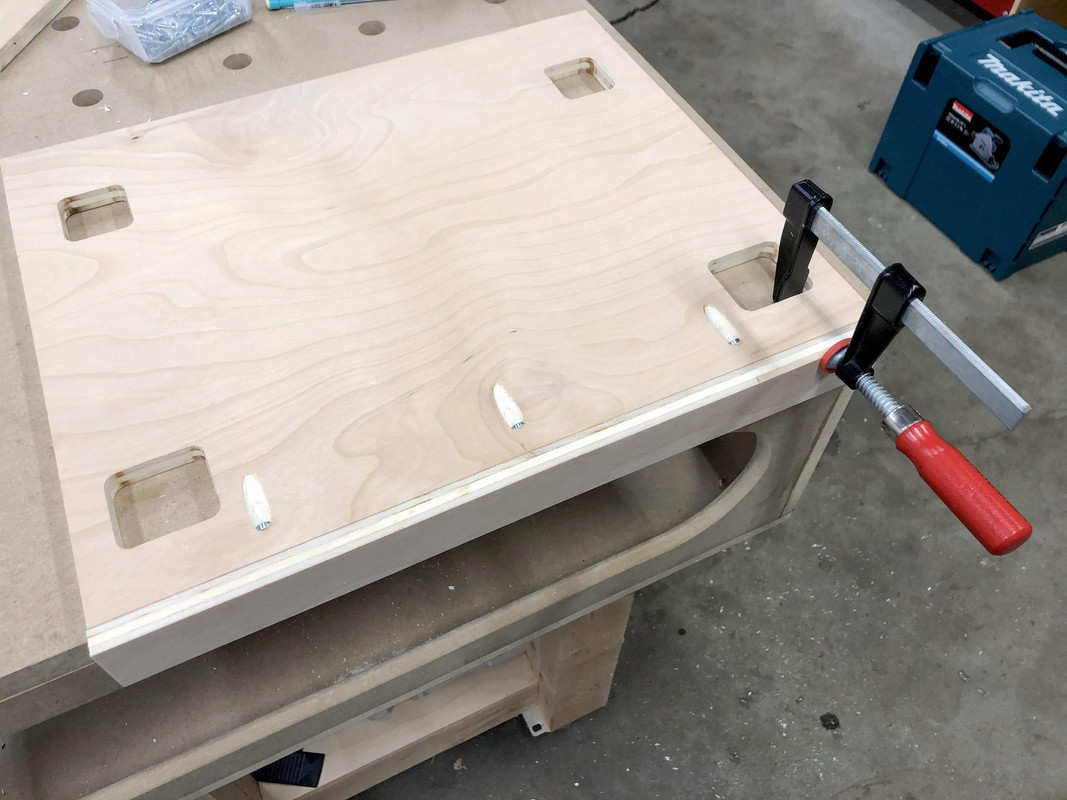
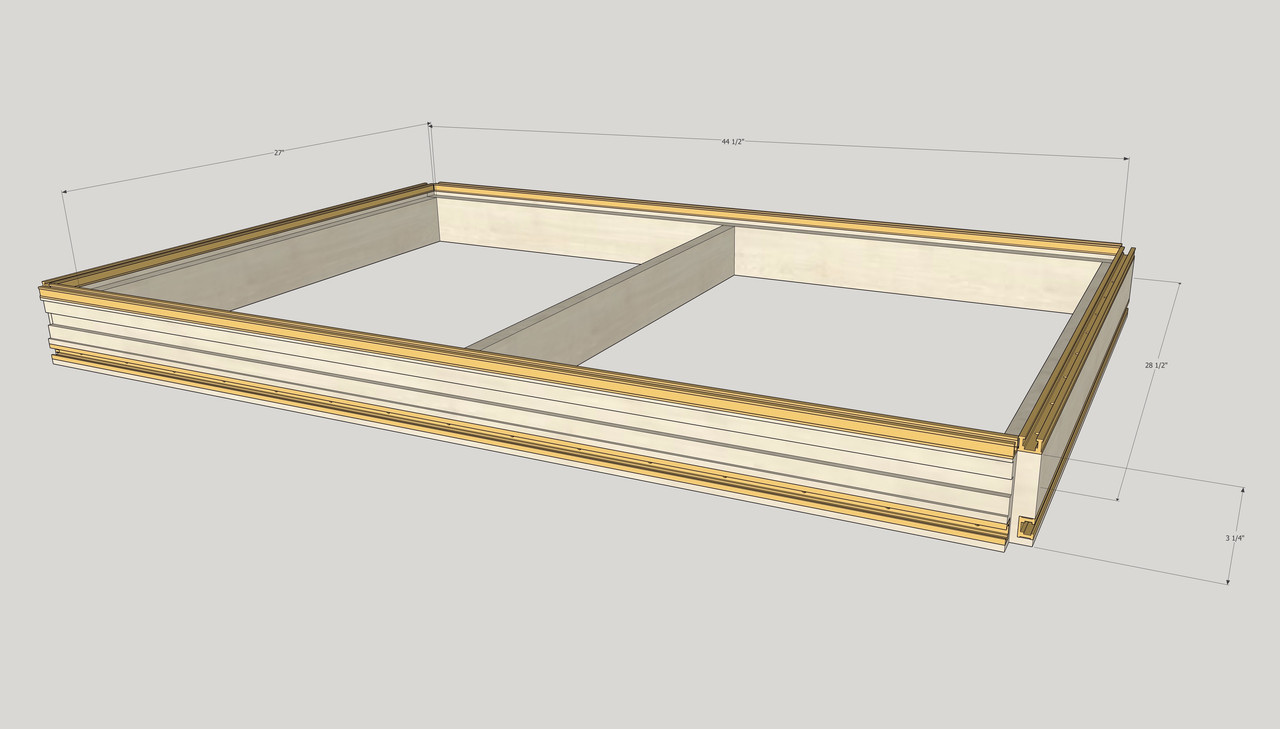
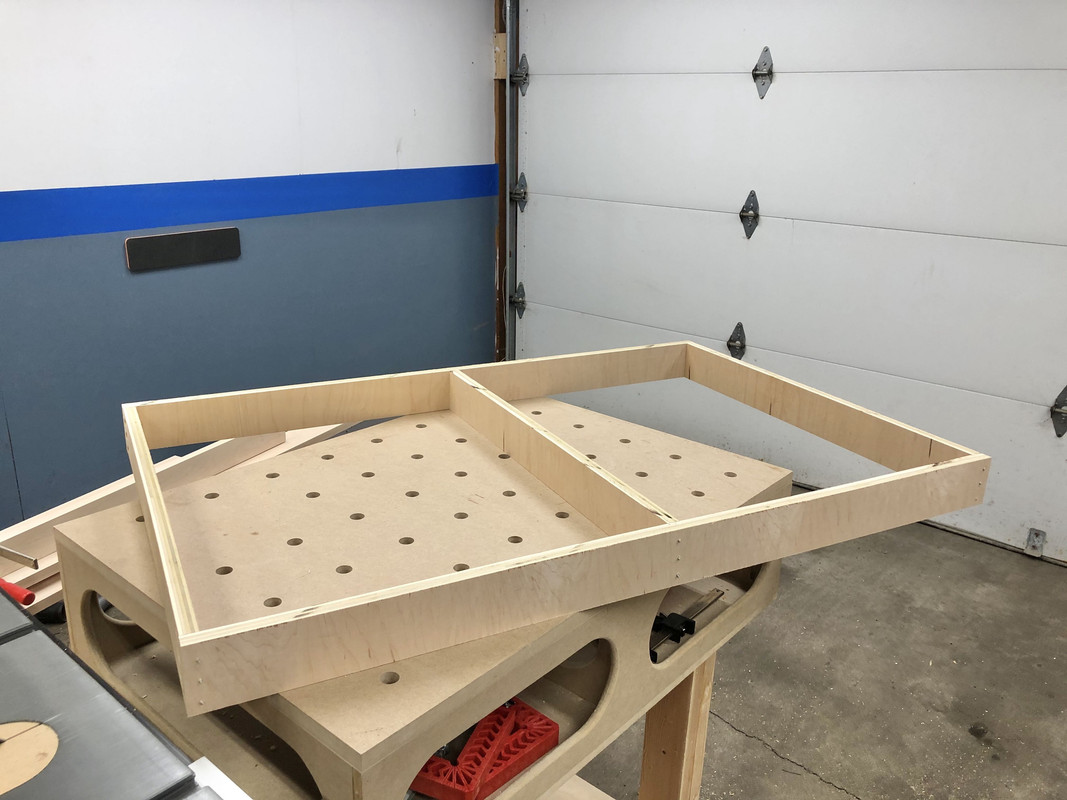
Before sealing it off I added some cleats in the middle cavity for some future shelves:

IMG-9873.jpg


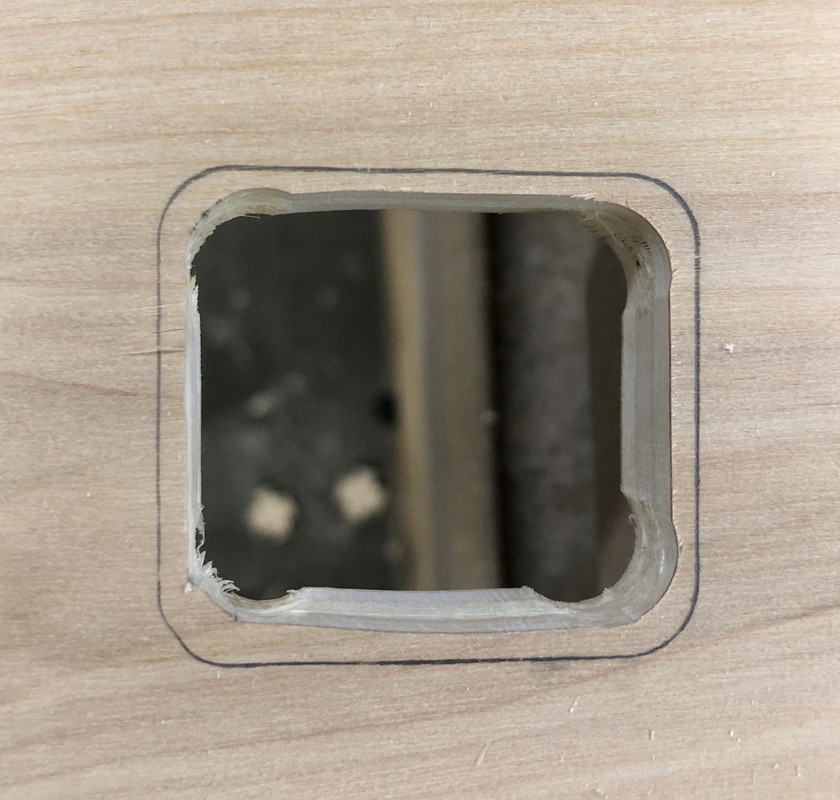
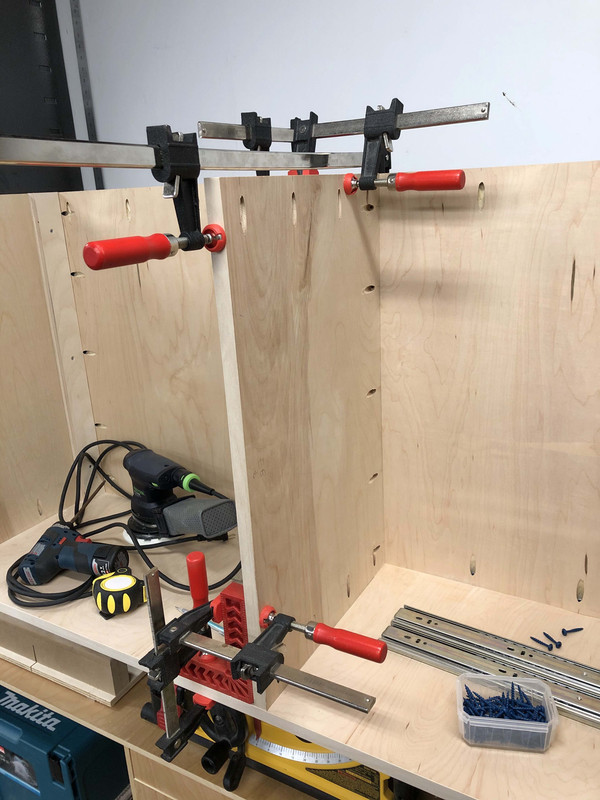
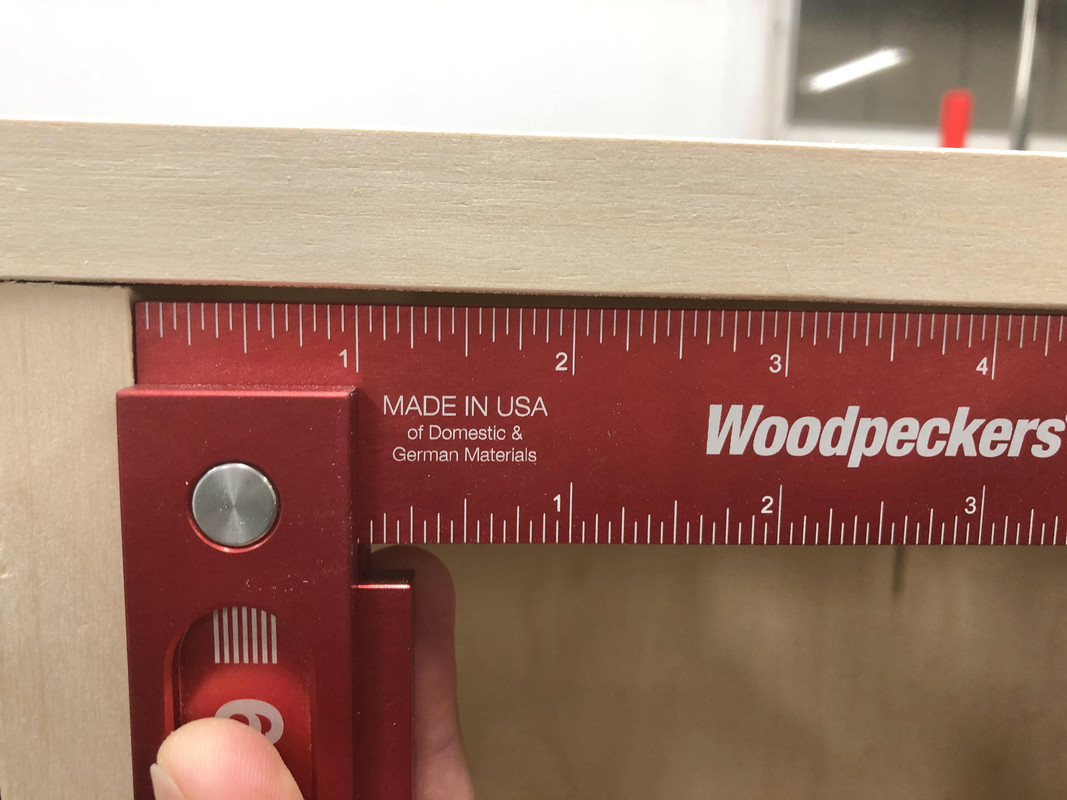
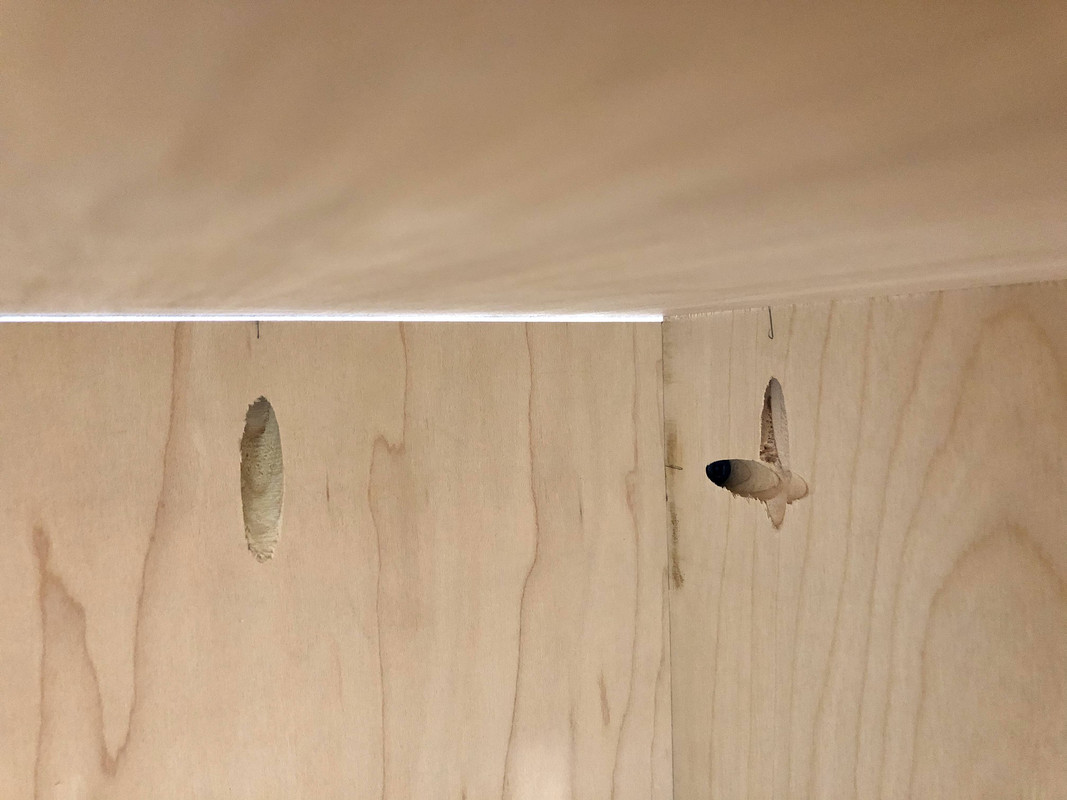
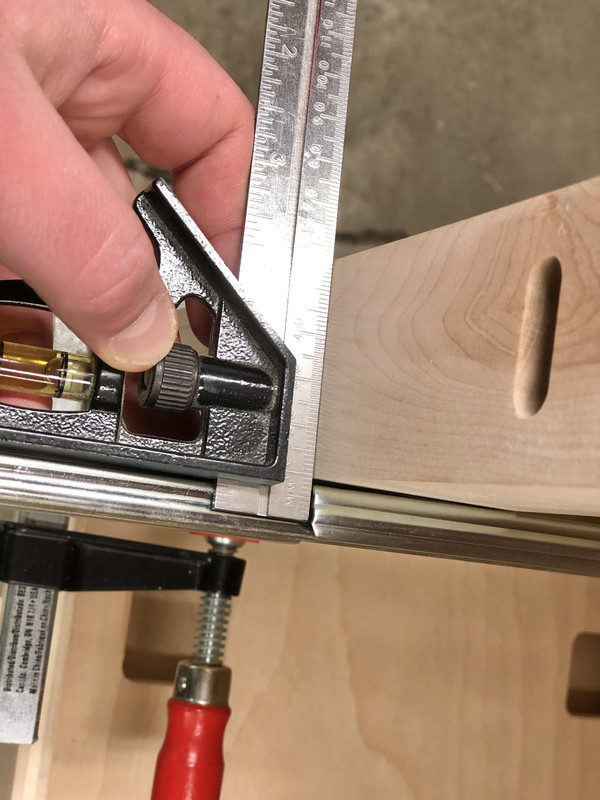
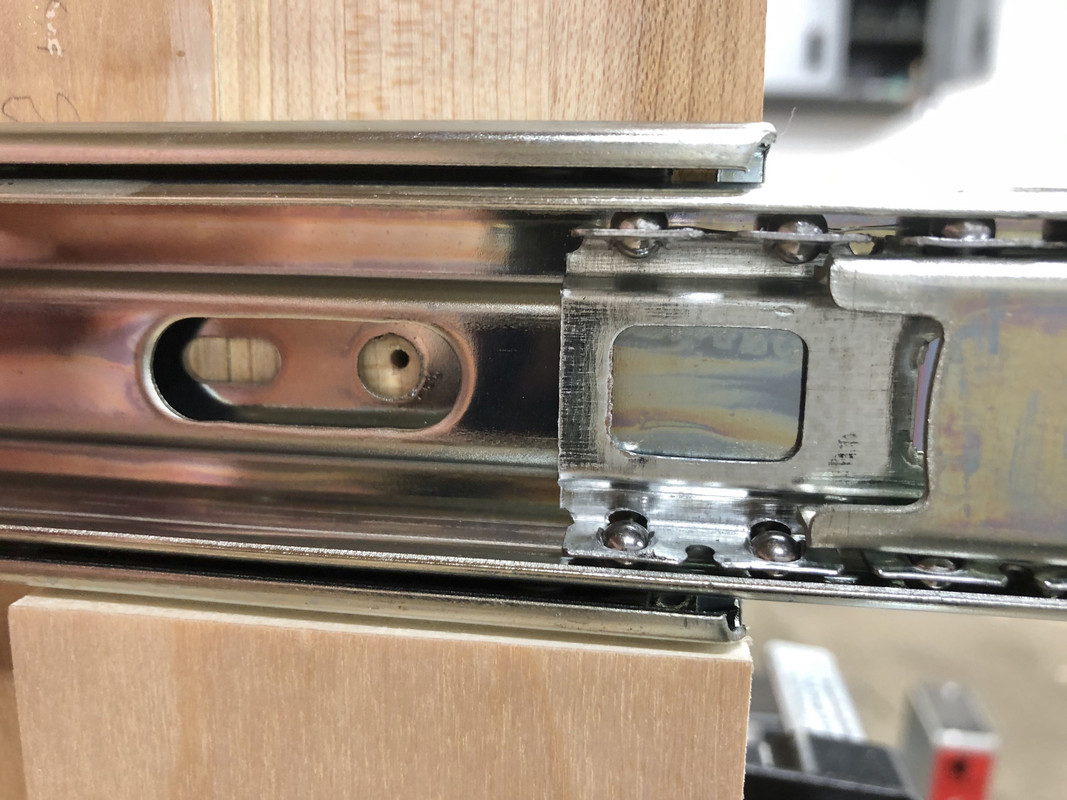
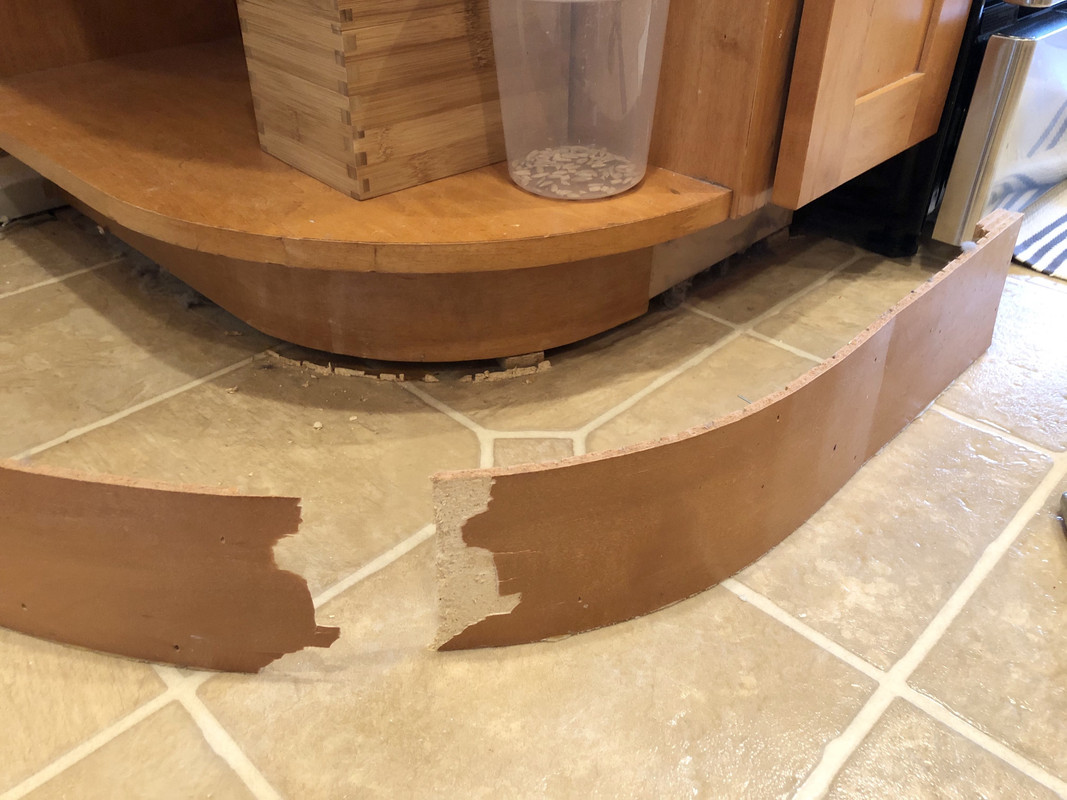
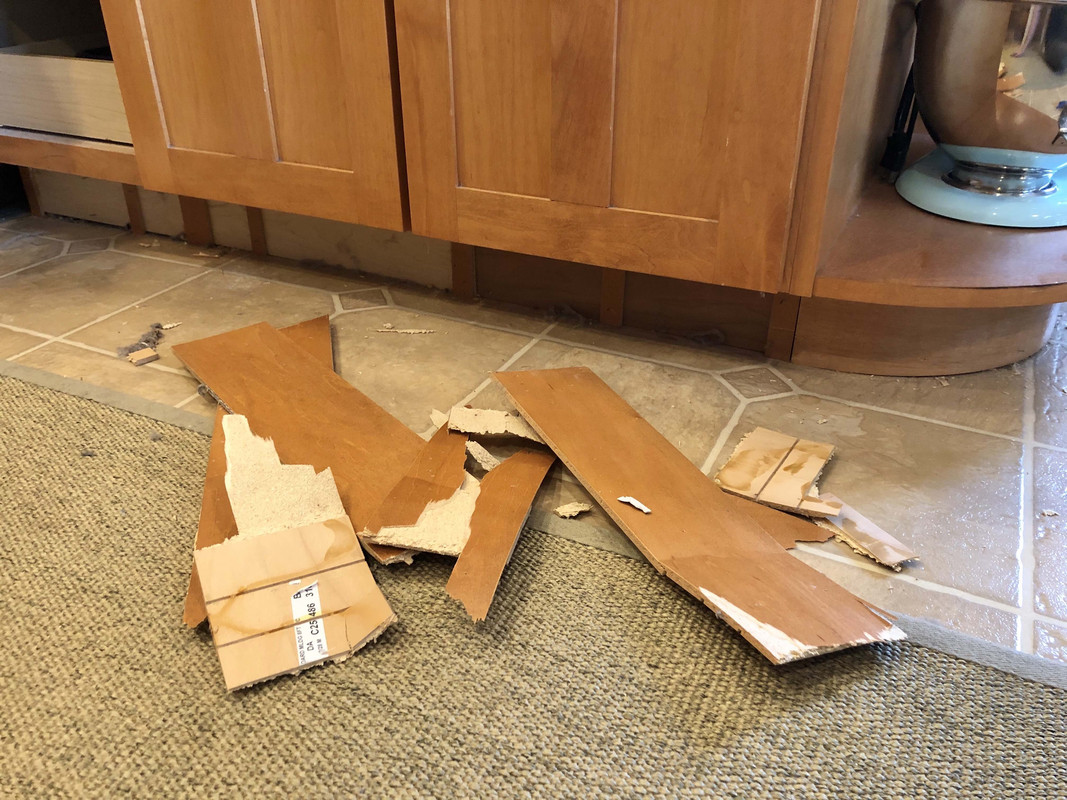
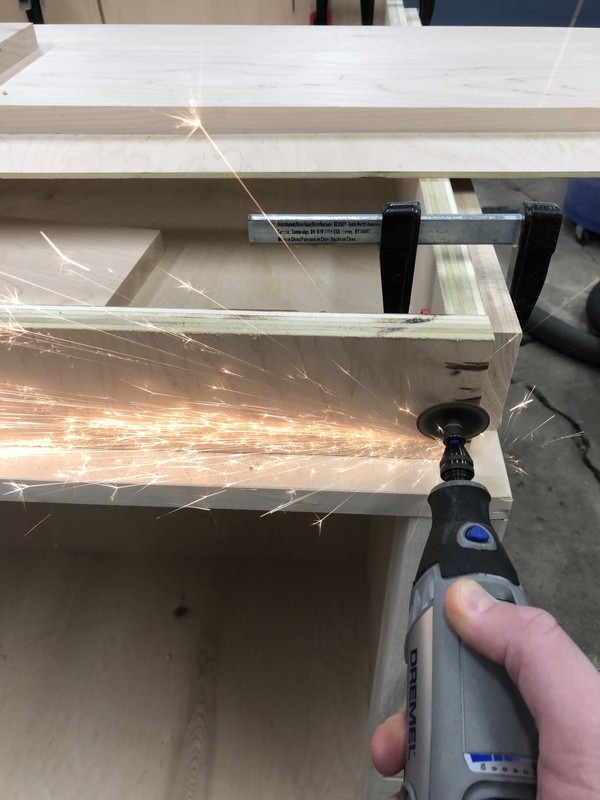
Take a square to the top or look inside and you'll see some dirty little secrets:

IMG-9881.jpg


IMG-9878.jpg


Spoiler alert... all my drawer slides are working well, but these pics illustrate exactly why I'm making this bench. Building square cabinets is hard. Especially without an accurate means of squaring the cuts, or repeatability. I feel like if I had this bench to make this bench, most of my errors would be eliminated.

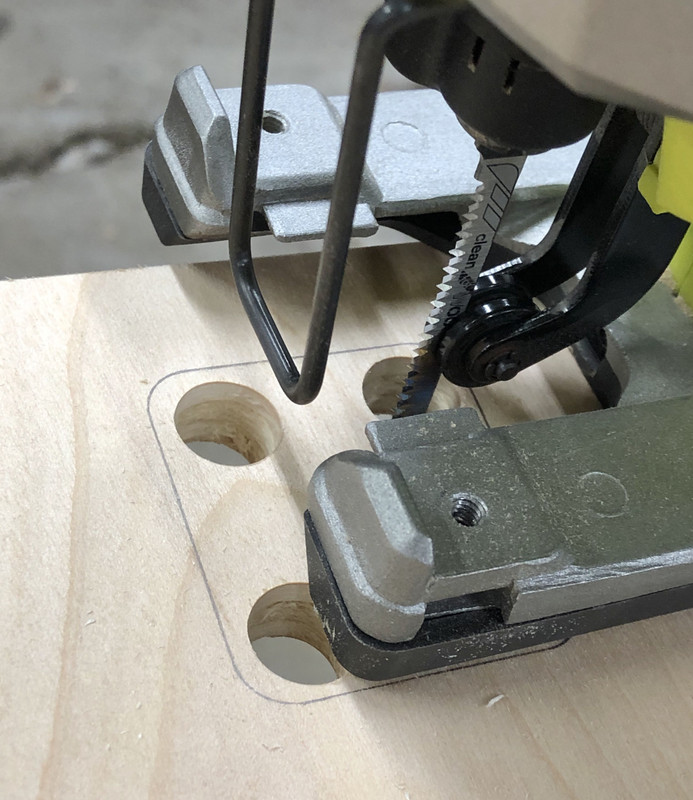
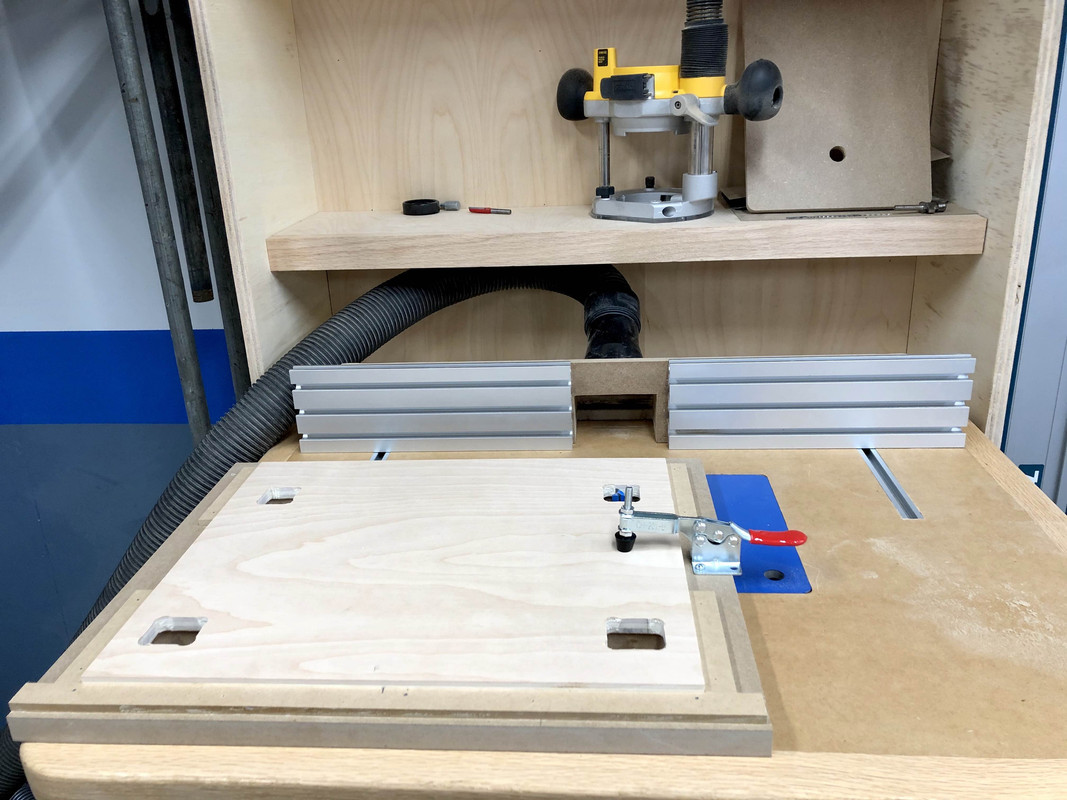
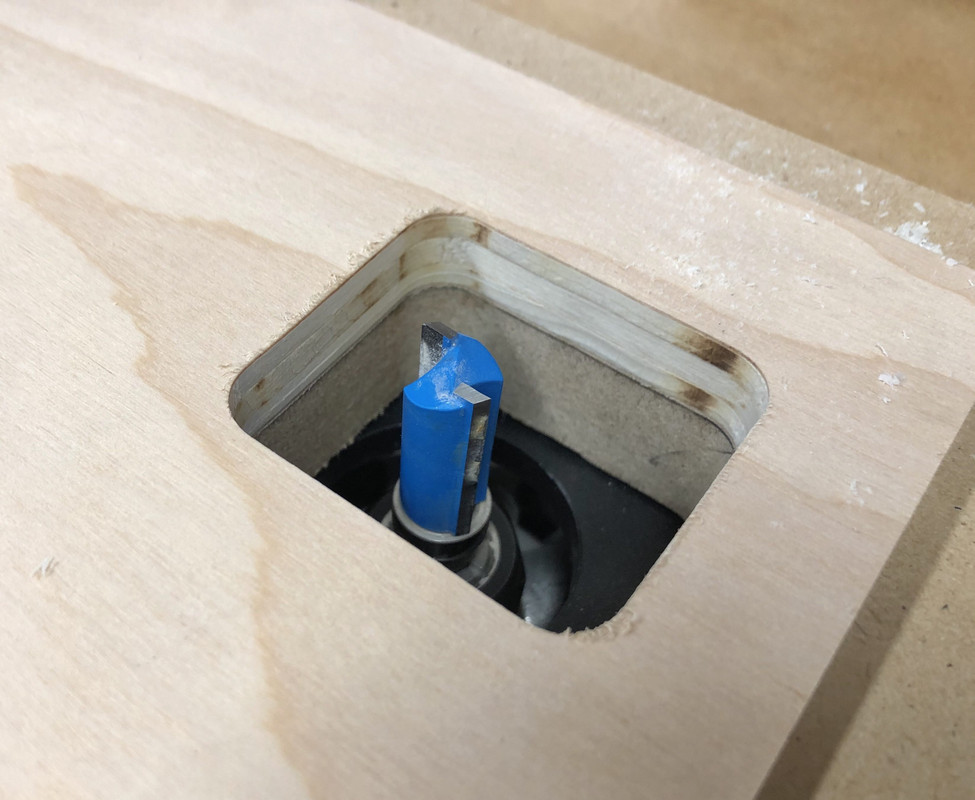
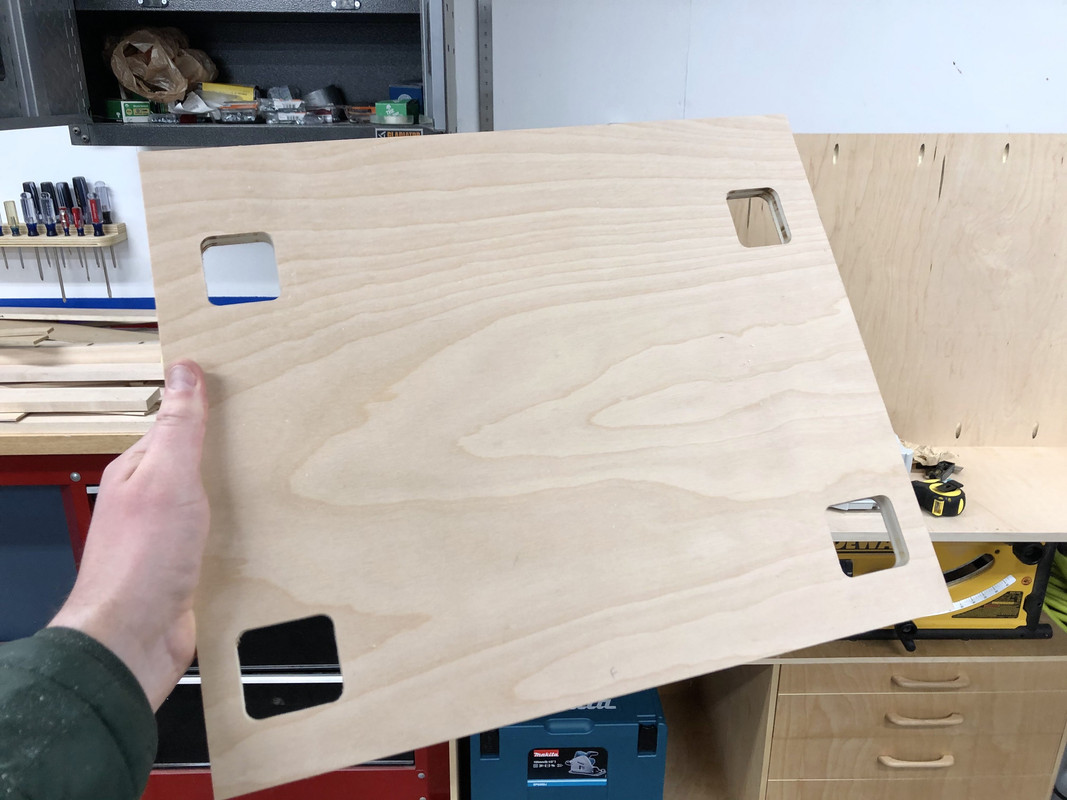
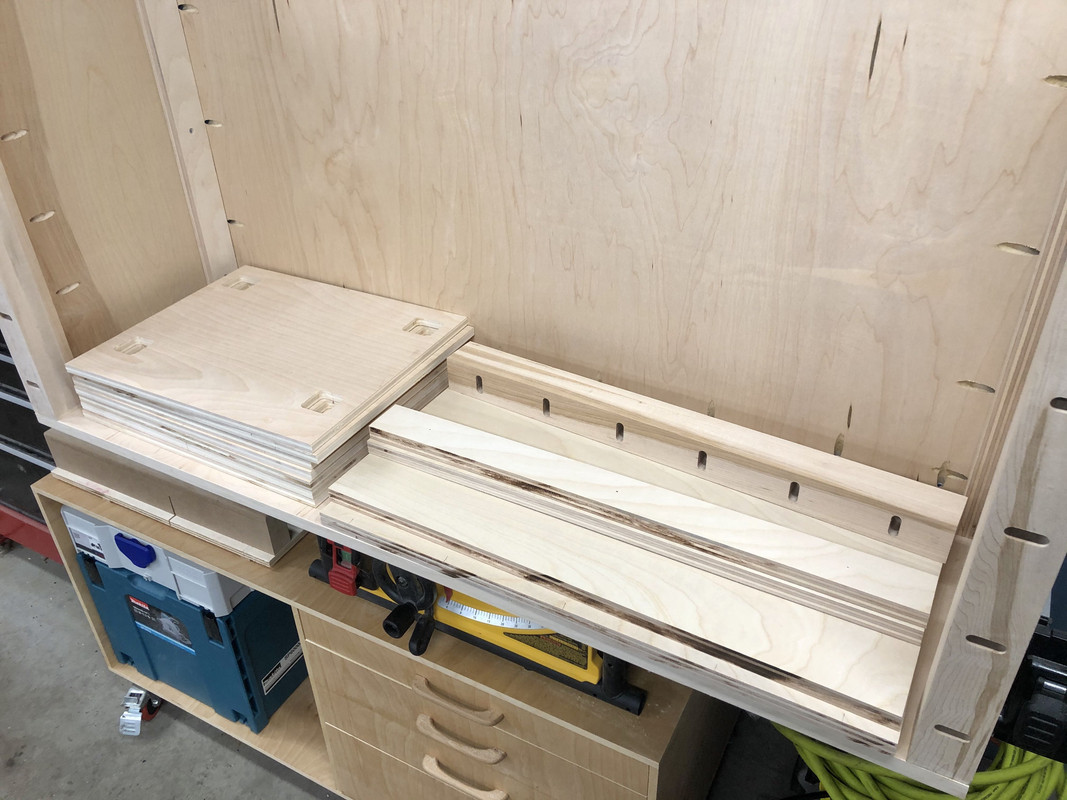
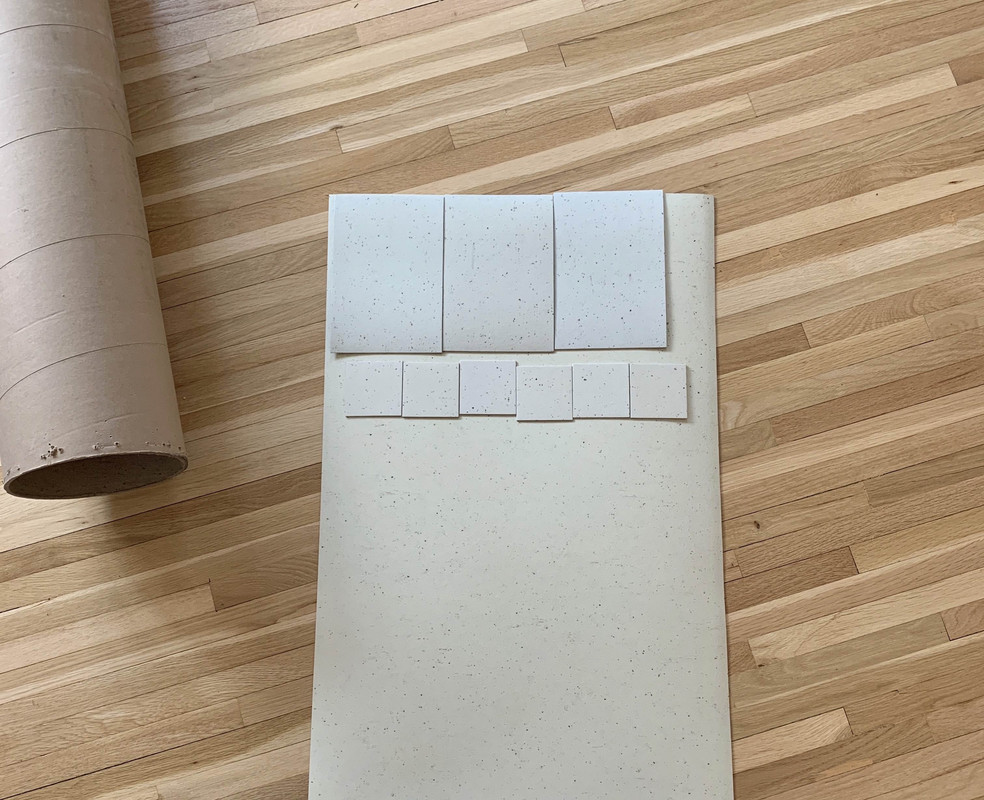
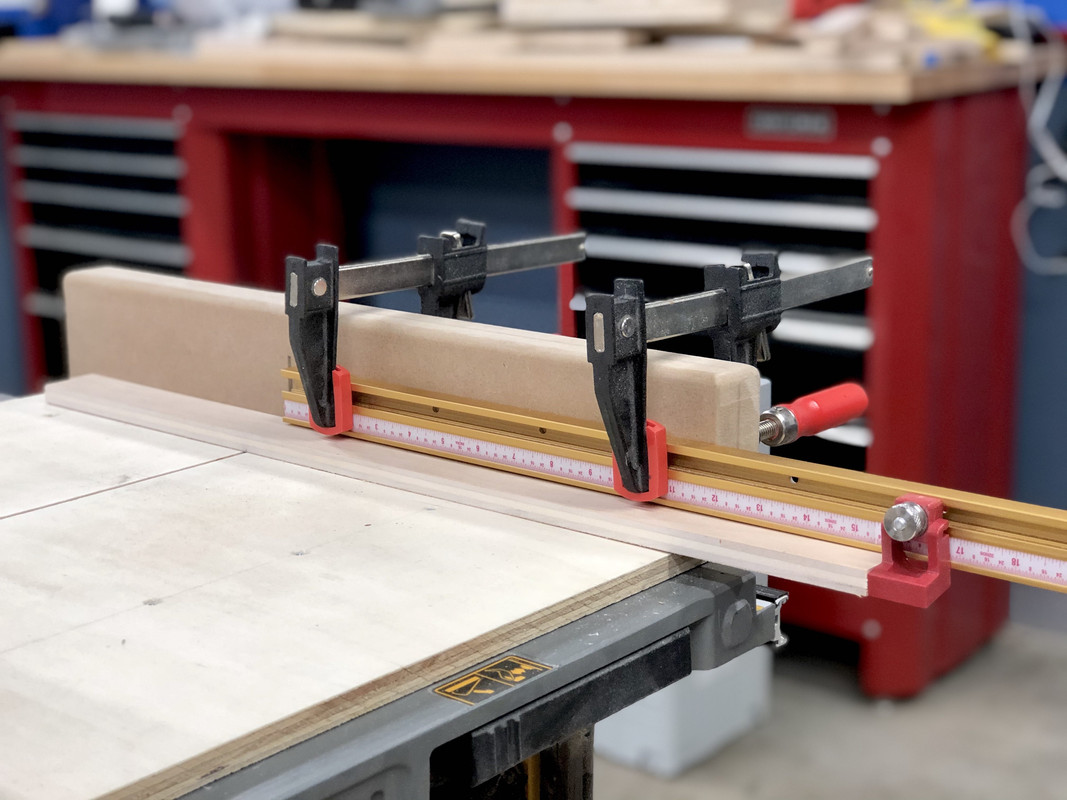
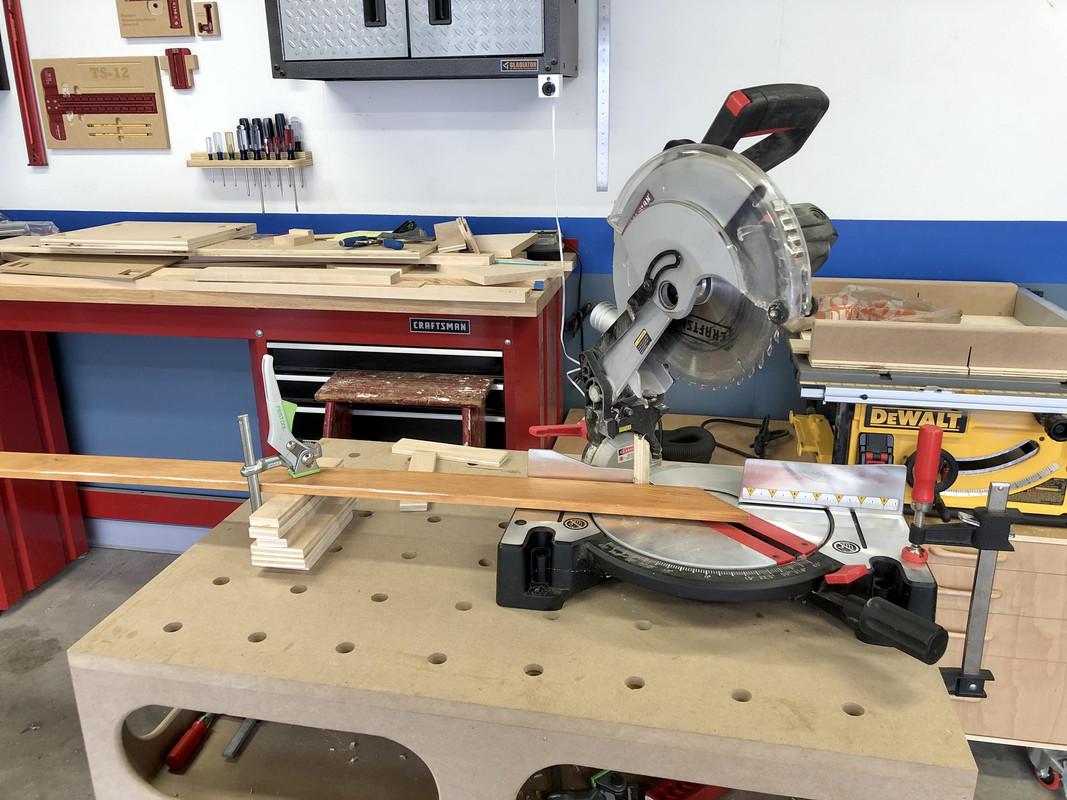
Drawer pulls are cut with crosscut sled for repeatability:

IMG-9875.jpg


And fastened with the mighty pocket screw:

IMG-9932.jpg


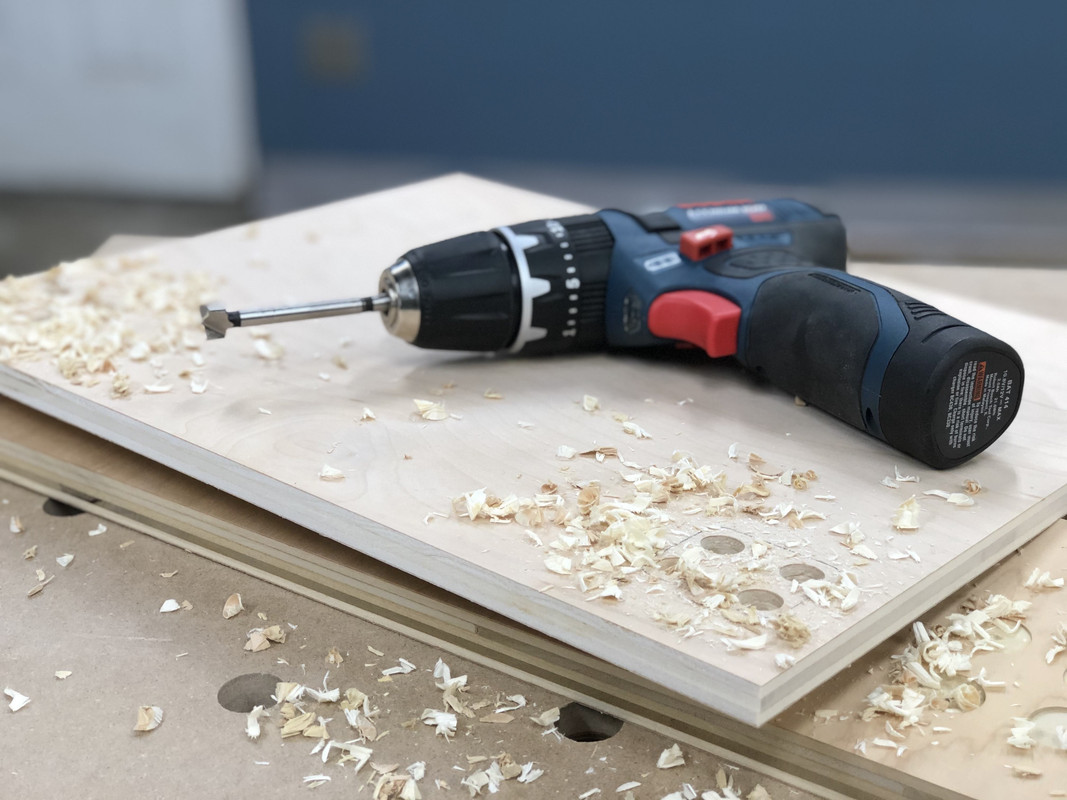
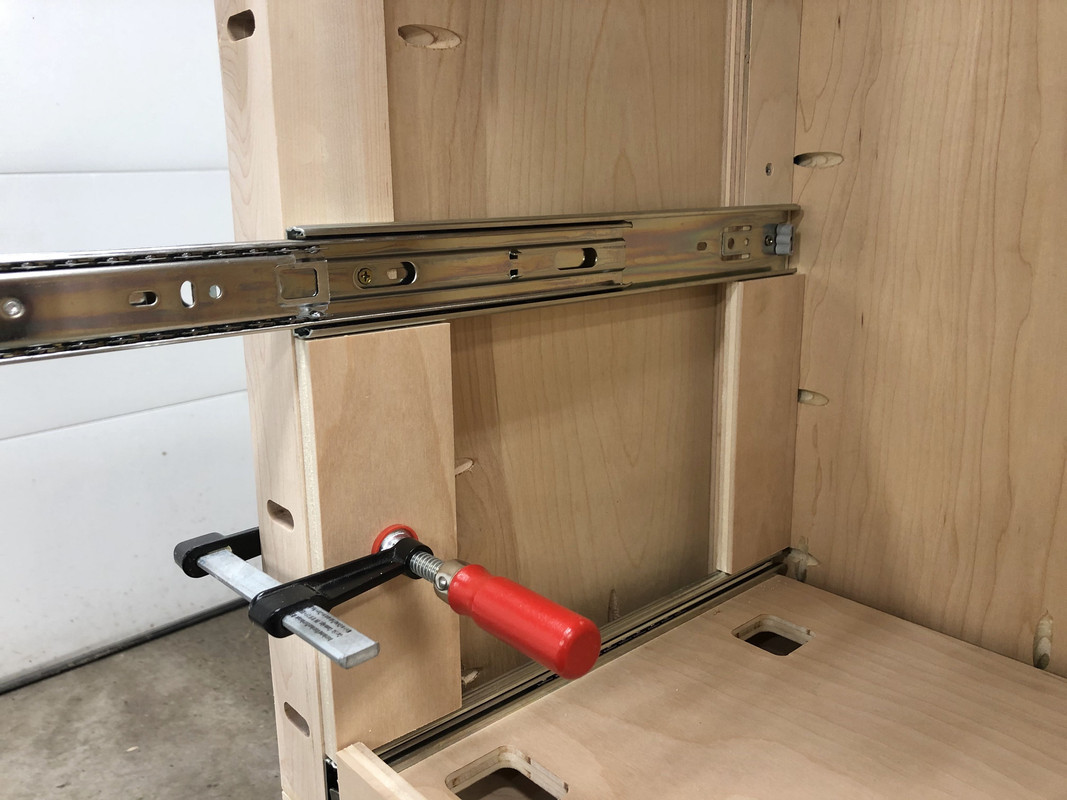
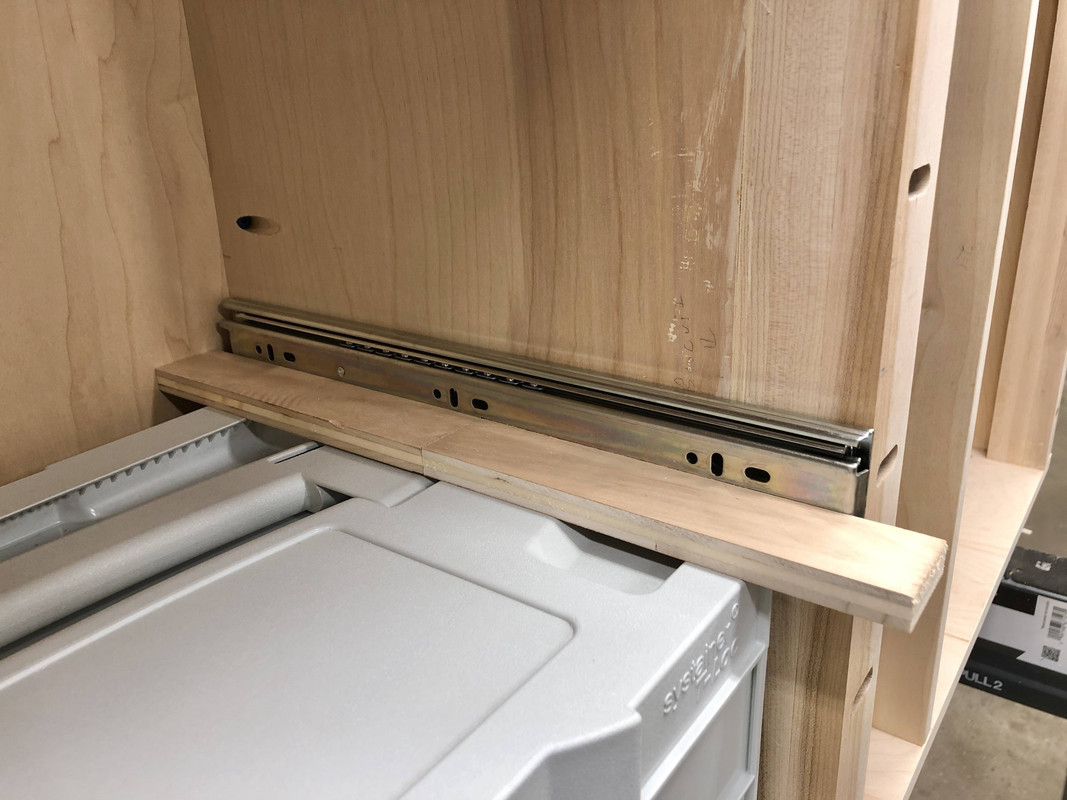
Not sure anyone is interested but this is my process for drawer slides. Start at the bottom, and use a combination square to get the slide aligned with the front of the cabinet (or set it back a bit if necessary). These I went flush.

IMG-9887.jpg


Each slide sits on spacers to ensure level and exact spacing both sides:

IMG-9885.jpg


Then with the "height" and "depth" set I hold it in place and carefully mark the screw positions with a scratch awl, and then pre-drill and screw in place:

IMG-9889.jpg


1/2" plywood as a spacer to set the height of the next drawer:

IMG-9890.jpg


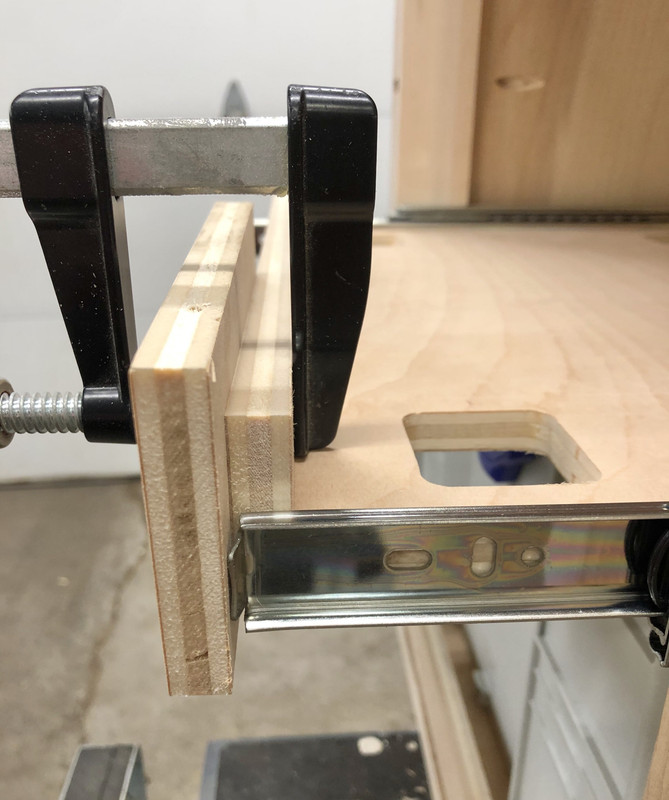
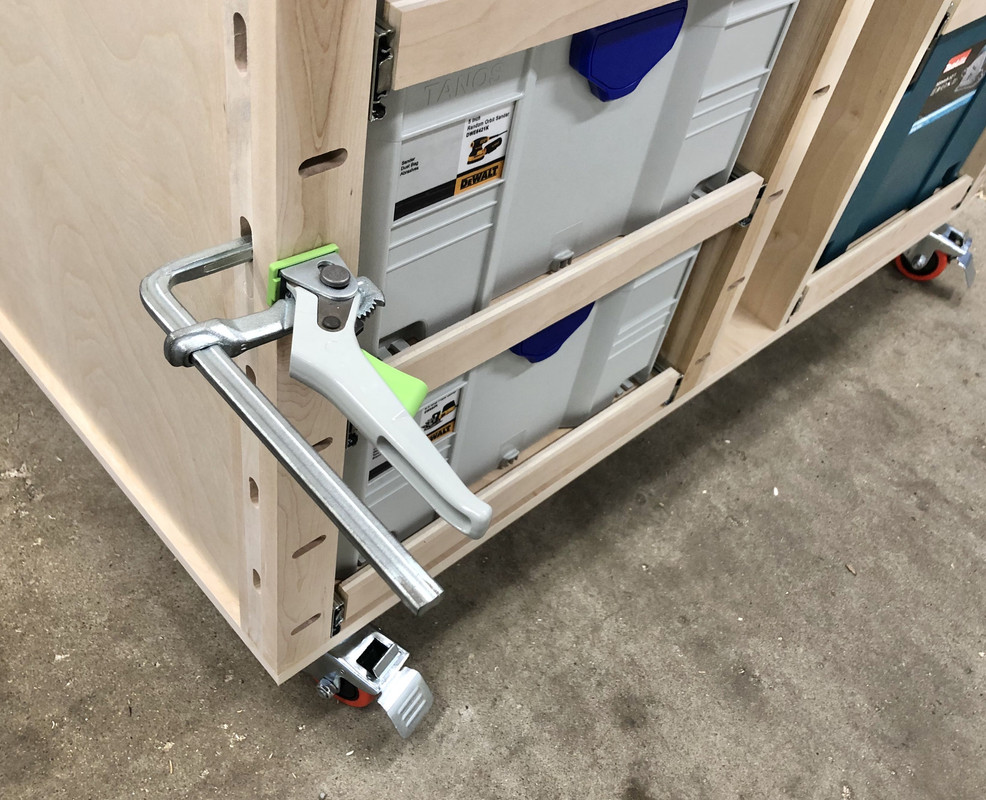
Attaching the slides to the drawers, I clamp a stop block to the drawer face so the slide has something to register to to get it flush:

IMG-9891.jpg


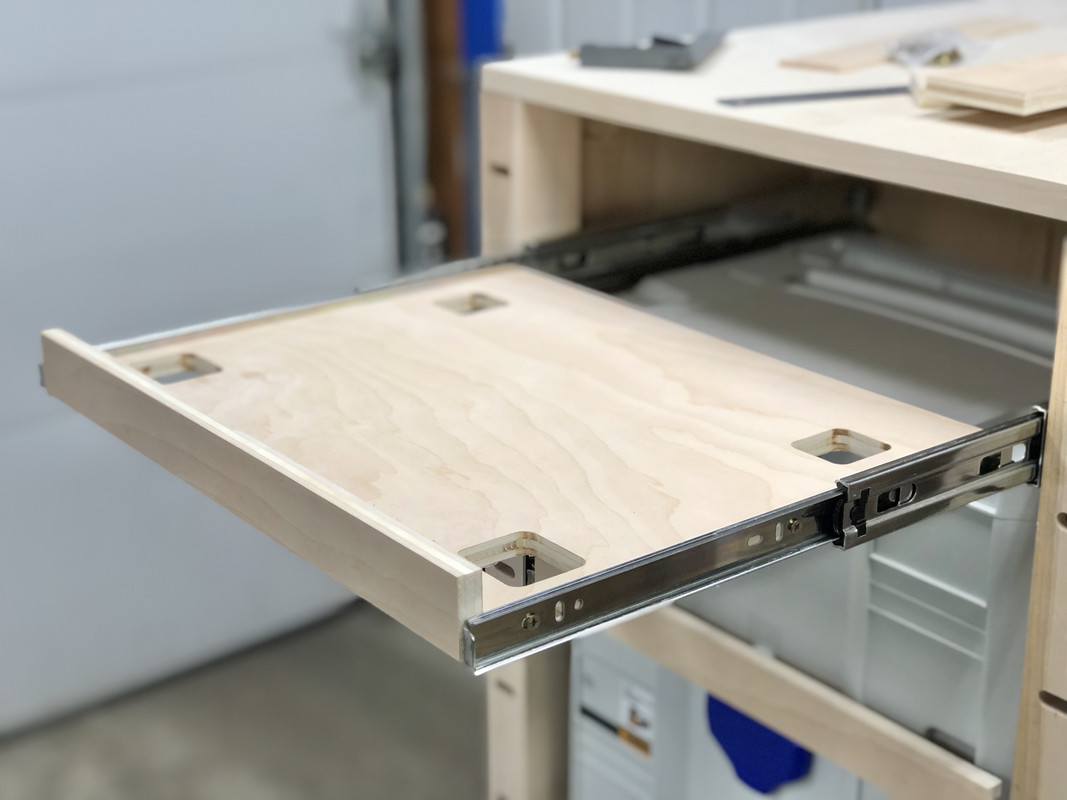
And then same thing, awl, drill, and screw in place. Slide the drawer out further, and repeat on the middle holes. For the rear holes, I remove the drawer at this point and put the last screws in on the workbench.

All these spacers are a bit tedious to calculate, but it makes the end result/process fairly easy.

IMG-9895.jpg


IMG-9902.jpg


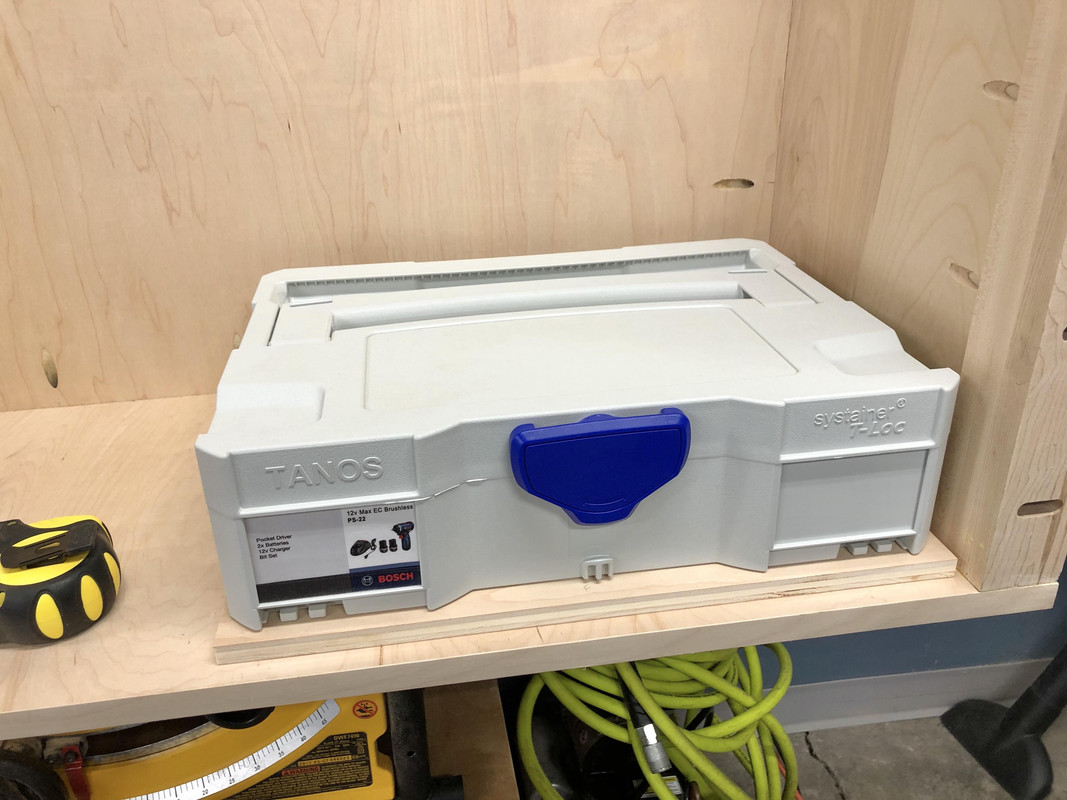
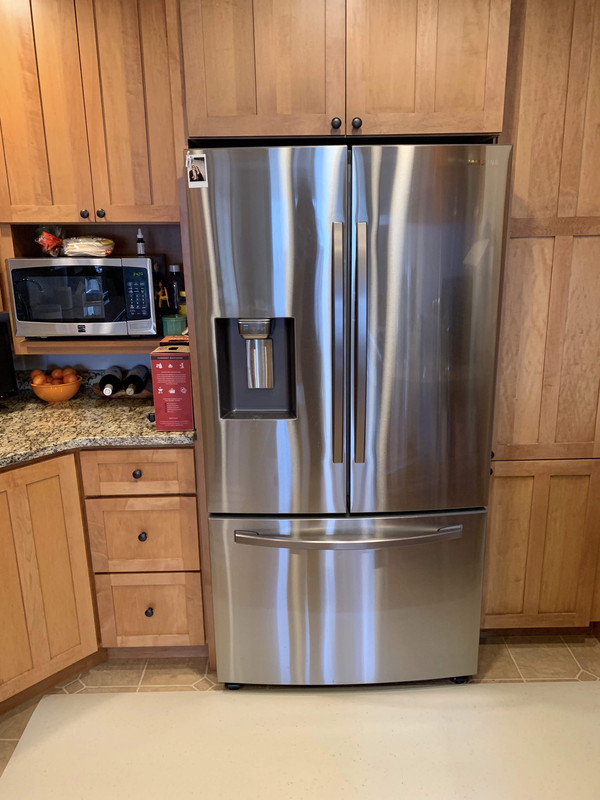
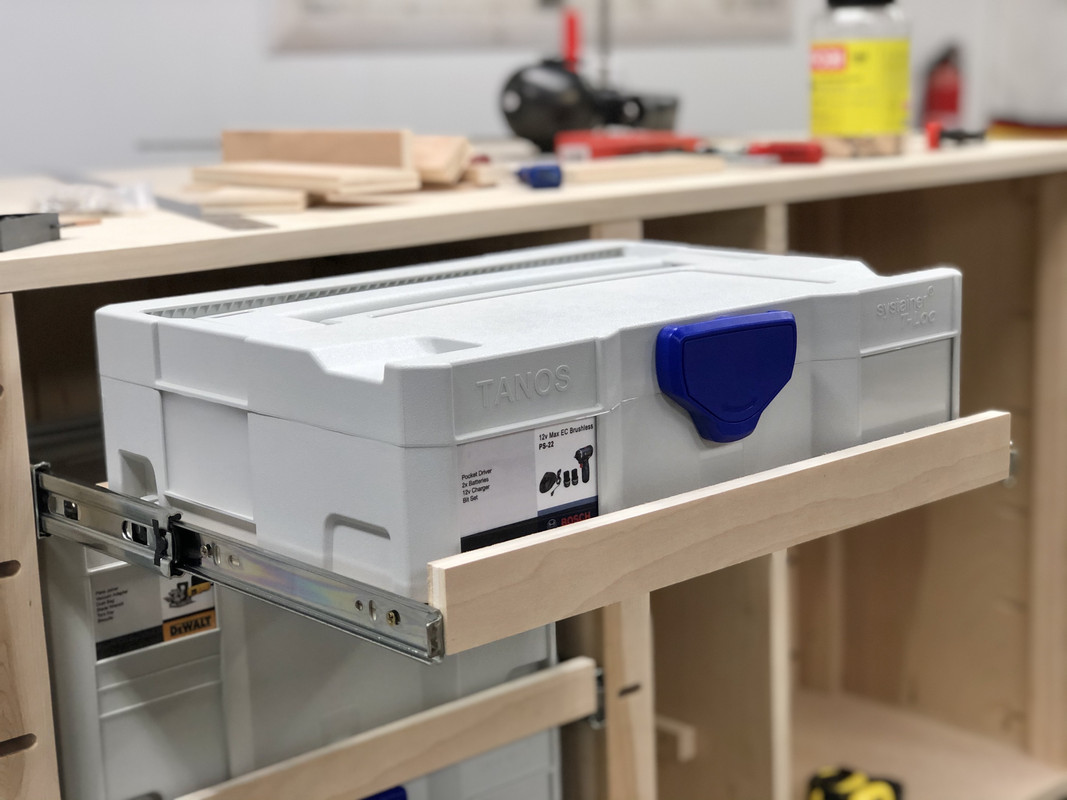
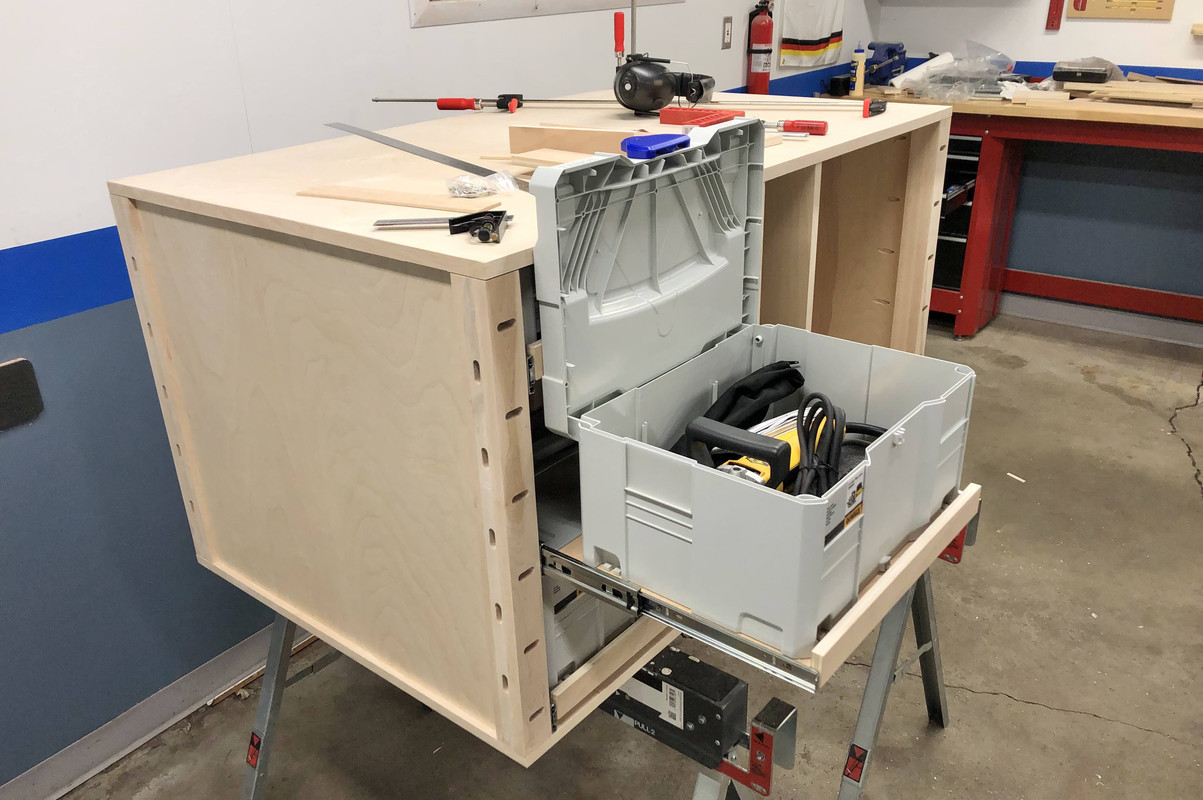
And yes, the Systainer lids open fully while in the drawer, but just barely!

IMG-9900.jpg


So that's where I'm at! Hope you enjoyed this little update.

IMG-9935.jpg


:beer:
 

bj383ss

Well-known member
Joined
Sep 29, 2011
Messages
3,166
Location
TX
Nick you cabinet looks great. If you look closely I am sure just about every shop built cabinet on GJ is a little off in some places. I think your biggest obstacle might be as you said getting square panels off of your tablesaw. The best practice I have had for large cabinet pieces is my 25" capacity tablesaw sled. Its hard to get things accurate if you can't make repeatable cuts for all parts.

Having said that no one but a true woodworker will even notice your cabinet not square. They will be more in awe that you made a cabinet to fit all you systainer cases.

P.S. I have two items arriving in the mail tomorrow that are your fault.:)

Bret
 
OP
N

nicholam77

Well-known member
Joined
Dec 18, 2016
Messages
2,669
Location
Minneapolis, MN
Thanks for the inspiration. Planning to get my build going and posting here.
Subscribed.

:thumbup: Do it! It's a great place to share, get feedback, and get inspired!

Nick you cabinet looks great. If you look closely I am sure just about every shop built cabinet on GJ is a little off in some places. I think your biggest obstacle might be as you said getting square panels off of your tablesaw. The best practice I have had for large cabinet pieces is my 25" capacity tablesaw sled. Its hard to get things accurate if you can't make repeatable cuts for all parts.

Having said that no one but a true woodworker will even notice your cabinet not square. They will be more in awe that you made a cabinet to fit all you systainer cases.

Thanks, Bret. You are totally right. I did not, however, use my table sled, for the main panels in this build. 100% track saw lining up to pencil marks. I do have a fairly large capacity crosscut sled (24" I think?), but trimming the ends of long 46" 3/4 plywood is difficult on my small jobsite saw, there's just not enough support to do it accurately and safely.

P.S. I have two items arriving in the mail tomorrow that are your fault.:)

Bret

Oh my, this is very intriguing! Can't wait to see what it is!
 
OP
N

nicholam77

Well-known member
Joined
Dec 18, 2016
Messages
2,669
Location
Minneapolis, MN
So, the kitchen flooring install got moved up. As in... should be starting tomorrow! As long as the state doesn't shut down non-essential businesses, which there has been talk of. Just need to make it through Friday.

I've transitioned to work from home, which is... interesting. Honestly I'd rather be at the office. My parents normally do daycare for us 3 days a week and are in their early 70's. They decided to stop doing daycare until the whole Covid thing blows over, which no one really knows how long it will last here. Fortunately neither myself or my wife have lost our jobs, the daycare conflict being the main problem to solve. All-in-all it seems like an inappropriate time to take on a big project, but I've been coordinating it with the flooring place for months, and they need the business right now, as does everybody. So we're going through with it.

I had said I would remove and reset the trim to save some money, so I got as far as I could on that this past Sunday.

I started in one corner and every board and wall gets labeled with a number:

IMG-9998.jpg


IMG-0016.jpg


Most of it went smoothly but I ran into a few issues. The door casing was heavily caulked, and very tricky to cut free without pulling the paint away from the walls.

IMG-9999.jpg


IMG-0030.jpg


IMG-0029.jpg


I'm probably going to have some mudding and clean up to do there.

The most difficult part were the toe kicks on these curved sections. There are two of them. I love the curvature of these areas as a design detail, but unfortunately they not only pin nailed the toe kicks but also used adhesive. Made of veneered particle board, they were destined to break.

IMG_0007.jpg


IMG-0008.jpg


The second one went even worse. :mad:

IMG-0011.jpg


I have one extra piece of toe kick material left by the previous owners, but it's not enough to cover both curves. I'm going to try and see if the product still exists to order, otherwise I'm *hoping* I can kerf-relief bend some 1/4" ply or even pine, and stain and poly close enough to match the finish of the cabinets.

So many nails. Many many more I haven't removed yet.

IMG-0017.jpg


IMG-0003.jpg


Needless to say the kitchen will be re-painted. Currently it's a very warm gray / beige color, I am thinking about continuing the same white from the rest of the main floor. I think the continuity would be nice, and it would be brighter, I just hope it looks ok with the orange-y-er wood.

IMG-0027.jpg
 
Last edited:

greyghost18t

Well-known member
Joined
Nov 24, 2010
Messages
187
Location
Milwaukee, WI
Great to see your keeping up with projects. I too am in the same boat. Both my wife and I are working from home right now. My mother in law is our daycare for out 2 1/2 year old. So now it is up to my wife and I to manage work, day care, and house projects. I also checked out your car. I have a mkvi GTI in the carbon steel grey. It is almost paid off and I would like to keep it, but there is not enough room in it right now for even a car seat. Both my wife and I are 5'10" so our knees are in the dash board with a car seat in the back! We have out Dodge Rebel right now which we use for everything. I would like to get a new Atlas Sportback, but who knows with what is happening out there right now.

I would also love to keep the GTI as a quick little car. But my repair list is long right now - Both front and rear bumpers need to be replaced, need to change the DSG at 95K now. Did it at 40K. Need to do oil change. Need to change out all rubber in the suspension, or get coilovers and new endlinks and rubbers for all mounts. The list goes on..plus a 2 1/2 year old, multiple bands, and golf has taken a lot of time too.. ***** to be bad at things and wanting to get better! Keep up with the good work at home and I can't wait to see what is next in store for you.
 

Unruh

Well-known member
Joined
Aug 12, 2017
Messages
1,431
Location
Silverdale, Washington
Looks like a lot of work! When we bought our house, my wife sent pictures to her Mom. Her mom actually prayed that we wouldn’t get it because of all the work it needed. We had to move fast to get it ready so we could move in and I cut some corners on the smaller details and now I’m wishing I would have taken a bit more time. You’ll be happy with all your attention to detail years later!
 
OP
N

nicholam77

Well-known member
Joined
Dec 18, 2016
Messages
2,669
Location
Minneapolis, MN
Great to see your keeping up with projects. I too am in the same boat. Both my wife and I are working from home right now. My mother in law is our daycare for out 2 1/2 year old. So now it is up to my wife and I to manage work, day care, and house projects. I also checked out your car. I have a mkvi GTI in the carbon steel grey. It is almost paid off and I would like to keep it, but there is not enough room in it right now for even a car seat. Both my wife and I are 5'10" so our knees are in the dash board with a car seat in the back! We have out Dodge Rebel right now which we use for everything. I would like to get a new Atlas Sportback, but who knows with what is happening out there right now.

I would also love to keep the GTI as a quick little car. But my repair list is long right now - Both front and rear bumpers need to be replaced, need to change the DSG at 95K now. Did it at 40K. Need to do oil change. Need to change out all rubber in the suspension, or get coilovers and new endlinks and rubbers for all mounts. The list goes on..plus a 2 1/2 year old, multiple bands, and golf has taken a lot of time too.. ***** to be bad at things and wanting to get better! Keep up with the good work at home and I can't wait to see what is next in store for you.

Thanks! Having a young kid around definitely makes things "interesting"! Old video, but:


Carbon steel gray is a great color. :D

Interesting about the car seat. Our little girl is only 1 1/2 yrs and still rear facing, but so far no issues with leg room in the GTI. And I'm 6'1" and my wife is 5'10". Funny enough it's WAY worse in her CX-5, I would have assumed the opposite. The Atlas Sportback looks nice, I feel like it kinda slots in where the Toureg used to be, which I've always admired.

That is a long list of things to take care of on your mk6. But I guess @95k those things can pile up. I want to get coils for mine, too, because the lowering springs I did have trashed the shock absorbers. And a clutch. And a tune. But I've kind of moved away from putting any money into it, because like you said, having too many hobbies can be a curse! Can't do everything.

Looks like a lot of work! When we bought our house, my wife sent pictures to her Mom. Her mom actually prayed that we wouldn’t get it because of all the work it needed. We had to move fast to get it ready so we could move in and I cut some corners on the smaller details and now I’m wishing I would have taken a bit more time. You’ll be happy with all your attention to detail years later!

A lot of times I get stressed out or impatient about the pace of improvements, but I am trying to do my best at everything, so I try to step back every once in awhile and realize it doesn't have to happen all at once. Having a kiddo has really helped put things in perspective on that front. Trust me, I still have plenty of small details I am not happy with in my work... but most everything I've done I was new to at a certain point. I just try to learn and make each next project better with that knowledge. If your garage is any indication, I'm sure you did a great job on your house. And one upside of doing the work yourself instead of buying a brand new place, is you get to customize it to your tastes and feel proud of the effort.
 
OP
N

nicholam77

Well-known member
Joined
Dec 18, 2016
Messages
2,669
Location
Minneapolis, MN
Another Kitchen Update:

Tuesday I continued to prep by removing the trim from the kitchen-to-hallway passage, back door threshold, and closet trim.

IMG_0047.jpg


Some drywall came with it. I'm trying to decide on the passageway if I should put some hardwood on the sides like maple and paint it white, and then casing back on, or if I should mimic the hallway-to-living room passage way and cornerbead and mud everything for a "trimless" look.

IMG_0042.jpg


The big downside to the drywall approach would be durability, and this one really bad edge:

IMG_0044.jpg


Any suggestions for filling that gap? Something stronger than regular joint compound?

Then we got the appliances moved to the living room ourselves. I usually try to take daytime pics because they look nicer, but the reality of it is a lot of this stuff has to happen after the baby goes to bed. So here's a night pic for ya:

IMG_0061.jpg


Yesterday the contractor started with the demo:

IMG_0070.jpg


You can see a better look at the original "faux brick" floor under our current vinyl, same as in those old film negatives I got developed.

IMG_0084.jpg


And then got about halfway on the plywood underlayment:

IMG_0082.jpg


IMG_0086.jpg


Professional labor ain't cheap, but it's worth every penny for this project, especially in these crazy times! Need to get it wrapped as soon as we can.

:beer:
 
To avoid these ads, REGISTER NOW!

Mr. Roboto

Well-known member
Joined
Dec 11, 2012
Messages
2,160
Location
New Hampshire
nice work! Can't wait to see the floor go in - fingers crossed they're still able to keep their appointment. You should see the size of the nails they fastened the trim with in my house... I can RARELY remove a piece without breaking it or damaging the drywall, it's nuts. I'm sure you'll be able to replace the broken curved trim without issue, you've got the tools and the skills!
 

wasfast

Well-known member
Joined
Apr 10, 2014
Messages
874
Location
San Diego CA
For the pass through/"hallway", I'd trim the 3 inside faces with 1x poplar (paint grade). Instead of flushing it to the walls on both sides, extend the piece 1/2"-3/4" out both sides. Backfill the gaps on the drywall with hot mud then finish compound.

The collision zone near the bottom will take some small dents but it's way more durable than corner bead and has a clean look without trim on the faces.
 

Trapps

ALLIANCE MEMBER
Joined
Feb 10, 2017
Messages
2,002
Location
The Detroit Zoo
Nick,

The Systainer storage looks great.
Question: What are the oval shaped cutouts on the front of the cabinet frames?


I have my own project going here to hold my small parts boxes (Dewalt Deep Pro Organizers - DWST14825):

medium800.jpg


The template was cobbled together to test fit.
Medium duty over travel slides:
medium800.jpg
 
OP
N

nicholam77

Well-known member
Joined
Dec 18, 2016
Messages
2,669
Location
Minneapolis, MN
nice work! Can't wait to see the floor go in - fingers crossed they're still able to keep their appointment. You should see the size of the nails they fastened the trim with in my house... I can RARELY remove a piece without breaking it or damaging the drywall, it's nuts. I'm sure you'll be able to replace the broken curved trim without issue, you've got the tools and the skills!

Thanks Roboto, our Governor ordered a shelter-in-place policy starting tomorrow at midnight. Floor is scheduled to be finished by then, so we should just squeeze by!

Removing trim intact can be really tough especially with a lot of caulk or big nails. If you're prying on the drywall side it can help to place a 4"x4" piece of plywood or something under the prybar to spread out the load and avoid denting/crushing the drywall. Maybe you already do that, but just a tip I learned.

Ya I should be able to replace the curved sections. It's just extra work, but that's the name of the game!

For the pass through/"hallway", I'd trim the 3 inside faces with 1x poplar (paint grade). Instead of flushing it to the walls on both sides, extend the piece 1/2"-3/4" out both sides. Backfill the gaps on the drywall with hot mud then finish compound.

The collision zone near the bottom will take some small dents but it's way more durable than corner bead and has a clean look without trim on the faces.

Great suggestion, thanks! It was previously trimmed with a softwood and was extremely beat up.

I'll Google it right after this, but I might as well ask you, what is "hot mud"?

:lol_hitti

Nick,

The Systainer storage looks great.
Question: What are the oval shaped cutouts on the front of the cabinet frames?


I have my own project going here to hold my small parts boxes (Dewalt Deep Pro Organizers - DWST14825):

c3.gif


The template was cobbled together to test fit.
Medium duty over travel slides:
c3.gif

Hey Trapps, the oval cut outs are for vertical clamping of boards or panels. They are designed to use the Festool / Bessey quick clamps. The horizontal ones on the face I would stick a small piece of wood kind of like a floating tenon that protrudes and supports the bottom of the workpiece, and the vertical ones on the sides accept the clamp:

IMG-0056.jpg


The reason for so many is adjustable heights for the material support. Use case for this might be holding a panel in place vertically to apply edge banding.

Your parts box drawers are looking good, can't wait to see more!
 

wasfast

Well-known member
Joined
Apr 10, 2014
Messages
874
Location
San Diego CA
Hot mud is the timed material (5 minute, 45 minute etc.). You can see the 5,20,40,90 minute versions from West pac here in medium size: https://www.homedepot.com/p/Westpac...v4Ig8iUC1gpdTxTvvRwaAnl7EALw_wcB&gclsrc=aw.ds

Once you add water, it sets the material off, usable until the time is reached. The plus is it hardens fast and doesn't shrink like evaporatory drywall compound. Just mix what you can dispense in the time listed.
 
OP
N

nicholam77

Well-known member
Joined
Dec 18, 2016
Messages
2,669
Location
Minneapolis, MN
wasfast, thanks for the info. I'll definitely look into this approach.

So... the floors are installed. My photo hosting service is undergoing maintenance and not letting me upload new pics at the moment, so the big reveal will have to wait until that's sorted.

I have a 23g pin nailer on the way from Amazon to re-attach some of the toe kicks and trims without leaving significant holes. That won't get here until Tuesday but I have plenty to do in the meantime!
 

bj383ss

Well-known member
Joined
Sep 29, 2011
Messages
3,166
Location
TX
Patiently waiting. I have a pin nailer on my list haven't pulled the trigger yet. :D

Bret
 
OP
N

nicholam77

Well-known member
Joined
Dec 18, 2016
Messages
2,669
Location
Minneapolis, MN
Patiently waiting. I have a pin nailer on my list haven't pulled the trigger yet. :D

Bret

My image hosting uploads are still down. :mad:

Pin nailers are so expensive! It's something I've thought about getting for awhile but always deterred by the price. I thought about getting a cheap one just for this project (harbor freight or something), but figured I would use it for assembly often enough, too, so went middle of the road brand name one with the Metabo HPT (Hitachi) on Amazon for $80. Still much cheaper than some of the other brand names like Bostitch, Porter Cable, etc. Well-reviewed for the most part but I'll let you know my thoughts once I've used it.

:thumbup:
 
OP
N

nicholam77

Well-known member
Joined
Dec 18, 2016
Messages
2,669
Location
Minneapolis, MN
Ok got the pics figured out.

Doing the underlayment the contractor made a lot of sawdust. He shop vac'd it of course but there was still a thick haze in the room so I brought my air cleaner inside. Seemed to do the job.

IMG-0091.jpg


I didn't take many pictures of the Marmoleum being installed, but essentially after cutting it to fit he spread adhesive and went over it with a heavy roller.

IMG-0095.jpg


All cleaned up after he finished:

IMG-0129.jpg


IMG-0136.jpg


He did a good job cutting it close to all the walls and cabinets.

IMG-0132.jpg


Up close you can see the little specks of cocoa.

IMG-0130.jpg


IMG-0140.jpg


Next up, before putting the trim back on, is painting. Which means I can finally get rid of this stupid hanging pot rack we don't use!

IMG-0147.jpg


Yesterday I started painting, taping everything off and cutting in some primer.

IMG-0157.jpg


IMG-0161.jpg


Normally I don't like using painter's tape, but it's going to be tricky around all the cabinets so I decided to use it.

I think it especially comes across in the last pic -- this material reflects a lot of green in certain lights, just like I feared. I'm going to reserve final judgment until painting and trim are done and I've lived with it for awhile, but so far I'm a bit disappointed in that. Other than that, the install went well.
 

bj383ss

Well-known member
Joined
Sep 29, 2011
Messages
3,166
Location
TX
Progress looks good Nick. I myself have been eyeballing the Ridgid Pin Nailer because it is a package deal with another brad nailer that shots staples for only $119. Not that I need another brad nailer buy mine does not shoot staples.

Bret
 
OP
N

nicholam77

Well-known member
Joined
Dec 18, 2016
Messages
2,669
Location
Minneapolis, MN
Nick I found the Youtube video with the Woodpecker stuff!


Bret

Thanks! Now you have me eyeing that Paolini Pocket Rule! Stay strong, Nick, stay strong. Must have willpower. I have to say hands down the one I have I use the most is my TS-3 mini scribing rule. It was a One Time Tool but the Saddle Squares are very similar. The Pocket Rule can do mostly the same thing, but it's really nice knowing the scribing holes never change, i.e. if you change the stop on the Pocket Rule or even a combo square and need to come back to it for some reason, it needs to be reset. The scribing holes are always there, and always exactly the same, just drop the pencil in.

I shoulda looked at that Rigid nailer combo because I started putting the trim back on and had a mishap with my 18-gauge gun. The first shot seemed to blow a seal, because afterwards, air starting rushing out the exhaust and wouldn't stop. No jams, nothing I could find. So I started removing the back and it "exploded" on me.

IMG-0193.jpg


Lot's of gaskets and o-rings and I had no manual and couldn't figure out how to put it back together.

:lol_hitti

Some small pieces fell out of the body, a little filter looking element, which this gun had always had a rattle. I think these parts were clanging around in there loose since the beginning. Not sure what to make of it other than I think the gun is trashed. :mad:

I was going to use 18-gauge brads for the baseboard, but with that gun broken, and no brads on hand for my bigger 16-gauge, I decided to try the new pin nailer.

The max nail it can shoot is 1 3/8", so not that long to go through baseboard AND sheetrock and into the framing. But since they can hardly be seen I could use more of them, and the holding power seemed to be pretty good. I might follow up with some 18-gauge if I get a replacement some day, but for now this is what I did.

IMG-0190.jpg


The Metabo HPT pin nailer worked great. It needed a consistent 90 PSI to set the nails, but other than that no complaints.

Instead of pounding or prying out all the nails and brads left in the trim, I clipped them with the Knipex.

IMG-0191.jpg


This was faster, and didn't leave holes where the nails used to be.

I only had to make one adjustment, to a piece of door casing, for which I dragged out my semi-broken miter saw.

IMG-0202.jpg


Got me thinking though, if I ever make a miter-setup again it will probably be something modular that works with the new tracksaw table, vs a big built-in cabinet.

IMG-0195.jpg


IMG-0204.jpg


I still have a few bits to do, but I got 90% of it on. We also painted the walls a few days prior. It's been a whirlwind and I am tired of working on it. Just a little more to go.

:beer:
 

Kriesel

Well-known member
Joined
Mar 25, 2014
Messages
138
Location
Afton, Minnesota
I would think you can find a youtube video on replacing the orings and such in your gun. I quickly ran across this one of an air nailer being taken apart:


If it's "broken" already, you can't brake it any worse. mess with it and see if you can fix it!

The new flooring looks good and clean
 

topcok88

Well-known member
Joined
Jun 3, 2013
Messages
660
Nick, I have the a Bostitch, grabbed the case to use it one day to install a small section of base moulding and it started gushing air out. Following disassembly it appeared the rubber o-ring and most importantly the head valve body was cracked open. The rubber/plastic components appeared to be degraded and fragile. Ordered all the parts off Amazon and was up and running after cleaning and lubing it all up. Hope you can fix it! IMG_5178.jpg


Sent from my iPhone using Garage Journal
 
OP
N

nicholam77

Well-known member
Joined
Dec 18, 2016
Messages
2,669
Location
Minneapolis, MN
I had an "off" day in the shop yesterday. Meaning things just didn't go smoothly. The plan was to continue on the tracksaw bench build with the worksurface frame. I spent some time modeling an updated design in Sketchup (based on Guy Woodshop's), to figure out dimensions:

MFT-Worksurface-Frame-2.jpg


First error was I realized my Sysport cart base was not exactly 46"x30" like my model. Some variables like human error, the edgebanding add on, etc. So I took custom measurements for the worksurface frame. And some how cut them a bit short. :mad: This was my only 3/4" ply left over and we are in lockdown status right now. I think Home Depot is technically open but don't really want to make the trip.

Second error, when pocket-holing the plywood inner frame, I set the stop-collar on the bit, but not the jig. So this happened:

IMG-0216.jpg


I had some shorter screws on hand, so they stick out less, but I will have to Dremel off all the tips.

I got a bunch of maple boards to do the outer frame, but now I'm wondering if I should hold off and get more plywood to fix my mistakes, or just roll with it. It's quite difficult for me to transport plywood with our compact cars, and the costs on this bench are really adding up (future post on that).

So I completed the inner frame and called it quits.

IMG-0222.jpg


IMG-0220.jpg
 
Last edited:

Bob Heine

ALLIANCE MEMBER
Joined
Oct 24, 2009
Messages
10,706
Location
Boca Raton, Florida
Nick, good luck with the nailer rebuild. I bought a small brad nailer and stapler pair from Sears years ago and rarely used them. Within a sort time they both blew out like yours so I went to buy the repair parts. Turned out the parts were double what I would pay for a new combo nailer/stapler from Harbor Freight. Now, that rarely used tool has been sitting for most of a decade so it will likely blow up next time I need it. Recent experience tells me Harbor Freight doesn't offer parts for their tools so Bret's post sent me directly to Home Depot's site and the two Ridgid tools are scheduled to arrive at my door today. Their most attractive feature was "Free Parts and Service for Life with Registration."
 
OP
N

nicholam77

Well-known member
Joined
Dec 18, 2016
Messages
2,669
Location
Minneapolis, MN
Bob, hopefully the Rigid are better quality than Harbor Freight/Sears, I would assume they are but who really knows? I've heard their lifetime warranty is a bit tricky to sign up for, but definitely a nice feature to have. Mine was a lower end Husky Home Depot brand. I haven't looked into repair parts cost yet, but it's not at the top of my to-do list. Thanks for checking in!

Unruh, I agree a battery powered nailer would be very nice indeed. Most nailing I've done has been inside the house so I have to drag the compressor and hose inside which is heavy and dirty. It's always hard to tell from online reviews whether a product is good or not. I always take a product's average review score into account, but it's not everything. You might buy that Makita and it might work perfectly fine for you. Maybe see if you can find some more in depth video reviews on YouTube?
 
OP
N

nicholam77

Well-known member
Joined
Dec 18, 2016
Messages
2,669
Location
Minneapolis, MN
Small update:

Got the summer shoes back on the mk7 today.

IMG-0303.jpg


My wipers were totally shot so replaced those, with OEM of couse. :)

IMG-0241.jpg


IMG-0244.jpg


Yesterday during baby nap time I tried to fix my errors on the MFT worksurface inner frame by Dremel-ing off the pocket screw tips.

IMG-0295.jpg


Then I resawed a piece of 3/4" plywood to 1/8" thick on the table saw to glue as a shim on the outside of the frame I made a little too narrow. No pic, so that's probably confusing, but I'll show more later.

Also ordered track saw guide rail supports:

festool-parts.png


I decided to just get the Festool parts vs. try to make something, or go with the 3rd party, but more expensive, Right Angle Design supports.

This bench has been a LOT of effort and $$$ just to cut square pieces of plywood, but on the few shop projects I've been lining up pencil marks the errors have shown through. I'm really hoping it's going to be the foundation for some future house furniture projects that *hopefully* I can achieve a more professional level of squareness and accuracy.

:thumbup:
 
To avoid these ads, REGISTER NOW!
Top Bottom