xtremek
Well-known member
Looks pretty good, except I don't understand how the new piece mates up to the outer skin.

Looks pretty good, except I don't understand how the new piece mates up to the outer skin.
 this new piece will also weld up to the inner side of the wheel tub and the side of the body.
Thanks for all the updates and insight into your projects. A little vicarious pleasure for me.

Spent some time tearing into things this weekend, nothing too involved, but it all needs doing eventually, right? It was nice to heat the garage and putz around.
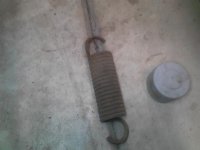
Got the clutch pedal, emergency brake and kick panel off to get at the crud caught in the fresh air vent. They always yield disgusting gifts courtesy of mice and trees, this one had a couple extra surprises due to the missing cowl screen.
 DSC_6959_1024x1024@2x by Dan Haas, on Flickr
 20181209_121508 by Dan Haas, on Flickr
 20181220_153527 by Dan Haas, on Flickr
 Screenshot_20191229-171149_Gallery by Dan Haas, on Flickr
 20200105_120936 by Dan Haas, on Flickr
 20200105_120941 by Dan Haas, on Flickr
 20190714_100257 by Dan Haas, on Flickr
 20190714_100441 by Dan Haas, on Flickr
 20190714_100403 by Dan Haas, on Flickr
 20200112_104331 by Dan Haas, on Flickr
  20191129_145201 by Dan Haas, on Flickr
 20200118_120431 by Dan Haas, on Flickr
 20200118_171858 by Dan Haas, on Flickr
 20200118_171825 by Dan Haas, on Flickr
 20200118_172905 by Dan Haas, on Flickr
 20200118_180009 by Dan Haas, on Flickr
 20200118_180747 by Dan Haas, on Flickr
 20200118_180721 by Dan Haas, on Flickr
")
"Haven't done much" > tears front end apart, lol.
My scarebird kit was for 5x5 bolt pattern. It specified a 75 tbird rear disc to go over the hub. Pretty much a modern front wheel drive setup.
I must have decided I need to have three vehicles torn apart to be just like you. The weather has been up and down lately, so every weekend that gets to the high 30's I kick a car out of the garage so I can work on a floorboard project ( gotta have room to open the door). Made it up to fitment this weekend, still gotta custom make the bucket seat/console mount as no one will cut one out and sell it to me, been trying for like 20 years.
Lucky on the Kanter stuff. Going with rear discs?
.
You wanna come down to MD for a week and help me with my bed? Never done sheet metal work so this oughta be interesting[/IMG]
Sent from my Pixel XL using Tapatalk
 20171004_190808 by Dan Haas, on Flickr
 20150919_124740 by Dan Haas, on Flickr
 20150919_124746 by Dan Haas, on Flickr
 20150919_124641 by Dan Haas, on Flickr
 20150919_124652 by Dan Haas, on Flickr
 20160514_121801 by Dan Haas, on Flickr
 20160807_100215 by Dan Haas, on Flickr
 20171005_215343 by Dan Haas, on Flickr
 20160731_160013 by Dan Haas, on Flickr
 20160731_163439 by Dan Haas, on Flickr
 20170819_194802 by Dan Haas, on Flickr
 20170819_183140 by Dan Haas, on Flickr
I'm surprised the Edsel has a 9" in it. The cutoff was supposed to be 3600lbs for their use.
Olds beefed up the standard rear in the Vista Cruiser with oversized bearings to handle the extra weight.


Yep, that was me! The rear suspension is the Nfamus 3 link kit.
Thanks for those pictures. I've found like 10 ways to do it so I really need to sit down and figure out which direction I want to go.
I think I want to stay away from the sheet metal bridge just because I feel like the raised floor looks a lot cleaner and the space for air management and battery service would be nice
Sent from my Pixel XL using Tapatalk
 20200126_121941 by Dan Haas, on Flickr
 20200126_134553 by Dan Haas, on Flickr
 20200126_113118 by Dan Haas, on Flickr
 20200126_113801 by Dan Haas, on Flickr
 20200126_113131 by Dan Haas, on Flickr
 20200127_203037 by Dan Haas, on Flickr
 20200127_200929 by Dan Haas, on Flickr
 20200127_195619 by Dan Haas, on Flickr
 20200127_195523 by Dan Haas, on Flickr
 20200127_195530 by Dan Haas, on Flickr
 20200127_202434 by Dan Haas, on Flickr
 20200127_202539 by Dan Haas, on Flickr
 20180527_151046 by Dan Haas, on Flickr
I see you now have a place for your sawed off shotgun in the trunk. When the revenouer asks you to pop the trunk looking for 'shine: POW!
That trunk work bench came in handy on the job too. I used the trunk of my parts car half the fall to toss power tools and hand tools in there, real close to where the action was. It took 10 solid minutes to empty it out and put stuff away when it came time to chop the car up.
Seeing how Chrysler and Jeep were about joined at the hip in the early '80's, check the specs on the 4 speed dodge truck stuff too. There were two levels, light duty car/van and heavier duty pick up truck.
I finally understand the trunk piece, and it looks nice. It's interesting what will work across the different car lines, and I'm looking forward to watching this play out.
 20191201_115256 by Dan Haas, on Flickr
 20191208_113524 by Dan Haas, on Flickr
 20191208_114032 by Dan Haas, on Flickr
Nice progress. It's cool seeing the old technology like the transmission-mounted pedals.
 1 by Dan Haas, on Flickr
 2 by Dan Haas, on Flickr
 3 by Dan Haas, on Flickr
 4 by Dan Haas, on Flickr
 5 by Dan Haas, on Flickr
 6 by Dan Haas, on Flickr
 7 by Dan Haas, on Flickr
 11 by Dan Haas, on Flickr
 8 by Dan Haas, on Flickr
 10 by Dan Haas, on Flickr
 9 by Dan Haas, on Flickr
 12 by Dan Haas, on Flickr
 13 by Dan Haas, on Flickr
 14 by Dan Haas, on Flickr
 15 by Dan Haas, on Flickr
 16 by Dan Haas, on Flickr
 20200223_151603 by Dan Haas, on Flickr
 Screenshot_20200202-124443_Video Player by Dan Haas, on Flickr
 20200202_164712 by Dan Haas, on Flickr
 20200201_182123 by Dan Haas, on Flickr
 20200202_164938 by Dan Haas, on Flickr
 20200202_164805 by Dan Haas, on Flickr
 last1 by Dan Haas, on Flickr
 last2 by Dan Haas, on Flickr
The doodles look like fun. I hope you get the car in paint soonish. Looking forward to see it driving before the summer is over.
I like the octopus
Winter is definitely slack season, ask me how I know.
That hour you spent on the front engine cradle has been on my "next time I feel like doing something" list for two months...
In my defense, Winter actually showed up with 16" of snow in February, so I've been going snowmobiling on the weekend. It then takes until Thursday for my old carcass to recover.
The doodles are probably a cheap form of therapy, no doctor bills!
 2020-02-28_07-08-48 by Dan Haas, on Flickr
 20190922_120126 by Dan Haas, on Flickr
 20190922_120118 by Dan Haas, on Flickr
"reminds me of Imron" That got my attention.
What's the temp range of the Tamco polyurethane? I was going to go Southern Poly, but they admit you need 70+ for their product to work well. That's not going to happen often in Northernish Wi.
 20200301_161909 by Dan Haas, on Flickr
 20200229_164415 by Dan Haas, on Flickr
 20200301_163231 by Dan Haas, on Flickr
 20200301_164042 by Dan Haas, on Flickr
 20200301_164949 by Dan Haas, on Flickr
 20200301_165804 by Dan Haas, on Flickr
 20200308_174037 by Dan Haas, on Flickr
 2020-03-16_08-16-28 by Dan Haas, on Flickr
 20200315_101227 by Dan Haas, on Flickr
 20200315_101309 by Dan Haas, on Flickr
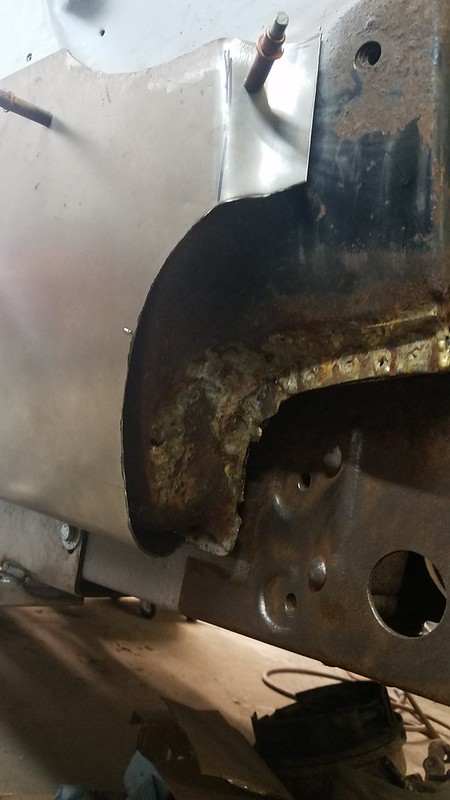 20200315_101255 by Dan Haas, on Flickr
 20200315_153526 by Dan Haas, on Flickr
 20200315_153535 by Dan Haas, on Flickr
 20200315_153705 by Dan Haas, on Flickr
Your newest pictures got me too antsy. I opened up the pole barn too early this weekend. Spent an hour scraping undercoat with the heatgun until my feet got cold on the 38 degree concrete. Maybe try again in a couple of weeks, did feel good to be back on the project for the first 50 minutes...
 20200321_173444 by Dan Haas, on Flickr
 20200321_194302 by Dan Haas, on Flickr
 20200403_200207 by Dan Haas, on Flickr
 20200404_135944 by Dan Haas, on Flickr
 2020-04-06_07-45-48 by Dan Haas, on Flickr
 20200404_142715 by Dan Haas, on Flickr
 20200404_154704 by Dan Haas, on Flickr
 20200405_095023 by Dan Haas, on Flickr
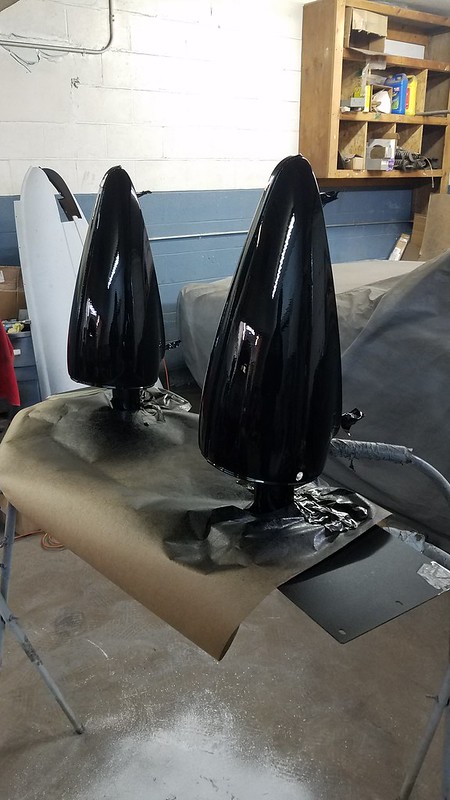 20200405_123131 by Dan Haas, on Flickr
 20200405_123256 by Dan Haas, on Flickr
Dam it has to feel good to have finish paint on parts of the car.
Your landlord end up using the metal support for his sander after all?