To avoid these ads, REGISTER NOW!

What did you do "IN" your garage today?

Jim_No_Garage

Well-known member
Joined
Jan 15, 2011
Messages
3,322
Location
Millington NJ
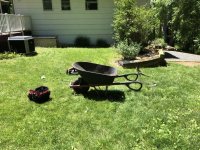
I picked up a steel frame for a wheelbarrow at the curb yesterday as I have a wheelbarrow with a rotten frame. Today I combined the two into a single working unit.

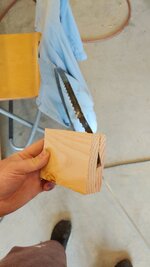
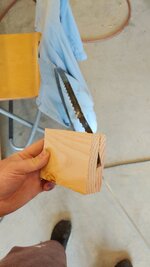
I had to make replacement "wedges" to put between the rails and the tub as the original ones had a family of carpenter ants living in them. I used some PT 2 x 4 I had laying around.

The tire leaked so I "Slimed" the tube and will hope for the best. I still have the wheel from the rotten frame so I can always swap that one on.

Cheers

Jim
 

Attachments

  • Frankenbarrow (1).jpg
    Frankenbarrow (1).jpg
    152.5 KB · Views: 94
  • Frankenbarrow (2).jpg
    Frankenbarrow (2).jpg
    150.9 KB · Views: 89
To avoid these ads, REGISTER NOW!

doorfx

Well-known member
Joined
Oct 7, 2016
Messages
708
Location
Calgary ab. Canada
Tune up time for all small equipment
687c6636ef7701807e8bce5b653886db.jpg
Weed walker, edger and blower all got the treatment as well lol7a22008a69f58005a38071a841e28ec4.jpg
174d352e562a82d083f75a33ab6e236e.jpg
45ab740162bdf2151a6f6a90b8322d19.jpg
 

Attachments

  • 174d352e562a82d083f75a33ab6e236e.jpg
    174d352e562a82d083f75a33ab6e236e.jpg
    332.1 KB · Views: 0
  • 45ab740162bdf2151a6f6a90b8322d19.jpg
    45ab740162bdf2151a6f6a90b8322d19.jpg
    165.4 KB · Views: 0
  • 7a22008a69f58005a38071a841e28ec4.jpg
    7a22008a69f58005a38071a841e28ec4.jpg
    250.5 KB · Views: 0
  • 687c6636ef7701807e8bce5b653886db.jpg
    687c6636ef7701807e8bce5b653886db.jpg
    206.9 KB · Views: 1

protegeV

Well-known member
Joined
Apr 18, 2018
Messages
13,363
Location
DFW
Pulled the motor in the truck I just bought. It was supposed to be a simple fix, but apparently not...
 

couch67

Well-known member
Joined
Mar 18, 2016
Messages
1,410
Location
Ontario Canada
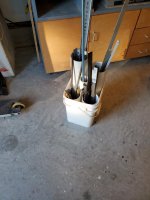
Built a metal cutoff bin, basically a cat litter bin filled with pvc tubes, works great for what I need.

There is a thread dedicated to this but could not find it, will post there once I do....
 

Attachments

  • 20200531_193657.jpg
    20200531_193657.jpg
    92 KB · Views: 88

Motorman55

Well-known member
Joined
Apr 10, 2016
Messages
2,650
Location
South Jersey
FWIW I doubt you will ever scrub that dress belt back to white and bleach is probably going to yellow it some. Not sure where you are located but if you want to display it I would just go online or to a nearby PX and pick up a replacement dress belt. This looks like a pretty decent deal https://www.marineshop.net/white-belt-for-male-dress-blue-uniform-500772

Thanks for info. The buckle was only displayed in one of my cases. The white belt was stored away for many years. I'll try to clean it anyway just because it was part of my wild youth.
 

soloz2

Well-known member
Joined
Jun 30, 2012
Messages
862
Location
Western NY
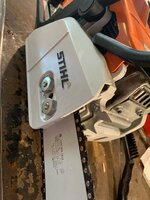
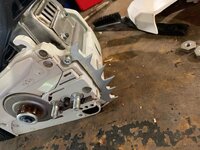
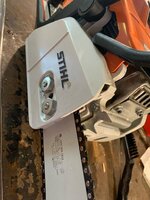
swept out and reorganized the small garage I use as a storage shed for outdoor equipment. I've got to sell my old snowblower this fall to clear up some room since I got a new one at the end of winter. I also cleaned up my chainsaw and installed the metal dog I picked up for it. ef0afb89d1dcf874572de2061225d014.jpg
a06043c3c01b0de2468635b7292ab63b.jpg


Sent from my iPhone using Tapatalk
 

Attachments

  • ef0afb89d1dcf874572de2061225d014.jpg
    ef0afb89d1dcf874572de2061225d014.jpg
    96.2 KB · Views: 1
  • a06043c3c01b0de2468635b7292ab63b.jpg
    a06043c3c01b0de2468635b7292ab63b.jpg
    118.6 KB · Views: 0

niget2002

Well-known member
Joined
Oct 2, 2012
Messages
11,260
Location
Josephine, TX
Yelled a few profanities...

First time snapping a bandsaw blade. It was my fault. I broke the table insert and haven't replaced it yet. The wood got pulled into the opening and jammed.0bb679673aed51ead253a8416059d82f.jpg

Sent from my LM-G820 using Tapatalk
 

Attachments

  • 0bb679673aed51ead253a8416059d82f.jpg
    0bb679673aed51ead253a8416059d82f.jpg
    320.4 KB · Views: 0

830singleshot

Well-known member
Joined
Jan 14, 2018
Messages
62
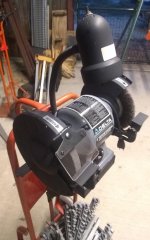
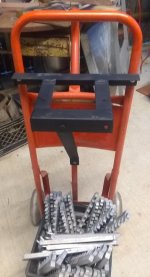
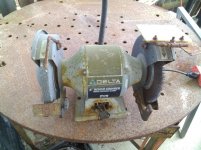
Built this portable grinder rig. I got this wreck of a 8" grinder and refurbished it. I saw somewhere on GJ someone adding a flap wheel to the end of the shaft, so I turned a little bushing to make it fit.
I've wanted a grinder to use under the shed part of my barn for a while. I took this discard 2 wheel dolly and everyone's favorite angle iron (bed rail) and built this. It's perfect for my needs. Now just have to replace the ballast milk crate.
 

Attachments

  • IMG_20200531_203743011.jpg
    IMG_20200531_203743011.jpg
    74.2 KB · Views: 93
  • IMG_20200531_202853197.jpg
    IMG_20200531_202853197.jpg
    62.2 KB · Views: 92
  • IMG_20200502_123857774.jpg
    IMG_20200502_123857774.jpg
    153 KB · Views: 88
  • IMG_20200531_203724142.jpg
    IMG_20200531_203724142.jpg
    74.9 KB · Views: 108

Motorman55

Well-known member
Joined
Apr 10, 2016
Messages
2,650
Location
South Jersey
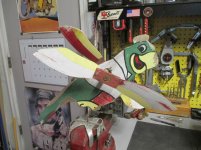
Meet Polly, Motorman's newest garage mascot. This old salty sailor has seen lots of action out in the weather.

He's rough around the edges, but I'm not about to clean him up cause he's earned his patina the hard way. Still I think he might be ready for retirement.

Of course us retired types still need to spin our wheels now and then, or in the case of Polly, to spin his wings. So maybe we can find a place in the garage where he can catch a breeze.
 

Attachments

  • IMG_4186.jpg
    IMG_4186.jpg
    150.1 KB · Views: 72
  • IMG_4185.jpg
    IMG_4185.jpg
    148.8 KB · Views: 62
  • IMG_4187.jpg
    IMG_4187.jpg
    149.8 KB · Views: 63

Flat Thunder Channel

Well-known member
Joined
May 4, 2020
Messages
402
Location
Ohio
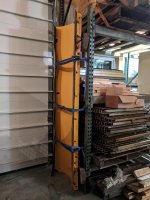
When you have a forklift..... You think everything is eeezy peezy. Uprighted my snowplow blade tonight to save space. Didn't figure out it was a bad idea until it was lifted teetering in the air. Don't try this at home folks! On a lighter note I can finally walk without stepping over a pile of boards and around a snow blade. Making room so I can actually walk around the shop again! Also pondered which breaker and wire combination I need for my Hobart 175 welder. Confused at best...:headscrat
 

Attachments

  • IMG_20200531_230931.jpg
    IMG_20200531_230931.jpg
    97.8 KB · Views: 98
  • IMG_20200531_230940.jpg
    IMG_20200531_230940.jpg
    97.2 KB · Views: 85
  • IMG_20200531_230955.jpg
    IMG_20200531_230955.jpg
    147.3 KB · Views: 89

WunTon

Well-known member
Joined
Jun 22, 2018
Messages
339
Location
My house in Purcellville VA
Noticed my belt was about to fall off while switching clearance inserts so I pull the top and found the set screw on the motor pulley had backed out slightly. Got that sorted out and then took the time to check everything over and lube all the appropriate places before putting the top back on.
 

Attachments

  • 5A4685FD-EBB8-4EE1-9B48-9137E0550ABA.jpg
    5A4685FD-EBB8-4EE1-9B48-9137E0550ABA.jpg
    141.8 KB · Views: 72

PhantomEB

Well-known member
Joined
Feb 6, 2006
Messages
6,817
Location
Medicine Hat, AB, Canuckistan
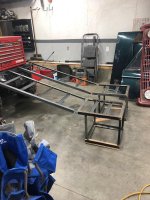
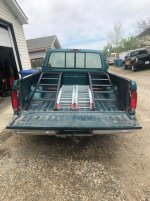
Cut up new and old steel on hand for my new and improved ATV riser set up for my truck. The platforms pretty much will stay in the truck unless need the room, Ramps can sit in the Side yard when not in use. Aiming to spread them out to the 25” mark so I can lay the other ramps flat on box floor when the quad is in use. Will store a Jerry Can underneath one ramp platform and a second battery/Compressor underneath the other. Then a Kolpin on the spreader bar that will be on the inner legs closest to the firewall.

It’s gonna be way nicer not to have the constant roller coaster ride of the old ramps. Why this way? I intend to pull a RV trailer down the line.
 

Attachments

  • DA22C37F-5C13-485F-A30C-3A22DF8AFAD2.jpg
    DA22C37F-5C13-485F-A30C-3A22DF8AFAD2.jpg
    87.1 KB · Views: 63
  • 228A9834-76E2-41AD-8D80-1656D25FCF8E.jpg
    228A9834-76E2-41AD-8D80-1656D25FCF8E.jpg
    138.4 KB · Views: 61
  • FCC7F9BF-8257-42CC-BCD4-4BE53F88AD29.jpg
    FCC7F9BF-8257-42CC-BCD4-4BE53F88AD29.jpg
    107.7 KB · Views: 60

Dan in Pasadena

Well-known member
Joined
Feb 18, 2009
Messages
13,164
Location
Pasadena, CA
Couldn't do much because we had the granddaughters (2 & 6) the last two nights.

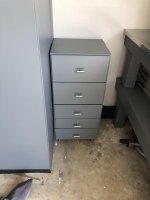
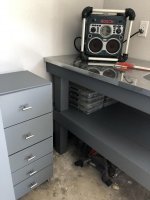
But I was able to paint a small cabinet of drawers and installed door handles on my cheap melamine cabinets. Cabinets were missing one and had mismatched white plastic and chrome handles otherwise. Found out I had a combination of 3" and 3-3/4" hole centers. DOH! Drilled some new holes and now I have some extra holes to fill and a little more painting to do.

You can see my flooring boxes stacked behind the cabinet of drawers. Can't wait to install it!!
 

Attachments

  • 314DD871-9218-4281-B74A-38D1BCAA5FA1.jpg
    314DD871-9218-4281-B74A-38D1BCAA5FA1.jpg
    40.1 KB · Views: 55
  • AAFA0F8A-DDC9-4D50-A738-E5F4E5C051AC.jpg
    AAFA0F8A-DDC9-4D50-A738-E5F4E5C051AC.jpg
    81 KB · Views: 59
Last edited:

Slednut

Well-known member
Joined
Dec 20, 2012
Messages
2,554
Location
Washington state
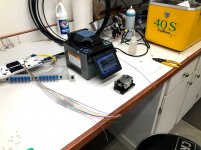
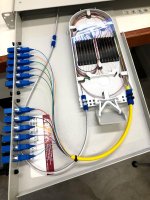
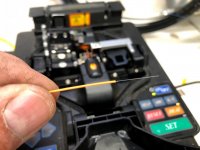
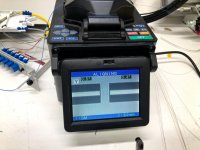
Because we are working from home I spliced up a fiber panel today for a remote cabinet in my shop.
 

Attachments

  • Fiber 1.jpg
    Fiber 1.jpg
    130.9 KB · Views: 104
  • Fiber 2.jpg
    Fiber 2.jpg
    148.1 KB · Views: 108
  • Fiber 3.jpg
    Fiber 3.jpg
    104.1 KB · Views: 112

kaymccampbell

Well-known member
Joined
Feb 27, 2015
Messages
29,625
Location
Upstate New York
Put a bunch of Stedlin anti thrash inserts on my air hoses.
Worked on the whole house fan.
Soldered up the shield board for the shop clock. No more breadboards.
 

PhantomEB

Well-known member
Joined
Feb 6, 2006
Messages
6,817
Location
Medicine Hat, AB, Canuckistan
Finished off my new bigger and better as well safer ATV riser ramps for my truck. Made the Ramps removable then decided flip uppable so now they can rest on the tailgate and act like a sled deck for bigger purchases. As well I can put Costco stuff underneath the Ramps when it’s elevated. Won’t need to remove them period now.

Then I cleaned my bench before painting the Ramps. Will have an installed pic tomorrow.:bounce:
 

Attachments

  • B6842A9E-CE57-437B-8614-6753AF0DD82D.jpg
    B6842A9E-CE57-437B-8614-6753AF0DD82D.jpg
    112.8 KB · Views: 95
  • 734EB44F-F9AA-4C10-8997-20D1EBAD39DE.jpg
    734EB44F-F9AA-4C10-8997-20D1EBAD39DE.jpg
    124.2 KB · Views: 97
  • DB259CFF-E1CA-40F2-91FA-420B6C3F5BA6.jpg
    DB259CFF-E1CA-40F2-91FA-420B6C3F5BA6.jpg
    104.2 KB · Views: 97
  • 7CB45244-8BD7-415D-9921-15178FC32FDD.jpg
    7CB45244-8BD7-415D-9921-15178FC32FDD.jpg
    121.4 KB · Views: 96
To avoid these ads, REGISTER NOW!

ZRX61

Well-known member
Joined
Aug 15, 2006
Messages
28,716
Location
Solar Blight Valley, SoCal
I got ambushed on the way to the garage...


Yanno how you can walk around your house with the lights off because you know where everything is etc?
Walked from the main hallway through the laundry room to the garage in the dark. Halfway through the laundry room & slam into a cupboard door that was left open.
Three feet later I slam into another one.
Asked roomie about it & all I got was "I wish I'd seen that"
Yeah, so do I...
 

Slednut

Well-known member
Joined
Dec 20, 2012
Messages
2,554
Location
Washington state
Nice looking work Slednut. Is that your own fiber splicer ?

No, it’s the oldest one the telephone company I work for has and was over $30,000. Our newer splicers are around $17,000. They have nice features but we’re constantly sending them in for repair. This one has always worked and I’ve gone through probably 6 sets of electrodes.
We’re planning on buying a ribbon splicer which splices 12 fibers at a time.
 

kaymccampbell

Well-known member
Joined
Feb 27, 2015
Messages
29,625
Location
Upstate New York
No, it’s the oldest one the telephone company I work for has and was over $30,000. Our newer splicers are around $17,000. They have nice features but we’re constantly sending them in for repair. This one has always worked and I’ve gone through probably 6 sets of electrodes.
We’re planning on buying a ribbon splicer which splices 12 fibers at a time.
Fiber splicing has obviously evolved a lot from the little guillotine, glue fixture, sanding block, and loupe.
 

Slednut

Well-known member
Joined
Dec 20, 2012
Messages
2,554
Location
Washington state
Fiber splicing has obviously evolved a lot from the little guillotine, glue fixture, sanding block, and loupe.

Yeah, with all the high speeds we are replacing all the hand polished/mechanical connectors.

Here's some pictures of the splicer aligning, fusing arc and how big the fiber is. In the aligning pic you can see the core of the fibers which is where the light actually travels through.
 

Attachments

  • Fiber 6.jpg
    Fiber 6.jpg
    98 KB · Views: 110
  • Fiber 4.jpg
    Fiber 4.jpg
    145.6 KB · Views: 112
  • Fiber 5.jpg
    Fiber 5.jpg
    145.1 KB · Views: 111
Last edited:

Dan in Pasadena

Well-known member
Joined
Feb 18, 2009
Messages
13,164
Location
Pasadena, CA
Not a lot. Too hot and muggy here.

Finished final coat on small drawers late last night so I could install drawer pulls. A long & short screw provided w/ea. pull; neither the right length natch - too short and too long! Had to cut & blend the threads to fit.

Mounted a long drawer pull to use as a hand towel bar on sink stand because it matches the door & drawer pulls. Good idea but didn't "stick out" enough so I added some blocks. Not sure I'll keep it this way but works for now. Mounted bottle opener & catch can.
 

Attachments

  • 11C7095C-A2EA-4DD0-881D-4B0A3398DFBC.jpg
    11C7095C-A2EA-4DD0-881D-4B0A3398DFBC.jpg
    91.9 KB · Views: 61
  • 47B6ED1E-A1A3-4F9C-8E1C-B22082BA090D.jpg
    47B6ED1E-A1A3-4F9C-8E1C-B22082BA090D.jpg
    53.4 KB · Views: 54
  • 8069F6AC-94CC-4859-B697-0D4117A10295.jpg
    8069F6AC-94CC-4859-B697-0D4117A10295.jpg
    68.7 KB · Views: 56

Kevkx125

Well-known member
Joined
Dec 26, 2013
Messages
3,394
Location
DOUGLASSVILLE, PA
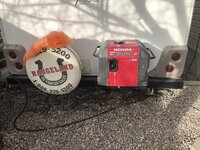
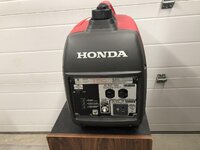
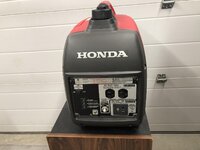
serviced my generator and played with my honda mt125
 

Attachments

  • GEDC0005.jpg
    GEDC0005.jpg
    151.3 KB · Views: 60
  • GEDC0003.jpg
    GEDC0003.jpg
    144.3 KB · Views: 63
  • GEDC0004.jpg
    GEDC0004.jpg
    118.2 KB · Views: 59

skulldrinker

Well-known member
Joined
Dec 25, 2011
Messages
1,171
Location
Bolingbrook, IL
I laid on my couch all stiff and sore from replacing the back 3 plugs and a coil on a toyota 6 cyl. 7 hour job.
 

Attachments

  • 20200531_214644.jpg
    20200531_214644.jpg
    99.9 KB · Views: 94

Motorman55

Well-known member
Joined
Apr 10, 2016
Messages
2,650
Location
South Jersey
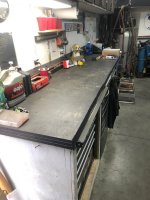
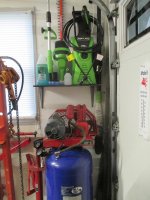
Remove all the yard tools hanging on the 'inside' wall near the overhead garage door. This opened up a nice 3 foot wide wall space to which I then placed the Skat-Blast cabinet against.

Put the 'Frankenstein' air compressor against the 'outside' wall near the overhead door. Then I installed a shelf over it and hung up all my HF Portland electric yard tools.

After that I hung all the HF tire changer parts on the wall under the window. I can easily reassemble and bolt it to the floor should I need it. Meanwhile its stored out of the way.

Next I rolled the Hein-Werner 12-Ton Press in front of the side window. There's even enough room to slide my stainless tool tray under the press. Getting that out of the way.

Still a few more things to do....as always.
 

Attachments

  • IMG_4203.jpg
    IMG_4203.jpg
    91.7 KB · Views: 97
  • IMG_4214.jpg
    IMG_4214.jpg
    101.3 KB · Views: 102
Last edited:

ZRX61

Well-known member
Joined
Aug 15, 2006
Messages
28,716
Location
Solar Blight Valley, SoCal
Nothing much, but heard on the local scanner that a mechanic in the next town over had a car fall on him (no details). There were no further updates, so it looks like it didn't end well.
 

PhantomEB

Well-known member
Joined
Feb 6, 2006
Messages
6,817
Location
Medicine Hat, AB, Canuckistan
Second thin coat of rockerguard before breakfast then waited til 2pm and loaded up the new ramps, measured 3 times and checked each side for same spacing and secured it all down.

My measurements were bang on as the ramps ‘just’ sit on top of The tailgate for plywood or drywall. No need to remove these guys unless I get the bed lineX’ed in grey. Extremely happy the Aluminum ramps lay flat for trips out.

Box cover is next.
 

Attachments

  • 829CE816-EF62-441C-86A1-8BCB4F010250.jpg
    829CE816-EF62-441C-86A1-8BCB4F010250.jpg
    140.9 KB · Views: 107

Flat Thunder Channel

Well-known member
Joined
May 4, 2020
Messages
402
Location
Ohio
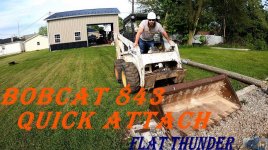
I finished the repair on my Bobcat quick attach mechanism. The bucket no longer falls off. Winning! :)

Check out the video:
 

Attachments

  • 2020-06-02 19_12_56-Untitled_2.1.1 - Windows Photo Viewer.jpg
    2020-06-02 19_12_56-Untitled_2.1.1 - Windows Photo Viewer.jpg
    164.4 KB · Views: 67

didit

Well-known member
Joined
Feb 11, 2020
Messages
892
Location
S.W. Ontario
I started mounting and designing the stretcher/shrinker on the pedestal so it can be operated with either foot, leaving the hands free for directing the metal. The pedestal was built to accept receivers for a buffing motor, wire wheels and the stretcher/shrinker in an attempt to save space in my small garage.
 

Attachments

  • DSC06039.jpg
    DSC06039.jpg
    154.4 KB · Views: 101

Motorman55

Well-known member
Joined
Apr 10, 2016
Messages
2,650
Location
South Jersey
Hung Ole' Polly the Parrot from the ceiling. By the look of the smile on his face, I think he's pretty happy.
 

Attachments

  • IMG_4192.jpg
    IMG_4192.jpg
    119.1 KB · Views: 99
Last edited:

Dogmeat

Well-known member
Joined
Jan 20, 2017
Messages
181
Location
S. Mich.
I swilled down some good ole' STROH'S....AND.....puffed on a little evil weed!!
It was a real "Joint Session"!!
 

ZRX61

Well-known member
Joined
Aug 15, 2006
Messages
28,716
Location
Solar Blight Valley, SoCal
Loaded car up with recycling for a trip to the *redemption center*. It was closed, didn't know they were closed Wednesdays.

Decided to leave it all in the car for another try tomorrow. On the upside, the car is currently worth far more than the $1.00 I paid for it.
 

jshillin

Well-known member
Joined
Nov 9, 2008
Messages
5,620
Location
PA
Put the top on the shoe rack I'm making and put the drawer in it. Hoping to get the drawer face routed tonight and everything sanded.
 

67carl

Well-known member
Joined
Dec 10, 2013
Messages
3,914
Location
California
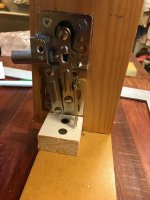
I built a test box for a hinged door...

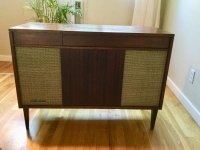
I had bought a mid century modern stereo console that didn't work, with the idea of using it my office to hold all my electronics. So I removed all the old electronics and modified the interior to suit my needs.

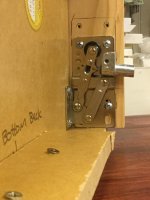
The front panel was never meant to come off but I needed regular, easy access. I found the panel was screwed in place to small blocks and taking those out meant the panel could be pulled out. It is a tight fit and not easy to do, so I wanted something easier. The panel is recessed, so it has to come forward first, then tilt out.

I came up with the idea to use hinges like the ones on those tilt out bathroom or kitchen drawers. The only problem is they are fairly difficult to install correctly. It's not so bad if you have rear access when to door is in place, but I don't have that, so I decided to build a test box and see where the pitfalls were.

It's a good thing I did as I learned a lot. At first I had the hinges mounted above the stop block, but found this moved the pivot point too high. When the door moved out then the top tilted out, the bottom tilted back too far and hit the stop block. So I know I'll have to cut the blocks out where I install the hinges. I also learned in the closed position the part of the hinge that attaches to the door isn't at a perfect 90 degree angle to the cabinet; it leans back. So I needed to mount the hinge a bit further back from the stop block, so that the door hits the stop block when the hinge is at 90 degrees (and isn't fully retracted).

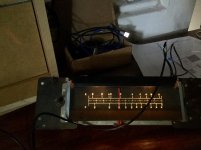
Anyway, got it figured out. Also had the old parts I removed and decided to see if I could power up the lights on the tuning dial. No idea what voltage it needed, so I started out low and cannibalized a USB cable. The tuning dial has 4 black, unmarked wires, so I just started trial and error with the hot and ground from the USB (low voltage, no danger). Finally got the right combo and it works! Not sure what to do with it...
 

Attachments

  • 5345F2BD-353C-4EFA-8C62-47B806053784.jpg
    5345F2BD-353C-4EFA-8C62-47B806053784.jpg
    147.3 KB · Views: 100
  • A33FB4F3-E544-443D-AFB4-57CC0D873A78.jpg
    A33FB4F3-E544-443D-AFB4-57CC0D873A78.jpg
    150.8 KB · Views: 93
  • CCB247D6-B269-415C-9A45-05DAD2957E85.jpg
    CCB247D6-B269-415C-9A45-05DAD2957E85.jpg
    87.9 KB · Views: 98
  • 5B26BC87-ED21-4F96-91DF-3C75FA7091DC.jpg
    5B26BC87-ED21-4F96-91DF-3C75FA7091DC.jpg
    69.6 KB · Views: 96
  • 4AC8B18D-8F2A-4268-98FA-5E9E35719953.jpg
    4AC8B18D-8F2A-4268-98FA-5E9E35719953.jpg
    152.1 KB · Views: 94
  • 6128C768-6995-4DC8-8B8A-FAA88CB7A80D.jpg
    6128C768-6995-4DC8-8B8A-FAA88CB7A80D.jpg
    149.7 KB · Views: 96
  • 40D7E1B8-B318-40A9-82E4-433F367AC12D.jpg
    40D7E1B8-B318-40A9-82E4-433F367AC12D.jpg
    146.6 KB · Views: 99
Last edited:
To avoid these ads, REGISTER NOW!
Top Bottom