To avoid these ads, REGISTER NOW!

Ohio 30'X40'X12' Pole Barn Garage

To avoid these ads, REGISTER NOW!
OP
F

fizznizzy

Well-known member
Joined
Sep 13, 2017
Messages
54
Location
NE Ohio
Long overdue for an update - I'll just go through pictures and explain

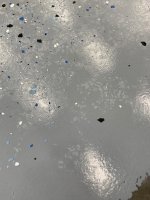
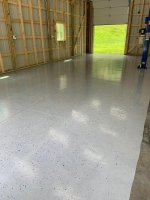
Floor coating went on... went with the Rustoleum Epoxy Shield and initially had some weird curing issues. There was random spots of moisture sitting on top of the coating while it was curing. From what I can tell there were 2 issues:

1. Too much temperature change - I found it cures much better if you apply in the late evening hours
2. I used muriatic acid to etch the concrete before I found in the instructions you weren't supposed to use that. I didn't see the kit came with the acid powder until after I had etched.

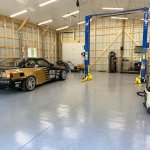
The second half came out better and I ended up re-coating the first half after wire wheeling the areas that had a bad cure. Came out pretty decent in the end.

attachment.php

attachment.php

attachment.php

attachment.php


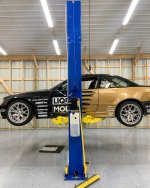
Finally put a car on the lift successfully after the floor cured. Feels good to finally use it

attachment.php


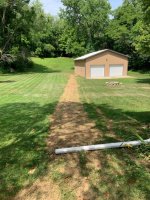
Next up was the gas line:
attachment.php
 

Attachments

  • 1.jpg
    1.jpg
    111.3 KB · Views: 1,237
  • 2.jpg
    2.jpg
    101 KB · Views: 1,227
  • 3.jpg
    3.jpg
    124 KB · Views: 1,234
  • 4.jpg
    4.jpg
    150.2 KB · Views: 1,240
  • 5.jpg
    5.jpg
    131.5 KB · Views: 1,235
  • 6.jpg
    6.jpg
    148.3 KB · Views: 1,234
OP
F

fizznizzy

Well-known member
Joined
Sep 13, 2017
Messages
54
Location
NE Ohio
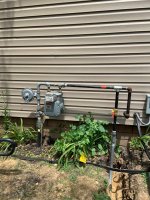
Gas line went in. I got a quote for $1500 and was told a permit didn't need to be pulled by a local gas company....

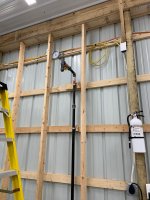
Obviously I decided that was too much and ended up doing the work myself. Pulled the permit (which was definitely required), ran plastic flexible line underground ~24" deep, T into the gas line from the house, and ran a pipe with a catch drain up the wall for the heater. I left a union on there so when I put the insulation/walls in I won't have to cut and patch a section.

Held 4 psi for days with the test gauge and passed inspection first try.

attachment.php

attachment.php


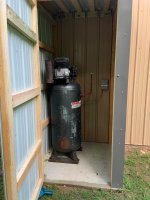
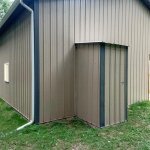
Last time I posted up about the concrete pad for the compressor hut - I finally built it with all the extra scrap material from the original barn build. Total cost so far is $5 for sealant on the roof panel and <$10 for hardline fittings. I still need to put a vent in for the air intake, but it's on it's way.

attachment.php

attachment.php


Bonus, I had some extra lights that I put on the side of the lift to get some better lighting. All racks/shelving/workspace areas are currently temporary until I can get the insulation done.
attachment.php
 

Attachments

  • 11.jpg
    11.jpg
    148.5 KB · Views: 1,234
  • 10.jpg
    10.jpg
    94.9 KB · Views: 1,229
  • 9.jpg
    9.jpg
    147.3 KB · Views: 1,235
  • 8.jpg
    8.jpg
    102.1 KB · Views: 1,232
  • 7.jpg
    7.jpg
    149.7 KB · Views: 1,235

Aaroncl

Active member
Joined
Dec 6, 2013
Messages
34
6 ONX 8u
Long overdue for an update - I'll just go through pictures and explain

Floor coating went on... went with the Rustoleum Epoxy Shield and initially had some weird curing issues. There was random spots of moisture sitting on top of the coating while it was curing. From what I can tell there were 2 issues:

1. Too much temperature change - I found it cures much better if you apply in the late evening hours
2. I used muriatic acid to etch the concrete before I found in the instructions you weren't supposed to use that. I didn't see the kit came with the acid powder until after I had etched.

The second half came out better and I ended up re-coating the first half after wire wheeling the areas that had a bad cure. Came out pretty decent in the end.

attachment.php

attachment.php

attachment.php

attachment.php


Finally put a car on the lift successfully after the floor cured. Feels good to finally use it

attachment.php


Next up was the gas line:
attachment.php

Sent from my SM-G986U using The Garage Journal mobile app
 
OP
F

fizznizzy

Well-known member
Joined
Sep 13, 2017
Messages
54
Location
NE Ohio
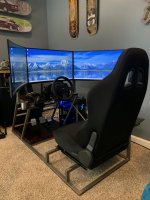
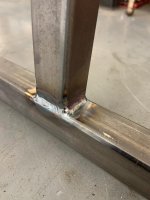
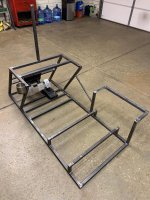
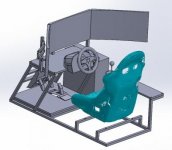
Extra bonus and side project update, with car events being cancelled the first half of the year I decided to build a sim rig. I had some scan data from making seat brackets in my E36 and did some modeling for a first round 'prototype' rig. I would make some changes after using it for a while, but for the most part I'm happy with it considering the cost vs buying a budget setup at a retail store.

attachment.php

attachment.php

attachment.php

attachment.php


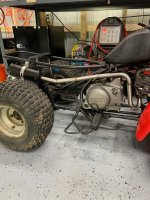
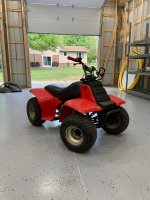
I've also made some progress on the race quad. I blasted the frame and re-assembled everything with fresh coating. After messing with the carb for days I found out the CDI box is bad and I have a new one on the way. Made a stainless exhaust for it just because. This is the first 'completed' project I've worked on in the barn.
attachment.php

attachment.php

attachment.php
 

Attachments

  • 13.jpg
    13.jpg
    125.9 KB · Views: 1,209
  • 12.jpg
    12.jpg
    139.2 KB · Views: 1,211
  • 18.jpg
    18.jpg
    105.1 KB · Views: 1,216
  • 17.jpg
    17.jpg
    75.6 KB · Views: 1,212
  • 16.jpg
    16.jpg
    119.6 KB · Views: 1,216
  • 15.jpg
    15.jpg
    18.6 KB · Views: 1,207
  • 14.jpg
    14.jpg
    116.4 KB · Views: 1,206

wachuko

Well-known member
Joined
May 15, 2008
Messages
691
Location
Ocala, FL
Cup holder!! Hahahahahaha

Can you share a bit more on the sim setup? Software, parts, etc... I would love to do the same... I have one of those playseats in the corner that I have been meaning to put it back in use... but PS3 died and the GT software just sits there gathering dust... I see you are using a computer, reason for asking what software you are using...

That is soooo cool man... awesome.
 
OP
F

fizznizzy

Well-known member
Joined
Sep 13, 2017
Messages
54
Location
NE Ohio
Cup holder!! Hahahahahaha

Can you share a bit more on the sim setup? Software, parts, etc... I would love to do the same... I have one of those playseats in the corner that I have been meaning to put it back in use... but PS3 died and the GT software just sits there gathering dust... I see you are using a computer, reason for asking what software you are using...

That is soooo cool man... awesome.

For sure! Cup holder was a must have.

I went with an 'off the shelf' computer since I needed one to replace my 10 year old PC anyway and wanted something I could 3D model with also. It's a pre built PC from Digital Storm - the Lynx 'level 3' (i7 9700F, Nvidia RTX 2060, 16GB ram)

Steering wheel and pedals came as a set and are the Thrustmaster T300RS. Entry level wheel with a belt drive. So far I have no complaints and it feels great for the price.

Seat is from Summit racing - I wanted some adjustibility for different size drivers so I found the cheapest race seat that came with sliders and bolted it down to the frame.

Monitors are curved 26" from amazon and I'm using some cheap mounts I found on there also. Took a bit of tweaking to get everything level, but I'm happy with it for now.

I've been running Assetto Corsa for drifting and I've been dabbling in Dirt Rally 2.0 also. The open source cars and tracks for Assetto make it worthwhile going with the PC in itself. There's tons of different cars with different characteristics to download and a huge variety of tracks that are all pretty much free.
 

wachuko

Well-known member
Joined
May 15, 2008
Messages
691
Location
Ocala, FL
Sweet... thank you. I just built one as well... two actually... daughter is into digital art and animation so she needs all the horse power for rendering... and my son is into VR... so built a similar setup for him...

i7-10700,Nvidia 2080 Ti, 32GB Ram, 1TB SSD

I kept the old one, that is still a decent machine, for this old fart...
i7-4930K 3.4GHz 6-Core Processor / 32GB Ram / Nvidida 1080 / 512GB SSD

I will search on / read up on Assetto Corsa.

Thanks again!
 

bagsanthony

Well-known member
Joined
Sep 2, 2010
Messages
377
Fizzynizzy: excellent build, looks great! Looking to build the same size. The led fixtures, I am guessing those are Amazon 4ft units? Can you please send me a link to those as those fixtures look excellent.
 
OP
F

fizznizzy

Well-known member
Joined
Sep 13, 2017
Messages
54
Location
NE Ohio
Fizzynizzy: excellent build, looks great! Looking to build the same size. The led fixtures, I am guessing those are Amazon 4ft units? Can you please send me a link to those as those fixtures look excellent.

Thank you! I found the lights while searching on this forum. They are Maxlite led's from Amazon. When you buy them in bulk the price comes down to ~$17 each
Check here
 

travisn1

Well-known member
Joined
Oct 22, 2012
Messages
152
Location
Waterloo NY
I've been thinking about making a compressor hut. But then I think, eh I should make it a little bigger to keep the power washer out at the barn, and then maybe continue the roof for outdoor wood storage, and so on. Then I get overwhelmed and do nothing.
 
OP
F

fizznizzy

Well-known member
Joined
Sep 13, 2017
Messages
54
Location
NE Ohio
I've been thinking about making a compressor hut. But then I think, eh I should make it a little bigger to keep the power washer out at the barn, and then maybe continue the roof for outdoor wood storage, and so on. Then I get overwhelmed and do nothing.

That's why I overbuilt it - I have room to put stupid things in there like rakes/shovels that I don't want taking up space in my work area. Plus the noise reduction when the compressor is running. 2x4's are cheap - if you have some extra side paneling it's not a hard process, just kind of a pain to pour concrete. That 4x4x~3" pad took 7-8 bags
 

joey1320

Well-known member
Joined
Jun 14, 2015
Messages
1,813
Location
NE Ohio
Can you provide a name for the builder?
PM me if you'd like.

I'm in NEO looking at different options.
Amazing shop you got there.
 

travisn1

Well-known member
Joined
Oct 22, 2012
Messages
152
Location
Waterloo NY
That's why I overbuilt it - I have room to put stupid things in there like rakes/shovels that I don't want taking up space in my work area. Plus the noise reduction when the compressor is running. 2x4's are cheap - if you have some extra side paneling it's not a hard process, just kind of a pain to pour concrete. That 4x4x~3" pad took 7-8 bags

Oh, so not a part of the original pad. Nice. Thing that make you go hmm
 

Bryan96GT

New member
Joined
Oct 10, 2017
Messages
4
Loved following this build and always look forward to updates. Hope to build something very similar. It has turned out great man!
 
OP
F

fizznizzy

Well-known member
Joined
Sep 13, 2017
Messages
54
Location
NE Ohio
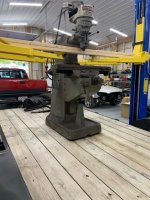
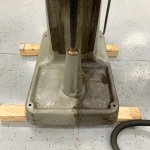
Planning on starting insulation and a heater install this weekend, but I got side tracked by a local machine shop clearing out and scored a Bridgeport for $600. It'll eventually get some sort of refreshing, but for now I just cleaned it up and put it in it's new home with a set of Egyptian Mill Movers.

Somehow I avoided spending a lot more money... by the time I get a VFD setup I'll be into this about $1000. Not bad.

Now I have to run another outlet before I put up walls

attachment.php

attachment.php

attachment.php

attachment.php

attachment.php
 

Attachments

  • IMG_5615.jpg
    IMG_5615.jpg
    128.9 KB · Views: 824
  • IMG_5488.jpg
    IMG_5488.jpg
    118.5 KB · Views: 825
  • A5885231-5E24-46FF-B96E-A937F2B311F5.jpg
    A5885231-5E24-46FF-B96E-A937F2B311F5.jpg
    115.1 KB · Views: 826
  • C0AF8C2B-00D2-4D2D-A98A-7494ED23AE94.jpg
    C0AF8C2B-00D2-4D2D-A98A-7494ED23AE94.jpg
    62.9 KB · Views: 823
  • B1D3D31B-496E-40E2-BF1C-A2D88F820F67.jpg
    B1D3D31B-496E-40E2-BF1C-A2D88F820F67.jpg
    79 KB · Views: 825
To avoid these ads, REGISTER NOW!

Mthomas1686

Well-known member
Joined
Sep 28, 2020
Messages
84
Location
My house, New Jersey
Wow man that's a great job. You're really getting it done! I'm dragging my feet over here since I have a closed in building now.
Looks well thought out and works well for you.
 

loganb

ALLIANCE MEMBER
Joined
Dec 29, 2011
Messages
5,644
Location
Omaha, NE
If those ways are decent and not a ton of backlash in the screws that is a steal on the mill if you didn't know... but think you do. Well done!

Sent from The Garage Journal mobile app
 
OP
F

fizznizzy

Well-known member
Joined
Sep 13, 2017
Messages
54
Location
NE Ohio
If those ways are decent and not a ton of backlash in the screws that is a steal on the mill if you didn't know... but think you do. Well done!

Sent from The Garage Journal mobile app

The ways are surprisingly good for how "seasoned" it looks and there's barely any backlash. Seems like it was a well greased machine, just cleaning wasn't a priority. Eventually I'll tear it down and rebuild when I have the time. The table is pretty beat up and should probably be replaced - some of the marks/holes in it make you wonder what really happened to create them...

Definitely a steal. I probably wouldn't own a Bridgeport for another couple years, but when the price is right you jump on it.
 

ATC

Well-known member
Joined
May 12, 2012
Messages
8,371
Location
VA
Very nice build. I'm looking to do something similar (20-24x40x12) in the near future. I'm currently sharing a 24x32 with my father, and that is not working out so well...

I'm debating on a pole barn, metal (carport style), or possibly an all block building.
 

rmckee

Well-known member
Joined
Jan 2, 2012
Messages
457
Location
Wake Forest, NC
That is an absolutely genius way of getting that thing off the trailer!! Love the shop - lights floor and lift all come together fantastically.
 
OP
F

fizznizzy

Well-known member
Joined
Sep 13, 2017
Messages
54
Location
NE Ohio
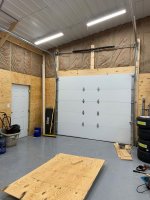
Insulation is complete. I've started putting up plywood for the lower 8' of the walls to make it easier to mount/screw things to. I'm still debating whether I want to do the upper portions in drywall to save some money or finish it all off in plywood.

1/2" 4 ply sheet from Home Depot runs ~$29 a piece

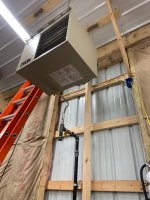
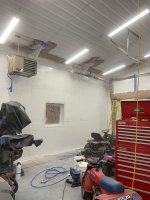
The heater is almost fully installed. Ran the exhaust vent the other day, just waiting on thermostat wire to finish it up. Just in time for the weather to turn. Went with 80,000 for a bit of overkill to get things heated up quickly

attachment.php

attachment.php

attachment.php
 

Attachments

  • IMG_5688.jpg
    IMG_5688.jpg
    106.8 KB · Views: 921
  • IMG_5745.jpg
    IMG_5745.jpg
    115.8 KB · Views: 922
  • IMG_5748.jpg
    IMG_5748.jpg
    103.5 KB · Views: 924

travisn1

Well-known member
Joined
Oct 22, 2012
Messages
152
Location
Waterloo NY
Man, idk. Half inch plywood isn't much better than drywall for wall hanging. Not sure what kind of wall hanging kind of guy you are though. It will be ok for street signs and maybe a white board, otherwise look for a stud. Seems like it would be easier to just continue the plywood then prime and paint it. No messing around with taping/mudding. Plus it will be nice if you want to pull down some sheets to run a new electrical wire or something.
 
OP
F

fizznizzy

Well-known member
Joined
Sep 13, 2017
Messages
54
Location
NE Ohio
Man, idk. Half inch plywood isn't much better than drywall for wall hanging. Not sure what kind of wall hanging kind of guy you are though. It will be ok for street signs and maybe a white board, otherwise look for a stud. Seems like it would be easier to just continue the plywood then prime and paint it. No messing around with taping/mudding. Plus it will be nice if you want to pull down some sheets to run a new electrical wire or something.

Cabinets, yes, studs for sure. Racks to hang yard equipment, small shelves, angle grinder rack, etc. the 1/2" is pretty solid. Once its attached to the framing it's better thank you'd expect.

Agreed I don't want to play the taping/mudding game. I'll probably finish it off with more plywood
 

Augus7us

Well-known member
Joined
Jan 14, 2017
Messages
1,190
Location
Central Ohio
Shop is looking good.

Your BMW brought back memories of the one they used in Top Gear for the 24 hour race.

Where is your Peniston Oil sponsor decal :D

LARSEN.jpg


topgeararsebiscuit.jpg
 
OP
F

fizznizzy

Well-known member
Joined
Sep 13, 2017
Messages
54
Location
NE Ohio
Shop is looking good.

Your BMW brought back memories of the one they used in Top Gear for the 24 hour race.

Where is your Peniston Oil sponsor decal :D
I am gladly accepting offers for sponsorship, although grassroots drifting isn't exactly the most marketable form of motorsports. Old BMW's are the best bang for your buck for racing/driving in my opinion

This one in particular is currently supercharged and (now that I have heat) should be getting a turbo setup during the off season. Build details soon to follow

Fired up the heater yesterday for the first time and everything works great!
 
OP
F

fizznizzy

Well-known member
Joined
Sep 13, 2017
Messages
54
Location
NE Ohio
Centrifugal supercharger... so no, just the turbski by itself.
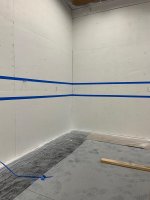
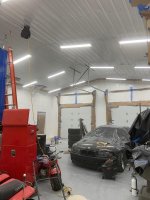
Finally finished the plywood to cover up the insulation. Planning on starting on the priming and painting this weekend. Another laborious and daunting task, but then I won't have to touch it for a long time. Planning on doing white upper with a black belt at outlet height and a grey underneath.

I'm definitely not a carpenter and pretty tired of dealing with wood and all of the various shapes in comes in other than flat and straight. Feels good to complete

Little things like the air hardline (still need to shorten and route) and speakers with no exposed wire make it feel more 'complete' and less temporary

attachment.php

attachment.php

attachment.php

attachment.php

attachment.php
 

Attachments

  • IMG_5863.jpg
    IMG_5863.jpg
    86.2 KB · Views: 743
  • IMG_5862.jpg
    IMG_5862.jpg
    129.1 KB · Views: 745
  • IMG_5861.jpg
    IMG_5861.jpg
    96.1 KB · Views: 745
  • IMG_5859.jpg
    IMG_5859.jpg
    102.8 KB · Views: 745
  • IMG_5860.jpg
    IMG_5860.jpg
    52.3 KB · Views: 743

K5/TBSS

Well-known member
Joined
Feb 26, 2013
Messages
91
Location
Indiana
Looks great! My dad just finished his 24x40 pole barn shop last year and they look very similar. Subscribed.
 

collinskl1

Well-known member
Joined
Apr 30, 2011
Messages
114
Location
Akron, OH
Shop looks great. I race a 318ti endurance car, but may bring it out to some Gridlife GLTC events if I want to get beat badly haha. My wife and I are building a house in Bath, while currently living in Medina.
 
OP
F

fizznizzy

Well-known member
Joined
Sep 13, 2017
Messages
54
Location
NE Ohio
Thanks for the supportive feedback everyone. On to the next task...

I borrowed an airless sprayer for this job and will likely never use one again unless I have an empty room with an unfinished floor. The masking took about a week working for a couple hours everyday after work and was unfortunately still inadequate for the job. I had never used an airless sprayer up until this point so hopefully someone can learn from my experience.

140' paper rolls from lowes are pretty affordable at $10 a roll. I also had some leftover plastic from the vapor barrier that runs about $60 a roll and covers big things (that I should have removed from the barn completely).
attachment.php

attachment.php


Kilz 2 was used with the 'large' nozzle on this Graco Magnum sprayer. The whole barn took about 15 gallons +/- 1 gallon for 2 coats and honestly could have used another, but I'm not that picky at this point.

Pros:
-I was able to put 2 full coats down by myself in 6-8 hours
-Coverage in little corners is nice and gets in areas that would be difficult with a brush

Cons:
-Overspray gets EVERYWHERE
-Setup and cleanup times are frustrating and involved
-Nozzle frequently gets clogged with exterior primer
-It can be easy to put on too much and not see drips until you go for the next coat

I guess my biggest gripe is the overspray. It put a fine dust on top of and underneath everything in the garage and took quite a bit of time to get things back to where they should be. The kind of dust that makes your dust pan dusty. I think I'll be finding reminders of this throughout the life of the barn.

BUT it's done.

attachment.php

attachment.php

attachment.php

attachment.php


Cleanup and lower apron painting time
 

Attachments

  • IMG_5923.jpg
    IMG_5923.jpg
    106.8 KB · Views: 558
  • IMG_5906.jpg
    IMG_5906.jpg
    83 KB · Views: 554
  • IMG_5931.jpg
    IMG_5931.jpg
    91.6 KB · Views: 559
  • IMG_5933.jpg
    IMG_5933.jpg
    92.4 KB · Views: 554
  • IMG_5935.jpg
    IMG_5935.jpg
    83.4 KB · Views: 555
  • IMG_5942.jpg
    IMG_5942.jpg
    66.8 KB · Views: 558
To avoid these ads, REGISTER NOW!
Top Bottom