Kriesel
Well-known member
Nothing to see here. No tourists would like the north shore... haha

Nothing to see here. No tourists would like the north shore... haha
Don't let Nick fool any of you, those pics were taken in California. There's nothing to see on MN's North Shore. There's definitely not a lot of good hiking trails, the food is terrible at all the neat little Mom and Pop restaurants you come across, nobody knows how to brew beer at any of the craft places, and Duluth might be the most annoying place I've ever visited due to that dumb bridge that always goes up and down. Save yourself the trouble and don't visit.
Was that place a VRBO type rental? If so, could you shoot me a PM? We'd like to find a spot like that for a family vacation one of these years.
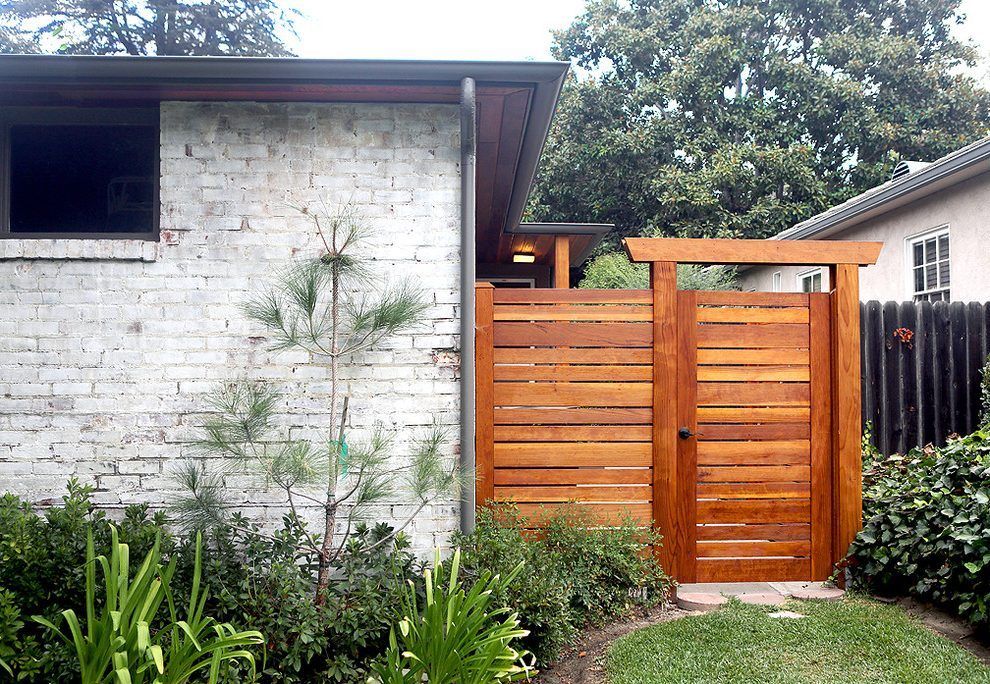
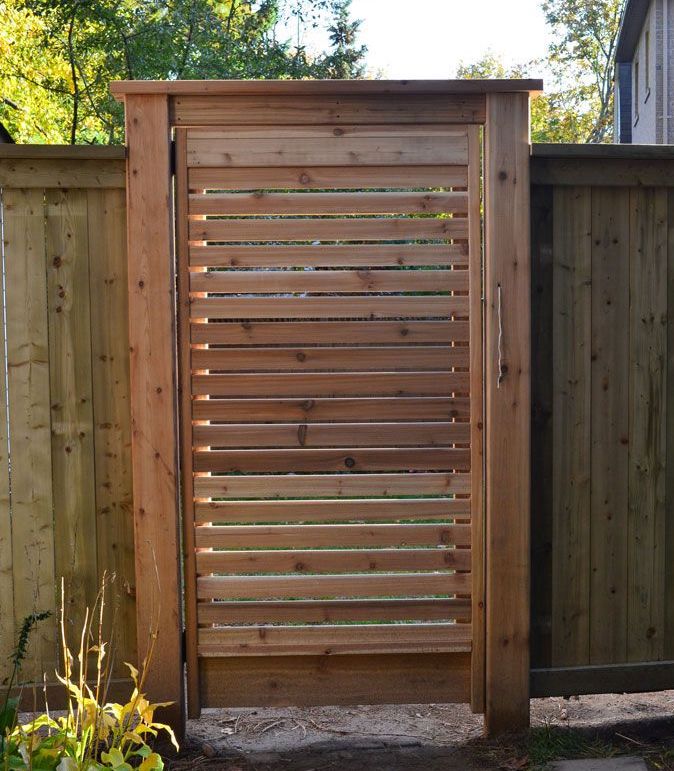
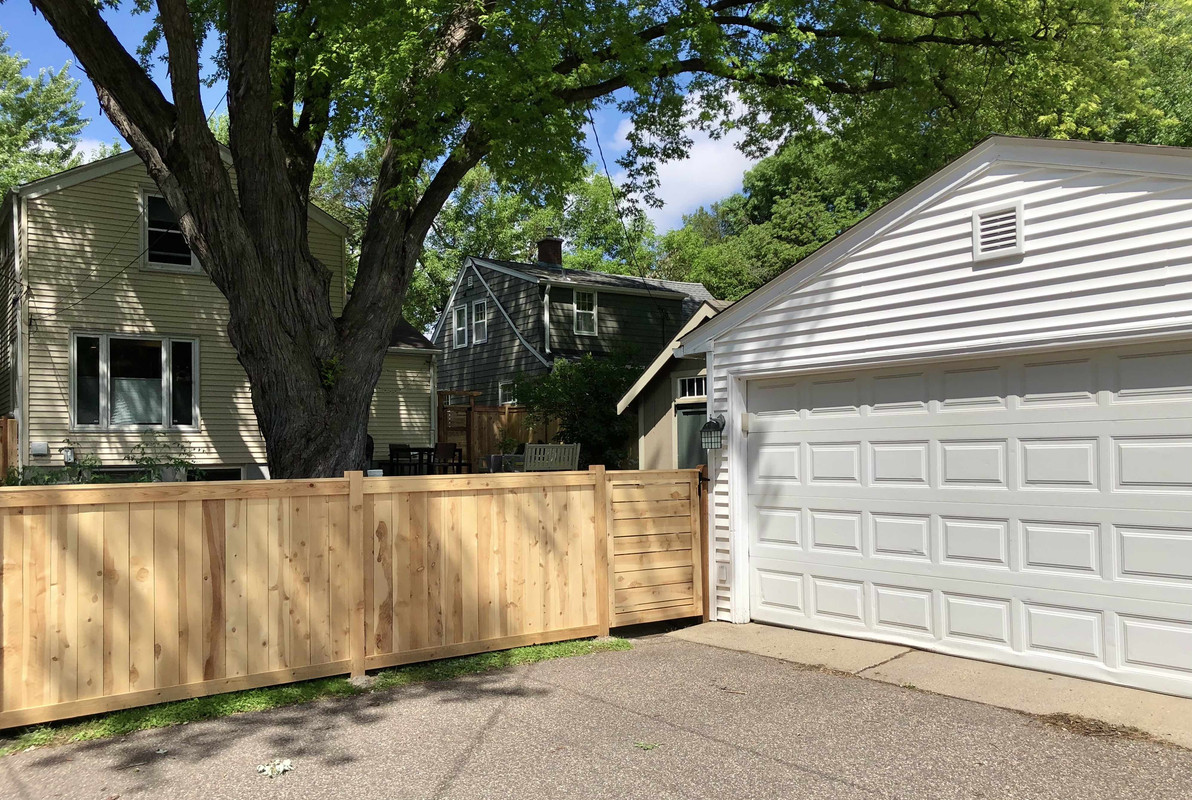
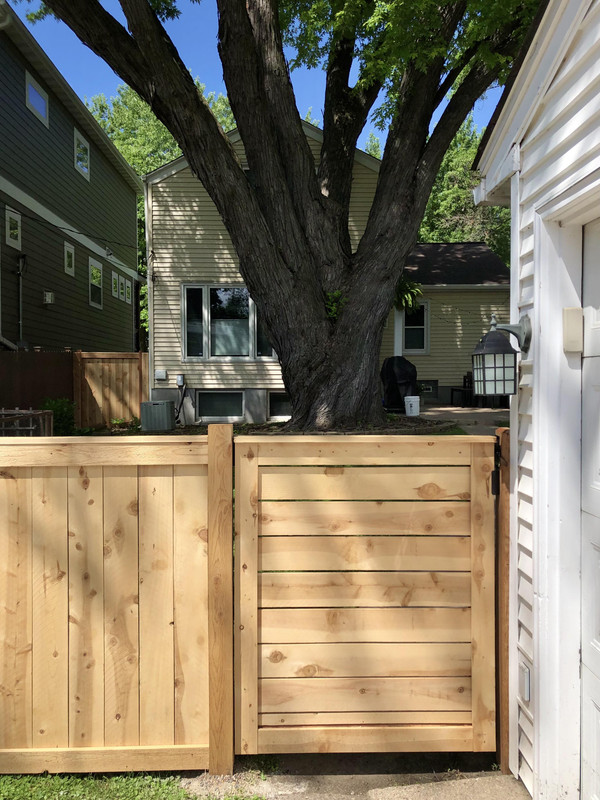
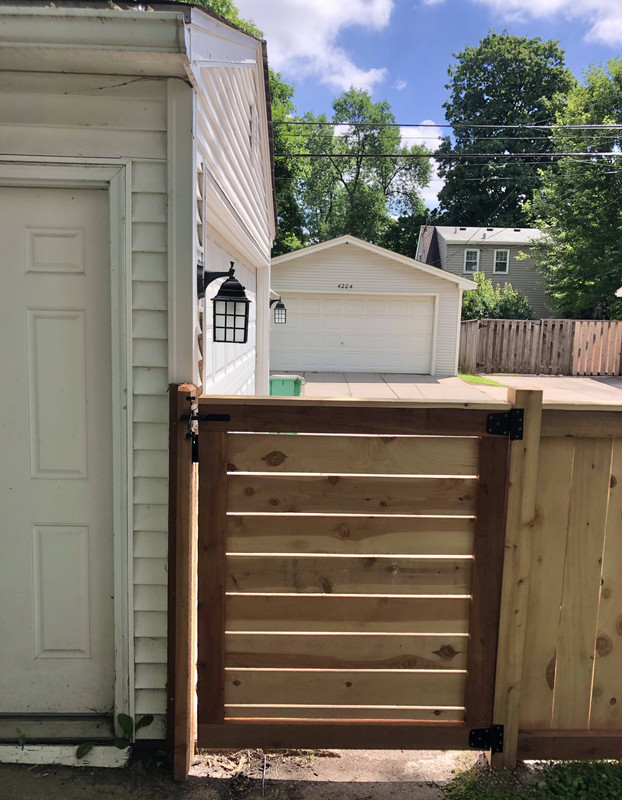
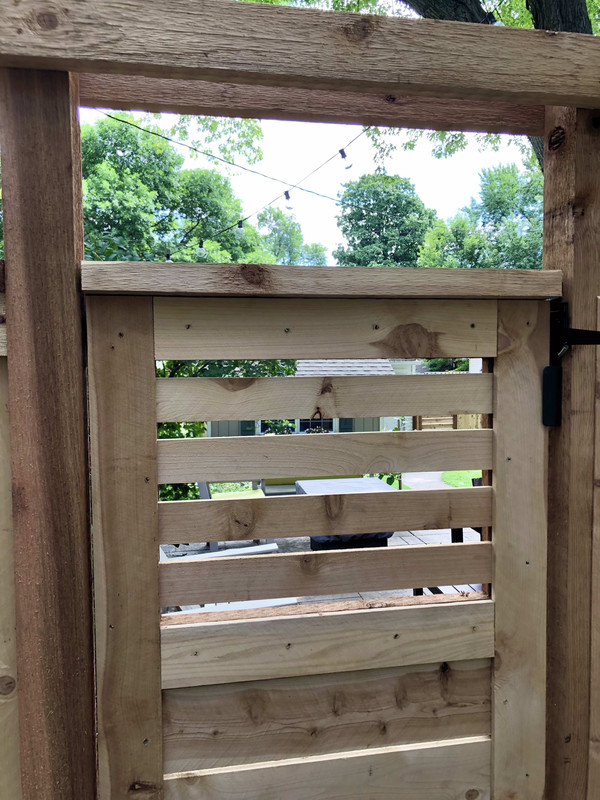
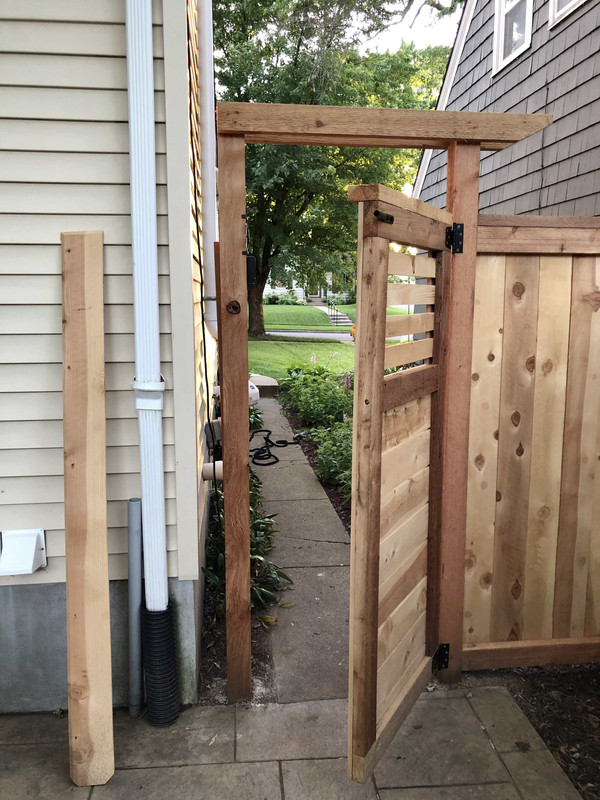
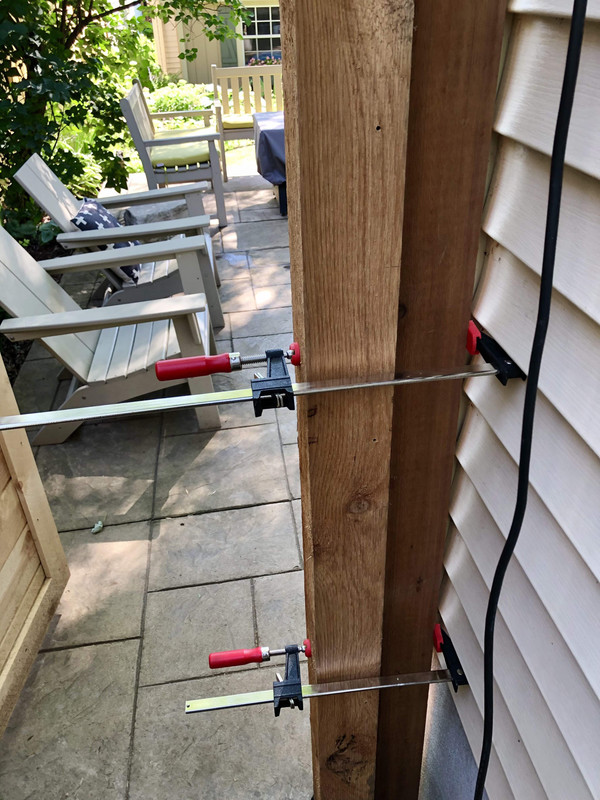
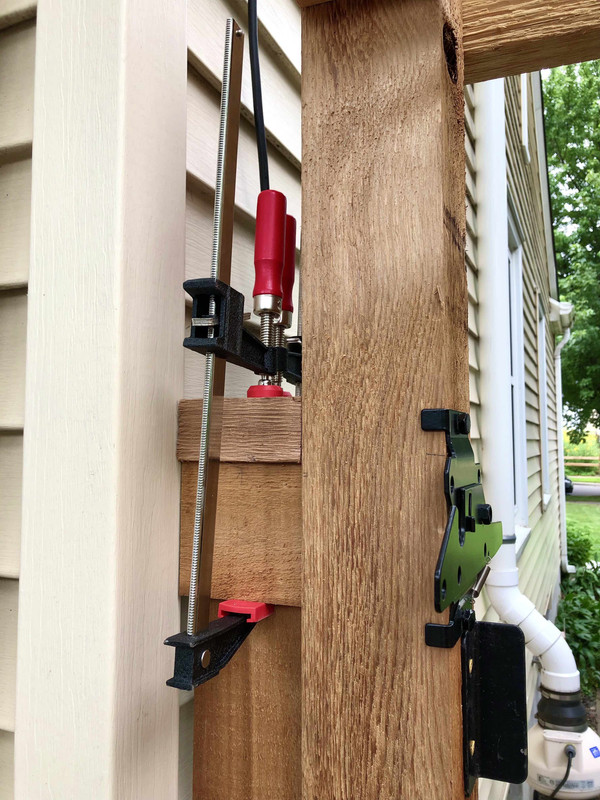
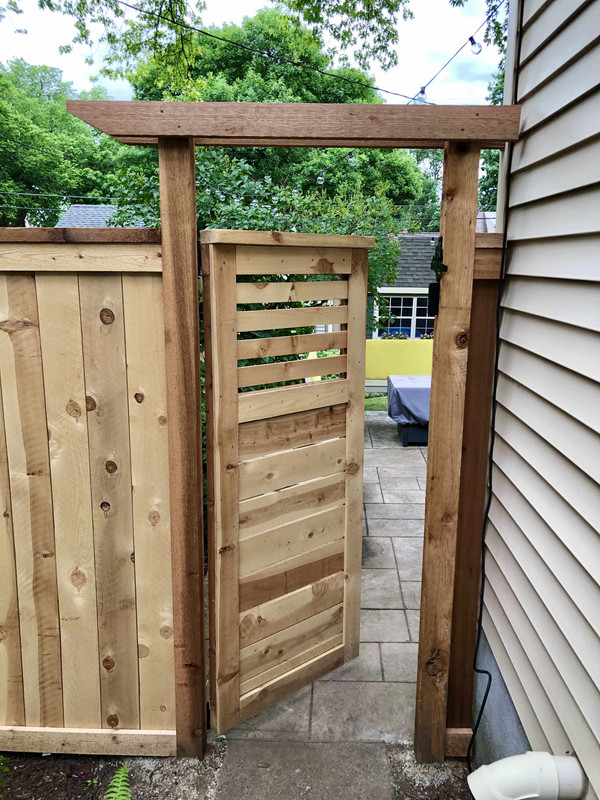
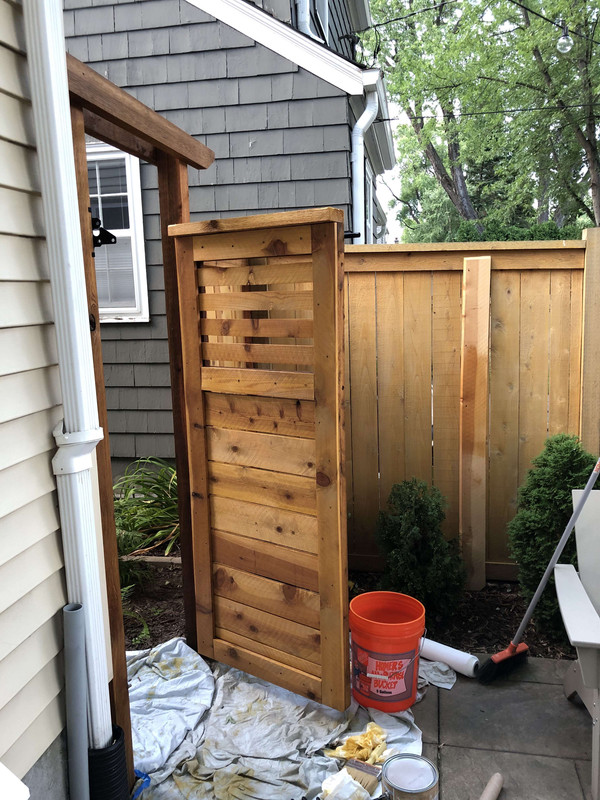
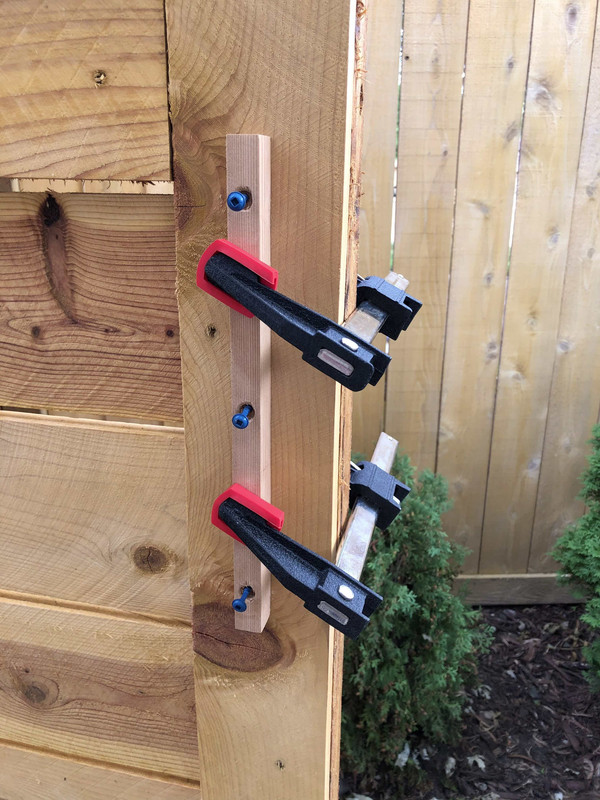
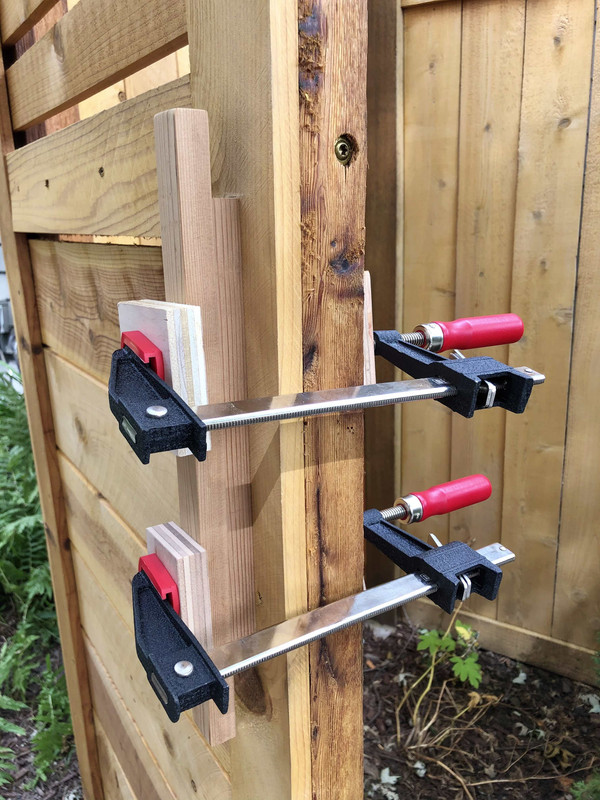
 , but it was expensive, and I feel like I mostly was paying for time. They only took 4.5 hrs to do everything. Crazy. Would have taken me so much longer, but I can't help but feel I could have made the gates better, even more structurally sound, and with more attention to detail. But with a kid and work, sometimes I have to accept I can't do everything myself or it would never get done.
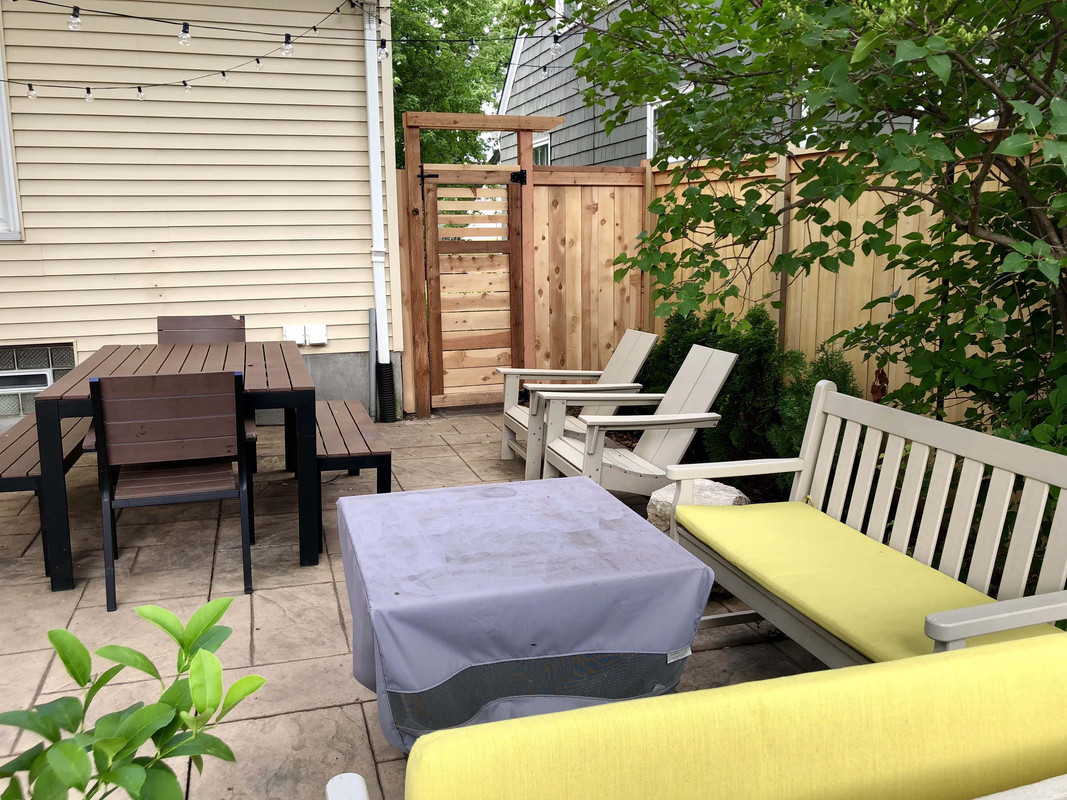
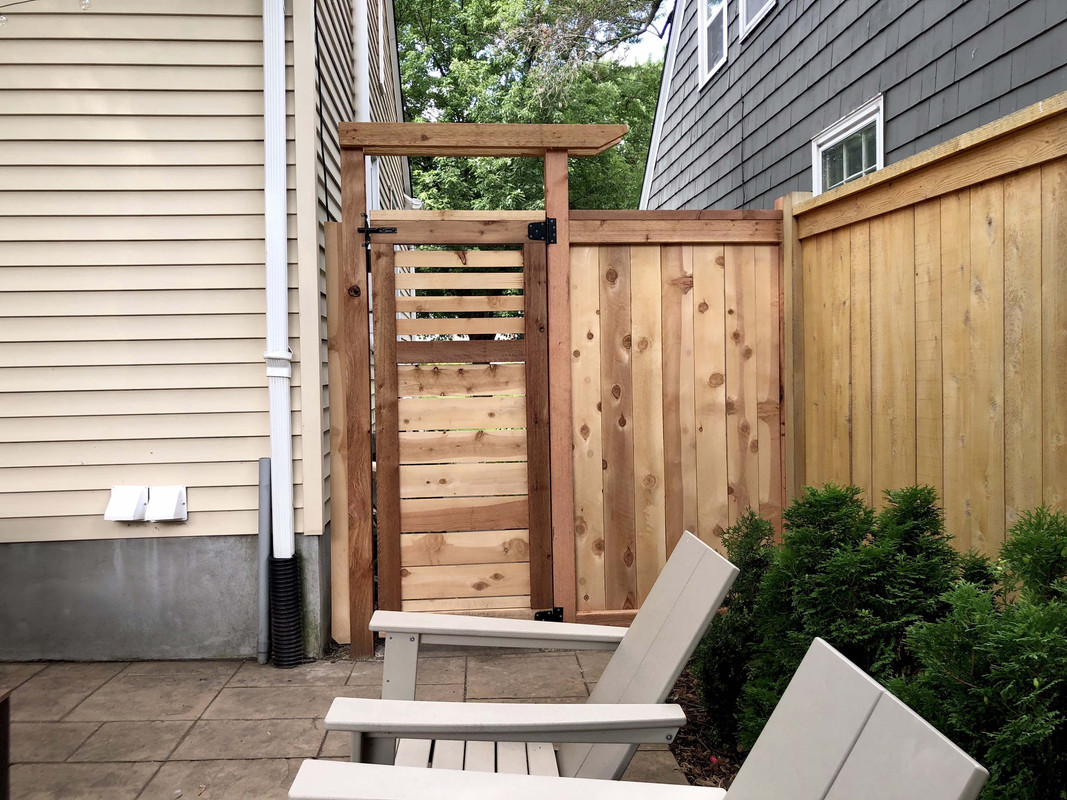
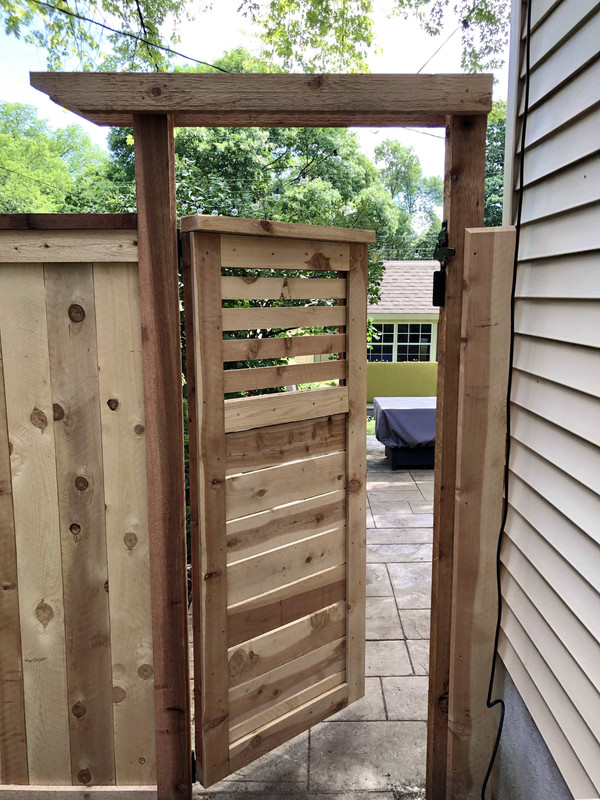
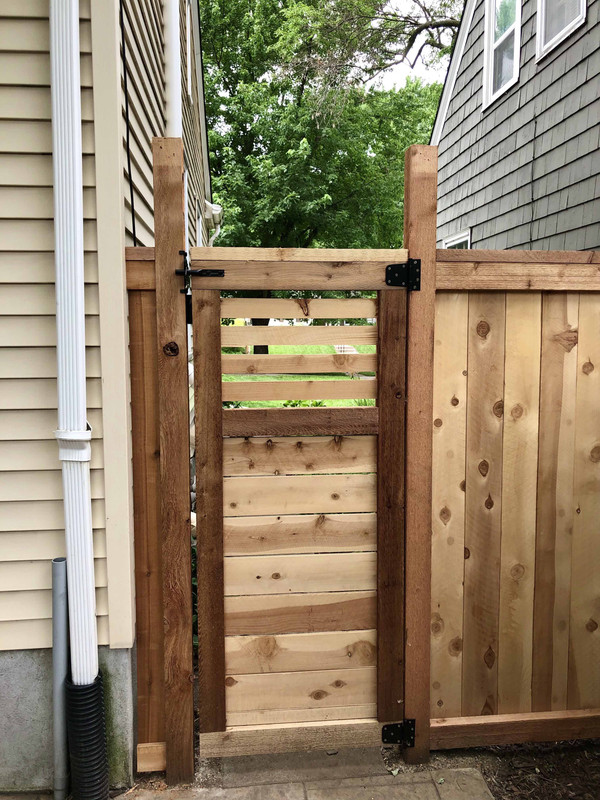
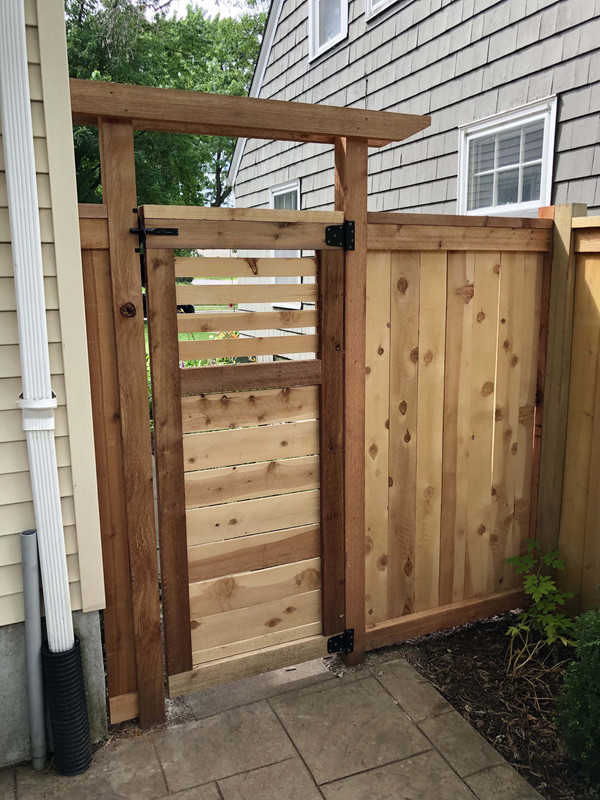
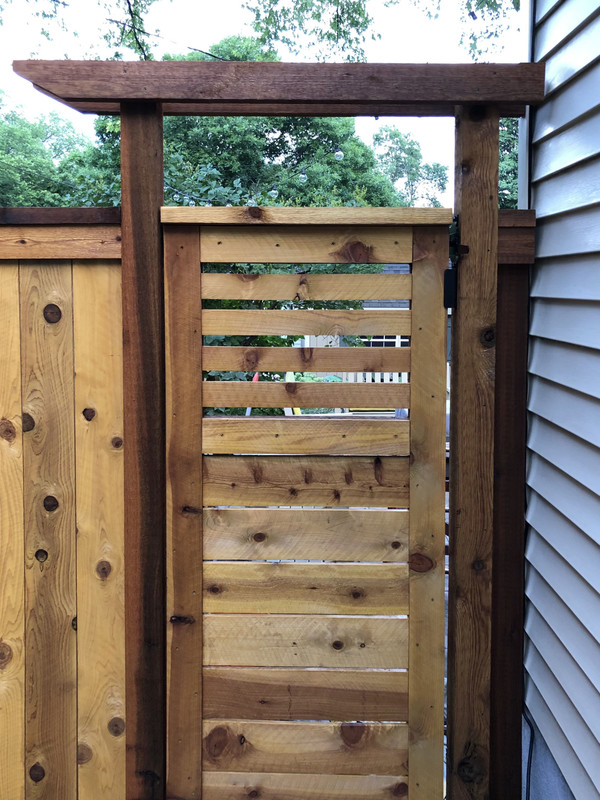
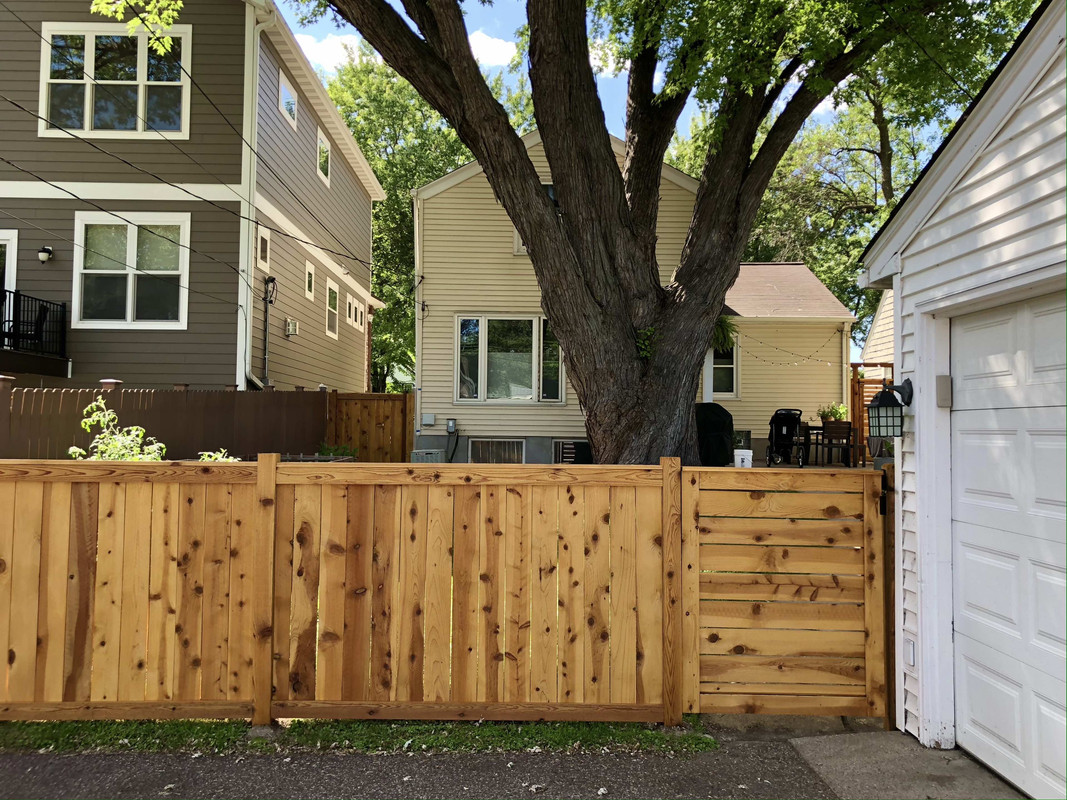
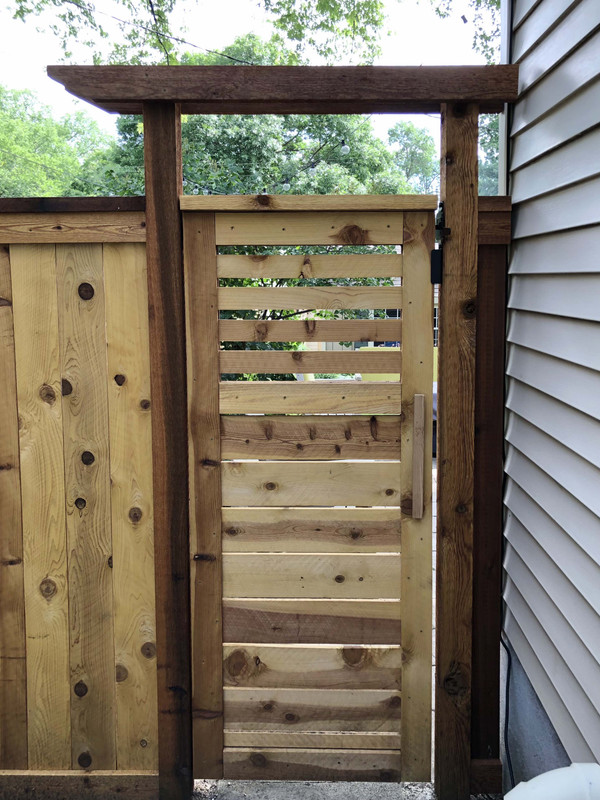
Fence came out VERY nice, Nick. Kudos!
Nice work!
I'm from Ireland but with lots of family in MN. We had a short stay at a similar location on the North Shore, possibly the same place - certainly similar properties/views/firepits/chairs etc.


So much better!
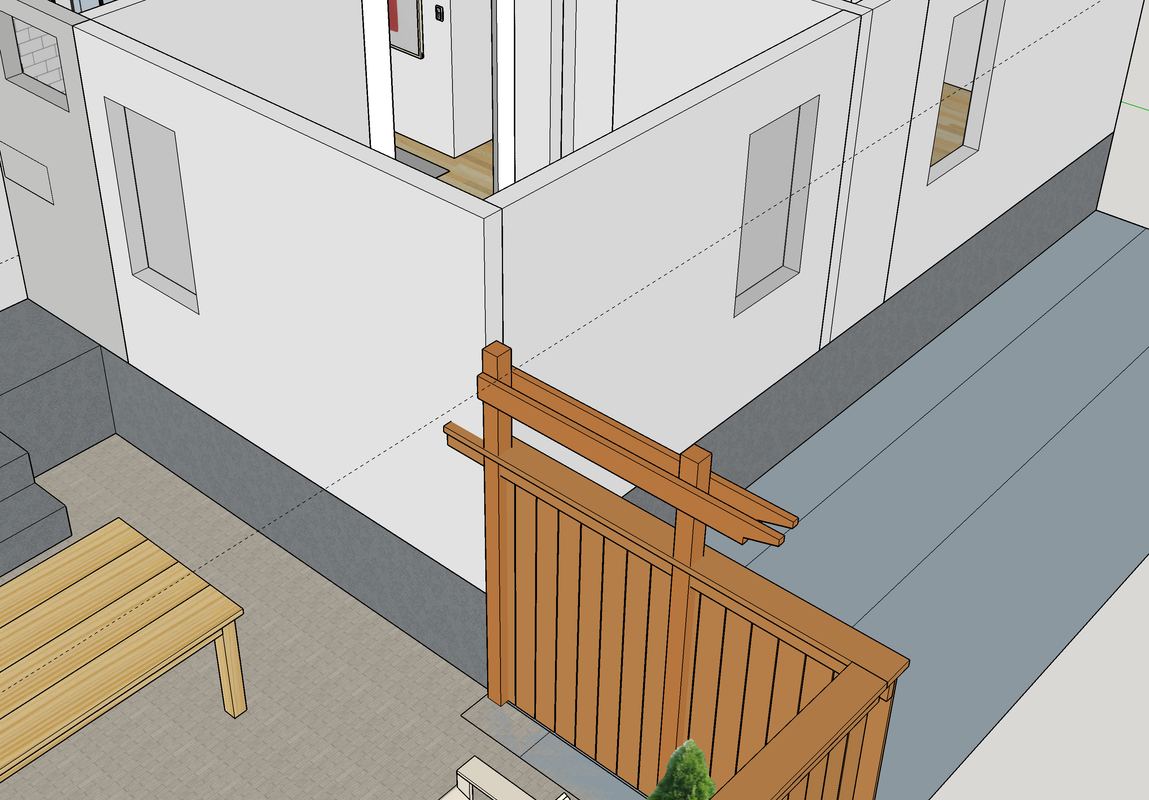
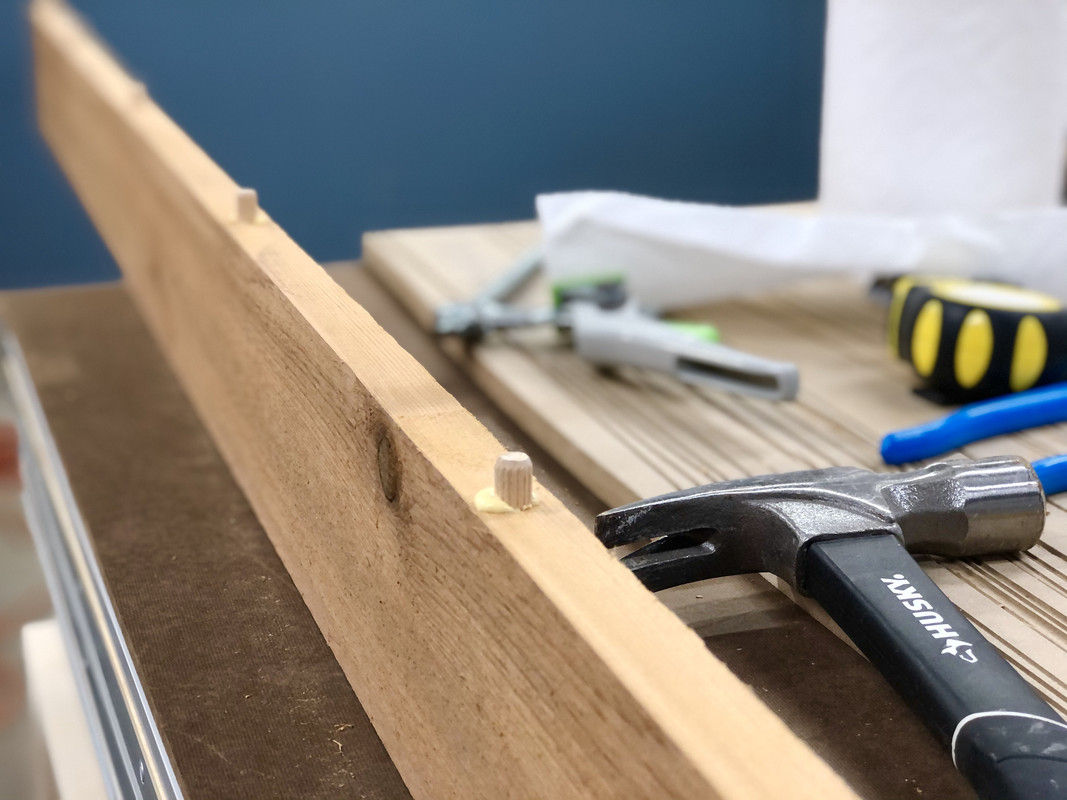
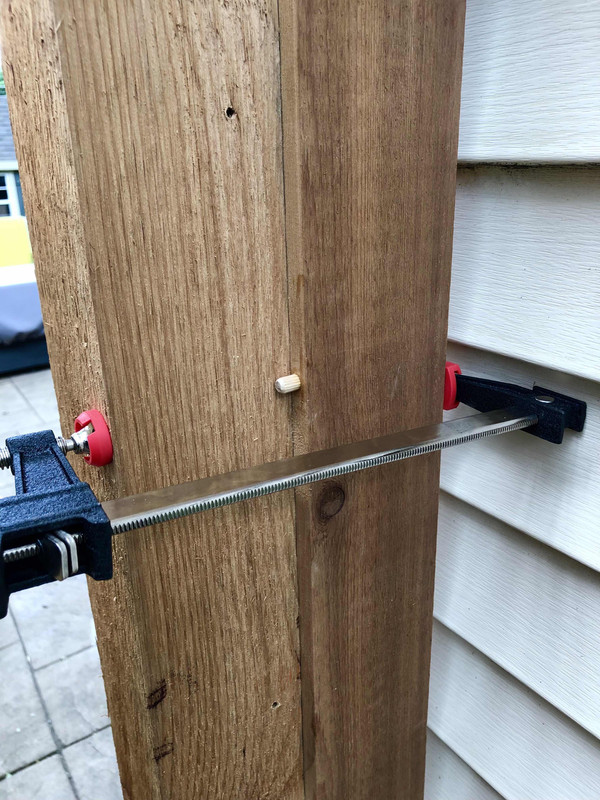
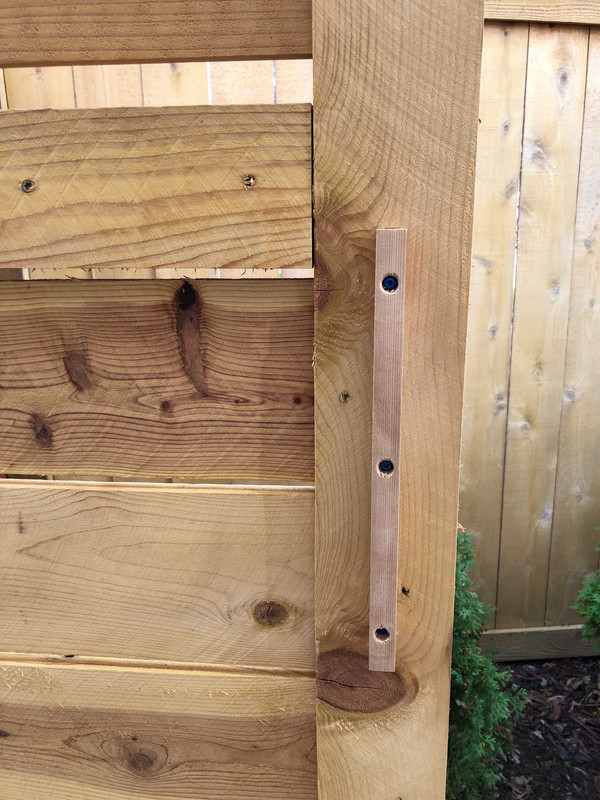
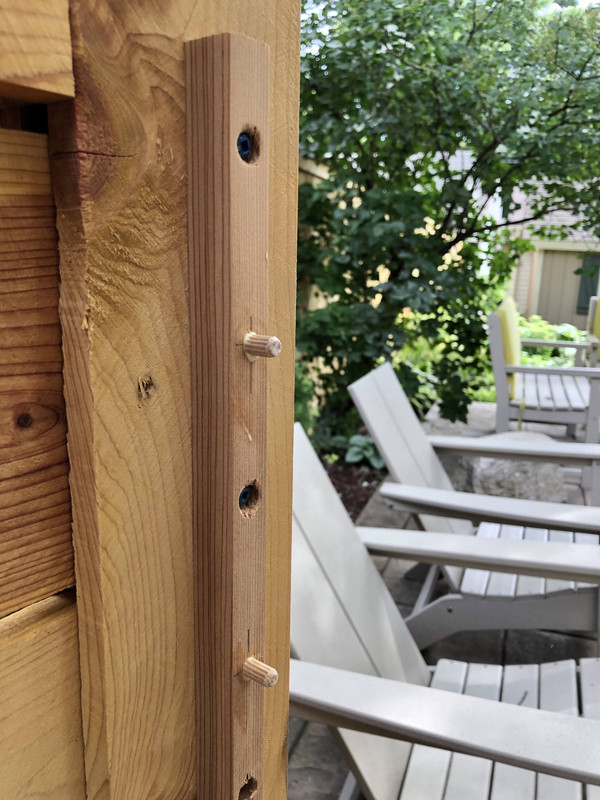
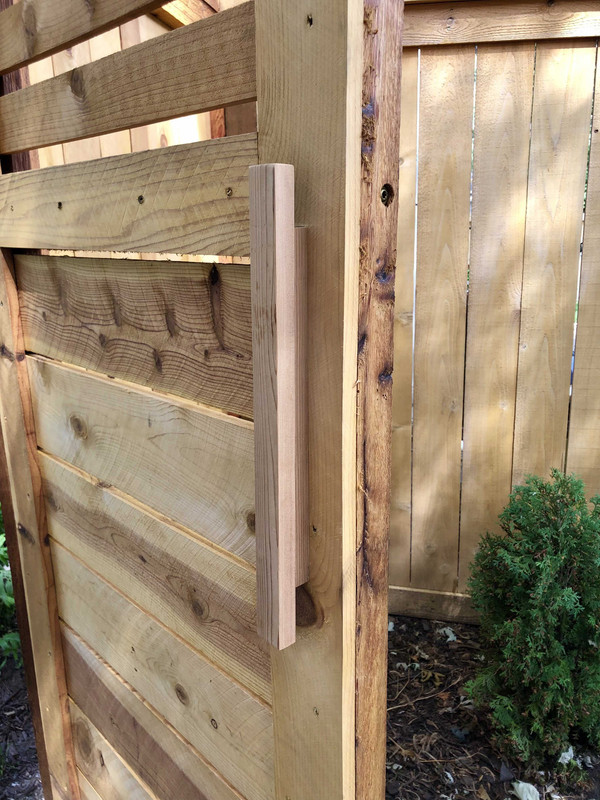
The attention to detail makes it all come together, especially having the arbor going all the way to the house. Clever idea using dowels in the spot.
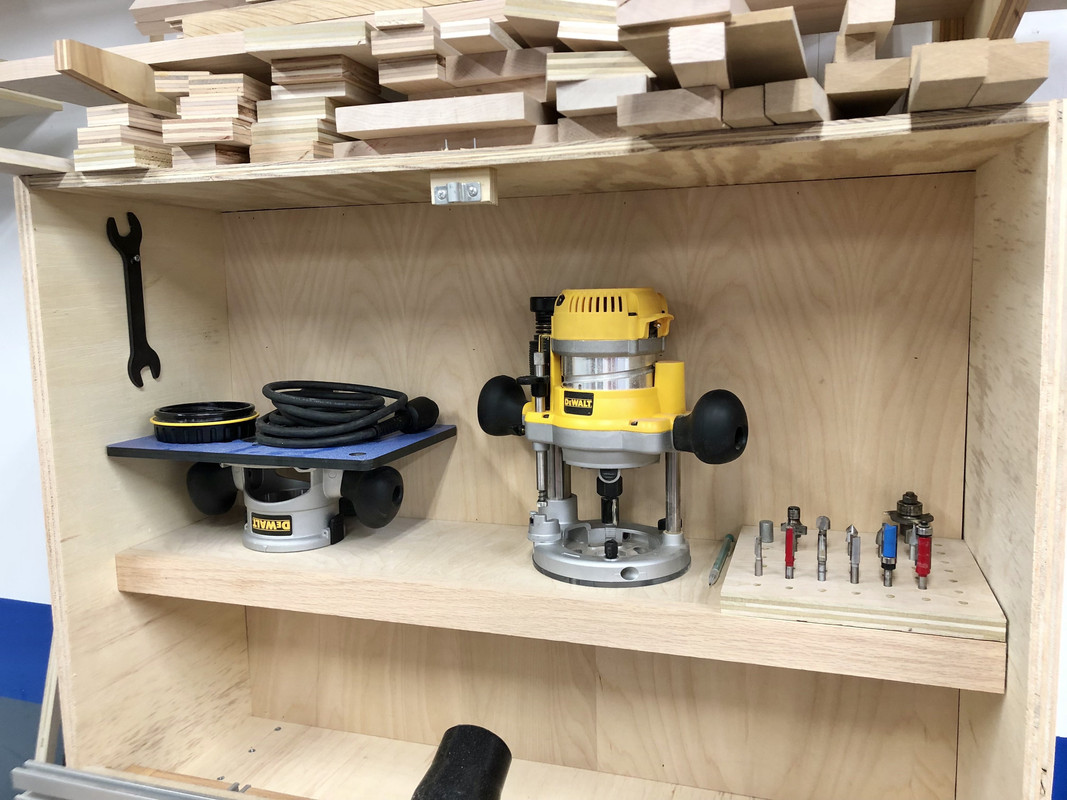
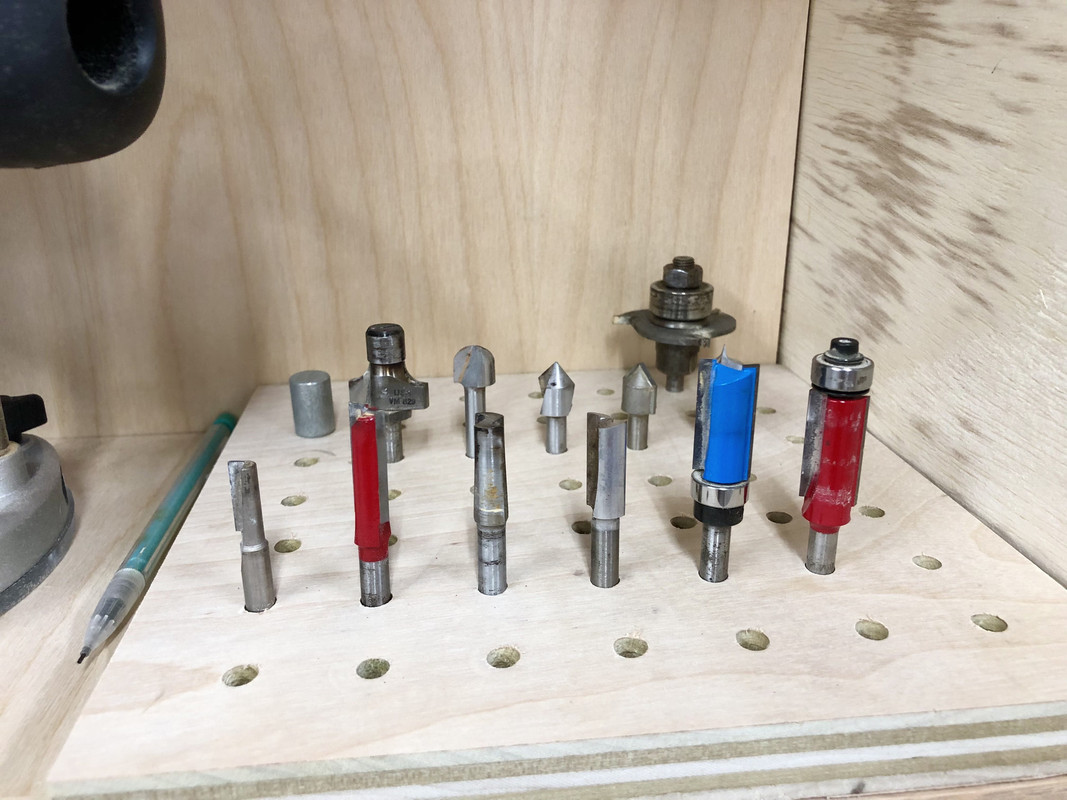
Can you recommend the right angle bit? I could have used one yesterday.
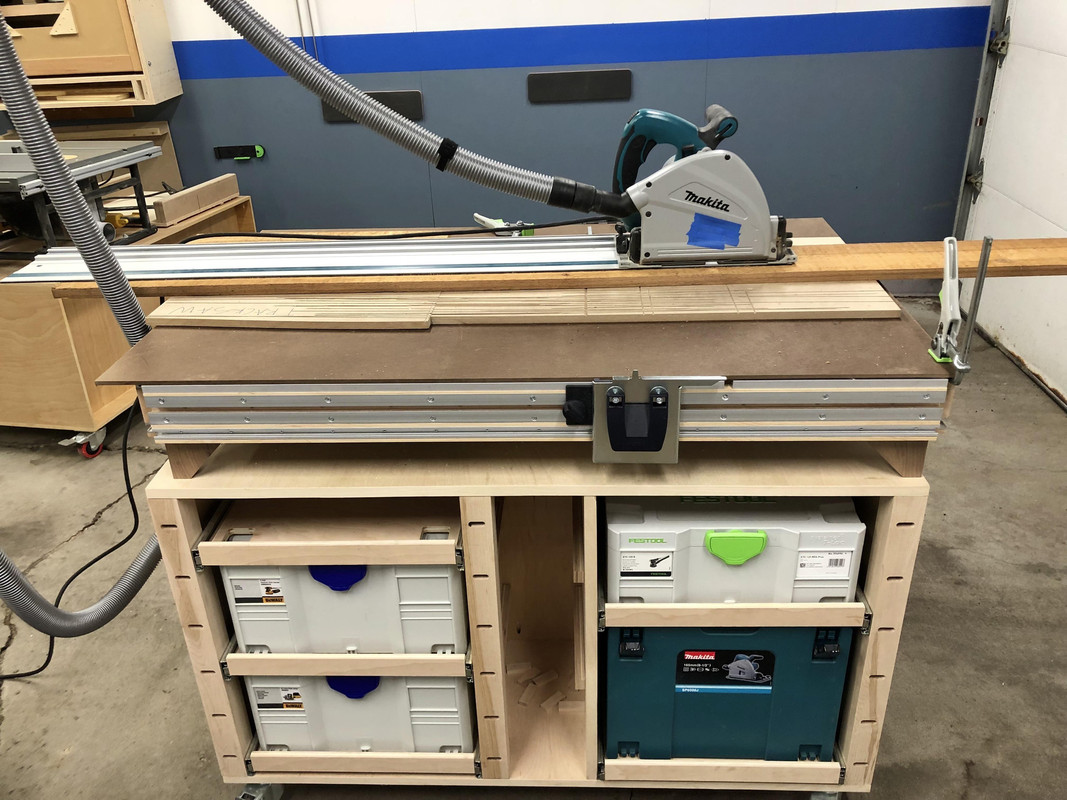
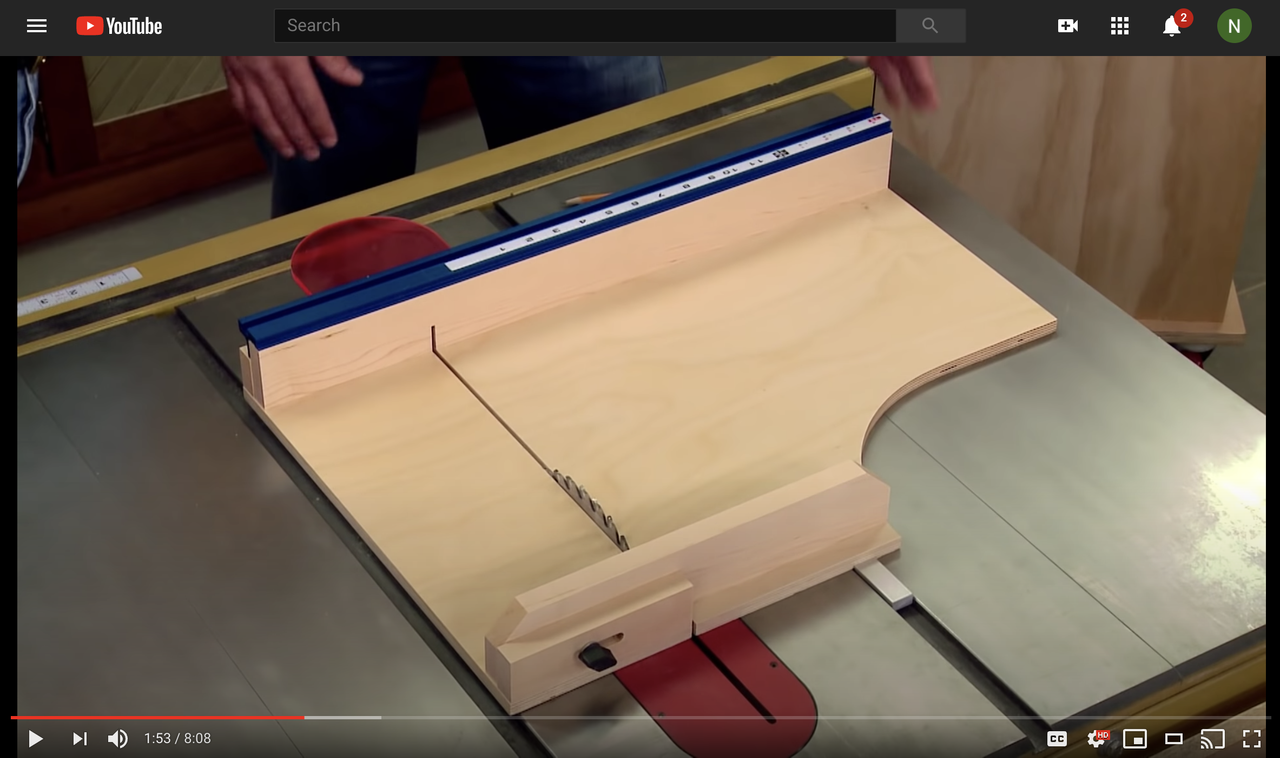
That looks wonderful! This and gregors thread make me want a track saw bad


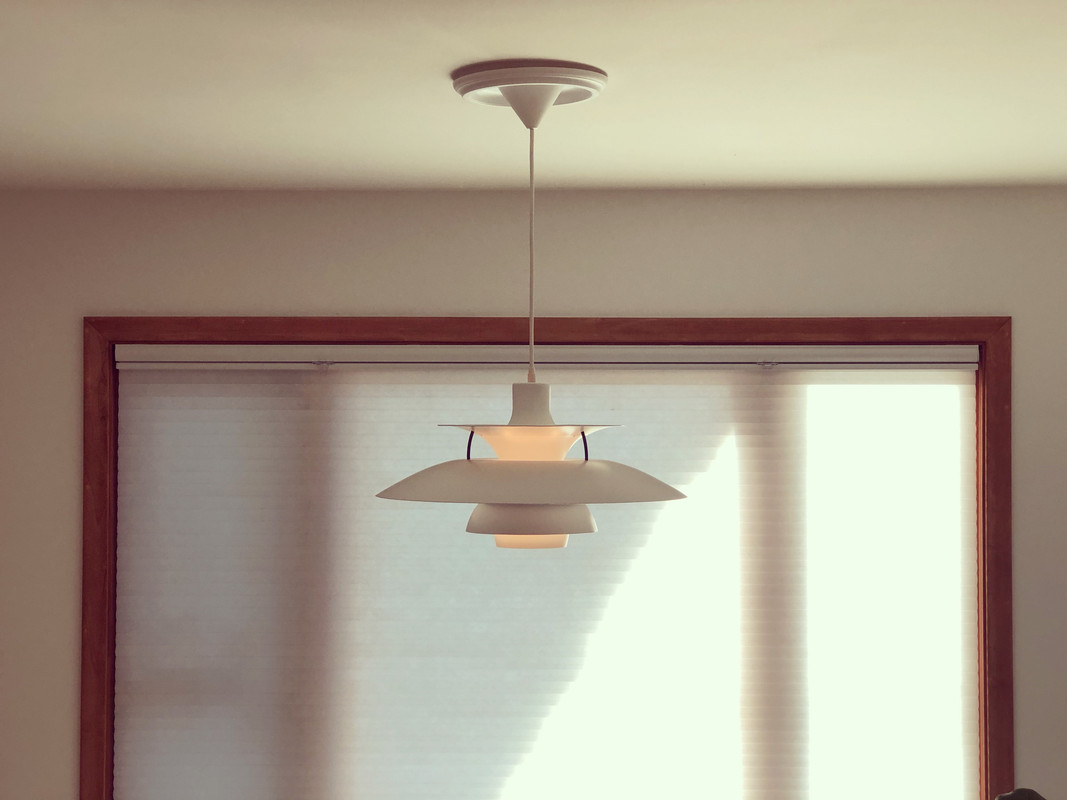

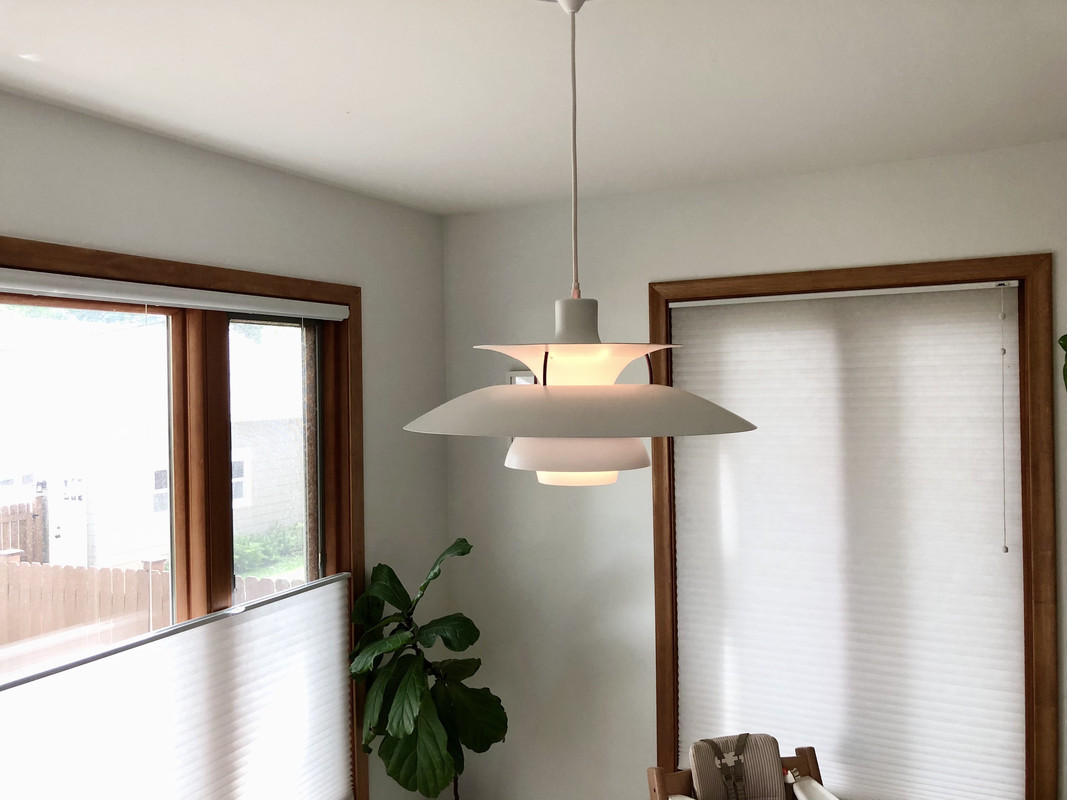
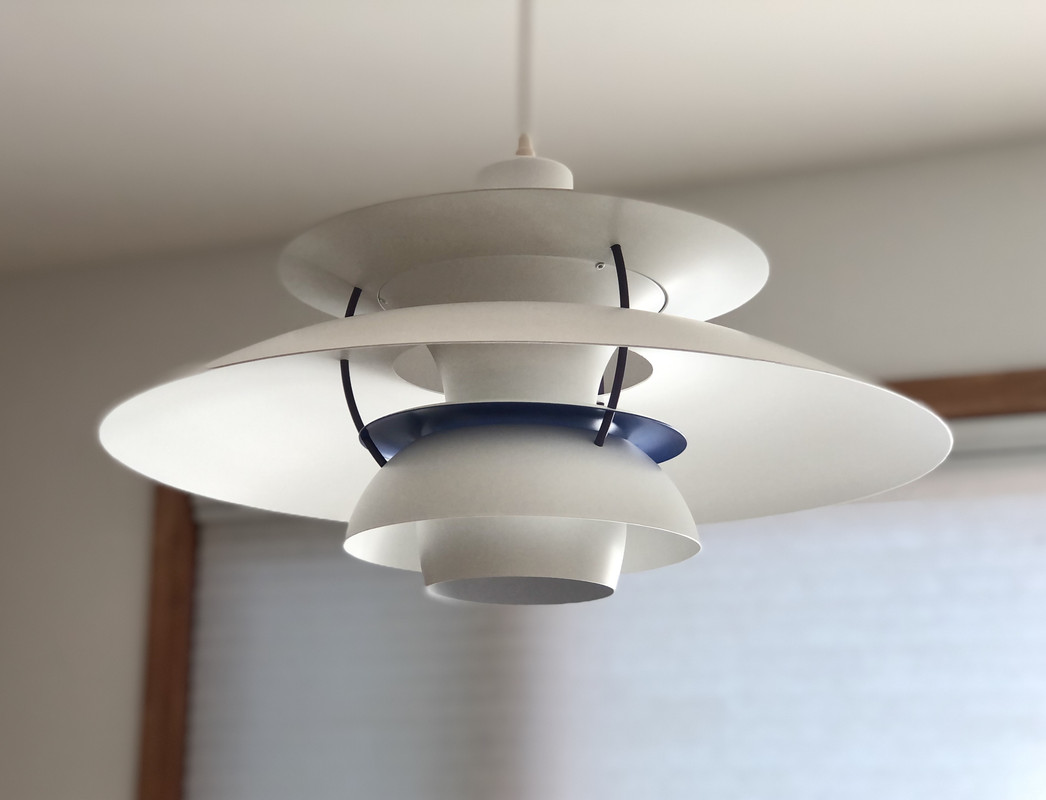
Great job fixing the fence. And the lamp is very cool.
That lamp was worth the wait.... a great example of design and function.
I hear you on the project burnout, I hit the wall about this time every summer. Wife has suggested a few times that I just save the driveway gate for next spring. I think I'm going to take her up on that offer and just enjoy the last few weeks of warm weather.

Just getting caught up on your progress, Nick. The end product of the fence came out great. It's a bummer the contractor couldn't quite carry out what you had envisioned, but luckily you have the tools and the skills to make up for it. Nice job!
The light looks great too, it definitely fits in with the rest of your decor!


...In other news I *might* have an incoming tool tomorrow, a fb martketplace find, if all goes well.
I agree with what Cobbler said regarding that option. I always have to laugh in those threads - you've determined you want to buy a moped and ask for what some good brands or options would be and within a few posts people are telling you to buy a pickup truck. Good on you for sticking to your guns with what your needs and constraints are - hope it works out!

Long time lurker here but going to try and post more now that I just moved and have a new garage build out to document...stumbled across this thread yesterday and just finished the whole thread....impressive work doesn't begin to cover! Especially love the attention to detail in all endeavors be it house or garage related. Also a sucker for anyone who models their house in CAD this extensively as its a problem I have as well...about to start modeling the new garage(using Fusion360)
Two quick questions if you wouldn't mind:
-Is the garage door lock(Surelock?) Still working well for you? My new house has an attached garage and been wanting something similar so would love your thoughts
-Any regrets on the corded tracksaw instead of the cordless model? I already use their battery platform for my bigger cordless tools, but am struggling with corded or cordless. Will primarily be doing work in the garage so cordless isn't a requirement and will be buying a new vacuum so will have the vac hose anyway...there is no real need for the cordless for how I use it but just struggle with buying corded toys when a cordless option is there


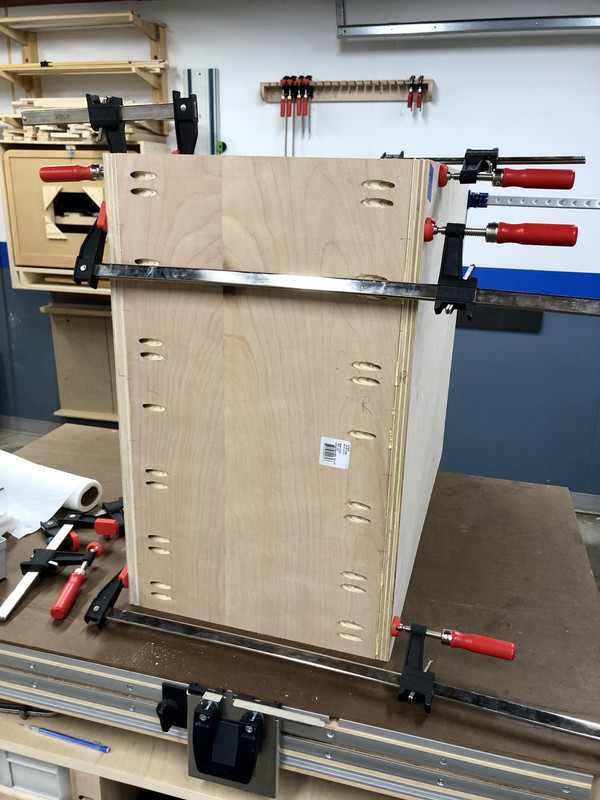
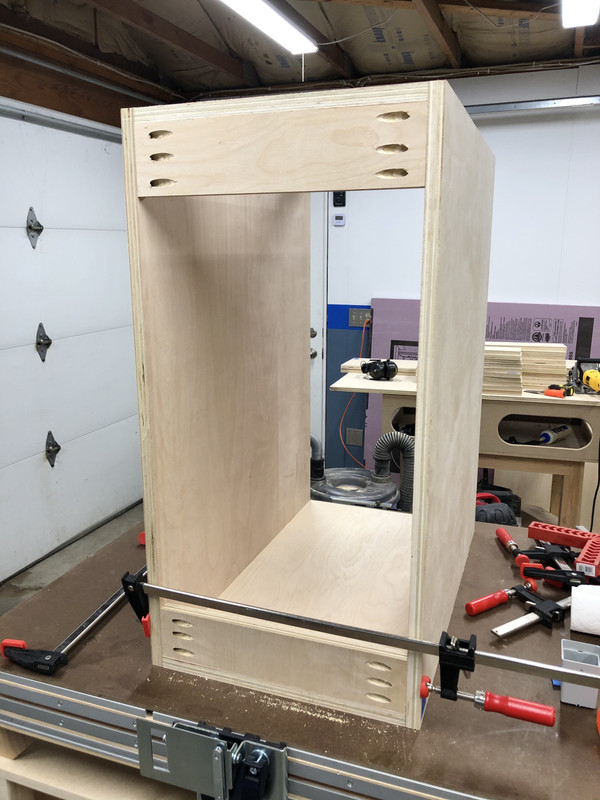
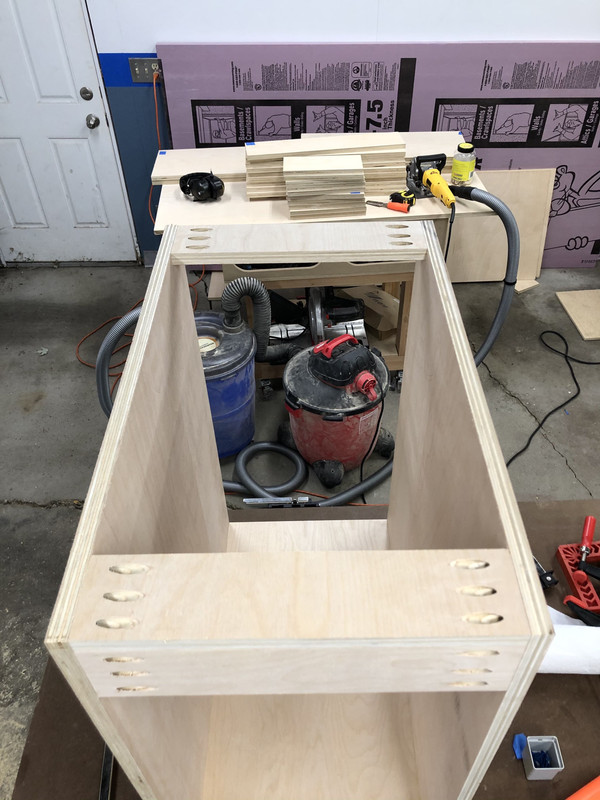
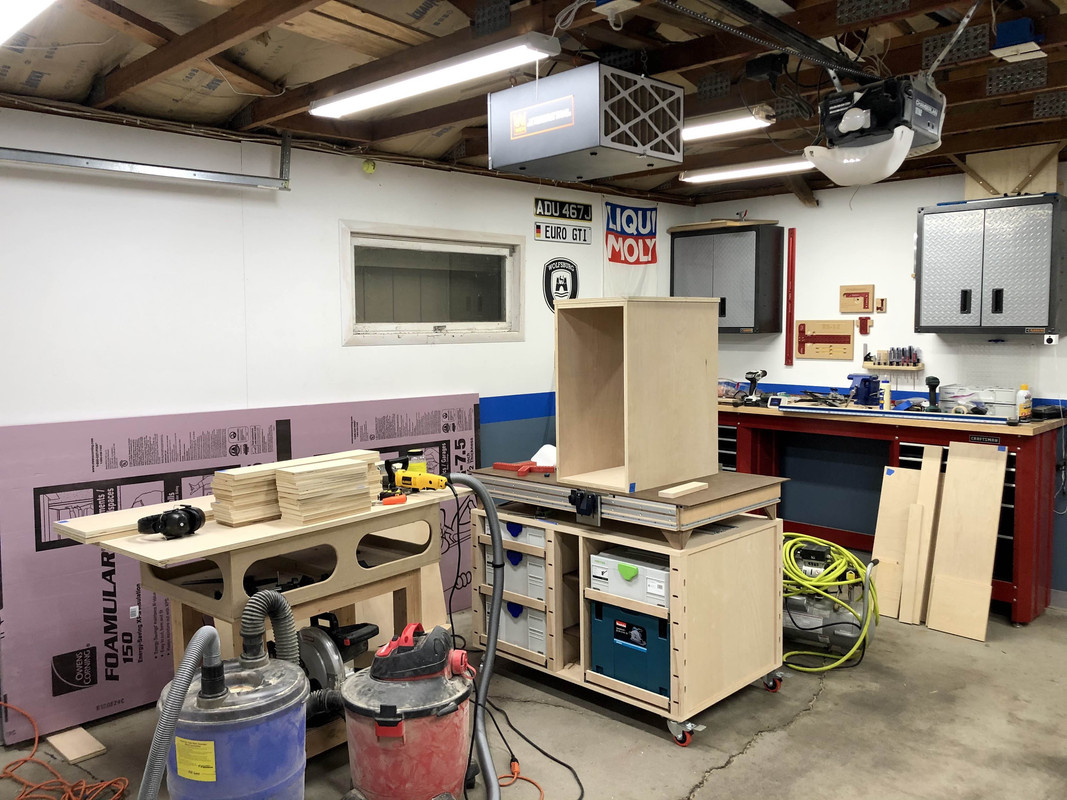
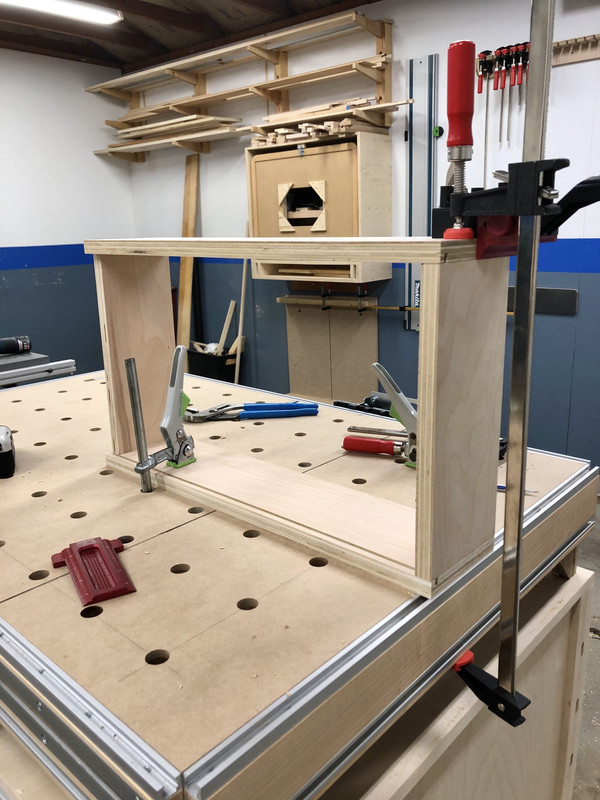
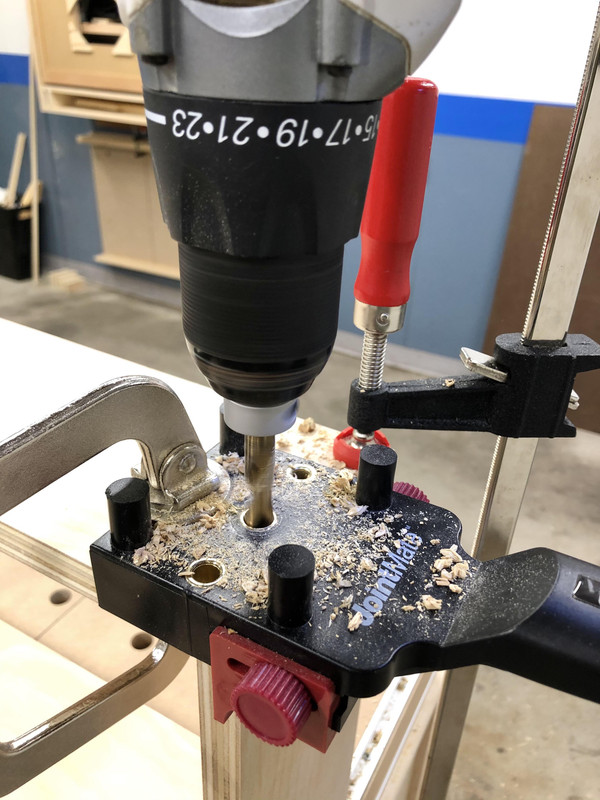
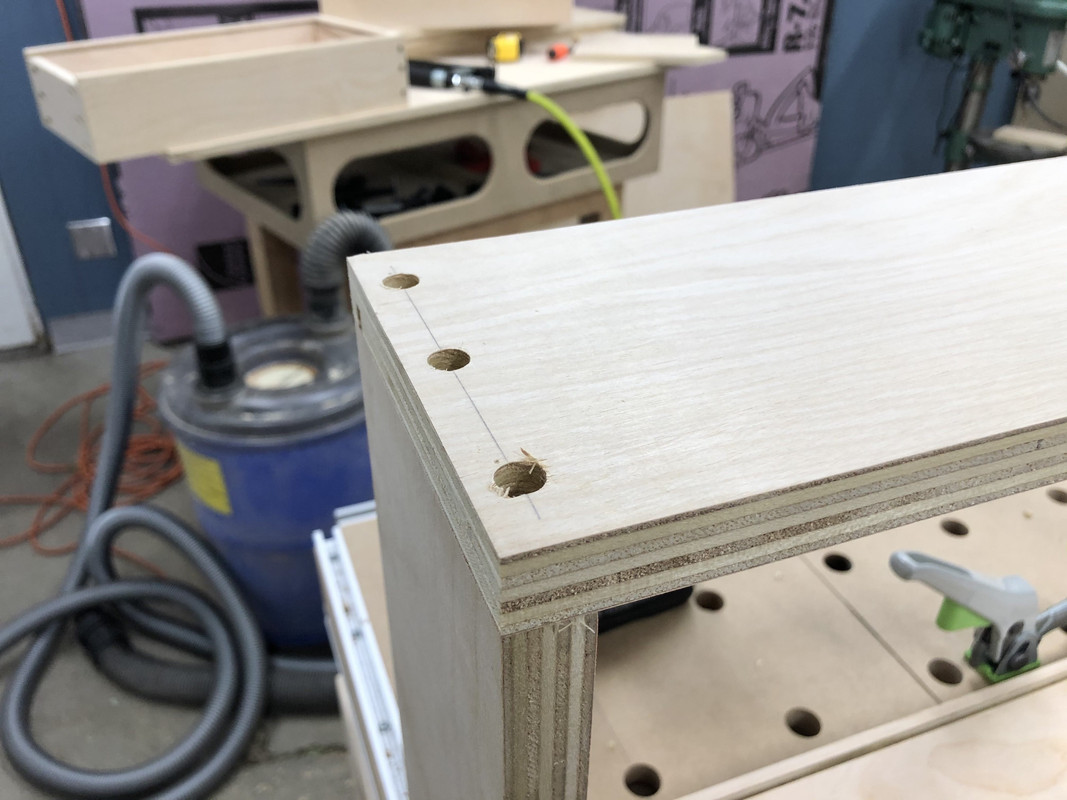
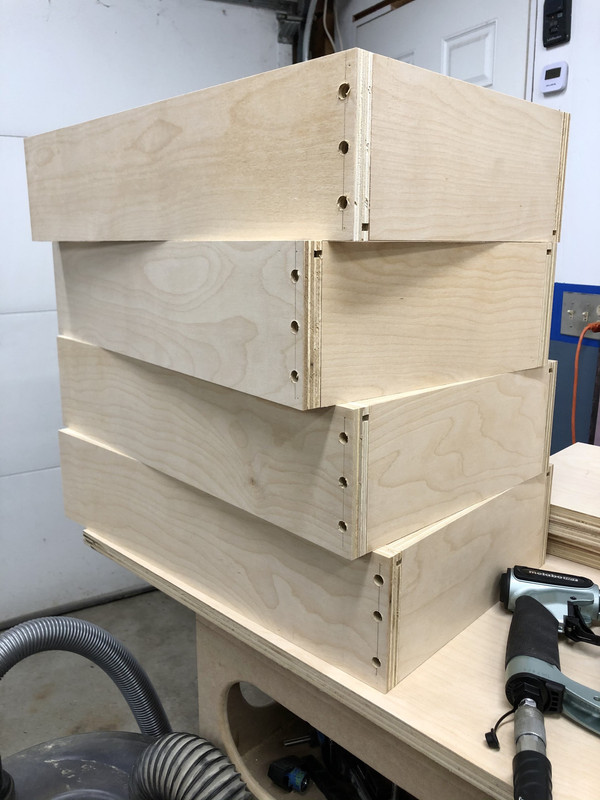
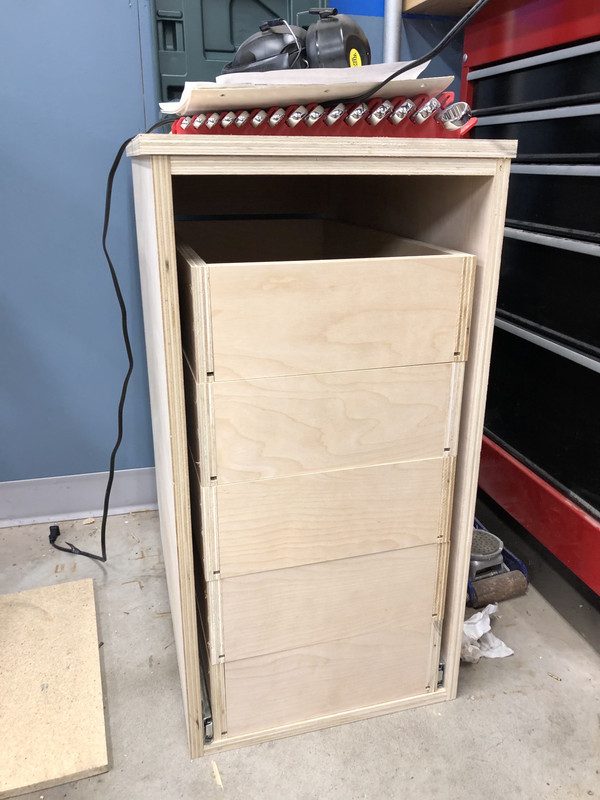
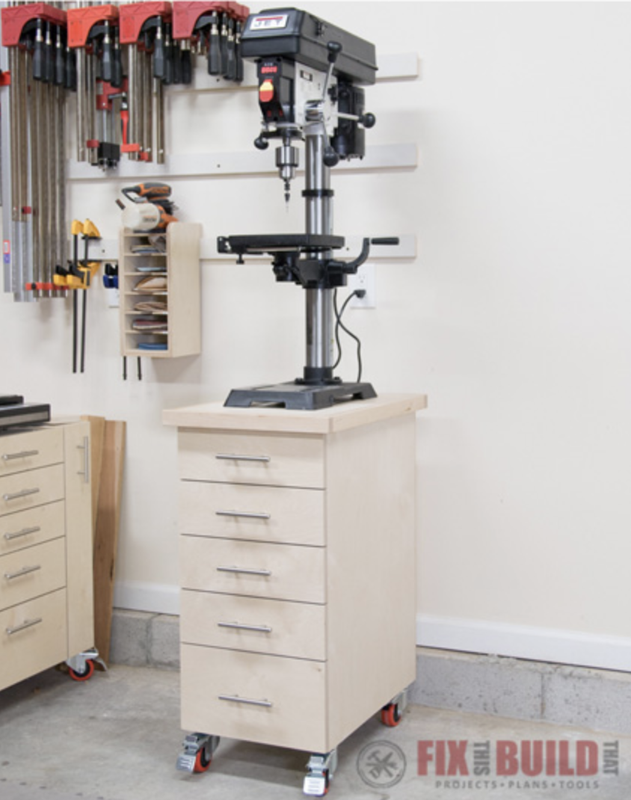
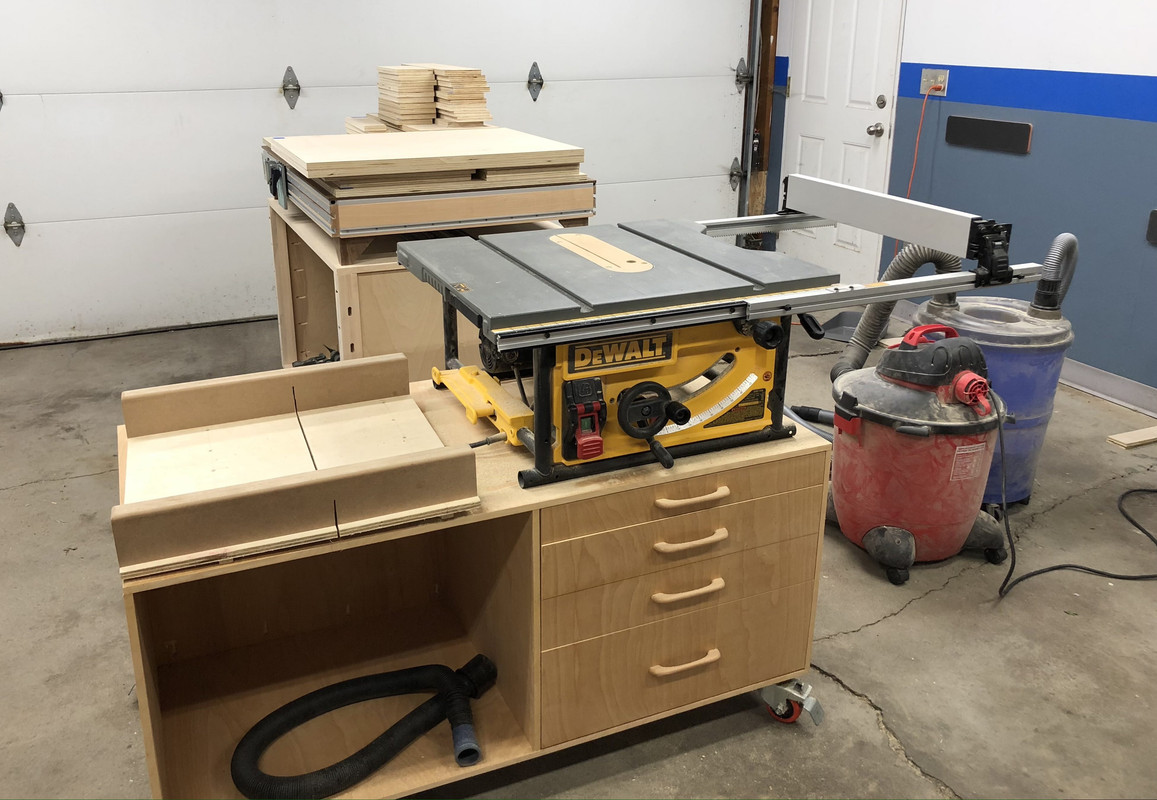
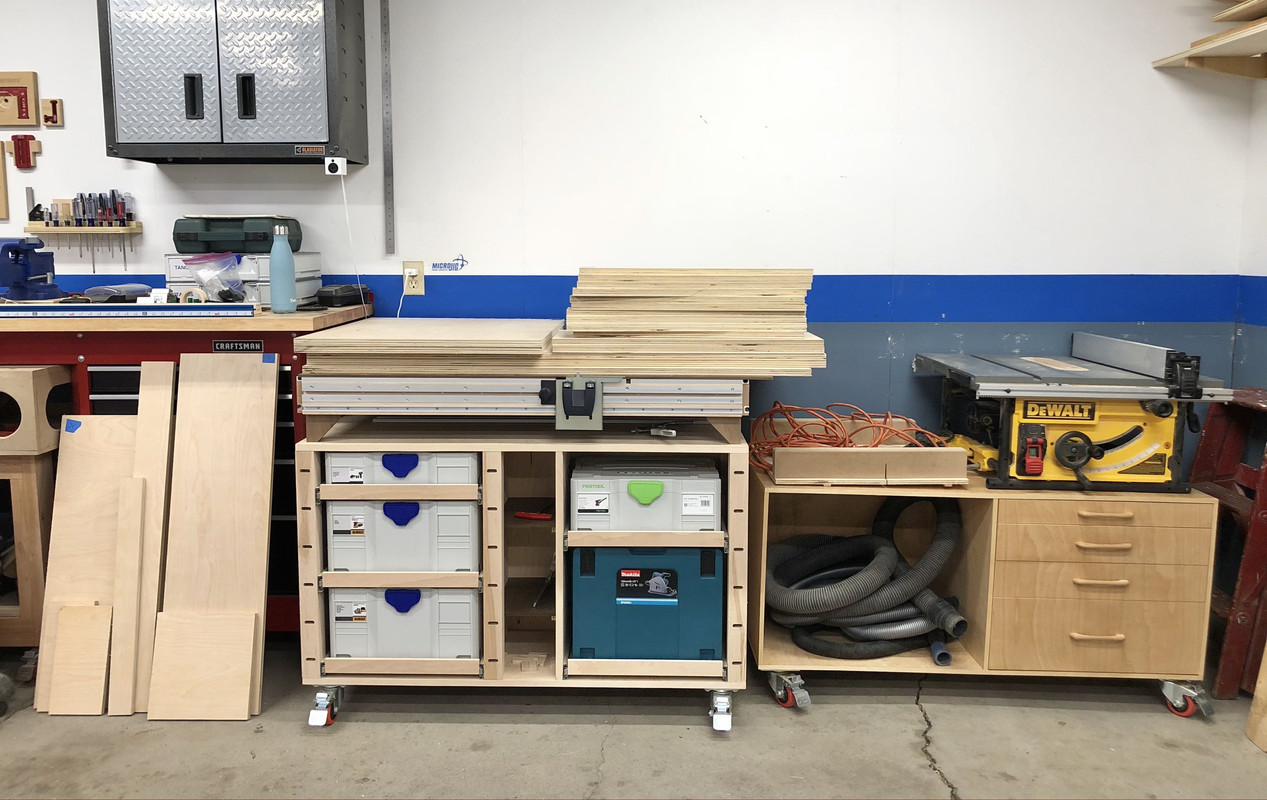
 so I've ordered a replacement from Grizzly, and I need to clean it up and test it out more, but I think it's going to be a nice compromise for me. So expect some add-on projects for it like a base cart w/drawers, and larger clamping table. Instead of mess around trying to find the right size I just ordered one I knew would fit from Grizzly for 7 bucks w/shipping. Not a big deal.
Thanks!! I'm a professional video editor (mostly advertising, TV commercials), so I'm used to in-depth professional softwares and Sketchup (the basics anyway!) was a pretty easy grab for me. I think Fusion or other 3D modeling programs would take more effort for me. Also... why does Autodesk have so many 3D programs... Fusion360, Maya, 3DS Max, etc?? Haha. Anyways, it totally takes time for me to do, but I like having a plan and a vision. A lot of stuff I've modeled I've stuck pretty closely to. It gives me a pre-visualization, helps the wife get on board with certain things, and kind of a comfort that I know what a project will roughly look like in the space.
The Sure Lock:
- it works great except when it doesn't. Occasionally I've had a sync issue where the lock doesn't retract fast enough and then the door gets stuck about 1 foot off the ground. Happens more often in winter. It has a manual override to "turn it off" so sometimes I flip that lever for a few days if it's acting up. Why does it do this? I don't know. Maybe I didn't install it right the right spacing for my opener. But overall I think it's a solid duty piece and there isn't much else out there like it that I know of. You may not have the problem I have, it's hard to say. So I guess I'd recommend it with that caveat.
The tracksaw
- personally I don't have any regrets, because like you I just use it in the garage, always with a vac hose, and don't mind managing the cord. I'm not really bought into a cordless system though. Unless I *need* it to be portable like a drill, I almost always err on the side of corded for reliability and power. I guess I've always been suspicious batteries can deliver the same performance, and with the extreme hot and cold we get here my garage isn't the ideal place to store them, either. But I will say... I have heard great things about both the Makita and the Festool cordless saws. As in they deliver the same or possibly even better power than the corded models. So if you already have the batteries and charger, you might be able to get a great deal on bare tool Makita, and I wouldn't hesitate. One thing I'd love to be able to do is bring it to the home center to be able to roughly break down a sheet good in the parking lot for transport. That could have been useful on a few occasions!
Anyways thanks for checking out my thread, going through the whole thing is a tall order at this point.
Do you have a thread yet? If not let me know when you make it, I'd love to follow along. I'd highly recommend starting one. It's great for feedback, motivation, new perspectives.

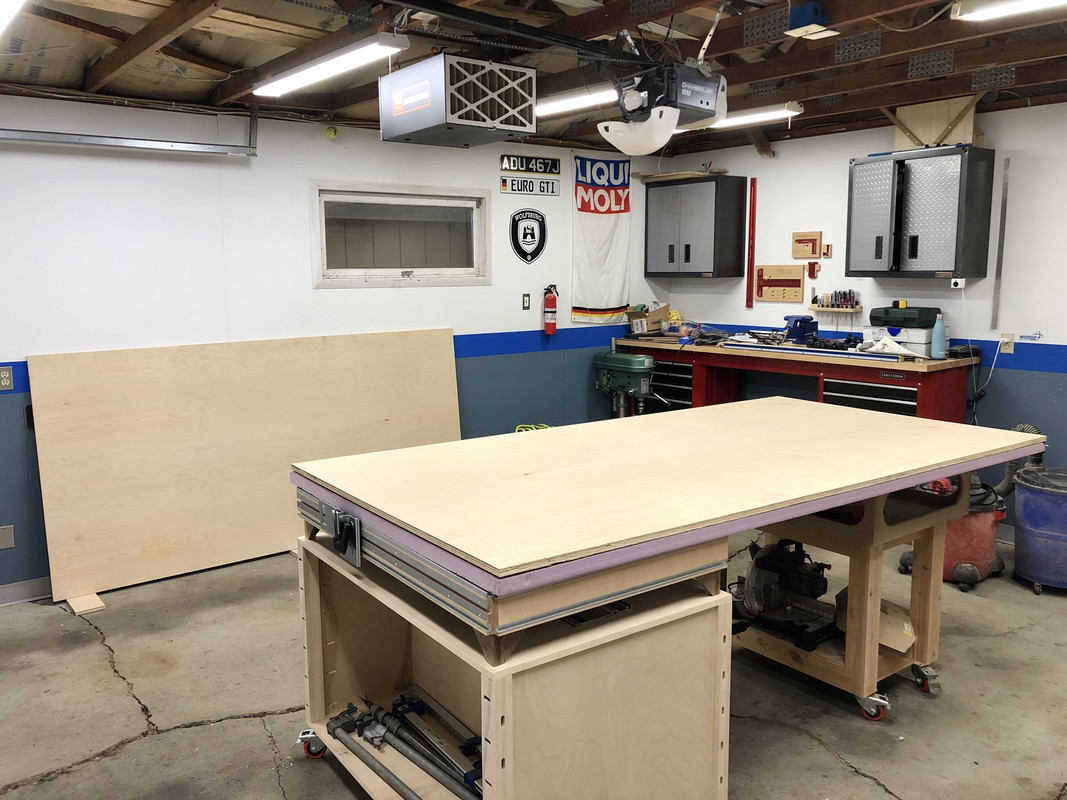
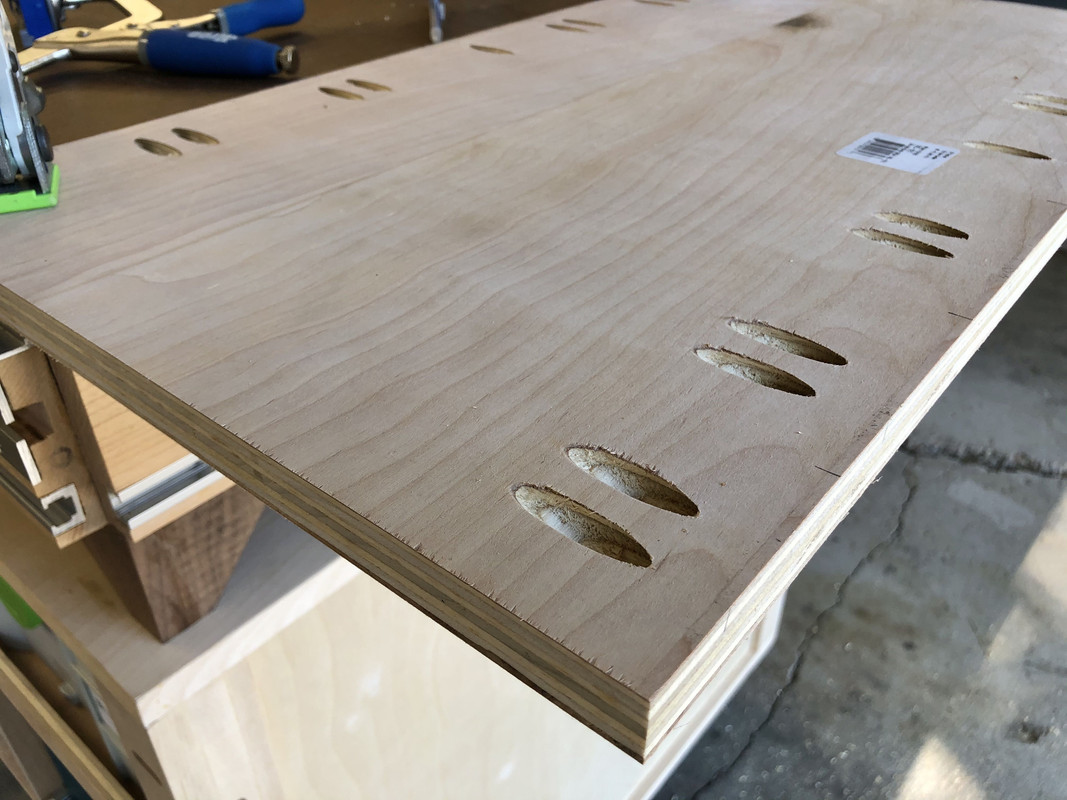
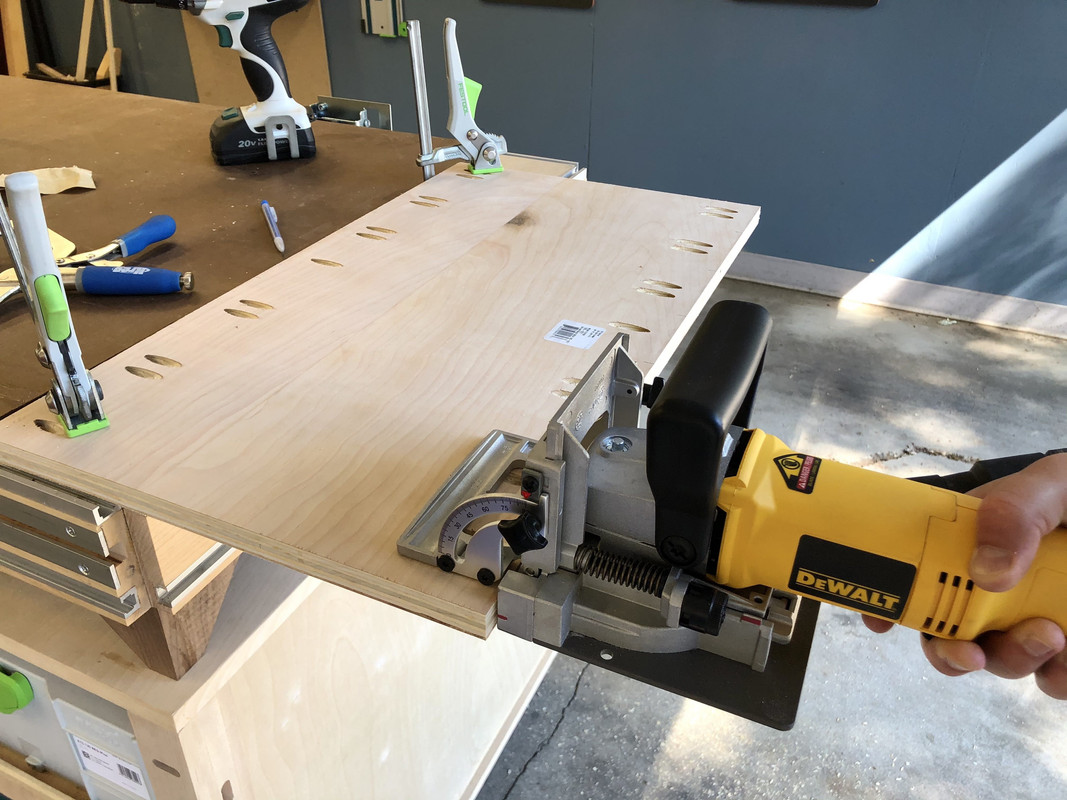
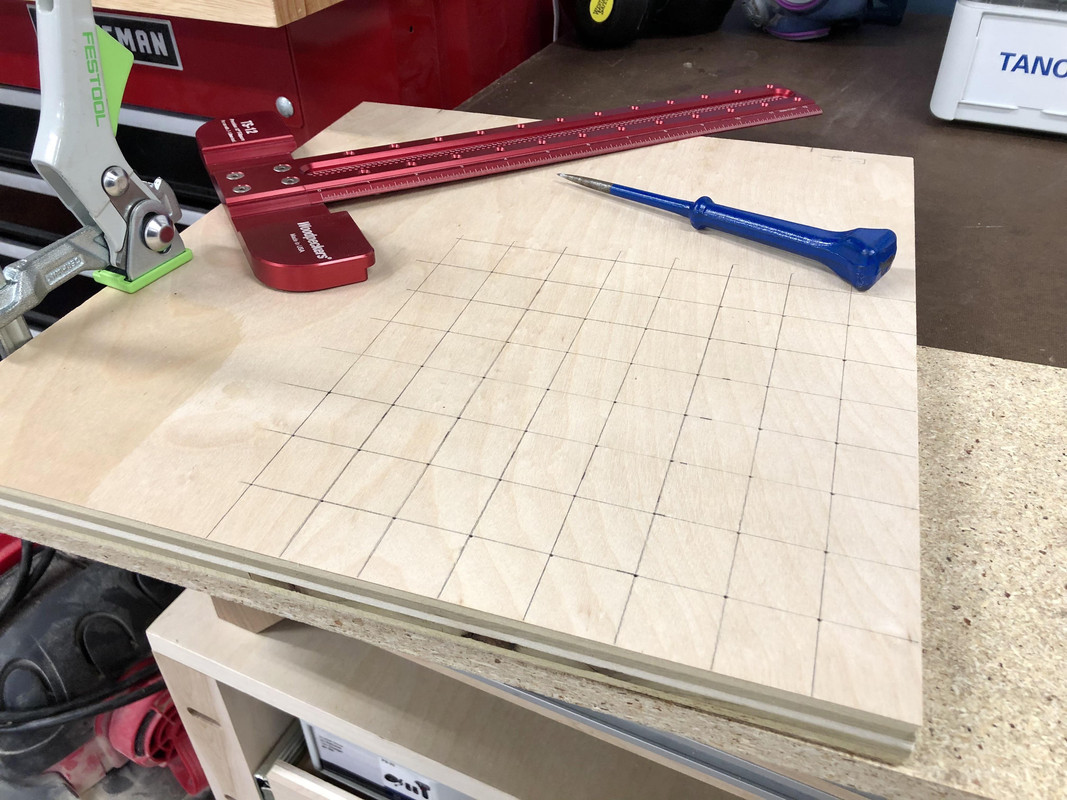
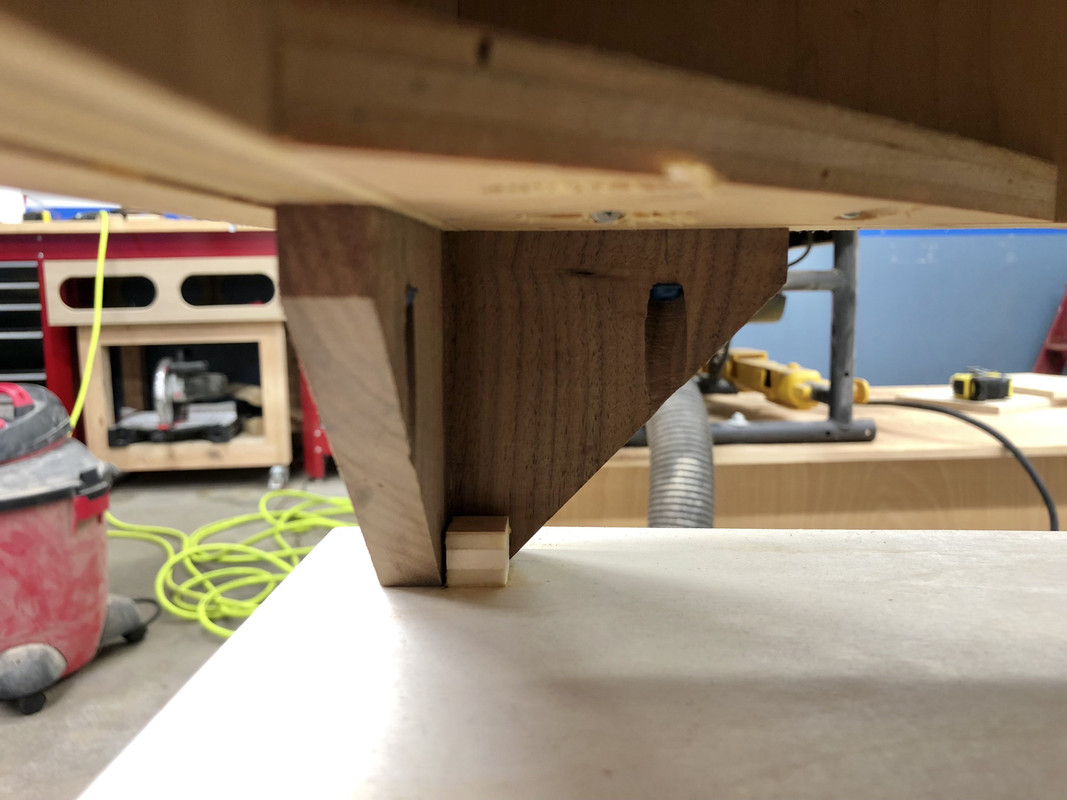
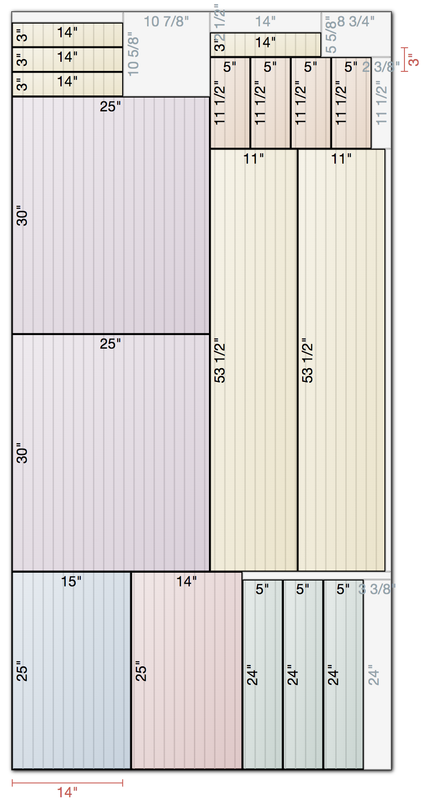
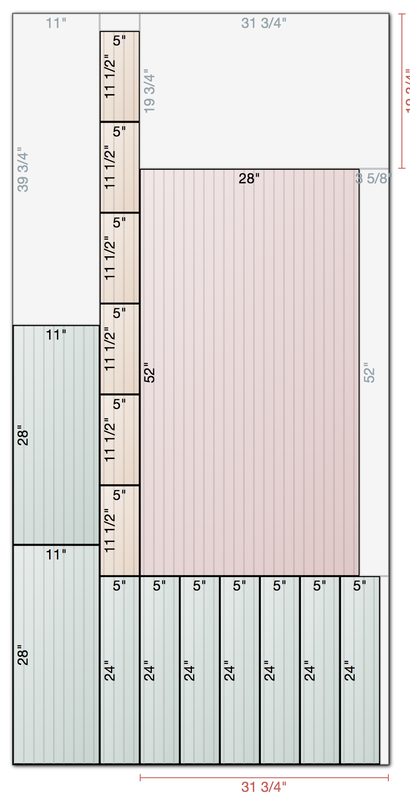
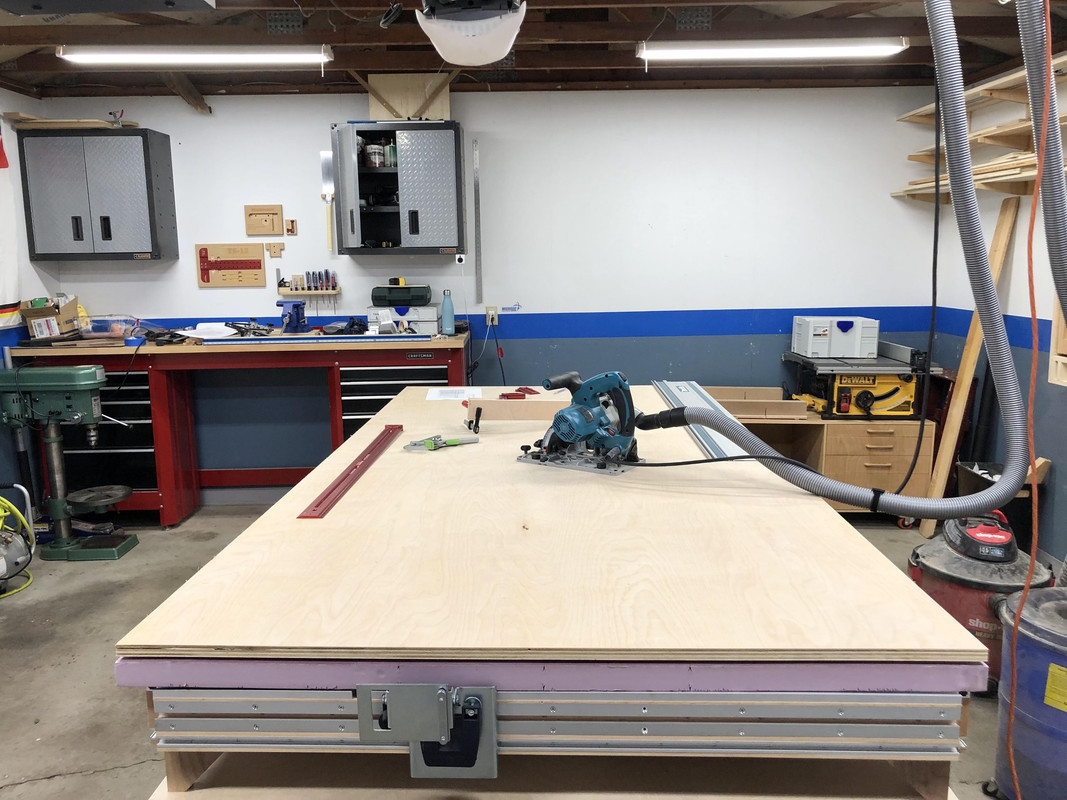
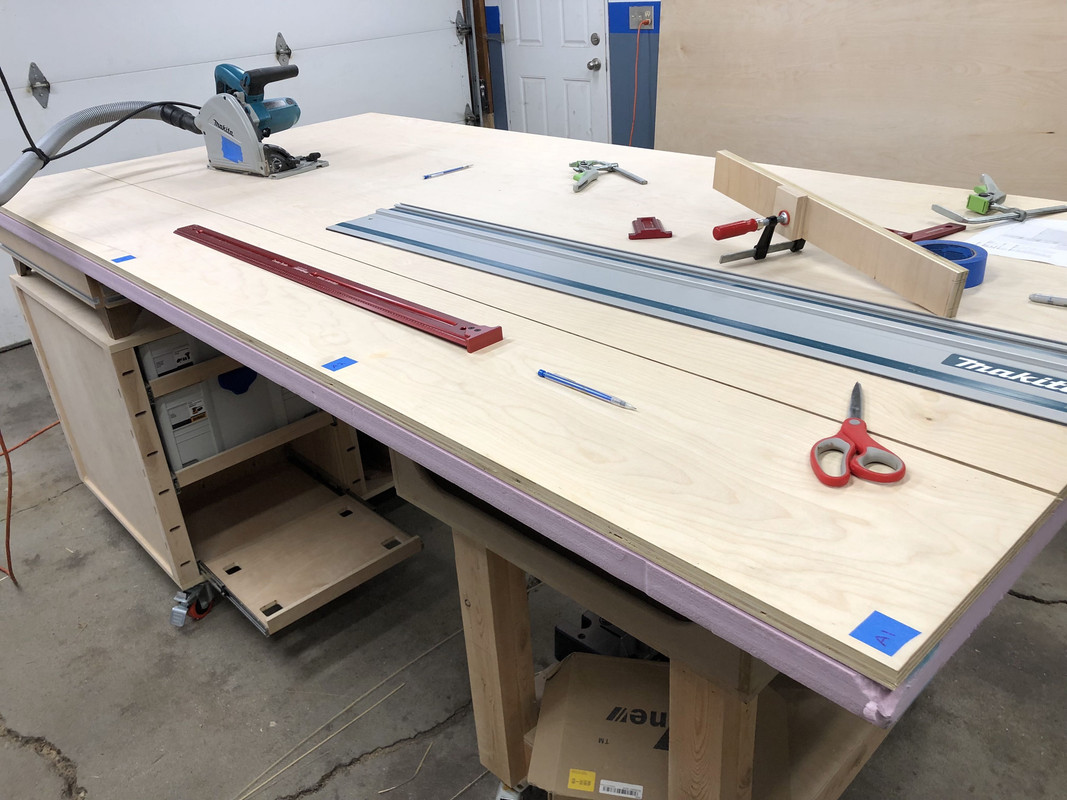
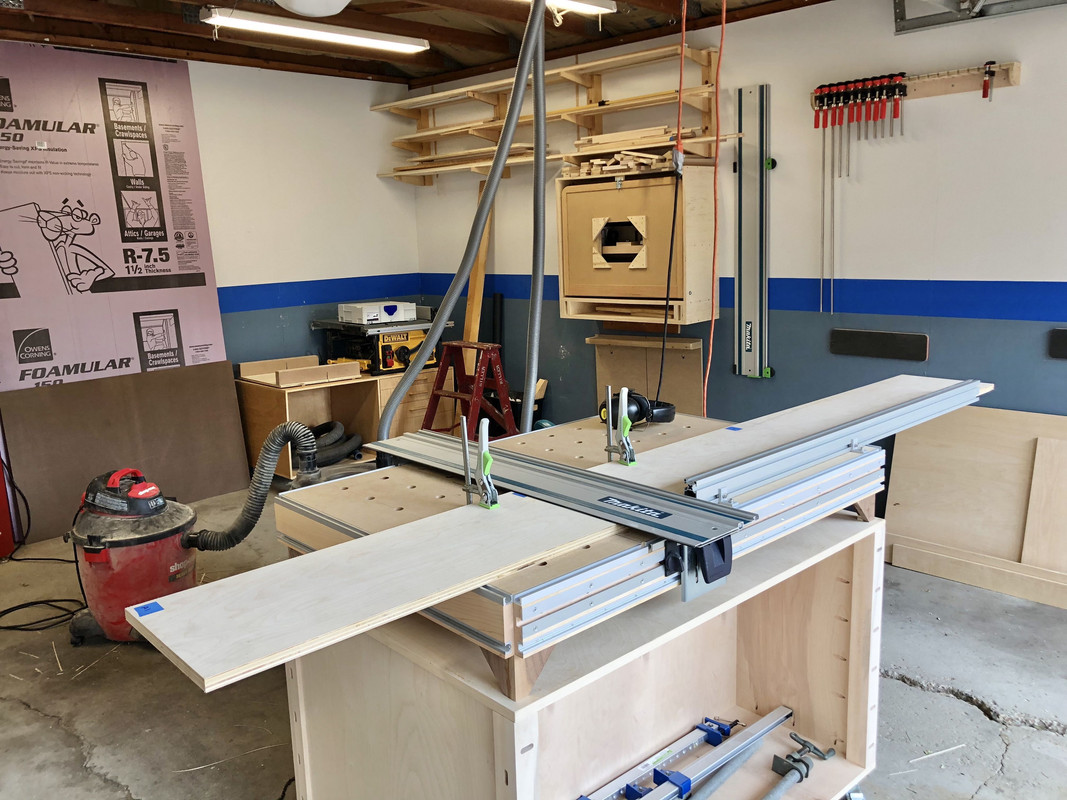
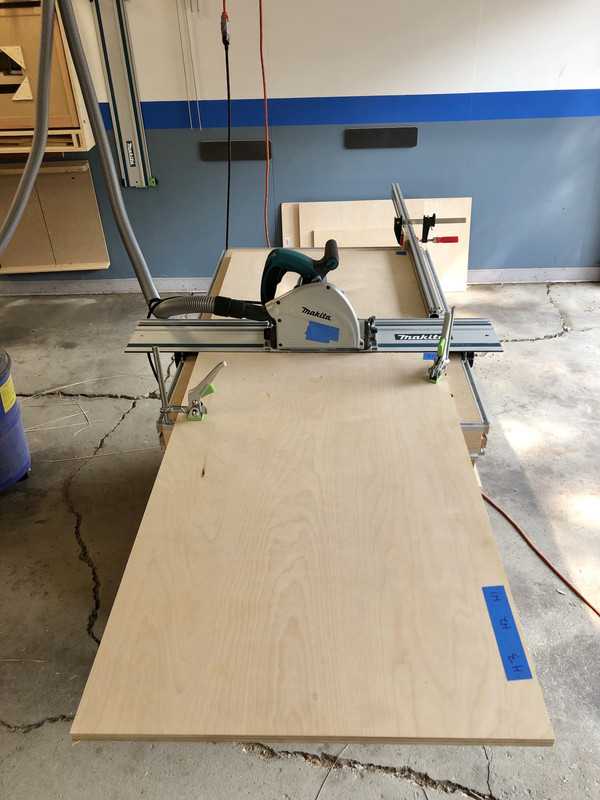
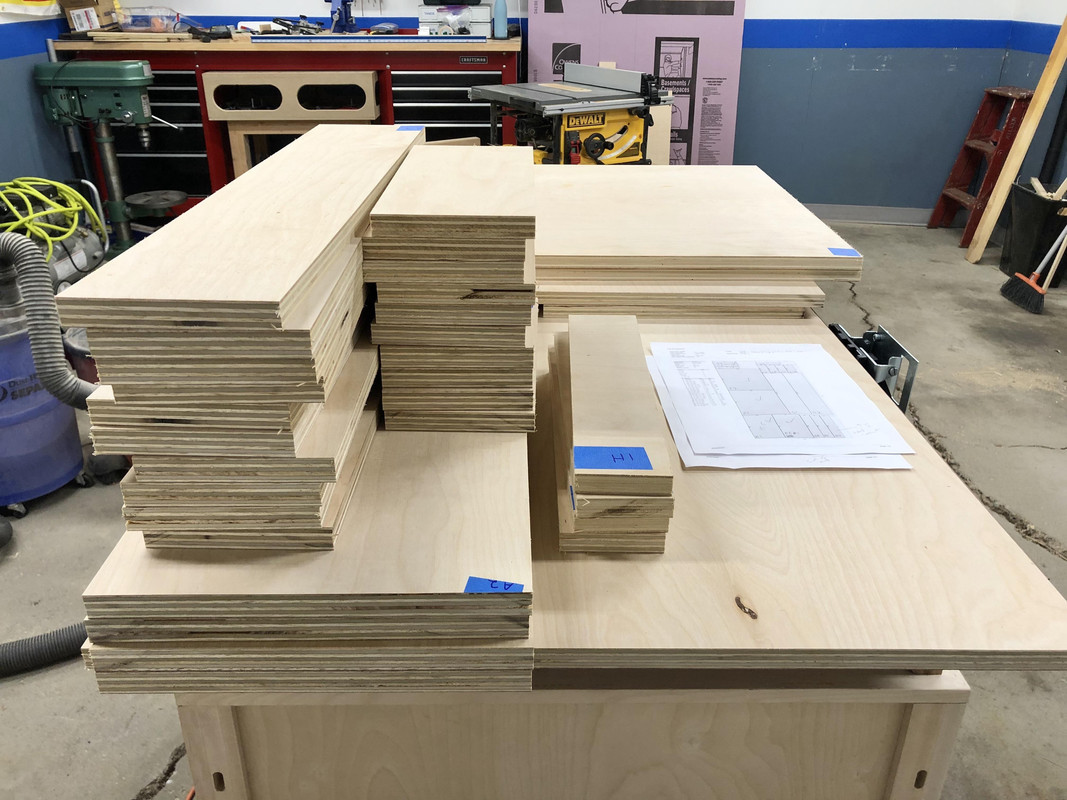
You can't just show us some plywood and then not give us details of your plans for it!!
 NEW TOOL ALERT!

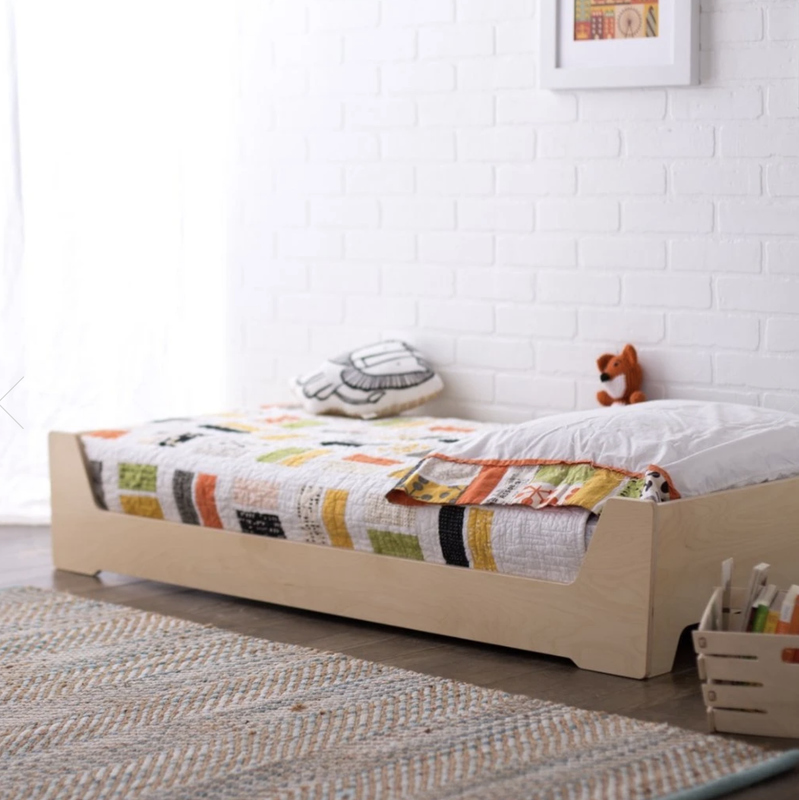
Great work! Going to be watching this build closely as not only did my Makita tracksaw show up today, I'm going to be in a similar camp needing to make a bed soon as my daughter is very close to the same age and I really like how that one looks!
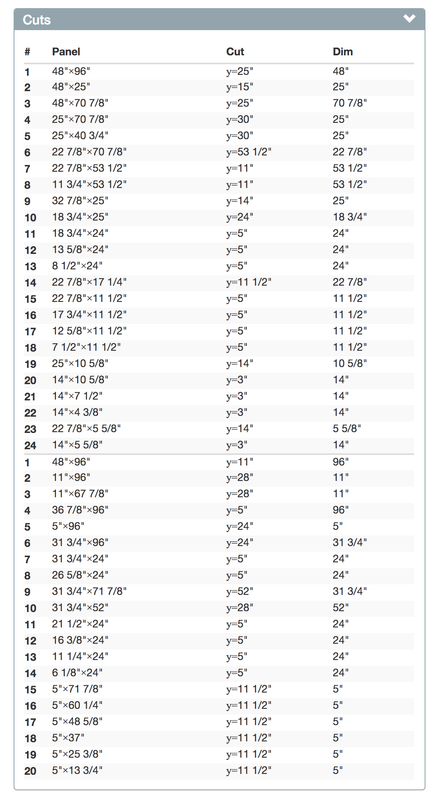
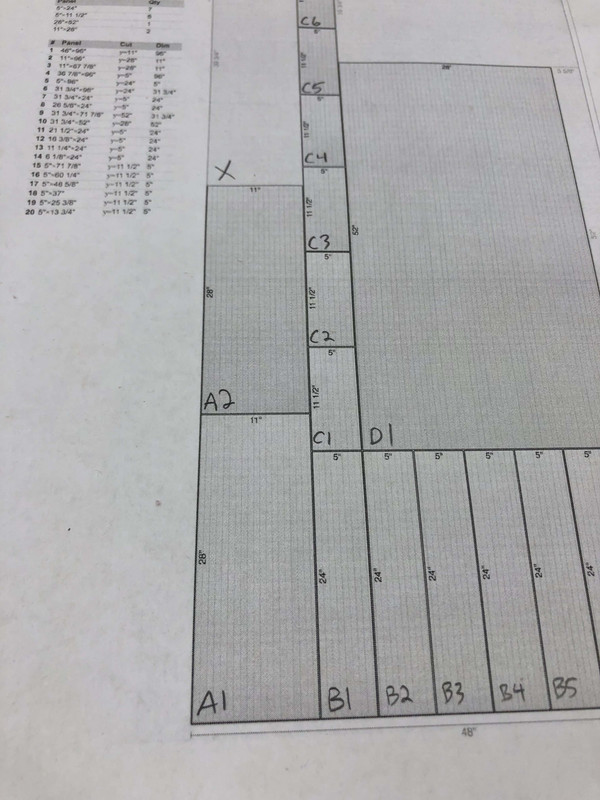
Nice projects! I used the Cutlist Optimizer for my garage cabinet build and it was a huge help and will be used for any applicable future projects in my house. I have also been considering a track saw for breaking down sheet goods. I have a 50" fence on my tablesaw so I can make any cut I need with it but manhandling a full sheet of 3/4 ply is not ideal and can be sketchy at times!
 Just sayin
 Nick, that bed looks super cool. My daughter is 21 mo and will be needing something soonish as well. Looking forward to seeing how this turns out...although I am sure it will be great based on your previous work
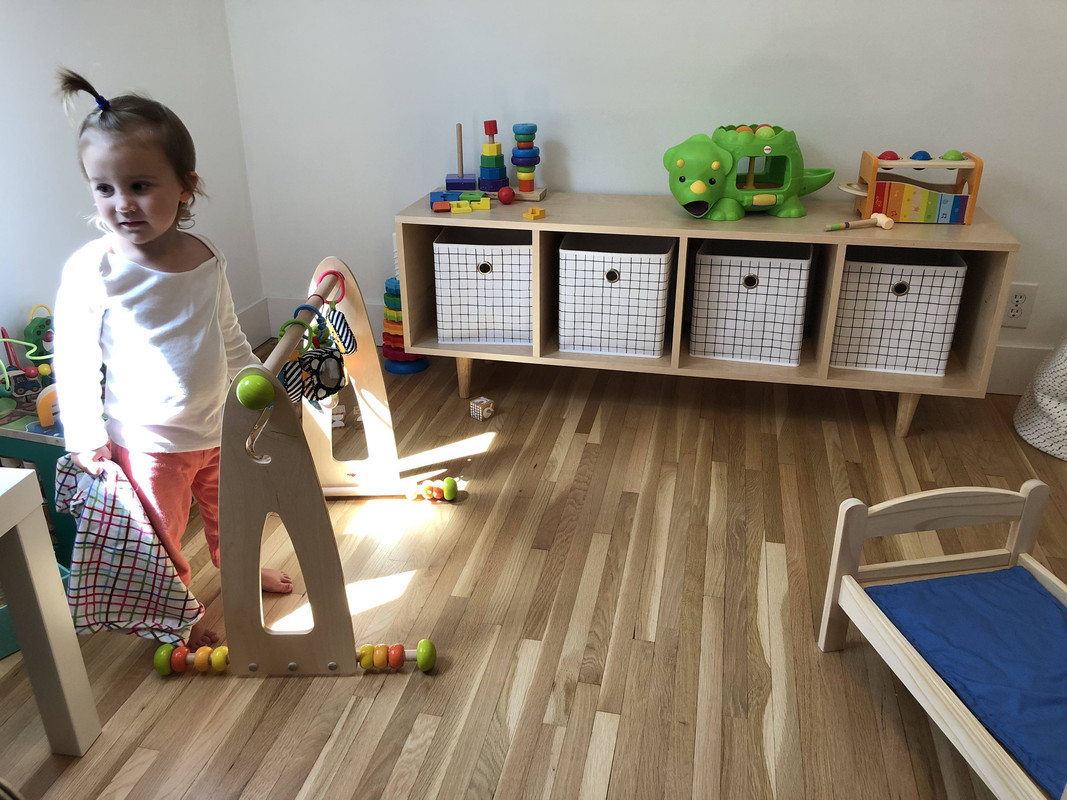
I also really liked that cuby cabinet you made for your daughter's room as well. In the future if you ever need materials delivered I have a full size truck and would be happy to buy and deliver materials (yours and mine) to you if you wanted to make an extra piece of furniture
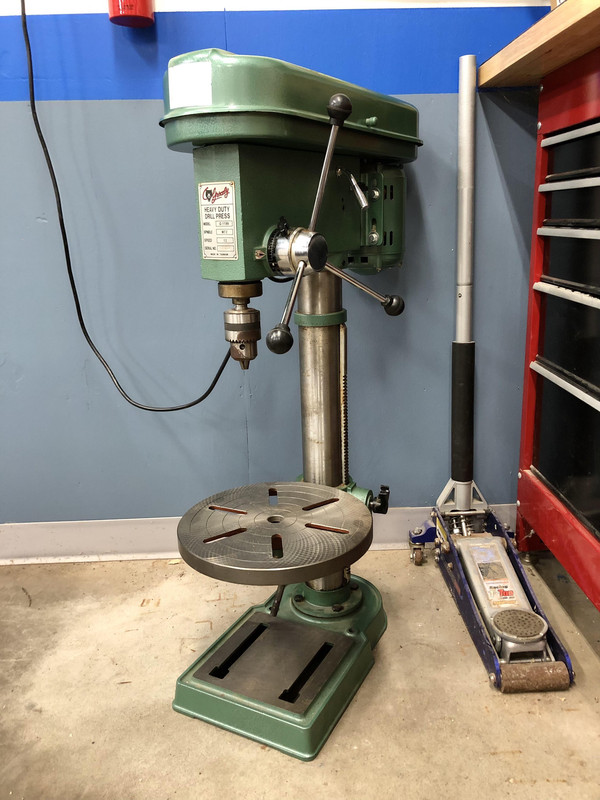
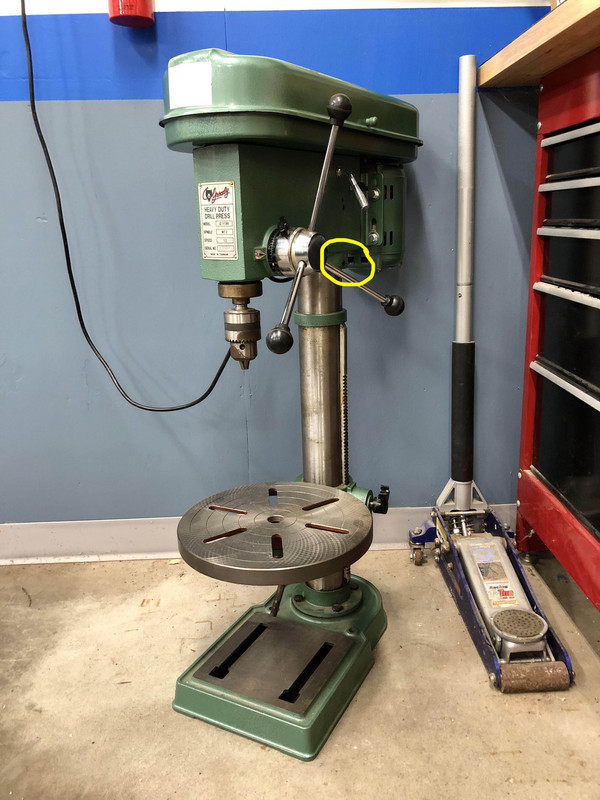
You should be able to rotate the base also, if the head is stuck.
If not maybe just take the motor off to shed some weight and make it easier to spin? I wouldn't think WD40 or PB Blaster would hurt anything either.
If you've got the set screw loose/removed, put one foot on the base and try lifting up/wiggling the head assembly while you twist it. I'd bet she's just a little cockeyed on the column. You're unlikely to break anything just wrestling with it, so give her the beans if you have to.