To avoid these ads, REGISTER NOW!

VISE REPAIR 101 all vise repairs, lubricants, sources for parts and the tricks to fix

carpq

Member
Joined
Apr 5, 2021
Messages
5
Location
Canada
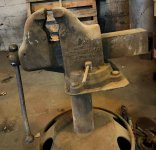
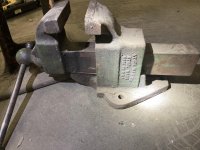
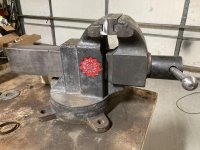
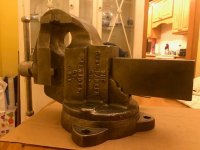
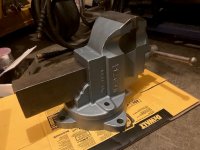
I honestly wasn't planning to do a full restoration when I started. I took it apart to try and solve the skipping issue. I cleaned the old grease with the WD40 grease remover (figuring it could use a fresh lube), then decided to clean the rust using Krud Kutter and a wire brush. The amount of rust removed was significant enough that I decided to go for the whole thing.

As for fully cleaning up the vise, I was a bit naive when I started. I was using some sand paper and a wire brush... then pulled out my dremel and found that the grinding wheels did a great job (though I had to be very careful not to take off too much metal) and they couldn't safely clean all the parts... The next day when I went to get paint, I noticed the wire brush attachments for hand drills, grabbed a pack and switched to that. Had to go back to a diamond bit on the dremel to really clean out the small corners around the letters etc though - even the wire wheels had trouble getting in there.

As for paint, I used Dupli-Color Self-Etching Primer -3 coats- and Dupli-Color Toyota Red Pearl (3P1) - 2 coats. Hopefully it'll last. If not, I guess I'll be trying out a different color in the future!
 
To avoid these ads, REGISTER NOW!

Mr. Wonderful

Well-known member
Joined
Jan 15, 2018
Messages
1,782
Location
Pacific Northwest
Drives,

I had that heat gun on there once we put as much tension on the chain as we dared. It did make the difference though. Where I was working there was no open flame allowed so the heat gun was the only way.
 

MattGavriloff

Well-known member
Joined
Jan 3, 2021
Messages
290
Location
Escanaba, Mi. South of Canada...
DRIVES- close, yes I like the Parkers specifically, naked. Something about the blocky lines and tall jaws, they just look right in bare metal to me. Not that I haven't seen some nicely finished ones in color.

Also yes, I have several vises in line for paint, but none that I currently have in mind for sale. I may have picked up one or two with the INTENTION of refinishing and reselling them, but at this point they are all welcome members of the collection.

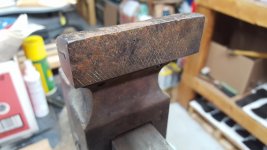
These two Parkers have jaws in pretty good shape, I assume because they spent some time with jaw covers. The set screw holes aren't pretty, but they are honest usage marks in my mind.
 

Attachments

  • 0 bytes · Views: 39
  • 20210330_205130.jpg
    20210330_205130.jpg
    116.2 KB · Views: 43
  • 20210330_211548.jpg
    20210330_211548.jpg
    64.8 KB · Views: 43
  • 20210403_225411.jpg
    20210403_225411.jpg
    111.2 KB · Views: 39
  • 20210403_225404.jpg
    20210403_225404.jpg
    98.9 KB · Views: 41
  • 20210403_225309.jpg
    20210403_225309.jpg
    124.3 KB · Views: 44
  • 20210403_225249.jpg
    20210403_225249.jpg
    152 KB · Views: 45
OP
D

drivesitfar

Well-known member
Joined
Oct 23, 2013
Messages
36,076
Location
Pacific Northwest
Carpq: I bet with all that prep and all the coats of paint that your cool red NO NAME vice has now it will be that way for 50 years. nice work!!

also isn't it nice to have a good excuse to buy more tools that will also work on other projects?

Mr. W: nicely done!!

Matt: I always like when you post up pics of your vises and only have one suggestion. change your drink of choice from DEW to ice tea or a good IPA/BEER. that sugar water isn't doing any good for your health, and if changing to beer just keep amount reasonable. (ok i'll get off my get healthy chair now). I drink a gallon of homemade morrocan mint Trader Joe's ice tea every day. I don't put any sugar or honey in it either and when I was younger (pre 30's) I'd drink about 6-12 cans of Pepsi or that many beers before lunch.

good to know that once some of your vise finds do get in your hands that you are not immediately trying to flip them. I've put more than a few of mine on other member's benches, but it is nice to have a few extra ones to use and maybe just to look at cause lot cheaper than extra cars and such.

ALL: I picked up a 3.5 inch swivel jaw the other night and even though I took it apart to see how it's vise nut and screw and parts looked I forgot to look at the brand, but I think it's an old Reed. i'll post pics when i get time to.

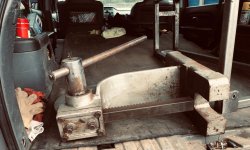
for all of you that straighten handles (this swivel jaw's handle looks like a snake) do most of you use a press with blocks and heat or hammer or do tell?
 

carpq

Member
Joined
Apr 5, 2021
Messages
5
Location
Canada
Carpq, I lean towards it being a Woden.

Just read more of the history of Woden (and what happened after they got bought). I can't find an image of this particular vise, however, I did find pictures of red woden vises... and post acquisition, the manufacturing moved to the Record factory, where they made identical vises and released them under different badges.

So yeah, most likely a 1970s Woden No3. Thanks!
 

NYCone

Active member
Joined
May 22, 2016
Messages
33
It's hard to tell until its apart, but:

  • Do the measurements I suggested
  • Get any obvious high spots flat/draw filed flat
  • Lay a straight edge on the parts you can get to on the slide. is it bent?
  • do you have access to the main screw from underneath? (particularly near the head of the screw - (Pics please)
  • There usually is a collar to lock the screw in place. sometimes staked sometimes with a pin, sometimes with setscrews.. This can free the screw, if accessible enough. but only really useful if a set screw is accessible.

The idea here is to get the screw out of the way, or at least unlocked so you can press the stuck part without breaking the main screw or nut...

With a 5-1/2 inch jaw, its getting to the big boys area, so more worth it to fix it if you can than a smaller vise.


I'll do measurements this weekend, I just took a look at the de-rusting effort and it's going well.

I have access to the set screw, but it's rusted solid. I couldn't move it with a regular wrench. I have to buy a 9/16s 4 point wrench to have a chance at it.

The sides of the slide are in great shape, it's just the top that's screwed up. The look of the slide being bent is an optical illusion due to missing material on top.

Now to the issue at hand. I can't get the slide to move, the screw will move a bit, but rust has sized the slide in place. I've done electrolysis for rust, and I plan on Liquid Wrench and propane heating to give me a chance, but I wanted to see what other folks have done. I saw a video where a fellow used two long threaded rods to jack the jaws open. I done have a full shop to make the jack he had, so I'm hoping there's an easier way. If I can separate the jaws, I think I can patch the top of the slide.

Any suggestions are welcome. I'll have more photos over the weekend.

Separately, I may also have another Columbian - this one is a 506! I wish it was a 606, but that's why I need to fix my 605 1/2...
 
OP
D

drivesitfar

Well-known member
Joined
Oct 23, 2013
Messages
36,076
Location
Pacific Northwest
CARPQ: mystery solved!!

NYCONE: did you put a straight edge on the bottom of your slide? I agree pictures sometimes make it look off, but it did look bent.

several members posted information about putting wedges in your static to try and break the rust that is holding it so give that a try maybe before that big screw jack. also i use kroil, but several penetrants work even WD40 has at times so maybe with the wedges in place squirting some inside will help.

from what i'm hearing and from my first look at your hole in the back of your slide it looks maybe like it's just cosmetic and an eyesore more than a flaw during use so worry about that after you get the vise apart and working.

good luck!!
 

Outlawmws

Well-known member
Joined
Aug 9, 2011
Messages
39,341
Location
The Badlands
I wouldn't even bother with WD or liquid wrench.

Kroil, or a 50-50 mix of ATF and acetone. (shake WELL before applying. it separates...)

The screw jack and setup like Mr W's should be your best bet.
 
OP
D

drivesitfar

Well-known member
Joined
Oct 23, 2013
Messages
36,076
Location
Pacific Northwest
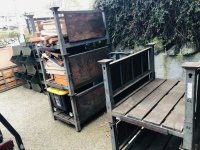
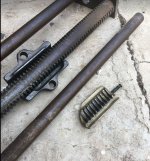
OUTLAW: I agree WD40 or even liquid wrench aren't much, but they are better than nothing if he doesn't have the others in his shop. I actually had a can of liquid wrench in my car that I used to get this pallet rack apart where a few of the sides had rusted together.

i do like Mr. W's method, but I might add some wood or even cloth T shirt in between the chain and the vise's jaw.
 

Attachments

  • IMG_1604.jpg
    IMG_1604.jpg
    155.7 KB · Views: 41

RBarnes

Well-known member
Joined
Mar 2, 2018
Messages
421
Location
Texas
Anyone have the main body of a Wilton 600 bullet vise ? Bought one that works fine but the main body is too beat up for me. The rest of the vise is pretty good, but they abused the body. Anyone have a 600 they are parting out? Please private message me.
 
Last edited:

Bumby

New member
Joined
Apr 9, 2021
Messages
4
Location
San Marcos Texas
Hello all, I just joined the forum today to get advice on my bench vise. It is a Columbian 9 RD quick release "front" vise (mounts on the side of the workbench AOT sitting on top) that I inherited from my great grandad. It looks cool as hell but doesn't work like I need it to. The problem is that when I really crank down on the handle to tighten something, the jaws slip or pop open. So I can only get things snugged down. This is good enough for many jobs, but not all.

I have replaced the "nut" that is bolted to the underside that the threaded shaft engages with, but this did not help.

I'm thinking I need to add material somehow to the OD of the threads on the nut, but I'm not sure.

I searched for this on the forum but couldn't find this exact topic.

Thank you for any help. Bumby
 

Attachments

  • vise.JPG
    vise.JPG
    113.4 KB · Views: 43
  • vise2.JPG
    vise2.JPG
    93.2 KB · Views: 44
  • halfnut.jpg
    halfnut.jpg
    17.7 KB · Views: 40
OP
D

drivesitfar

Well-known member
Joined
Oct 23, 2013
Messages
36,076
Location
Pacific Northwest
RB: this isn't the parts thread either, but good luck in your search cause those big Wiltons usually get saved if at all possible cause they seem to be like gold.

here's a link to the parts thread: https://www.garagejournal.com/forum/showthread.php?t=88292&highlight=vise+parts

after looking for that thread I see that you found it and made a post there too.

good luck

Bumby: first off WELCOME TO GARAGE JOURNAL. I haven't worked on my wood vises so not sure if you are missing a part or if you just have it put together wrong so i'll wait and see if anybody else here can help you.

just an FYI. it's good to take pictures as you take old vises and old tools apart so you'll know how they should go back together is a good practice some of us do almost without thinking about it cause more than a few times in our past we were scratching our heads wondering where something goes.
 

RTM

Well-known member
Joined
May 13, 2019
Messages
13,264
Location
SF Bay Area
. The problem is that when I really crank down on the handle to tighten something, the jaws slip or pop open. So I can only get things snugged down. This is good enough for many jobs, but not all.

I have replaced the "nut" that is bolted to the underside that the threaded shaft engages with, but this did not help.

I'm thinking I need to add material somehow to the OD of the threads on the nut, but I'm not sure.

Where did you get a replacement nut? New or Used?

Or are you referring to the loose piece in your pic? Does anything hold that down to the shaft when engaged, or just gravity? Are you testing the vise while upright, cuz the gravity won’t help much if not upright. ( had a friend work on one while inverted, could not understand why it would not lock). Can you show how the loose piece mounts, is that just a screw, or screw with spring?
 

Bumby

New member
Joined
Apr 9, 2021
Messages
4
Location
San Marcos Texas
RTM and others, thanks for your replies. When I first posted in the General Tool section, Oldsoul suggested maybe the fact that I lubricated the threads was the problem and he appears to be right. I wiped off all the grease and put it back together and it seems to be holding firmly now even when I really crank down on it. Seems obvious now... Check the easy stuff first.

By the way I got the half nut from Milwaukee Tools. Bums.
 
OP
D

drivesitfar

Well-known member
Joined
Oct 23, 2013
Messages
36,076
Location
Pacific Northwest
Bumby: thanks for posting up not only your issue, but the solution after you figured it out. :thumbup:

some of us just learned something else we can apply to our own vices or to pass on information to help others.

ALL: i'm not sure why anybody would want to crank down so hard on a vise's handle to make it look like this, but i'm sure I can straighten it out. it's also hard on the vise's nut and main screw too, but I know some use a vise as a ALL IN ONE FIX ALL TOOL which it's not.

the other day when I posted about it I thought it was a REED 403.5, but at the time I couldn't even recall looking at the name when i was checking it out before handing the owner some cash.

i'm not in a rush to clean it up cause it might not ever hit a bench here, but at some point i'm going to and get that handle at least straighter.

any tips on bending handles cause we don't have enough of that on this thread? pics along with your thoughts is even better if you have time or have some to post.
 

Attachments

  • IMG_1617.jpg
    IMG_1617.jpg
    148.6 KB · Views: 30
  • IMG_1616.jpg
    IMG_1616.jpg
    147.7 KB · Views: 32
  • IMG_1615.jpg
    IMG_1615.jpg
    153.8 KB · Views: 30
  • IMG_1614.jpg
    IMG_1614.jpg
    151.4 KB · Views: 27
  • IMG_1619.jpg
    IMG_1619.jpg
    148.4 KB · Views: 28
  • IMG_1618.jpg
    IMG_1618.jpg
    150.6 KB · Views: 36

ed4banger

Well-known member
Joined
May 28, 2016
Messages
470
Location
Virginia
any tips on bending handles cause we don't have enough of that on this thread? pics along with your thoughts is even better if you have time or have some to post.

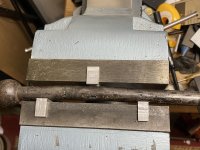
Sometimes its easier to just give it a new handle. When I want to straighten one, use my big Wilton with smooth jaws. Just giving it a good squeeze between the jaws will get it close. For the final straightening, I use small aluminum shims, one on the high point, others a little to each side. Can usually get the handle close enough to straight that is plenty acceptable. This method has its limitations, one being handle size. At some point a hydraulic press will be the answer.
 

Attachments

  • 111.jpg
    111.jpg
    152.8 KB · Views: 39
  • 222.jpg
    222.jpg
    151 KB · Views: 40
  • 333.jpg
    333.jpg
    131.1 KB · Views: 37
Last edited:
OP
D

drivesitfar

Well-known member
Joined
Oct 23, 2013
Messages
36,076
Location
Pacific Northwest
ED: I do have a big press, but I also have a Reed 4c sitting outside and one on my bench inside. while I don't recommend using a good vise as a PRESS since this vise handle is probably pretty soft steel that might work without me having to set up my press that doesn't yet have a permanent spot.

I'm not sure I'd like to mark up my nice copper jaws on my restored 4c or it's new smooth jaws to bend the handle so I might just use my older 4c that has pretty smooth jaws to see how this works.

thanks for the tip and the aluminum shims look like an even better one.
 

Attachments

  • Reed 4c Duwamish River Fab shop (2).jpg
    Reed 4c Duwamish River Fab shop (2).jpg
    145.1 KB · Views: 30
  • Reed 4c Duwamish River Fab shop 3 (2).jpg
    Reed 4c Duwamish River Fab shop 3 (2).jpg
    128.4 KB · Views: 29
  • Reed 4c Duwamish River Fab shop 4 (2).jpg
    Reed 4c Duwamish River Fab shop 4 (2).jpg
    93.9 KB · Views: 30

ALTEREGO

Well-known member
Joined
May 15, 2018
Messages
420
Location
@HOME
While cleaning up this Columbian 3 1/2 that looked in EXCELLENT condition I encountered a (very) stuck dynamic jaw.

I had recently taken apart and cleaned up a bigger Columbian in much worst shape (rust, beat up, etc.) and the slide came out easily.

After cleaning and soaking the vise with my in-house mix of ATF/Break Fluid/Acetone for a while I had to finally use an hydraulic press to take the dynamic jaw apart.

Not sure if it can be appreciated in the picture below but there is a protuberance on the sliding jaw (green arrows), is this a casting defect or is this on purpose (if so, to what effect)?

The jaw gets stuck at the end (see second picture), there are no obvious signs of swelling or damage, I will have to investigate (measure) further but any pointers will be greatly appreciated. I would like to get this one done in a couple weeks tops, before is too hot to be outside for half a year.

c3af7aeab69d754eeadbfb95b296abc1.jpg

9290ce8c8d2d0cbef8ad93ed782e17fa.jpg
 

Attachments

  • c3af7aeab69d754eeadbfb95b296abc1.jpg
    c3af7aeab69d754eeadbfb95b296abc1.jpg
    127.8 KB · Views: 0
  • 9290ce8c8d2d0cbef8ad93ed782e17fa.jpg
    9290ce8c8d2d0cbef8ad93ed782e17fa.jpg
    173.1 KB · Views: 1
Last edited:
To avoid these ads, REGISTER NOW!

LesserSon

Well-known member
Joined
Feb 7, 2016
Messages
5,089
Location
PA USA
ALTEREGO
Have you had the screw out from the slide? (The hub is out of frame in your first pic, but the screw is visible in the slide in the second pic.) Remove it from the slide and try the slide without it, then the screw without the slide, to isolate the cause. Grinding the protuberence on the slide won’t solve the problem if the cause is a burr on the screw.
Does the last pic show the position (fully open) where the hang-up occurs? If so, the protubertence must be over the support shelf at that point. What’s that look like? Is it perfectly flat, or could a slight unevenness near the centerline be catching on the protuberence?
Looking at the protuberence, I would guess it is either a defect or an artifact of rough casting the slide that just wasn’t milled completely away in the finishing process. I can imagine that if it was a tab that bridged the two sides when first cast, it could help prevent warpage during the cooling process.
Regardless of its origin, it is completely useless now, so if you think it may be hanging up on the main nut or the edge of the shelf, file or grind it back a bit. It should not require complete removal to find out whether it is the cause, and I would NOT create a hollow where it is now with excessive removal.
If that isn’t the reason for the hang-up, sighting along the outside corners of the slide and the inside corners of the static tower may reveal some other deformity.
 
Last edited:

RTM

Well-known member
Joined
May 13, 2019
Messages
13,264
Location
SF Bay Area
Or, uninformed opinion HERE, is the lump there to stop you from cranking the dynamic all the way out easily, and dropping it on the floor. Seems your second pic is out at the edge of disaster. Have only had three vises apart, and none had that, so probably just a WAG.
 

ALTEREGO

Well-known member
Joined
May 15, 2018
Messages
420
Location
@HOME
ALTEREGO
Have you had the screw out from the slide? (The hub is out of frame in your first pic, but the screw is visible in the slide in the second pic.) Remove it from the slide and try the slide without it, then the screw without the slide, to isolate the cause. Grinding the protuberence on the slide won’t solve the problem if the cause is a burr on the screw.
Does the last pic show the position (fully open) where the hang-up occurs? If so, the protubertence must be over the support shelf at that point. What’s that look like? Is it perfectly flat, or could a slight unevenness near the centerline be catching on the protuberence?
Looking at the protuberence, I would guess it is either a defect or an artifact of rough casting the slide that just wasn’t milled completely away in the finishing process. I can imagine that if it was a tab that bridged the two sides when first cast, it could help prevent warpage during the cooling process.
Regardless of its origin, it is completely useless now, so if you think it may be hanging up on the main nut or the edge of the shelf, file or grind it back a bit. It should not require complete removal to find out whether it is the cause, and I would NOT create a hollow where it is now with excessive removal.
If that isn’t the reason for the hang-up, sighting along the outside corners of the slide and the inside corners of the static tower may reveal some other deformity.


Hi LesserSon,

The screw is still in, the main nut is out. I’m having a hard time removing the screw on the collar that holds the screw on the jaw but you are right, I have to remove it to isolate the issues. Having said that, the jaw wouldn’t come out when the screw was still threaded in the main nut. Fearing that the issue was with the threads (on the nut or screw), I unscrewed the nut completely and took it out, then I used the hydraulic press.

Yes, the second picture shows the position where the jaw gets stuck. I guess it wouldn’t be a huge deal since the jaw would only need to be opened that far for taking it apart for cleaning/maintenance but... now that I know is there, I just have to fix it.

I’m going to look at the jaw shelf support again and report back. If I remember correctly it was not completely flat, that could certainly be the cause, thank you for the feedback!

Good to know about the protuberance, I thought it was a defect but wanted to be sure. I don’t think is causing any issues but I will double check once I deal with the main issue and file it a little bit only if needed.
I will also check the corners, it was late last night and I didn’t have a flashlight on hand to thoroughly inspect the walls/corners but now that I have some pointers I feel more confident on getting it done before temperatures outside are unbearable.

Thank you for your help!
 

LesserSon

Well-known member
Joined
Feb 7, 2016
Messages
5,089
Location
PA USA
I unscrewed the nut completely and took it out, then I used the hydraulic press.

If you did that, and still needed the press, I think it rules out a problem with the screw.
RTM makes a good point - if it only binds at the point of falling out, it does serve a useful purpose, whether it was intended or not. But now it’s apart, will it go back together without identifying and addressing the issue? I bet not.

I had a vise apart last week that kept binding mid-travel. The slide had been coated with something hard - I don’t know what - that only chipped off with multiple light hammer taps, after I tried scraping and then filing. After taking the time to do all that, AND filing down a ridge inside the tower, it STILL bound! Finally I looked very carefully along the bottom corners of the slide and found I had missed two drips of the same stuff. Now it slides easily. If I had spotted them first, I may have been able to leave the top and sides alone.
You can expend a lot of energy fruitlessly, then the problem turns out to be smaller than you thought. Look it over good before going too far down one road.
 
Last edited:

ALTEREGO

Well-known member
Joined
May 15, 2018
Messages
420
Location
@HOME
Or, uninformed opinion HERE, is the lump there to stop you from cranking the dynamic all the way out easily, and dropping it on the floor. Seems your second pic is out at the edge of disaster. Have only had three vises apart, and none had that, so probably just a WAG.


Hi RMT,

I don’t think the lump is what is causing it to get stuck. The lump is in the middle of the jaw, it would have to grab onto the beginning of the shelf support somehow but that is very unlikely since the support doesn’t go in the jaw and the only areas where they come into contact are flat (I believe). I would double check, thanks for taking the time to help.

In any case, I think is not the worst place for the jaw to get stuck, as you mentioned it does prevent the jaw from being dropped, the problem now is going to be getting it back in without abusing any damage. Once I find the issue I think I will try just make it a little easier for the jaw to come apart but leave some of that grabbing there.
 

ALTEREGO

Well-known member
Joined
May 15, 2018
Messages
420
Location
@HOME
If you did that, and still needed the press, I think it rules out a problem with the screw.
RTM makes a good point - if it only binds at the point of falling out, it does serve a useful purpose, whether it was intended or not. But now it’s apart, will it go back together without identifying and addressing the issue? I bet not.

I had a vise apart last week that kept binding mid-travel. The slide had been coated with something hard - I don’t know what - that only chipped off with multiple light hammer taps, after I tried scraping and then filing. After taking the time to do all that, AND filing down a ridge inside the tower, it STILL bound! Finally I looked very carefully along the bottom corners of the slide and found I had missed two drips of the same stuff. Now it slides easily. If I had spotted them first, I may have been able to leave the top and sides alone.
You can expend a lot of energy fruitlessly, then the problem turns out to be smaller than you thought. Look it over good before going too far down one road.


Hi LesserSon,

You are right, I will clean it up really good (my vise has some grease+dirt compound that is really hard) look at it really good a couple times and then a couple more and hopefully the issue is very small and way to address. Thank you again for your help, I appreciate it!
 

motorhead1977

Well-known member
Joined
Mar 10, 2020
Messages
48
Location
North Georgia
Reed vise question that I'm sure has been asked many times. I have a 403 1/2 R. The static jaw swivels and I can't seem to remove the pin. I have the base off and can get a drift in there to tap on it. It's STUCK! I've put kroil on it and it goes in right away. I'm pretty sure the kroil is going into the channel that the static jaw swivels in. I'm pretty sure that pin is soft and don't really want to beat on it. I would imagine is should just be tapped out easily. Any tips would be greatly appreciated. I can post photos if you'd like to see.
 
OP
D

drivesitfar

Well-known member
Joined
Oct 23, 2013
Messages
36,076
Location
Pacific Northwest
Motor: check Matt’s post last month or about that in this thread cause he had a Parker swivel jaw pin he documented how he removed it. Be patient and I’ve yet to see any that can’t be removed without damaging the vise. Also post up a few before posting always helps.
 

MattGavriloff

Well-known member
Joined
Jan 3, 2021
Messages
290
Location
Escanaba, Mi. South of Canada...
Go to post 8622 for beginning pics and info. Post 8676 for success pictures. About a week of clamp, heat, soak, hammer, repeat and it came loose. Prentiss No 4, DRIVES was close. He's right to guess Parker though, since I have several more of those than Prentiss.
 

ALTEREGO

Well-known member
Joined
May 15, 2018
Messages
420
Location
@HOME
After a light scrubbing my question immediately changed from “where is it getting stuck?” to “how is this even sliding?!!!”

IMG_8640.jpg

I did some cleaning with a file and some sanding, it felt much better to the touch but still needed some “persuasion” to go back in.
IMG_8641.jpg
IMG_8643.jpg

I thought the cleaning would fix it but it is still hard to open/close. Right when I was putting all the tools away before going to bed I noticed a line along the middle of the sliding jaw, on both sides (see pictures below).
More fun to come... tomorrow.

IMG_8644.jpg
IMG_8645.jpg
IMG_8646.jpg
 

PierceA

Well-known member
Joined
Aug 6, 2020
Messages
471
Location
SE Michigan
One way to find the burrs, raised edges, protuberences and other obstructions to some friction or binding is to CLOSE YOUR EYES..
And for some of us, wearing a cheap disposable latex glove also seems to improve our sense of touch.
Use just your finger tips and feel all over the surfaces, the insides and outsides.. ONLY open your eyes when you feel something and then investigate it..

Our sense of touch is usually VERY good. We can feel much more sensitively than we can see. Often I can feel something that takes several tries to see, and often only with multiple repositioning of the light source.

AlterEgo: Those scratches down the sides of the slide to me indicate burrs or stuck in place bits of hard steel that are on the inside of the static jaw's broached opening for the slide.
Bits of hard chips or slag or whatever get on the slide then make it inside.. and get glued in or mechanically jammed into the insides of the static.
I've had to use a chisel and hammer to remove burrs or debris more than once..

Feel your way to finding the obstructions !!

PierceA.
 
Last edited:

PierceA

Well-known member
Joined
Aug 6, 2020
Messages
471
Location
SE Michigan
Drives: straightening your handle.. I've seen you suggest many times that a vise is not a press. So if you ARE going to use your outdoor 4C as a straightening press, let's think about this: WHAT would be the possible damage?
1.Over stressing the nut, it's dovetails or the mainscrew
2. Having an object in the jaws which are 6" or more above the slide, which exerts a huge leverage on the intersection of the jaw tower and the slide. Can you say 'Crack'?
3. The downward force from the dynamic jaw and slide being forced into the static: this exerts a lot of force down on the jaw or chin support: again can you say 'Crack' ?

So: most of the above potential issues or worse disasters can be minimized by doing this:
1. Lubricate the screw threads and the slide and run it in and out a few times to distribute the lubricant. Lubricate under the meatball of the mainscrew.
2. Position the bent vise handle not in the jaws, but at the bottom of the jaw opening, rest the bent handle on the top of the slide, set aluminum or copper blocks such that the steel handle is not against the cast iron/steel of the Reed 4c's jaw towers.

Then bring the jaw towers together gently, and watch the bend disappear. The placement of the aluminum blocks will determine where the bend will get the greatest amount of straightening pressure.. Multiple repositionings will do the job.

OR just use your H-Press from Harbor Freight.. My 20 ton unit has done well for at least 20 years for me.. only occasionally do I have to go into town and use a 60 ton press i have access to. And never for anything to do with a vise..

PierceA.
 

PierceA

Well-known member
Joined
Aug 6, 2020
Messages
471
Location
SE Michigan
Some recent acquisitions:
An American Scale that I might have posted a few weeks ago.

A going out of business auction netted THREE Athol 615s. One on a very nice cast iron stand.. Covered in ancient crusty foam.

And down the street a Reed 214 Pattern Maker's vise

And a CL ad netted a Yost 107 monster. Pretty well used but with some fluffing it turned out to be pretty nice.

PierceA
 

Attachments

  • AtholTHIRD615.jpg
    AtholTHIRD615.jpg
    149.3 KB · Views: 34
  • auctionVises.jpg
    auctionVises.jpg
    79.6 KB · Views: 37
  • Reed214After.jpg
    Reed214After.jpg
    156.3 KB · Views: 37
  • Athol615Orange.jpg
    Athol615Orange.jpg
    150.1 KB · Views: 40
  • Athol615W:Stand.jpg
    Athol615W:Stand.jpg
    130.2 KB · Views: 38
  • Yost107After.jpg
    Yost107After.jpg
    158.1 KB · Views: 35
  • AmericanScaleAfter.jpg
    AmericanScaleAfter.jpg
    151.3 KB · Views: 35
OP
D

drivesitfar

Well-known member
Joined
Oct 23, 2013
Messages
36,076
Location
Pacific Northwest
Alterego: I saw that Lesson and RTM and now PIERCE are helping you so I didn't read all the long posts yesterday, but I will and see how you did and thanks for posting it up cause it sounds like it's something we all might encounter.

Pierce: I thank you very much for your detailed post on using or not using my big old Reed 4c as a press and i'll probably just pull my big old press (not HF) out of storage and use it with some blocking when I get to that little Reed's bent handle.

also that is surely some EYE CANDY to wake up to. sorry to hear another good shop is going out of business though.

I forgot that Athol had those HUGE baseball shaped hubs on their handles like my Rock Islands and Fultons do and even though I own a few I don't think I have any 5 or 6 inch ones where that ball would stand out to me.

i've yet to see an 8 inch wide old USA made vise in person and I haven't owned anything bigger than a 6.5 inch so that 107 Yost would be my biggest and might weigh more than my Reed 4c's. speaking of that how much does it weigh?
 

Attachments

  • big press with stand.jpg
    big press with stand.jpg
    151 KB · Views: 26
  • stand for big press.jpg
    stand for big press.jpg
    128.4 KB · Views: 25
  • big press with stand 1.jpg
    big press with stand 1.jpg
    152.9 KB · Views: 27

ALTEREGO

Well-known member
Joined
May 15, 2018
Messages
420
Location
@HOME
One way to find the burrs, raised edges, protuberences and other obstructions to some friction or binding is to CLOSE YOUR EYES..
And for some of us, wearing a cheap disposable latex glove also seems to improve our sense of touch.
Use just your finger tips and feel all over the surfaces, the insides and outsides.. ONLY open your eyes when you feel something and then investigate it..

Our sense of touch is usually VERY good. We can feel much more sensitively than we can see. Often I can feel something that takes several tries to see, and often only with multiple repositioning of the light source.

AlterEgo: Those scratches down the sides of the slide to me indicate burrs or stuck in place bits of hard steel that are on the inside of the static jaw's broached opening for the slide.
Bits of hard chips or slag or whatever get on the slide then make it inside.. and get glued in or mechanically jammed into the insides of the static.
I've had to use a chisel and hammer to remove burrs or debris more than once..

Feel your way to finding the obstructions !!

PierceA.


Great tips, I wish you were my neighbor!

Thank you for taking the time to help me, I will try to work on it tonight.

Also, great finds! I particularly like the Athol triplets!
 

PierceA

Well-known member
Joined
Aug 6, 2020
Messages
471
Location
SE Michigan
Motorhead1977: If you can make a miniature 'screw-jack' then you might avoid drilling out the taper pin.
I put a heavy piece of steel inside the static, to cover the dovetail-slot for the nut, and provide a good working platform.
Then a socket-head [allen wrench] screw that the socket head will fit into the hole for the bottom of the taper pin. Thread a nut on the screw, then put the screw into a stack of washers or a cut off piece of tubing to take up the excess space from the nut to the floor of the static.
When you hold the screw and unthread the nut, the nut presses down on the bottom of the static and up on the end of the taper pin.
Put a good amount of pressure on the nut/screw. Then use heat to warm up the pin, the surrounding metal. Often the pin is not stuck in the swivel jaw, but the static jaw body. So use heat aimed at the underside of the static where the jack-screw is pushing on the pin.
With steady pressure, and heating, letting cool, then heating again, eventually the pin will move.
On a couple of these pins I did have to drill and tap the top 1" of the pin, and put a good stud into the pin. With the inside of the static empty, I took the dynamic and put it in the static backwards, or from the rear. So that the two jaw towers were facing the same way but 8"-12" apart. I put a piece of strong steel across the top of the two jaws and you have a bridge over the drilled pin and the stud.

Thread a nut and washers onto the stud, the stud through the 'bridge' and into the pin. And tighten the nut..
This pulling method works better because it tends to stretch the pin slightly. When you push the pin, from underneath, it makes the pin swell slightly.. and with the pin being so tight and stuck, this slight bit of stretching does the trick..
Tighten the nut, heat and let cool, tighten again and reheat.. It will give up and pull out with a few heating cycles.

PierceA
 
Last edited:

wbarnes1001

Member
Joined
Jan 3, 2020
Messages
17
Location
Maryland
I posted this in the wrong vise forum I think a couple of days ago, but I think the post belongs here. I bought this 974.5 Parker Vise (4.5 “ jaws) on Craigslist for $150 over a year ago (WWII era vise). I chose it for the pristine condition of the jaws primarily, but the entire vise is in excellent condition. It looks like it has hardly been used.

The seller shipped it in a box poorly packaged and one of the swivel base mounting ears broke off on the way significantly stalling my restoration project. After that experience, I am now of the opinion that the only way to safely ship these heavy vises is by creating a 2X4 box frame to bolt it to for shipping. I knew a welder that attempted to repair it for me, but the ear was oriented incorrectly in the end. I was majorly bummed and started looking online (FB Marketplace, eBay, and Craigslist) for a swivel base replacement. Finally, after many months, I found an older Parker 205 swivel base that perfectly matched the dimensions of the 974.5 on eBay and bought it immediately. KMScott, you may remember I spoke to you about a year ago trying to find a replacement.

So, how did I restore it? In my excitement to proceed, I foolishly forgot to take the before pictures, so I apologize as that was a major oversight. The vise was significantly patinaed and somewhat surface rusted. I soaked the vice and parts in Simple Green for two days and used a wire brush, wire wheel on a bench lathe, and a wire cup on an angle grinder afterwards. I worked the tighter areas with a Dremel tool and a small wire wheel attachment. Afterward, I rinsed all the parts in very hot water (to clean and facilitate drying), dried them with a towel, and immediately moved the pieces to sit next to the heater vents in my house in the winter. Then I added a small length of brass pipe from McMaster-Carr to tighten up the spindle action in the dynamic (movable) jaw piece. I slightly honed the inside of the brass with the Dremel and a barrel stone attachment to custom fit the spindle. I masked it and finished the paint job (3 coats) two days ago. If you are old enough like I am, you might recognize the color. It is a 1969 Pontiac Firebird engine block spray paint (1 can from Hirsch). I am 50 years old, but I remember seeing it in the engine bay of the 69’ Firebirds in the 80s. I chose to leave the spindle collar in bare metal for contrast. Do you like the overall result?

My daughter is an artist and she is going to thinly letter the wording on both sides of the static jaw unit with black lettering paint. After she is finished, I will apply Mobile 1 synthetic grease where needed, finish the assembly, and mount it to my solid bamboo work bench. I have a metal protectant that I will add to the bare metal areas periodically to inhibit rust. I will upload more pictures when it is done.

I am a retired Air Force veteran and my grandfather served in WWII. These Parker vises were used a lot in the services during that time. It is great to bring the history back to life with a good restoration and it is something that I will pass down to my son in time. The vise will be used whenever needed, but hammer blows on work pieces will be done with caution!
 

wbarnes1001

Member
Joined
Jan 3, 2020
Messages
17
Location
Maryland
Sorry, pics didn't take the first time.
 

Attachments

  • Parker Vise Wire Brushed, 3.jpg
    Parker Vise Wire Brushed, 3.jpg
    47.9 KB · Views: 31
  • Parker Vise Wire Brushed, 2.jpg
    Parker Vise Wire Brushed, 2.jpg
    63.1 KB · Views: 33
  • Parker Vise Restored, 1.jpg
    Parker Vise Restored, 1.jpg
    87.3 KB · Views: 35
  • Parker Vise Restored, 2.jpg
    Parker Vise Restored, 2.jpg
    86.6 KB · Views: 35
  • Parker Vise Wire Brushed, 1.jpg
    Parker Vise Wire Brushed, 1.jpg
    65.3 KB · Views: 34
  • Parker Vise Restored, 3.jpg
    Parker Vise Restored, 3.jpg
    78.9 KB · Views: 34
OP
D

drivesitfar

Well-known member
Joined
Oct 23, 2013
Messages
36,076
Location
Pacific Northwest
Pierce: thanks again for taking time to write up that pin removal process!!

WB: you were fine posting it on the other vise thread and thanks for coming over here to give us your story too. Can you edit or make another post and add pics too? Again welcome to GJ!!

Sorry i was too quick and just saw you posted pics.

Well done!!
 
To avoid these ads, REGISTER NOW!
Top Bottom