To avoid these ads, REGISTER NOW!

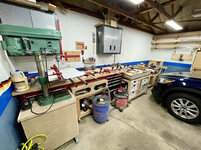
Between 265 & 485 SQ/FT Nick's Two-Car Detached Vdub Garage

Workspaces sized between 265 and 485 squarefeet.
OP
N

nicholam77

Well-known member
Joined
Dec 18, 2016
Messages
2,671
Location
Minneapolis, MN
Here's some more filler content instead of actual projects :ROFLMAO:

I've been insanely busy on a project at work pulling 12-15 hour days. And Memorial Day weekend we went to Disney World with my wife's parents. It was nuts. I'm dead tired.

After another intense work week this week, I surfaced for air this morning and decided to go to MN Cars + Coffee, back for the first time in over a year, since Covid began.

It was packed and there was all sorts of amazing stuff to look at. Just a few samples:

IMG-2584.jpg

IMG-2563.jpg


IMG-2568.jpg

Yeah that's a Bugatti Divo.

IMG-2571.jpg

IMG-2577.jpg

IMG-2580.jpg

And yeah I finally cleaned up the GTI and parked in the "overflow" lot.

IMG-2560.jpg

IMG-2592.jpg

I think next month I'm going to try and bring my daughter. I really missed this event last summer, so I'm glad it's back!!

It was humid and 98° F today, so not much to get done except for sweat. We took my daughter to a "splash pad" with her little cousin and that was some good fun.

IMG-2601.jpg

I'm hoping if my work calms down in a couple weeks I can get back to my dad's cabinet project a bit.

🍻
 
To avoid these ads, REGISTER NOW!

Mr. Roboto

Well-known member
Joined
Dec 11, 2012
Messages
2,160
Location
New Hampshire
Sure feels good to get out again, doesn't it?! We (as I'm sure you guys are as well) are trying to make the most of our last summer as a family of 3 before our next girl arrives. We have one of those splash pads in our town as well, and with temps being 95+ here all week, a trip might be in order!
 
OP
N

nicholam77

Well-known member
Joined
Dec 18, 2016
Messages
2,671
Location
Minneapolis, MN
Sure feels good to get out again, doesn't it?! We (as I'm sure you guys are as well) are trying to make the most of our last summer as a family of 3 before our next girl arrives. We have one of those splash pads in our town as well, and with temps being 95+ here all week, a trip might be in order!
100%. I'm definitely an introvert in real life, but after a year of work-from-home, nothing to do, trapped inside all winter... I'm pretty much craving "normal" things to get out of the house and do at this point. Fortunately things are finally coming back in time for summer!

Before my first kid I think the rush leading up to it was about how many house and shop projects I could cram in before my "free time" was taken away. :rolleyes: (*rolls eyes at past self*). Leading up to the 2nd one my only goal has been to have FUN, and spend quality time with the wife and existing kid before the new one gets here. My job and my dad's project are trying to throw a wrench in it at times but I have ~4 weekends left to make the most of!!

Highly recommend the splash pad, it was a blast.
 

MrPink

Well-known member
Joined
Feb 16, 2021
Messages
1,178
Location
Bridgeport,MI
We try and take my daughter to the local splash pad a couple times a summer. My MIL just got a pool though so that I know will get its use by my daughter.
 
OP
N

nicholam77

Well-known member
Joined
Dec 18, 2016
Messages
2,671
Location
Minneapolis, MN
We try and take my daughter to the local splash pad a couple times a summer. My MIL just got a pool though so that I know will get its use by my daughter.
My MIL got one recently, too. Inflatable with unicorn that sprays when you hook a hose up. Good stuff.

____________________________________​


I finally got some work in. My dad and I worked from 8-11pm tonight in the 99° weather.

Not pictured, but we completed the shelf pinning on the shallower two cabinets.

I wanted to put one of the boxes together as a test and to feel like we got somewhere, so we cut the joinery for just one.

And for that we used... some tasty biscuits!!! Smothered in gravy, er... Titebond II.

IMG-2652.jpg

IMG-2653.jpg

Oh, but it doesn't stop there! I had to also use the mighty pocket screw! DOUBLE JOINERY.

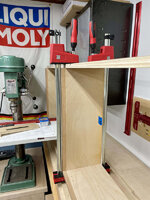
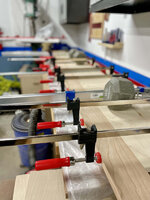
During the glue up I gave my new parallel clamps a try:

IMG-2654.jpg

Positive impressions so far.

IMG-2656.jpg

The awesome thing about the pocket screws is they clamp the joint tight while the glue dries, so I only need the clamps to hold the joint while the screws are driven. Then it's on to the next one and the clamps can be reused.

IMG-2655.jpg

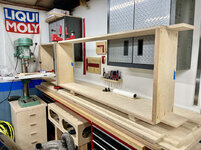
Here's where we ended up for the night. A mostly assembled carcass (sans the back). It's always cool to see it start to take shape. As long as I don't fudge up the doors I think they are going to turn out pretty great.

🍻
 
OP
N

nicholam77

Well-known member
Joined
Dec 18, 2016
Messages
2,671
Location
Minneapolis, MN
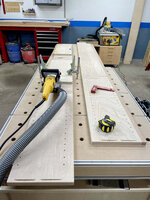
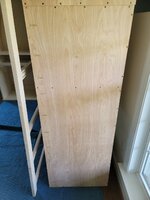
This morning I got the 1/4" ply back fastened on:

IMG-2686.jpg


Unlike my living room built ins where I fitted the back in a groove in front of the nailer strips, I decided to make it easy on myself for this build and the back is just stapled in place. I cut it a little oversized and then flush trim with a router for a nice flush fit.

My dad wanted the nailer strips on the inside for some reason, so that's what we're doing. It's a pantry and will be full of supplies, so you won't really see them, anyways.

He swung by with his truck and we got it loaded up to take to his house.


IMG-2690.jpg

Trying to offload them as they get finished and free up some space 😄

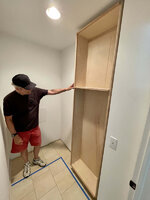
I helped him carry it up to where it's going to go and we held it in place:

IMG-2692.jpg

Of course it needs final sanding touches, a filler strip on the right, a filler strip on the top, polyurethane finish, doors, 3x more cabinets... ok holy **** there is a lot left to do. But the first "box" is looking awesome and I'm happy with how it came out.
 
OP
N

nicholam77

Well-known member
Joined
Dec 18, 2016
Messages
2,671
Location
Minneapolis, MN
Nice progress Nick (y) That plywood looks super nice!
Thanks T! It's just big box store / Home Depot "cabinet grade" plywood. My dad's picking up the materials tab on this one since it's his project, but I steered him in that direction. I'd love to use true baltic birch, but it's simply too expensive, especially for a bigger project like this! The "A" side veneer does look pretty good, though, and no one will ever see the back or plys on this build so it's perfect!
 

jar944

Well-known member
Joined
Jul 26, 2010
Messages
5,938
Location
Northern VA
Thanks T! It's just big box store / Home Depot "cabinet grade" plywood. My dad's picking up the materials tab on this one since it's his project, but I steered him in that direction. I'd love to use true baltic birch, but it's simply too expensive, especially for a bigger project like this! The "A" side veneer does look pretty good, though, and no one will ever see the back or plys on this build so it's perfect!
HD is birch or maple around here is usually c3 columbia purebond. Relatively decent for the price. It does take looking through to cull the less than stellar sheets.
 

Trapps

ALLIANCE MEMBER
Joined
Feb 10, 2017
Messages
2,003
Location
The Detroit Zoo
HD is birch or maple around here is usually c3 columbia purebond. Relatively decent for the price. It does take looking through to cull the less than stellar sheets.
LOL. I am the guy whole will look through a whole stack of <insert lumber here> because A) I like working with as straight and unblemished as possible, and B) the junk has the same price as the best pieces. I usually put everything back, but once in a long while, after looking at 30 2x and finding all junk, I get frustrated and simply leave. It's not the store employees, it is the buyers and suppliers. When 70% of a stack of 'Premium' is as crooked as a rocking chair, I get pissed. Sheet goods are usually OK, but I admit to looking for a grain pattern that doesn't bug me. Lately I've noticed Menards having slightly better quality than Home Depot and MUCH better quality than my local Lowes.
 
OP
N

nicholam77

Well-known member
Joined
Dec 18, 2016
Messages
2,671
Location
Minneapolis, MN
@jar944 yep that's it the C3 Columbia Purebond birch or maple. For me it used to be $55 a sheet for 3/4, now it's up to $66 with current pricing. Totally agree with you and @Trapps, some batches are great, some crappy. I definitely pull them all off the shelf -- for my dad's project we had to go to two Menards and three different Home Depots before we found acceptable stock. It can be a pain in the @$$ but I don't have a baltic birch supplier and don't want to pay $150 a sheet or whatever ungodly price it might cost anyways. It's funny in the stacks they are literally sequential from the same tree... if the top of the stack has a **** veneer it's likely it will be carried through all the way down.

I hate warped plywood and it's something I fight a lot with my non-climate-controlled shop and the humidity swings we get in MN.

Where is C&C held now? Obviously not at the Autoplex anymore.

Hey! Yeah I kind of miss when it was at the AutoMotorPlex! Horrible parking but cool venue. I think either the MotorPlex or the city of Chanhassen got tired of the huge crowds and required policing efforts, so 4+ years ago they moved it to Canterbury Park. Then it got moved to Mystic Lake Casino for a year, then got cancelled for Covid last summer, and now it's back at Canterbury Park. Just in the parking lot... but it's huge, so can fit a ton of cars and people!

FWIW there's a new even bigger AutoMotorPlex in Medina that does their own "Caffeine and Octane" copycat show on the 2nd Saturday of each month. Haven't been to one of those yet.
 

jar944

Well-known member
Joined
Jul 26, 2010
Messages
5,938
Location
Northern VA
@Trapps, some batches are great, some crappy. I definitely pull them all off the shelf -- for my dad's project we had to go to two Menards and three different Home Depots before we found acceptable stock. It can be a pain in the @$$ but I don't have a baltic birch supplier and don't want to pay $150 a sheet or whatever ungodly price it might cost anyways. It's funny in the stacks they are literally sequential from the same tree... if the top of the stack has a **** veneer it's likely it will be carried through all the way down.

I hate warped plywood and it's something I fight a lot with my non-climate-controlled shop and the humidity swings we get in MN.
Baltic birch is unnecessary expensive and rather heavy for cabinets. It also requires more prep as it's not sanded nearly to the degree of regular veneer core ply. IMHO you are farther ahead with what you used.

I typically build the sides out of 1/2" plywood and uppers are all 1/2" (except for shelves) lowers and full height boxes are 1/2 for the sides and 3/4 for the deck. Always separate ladder kicks.
 
OP
N

nicholam77

Well-known member
Joined
Dec 18, 2016
Messages
2,671
Location
Minneapolis, MN
Baltic birch is unnecessary expensive and rather heavy for cabinets. It also requires more prep as it's not sanded nearly to the degree of regular veneer core ply. IMHO you are farther ahead with what you used.

I typically build the sides out of 1/2" plywood and uppers are all 1/2" (except for shelves) lowers and full height boxes are 1/2 for the sides and 3/4 for the deck. Always separate ladder kicks.
Hmmm, good point, I didn't even think about the weight. The Walnut ply I used on my built in doors was the first time I used real "nice" hardwood plywood with 13 plys, no voids, etc. I think it spoiled me. Stayed dead flat the whole time and easy to work with. But yes, expensive, and now that you mention it they were heavy!

That is very interesting you do the sides out of 1/2", I always enjoy your experience / tips. Stuff you can't always learn from YouTube. Due to the size of these boxes and the fact they are frameless I'm still glad I went 3/4" all around but that's something I'll keep in mind for the next one!
 
OP
N

nicholam77

Well-known member
Joined
Dec 18, 2016
Messages
2,671
Location
Minneapolis, MN
Another late night session yesterday. My dad is out of town but since I know what I'm doing on this part (just rinse and repeat) I decided to keep at it solo.


IMG-2707.jpg

After consulting the plans and making sure I was grabbing the right pieces, I did the joinery and assembly for a second cabinet. I feel like my schtick doesn't need captioning anymore since I've done it so much, but here's a little pictorial anyways...

IMG-2706.jpg

IMG-2708.jpg

IMG-2710.jpg

IMG-2711.jpg

This mid-panel came out squarer than the first one. The one thing about biscuits (at least with my DeWalt joiner), is there is some play in the width of the slot. So assembly still requires some careful positioning and clamping to achieve a square joint. For some reason I've always used Ryobi biscuits, I don't know if the DeWalt brand would be any tighter of a fit or not. I do love my biscuit joiner, but it doesn't quite index with the precision of a dowel or a domino. Which can be both good and bad.

IMG-2712.jpg

After that I continued the lower shelf pins on one of the deeper cabinets. I'm ready for this shelf pin nightmare to be over haha. At this point I have about zero faith the shelves won't rock, but I guess we'll just have to shim them with tape and not move them around a lot. Once clamped in place, drilling the holes with my jig is so fast, but the setup is just too involved and not accurate enough.

Next time I have a large build like this I definitely will be looking into something else. I want something router-based, and my eyes are either on the Woodpecker jig or possibly trying to piecemeal / hack some of the LR32 components.
 

jar944

Well-known member
Joined
Jul 26, 2010
Messages
5,938
Location
Northern VA
That is very interesting you do the sides out of 1/2", I always enjoy your experience / tips. Stuff you can't always learn from YouTube. Due to the size of these boxes and the fact they are frameless I'm still glad I went 3/4" all around but that's something I'll keep in mind for the next one!
I didn't even connect you were building frameless. 3/4 all the way around on those

IMG-2711.jpg

This mid-panel came out squarer than the first one. The one thing about biscuits (at least with my DeWalt joiner), is there is some play in the width of the slot. So assembly still requires some careful positioning and clamping to achieve a square joint.
The cabinet backs should take care of any minor out of square ness (assuming its racked consistently across the cabinet.) I went back to dados and rebates for my boxes. No need for clamps, just screws through the outside. Lots of ways to skin a cat though.
 
Last edited:
OP
N

nicholam77

Well-known member
Joined
Dec 18, 2016
Messages
2,671
Location
Minneapolis, MN
@jar944 now I'm wondering why I'm doing frameless, haha. My dad drew it up that way and I didn't question it because that's all I've built. But the doors will be rail and stile, not flat panel. Full overlay, but I guess there will be a seam where the cabinets join side-to-side.

¯\_(ツ)_/¯

2nd box was almost perfectly square. 1st one the ends were good, just the mid-panel was slightly off. I blame the slop of the biscuits. Both had very slight racking that was corrected with the backs like you said.

I should try dados and rabbets sometime. I just haven't taken the time to make jigs to do it accurately with the router, so I always grab the biscuit joiner out of laziness.
 

Bakafish

Well-known member
Joined
Feb 7, 2017
Messages
477
Location
Tokyo
The thing about dados and rabbets is that they are pretty much irreversible. If I screw up a domino location by a few mm I can usually just put a new set of slightly offset slots and the width of the panel is enough to cover up the mistake. I know that these sort of errors shouldn't happen in the first place, but they do, and not having to scrap my (expensive BB) work or settle for something off a few mm is not worth it. So many times during the dry fit up a unforeseen issue or clearance is discovered that I can workaround, that would have required a complete rebuild had I done dados and rabbets. It also complicates all the measurements as you need to account for the dado/rabbet depth which is hard to keep consistent when you don't have a machine dedicated to making them. For me, simplicity and resilience beats the additional strength gained by a slotted join, the domino has been a good trade off but I could see dowels or biscuits being just as good in the right hands.

The slop in biscuits is actually a feature, they give some play when doing your initial assembly, but when they fully absorb the glue and swell up they are going to hold in place really well. Squaring and clamping is important with them, a domino or slot just front loads that alignment with less ability to compensate. Using pocket screws to "clamp" works only if you are really careful to prevent them from pulling things out of alignment. A domino (by itself) or virtually any other free tenon will not constrain a pocket screw from pulling a joint out of whack because of the angular force they generate, so you need to clamp the **** out of everything first anyway. They are a deceptively simple solution that actually make things a lot worse if you don't watch them carefully. So on the positive side, a rabbet or dado with a perpendicular screw isn't going to move at all, super strong and no unexpected skewing, but you've got to get those cuts perfect the first time.
 

jar944

Well-known member
Joined
Jul 26, 2010
Messages
5,938
Location
Northern VA
@jar944 now I'm wondering why I'm doing frameless, haha. My dad drew it up that way and I didn't question it because that's all I've built. But the doors will be rail and stile, not flat panel. Full overlay, but I guess there will be a seam where the cabinets join side-to-side.

¯\_(ツ)_/¯

2nd box was almost perfectly square. 1st one the ends were good, just the mid-panel was slightly off. I blame the slop of the biscuits. Both had very slight racking that was corrected with the backs like you said.

I should try dados and rabbets sometime. I just haven't taken the time to make jigs to do it accurately with the router, so I always grab the biscuit joiner out of laziness.

I've done biscuits and dados / rabbits and find the dados / rabbits faster to cut and assemble compared to the other methods while also being self squaring. I'll use biscuits for face frame attachment when I can't use a pocket hole (typically a mid cabinet partition on uppers) they are all the same depth (.125") regardless of plywood thickness. It allows consistency with all the measurements.

Though rabbits are really fast with my setup
 

samb

Well-known member
Joined
Apr 15, 2011
Messages
124
Location
UK
Just read your whole thread Nick, really nice work- dab hand at woodwork for sure!
 
To avoid these ads, REGISTER NOW!

Bakafish

Well-known member
Joined
Feb 7, 2017
Messages
477
Location
Tokyo
I've done biscuits and dados / rabbits and find the dados / rabbits faster to cut and assemble compared to the other methods while also being self squaring. I'll use biscuits for face frame attachment when I can't use a pocket hole (typically a mid cabinet partition on uppers) they are all the same depth (.125") regardless of plywood thickness. It allows consistency with all the measurements.

Though rabbits are really fast with my setup
I hear you, if I had a precision cabinet saw with a nice dado stack and a big garage I would be a lot more open to the technique. My router table could be contorted to work with a lot of effort, but the whole procedure requires manipulating large panels while cutting them which ***** for a single person in a constrained space. It is always easier to fix what I'm working on and move the tool, not the work. As a professional solution it makes sense, but for amateurs like me I feel we are much better served by more forgiving and less demanding approaches like dominoes, dowels and biscuits. Even pocket screws can help, although I don't feel like they are a solution to quality box cabinets on their own, some form of tenon needs to be involved in any non-trivial design.
 
OP
N

nicholam77

Well-known member
Joined
Dec 18, 2016
Messages
2,671
Location
Minneapolis, MN
Just read your whole thread Nick, really nice work- dab hand at woodwork for sure!
Thanks!! 🍻

A domino (by itself) or virtually any other free tenon will not constrain a pocket screw from pulling a joint out of whack because of the angular force they generate, so you need to clamp the **** out of everything first anyway. They are a deceptively simple solution that actually make things a lot worse if you don't watch them carefully.

Oh I do clamp the :poop: out of them. I've probably pictured it before, but I use some plastic 90° squares clamped on both sides of the joint which prevent the panel from moving inward outward. And then for good measure I clamp the whole joint tight, either with F-clamps, or now with the parallel clamps. I've used this method quite a bit and it's worked pretty well for me. I do like the double approach, and I agree that neither pocket screws nor biscuits on their own are ideal. But they sort of work together. At least for me. Like you said I don't have a big shop or a sweet setup for rabbets like @jar944, I've often found the precision of dowels to work against me... so this is where I've landed.

I've done biscuits and dados / rabbits and find the dados / rabbits faster to cut and assemble compared to the other methods while also being self squaring.

Well damn I can see why that works well for you, that's a pretty sweet machine! I've never done a comparison but I would guess it would take me more time to layout and setup dados than it would to actually do the biscuit-ing and pocket hole-ing.


________________________________________________________________________

My dad and I got another cabinet box finished this weekend.

giphy.gif

IMG-2721.jpg

IMG-2719.jpg

It was another late night session.

IMG-2720.jpg

If you're keeping score, this is 3 boxes done, 1 to go.

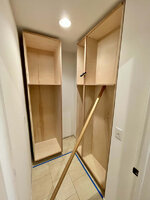
I also helped him get it to their house and set in place.

IMG-2736.jpg

Just the corner one to build now. All these will have to come out and get finished and the corner will go in first.

I'm like 99% sure I'm going to run out of time on this project before my 2nd baby arrives. Actually I know I am. But my goal is to try and finish the boxes at least so my dad can get them finished and installed. And then the doors will have to be postponed I think.

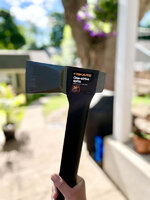
Speaking of kids, I hope all the dads on this board had a great Father's Day. Myself, I just spent it with my daughter as my wife was working all weekend (hospital hours). We're all sick with a bad cold, so... just tried to make the best of it. My wife did completely surprise me with this axe as a present:

IMG-2751.jpg

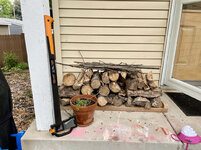
It's summer here now, but in the past I've probably grumbled about not having an axe to chop firewood haha. It's a bit different than @bdbecker 's **** wooden handle restorations, as it has a hollow fiberglass composite handle. I don't know much about axes or this brand but she picked it out for me. I split a few logs with it and it's awesome. Now I need to work on my technique lol.

IMG-2748.jpg


We finally have a cooler day here, so if inspiration "strikes", I might attempt the first fire with the new built ins.
 

jar944

Well-known member
Joined
Jul 26, 2010
Messages
5,938
Location
Northern VA
My dad and I got another cabinet box finished this weekend.

giphy.gif

IMG-2721.jpg
Just a observation, but if the sides will be hidden you can skip the clamps and just run screws (predrilled and countersunk) into the partitions / top / bottom to hold it all together.
20210621_115948.jpg

Also regarding the pocket hole pulling the joint. From my own experience it's worse with the Kreg/Ritter pocket drilled holes compared to the Castle routed slots. It's also worse with glue added vs dry assembly and It's also worse with a impact driver vs a drill with a clutch.
 
Last edited:

T-handle

Well-known member
Joined
Jun 17, 2019
Messages
440
Location
Northern Ostrobothnia Finland
Great progress again Nick! Happy late Father's day too, exiting times with the new baby coming:)

That's a nice present from your wife. Fiskars is one of the top brand tools made in Finland. I think the Fiskars scissors and axes are manufactured here still. The Fiskars was founded 1649 and it's our oldest company.
Good stuff there, I've had that kind of axe for twenty years and it's still going strong (y) You need a strong splitting log about the hight of you knees or little over and the splitting is nice and easy, good workout for the back too. Your wife have definitely a good taste of tools;)
 
OP
N

nicholam77

Well-known member
Joined
Dec 18, 2016
Messages
2,671
Location
Minneapolis, MN
Also regarding the pocket hole pulling the joint. From my own experience it's worse with the Kreg/Ritter pocket drilled holes compared to the Castle routed slots. It's also worse with glue added vs dry assembly and It's also worse with a impact driver vs a drill with a clutch.

You're right I could have done screws from the sides on these. There is something I like about the "jig" aspect of pocket holes, though. It's kind of mindless. I don't have to hold the drill level, countersink, worry about splitting the plywood, etc. And the dust collection is excellent. All positives in my book.

To your other point about the pesky "wandering", the driver I use for pocket screws is always the Bosch PS21. It's a small 12v driver with clutch and variable speed trigger. Works perfectly to gently drive and not overdo it. That's the other thing I like about combining pocket holes and biscuits -- I tend to only put glue on the biscuits and not the whole joint. I figure with the screws that should be plenty to hold it tight. As mentioned I also use plenty of clamps, but minimizing the glue is part of the strategy, too.
Nice work, as always! I'm sure dad appreciates your help. At least you'll have a great reason to tell him no once baby #2 arrives!

Thanks man! Yes, dad is loving this project I think. I knew it was over-ambitious from the start, he has come to terms with that and understands we'll have to pick it up later. That's what he gets for hiring free labor :LOL:. Although I'm guessing a custom cabinet maker would charge an astronomical amount to build something like this in this day and age, so... pros and cons haha.
Great progress again Nick! Happy late Father's day too, exiting times with the new baby coming:)

That's a nice present from your wife. Fiskars is one of the top brand tools made in Finland. I think the Fiskars scissors and axes are manufactured here still. The Fiskars was founded 1649 and it's our oldest company.
Good stuff there, I've had that kind of axe for twenty years and it's still going strong (y) You need a strong splitting log about the hight of you knees or little over and the splitting is nice and easy, good workout for the back too. Your wife have definitely a good taste of tools;)

Thanks @T-handle , happy late Father's Day to you, too!

That is very cool about the Fiskars company. I did some reading and found the same as you've said. I now know Fiskars is Finnish, but I have a fondness for Scandinavian design and products in general as my heritage is 100% Swedish. Born and raised in the U.S. of course, but great-grandparents came over from Sweden originally, and I still identify with that to a degree. I haven't showed the axe to my dad yet but he loves Viking history and stuff like that haha, so I'm sure he'll find it interesting, even though it's more of a modern high-tech product. I'm also fond of Scandinavian furniture and lighting design, so why not throw tools and axes in there, too. :ROFLMAO:

I'll have to look into the chopping block situation, and thanks for the tips. Right now I have no good place to do splitting that's not the grass or gardens haha, so in addition to the height it would be nice to have a dedicated spot to do it.

Cheers!
 

bdbecker

ALLIANCE MEMBER
Joined
Nov 18, 2015
Messages
5,574
Location
Iowa
You've got a keeper Nick - your wife picked out a great splitting axe for you! Fiskars makes great quality tools. I carry an X7 in my backpack when hiking or hunting. Pretty much all of our garden tools are Fiskars as well.
 
OP
N

nicholam77

Well-known member
Joined
Dec 18, 2016
Messages
2,671
Location
Minneapolis, MN
You've got a keeper Nick - your wife picked out a great splitting axe for you! Fiskars makes great quality tools. I carry an X7 in my backpack when hiking or hunting. Pretty much all of our garden tools are Fiskars as well.
Thanks Brad. It's kind of odd timing with it being summer and all, but I think I need to upgrade my pathetic little woodpile for next winter. I've already been eyeballing that X7 😄
 
OP
N

nicholam77

Well-known member
Joined
Dec 18, 2016
Messages
2,671
Location
Minneapolis, MN
MFT Flip Stop

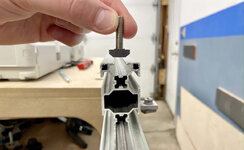
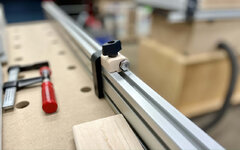
I worked on something other than the pantry cabinets today. I was fortunate enough to send the little one to Grandma's for part of the day. Not enough to start something major, but I felt like tinkering. I've been meaning to add a flip stop on my MFT crosscut fence for forever. In fact, I ordered these special T-nuts that fit the extrusion when I bought it, with that in mind:

IMG-2816.jpg

And this is where sort of I messed up. I used a 30x60 extrusion from Misumi Engineering for my fence. Mostly because The Alabama Woodworker featured this on his YouTube channel, and laid out the part numbers nice and easy. But... every bit of me wishes I had gone with 20x40. The Festool "Flag Stop" and other options by Benchdogs, as well as free 3D printed options, all fit on this 20x40 profile. My 30x60... not so much. Which means I have to make my own. Not a huge deal, but a somewhat involved project and I'd rather just be able to by a $15-20 stop I know will fit well and work well.

I've searched high and low for something I could purchase, and make work, including on eBay, Banggood, Amazon, etc. Because the profile is 60mm tall, the stops were often too short.

Finally, I found this option from Peachtree Woodworking:

IMG-2807.jpg

It's not metric, but with a height of 2 5/16", it was just about a perfect match for the 60mm height of my fence. All metal parts, nice and thick aluminum, and was only $15 which is actually cheaper than most stops I could find. I took a gamble on if the rest of it would fit.

IMG-2812.jpg

And... that's a no. The flip stop part would not lay flat, and the nut would not tighten securely. Once I discovered that, it sat around in the garage for months. Until today.

IMG-2813.jpg

I figured I could make my own block that attaches to the fence, and use the purchased flip stop arm.

IMG-2786.jpg

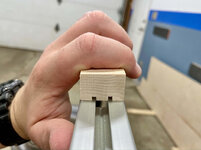
I took a quick measurement of the top slot and transferred it to a piece of 3/4 maple scrap.

IMG-2787.jpg

Ran through the table saw and did a check.

IMG-2789.jpg

Fine tuned until the fit was just a hair loose.

Then gave the top edges a round over, because hey, I take my flip stops seriously. I've never liked starting on the bearing with small pieces like this, so I lined up the bearing with the router table fence.

IMG-2795.jpg

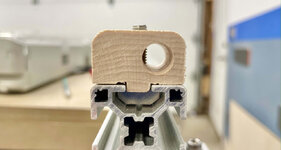
Did some goofy math and measuring and drilled the two holes necessary.

IMG-2799.jpg

IMG-2800.jpg

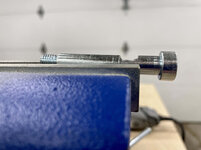
And... the threads from the vertical bolt interfere with the horizontal bolt:

IMG-2817.jpg

Hmmmm. Time to get janky with it. Digging through my bins to see if I had something that could work.

IMG-2803.jpg

I decided instead of the 3/8 bolt that came with it, I could use a slightly less 5/16 bolt and skew it to the left of the interfering bolt. The flip stop would be a little loose on the 5/16 bolt, but I figured once the whole thing was tightened it would be fine??

IMG-2819.jpg

I'm sure the suspense is killing you. Will it work? Won't it work? Did he just waste the last 3 hours?

Well, I'm not sure, because I don't have an M6 nut to tighten it to the extrusion 😂

But, my guess is it should be fine. Here it is "mocked up" with an imperial knob.

IMG-2826.jpg

IMG-2825.jpg

I made 3x extra of the maple blocks, so if it works out I can just order some more flip stops.
 

TomGW

Well-known member
Joined
Apr 14, 2014
Messages
48
Just grind a flat spot in the middle of the original, horizonal bolt, sufficient to clear the vertical bolt. After all, the horizontal bolt doesn't need to rotate to tighten. The hex key head is just to hold it while you tension with the nut at the flip stop side. Obviously the horizontal bolt will have to be inserted first, but that's not an issue.
 
OP
N

nicholam77

Well-known member
Joined
Dec 18, 2016
Messages
2,671
Location
Minneapolis, MN
Just grind a flat spot in the middle of the original, horizonal bolt, sufficient to clear the vertical bolt. After all, the horizontal bolt doesn't need to rotate to tighten. The hex key head is just to hold it while you tension with the nut at the flip stop side. Obviously the horizontal bolt will have to be inserted first, but that's not an issue.
Ha!! Too funny I came to this exact conclusion the other night! I was going to post it up once I'd completed it, just haven't found the time. I only have a Dremel but it should do the job. My brain must not have been working 100%, sometimes you just need to sleep on it for a bit :)

In any case I'm totally tracking with you and I appreciate the suggestion! I think using the original bolt is going to be much better, tighter tolerances and make it feel more solid.
 

loganb

ALLIANCE MEMBER
Joined
Dec 29, 2011
Messages
5,575
Location
Omaha, NE
Trying To catch up on threads whole hanging in the hospital...awesome progress sir! Gonna have boxes down pat soon...want to help put mine together for my closet organizers I most definitely did not get done before kiddo showed up? Lol

Nice to see the car shows return....my father in law historically attended the annual Good Guys show and was disappointed to not make that run with his Omaha car buddies the last 2 years but they're starting to go back on the schedule here so hoping I can catch a few later in the summer...nothing to show but just love walking them!
 

Robey5

Well-known member
Joined
Jan 18, 2010
Messages
406
Location
North of Detroit, Mi
Wow. Nice work on those boxes; keep the posts coming!

So, some years back, I gave my dad the same biscuit jointer tool, he loves it even though he has been too immersed in the restoration of a historic house in the past 3 years to bust out new wood projects. I have used it once, and I *love* it. That joint has enough “give” for a slob like me, but soaks up the glue nice and provides a solid, rigid joint.
 

Bakafish

Well-known member
Joined
Feb 7, 2017
Messages
477
Location
Tokyo
I'd tease you about not having a 3D printer and just printing some of those adaptors up, but honestly the wood looks nicer!
 
OP
N

nicholam77

Well-known member
Joined
Dec 18, 2016
Messages
2,671
Location
Minneapolis, MN
Trying To catch up on threads whole hanging in the hospital...awesome progress sir! Gonna have boxes down pat soon...want to help put mine together for my closet organizers I most definitely did not get done before kiddo showed up? Lol

Nice to see the car shows return....my father in law historically attended the annual Good Guys show and was disappointed to not make that run with his Omaha car buddies the last 2 years but they're starting to go back on the schedule here so hoping I can catch a few later in the summer...nothing to show but just love walking them!

Ha! I think after this I'm going to take a break from cabinets 😄

I'd love to get the last box put together and delivered to my parents house in the next week. Then at least that stage will be off my plate and I can forget about it and not have to store materials. Not sure how realistic it is though, time is counting down fast and I have a lot of other things to do to get ready. So the possibility is very real I'll be leaving this project in an awkward unfinished position.

I agree on car shows, you don't need to be an "enthusiast" or even care that much about cars to enjoy. It's just nice to get outside in the summer weather and have something to do. I think I'm going to bring my parents and daughter to the next one this weekend.

Hope you and the little one are still doing well, take care man!

Wow. Nice work on those boxes; keep the posts coming!

So, some years back, I gave my dad the same biscuit jointer tool, he loves it even though he has been too immersed in the restoration of a historic house in the past 3 years to bust out new wood projects. I have used it once, and I *love* it. That joint has enough “give” for a slob like me, but soaks up the glue nice and provides a solid, rigid joint.

Thank you @Robey5 ! I also find the biscuit joiner fun to use. The plunge action is just so satisfying, it feels like cheating to leave a perfectly cut hole in a matter of seconds. Makes glue ups like these full height cabinets I've been working on, much easier.

I'd tease you about not having a 3D printer and just printing some of those adaptors up, but honestly the wood looks nicer!

Yeah, 3D printer is what was going though my mind the whole time. There's existing files out there for the 20x40 extrusion. I'm not the handiest with metal, so making one of those steel "flag stops" might have been a challenge for me, but I could have at least 3D printed the base for this one. Would have definitely saved me time. I do think the maple looks nice, though.

I do want a 3D printer, I feel like I would use it for small things, but not sure I can justify the cost over other tools at this point. I don't have an engineering background and am only mediocre with CAD, and only have used Sketchup, so I'd probably mostly print pre-existing files. Let's say I got a ~$300 model, I'd have to do at least 12+ projects of this scale (I could purchase the actual Festool stop for $25) to justify the cost. As of now I feel like it would take me a year or more to do enough with it where I'd be saving money. And of course not everything makes sense to be 3D printed.

But... every time I see people on here using them for woodworking applications it makes me want one!
 

Bakafish

Well-known member
Joined
Feb 7, 2017
Messages
477
Location
Tokyo
Getting good at doing 3D modeling in Fusion 360 has helped my woodworking immensely, the side effect of applying to 3D printing and hobby machining is just a bonus as far as utility. I tried Sketchup years ago, it was unpleasant to me, maybe it's better now. I was a 2D CAD user from the old days of light pens, digitizers and plotters, and F360 took a while to start to make any sense, I usually am unwilling to put up with newfangled human interface paradigms. But I've made my peace with its quirks, and I find it works really well for designing and creating cut plans for my woodworking projects.

3D printers right now are so cheap, and the quality is shockingly good at the low end. A Creality Ender 3 V2 is like $260 over there, it is hard to imagine it wouldn't pay for itself in broken stuff it could fix or build instead of buy. But F360 (for Makers) is free, so I'd get a start there, watch some of the "things I wish I knew when I started using Fusion 360" videos on YouTube to avoid the most frustrating mistakes you are likely to make. Create some models, then decide how eager you are to make them real (or just carve them out of wood instead...)
 

loganb

ALLIANCE MEMBER
Joined
Dec 29, 2011
Messages
5,575
Location
Omaha, NE
Realizing that you have negative time in the day now and it's going to get worse, I agree with Baka that with the maker license for F360 and YouTube I think you'd be doing 3D way faster than you realize. I started my personal 3D work back up in Fusion and switched to Solidworks just due to greater familiarity with it and a few higher end things not necessary for most and I think Fusion is more intuitive and easier to pickup for the new user. My biggest concern with Fusion, especially the maker license/free version is that the .stl converter(which is the file type required for 3d printing) is all web based which means they could turn off that capability at any time if they so choose. They restricted a number of other file types/features earlier this year from the Maker/personal use license and with the direction that Autodesk as a company is going on their other programs them making that converter a monthly/annual subscription fee wouldn't surprise me in the least. It would seriously damage their support amongst the printing/maker community but they'll do their analysis and believe it'll improve the bottom line and that'll win out. They just played that game of chicken with our AutoCAD licenses at work and we dropped them and switched 95% of the users to one of the "clone" programs that for the 2D needs for part checking templates and facility layout work scratches the itch perfectly with a huge annual savings(or technically cost avoidance vs the new AutoCAD licensing agreement that we never signed)

If it does happen, some others will probably figure out a web-based program or write an app that could use the native filetype and do the same conversion, or you'll have mastered the majority of the CAD side and either pay their fee or switch to another program having already completed the learning curve and then just need to learn the buttons and layout of the new program
 

zanyad

ALLIANCE MEMBER
Joined
Apr 26, 2018
Messages
2,804
Location
NE Ohio
...
They just played that game of chicken with our AutoCAD licenses at work and we dropped them and switched 95% of the users to one of the "clone" programs that for the 2D needs for part checking templates and facility layout work scratches the itch perfectly with a huge annual savings(or technically cost avoidance vs the new AutoCAD licensing agreement that we never signed)
...
The clone we'd been using (DraftSight) is no longer free; who did you end up switching to?
 
OP
N

nicholam77

Well-known member
Joined
Dec 18, 2016
Messages
2,671
Location
Minneapolis, MN
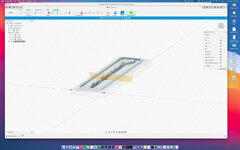
Well I had a few hours of downtime today so I downloaded Fusion360 and watched a tutorial on YouTube.

fusion360.jpg

Obviously I've just dipped my toes in, but so far, it's not very intuitive to me.

@Bakafish -

That's interesting you like it more than Sketchup for woodworking, but good to hear. One of the things that drew me to Sketchup was it wasn't like other 3D softwares in some respects. I just found it less complicated and easier to grasp, but I do get frustrated with it at times. My background is in film & video, so I'm not a stranger to professional softwares, just not 3D. I took a beginner course on Maya in college about 12 yrs ago and it was overwhelming haha.

I happened to be at a local computer store the other day to get some ethernet cable ends, and they have a hobby section which had a Creality Ender 3 V2, for $259 just like you said. I'm still not convinced it would save me money, at least for awhile, but it did look cool. It wasn't really on my radar (more of an "oh, that's neat!") until you guys started chiming in, but I think I'll do some deeper research and see if it's something I want to get into to and dedicate the time to. Thanks for the Fusion360 suggestion, though, I do think that's a great place for me to start! Like you said, even if I end up liking it better than Sketchup for woodworking and don't go down the 3D printing rabbit hole, that's still a win.

@loganb -

Subscription licensing is a double-edged sword. I used to hate it, and still sort of do. It's generally favorable for companies, but not so much the individual, unless you're a successful freelancer. We use Adobe Creative Cloud at my work (Premier Pro mainly myself) and it's a bummer that it's far too expensive to have my own personal copy. The constant updates and feature releases are both nice and annoying at the same time. Compatibility can become a nightmare in an office scenario without a dedicated IT person. But my biggest fear with subscription-based models, including Netflix, Spotify, all of that, is that like you said it can be turned off with the flick of a switch. It's money down the drain. If a company goes belly up (will Spotify be here in 10 yrs??), how much money will all have poured into this things for the sake of convenience, but have no ownership or physical product to speak of. Whereas in the good old days of buying physical media, software, music, etc, at least you knew you got to keep it. Basically everything is connected and requires the internet, now. And even though I would consider myself a "techy" person, to me that is both exciting, and scary.

Anyways thanks for the heads up on the STL files. I would hope a 3rd party would fill in the gaps if it happens. I'm sort of in the same boat with all my Sketchup models... I have a 2017 version of the free desktop software for Mac. A bit ago they changed the free version to a web app, and I think it's far worse. So when my version is no longer compatible with the OS, I could be out of luck on all the house models and stuff I've poured so many hours into. Grrrrrr.

Hope everyone in the U.S. had a great 4th!
 
OP
N

nicholam77

Well-known member
Joined
Dec 18, 2016
Messages
2,671
Location
Minneapolis, MN
Found another use for the CT15 😁

IMG-2953.jpg

IMG-2956.jpg

Suction on low and hearing protection not needed.

In a bit of a boring update, @TomGW I followed your advice and grinded down some of that pin for the MFT flip stop:

IMG-2945.jpg

IMG-2946.jpg

IMG-2947.jpg

Worked great. I'm still not sure the overall success as I don't have the top secure and everything is loose. But I have some special M6 levers on the way from McMaster-Carr.

I failed to take many photos and just concentrated on the work, but last night my dad came over after kid bedtime and we put in a few hours, trying to get the corner cabinet box completed.

The last of the shelf pins (glad to have that nightmare behind me), and glued a cherry board to one of the sides. Kind of hard to describe why but it's needed for this special corner construction. Biscuits and as many clamps as I had that fit.

IMG-2961.jpg

We also had to trim back the cherry edgebanding on the top, bottom, and mid-divider for this one, due to the way it fits together. It was an oversight, but actually doing this after gluing on the cherry piece above let me get a relative measurement on exactly how far to cut back the edge banding (pictured below).

IMG-2964.jpg

This was a careful combo of table saw rip, crosscut sled, and Ryoba hand saw.

Everything tucked along the back wall for the night:

IMG-2963.jpg

Hopefully back at it tomorrow evening to see if we can get through pocket holes, biscuits, sanding, and glue up. Then I'm calling it quits until the baby arrives. Will have to fit in getting the backing on but that's not time-intensive. Fingers crossed I can get this last one out of the shop and delivered.

🤞
 
Last edited:
To avoid these ads, REGISTER NOW!
Top Bottom