To avoid these ads, REGISTER NOW!

CBacres ex horse barn shop

shopnut

Well-known member
Joined
Feb 22, 2006
Messages
4,237
Location
Florida
That is simply awesome CB! It has a very integrated look... like it was designed into the structure from the get go. And it looks like it is as high as it can possibly go with the clearance around the trolley.

A job well done by you and your son! 1000s of uses for years to come!
 
To avoid these ads, REGISTER NOW!
OP
C

cbacres

Well-known member
Joined
May 28, 2010
Messages
5,998
Location
SW Florida
That is simply awesome CB! It has a very integrated look... like it was designed into the structure from the get go. And it looks like it is as high as it can possibly go with the clearance around the trolley.

A job well done by you and your son! 1000s of uses for years to come!
Thanks Mark.
I think more pondering went into it than actual work.
It’s as high as it can go, I even eliminated the link for the hoist hook to gain 3-4”.
Once the trolley beam was in, it was so close I had to set part of trolley to make sure it cleared the sheet metal.

It got a little hairy a couple times, but we had 30’ of chain tie it off.
 
OP
C

cbacres

Well-known member
Joined
May 28, 2010
Messages
5,998
Location
SW Florida
Job greatly done ......


No blood huh :mad:


Seriously ,great job and no one hurt is as good as it gets.
Thanks.
A little blood, but compared to another member here, you all would scoff at the amount.🤣🤣
We took the time to safe the stuff around us, like using the chain as safety’s in the event the beam decided to take off.

Mostly from the wire wheel porcupines.
I did have the 8” beam roll off the stands on me, drew a little blood on that one.
Going to play with the light weight stuff for a while.
 

mybigwarwagon

Well-known member
Joined
Nov 4, 2009
Messages
4,428
Location
Vale, Nc
I saw those first two pics, and I wondered why you didn't turn it the other way because it would look better.

Now that you corrected it, it looks awesome, and I bet you will find your back feels much better when using it, as opposed to lifting cabinets into your truck by hand.
 
OP
C

cbacres

Well-known member
Joined
May 28, 2010
Messages
5,998
Location
SW Florida
I saw those first two pics, and I wondered why you didn't turn it the other way because it would look better.

Now that you corrected it, it looks awesome, and I bet you will find your back feels much better when using it, as opposed to lifting cabinets into your truck by hand.
Thanks.

Willie, very few cabinets get lifted into the truck, usually there’re being unloaded out of the truck, but yes the mobility will make it a breeze.

I sure hope my back feels better, it’s pretty tapped right now after handling all that iron.

I had a stationary hoist in place, the trolley will be a huge improvement.
 
OP
C

cbacres

Well-known member
Joined
May 28, 2010
Messages
5,998
Location
SW Florida
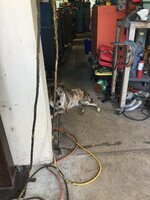
Didn’t do much yesterday, dogs were in the way.
830375AE-0AFB-4C3A-B448-75B0FB313248.jpeg
2A0C134C-60D9-4D29-A870-9B7272992171.jpeg
Installed castle nut and cotter pin on before I forgot, drilled and set anchors on base plates.
534F4392-42FE-4E16-8495-3B5DF80C583C.jpeg
Glad they have all these warnings way up in the air where they can be seen. They take all the fun out of using.
D67BF817-4462-4D02-AFF0-FB39A19EFD07.jpegUsed these tapcons on steroids for base plates. 1/2” diameter.EF341A28-121B-4690-AAE2-E1D670A8DD7F.jpeg
Then sat down to a job well done.
6FB28A6A-4FFD-49AF-AE87-D24C6BFEC434.jpeg
I need to get back on some house stuff.
 
OP
C

cbacres

Well-known member
Joined
May 28, 2010
Messages
5,998
Location
SW Florida
Been doing stuff, been here, just haven’t stopped.
I’ve been working at my cousins welding helping him build a work barge while I’m still hunting a job. A near solid day of welding, haven‘t done that in a lot of years, but I can still hack it.
We have 94 or so of these frames to build, they then will make up the frame of two barges.
955CAF69-691A-444D-B587-283C3A95F545.jpeg

He runs flux core & gas, I didn’t even know it was flux core, first time I’ve run that. I like it. But I have 70 lbs of regular wire to burn up first.
46BBCB53-E7D2-4745-9596-78D77D775751.jpeg
We fit up the pieces in a jig, check square, weld the one side and flip over to get the joints on opposite side. We started flipping over onto the forklift forks to do the second weld, then use forklift to move completed frame to the pile.

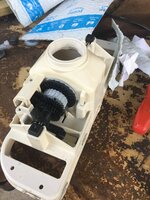
In other happenings, I think Bob H passed n his pool equipment needing repair virus to my pool vacuum. The vacuum would get on the wall and not move. Pulled it off and took apart, ordered a few gears and a three prong sprocket that pushes a brush down every so often.
$60 something in plastic parts later.
7D4F6213-BBAC-4F82-9A1C-C450D86951F7.jpeg

A63C37FA-333F-421D-BCAE-41EB9BF1C7FA.jpeg

Grouted the base plates on the new hoist columns.

B3AA11B4-D605-459C-979B-2C3D5ACFA46B.jpeg

Time to-get ready for another multi change of clothes day tomorrow.
 

Attachments

  • C319A0BB-BAB7-42D2-9AD3-C73D304E183B.jpeg
    C319A0BB-BAB7-42D2-9AD3-C73D304E183B.jpeg
    354.3 KB · Views: 16
OP
C

cbacres

Well-known member
Joined
May 28, 2010
Messages
5,998
Location
SW Florida
Been doing all kinds of stuff. Our son had to swap out the AC unit on his RV trailer, mainly went to help to get on the roof. The existing unit had a thermostat with the ac and he researched using a house style thermostat with new unit, found many people had done this, but no details on wiring.
It took a little more doing to figure out the wiring, but finally got it, we were being conservative as didn’t want to chance letting the majic smoke out of anything.
His skid steer made it pretty easy to get unit on roof.
25F2EDE5-1135-4FD8-82E9-802FC0673A63.jpeg
He just carried the new unit to hole, the old one he dragged on a blanket to edge.
C10C6F00-BFF5-47E0-81E6-C367C0E32369.jpeg
Four bolts through a steel frame inside to the unit on top sandwich the roof. Just like a dang car, no room to get my hands on anything.
3591D7ED-C196-4188-879E-106B6A9126B2.jpeg
BF2EDDE1-C59A-4D07-A886-2ADA8DB981BE.jpeg
The RV has a 12 volt supply along with the 120 volt feed. The hang up with the wiring was there wasn’t clear connection point between ac and thermostat. I had him mock up the thermostat with 12 volt and run through the functions to confirm output, then we were comfortable making connections and it fired right up with no sparks.

I did pay homage to Shortys thread.

BA001212-83BE-451D-A139-6F8F09105550.jpeg
When I was on the ladder lifting the one end of the unit onto roof, my hand was very lightly against the coils, it’s like I used a food slicer on my hand.
This was a critical project to get done, as he will be supplying us with our grandson in the coming week. We didn’t want him to be overcooked!!

We actually started to do Saturday, backed off because lack of wiring info. First thing Sunday morning I get a text “guess what quit working at 2:00 AM?)
I learned some new things!.
 
OP
C

cbacres

Well-known member
Joined
May 28, 2010
Messages
5,998
Location
SW Florida
What’s been up? I haven’t posted, but plenty going on. Our grandson finally got here a few weeks ago, started back to work, replaced almost all the interior doors in the house.

First things first.

Was taking a shortcut behind a Walmart to meet my wife for dinner and spotted this peeking over the edge of a 30 CY dumpster.
378DC999-FC62-4330-90D9-513BEC627796.jpeg
It jumped in the back of my truck when I went by.

Some of you may notice bare floor in the background.
I sold my 4’x8’ welding table, loaded it up and delivered to my cousin.
592DBD34-BD66-49E2-95CB-E950DC944A7A.jpeg
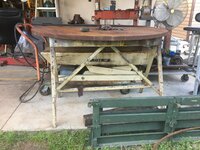
With that one out of the way, I temporarily set the 70” plate circle on saw horses to get out of the way and so I can work on as I get time.
1AD68859-3979-4734-B714-4BC94DBF2EA2.jpeg
So some short dude made a great suggestion to use my 1,000 lb lift table to move this 1,600 lb future round welding table over to the side.
4996F288-0749-4BF3-AC30-33E8541980E7.jpeg

536BD59A-B308-48C0-ABEE-C4202D493D49.jpeg
B5D7087B-116C-4E14-91C0-30A4378C0DFD.jpeg
It picked it up just fine, i just had to use a Johnson bar to pry the cart over to the side. I guess old HD carts aren’t made to carry 2,000 plus lbs.
 
OP
C

cbacres

Well-known member
Joined
May 28, 2010
Messages
5,998
Location
SW Florida
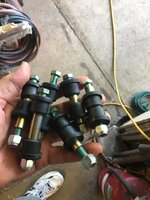
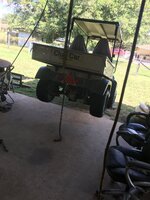
Been getting the cart ready for Flywheelers next week. Had to replace the rear leaf spring hanger bushings.
0B4E08D8-6BFB-4DF8-91B2-0C0F237F3EAA.jpeg
The new chain hoist came in handy.
5C524FBD-FFC3-4DE3-AA4F-25F9644073F8.jpeg


232757ED-1C6F-43A9-A345-DDC2CE2A4973.jpeg
Well, you know how stuff evolves. I got to thinking about taking a few items to sell while riding around at Flywheelers. My son mentioned using the slide in basket, hmmm, this will give me some extra room.
2F7DE898-7370-40B9-999B-C81699AC83E3.jpeg
A little too wide, it’d be like driving a dozer through the crowds of people in the swap meet!🤣🤣. So, that means building something custom.
A115D033-2F64-4154-8E20-42C7EF32EB8C.jpeg
0025227A-819C-42D4-BA74-55CD2DD89A99.jpeg
I have some aluminum sitting around, so might as well give my back a break. It’s 4” channel frame, expanded metal floor, it‘ll sit on a 6” channel for a main support. The 6” raises it up to bumper height, that way I’ll be able to knock people over easier. No one is getting in my way of a vise or something for sale.🤣🤣🤣.
The 6” channel will sit on a 2” sq. Tube that will slide into the receiver hitch on the cart.
I clipped the front corners so there wouldn’t be a sharp corner, as this thing will be sticking out.

I‘m using pipe to fill in the clipped corner, it’ll be a nice rounded corner and give me a spot to stick a flag or something in.
0F4A3C34-7785-42DF-936D-FECF4D2B7981.jpeg
See ya tomorrow.
 

Attachments

  • DF1900B5-B98F-4B6C-A8B7-898820E8BCFB.jpeg
    DF1900B5-B98F-4B6C-A8B7-898820E8BCFB.jpeg
    263.2 KB · Views: 6
OP
C

cbacres

Well-known member
Joined
May 28, 2010
Messages
5,998
Location
SW Florida
That will be one heck of a welding table, just a little jealous!
Jim, Im already using it as it sits. It’s going to be a beast. the round will fit and make better use of my shop. The table I just sold was a 4’ x 8’ x 3/4” top. It was nice, but It was a catch all most of its life. I’ve found that most of my welding projects took place on a fairly small area. I’ll make some stands that match the height of the table for longer stuff.
 
To avoid these ads, REGISTER NOW!
OP
C

cbacres

Well-known member
Joined
May 28, 2010
Messages
5,998
Location
SW Florida
How you been Bob?

I love welding the aluminum, it just take me a little to get dialed in, like about when I finish this project. I have learned to get dialed in on some scrap before buggering up my work.
Good thing I’m planning on buffing this when I’m done, so nice grinds will be in place!🤣
 

shortykorte

Well-known member
Joined
Sep 1, 2014
Messages
8,039
Location
Tallahassee, Fl
How you been Bob?

I love welding the aluminum, it just take me a little to get dialed in, like about when I finish this project. I have learned to get dialed in on some scrap before buggering up my work.
Good thing I’m planning on buffing this when I’m done, so nice grinds will be in place!🤣
Bob is an expert
Craig, I'm doing well but the pandemic has made Liane paranoid. She's even afraid of getting together with family.
Depending on the family, that could be a good thing.

Short? What you talkin’ ‘bout Willis?
 
OP
C

cbacres

Well-known member
Joined
May 28, 2010
Messages
5,998
Location
SW Florida
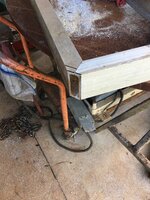
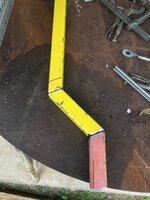
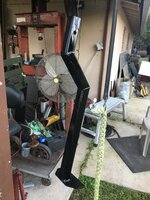
Got the 2” steel sq tube cut and ready to weld up. I built the offset so the aluminum rack would be bumper height. I abandoned the plan to use the 6” channel to raise rack, was concerned it just wouldn’t be sturdy enough. Keep in mind Shorty is going to be around this!😜😜

A little more aluminum welding, couple of holes to drill and I should have it wrapped up.
1D66D878-C678-4809-BD4C-2EDB68E38D94.jpeg
37E9208D-1096-4CA8-9F36-2002BDE0CEEF.jpeg
 
OP
C

cbacres

Well-known member
Joined
May 28, 2010
Messages
5,998
Location
SW Florida
2” sq tube welded and in place to do final fitup.
32EDBB8C-D268-4A93-88B6-637B91EF40C8.jpeg
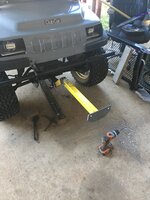
The tube slide in had the typical slop and the rack leaned down in the front, the easiest remedy was to drill the carts receiver and weld a 1/2 nut to the bottom, a 1/2” bolt snugs it good enough.
95FAD10D-92EE-46A1-9FBF-51024364028B.jpeg
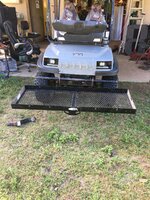
Rack welded and corner rounded.
5006A052-1DF3-4FC9-A2AC-F7A4FB3AF06D.jpeg
Rack mounted up.E492ED25-BE0A-4F6F-953E-F2D08B382148.jpegC6E50D42-F131-401E-8A61-9AB52B539AA3.jpeg6BDBC6CE-020D-4799-B183-A3CD2B000030.jpeg
I made a couple of brackets to bolt the back of rack to bumper mounts, this really took any flex/rocking out.DDAE93FE-50B8-49A4-8F07-55C781592B05.jpeg
All painted up!
3ED17208-2548-4C13-96F8-F3A6C3F11D7D.jpeg
OK, you all don’t say anything, but this is Shortys seat. I think the bracket on the end of the yellow tube should be enough for him to brace his feet on.😳🤣🤣
 
OP
C

cbacres

Well-known member
Joined
May 28, 2010
Messages
5,998
Location
SW Florida
We need some updates, blood, Florida safety shoes, Hooters girls, something..........
For starters.....
4F8733B2-4769-48A6-BD96-FECCDFE3C374.jpeg
Went to use angle grinder with a flap disk to pre for some welding, turn switch on (locking switch) and nothing. Went to investigate ever so slightly moved grinder and it came to life, guess I relaxed my grip on it cause it jumped across my left hand knuckle, skated across the cabinet, dropped to floor and got wedged against a stand, disk down, flapping my concrete!

If I had a gun handy, I’d shot the fukking thing.
Craig has a job now. I think it's slowing down his play and posting time. 😜
He still finds time to screw with Shorty, and tries to enable me. 😉
Yes, I’m back to work since October and I actually work most all day! It really don’t take much time to screw with Shorty, sometimes it’s kinda like pushing a ball over the side of a hill.

Sooner or later I’ll get Andrew to spend money.
Why would anyone let a job get int he way of GJ???
It’s not so much work, seems like everything else decided to happen in the same time.
We gained this little guy.
1D212303-4867-4540-8187-A3369330D16F.jpeg
Our first grandson! I figured I have about a year that I really need to shop in shape so he can come out there.

I’ve been meaning to catch you all up here, thanks for the motivational kick.

We added some Christmas lights, repaired a bunch of old ones, cut some tall trees that needed to come out, used a man lift and a chainsaw at the same time, no blood, just poison Ivy again.

Hope everyone had a great Christmas and Happy New Year to ya!
 
OP
C

cbacres

Well-known member
Joined
May 28, 2010
Messages
5,998
Location
SW Florida
Made it to Flywheelers back in November with Shorty and Chris.
I actually sold more than I bought.
The new cargo tray for the cart worked great.

Heres Shorty making a very important point to Chris!
4A04ECB3-8A07-4110-8C24-74F7336A729D.jpeg
The vendor in the background had a bunch of boxes, totes etc with random stuff. I lucked out and found a 3/4” Wright wrench in the same style of a set I have. I the 3/4” a while back. Nice to have the set complete again.
B5D41399-C7AD-4645-81B7-1039557FC377.jpeg
 

shopnut

Well-known member
Joined
Feb 22, 2006
Messages
4,237
Location
Florida
Congrats on the grandson CB! He'll be wrenching out in the shop with you in no time... teach him well! I learned so much from my grandpa and I remember him being so patient with me as he was passing on the tribal knowledge. We even built an electric motor from scratch so he could explain in detail how one works.

Happy New Year to you and yours!
 
Last edited:
To avoid these ads, REGISTER NOW!
Top Bottom