OP
zmotorsports
ALLIANCE MEMBER
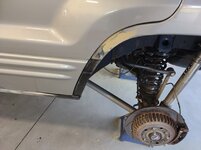
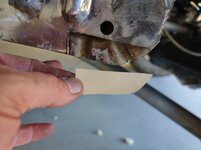
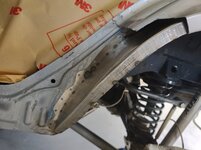
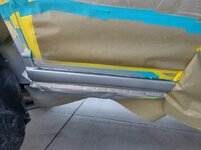
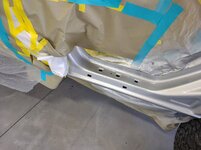
Up until this point we only thought we had a rust issue on the driver's rear dog leg/rocker area but there was a small rust spot on the passenger's rear rocker that had gotten my attention the week earlier that didn't look very good. First order of business on Saturday morning was to knock the paint off of that area and see it it was just some surface rust or something worse. YEP! It was something worse.
We shifted gears and began a plan to address this area while we were already cutting metal and planning on doing some painting, otherwise, we would be doing this spot very soon.
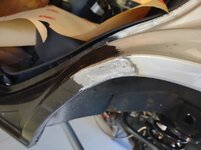
Marked out past the rust and into good sheet metal. There were three spots that I went through with the pick end of my body hammer after removing the OEM paint and primer.

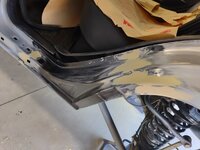
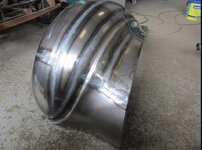
Bent up a patch panel and worked on getting the correct curvature based on trial and error.
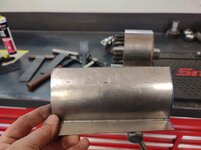
Continued to sneak up on the proper radius as well as the fitment trimming a little at a time.
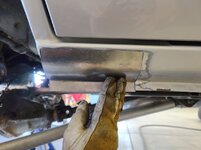

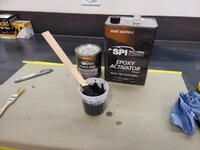
I can live with that fitment. Now just have to get some Metal Prep on the interior panel to treat the rust then apply some SPI Epoxy Primer to the inner panel as well as the back side of the repair patch so it can cure.
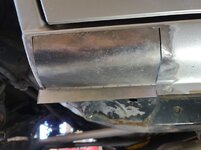
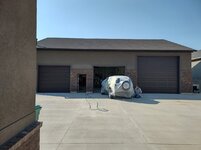
While my son was cleaning the remainder of the rocker panels in preparation for scuffing he noticed that we had a little friend in our shop. There was a humming bird flying around the shop and we were concerned he was getting tired as he couldn't find his way out. Those two large garage doors were something I guess he couldn't find. My wife mentioned she had some lunch for us so we turned out the lights and turned the fans off in the shop hoping he would find his way out of the shop.
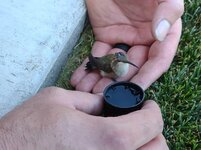
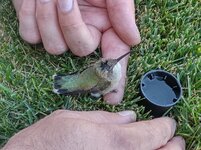
When we returned to the shop he was still there so we went back to work and before long he had gotten struck by one of the ceiling fans and knocked him to the ground. I had my welding gloves on so I carefully scooped him up and could see he was still breathing so I took him outside to the grass where there was some shade just outside of the shop. I had my son get some water for him as he was still breathing but definitely stunned. My son grabbed a lid from an aerosol can and put some water in it and began nursing him back. My son has always had a special way with animals and within a few minutes of my son dipping his finger into the water and allowing the humming bird to drink the droplets from his finger he had come around enough that he was sitting up on my son's hand and drinking some water. Then within a few more minutes he took off and flew away. It was really a cool moment watching my son helping this small bird and then when he flew away he hovered over my son for a few short seconds about eye level and then flew away.

Then it was back to work on the WJ. We made a small section to fill in where we left off on Wednesday evening before out detour with his power steering gearbox.

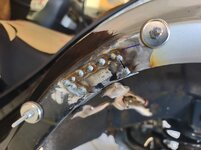
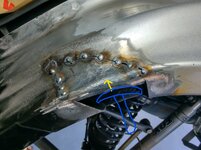
After getting the small patches basic shape we tack welded it into place. Once one set of tack welds were done, I knocked them down with a 1/16" wide grinding disk so they were just barely proud of the parent material and laid another tack weld about 50% on top of the previous one. The trick here to to be absolutely certain that you are using enough voltage and wire speed to get full penetration. This will require a little testing before hand to ensure you have the correct settings on the welder. You should have a nice dimple on the back side depicting full penetration. Then when you knock the weld down you don't have to worry that your panel will not be fully welded and result in cracks in the repair area. If you hit it with enough heat and enough wire speed you should get good penetration without blowing a hole in the panel. I also like to try and hit the previous spot weld dead in the middle between the two panels to ensure I am splitting the heat between both the new panel and the original panel. If you try and focus the wire to one side or the other you are actually overheating the one where the wire makes contact. One other thing I do is snip the wire at a slight angle between each tack. This cuts that little bit of a ball off the end of the wire which takes more current to melt, but also eliminates that little bit of silicone from the end which is an insulator and makes it harder for the arc to start at the next tack weld. By having a small angle on the end of the wire it requires less current to begin the arc then stay on the trigger barely long enough for the tack weld to get to the desired size, nothing longer or you will blow a hole through the panel.

More pictures to follow.....
We shifted gears and began a plan to address this area while we were already cutting metal and planning on doing some painting, otherwise, we would be doing this spot very soon.
Marked out past the rust and into good sheet metal. There were three spots that I went through with the pick end of my body hammer after removing the OEM paint and primer.
Bent up a patch panel and worked on getting the correct curvature based on trial and error.
Continued to sneak up on the proper radius as well as the fitment trimming a little at a time.
I can live with that fitment. Now just have to get some Metal Prep on the interior panel to treat the rust then apply some SPI Epoxy Primer to the inner panel as well as the back side of the repair patch so it can cure.
While my son was cleaning the remainder of the rocker panels in preparation for scuffing he noticed that we had a little friend in our shop. There was a humming bird flying around the shop and we were concerned he was getting tired as he couldn't find his way out. Those two large garage doors were something I guess he couldn't find. My wife mentioned she had some lunch for us so we turned out the lights and turned the fans off in the shop hoping he would find his way out of the shop.
When we returned to the shop he was still there so we went back to work and before long he had gotten struck by one of the ceiling fans and knocked him to the ground. I had my welding gloves on so I carefully scooped him up and could see he was still breathing so I took him outside to the grass where there was some shade just outside of the shop. I had my son get some water for him as he was still breathing but definitely stunned. My son grabbed a lid from an aerosol can and put some water in it and began nursing him back. My son has always had a special way with animals and within a few minutes of my son dipping his finger into the water and allowing the humming bird to drink the droplets from his finger he had come around enough that he was sitting up on my son's hand and drinking some water. Then within a few more minutes he took off and flew away. It was really a cool moment watching my son helping this small bird and then when he flew away he hovered over my son for a few short seconds about eye level and then flew away.
Then it was back to work on the WJ. We made a small section to fill in where we left off on Wednesday evening before out detour with his power steering gearbox.
After getting the small patches basic shape we tack welded it into place. Once one set of tack welds were done, I knocked them down with a 1/16" wide grinding disk so they were just barely proud of the parent material and laid another tack weld about 50% on top of the previous one. The trick here to to be absolutely certain that you are using enough voltage and wire speed to get full penetration. This will require a little testing before hand to ensure you have the correct settings on the welder. You should have a nice dimple on the back side depicting full penetration. Then when you knock the weld down you don't have to worry that your panel will not be fully welded and result in cracks in the repair area. If you hit it with enough heat and enough wire speed you should get good penetration without blowing a hole in the panel. I also like to try and hit the previous spot weld dead in the middle between the two panels to ensure I am splitting the heat between both the new panel and the original panel. If you try and focus the wire to one side or the other you are actually overheating the one where the wire makes contact. One other thing I do is snip the wire at a slight angle between each tack. This cuts that little bit of a ball off the end of the wire which takes more current to melt, but also eliminates that little bit of silicone from the end which is an insulator and makes it harder for the arc to start at the next tack weld. By having a small angle on the end of the wire it requires less current to begin the arc then stay on the trigger barely long enough for the tack weld to get to the desired size, nothing longer or you will blow a hole through the panel.
More pictures to follow.....