To avoid these ads, REGISTER NOW!

Above 1200 Sq/FT The Lone Beech Garage (60x46x16)

Wokspaces above 1200 squarefeet.

drivesitfar

Well-known member
Joined
Oct 23, 2013
Messages
36,077
Location
Pacific Northwest
Re: The Lone Beech Garage Build Thread (60x46)

SB: did you get tired of working on the 2 lathes and the new Jet mill and talking about it or are you taking a break? or maybe this is your busy season at work and you are flying all over the world?

in any case I (we) miss you so send up a smoke signal to let us know you are ok please if you have a minute.

cheers
 
To avoid these ads, REGISTER NOW!
OP
S

sbosecker

Well-known member
Joined
Sep 25, 2012
Messages
3,539
Location
Peachtree City, GA
Re: The Lone Beech Garage Build Thread (60x46)

Everything ok Scott? Been nearly 5 weeks without updates.

SB: did you get tired of working on the 2 lathes and the new Jet mill and talking about it or are you taking a break? or maybe this is your busy season at work and you are flying all over the world?

in any case I (we) miss you so send up a smoke signal to let us know you are ok please if you have a minute.

ABSTIFFGS & DrivesItFar,

Thank you so much for asking!

All is well - just professional stuff and spring cleaning projects ...mostly spring cleaning!

I did get into the LBG a few times among all that other stuff and did a few piddling things but they didn't seem worthy of an update.

Best regards,

Scott
 
OP
S

sbosecker

Well-known member
Joined
Sep 25, 2012
Messages
3,539
Location
Peachtree City, GA
Re: The Lone Beech Garage Build Thread (60x46)

Friday - April, 20, 2017

Today I was able to spend a quite few hours in the LBG. This was the first time I had been able to do that in over a month. Late this afternoon I slapped a Led Zeppelin CD into the music box and proceeded to get my hands dirty.

20180420-01.jpg 20180420-02.jpg 20180420-03.jpg

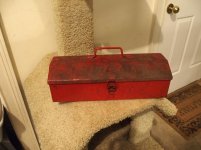
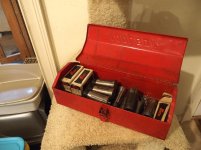
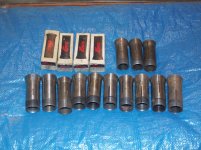
Several weeks ago I saw some 5C collets for sale on Craigslist. These were something I should, eventually, be able to use with my Rockwell Metal Lathe. However they were 2 hours away and I was in the middle of Spring Cleaning chores. I had other priorities.

These items didn't seem to be getting any love and remained an active ad for 3 weeks. My daughter lives in Athens, GA near where these collets were. I asked her if she would be willing to act as my mule if I was able to come to an agreement on price for these treasures. She agreed to help me out.

I contacted the seller and asked about the sizes expecting to hear 1/16" through 1" in 1/16" increments with one oddball square collet I had seen in the picture. To my surprise they were a real salad of sizes... from 1/16" to 1" but in odd groups of x/64" & x/32" fractions. The seller described them as some unused and others barely used, made by Hardinge & Enco.

I responded with an offer a fraction of what he was asking due to the weird sizes. He accepted the offer which amounted to just a bit over $2 for each collet.

My daughter met the seller and completed the transaction. She brought them to me last weekend when she came down for a seasonal weekend job she does nearby every spring.
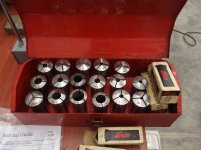


20180420-04.jpg

When I saw them I thought the seller had overstated the condition considerably and there was at least one other manufacturer in the mix. However for $2 per unit, I wasn't going to complain. Today I spent the first hour or so in the shop cleaning up the box - filthy and with a considerable amount of swarf inside - and the collets.

I couldn't complain about the box as it wasn't even listed in the ad!

All in all I think I did OK on these items. I turned my attention to another project.


20180420-05.jpg 20180420-06.jpg 20180420-07.jpg

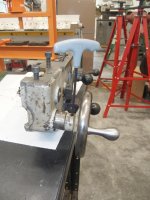
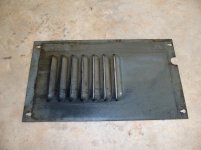
At the end of February a fellow was parting out a Rockwell 11-Inch Metal Lathe like my first lathe. I obtained a few oddball pieces that I needed for it.

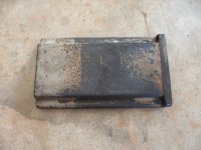
The first picture is a cover for the opening in the cabinet where the motor lives. I never would have expected to get this. The seller tried to sell the whole cabinet but got no takers. I contacted him and asked if he would be willing to sell the motor cover by itself. He agreed to do this and did so at an acceptable price.

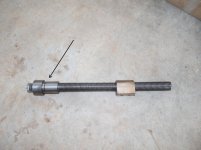
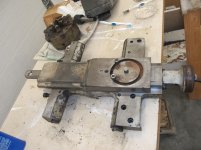
He also had an entire crossfeed assembly that didn't sell. I asked if he would be willing to sell a bushing from the crossfeed screw (Arrow in third picture). He didn't want to sell just the bushing but he offered the screw, bushing and crossfeed nut for a very acceptable price.

This bushing is needed to use the lathe without a taper jig. The lathe came with this bushing but the instructions for the taper jig call for the installer to discard this bushing! Since both my lathes have taper jigs (but my first lathe's jig is broken) I needed this bushing to operate a lathe properly. This is something that could be made on a lathe but now that's not needed.

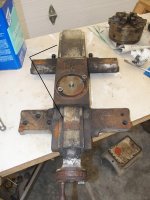
The second picture is an item that was missing on my first lathe. It covers the crossfeed screw and protects it from metal shavings.

The Cabinet Motor Cover was installed on the first lathe almost as soon as I got it.

The bushing is waiting to see whether both lathes will eventually become fully operational and then one will get the taper jig and the other will get the bushing.

The Crossfeed Cover goes on the first lathe as a part of its saddle.


Continued in next post...
 
OP
S

sbosecker

Well-known member
Joined
Sep 25, 2012
Messages
3,539
Location
Peachtree City, GA
Re: The Lone Beech Garage Build Thread (60x46)

Continued...


20180420-11.jpg

After getting the collets cleaned up, I decided to work on the first lathe's saddle. It is not pretty. Ha! The arrow points to the eBay Crossfeed Cover.


20180420-12.jpg

First I worked on the underside of the saddle. This is how it looked when I started. I just worked on cleaning up the areas that ride on the lathe's ways and I forgot to take a picture after I completed that work this evening.


20180420-13.jpg

I then flipped the saddle back upright. The arrows point to the covers that protect the crossfeed screw. The eBay acquisition is at the top.


20180420-14.jpg

With no taper jig to mount the far end of the crossfeed screw to, the crossfeed will only travel in one direction. I used a large C-Clamp to act as a stop and that allowed the crossfeed to work in both directions. A lot of cleaning had been done at this point and the C-Clamp allowed me to clean pretty much all of the crossfeed's contact areas without a complete disassembly.


20180420-15.jpg 20180420-16.jpg

A "before and after" of the crossfeed after I was able to expose & clean this area with the C-Clamp trick.


20180420-17.jpg

That's as far as I got tonight. It was great to get some quality time in the shop even if it was mostly just a lot of cleaning of greasy parts!


Scott
 
Last edited:
OP
S

sbosecker

Well-known member
Joined
Sep 25, 2012
Messages
3,539
Location
Peachtree City, GA
Re: The Lone Beech Garage Build Thread (60x46)

Sunday - April 22, 2018


Returned to the shop this evening to work some more on Metal Lathe #1's cleanup. I just worked on the apron tonight.


20180422-01.jpg 20180422-02.jpg

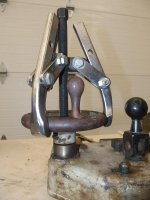
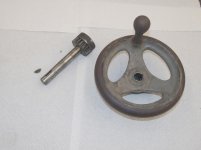
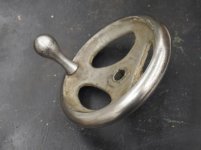
I removed the Apron Handwheel using a 3-jaw puller. I intend to press off the handle and try to clean it and the Handwheel. We'll see if I can find an efficient way get back to silver metal. The tiny shaft key is chowdered up a bit. I'll have to see if I can find a replacement at a local hardware store.


20180422-03.jpg 20180422-04.jpg

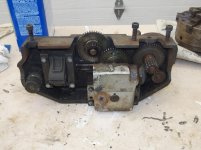
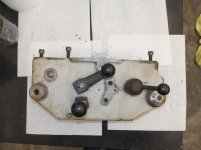
Here's what the apron looked like at the start of my work tonight.


20180422-05.jpg 20180422-06.jpg

Here's where I was when I left the shop for the night. Plenty to do yet but it's shaping up.


20180422-07.jpg

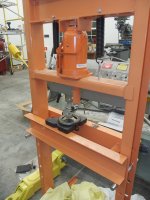
I didn't get a chance to press off the Apron Handwheel's Handle. I needed to locate a suitable pin or bolt to transmit the force from the shop press to the Handle's pin.


Scott
 
Last edited:
OP
S

sbosecker

Well-known member
Joined
Sep 25, 2012
Messages
3,539
Location
Peachtree City, GA
Re: The Lone Beech Garage Build Thread (60x46)

Monday - April 23, 2018


This morning I picked up from where I left off last night. I went down into my basement and found a suitable bolt in my hardware cabinet. I used this bolt as a pin to drive the handle out of the handwheel.


20180423-01.jpg 20180423-02.jpg

The Shop Press made short work of removing the handle.


20180423-03.jpg 20180423-04.jpg 20180423-05.jpg

With the handle removed, I now realized the Mini-Lathe might be the answer to removing the rust from the handwheel. I put in the "outside" jaws and chucked up the handwheel. I threw a rag over the ways to protect them from rust particles.

Spinning the handwheel at a moderate speed and applying a Scotchbrite pad to the handwheel turned out to be a winning combination! I was extremely pleased with the results. I put the handle into the drill press's chuck and it also cleaned up nicely.

I pressed the handle back onto the handwheel using the shop press.

That looks MUCH better!


20180423-06.jpg 20180423-07.jpg

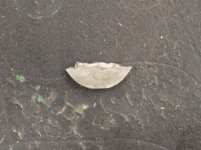
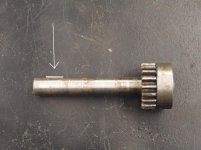
I turned my attention to the shaft & gear that the handwheel was fastened to. What's up with this key? Is that the way it is supposed to look or has it suffered from some sort of abuse?

I wouldn't have thought the handwheel would have chowdered up a key like this but...

I took some measurements...

The thickness was .094"
The width was .465"
The height was .192"

I went online and looked at examples of keys and nothing looked like this one. I am assuming that this was once a regular Woodruff Key.

Comparing my measurements to standard size Woodruff Keys...

The thickness is pretty close to 3/32" which points to a 300 series Woodruff Key. The width is not too far away from the .491" (up to -.01") spec for the width of a #304 Woodruff Key. The height I measured is in the range for a #304 Woodruff Key with a flat bottom.

I'm going to see if I can locate a Flat Bottom #304 Woodruff Key at a hardware store tomorrow.

Scott


Key Words: Rockwell Delta SP-2617
 
Last edited:

drivesitfar

Well-known member
Joined
Oct 23, 2013
Messages
36,077
Location
Pacific Northwest
Re: The Lone Beech Garage Build Thread (60x46)

SB: nice to see that you are posting up your adventures again. also nice to see that you are using a lot of your tools and machines to shine up and fix your other projects (machines and parts).

keep up the good work and best of luck at the hardware store today finding a match for your buggered up part.

cheers
 
OP
S

sbosecker

Well-known member
Joined
Sep 25, 2012
Messages
3,539
Location
Peachtree City, GA
Re: The Lone Beech Garage Build Thread (60x46)

SB: nice to see that you are posting up your adventures again. also nice to see that you are using a lot of your tools and machines to shine up and fix your other projects (machines and parts).

keep up the good work and best of luck at the hardware store today finding a match for your buggered up part.

cheers


DrivesItFar,

It's great to be able to get back out into the shop again.

Thanks for stopping by!

Best regards,

Scott
 
OP
S

sbosecker

Well-known member
Joined
Sep 25, 2012
Messages
3,539
Location
Peachtree City, GA
Re: The Lone Beech Garage Build Thread (60x46)

Tuesday - April 24, 2018

This morning I went to a local hardware store. They had 3/32” x 1/2” flat bottom woodruff keys. In their parts bin they were labeled as #2. I handed the lady at the counter 59 cents and walked out with my prize.

It was time for lunch when I got home but I ran into the shop first. I placed the new key into the shaft’s slot and tried putting the handle onto the shaft. It seemed like a good fit and I came into the house for a sandwich.

So it looks like the ANSI (American National Standards Institute) number for the Rockwell Part # SP-2617 Key is a flat bottom 304 and, after some research it looks like that #2 designation is a SAE (Society of Automotive Engineers) number.


20180424-01.jpg

Comparing the old and the new it looks like my new replacement might be too long.


20180424-02.jpg 20180424-03.jpg 20180424-04.jpg

However, the new Key fits perfectly. How in the world did the old one get so chewed up?


Continued in next post...
 
OP
S

sbosecker

Well-known member
Joined
Sep 25, 2012
Messages
3,539
Location
Peachtree City, GA
Re: The Lone Beech Garage Build Thread (60x46)

Continued...


It's hard for me to believe but it's been over 2-1/2 months since the JET X-Axis Powerfeed warranty replacement arrived on January 31st.

Readers of this thread may recall that, after I installed this Powerfeed back in December, the unit would only work in one direction.

This afternoon seemed like a good time to swap out the old unit and install the new one.

...for some reason I decided to exercise the controls of the "faulty" device one more time before removing it. It continued to only work in one direction the first time I tried it but then there was a "CLICK" from the innards of the gadget and it started working properly.

Go figure.

To see a video of the X-Axis Powerfeed in action, click HERE.


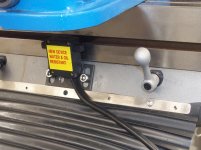
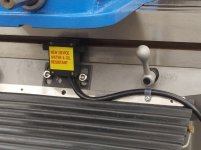
With the Powerfeed working properly, I began the final part of the installation: Mounting the Powerfeed Limit Switch.


20180424-11.jpg

The manual "Bumper Stops" were removed.


20180424-12.jpg 20180424-13.jpg

The Limit Stops were slid onto the Table.


20180424-14.jpg

The Bumper Stop "Post" was removed.


20180424-15.jpg 20180424-16.jpg

The new Limit Switch was installed where the Bumper Stop Post lived previously and the cable for the Limit Switch was anchored to the Table.


Nice to have the Powerfeed fully functional but I don't really trust the thing due to its history. We'll see if it continues to function as it should.


Scott
 
Last edited:

dchance

Well-known member
Joined
Oct 3, 2016
Messages
614
Location
OKC
Re: The Lone Beech Garage Build Thread (60x46)

The handle turned out great.

Dwight
 
OP
S

sbosecker

Well-known member
Joined
Sep 25, 2012
Messages
3,539
Location
Peachtree City, GA
Re: The Lone Beech Garage Build Thread (60x46)

Wednesday - April 25, 2018


Sharp eyed readers of this thread might have noticed a distinctly blue colored vise on the table of the JET Mill in the previous day's post.


20180425-01.jpg 20180425-02.jpg

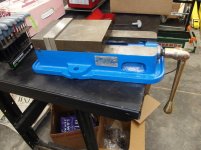
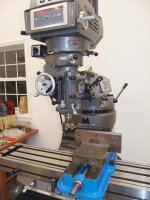
In early March I saw a Kurt D60-1 Vise advertised on Craigslist. It was nearby and the price was interesting. The vise was missing its jaws, had no handle and the seller indicated a problem with a retaining nut.

The seller and I met and came to an agreement on the price.


20180425-03.jpg

About a week later a box arrived from Kurt Workholding. Kurt has some scratch & dent stuff for sale (which is what the jaws were). I also thought their website prices for the handle and the retaining nut were fair; particularly with free shipping. I could see no flaws on the Jaws.


20180425-04.jpg

I installed all the parts and had pretty nice 6-inch machinist vise.


20180425-05.jpg

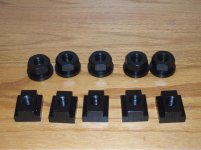
I acquired some T-Slot Nuts & some 2-1/2 inch studs.


20180425-06.jpg

I removed my 4-inch vise and mounted the Kurt onto the JET Mill's table. I'm very pleased with this addition to the shop.


Scott
 

AZpilot

Well-known member
Joined
Sep 29, 2012
Messages
413
Location
Mesa, AZ
Re: The Lone Beech Garage Build Thread (60x46)

Envious of all the cool shop tools. I have a drill press. Big deal. LOL
 
OP
S

sbosecker

Well-known member
Joined
Sep 25, 2012
Messages
3,539
Location
Peachtree City, GA
Re: The Lone Beech Garage Build Thread (60x46)

Envious of all the cool shop tools. I have a drill press. Big deal. LOL


AZpilot,

Thanks for stopping by!

Cool shop tools are one thing...

Knowing how to use them is another. Ha!

I think you're probably way ahead of me on the latter but I'm trying to learn.

Best regards,

Scott
 
OP
S

sbosecker

Well-known member
Joined
Sep 25, 2012
Messages
3,539
Location
Peachtree City, GA
Re: The Lone Beech Garage Build Thread (60x46)

Saturday - April 28, 2018


My son works for a hotel management company in their IT department. This company owns and manages several hotels in the greater Atlanta area. My son recently learned that one of his company's properties has a bunch of cubicles that are being discarded.


20180428-01.jpg

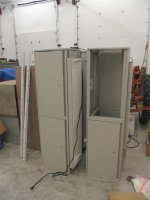
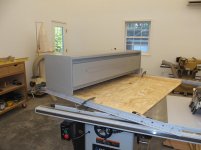
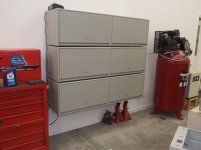
On Wednesday my son and I brought a few Cubicle Overhead Bins to the Lone Beech Garage. In the cubicle these are located over a desk at about standing eye level. They are about 5 feet wide and roughly 16" tall and 16" deep. Some of them have a fluorescent light under them which needed to be removed for my purposes.

These units were made by Steelcase and are quite well made; very sturdy with retractable doors. I suspect they were quite expensive when they were purchased about 30 years ago.

My idea was to use these cabinets as storage around the JET Mill and the Metal Lathe. After I got them home I started to realize that the 60" width limits what I can do with them.


20180428-02.jpg 20180428-03.jpg

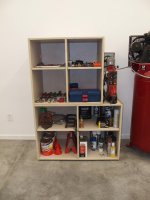
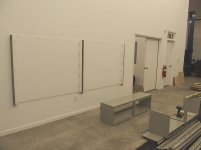
Still, I knew one place they could be used. This area with some stacked shelving could use an upgrade.


20180428-04.jpg

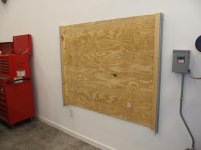
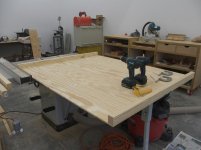
I wanted to use the rails that were in the cubicles to mount the Overhead Bins. This would require a support system. I chose to make this out of some scrap 3/8" plywood (58-1/2" x 48") and some 2x4's trimmed to size.


20180428-05.jpg

After cutting the wood I wanted to make sure the Overhead Bin's "mounting hooks" would engage the rails when they were attached to the wooden support system. To my surprise this test fit went well the first time!


20180428-06.jpg

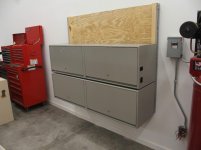
I had hoped that I could stack 4 of the Overhead Bins on the rails. However, measuring the rails revealed that I could only stack 3-1/2 Overhead Bins. I used a pneumatic cutoff tool to trim the rails to accommodate a stack of 3.


20180428-07.jpg

I mapped out the location of studs behind the drywall and, with the help of my son, mounted the support system.


Continued in next post...
 
Last edited:
OP
S

sbosecker

Well-known member
Joined
Sep 25, 2012
Messages
3,539
Location
Peachtree City, GA
Re: The Lone Beech Garage Build Thread (60x46)

Continued...


20180428-11.jpg 20180428-12.jpg 20180428-13.jpg

My son continued to help by assisting with the mounting of the Overhead Bins. It's a pretty straightforward job for two people but would be pretty difficult for one person to accomplish.


20180428-14.jpg 20180428-15.jpg

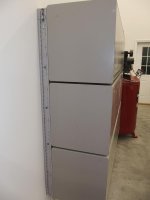
Displaying some of the retractable doors in the first picture; the second shows the rail system up close. I used five 1/4" bolts to mount each rail to the wooden support. In the cubicle the rails are covered with some trim pieces. I'm going to see if I can get a couple of those covers to clean up the look a bit.


20180428-16.jpg

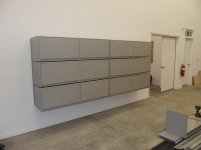
Still a few details to clean up but I think this storage idea is going to work out!


Scott
 
Last edited:

Pressingonward

Well-known member
Joined
Mar 9, 2016
Messages
522
Location
SW WA
Re: The Lone Beech Garage Build Thread (60x46)

Monday - April 23, 2018

20180423-03.jpg 20180423-04.jpg 20180423-05.jpg

With the handle removed, I now realized the Mini-Lathe might be the answer to removing the rust from the handwheel. I put in the "outside" jaws and chucked up the handwheel. I threw a rag over the ways to protect them from rust particles.

Hi Scott, I've been following along and enjoying your shop build and projects; it's been fun to watch and your shop turned out great!

I wanted to comment on your use of the rag to protect your lathe ways in the pictures above - it's easy to accidently catch a loose rag with your hand and move it around, potentially bunching it up where it could get grabbed by your chuck or workpiece.. The risk is probably low in this case, but I wouldn't make a habit of putting loose items anywhere near your lathe chuck that could get caught up in it and cause damage to you or your lathe. I would recommend a small sheet of aluminum or plastic to protect the ways while sanding. We do this at my work and lock the sheet of aluminum in place by moving the table against it gently.

All the best,
Justin
 
OP
S

sbosecker

Well-known member
Joined
Sep 25, 2012
Messages
3,539
Location
Peachtree City, GA
Re: The Lone Beech Garage Build Thread (60x46)

Hi Scott, I've been following along and enjoying your shop build and projects; it's been fun to watch and your shop turned out great!

I wanted to comment on your use of the rag to protect your lathe ways in the pictures above - it's easy to accidently catch a loose rag with your hand and move it around, potentially bunching it up where it could get grabbed by your chuck or workpiece.. The risk is probably low in this case, but I wouldn't make a habit of putting loose items anywhere near your lathe chuck that could get caught up in it and cause damage to you or your lathe. I would recommend a small sheet of aluminum or plastic to protect the ways while sanding. We do this at my work and lock the sheet of aluminum in place by moving the table against it gently.

All the best,
Justin


Justin,

Thanks for dropping by and for the very kind words!

I also appreciate very much your thoughtful comments regarding safety around the lathe. As you pointed out, probably not an issue here but...

I am new to this sort of thing so I will be developing habits now that will stick with me in the future. Now is the time to develop good habits rather than bad ones.

I will try to acquire a sheet of plastic to protect the ways. Thanks too for the tip on how to secure the protective sheet during the operation!

Best regards,

Scott
 
OP
S

sbosecker

Well-known member
Joined
Sep 25, 2012
Messages
3,539
Location
Peachtree City, GA
Re: The Lone Beech Garage Build Thread (60x46)

Sunday - April 29, 2018

I was so happy with the stacked Cubicle Overhead Bins that I decided to take advantage of the opportunity to get more of them.


20180429-01.jpg

So I got enough for 4 more stacks of 3! I think I can put a couple more stacks in a part of the long bay and maybe one or two stacks in the wood shop. I could also use them as storage in the house garage or in my basement so I'll figure out some place to use them.

They are an awkward size. I can really only get 3 of them in my pickup at a time (without risking damage) so several trips were made to get all this stuff home. It's only about a 10 to 15 minute drive one way so that wasn't a big deal.


20180429-02.jpg

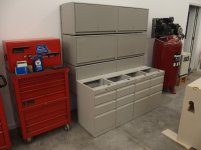
In addition to the Overhead Bins we found 4 of these drawer sets. If the newly installed Bin Stack was raised about 8 or 9 inches they would fit perfectly under it.

Tempting, but...


20180429-03.jpg

Those drawer sets might fit nicely under this piece of 1/2-inch steel and make a nice welding table set up.

Decisions, decisions...


Scott
 
Last edited:
To avoid these ads, REGISTER NOW!
OP
S

sbosecker

Well-known member
Joined
Sep 25, 2012
Messages
3,539
Location
Peachtree City, GA
Re: The Lone Beech Garage Build Thread (60x46)

Monday - April 30, 2018


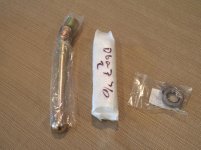
Back on April 20th I reported the acquisition of some used 5C collets. A few days later a 5C Collet Spindle Adapter for an 11-Inch Rockwell Metal Lathe was listed on eBay.


20180430-01.jpg

I purchased that adapter.


20180430-02.jpg

Last Friday I became aware of an eBay seller that had made some Thread Protectors out of aluminum that would fit the 2-1/4" - 8 thread on my 1966 Metal Lathe. I bought one of these Thread Protectors and it arrived in today's mail.


20180430-03.jpg

The Thread Protector does protect the threads during an operation that has the threads exposed but it also helps get the adapter out of the spindle.


20180430-04.jpg 20180430-05.jpg 20180430-06.jpg

I got my Draw Tube (first picture), inserted a collet into the Collet Spindle Adapter (second picture) and placed the Adapter into the Spindle. The third picture shows the Draw Tube being inserted into the Spindle.


20180430-07.jpg

I screwed the Draw Tube onto the Collet (picture). Further tightening drew the collet into the adapter (not shown).

I then loosened the Draw Tube and used a Spanner Wrench to turn the Thread Protector against the Collet Spindle Adapter. This forced the Adapter out of the Spindle.

So today's dry run seemed to work!


Scott
 
Last edited:
OP
S

sbosecker

Well-known member
Joined
Sep 25, 2012
Messages
3,539
Location
Peachtree City, GA
Re: The Lone Beech Garage Build Thread (60x46)

Tuesday - May 1, 2018


20180420-07.jpg

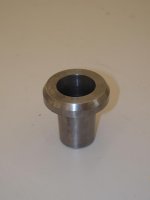
Back on April 20th I mentioned acquiring a few parts for the 1966 Rockwell 11" Metal Lathe. This bushing was one of those parts (Black Arrow).


20180501-01.jpg

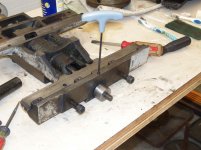
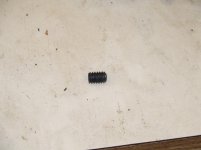
There is a V-shaped groove in the bushing who's actual purpose escaped me until the past week or so. This bushing and two 1/4"-20 x 3/8" set screws are "discarded" during the installation of the taper jig. The odd thing was the two set screws had different part numbers.

Hmmm...

Maybe one of the set screws was a cone point set screw? I couldn't find any cone point set screws of this size in my town. I went to eBay and found that I could buy one for about $3 or 25 for about $7.

Guess which way I went. Ha! I now have enough of these things to last me several lifetimes.


20180501-02.jpg

This is the underside of the lathe's Saddle.
The Black Arrow is pointing to the item that will be removed. It interfaced with the Taper Jig but with no Taper Jig the Crossfeed doesn't work.
The White Arrow points to the 1/4"-20 threaded hole that the set screws go into. Once the Bushing is in place, the cone shaped set screw allows the Crossfeed to operate correctly.


20180501-03.jpg 20180501-04.jpg

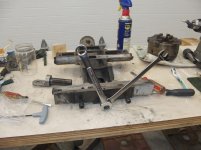
So when was the last time anyone reading this post used a 11/16" Tappet Wrench? The thinner profile of the Tappet Wrench allowed me to remove these nuts without issue.


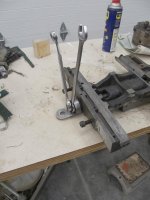
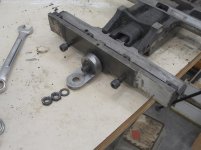
20180501-05.jpg 20180501-06.jpg

So this part was removed without issue. Time to install the bushing.


Continued in next post...
 
Last edited:
OP
S

sbosecker

Well-known member
Joined
Sep 25, 2012
Messages
3,539
Location
Peachtree City, GA
Re: The Lone Beech Garage Build Thread (60x46)

Continued...


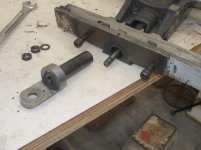
20180501-11.jpg

So I'm ready to insert the bushing into the Saddle. However, it will not slide in. I had seen this dimple - most likely caused by a misaligned cone point set screw - before I tried to insert it in the Saddle but it didn't look like it would cause a problem.

I was wrong.


20180501-12.jpg 20180501-13.jpg 20180501-14.jpg

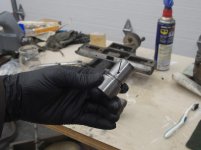
I chucked the bushing into the mini-lathe (rag in first picture was removed prior to spinning up the lathe) and started the mini-lathe.

I positioned the tool just above where the dimple was on the bushing and fed it in until it just kissed the metal. I moved the tool to the left, cleaning up the dimple. I moved in a thou and repeated a time or two until I could see just a slight indication that I was touching the original surface of the bushing.

I shut down the mini-lathe and tried inserting the bushing into the Saddle.


20180501-15.jpg 20180501-16.jpg 20180501-17.jpg

The bushing could now be installed. After it was in position, I installed the cone point set screw followed by a normal set screw.


Continued in next post...
 
Last edited:
OP
S

sbosecker

Well-known member
Joined
Sep 25, 2012
Messages
3,539
Location
Peachtree City, GA
Re: The Lone Beech Garage Build Thread (60x46)

Continued...

20180501-21.jpg

A thick washer is slid over the screw. There is an identical washer on the opposite side of the bushing.


20180501-22.jpg

The two nuts are tightened onto the screw.


The Crossfeed now operates correctly. A short video of the operational test may be viewed by clicking HERE.

The Saddle is just sitting on the ways so it does move a bit during the test.


Scott
 
Last edited:
OP
S

sbosecker

Well-known member
Joined
Sep 25, 2012
Messages
3,539
Location
Peachtree City, GA
Re: The Lone Beech Garage Build Thread (60x46)

Wednesday - May 2, 2018

I tried to clean up the details on the Cubicle Upper Bin Storage Stack today.


20180502-01.jpg

My son helped me dismount the stack before he went to work. I then primed and painted the wooden support system.


20180502-02.jpg

I added a few Hollow Wall Anchors along the right side of the support system. The black arrows point to where the stud is (left) and where I placed the Wall Anchors (right). It probably didn't do a lot but I was trying to reduce to an absolute minimum any tendency for the right vertical support rail to twist away from the wall.


20180502-03.jpg

When my son returned from work he helped me remount the cabinet stack. The painted wooden support system looks better and "brightens" the inside of the cabinets.


20180502-04.jpg 20180502-05.jpg

I threw everything that had previously been in the "stacked cubes" and then a few other things into the new setup. Obviously to use the space efficiently the hammers, wrenches & such need to find a new home and bulkier items should go into this space.

That's for another day.


Scott
 
Last edited:
OP
S

sbosecker

Well-known member
Joined
Sep 25, 2012
Messages
3,539
Location
Peachtree City, GA
Re: The Lone Beech Garage Build Thread (60x46)

Thursday - May 3, 2018


20180503-01.jpg

Today I managed to find 4 - and only 4 - cubicle drawer sets that fit exactly under the current bin stack. The beauty of these particular drawer sets is that I didn't need to change height of the already mounted overhead bins.

Sweet!

They do stick out beyond the front of the overhead bins a few inches but I'll put some sort of cover on them as soon as I can.


20180503-02.jpg 20180503-03.jpg 20180503-04.jpg

The rest of today's available shop time was spent building & priming a couple more wooden support structures for the next two sets of stacked overhead bins.

I hope to put a coat of paint on them tomorrow and, maybe, get them mounted on a wall.


Scott
 
Last edited:

1949 caddyman

Well-known member
Joined
Oct 5, 2010
Messages
1,778
Location
Arizona
Re: The Lone Beech Garage Build Thread (60x46)

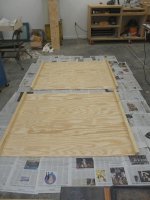
I’m liking the way you’re recycling equipment in Your shop! It also looks like you get a printed newspaper. They make a great masking paper.
 

250

Well-known member
Joined
Oct 16, 2014
Messages
537
Location
West of the Sierras
Re: The Lone Beech Garage Build Thread (60x46)

Nice job on the storage. I find that neat and clean shop storage is a real challenge without spending a bundle.
 
OP
S

sbosecker

Well-known member
Joined
Sep 25, 2012
Messages
3,539
Location
Peachtree City, GA
Re: The Lone Beech Garage Build Thread (60x46)

I’m liking the way you’re recycling equipment in Your shop! It also looks like you get a printed newspaper. They make a great masking paper.

Nice job on the storage. I find that neat and clean shop storage is a real challenge without spending a bundle.


1949 caddyman & 250,

Thanks for the kind words! I really lucked out on these cabinets & such.

When the opportunity presented itself, I dropped all other projects and jumped on these things.

I made a pretty good dent in getting some of the accumulation of tin off the shop floor today.


Best regards,

Scott
 
OP
S

sbosecker

Well-known member
Joined
Sep 25, 2012
Messages
3,539
Location
Peachtree City, GA
Re: The Lone Beech Garage Build Thread (60x46)

Friday - May 4, 2018


20180504-01.jpg 20180504-02.jpg

One of the items that I got in the Office Cubicle accumulation was a Hon 3-shelf bookcase. It's been a while since I've done anything in the Mezzanine Office Space.

I took the bookcase upstairs and placed the security "stuff" on top of it. I then made several trips from my house with my accumulation of Fine Woodworking magazines. This is the place to store that sort of thing.


20180504-03.jpg

I got a coat of white paint onto the Overhead Bin Supports this morning.


20180504-04.jpg

While the paint dried I trimmed the Support Rails with my Portable Band Saw.

I also mapped out the studs on the wall the Overhead Bin Stacks would be mounted.


20180504-05.jpg

After the paint had dried enough, I attached the rails to the Supports.


20180504-06.jpg 20180504-07.jpg

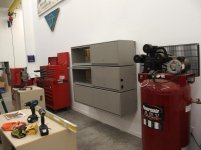
My wife helped me mount the Supports to a wall in the long bay of the LBG. When my son came home from work, he helped me get the Overhead Bin Stacks installed on the rails.

This setup is about 10 feet wide and the cabinet stack is about 4 feet tall.

I'm pretty happy with all this storage. All I have invested is some plywood and lumber from Home Depot and a few hours of labor.


Scott
 
Last edited:
OP
S

sbosecker

Well-known member
Joined
Sep 25, 2012
Messages
3,539
Location
Peachtree City, GA
Re: The Lone Beech Garage Build Thread (60x46)

Sunday - May 6, 2018


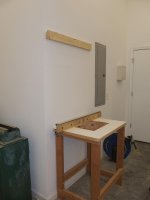
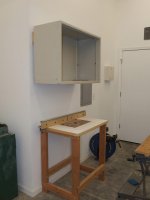
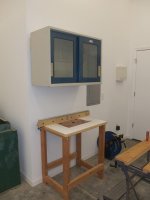
Back in January ...of 2016... I acquired a wall cabinet at a local business auction. It has a couple of sliding glass doors and is 3 feet wide by 2 feet tall and about 17 inches deep. It is a well made cabinet.

When I got it the Lone Beech Garage was still being built. I sat the cabinet aside and worked on other stuff.

Today I decided to hang this cabinet. It looked like is should work well over the router table.


20180506-01.jpg 20180506-02.jpg 20180506-03.jpg

I decided mounting the cabinet using a French Cleat made the most sense.


20180506-04.jpg 20180506-05.jpg

Glad to have that up on the wall!


Scott
 
OP
S

sbosecker

Well-known member
Joined
Sep 25, 2012
Messages
3,539
Location
Peachtree City, GA
Re: The Lone Beech Garage Build Thread (60x46)

Monday - May 7, 2018

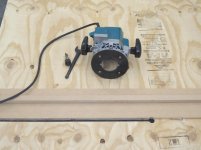
This evening I posted a thread in THE GENERAL TOOL DISCUSION regarding a problem I had with my Makita 3612BR Plunge Router a few days ago.


20180507-01.jpg 20180507-02.jpg 20180507-03.jpg

The thread is entitled: Makita 3612BR Plunge Router Collet Failure

That seemed like the right place to try to get information on whether this is repairable or not.

I think that is a date stamp on the Router's Data Plate. February 1985 (85 . 2) sounds about right for this machine.

Scott
 
OP
S

sbosecker

Well-known member
Joined
Sep 25, 2012
Messages
3,539
Location
Peachtree City, GA
Re: The Lone Beech Garage Build Thread (60x46)

Wednesday - May 9, 2018


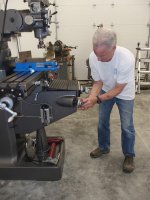
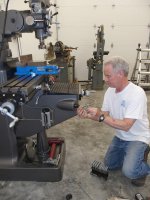
This evening I started the installation of the Z-Axis Power Feed on the JET Mill.


20180509-01.jpg

The beginning...
When all things - despite the rather poor documentation - seemed possible.


20180509-02.jpg

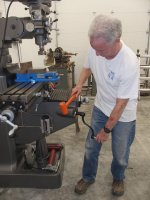
Removed the Knee Hand Crank.


20180509-03.jpg

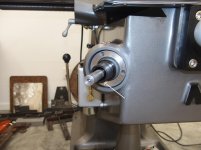
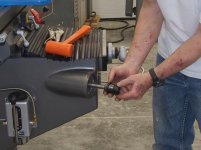
Removed the Clutch Insert. This just slides out and off.


20180509-04.jpg

Removed the Dial Nut. This screws off - Right Hand Threads.


20180509-05.jpg

Removed the Dial. Slides out and off.


20180509-06.jpg

Removed the Dial Shims.


20180509-07.jpg

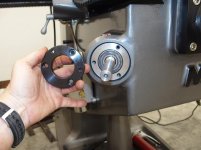
At this point the "Instructions" called for removing the Dial Holder. This is threaded on (Right Hand Threads) and I watched a couple of YouTube Videos that showed this procedure. It didn't appear from those videos that I should have any trouble getting it off.

However I wasn't having any luck. The Dial Holder had some scuffs on its paint that looked like someone had gripped it with a tool. I thought that might be a bad sign as I had purchased this machine new.

I elected to remove the Bearing Flange and see if that would reveal a path to removing the Dial Holder.


Continued in next post...
 
Last edited:
OP
S

sbosecker

Well-known member
Joined
Sep 25, 2012
Messages
3,539
Location
Peachtree City, GA
Re: The Lone Beech Garage Build Thread (60x46)

Continued...


20180509-11.jpg

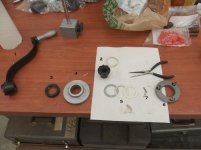
So here's what's been removed so far...

1. Knee Crank
2. Clutch Insert
3. Dial Nut
4. Dial
5. Shims
6. Bearing Flange
7. Shaft Key


20180509-12.jpg

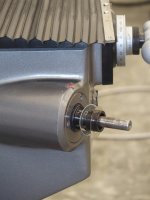
White Arrow points to the Dial Holder. This son-of-a-bleep is fast on the shaft. Part of the issue was the shaft was turning when I tried to turn the Dial Holder.

After fighting it for a while with no positive result, I finally realized that I needed to get the Key back into the shaft.

The Key had fallen out (it was facing down) during the disassembly of the various components. It was in between the shaft and the Dial Holder and I snatched it out with a Needle-Nose pliers.

How to get it back in? The shaft's Keyway was inside the Dial Holder. I had very little access to achieve success but, after a few attempts using needle-nose pliers and a very small screwdriver, I got the Key back into the Keyway.

I inserted the Clutch Insert onto the shaft, grabbed the Dial Holder with some Vise Grips, and engaged the Hand Crank with the Clutch Insert.


20180509-13.jpg

I positioned the Hand Crank against my leg and whacked the Vise Grips with a dead-blow hammer. I think it was the second whack that did it.


20180509-14.jpg

The Dial Holder could now be spun off.


20180509-15.jpg

Everything that needed to be removed has been removed.


20180509-16.jpg

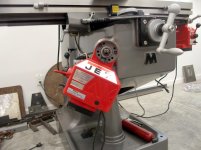
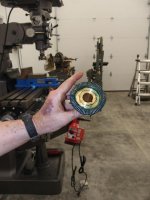
The Instructions called for the Extension Shaft to be threaded on at this point. As shipped, the Extension Shaft had the Clutch on it and I could see that the Flange wouldn't fit over that.

I decided to install the Flange first and I was a bit surprised at the orientation of the flange's mounting holes as the drawing in the "Instructions" showed a different arrangement for the holes.


20180509-17.jpg

I installed the Flange.


Continued in next post...
 
Last edited:
OP
S

sbosecker

Well-known member
Joined
Sep 25, 2012
Messages
3,539
Location
Peachtree City, GA
Re: The Lone Beech Garage Build Thread (60x46)

Continued...


20180509-21.jpg

Upon further review I discovered the Clutch slides right off. I removed it and then I installed the Extension Shaft by threading it on and I ensured the Extension Shaft was against the Bearing.


20180509-22.jpg 20180509-23.jpg

The first picture shows the arrangement of the Power Feed's mounting holes. I slid the Power Feed onto the Extension Shaft.


20180509-24.jpg

Weird... this is the closest I could get to a vertical mount. I decided to worry about that later as it was getting late.


20180509-25.jpg 20180509-26.jpg

I greased the Bevel Gear and then slid it onto the shaft.


20180509-27.jpg

What happens next is a lot of installing and removing components. Shims are added and removed to get the best "feel" of the gears meshing. "Obtain proper mesh" is the only help the "Instructions" provide.


Continued in next post...
 
Last edited:
OP
S

sbosecker

Well-known member
Joined
Sep 25, 2012
Messages
3,539
Location
Peachtree City, GA
Re: The Lone Beech Garage Build Thread (60x46)

Continued...
20180509-31.jpg 20180509-32.jpg

When satisfied the gears were meshing properly and the Dial had enough clearance to spin freely, the Dial Nut was installed as then the Clutch.

I ran the Power Feed through its paces. Everything seemed fine except the Power Feed seemed a little loose on the Flange.

When I mounted the Power Feed to the Flange it seemed like the supplied bolts bottomed out before I had them tight against the Flange.

It is late. I'll work on that tomorrow.

Scott
 
Last edited:
OP
S

sbosecker

Well-known member
Joined
Sep 25, 2012
Messages
3,539
Location
Peachtree City, GA
Re: The Lone Beech Garage Build Thread (60x46)

Thursday - May 10, 2018

So it was back out to the shop this morning to continue the Z-Axis Powerfeed installation on the JET Mill.


20180510-01.jpg

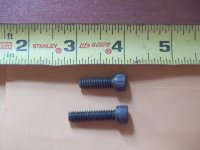
The first thing I needed to do was to see about the loose mounting of the Powerfeed. I removed the stack of components on the spindle until I got to the Flange. I removed one of the 2 Cap Screws that came with the kit. I then drove to a local hardware store and bought 2 similar, but 1/4-inch shorter, Cap Screws. I would have preferred to only go about 1/8" shorter but this was what they had. In the picture the supplied screw is on the bottom and the purchased replacement is on top.


20180510-02.jpg

I used the two shorter Cap Screws to mount the Powerfeed to the Mill. That did the trick; the Powerfeed was now tight on the mill.


20180510-03.jpg

Although I had done the drill mentally and it didn't achieve better results, I was all set to remove the Powerfeed and try different mounting positions in an attempt to get the Powerfeed to "sit upright".

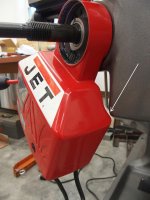
That's when I noticed there is a clearance problem if the Powerfeed is vertical (White Arrow). This seems to be the way the Powerfeed is to be mounted. Later today, while on-line trying to research mounting the Limit Switch Assembly, I came across a picture on the JET Tools website that showed the Z-Axis Powerfeed mounted canted just like mine is. That would seem to confirm that this is the correct orientation for the Powerfeed.


With the Powerfeed mounted, I decided to exercise the controls of the machine. To see a video of that, click HERE.

There is still a step remaining for the installation of the Powerfeed on the Mill. A hole is to be drilled though the Clutch into the Spindle Extension and a Pin installed. I will wait a bit longer and insure that I've got everything the way it is supposed to be before I do that.


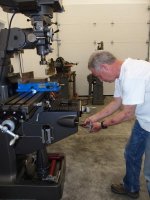
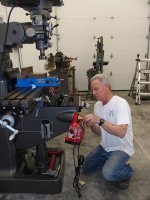
I now started taking the Limit Switch Assembly out of its packaging. I got a bit of a surprise.


20180510-04.jpg

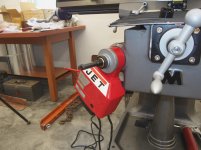
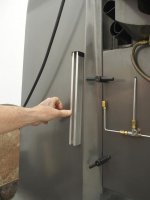
There's a couple pieces of aluminum channel that hold the "stops" for the Limit Switch. This aluminum channel doesn't fit in close to the Knee due to a more "organic" casting than the Bridgeports have. Where I am holding it seems to be the closest I can get to the Knee with this item. This is different than any of the YouTube Videos that I came across.


20180510-05.jpg

This is the Bracket that holds the Limit Switch.


20180510-06.jpg

This is - sorta - the way the Limit Switch and the Bracket interface.


20180510-07.jpg

This is an attempt to demonstrate - and take a picture of the demonstration - of how the Bracket is going to need quite a bit of help to get the Limit Switch anywhere near where the Aluminum Channel is holding the Stops.


I'm a bit disappointed in this situation. This JET branded item has a price that reflects some "added value" vs. the Align Powerfeeds they appear to be based on (see LINK - it appears to be identical to the JET). It was one of the reasons I purchase a "JET" Powerfeed. I thought it would be customized for their machines.

I'm confident that JET is using a different Bracket to mount the Powerfeed on the machines they sell with this option. I'll be giving them a call tomorrow to ask about this.


Scott
 
Last edited:
OP
S

sbosecker

Well-known member
Joined
Sep 25, 2012
Messages
3,539
Location
Peachtree City, GA
Re: The Lone Beech Garage Build Thread (60x46)

Friday - May 11, 2018

I had a nice chat with Mary at JET's Metalworking Technical Support this morning. I explained my problem with the Limit Switch mounting hardware and asked if it would be possible to get pictures of how JET mounted this device at their distribution center. I followed up with an email

Early afternoon I got a reply email with 3 images of a JET Mill with the Z-Axis Limit Switch mounted. This confirmed my theory that JET had "special" brackets available for their distribution center's use.


20180511-01.jpg 20180511-02.jpg 20180511-03.jpg

So this is how the big boys do it.

I sent a reply to Mary thanking her for the images and asking if the Z-Axis Limit Switch hardware would be available to someone (me) who had purchased JET Powerfeeds & a JET Mill.

I was hoping to get an affirmative reply and this is what I would use to mount the Z-Axis Limit Switch assembly. If not, I was sure that I could replicate it but why reinvent the wheel?

Got a couple more emails this afternoon from Mary at JET Technical Support. She is arranging for the JET Distribution Center Brackets/Hardware to be sent to me.

All she wanted was a receipt showing where I had bought the Powerfeeds from, my mailing address & phone contact info.

I am extremely pleased with JET's (and Mary's!) response. My only concern is that I'm doing this (late) on a Friday afternoon. I've found that the most sincere customer service on a Friday afternoon often goes pear-shaped over the weekend and the process must be repeated early in the following week.

Hopefully the brackets/hardware will be shipped without further input by me.


Scott

Key Words: JET 350196 Powerfeed Power Feed Z-Axis Knee Limit Switch Bracket Hardware
 
Last edited:
OP
S

sbosecker

Well-known member
Joined
Sep 25, 2012
Messages
3,539
Location
Peachtree City, GA
Re: The Lone Beech Garage Build Thread (60x46)

1/2 Cup,

I'm so pleased that you drop in from time to time...
Thank you for the kind words!

Best regards,

Scott
 
To avoid these ads, REGISTER NOW!
Top Bottom