To avoid these ads, REGISTER NOW!

21'x21' ///M Garage Build

neogenesis2004

Well-known member
Joined
Jan 21, 2014
Messages
49
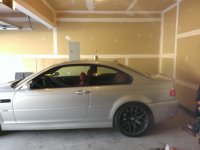
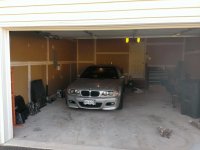
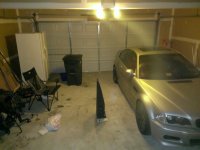
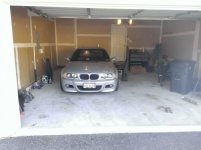
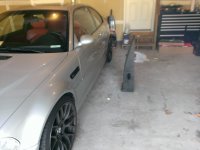
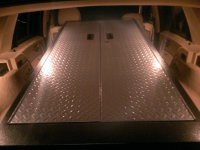
I've been lurking the forums here for a while, checking out all the nice garages/work spaces and gathering ideas. I do about 99% of my own mechanic work to include engine building and more. So it's very important to me to have a nice, organized space whenever possible to increase my comfort and efficiency. My garage is about 21x21x9.5. So its not huge by any stretch and not super tall. It's a good size space compared to anything I've had in the past, and with the right choices I think it will become an absolutely great space.

About the space:
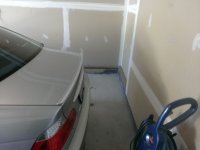
Like I said above, its roughly 21x21x9.5 standard 2 car garage. The entry door to the house is at just about the center of the rear wall. The plan is to have the rear wall lined with wall cabinets all the way across. To the left of the stairs will be a tall floor cabinet against the left wall, and a workbench with tool box underneath between that and the stairs. On the right of the stairs it will be mostly open with just one of those standing plastic sinks, and a spot for my engine lift and shop press. The reason for the open space is to enable easier ability to pull an engine out the front of one of my cars. Thus, the lift will be in the right bay. I'm still deciding, but I'm also thinking the wall cabinets on the rear wall will wrap around and continue on the wall of the left bay (better to have too much storage right?). So that's it for the basics of the layout I'm looking to do.

Fun parts:

Lift:
I've spent a lot of time thinking about this decision, going back and forth around a handful of them. I've jumped between the MaxJax, a regular midrise, and various other midrise or full rise scissor lifts. The biggest variables being width/footprint, underbody access, price, ease of install. I have a crack running right down the center of my garage slab running left to right, so that is a big factor of the overall potential cost and ease on install considerations that has gone in to my decision.

The MaxJax is great, but it would require concrete work because of the location of the crack in my floor. So that would be additional cost and time. The biggest issue though is just how wide the two post setup would be. I have 2 E46 M3's in the garage, so they are each fairly wide. After measuring, the MaxJax would make using the other bay pretty tight on a daily basis so I've ruled it out.

The lift that I ultimately think I will be getting is the Atlas Kwik Bay 7000 mid rise scissor lift. It has a completely open center, price is reasonable compared to the other options I was considering, it doesn't require bolting to the floor so the crack isn't a concern, and the footprint is no wider than the car that will sit on top of it. Also, there is a Greg Smith Equipment warehouse in Delaware a few hours away. So I could pick up the lift in a truck and drive it home to save on shipping.

Cabinets:
I am leaning toward white Ikea cabinets with a yet to be determined door color. I'd prefer to to have solid wood cabinets, but I don't have the setup or the time to make my own cabinets from quality plywood and I don't want to get bent over from some cabinet supplier. Definitely open to options here.

Workbench:
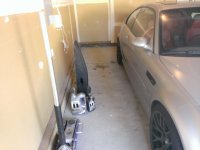
I just picked up a 6ft Gladiator adjustable bench from Sears Outlet for $350 out the door, $150 off the new price. I feel like I got a solid deal for basically new. It really is a nice piece, really hefty and solid. Pic attached.

Toolbox:
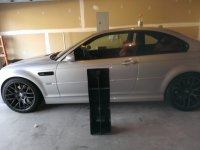
To go along with my workbench find, during the same search I found out that my local Sears was getting rid of a display model Viper Tool Storage 41" 9 drawer toolbox. I got it for just about $400 out the door, $270 off new price. It's basically brand new with just some minor scuffing on the top. It will be residing under the workbench though so that doesn't matter at all to me. Pic attached. If I outgrow it I can look in to getting one or two side cabinets for it.

Compressor:
I haven't put a ton of research in to this yet. I'd like to get a large 60-80Gal upright compressor and most likely install it into the utility room in the basement. From there, copper pipe it up in to the garage and have a drop line coil mounted in the center of the ceiling, and a hookup on the left and right walls and one by the workbench on the rear wall.

Flooring:
I love the clean look of epoxy floors, but I'm not really interested in not being able to use my space for even more than a day. I have some really really heavy stuff in there that I just can't move anywhere else, multiple spare M3 motors and other stuff. Another thing that steers me away from it is that my knees, ankles, and heels just do not agree with standing on concrete for extended periods, which I'm prone to do in the garage. All that said, I'm leaning toward some sort of garage floor tiles. Those will absorb some of the shock from standing, and I can install them in a full day and be able to move my large heavy items around with my engine lift during the install. I haven't settled on any particular brand or tile style yet.

Climate Control:
I plan on most likely getting a mini split heat pump installed so that I can independently heat/cool the garage without having to worry about code regarding sharing climate control with the rest of the house.

Where to go from here:
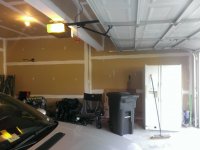
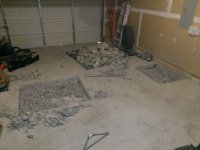
Right now the garage is pretty plain and barren. It's also sort of a mess at the moment with parts all over the place from my project car and maintenance on the other M3. I need to move as much as possible into temp storage in the basement. High level list of things to do:
1) Clean out garage and move stuff to the basement.
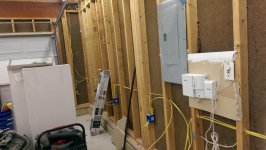
2) Get an electrician to come in and install additional 120V and 240V outlets
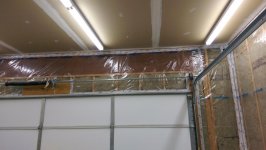
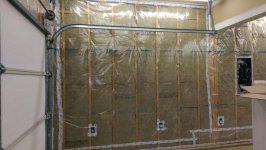
3) Insulate the garage door, above the open ceiling, and in the one exterior wall if it is not already.
4) Get someone to come in and finish the drywall.
5) Paint. I hate painting because I'm extremely **** about details, so I am never satisfied....
6) Hang cabinets.
7) Install garage tiles on floor.
8) Get a plumber to install garage sink.
9) Begin bringing tools, etc... back up into the garage and organize into toolbox and cabinets.
10) Purchase and install lift.
11) ...
12) Profit?

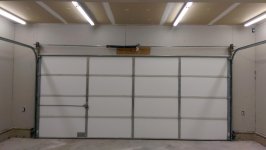
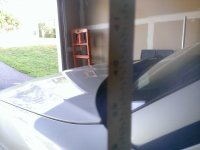
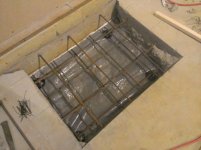
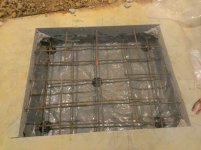
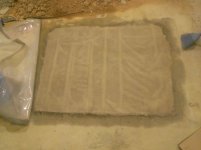
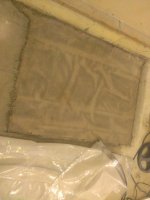
Pardon the initial crappy phone pics. I'll start using my digicam as I make progress.
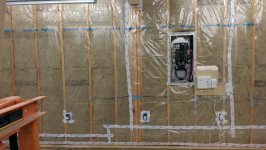
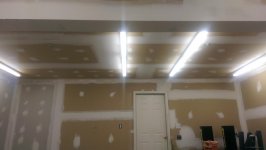
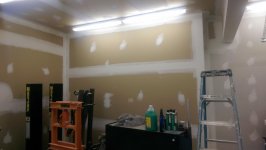
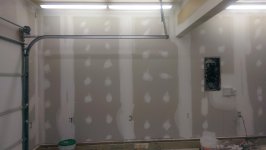
 

Attachments

  • WP_20140514_009.jpg
    WP_20140514_009.jpg
    69.5 KB · Views: 338
  • WP_20140514_004.jpg
    WP_20140514_004.jpg
    76 KB · Views: 483
  • WP_20140514_001.jpg
    WP_20140514_001.jpg
    73.3 KB · Views: 346
To avoid these ads, REGISTER NOW!

dubber

Well-known member
Joined
Dec 31, 2012
Messages
5,326
Location
Canada's Capital
I'm sure this will be an amazing place. Two M3's with multiple extra motors? Wow, are you tracking them? I'm starting to plan out my next space which will be slightly smaller then yours but its great to see the ideas. I've also had my eye on that Gladiator workbench, but the fixed legged version, sells for $299 in Canada @ Lowes. How deep is yours? The fixed leg is 23".

Good luck, i'll definitely be checking back.
 
Last edited:
OP
N

neogenesis2004

Well-known member
Joined
Jan 21, 2014
Messages
49
Not a lot has happened work-wise on the garage since last time. Other chores keep getting in the way. I spent a weekend paint correcting and detailing my 1st gen Insight to get it ready to put up for sale. Once that is gone I'll have room in the driveway to push the rolling chassis M3 into the driveway and put a cover on it. Once I can get it out of the garage I will be able to start gutting the drywall to do electrical, insulate, and put up new drywall.

Anyways, small update for now. I've been keeping an eye on Gladiator deals that Sears keeps putting on and dropping the hammer on things I wanted but were too expensive to stomach. I picked up 6 of the 30" welded cabinets, and just today went and picked up 46 boxes of 4' Gearwall. It's enough Gearwall to make a 6-7' tall strip on all 3 walls, almost floor to ceiling. I considered buying enough to do that, but I want to leave enough room to have a little bit of color on the walls to break up the monotony of the white Gearwall and white ceiling.

The cabinets were $99/ea, and the Gearwall came out to about $16/ea since they were 50% off and BOGO. All in all I saved about $600+ on the cabinets and like $2300 on the Gearwall.
 

Attachments

  • WP_20140614_001.jpg
    WP_20140614_001.jpg
    49.3 KB · Views: 225
Last edited:
OP
N

neogenesis2004

Well-known member
Joined
Jan 21, 2014
Messages
49
I went ahead and bought a MaxJax while it's on sale at Costco. I figured $2k was a good price, Costco includes liftgate in their price, and I just can't (don't want to) wait for another group buy to come around for just a couple hundred more dollars in savings. It should be delivered this time next week.

Since my first post I was able to think of a better way to orient the car in my garage for lifting which will give me more vertical height, avoiding the beam near the middle of the garage. The best part about the adjusted layout is that it moves me 13-14" away from the crack going across the floor. So I decided to go with the MaxJax after all. Really looking forward to getting it, and ready to use it on a couple tasks immediately!
 

bonecrrusher

Well-known member
Joined
Aug 18, 2011
Messages
578
Location
Charlotte, NC
When did you get the 30' premium wall cabinets?

I haven't seen them marked down that low since Black Friday like 2 years ago.
 
OP
N

neogenesis2004

Well-known member
Joined
Jan 21, 2014
Messages
49
I bought the cabinets on May 25th and had them shipped to the store. They had a sale on the website that week for $99/ea. Then two weeks later they had the Gearwall on sale, so I jumped on that too.

I have a tab in my browser open pretty much 24x7 for slickdeals.net. I just refresh it every few hours and if something pops up that I really want or need on the front page where the hot deals are I go ahead and grab it. That is how I've seen all the Sears deals so far. Someone eventually posts them on the deals forum here, but nowhere near as fast as they show up on that site.
 
OP
N

neogenesis2004

Well-known member
Joined
Jan 21, 2014
Messages
49
I spent nearly the entire day moving stuff out of the garage, around the house, and down in to the basement. As well as cleaning the floor, putting away tools, etc... I'm unbelievably exhausted but very happy with the progress.

I'm attaching pics of the progress (I'll have to make a second post with the rest of the pics) and also of where the car and the MaxJax posts will go. I didn't really take any before pics, but it basically looks like the mess from my first post. Now I've pushed the rolling M3 into the driveway and put a car cover on it to appease the HOA nazis. I put the good engine on a dolly from HF so that I can push it around like I can the blown one with my spare trans. I also moved the toolbox over where its permanent resting location will be. Eventually it will have my Gladiator 6' adjustable workbench overtop of it. I plan on taking off the castors an putting it on feet like 1" off the ground so that I can lower the workbench around 3" to make it more comfortable. I also plan on purchasing a matching black Viper 16" rolling cart that will be my mobile toolbox and will fit under the workbench beside the toolbox.

The white fridge is going on Craigslist in a few minutes, spent a coupe hours cleaning it up as well. I bought it used when I had some family living with me to let them use, but they are moved out now so its purpose has been served and it's time to go. It is taking up needed garage space.
 
OP
N

neogenesis2004

Well-known member
Joined
Jan 21, 2014
Messages
49
Pics didn't seem to attach in he last post... These 7 pics show the garage after most of the stuff that can be removed has been removed. The engines are pretty heavy, so they aren't just getting picked up and put in the basement. Pic 7 shows the rear clearance when the car is backed up in to the position where it will sit on the MaxJax.
 

Attachments

  • WP_20140628_007.jpg
    WP_20140628_007.jpg
    112.1 KB · Views: 181
  • WP_20140628_006.jpg
    WP_20140628_006.jpg
    129.4 KB · Views: 196
  • WP_20140628_005.jpg
    WP_20140628_005.jpg
    123.5 KB · Views: 209
  • WP_20140628_004.jpg
    WP_20140628_004.jpg
    67.5 KB · Views: 224
  • WP_20140628_003.jpg
    WP_20140628_003.jpg
    144.2 KB · Views: 239
  • WP_20140628_002.jpg
    WP_20140628_002.jpg
    68.2 KB · Views: 262
  • WP_20140628_001.jpg
    WP_20140628_001.jpg
    142.9 KB · Views: 300
OP
N

neogenesis2004

Well-known member
Joined
Jan 21, 2014
Messages
49
The first pic shows the vertical height of the beam, 93". The other tape measure pic crappily shows the height of the windshield on the position where the car will be lifted, ~42". So I have clearance for about 51", just enough to go full height. It is possibly in the cards to someday have that beam flushed up to the floor above, that would gain me another 8" or 10". Not sure what size the floor beams are off the top of my head. Also in these pics, the ramps are roughly the locations of the MaxJax posts at 128" which from what I've read is a good spacing for an E46 M3. I've decided after seeing the floors clean and cleared that I will be cutting an pouring new pads for the posts. My floor has shrinkage cracks all over the place and I just don't want to chance anything. One the posts come in I will assemble them and place everything out. From there I will make pads like 1-1.5' larger than the post base in each direction. MaxJax is getting delivered on Tuesday, so I'll probably be renting the concrete saw on Thursday to cut it up that night. Hoping to be pouring new pads next weekend.

An added benefit of having everything setup for backing in is that when I pull in normally neither post is in the way of opening the doors at all.
 

Attachments

  • WP_20140628_033.jpg
    WP_20140628_033.jpg
    142 KB · Views: 151
  • WP_20140628_020.jpg
    WP_20140628_020.jpg
    129.9 KB · Views: 150
  • WP_20140628_017.jpg
    WP_20140628_017.jpg
    74.2 KB · Views: 148
  • WP_20140628_012.jpg
    WP_20140628_012.jpg
    132.5 KB · Views: 134
  • WP_20140628_011.jpg
    WP_20140628_011.jpg
    132.8 KB · Views: 143
  • WP_20140628_010.jpg
    WP_20140628_010.jpg
    141.4 KB · Views: 114
  • WP_20140628_009.jpg
    WP_20140628_009.jpg
    115.4 KB · Views: 128
OP
N

neogenesis2004

Well-known member
Joined
Jan 21, 2014
Messages
49
Dollys like that are on my short list once I get all the rest of the garage build done and start working in earnest on the project car. They will be really useful for moving the rolling chassis left and right between spots in the garage until it is moving under its own power. Otherwise though, it is not difficult fitting 2 cars in there and pulling in/out.
 

bonecrrusher

Well-known member
Joined
Aug 18, 2011
Messages
578
Location
Charlotte, NC
You've got a lot of the same tools that I do - if you need more ideas checkout my thread.

I've got the Maxjax, Gladiator cabinents and benches, etc.

You will like the Gladiator brand equipment - word of advice on the MaxJax - get the 90* hydraulic hose fittings as it ***** getting tripped over them all the time.

Also - I reccomend the Greg Smith low profile jacks stands - they will allow you to hold up exhaust parts, transmissions, etc when the BMW is up in the air.
 
OP
N

neogenesis2004

Well-known member
Joined
Jan 21, 2014
Messages
49
Oh hey, whats this little thing here?


I gave the truck driver $40 and he backed the entire semi truck into my driveway right up to my garage door, so offloading was super simple. One thing to note that I wasn't aware of, the MaxJax does not come on a pallet at all so I had to scramble to find some spacers so that the guy could put them between the posts and the pallet jack. Luckily I have some random bricks that had been left in the basement by the previous owner.
 

Attachments

  • WP_20140702_001.jpg
    WP_20140702_001.jpg
    133.2 KB · Views: 195
  • WP_20140702_002.jpg
    WP_20140702_002.jpg
    129.7 KB · Views: 126
OP
N

neogenesis2004

Well-known member
Joined
Jan 21, 2014
Messages
49
Quick update, today I rented a 14" Makita electric concrete saw from Home Depot. The thinking was that it would be quieter than a gas one and sufficient to get the job done. Well, it did the job but it took forever. Imagine leaning over for 2-3 hours straight.... not fun, ever. So I cut max depth on that thing and it was still cutting even at the very bottom, ~5". So I'm thinking my floor is at least 6" thick at this point but possibly more. I bought a Hitachi SDS-Plus rotary hammer on Amazon for like $90 on sale, that will be coming next week. I was contemplating renting a SDS-Max one, but since I'll need to rent it 2x for pinning the existing pad and then again to drill the anchors. I decided to buy the Hitachi for the same price as 2 rentals. Wishing right now that my floor had been properly cured so that it didn't have all the shrinkage cracks, it is absolutely thick enough.

So the original plan was to cut the outline, and then make cuts to make 12"x12" blocks. I threw that out the window 1 hour in. I work from home so I'll rent the Hilti Pro Hammer from HD on Monday night, and take 4 hours off during the day on Tuesday. That way I can break it up while all the neighbors are away at work.

I'll post picks later after the dust has settled. It's been 3 hours and there is still some haze lingering in the air. I haven't opened the garage door at all because the M3's are right on the other side. I have no interest in them getting covered in concrete dust.

I've gotten a few other goodies in as well in preparation. I ordered 2 Traxion Progear Mobile Seats, http://www.amazon.com/gp/product/B007JYSWAA/?tag=atomicindus08-20 . I also ordered a bunch of fittings for the MaxJax preemtping any sort of leaking that some people have. With that order I also ordered 4 flat faced quick disconnects to put on both sides of the hoses.
 
OP
N

neogenesis2004

Well-known member
Joined
Jan 21, 2014
Messages
49
I just got done using the Hilti TE3000 from HD. That thing is a beast, I would highly recommend it over any of the smaller hammers. Easily worth the 24 hour rental cost over the others just in the ease of use and time savings. What you see in the first pic is what it did to the 2 pads....in only 30 min with a couple breaks to catch my breath and move out the big chunks to make breaking easier.

Question on the second pic. There is some sort of random wire that just is floating in the floor down there. It doesn't appear to be attached to anything at all, and its not hot or anything like that. My saw didn't cut it, its like 12" down there. It was slightly embedded in one of the last chunks I took out. I'm leaning toward it just being waste wire that was on the floor since the electrical box is right above this pad. The other side is still embedded in concrete so I won't be able to pull it out.

Turns out the concrete is just over 5" thick which would have been great without the shrinkage cracks. Glad I went ahead and removed the concrete though. As I was breaking chunks were just easily peeling off along every single crack. So I'm sure they had a decent mechanical bond because the cracks were not wide at all, but they were still weaker than no cracks at all.

My SDS bit comes in today, and my Hitachi rotary hammer comes in tomorrow. So I'll have the existing pad pinned, hole dug out, and rebar cage ******* and ready to go for concrete pouring on Saturday. Really getting a lot of positive motivation now that this part of the demo is done. It was the biggest thing dragging me down mentally. The weekend after next, after the concrete has had 7 days to harden, I will demo all the drywall on the walls and ceiling and call in an electrician for lighting and outlets.
 
OP
N

neogenesis2004

Well-known member
Joined
Jan 21, 2014
Messages
49
Floor pics
 

Attachments

  • WP_20140708_002.jpg
    WP_20140708_002.jpg
    108.6 KB · Views: 198
  • WP_20140708_001.jpg
    WP_20140708_001.jpg
    134.8 KB · Views: 272

CooperS7777

Well-known member
Joined
Apr 14, 2010
Messages
120
Location
Lakes Region, NH
Awesome build, and beautiful cars! I love how your making the best out of the space that you have.

I have an Evo X that is my dedicated track car right now, but I've really been getting an itch for an E46 lately...perhaps after we finish the new garage!
 
OP
N

neogenesis2004

Well-known member
Joined
Jan 21, 2014
Messages
49
It took 2 trips to the dump with the back of the X3 full of concrete chunks, and a whole lot of sweat, but all the rubble is gone. I filled 12 5gal buckets with the small to medium-small pieces a well. Glad that is all over with. Right now the plan is to rent the 6 cuft mixer from HD tomorrow night before they close and probably do the pouring overnight. The attached picture is what 60 80lb bags of concrete looks like.

Also in the pic you can see I got in 2 boxes of the Matador garage door insulation. It's pretty nice stuff. So far I'e only put in a single panel just to see how easy it is. Pretty idiot proof.
 

Attachments

  • WP_20140710_001.jpg
    WP_20140710_001.jpg
    126.5 KB · Views: 193
To avoid these ads, REGISTER NOW!
OP
N

neogenesis2004

Well-known member
Joined
Jan 21, 2014
Messages
49
Long time no post.... Finally got the pads totally dug out, prepped, and poured concrete. Work, life, and other projects have killed my motivation until this last weekend.

Right now I only have the prepped pics to attach. The concrete is covered in 6mil plastic with the edges sealed to the floor with duct tape, so nothing to take pics of there really atm. I pretty much plan on just leaving it covered for 30 days. No reason to take the plastic off before then afaik. I can't drill it for my epoxy anchors before before then.

As you can see in the pics, I opted for overkill. I figured, if I went through all the hassle... and it was a lottttttttt.... of cutting, digging, hauling away, etc... I might as well make this thing bulletproof. So I dug down 12", filled back 2" of gravel to make the pads 10" thick. I layed down a bottom layer of 1/2" rebar on 2.5" stands, drilled 6-8" into the existing slab and epoxied 1.5ft 1/2" rebar lengths, and also dug 6" under the slab around the perimeter of the slab hole. In all, I used 43 80lb bags of concrete. So I definitely over-ordered on the bags of concrete. I guess when they say that each bag is approx 0.6cuft they must be erring well on the low side. No worries, I'll just list them on craigslist for 1/2 price. I'd return them but at this point I'm past the 30 day return policy.

That's all for now, pictures speak more then words.
 

Attachments

  • WP_20140817_002.jpg
    WP_20140817_002.jpg
    132.6 KB · Views: 145
  • WP_20140817_003.jpg
    WP_20140817_003.jpg
    135.9 KB · Views: 142
OP
N

neogenesis2004

Well-known member
Joined
Jan 21, 2014
Messages
49
Now that the concrete is a week old, I took the covers off to snap some shots before I wet it down and covered it again. I know it's not the prettiest job, the edges could be a little bit better in some places. I let my brother finish it while I took the mixer back to HD. In hindsight, I should have stuck around until it was 100% finished. At the end of the day though I'm not sweating it since it's going to get covered in racedeck anyway.

Another big plus, I stopped by Sears with a buddy to get a tool while we were working on his Cayman and found a store display Gladiator 66" Cabinet for $225. So of course I went ahead and bought it. I'll figure out if I actually need it and where it will fit later. Its a little banged up in the bottom right corner, but otherwise it looks to be in good shape. It's missing the bracket for the GearWall, but I'll find a replacement when the time comes to hang it.
 

Attachments

  • WP_20140822_001.jpg
    WP_20140822_001.jpg
    141 KB · Views: 130
  • WP_20140822_003.jpg
    WP_20140822_003.jpg
    136.9 KB · Views: 119
  • WP_20140823_001.jpg
    WP_20140823_001.jpg
    136.3 KB · Views: 114
  • WP_20140823_002.jpg
    WP_20140823_002.jpg
    95.2 KB · Views: 117
OP
N

neogenesis2004

Well-known member
Joined
Jan 21, 2014
Messages
49
I tore down the drywall on the non-attached walls and started working on electrical. The wires are for outlets on those walls, and I'm gonna run outlets in the attached tomorrow. Those will be the more difficult. I'll most likely pull those up through the base plate from the basement. I also went ahead and wired/mounted the lights. The lighting is SOOOOOOO much better. Huge grin on my face right now. I'm going to use Roxul insulation in the walls and the uninsulated portion of the ceiling, and then probably contract out the drywall hanging/finishing. I'm also going to put in an order for RaceDeck at the beginning of the week. Things should move pretty fast from here I think. Most of the hard work is done.
 

Attachments

  • IMAG0002.jpg
    IMAG0002.jpg
    142.1 KB · Views: 138
  • IMAG0005.jpg
    IMAG0005.jpg
    139 KB · Views: 125
  • IMAG0004.jpg
    IMAG0004.jpg
    145.5 KB · Views: 134
  • IMAG0006.jpg
    IMAG0006.jpg
    142.4 KB · Views: 164
OP
N

neogenesis2004

Well-known member
Joined
Jan 21, 2014
Messages
49
I got the Roxul insulation up on the exterior walls. A quick unscientific sensory test by my skin says that the garage is already staying a solid 10 degrees warmer at night, and I haven't gotten the ceiling insulated yet. I'm going to try to get a quote this week on hanging drywall and finishing all the walls to be ready for paint. I'm getting really excited about this thing starting to wrap up. I want to start using the lift so badly right now.
 

Attachments

  • IMAG0015.jpg
    IMAG0015.jpg
    147.4 KB · Views: 126
  • IMAG0014.jpg
    IMAG0014.jpg
    147.2 KB · Views: 115
OP
N

neogenesis2004

Well-known member
Joined
Jan 21, 2014
Messages
49
I had someone come by mid-week last week to give me a quote on hanging new dry wall and finishing the entire garage (driving screws in the existing walls where it's mostly nails and also retaping), and then priming and painting the entire thing. I'm just really ready to start using it at this point. I've got a few cars in need of maintenance; DD M3, DD X3 prep for yearly inspection and winter, Scion TC that my brother drives. I also have no interest in further dragging out doing the drywall and paint, so I've decided to bite the bullet, pay up, and let a professional knock it out. The quote is probably a little high but I just told them to schedule me right during the visit. It's a highly rated company on homeadvisor and other places, licensed, insured, etc... They will start hopefully on Nov 3rd. I'd love for them to start tomorrow, but they were already booked up next week. I'll post pics once they get started. I should be up and running here very soon. Once they finish painting I can get my workbench set up, mount the maxjax posts, and start hanging some Gearwall and cabinets. I'm also going to be putting on the Liftmaster 8500 in the next 2 weeks.

It's amazing how much of a difference the insulation on the walls and on the garage door already make and I still need to do the attic portion of the ceiling. At night its starting to get down to the mid-high 40s and I keep my house at a nice 71-72 year round. The garage I swear actually feels nicer than in some parts of the house since there are no windows. I'm sure it helps that like 30-40% of the walls/ceiling are attached in keeping the temperature nice and cozy in the garage.
 

budmanm3

Well-known member
Joined
Nov 2, 2010
Messages
123
Location
Florida
Going to look great when completed. I love my gladiators, such a clean look.

Nice choice in cars too!!
 

cruzinZ

Active member
Joined
Jun 16, 2012
Messages
25
Location
Clovis Ca
Your garage looks like it's coming along. Great work so far and keep us posted as things progress.
 
OP
N

neogenesis2004

Well-known member
Joined
Jan 21, 2014
Messages
49
I decided to go ahead and buy a mini split. I'm going with the 120V Pioneer 12k through Amazon. It isn't terribly new or efficient, but it has great reviews and should be able to supplement the heating/cooling the room gets from the attached walls and keep the temperature perfect in the extreme seasons of the year. I don't run a shop and don't live where it regularly gets down to or below 0, so I'm not running it 24/7. I bought it, vac pump, digital micron gauge, various hoses/fittings/adapters, wall mount for the outdoor unit, outdoor disconnect with built in GFCI outlet, yadda yadda so on and so forth. Basically everything I need to install it. Most of it will be here by Wed (LOVE Prime shipping!) and the mini split shipped today and has estimated delivery around Nov 5th. I'm going to go ahead and have the disconnect and outdoor GFCI wired up at the end of the week that way it's done before drywall gets started next week.
 

bonecrrusher

Well-known member
Joined
Aug 18, 2011
Messages
578
Location
Charlotte, NC
Looking good - dont blame you on farming out the drywall.

I retaped and mudded my ceiling - and that ***** balls.

I installed my Liftmaster 8500 - not a bad install just takes a long time.

Read the instructions!
 
OP
N

neogenesis2004

Well-known member
Joined
Jan 21, 2014
Messages
49
I spent all day after work today finishing all the remaining tasks before the drywall crew comes tomorrow morning. I bought Certainteed Membrain from Menards online to use as a air/vapor retarder. The Membrain is supposed to allow inward drying in highly humid conditions but act as a vapor barrier in lower humidity for outward only drying. I have a new found appreciation of people who do this every day for a living. It took my brother and I like 4-5 hours to do it all and it was only just over half the room. I was taking a lot of time to make 100% sure I was sealing everything as best as possible. Unfortunately I ran out of Tyvek tape and couldn't put a strip over the studs to cover the staples. I know it probably barely matters since they will be screwing into it for the drywall, but I think the less hole the better.

I'll post pics tomorrow of drywall progress. Super excited! I'm hoping to be hanging some Gearwall and cabinets by Saturday morning.
 

Attachments

  • IMAG0094.jpg
    IMAG0094.jpg
    146.4 KB · Views: 90
  • IMAG0091.jpg
    IMAG0091.jpg
    140.1 KB · Views: 89
  • IMAG0089.jpg
    IMAG0089.jpg
    147.4 KB · Views: 92
  • IMAG0088.jpg
    IMAG0088.jpg
    150.8 KB · Views: 105
  • IMAG0086.jpg
    IMAG0086.jpg
    146.2 KB · Views: 115
Last edited:

NY98M3

Active member
Joined
Jul 24, 2007
Messages
44
Nice build, I like how you chopped out the concrete to accept the weight of the lift.

I just built a 25x20 but Im thinking the concrete is only 4" thick, I may have to do the same as you. Just purchased a Mohawk lift, no time for anything is preventing me from going ahead with it. I have to drill some test holes.

BTW - Another M3 owner here, E36 M3.
 
OP
N

neogenesis2004

Well-known member
Joined
Jan 21, 2014
Messages
49
It turns out I had the start date on the drywall off by a week. Luckily, they started today :) All the rock is up and they have begun taping. I'm hoping all the finishing will be done tomorrow so they can paint on Thursday. I'm REAALLLLY wanting to mount up the MaxJax on Friday so I can begin using it on the weekend.
 

Attachments

  • IMAG0102.jpg
    IMAG0102.jpg
    140.7 KB · Views: 88
  • IMAG0101.jpg
    IMAG0101.jpg
    127.3 KB · Views: 83
  • IMAG0100.jpg
    IMAG0100.jpg
    138.6 KB · Views: 91
  • IMAG0099.jpg
    IMAG0099.jpg
    139.5 KB · Views: 78

2nrguy

Well-known member
Joined
Sep 24, 2014
Messages
158
Looks like its going to be a rather nice set up, wish i had that kind of space.
 
OP
N

neogenesis2004

Well-known member
Joined
Jan 21, 2014
Messages
49
Almost done. The crew will do finish sanding in the morning, get the whole room primed, and paint the ceiling. They won't finish paint the walls until Monday unfortunately, so I'll miss getting to do anything this weekend :( I've got my electric heater in the room to keep it warm now that the cold whether has really started to settle in this week. This way the paint and mud can dry properly. I also have someone coming tomorrow to give me an estimate on putting blown in insulation in the open part of the ceiling. The room is already "tshirtable" with the electric heater running and it being in the low 40s outside. Once the ceiling is insulated I will probably just tear up it will be so nice.... Just remembering how miserable it was to do anything in there last winter compared to now, its night and day.
 

Attachments

  • IMAG0110.jpg
    IMAG0110.jpg
    127.9 KB · Views: 78
  • IMAG0109.jpg
    IMAG0109.jpg
    136 KB · Views: 72
  • IMAG0108.jpg
    IMAG0108.jpg
    144.3 KB · Views: 75
  • IMAG0107.jpg
    IMAG0107.jpg
    138.5 KB · Views: 72
  • IMAG0106.jpg
    IMAG0106.jpg
    139.1 KB · Views: 75
  • IMAG0103.jpg
    IMAG0103.jpg
    127 KB · Views: 86
  • IMAG0111.jpg
    IMAG0111.jpg
    144.8 KB · Views: 68
Last edited:
To avoid these ads, REGISTER NOW!
Top Bottom