To avoid these ads, REGISTER NOW!

40X60 Shop Build - Washington State

GeddyT

Well-known member
Joined
Jun 17, 2015
Messages
1,245
Location
Bellingham, WA
Sounds like you got a good deal on the Superpaint, and if that's what your painter is used to, not a bad idea to stick with it (every paint goes on a little differently, so you get used to altering your technique a little). I think @wasfast and I are on the same page from a price standpoint, but your discount has moved it a lot closer to Behr's price, so no big deal.

I always struggled with that question where to save money and where to go nuts with my shop build. I bet anybody following my build would have thought I were bipolar. One day the justification for, say, spending a little extra on 30# felt vs. 60 minute paper was, "What's another $200 on a six-figure build?" Then, the next day, it would be, "That extra $5 per gallon adds up!" And so on and so on.

I found out the hard way with both my kitchen remodel 200 years ago and with the more recent shop build that a little scope creep here and another there can suddenly double the price of a project death-by-1000-papercuts style. Then again, it's so hard to put so much blood, sweat, and back injuries into a project only to cheap out on something as important as paint!

In other news, watching the pace of your progress of late makes me almost wish I'd fallen off a ladder earlier in my progress so my stubborn self would have offloaded a lot more of the work a lot earlier and gotten the shop finished in half the time! Almost... I'm excited for you to get this thing done and see what you do with that huge, awesome space.
 
To avoid these ads, REGISTER NOW!
OP
K

KrucksGarage

Well-known member
Joined
Jul 10, 2011
Messages
400
Location
Washington State
Sounds like you got a good deal on the Superpaint, and if that's what your painter is used to, not a bad idea to stick with it (every paint goes on a little differently, so you get used to altering your technique a little). I think @wasfast and I are on the same page from a price standpoint, but your discount has moved it a lot closer to Behr's price, so no big deal.

I always struggled with that question where to save money and where to go nuts with my shop build. I bet anybody following my build would have thought I were bipolar. One day the justification for, say, spending a little extra on 30# felt vs. 60 minute paper was, "What's another $200 on a six-figure build?" Then, the next day, it would be, "That extra $5 per gallon adds up!" And so on and so on.

I found out the hard way with both my kitchen remodel 200 years ago and with the more recent shop build that a little scope creep here and another there can suddenly double the price of a project death-by-1000-papercuts style. Then again, it's so hard to put so much blood, sweat, and back injuries into a project only to cheap out on something as important as paint!

In other news, watching the pace of your progress of late makes me almost wish I'd fallen off a ladder earlier in my progress so my stubborn self would have offloaded a lot more of the work a lot earlier and gotten the shop finished in half the time! Almost... I'm excited for you to get this thing done and see what you do with that huge, awesome space.
I appreciate the feedback. Yea going with the painter's experience and recommendation in this case paid off with the discount applied to the product, and they're painting it with no additional labor charge. The original bid was through primer and not including paint, so when I decided to paint it while everything is out of the way, they told me to just buy the materials under their account and they'll shoot it while everything is there and things are masked off. Can't beat that! It helps that the business that's doing this for me is family. :)

I've lived that death by 1,000 paper cuts on this build too in some areas. It's hard like you say to pull back when you need to knowing the scope and scale of the entire build. Hard to justify the spending in some areas, but easy call in others. Especially instances like these where it's hard to get the building prepped for paint twice, move all that stuff around, and get things masked off. One of the toughest segments was the concrete phase and deciding on some of the configuration concerns I needed to address. Happy I went with the 6" slab throughout, I think that will prove to have been a good call. I get some big heavy things coming in the shop from time to time.
 

Jman73

New member
Joined
Oct 21, 2010
Messages
3
Amazing build. Perhaps I missed it somewhere, are you painting / coating the concrete walls?
 

drivesitfar

Well-known member
Joined
Oct 23, 2013
Messages
36,174
Location
Pacific Northwest
I agree with your thinking on the 6 inch concrete floors cause that's how thick I pour my sidewalks and our new driveway will be 5-6 inch with a good base.

your drywall and painting is going quick and soon you'll be back to moving all your cool stuff back inside.
 
OP
K

KrucksGarage

Well-known member
Joined
Jul 10, 2011
Messages
400
Location
Washington State
Amazing build. Perhaps I missed it somewhere, are you painting / coating the concrete walls?
Ya know, that has been tormenting me. I think I'll do a roll-on coating down the road. I have to move my racks around and stuff like that to do a good job so that's a project for another day! Ideally, I'd like to mortar over all the porosity and form tie areas and smooth things out before I coat it, and if have to decide what product and color to go with. Open too suggestions on that one if you have knowledge in that area! After the slab got sealed I could hardly stand it and had to start moving things in LOL!!
 
OP
K

KrucksGarage

Well-known member
Joined
Jul 10, 2011
Messages
400
Location
Washington State
I agree with your thinking on the 6 inch concrete floors cause that's how thick I pour my sidewalks and our new driveway will be 5-6 inch with a good base.

your drywall and painting is going quick and soon you'll be back to moving all your cool stuff back inside.
Yep we're getting closer to the finish line! We didn't paint today because we noticed a couple areas where the mud line was not completely dry and I don't want to paint over any residual moisture areas. We'll try again tomorrow so I have electric heaters going in there for a nice dry heat and will let those run all night. Crossing fingers for paint spray tomorrow!
 
OP
K

KrucksGarage

Well-known member
Joined
Jul 10, 2011
Messages
400
Location
Washington State
Gale contractors came out today and blew in the fiberglass in the attic space. Only took about 2 hours start to finish. Picture shows the packaged bale of what was used. It's blown in at 18"-20" thick above my shop space and my second floor bonus room (minus the attic truss room area), giving it an R-49 value.


PXL_20220204_173333323.jpg

PXL_20220204_173318615._exported_1644021305192.jpgPXL_20220204_173315638.jpgPXL_20220205_044106901_copy_3225x2419.jpg
 
Last edited:
OP
K

KrucksGarage

Well-known member
Joined
Jul 10, 2011
Messages
400
Location
Washington State
I got six loads of 1-1/4" minus dumped out front of the shop today. I think we'll be spreading it tomorrow. I really think this is going to be the ticket to put over this sandbox base I have here. I'll let this settle and decide next year if I want to top coat it or pave/concrete it. My brother in law owns a land development company and uses this guy Sean from ******** Trucking pretty frequently. Great driver and he did an excellent job navigating in the loose sand and slopes I have at my place.

PXL_20220204_155311555._exported_stabilized_1644021685870.gif
 
OP
K

KrucksGarage

Well-known member
Joined
Jul 10, 2011
Messages
400
Location
Washington State
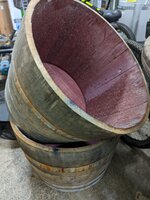
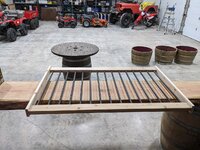
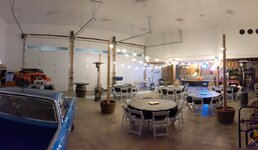
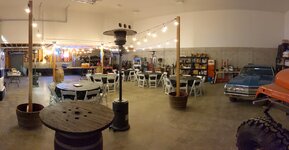
I've been picking up some fun things for a big party we're hosting in our shop. My 40th is coming up and we're having friends and family over for live country music, food and drink, and some good times! I'm going to use the two full barrels and put a live edge 3" thick slab I milled up on top, between my posts. And the half barrels are going to be post bases for string lights. I'll post up some pictures when I get it put together! Should be over 70 people coming out.

PXL_20220204_035257721_copy_1512x2016.jpgPXL_20220202_020716941_copy_1512x1567.jpgPXL_20220205_044331633_copy_1512x2016.jpgPXL_20220205_044327050_copy_1512x2016.jpg
 
OP
K

KrucksGarage

Well-known member
Joined
Jul 10, 2011
Messages
400
Location
Washington State
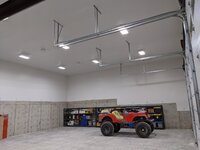
Painter finished up the de-masking and touch ups today. Now I've just got a bunch of cleaning up and blow down to do, outlet covers to install and put this place back together! That drywall and paint dust is in and on everything around here but that's expected to some degree, they did an outstanding job and I'm happy with the semi gloss finish. This is with one coat of primer and one coat of Sherwin Super paint, matched to the door interior. Coverage seems good. We used 15 gallons of paint for the single coat and it went on pretty heavy. I had the OSB wall painted the same color (shop side of second floor wall). It soaked up a lot of paint but I like the uniformity of the color match up there. Now I have to make some trim rings for that side of the port holes. I have a cool design laid out for those.


PXL_20220208_021302330._exported_599_1644288601543_copy_1024x768.jpgPXL_20220208_021242989_copy_2016x1512.jpgPXL_20220208_021213059_copy_2016x1512.jpgPXL_20220208_021237161_copy_2016x1512.jpgPXL_20220208_022027506_copy_3024x2268.jpg
 
OP
K

KrucksGarage

Well-known member
Joined
Jul 10, 2011
Messages
400
Location
Washington State
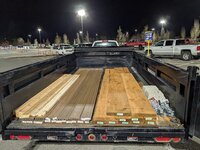
Getting ready to build the porch/deck for my exterior door to the bonus room up stairs. Turns out $1000+ doesn't get you much these days....:cautious: I've got the framing assembled, and working on decking and railing now. Decided to run all cedar for the posts and railings, and TREX for the decking to make things easy on myself later. Just a little 6'x6' deck on pier blocks and built to a ledger, and a few stairs, nothing crazy.


Porch Materials.jpg
 
To avoid these ads, REGISTER NOW!
OP
K

KrucksGarage

Well-known member
Joined
Jul 10, 2011
Messages
400
Location
Washington State
Here to share a fun new purchase.

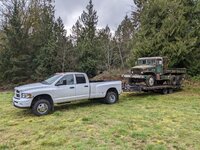
2007 PJ 28' 21K gross triple axle deck-over gooseneck trailer. Yee-haw!

This trailer has been sitting in a field and hasn't moved in years near my house. It's been driving me crazy seeing it sit there and I finally did some homework to find out who owned it. Long story short, I met the gentleman who owned it, super nice guy, retired Navy. He used to have equipment, hauled hay, things like that but wound up selling a lot of things off and had no more use for the trailer so it sat. He was very open to selling it and offered me a fair price so I picked it up. I let him know that if anything came up and he needed something hauled, that's what neighbors are for and I'd help him out! That made it easier for him to let it go. Those "just in case" items are hard to part with. I probably have too many of those myself! But in this case it was a win-win sale.

Anyway, I wish I'd had this trailer over the last several years building the shop, boy that would have been handy! I've rented and borrowed trailers in the last few years from good friends, have owned several different ones, but I think this one's finally a keeper! It should haul lower stance classic cars with the long ramps, and long material if I want to forklift bunks of lumber packages or anything else. It's 22.5' flat with and additional 5.5' dovetail. With the ramps folded down, it's about 11 foot approach, nice and gradual. Also being 21K gross, it will haul my 12,000 lb excavator with ease!! I recently bought a couple deuce and a half trucks, weighing around 13,000 each and rented a 16K tilt deck which was really pushing it, but it did fine. This setup will make me much more comfortable hauling those heavier loads.

I spent a few hours pressure washing and soaping it down, it was pretty slimy and grimy from sitting in a field under a tree, but the deck cleaned up nice and is not rotten, tires are in great shape too. He bought it brand new in 2007. Clean title and all.

PXL_20220221_013939710.MP_copy_3024x2268.jpgPXL_20220221_014027601_copy_3024x2268.jpgPXL_20220221_013847274_copy_3024x2268.jpg
 
OP
K

KrucksGarage

Well-known member
Joined
Jul 10, 2011
Messages
400
Location
Washington State
These are the two deuce and a half trucks I recently picked up. The cargo bed truck is a 1953 GMC M211, and the dump truck is a 1954 M215. Haven't decided what I'll do with these big fellas yet but they're cool as hell!!! Both trucks have winches, and I have several parts and accessories. The M211 has a boom that mounts to the front, and uses the winch and makes a crane truck out of it, so I have all that too, had to take it all apart to move it, it was 20 feet in the air and can go much higher with it's telescoping feature. They both have aftermarket fiberglass hard tops as well. These were traditionally canvas top trucks, but hard tops were rare and available in some applications (they're really neat and have corner glass like an old Chevy 5-window pickup!). They don't currently run but only because they've been sitting for 15-20 years. Supposedly, according to the son who I bought them from told me his old man who owned them drove and parked them to where they sat. Mechanically they're very simple though, and run GMC 302 inline-6 gas engines, with a split range GM hydromatic auto trans, and single range transfer case. Their later Vietnam era Kaiser truck counterparts run the 465 multi fuel (diesel) engine and a 5-speed manual trans, with either a sprague gear or air shift two range transfer case. Anyway, cool trucks but how many projects can a guy do.... Me... Not too many lol!

You can see that the 16k rented trailer wasn't super pleased with the haul, and that deck might have a "slight" bow under the weight. But we made it, and burned a lot of diesel getting these home!!

PXL_20220205_232953410_copy_3024x2268.jpg

PXL_20220205_201513602_copy_3024x2268.jpgPXL_20220205_215824258_copy_3024x2268.jpgPXL_20220206_000144662_copy_3024x2268.jpg
 
Last edited:

ODIS

Well-known member
Joined
Apr 30, 2012
Messages
2,110
Location
Pacific Northwest
These are the two deuce and a half trucks I recently picked up. The cargo bed truck is a 1953 GMC M211, and the dump truck is a 1954 M215. Haven't decided what I'll do with these big fellas yet but they're cool as hell!!! Both trucks have winches, and I have several parts and accessories. The M211 has a boom that mounts to the front, and uses the winch and makes a crane truck out of it, so I have all that too, had to take it all apart to move it, it was 20 feet in the air and can go much higher with it's telescoping feature. They both have aftermarket fiberglass hard tops as well. These were traditionally canvas top trucks, but hard tops were rare and available in some applications (they're really neat and have corner glass like an old Chevy 5-window pickup!). They don't currently run but only because they've been sitting for 15-20 years. Supposedly, according to the son who I bought them from told me his old man who owned them drove and parked them to where they sat. Mechanically they're very simple though, and run GMC 302 inline-6 gas engines, with a split range GM hydromatic auto trans, and single range transfer case. Their later Vietnam era Kaiser truck counterparts run the 465 multi fuel (diesel) engine and a 5-speed manual trans, with either a sprague gear or air shift two range transfer case. Anyway, cool trucks but how many projects can a guy do.... Me... Not too many lol!

You can see that the 16k rented trailer wasn't super pleased with the haul, and that deck might have a "slight" bow under the weight. But we made it, and burned a lot of diesel getting these home!!

PXL_20220205_232953410_copy_3024x2268.jpg

PXL_20220205_201513602_copy_3024x2268.jpgPXL_20220205_215824258_copy_3024x2268.jpgPXL_20220206_000144662_copy_3024x2268.jpg
Would love to show up at our local C & C with one of these trucks....perhaps with a 356 loaded on the bed!

Nice score!
 
OP
K

KrucksGarage

Well-known member
Joined
Jul 10, 2011
Messages
400
Location
Washington State
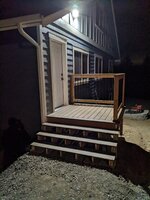
I finished up my little deck project for the most part today. Trex deck boards and cedar railing turned out pretty good. I still plan to face the stair risers with cedar, and wrap the deck framing with a cedar band as well, but it's done enough for the big party this weekend! Don't want any face plants!! And the stack of pallets and railroad ties I had before would not have gone well. Lol. There will also be a series of bulkheads around the deck once I get the ground work completed. Hopefully another loose end I'll tie up this summer.

PXL_20220223_044713120_copy_2268x3024.jpgPXL_20220223_044720801_copy_2268x3024.jpg
 
Last edited:

robb1887

Well-known member
Joined
Jun 9, 2014
Messages
117
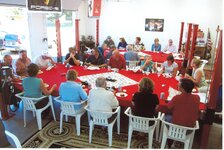
Party looked Rad. It's funny how when looking at your photos sans humans in them, the low hang side of the space looks tiny. then you get people standing around and it puts a perspective on the entire space. Looks great and jealous of the space!
 
OP
K

KrucksGarage

Well-known member
Joined
Jul 10, 2011
Messages
400
Location
Washington State
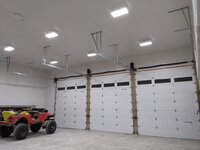
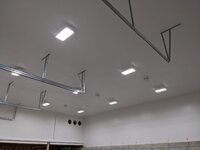
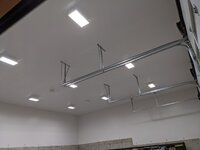
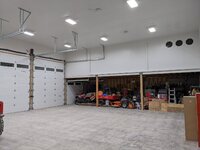
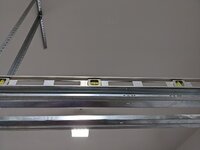
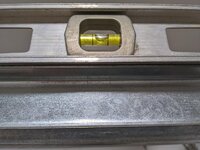
So if you run LiftMaster 8500 sidewinder (jackshaft) openers, and then you drywall later.....try to remember to shorten your overhead track brackets to compensate for the drywall thickness so your door continues to roll downhill when it closes. My tracks became too low, I didn't check level, and it had to travel "slightly" uphill before closing, allowing the cable spool to bird nest, then the door caught up when gravity took over finally and slammed against the slack cable and bow howdy, what a mess!! Stupid should hurt, and this comes with a repair cost. My bad....but Kitsap Garage Door will be out to fix things up properly and reset spring tension end of the week. Man lift cost is $150, commercial hourly rate is $165. We'll see where it goes from there.

I fought this mess for a couple hours and let it know how I felt about it, finally got the door closed for the night and called it good enough. Had to remove brackets and straighten them back out enough to roll down the track, and reinstall them. Also popped the skins back on the panels that popped loose from the jarring. I'll let the pros dial it all back in and go through all the door tracks. I'm going to have all the spring tensions checked as well while they're there. I'm amazed at just how heavy that insulated 12x14 door actually is without any spring tension, it was rough lifting it up to straighten it out between the tracks and get it set on that post while I worked the cables. Lesson learned...

Door damage track level.jpgDoor damage track level 2.jpgDoor damage bent hinge close up.jpgDoor damage bent hinge in place.jpgDoor damage bird nest 1.jpgDoor damage bird nest 2.jpgDoor damage hinge bent.jpgDoor damage hinge straightened.jpgDoor damage on post.jpgDoor damage panel separation.jpg
 

GeddyT

Well-known member
Joined
Jun 17, 2015
Messages
1,245
Location
Bellingham, WA
Now I KNOW I could have infiltrated the party! All I would have needed was a red flannel shirt and a grey puffy vest...

I feel your pain on that garage door situation. I'm pretty certain I have that exact same door, only 18x8. Those panels are HEAVY. And the one with the windows is way up high and heaviest of all. I installed mine myself as well, and thought I did a pretty good job. I also bought that same Liftmaster 8500. It's still in the box in the shipping container going on four years later. I have made countless adjustments to my door and tracks, and there's nothing I can do to make it slide smoothly enough to not potentially damage the opener. I even had the installer back out to look it over. He took a whole bunch of pictures and said he'd have to ask his boss why it would bind, as I installed it perfectly. That was at least a year ago, and I haven't heard back.

Hopefully you get a swifter resolution to your door fix!

Oh, and if you don't have one already, one of the best investments I've made is a Johson tri-beam self-leveling laser. Johnson is what I'd call the value buy in this category--you get good accuracy for far less money than other brands. Unfortunately, they no longer make the one I have, which is super handy for only a couple hundred bucks. For a bit more, though, this does the same thing, with the bonus of green lasers. Adjustable magnetic base makes using this super easy, too. With garage tracks, for instance, you'd just stick the base right to the door panel at the right height, and you'd have a green line show you exactly where your tracks need to be. I also used the vertical cross lines to set the angle across the ceiling of my tracks very easily. This one here would be my recommendation. I use this thing ALL THE TIME. Totally worth it.
 
To avoid these ads, REGISTER NOW!
Top Bottom