Question: what amperage do you use to weld the thin wall tubing and how do you keep the heat concentrated in such a small area?
First I'm welding with a TIG Welder (Miller Dynasty 200 DX specifically). Just want to make that clear to everyone. TIG allows for a lot of control, and especially machines that have pulse with separate settings for Peak Amperage, Pulses Per Second (PPS) and Background. Having control of those 3 factors can really make a difference especially with heat control because the pulse is, well pulsing or rather it ramps up to the peak amperage, then goes down to a preset lower amperage, then back up, then back down and so on. So you're basically able to put half the heat into the weld. It also really helps with your pace, timing and heat input naturally.
Amperage depends on where I am located while welding a frame be it tube to tube or tube to head tube, tube to dropout, tube to bottom bracket, etc. where there is a dramatic thickness difference between the two parts being joined. The wall thickness of the tubing can be anywhere from .035" wall thickness down to .02" wall thickness and sometimes even thinner.
So for example, for tube to tube of .035" wall thickness Chromoly tubing, I'm anywhere from 47 amps up to 50 amps. Most times I set it around 48 amps, but pulse is ON with these settings (on my Miller, the pulse settings are set in %'s):
48 Amps @ 1.2 PPS / Peak @ 60% / Background @ 20%
Anything more than 1 or 1.5 PPS and it makes my head hurt. I like a nice, heavy pulse to set up my timing and be able to adjust as I slowly add filler.
Tube to Bottom Bracket, I'm generally in the 53-56 amp setting with the same Pulse settings above. If the build is using a tapered, 44mm head tube where the wall thickness of that part is pretty thick in comparison to the tube, I'll also be in the 55-58 amp range. Only time I go up into the 60+ amp range is dropout to Disk Brake ISO mount. That's basically 1/4" plate to 1/4" plate and I need the extra amps. Tube to tube I start my arc between both tubes. Tube to say bottom bracket or Head tube, I strike my arc just a bit more biased to the thicker part.
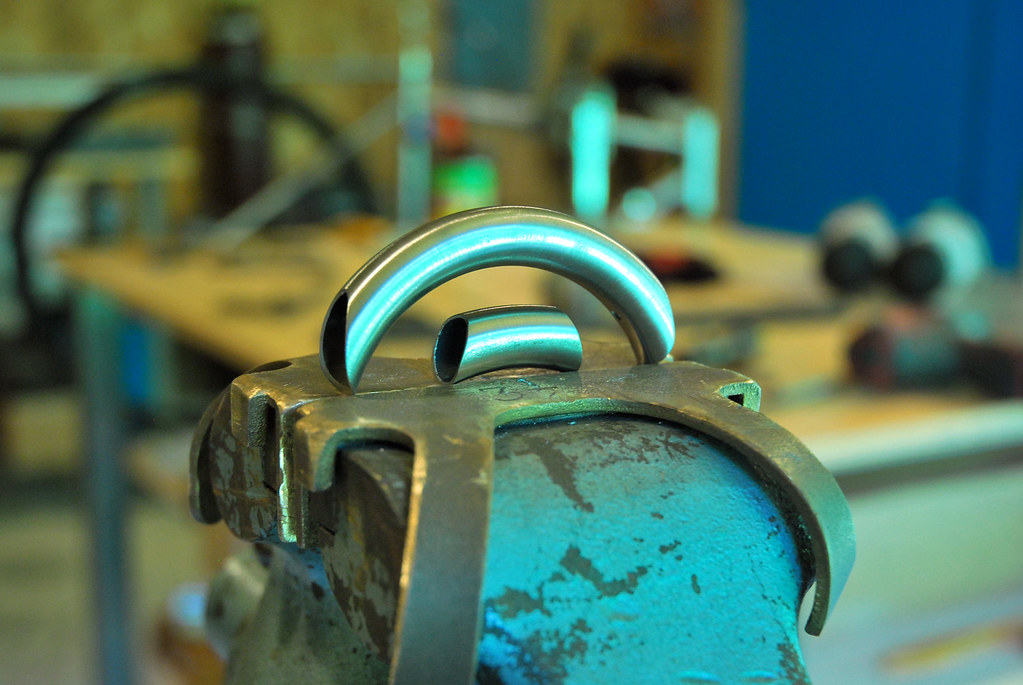
In all cases, I generally use heat syncs I've made that are precision turned on a lathe for specific tube I.D.'s. Here's some examples:

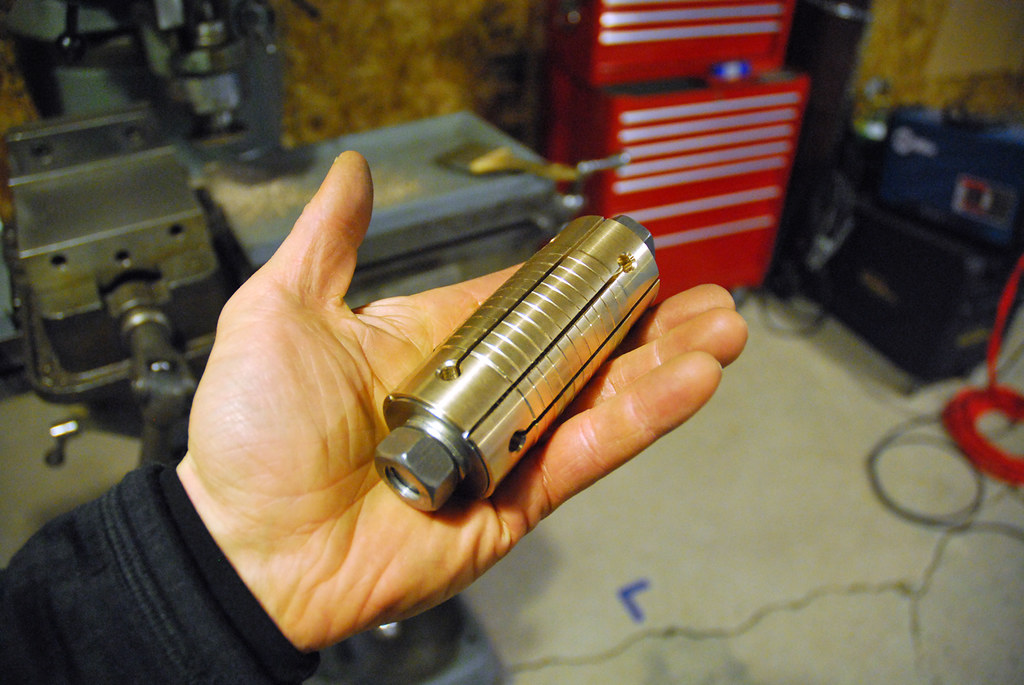
Here's the whole kit actually:

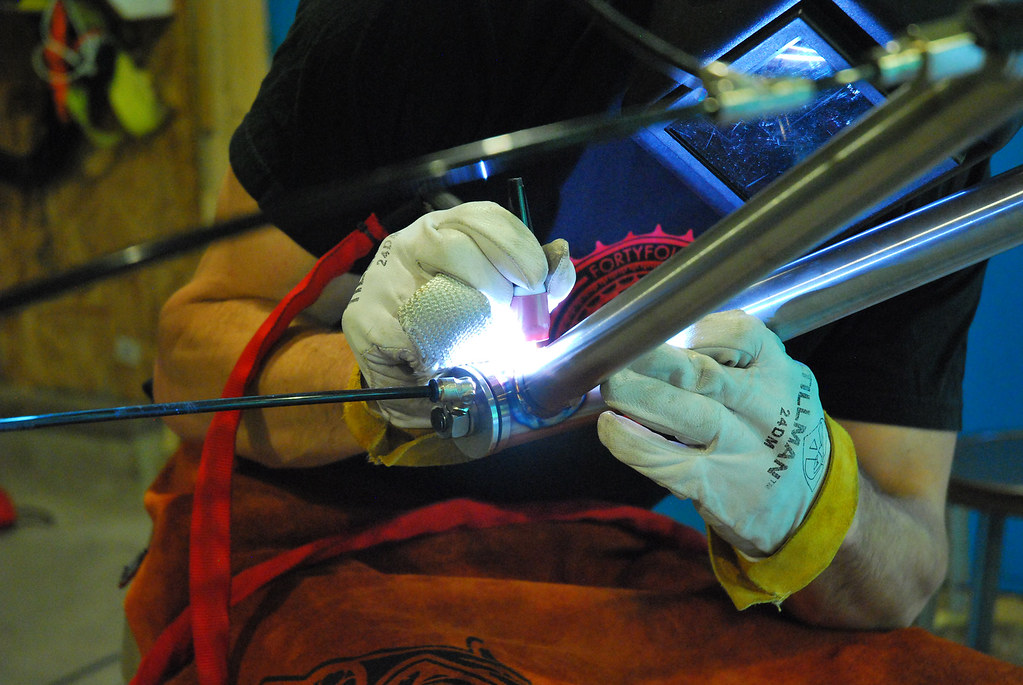
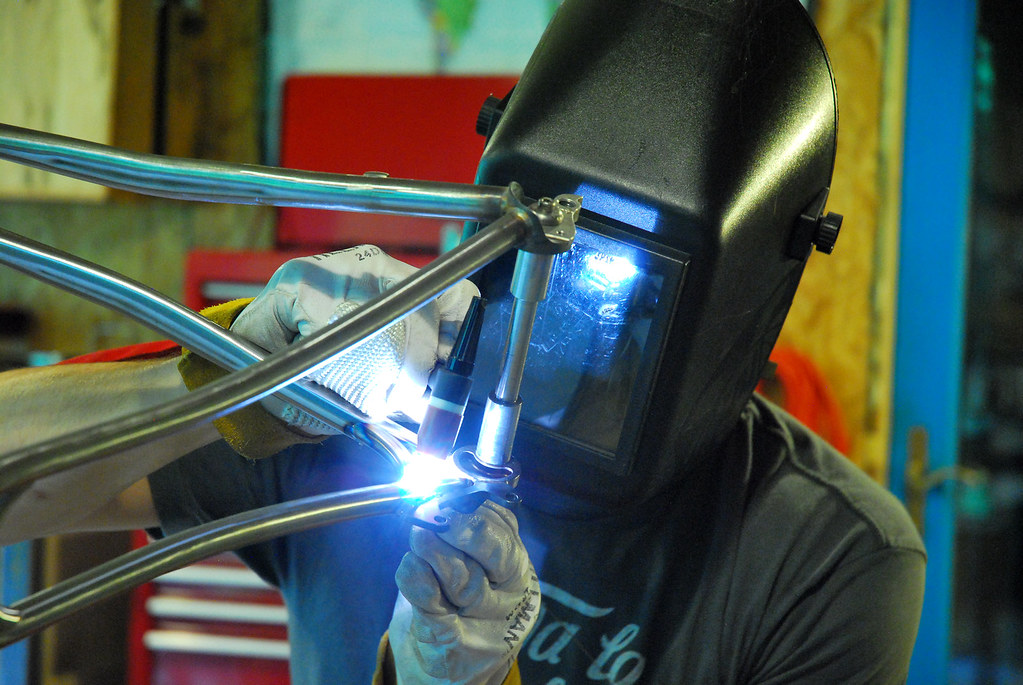
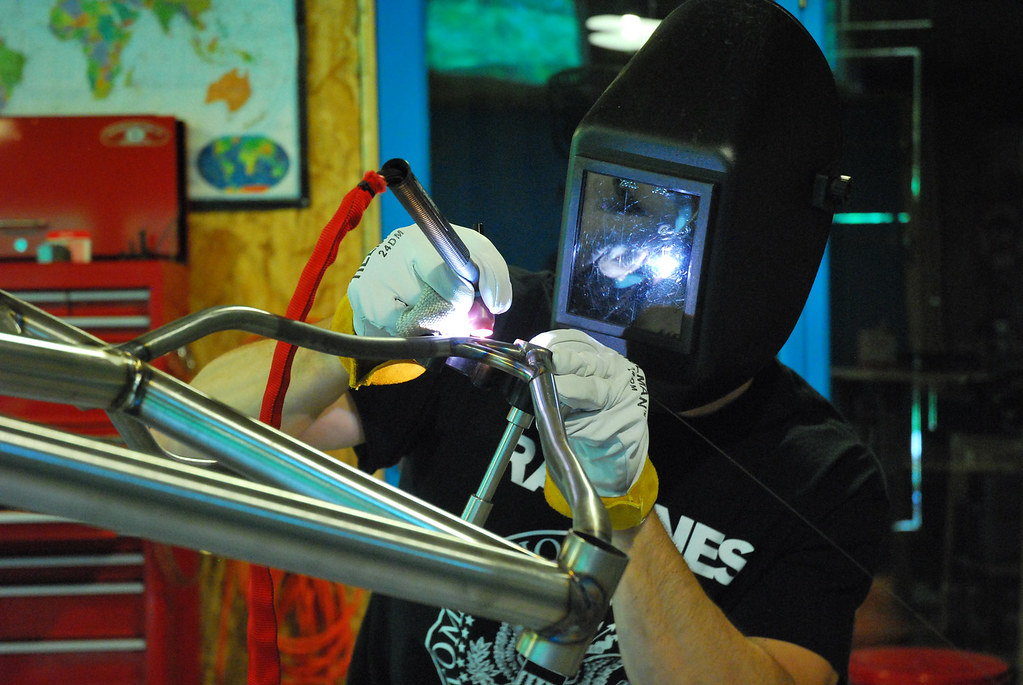
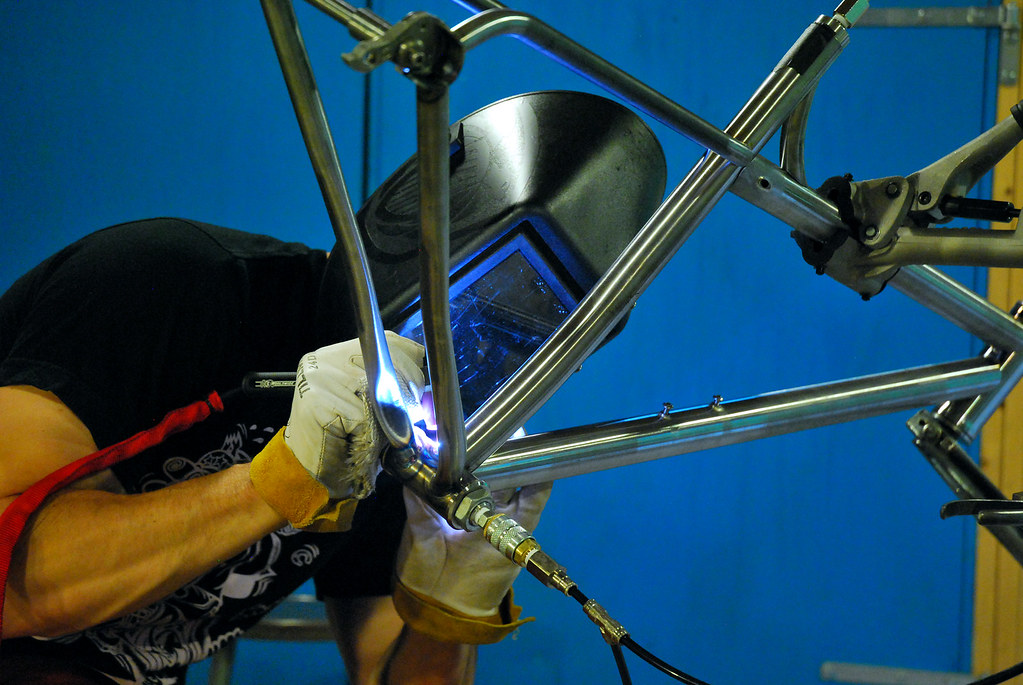
And in action:
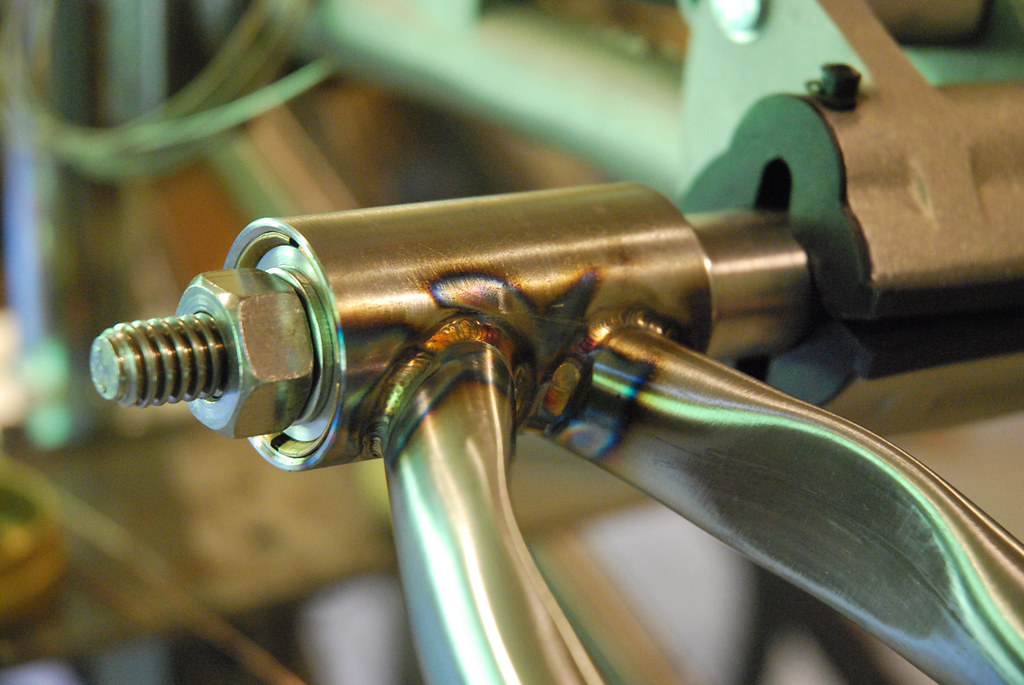
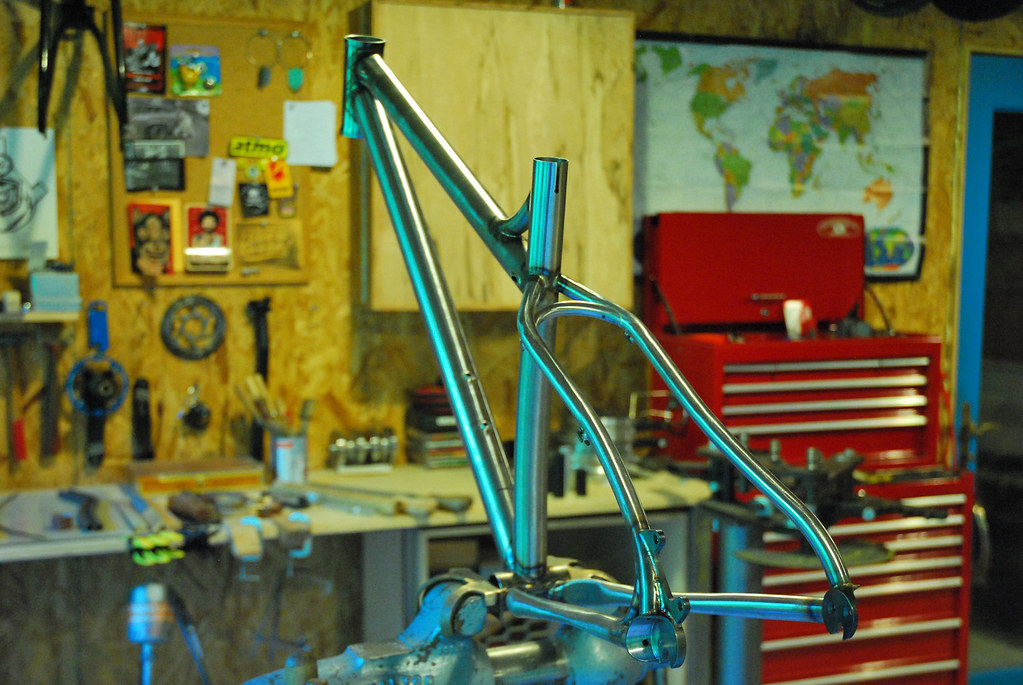
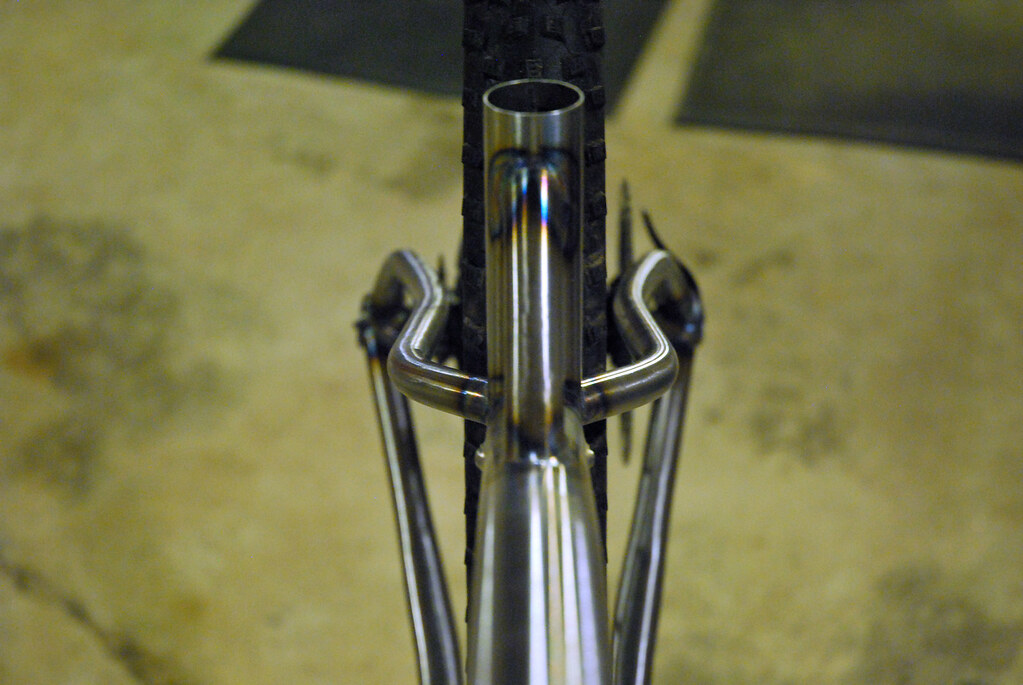
You can see the stub of the seat tube heat sync sticking out in this shot:


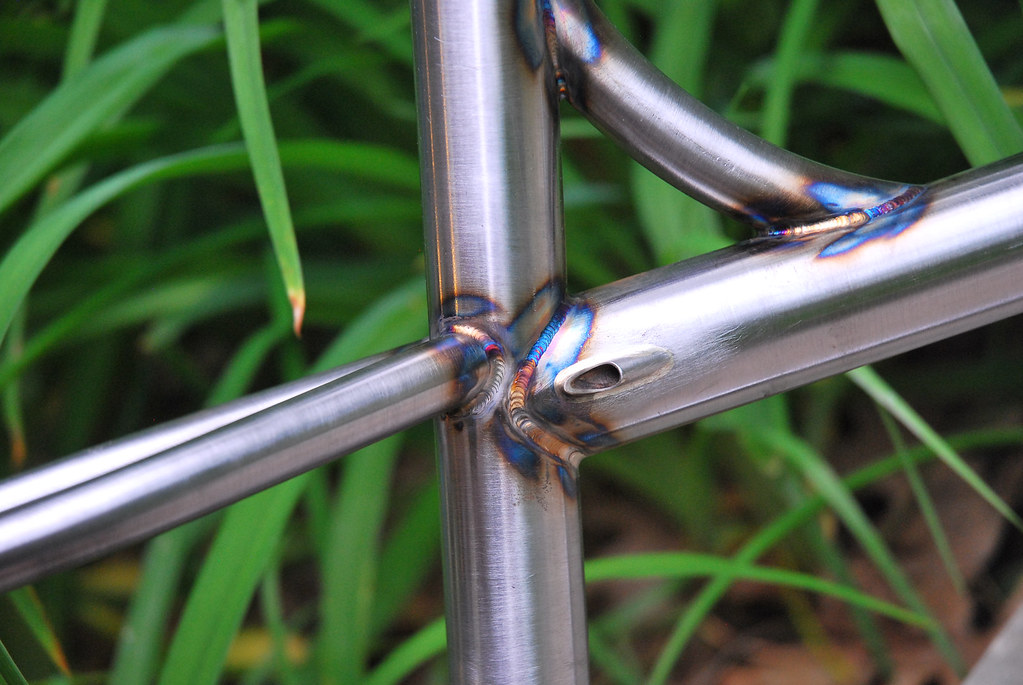
I've heard them called "backing bars" too. Basically they're bronze expanding mandrels. These help to draw heat away from the tubes as you're welding and act as a heat sync to reduce the HAZ (heat effect zone). The other thing is pace. If you're too slow, you're going to cook the weld. It will look kind of dull and flat. Timing good, along with good gas coverage and you'll have little to no blueing (Blue, silver, goldish colors are good) and the welds will appear shiny. That's a good thing. If it looks good, it most likely is good!
Another great recommendation is to use a gas lens. I use a No. 8 Stubby Alumina Cup with 1/16" gas lens and matching 1/16" Lanthanated Tungsten (Gold tip and not radioactive). Another thing that can effect weld quality, is tungsten prep. But a great piece of advice is to use a gas lens if you are not. This increases gas coverage, cuts down on turbulence from the flow of argon and helps to stabilize the arc and prevent arc wandering. You can also pull the tungsten tip out up to .75-1" with this setup to get into tight spots.
Here's some tips I picked up from some welders who really knew their sh!t:
1. Cleanliness is next to nothing. Clean the parts inside and out, remove all oils, and mill finishes. Wash the parts with warm water/soap, then use a denatured alcohol final wipe down.
2. Always start with a weld by clipping off the tip of your filler. Start fresh.
3. Tap the pedal to begin post flow of argon BUT do not strike a arc. Let the post flow run it's course. Now you absolutely have a clean weld site. Flip the lid and start your arc.
4. I know a lot of people dip, but I use a technique where you just "lay" the filler in. So constant pressure at the weld site, kind of in and down. Geometry of filler to weld site and geometry of tungsten tip to weldsite is critical for good stacks of dimes. Time yourself to the pulse so you're advancing with the pulse, and watching everything between the pulses to make subtle adjustments of filler, torch, and your body. There's a flow getting set up naturally and you need to be "in it" and be relaxed.
5. If you need to stop to reposition yourself or the work, do not remove the filler. Leave it in at the last weld pool. But wait for the post flow to stop. You now have a clean weld site where you can pick back up again. If you remove the filler when you are done, that's ok too but let the post flow do it's thing. If you remove the filler, cut a clean tip.
Here's a shot of that cup size:

Heat input though from my knowledge has a lot to do with your timing. If you're really cooking the weld, try and speed up and reduce your amperage a bit or use a pulse and set your timing to that too. I know it's really helped me.
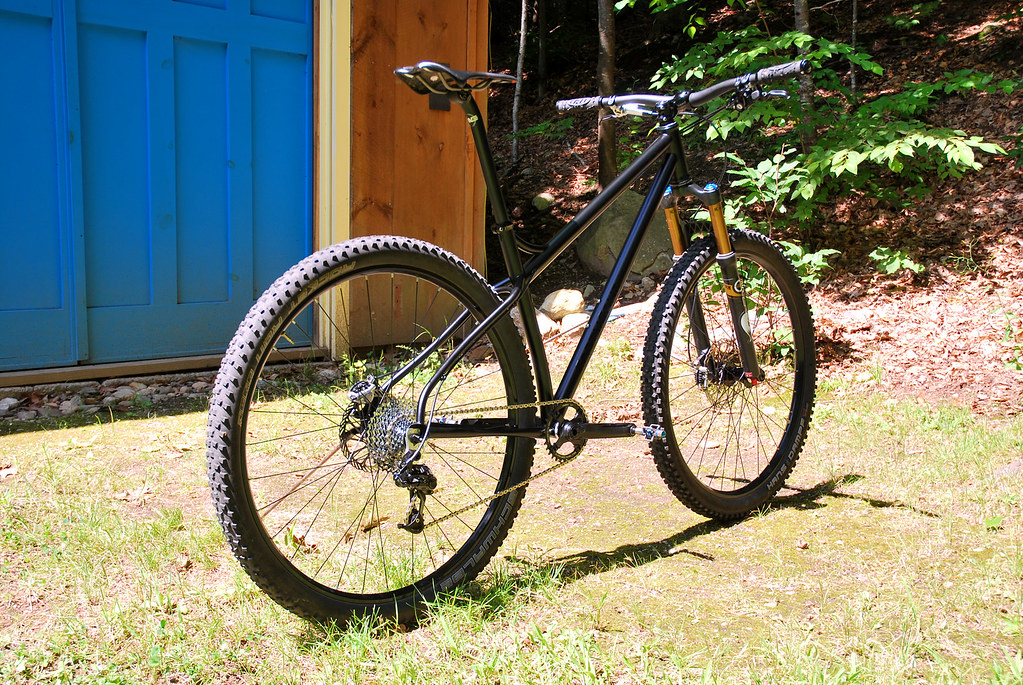
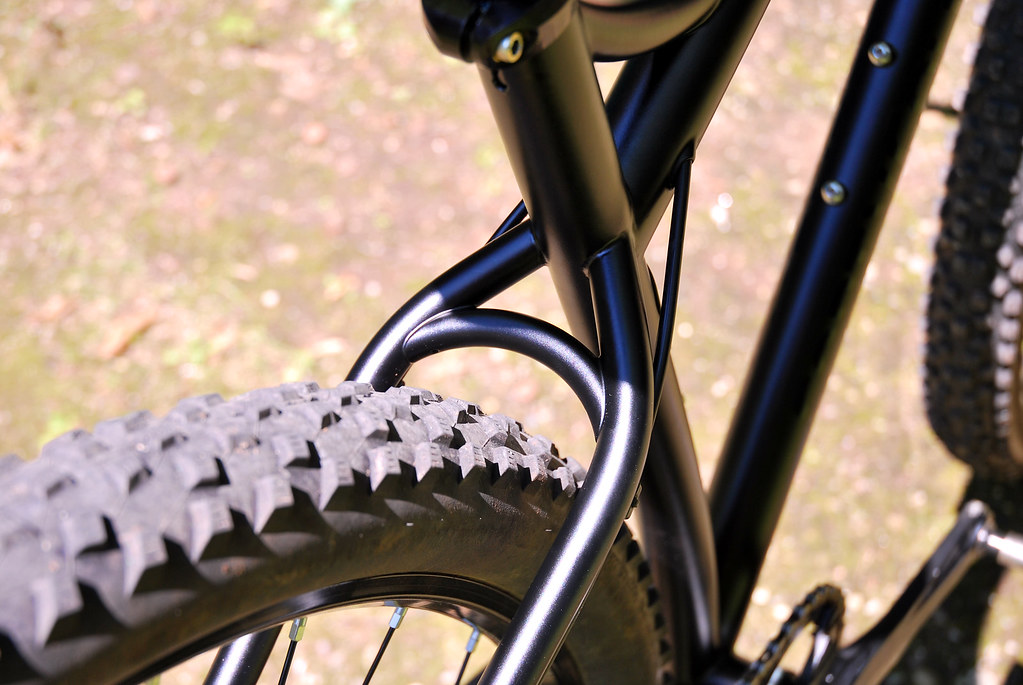
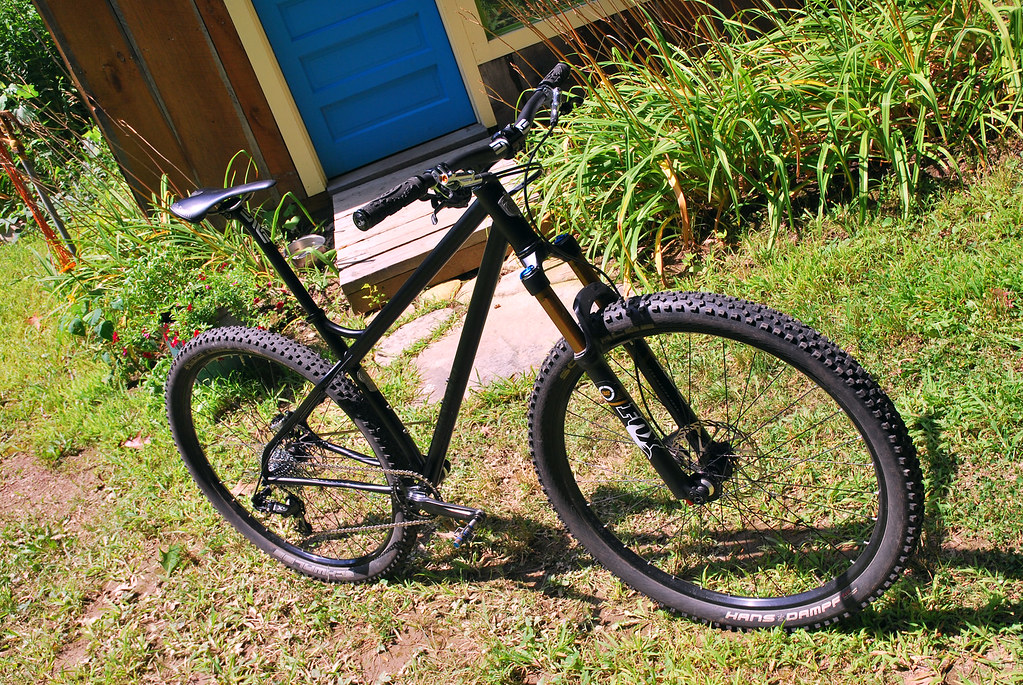
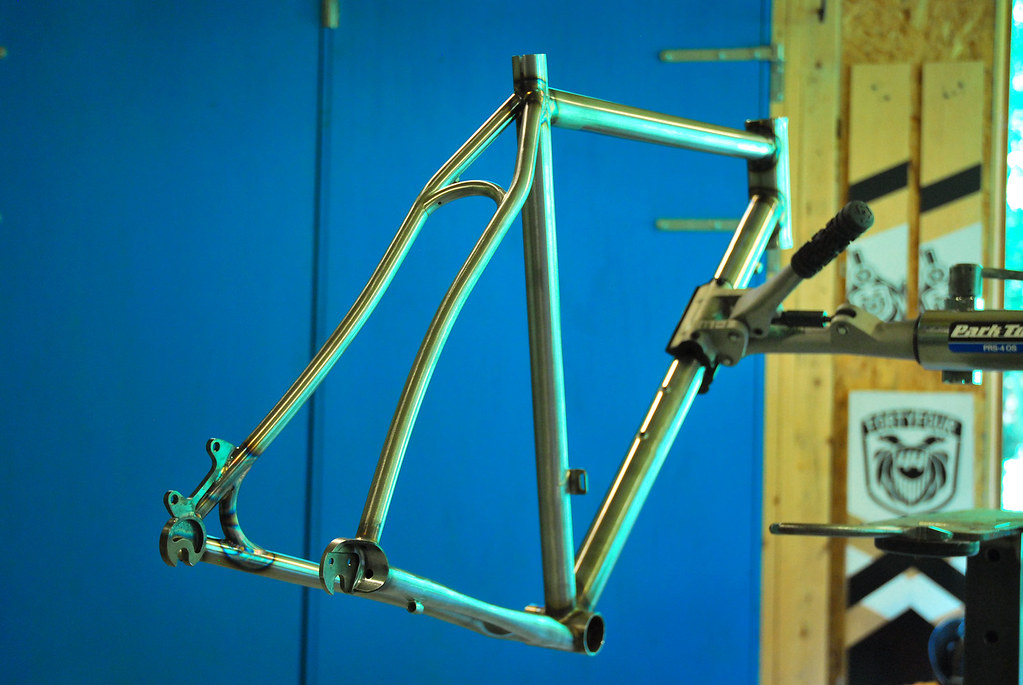
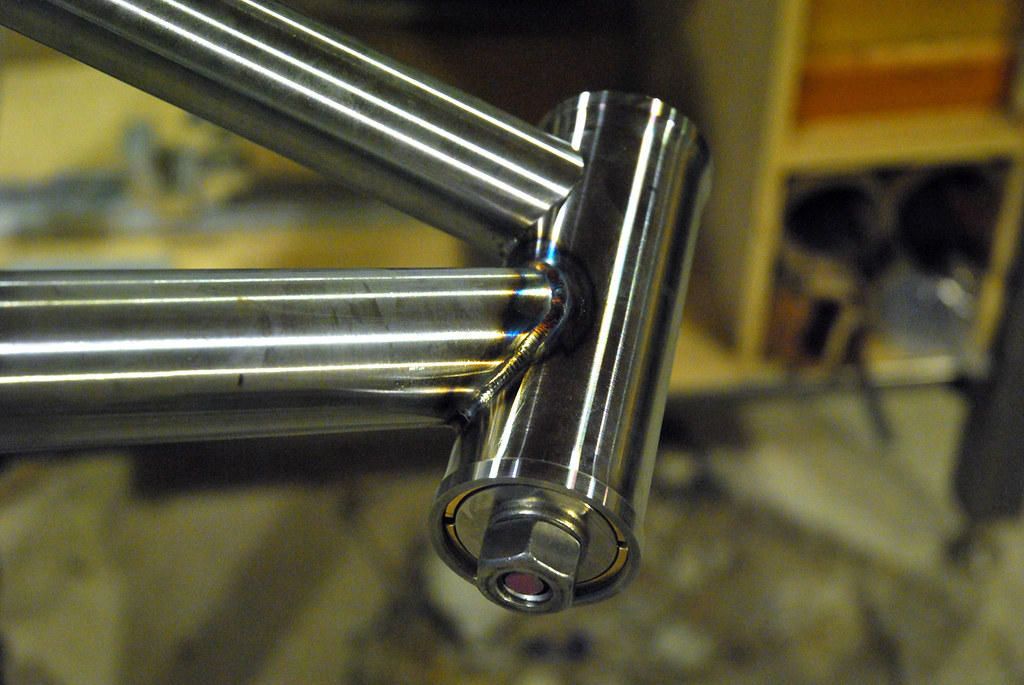
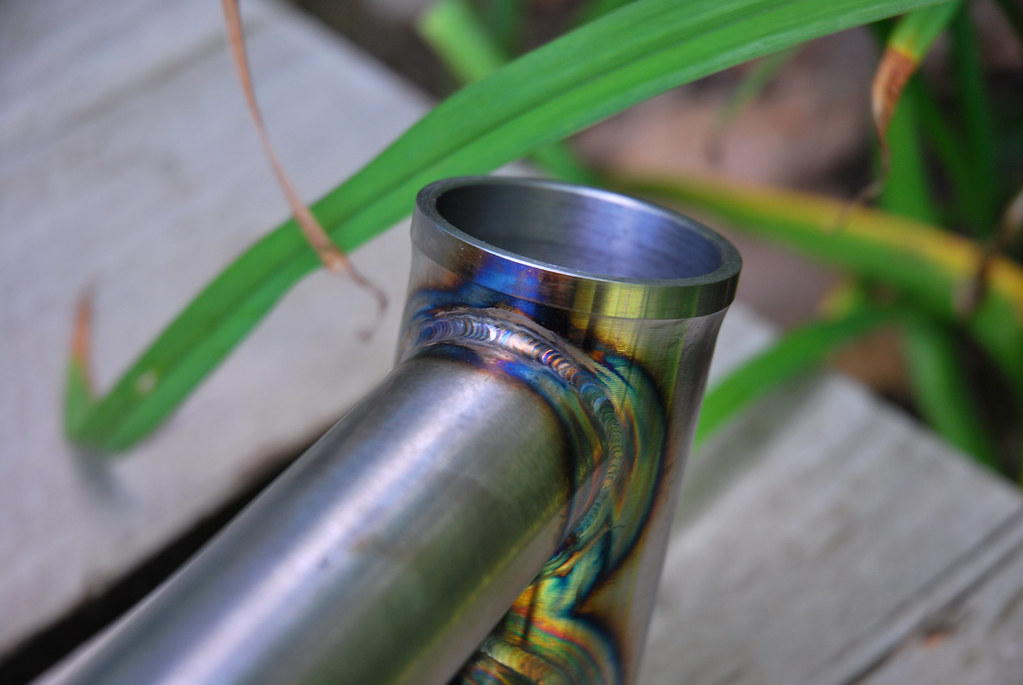
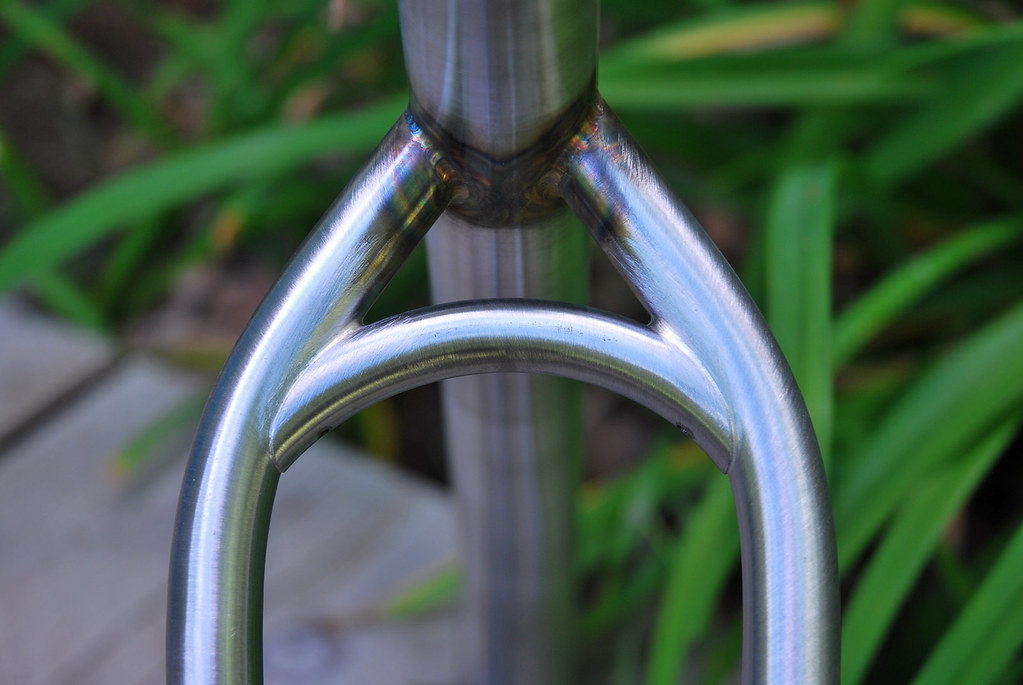
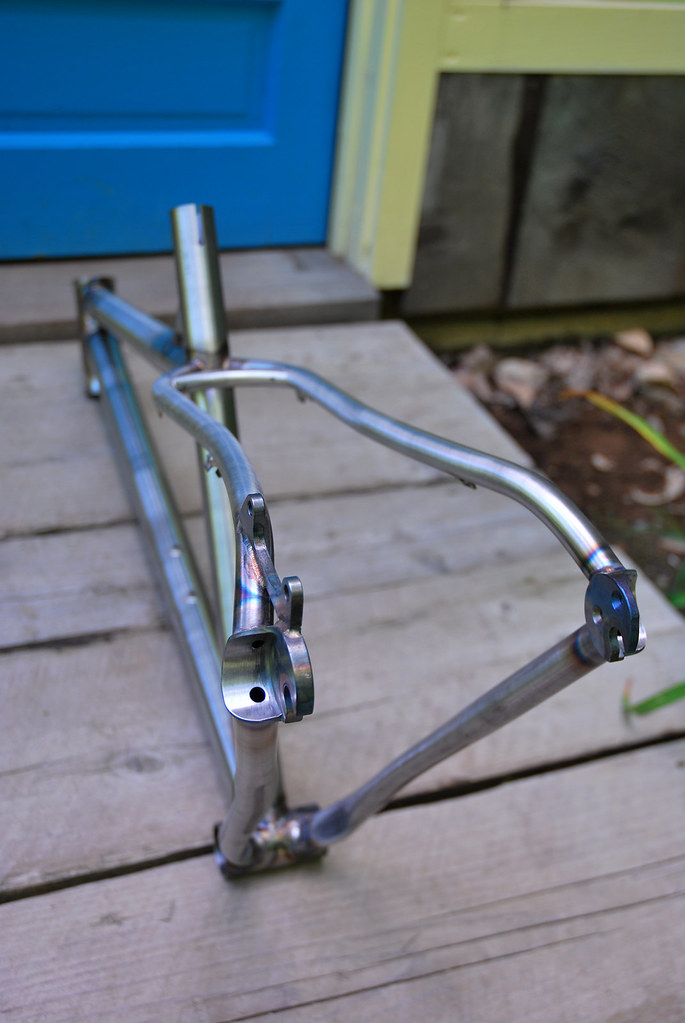
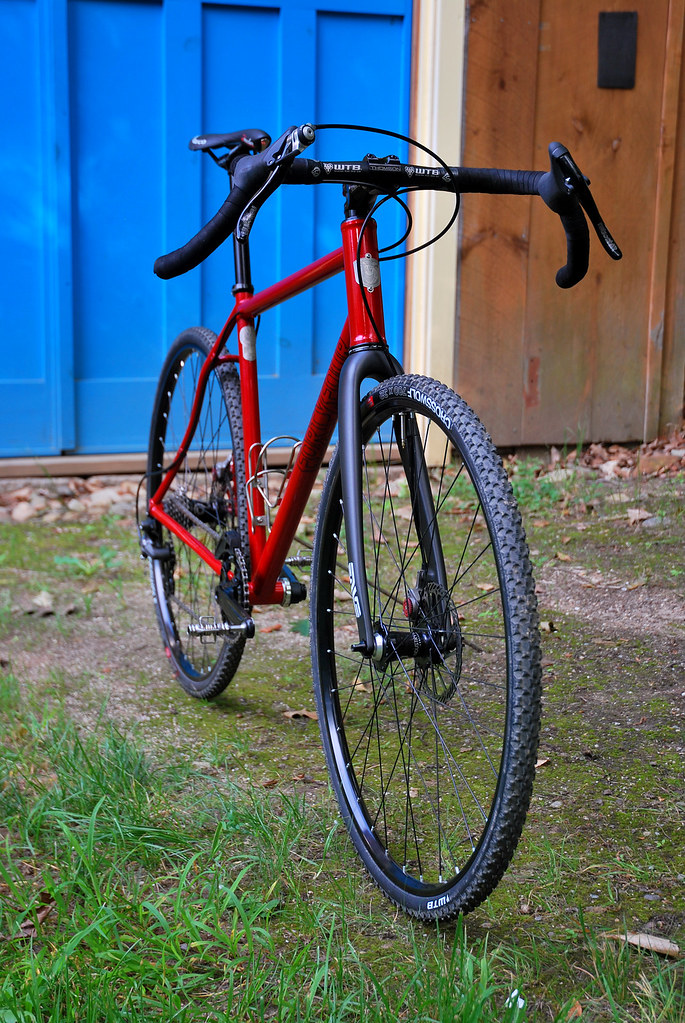
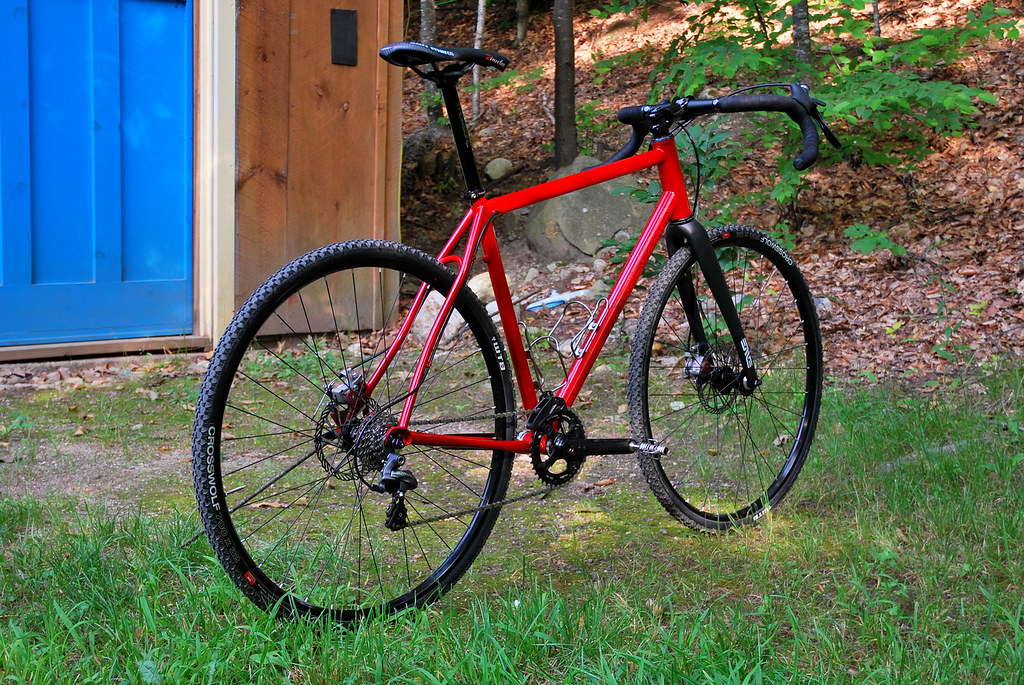
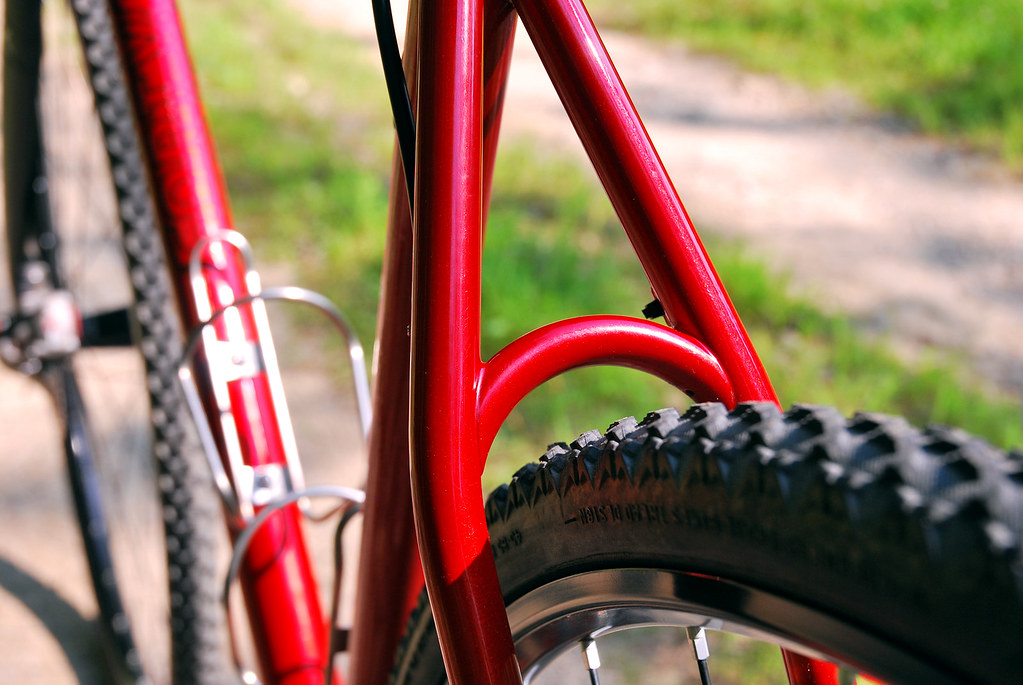
Hope all of this helps. It's a lot of practice to do welds on tubes to get to this:
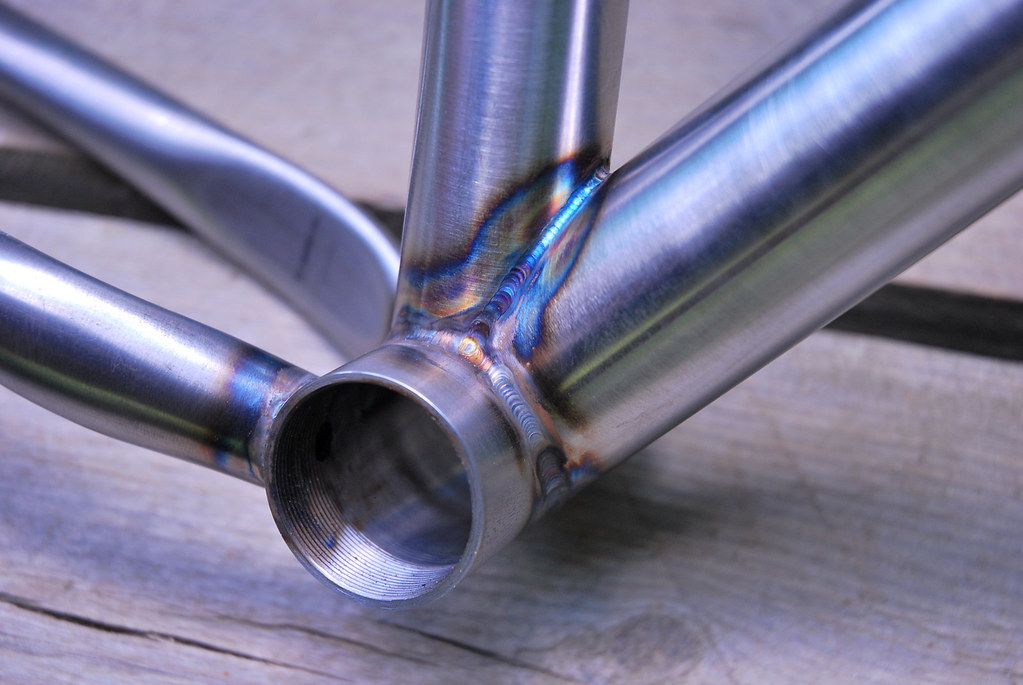
Or this:

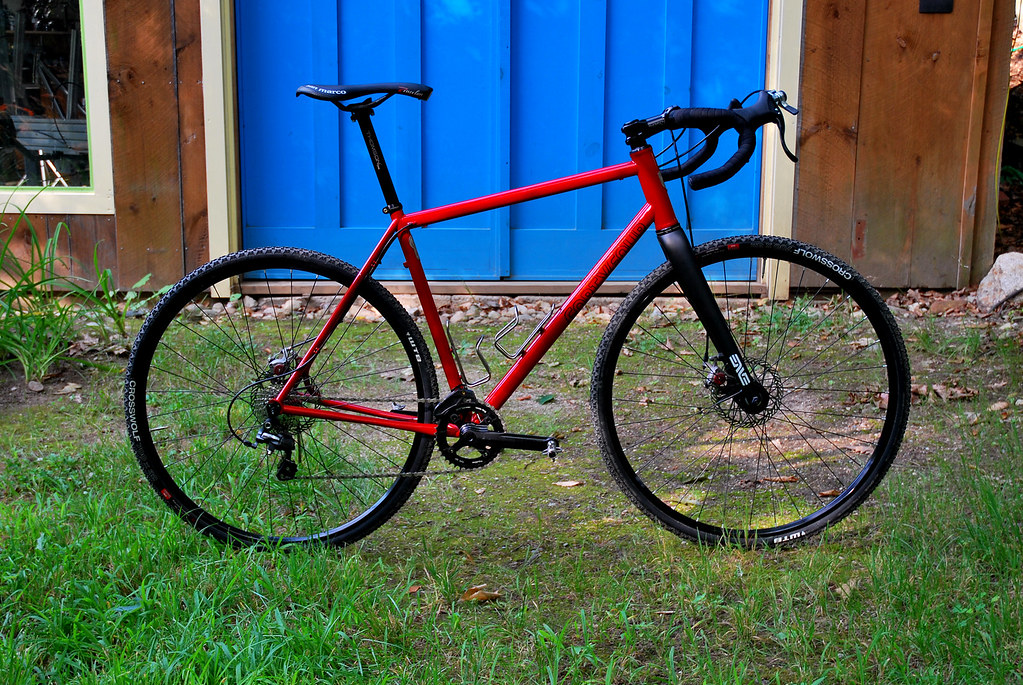
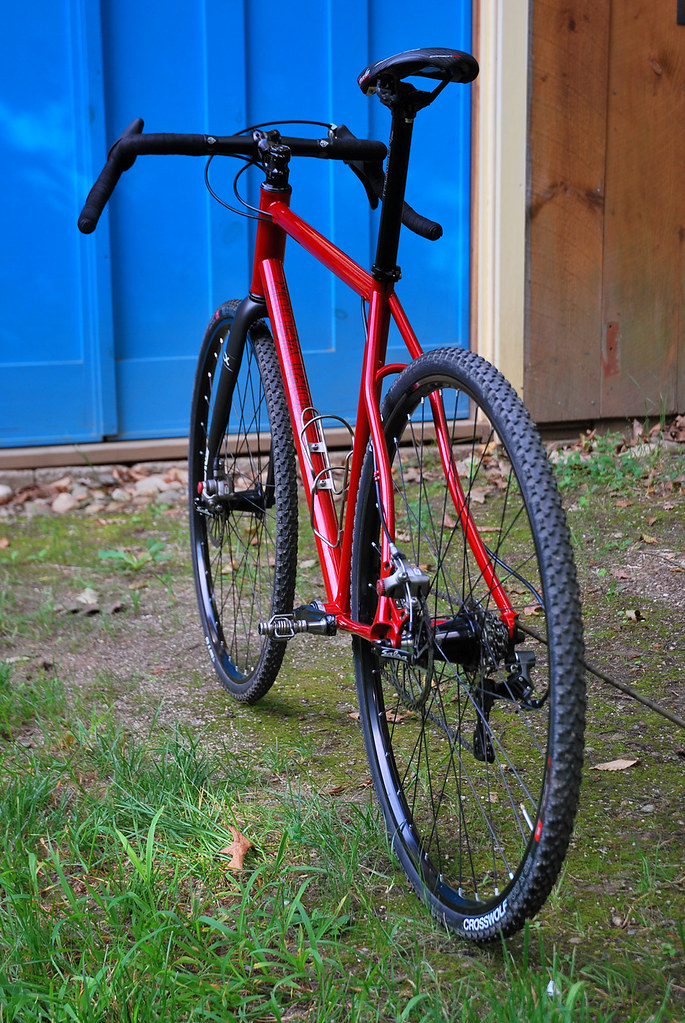
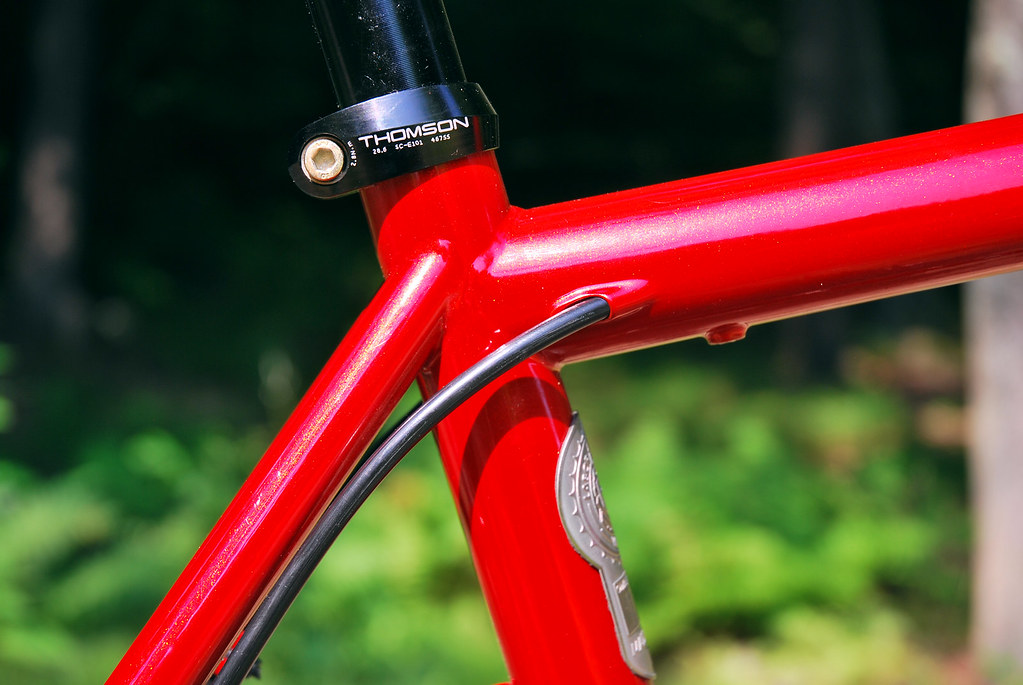
And I still have a ways to go IMO! But practice makes perfect as they say (above 2 weld examples were from this week building this bike):
") I've found the Miller literature/manuals pretty well put together and instructive. I know when I was figuring out the Pulse settings on mine, it was really helpful to decipher what is responsible for what.
I've found the Miller literature/manuals pretty well put together and instructive. I know when I was figuring out the Pulse settings on mine, it was really helpful to decipher what is responsible for what. 


 You are a true craftsman meets artist.