To avoid these ads, REGISTER NOW!

50" press brake build

bullnerd

Well-known member
Joined
Sep 17, 2012
Messages
5,690
Location
Jersey
I hope I'm not the only one who didn't quite follow what you are trying to describe here. If you could elaborate and or post some photos of this process I would appreciate it.

Im guessing by "pick up" he means locating the x-y zero for his plasma cutting program.

Using a point in place of the plasma torch, you can eyeball "zero" on the corner of the plate.

Kind of like a wiggler used for machining.
 
To avoid these ads, REGISTER NOW!

theoldwizard1

Well-known member
Joined
Feb 22, 2011
Messages
43,123
Location
SE MI
Unless I missed something, the "weak link" in you chain is where your cross piece attaches to the uprights.

Capture.JPG

This is just like building the the second floor of a house. The joist need to REST on the structure (top plate and studs) below or have auxiliary support (Simpson Strong Tie Joist Hangers). I am not saying it will fail, but it it dos, it will likely be at that connection.
 
OP
D

Dwerden

Well-known member
Joined
Dec 28, 2018
Messages
130
Location
Ontario
Started the day off proper with a little bandsaw action, the piece buddy had was 54 inches so i cut 4 off. Actually worked out nice having the little 4 inch piece for fitting the upper plate


After that I did some figuring on the doubler plates for the upper punch plate. It will have 4 wheels that will roll on the uprights, I am welding 1/4 plate ontop of the uprights first


I also cut out the matching gusset for the other side of the top


Heres where Im at


I sorted through a bunch of hydraulic hoses I acquired a few years ago and there are 4 hoses that are perfect, 2 about 5 fert long for the ram to spool then 2 more about 15 feet long that I can run to my tractor parked outside. I also had most of the fittings I needed. I went and got some angle iron and flatbar to build somes dies, I am going to start with a 1 7/8 and a 3/4. I think that should cover most of my application. I grabbed some hydraulic quick connects that were the wrong ones so ill have to try and find one of those.
 
Last edited:

lis2323

Well-known member
Joined
Dec 25, 2016
Messages
3,234
Looking good! The day of reckoning is approaching....


Sent from my iPad using Tapatalk
 
OP
D

Dwerden

Well-known member
Joined
Dec 28, 2018
Messages
130
Location
Ontario
Unless I missed something, the "weak link" in you chain is where your cross piece attaches to the uprights.

Capture.JPG

This is just like building the the second floor of a house. The joist need to REST on the structure (top plate and studs) below or have auxiliary support (Simpson Strong Tie Joist Hangers). I am not saying it will fail, but it it dos, it will likely be at that connection.


I think you missed these?


If this isnt enough ill pick up a couple 2x4s and some 3" deck screws to beef it up
 
OP
D

Dwerden

Well-known member
Joined
Dec 28, 2018
Messages
130
Location
Ontario
Im guessing by "pick up" he means locating the x-y zero for his plasma cutting program.

Using a point in place of the plasma torch, you can eyeball "zero" on the corner of the plate.

Kind of like a wiggler used for machining.


Yes this is exactly what happened, I meant to take a picture today but forgot
 
OP
D

Dwerden

Well-known member
Joined
Dec 28, 2018
Messages
130
Location
Ontario
That gusset will add a LOT of support. I assume you are going to weld the other side also.

Yes there is a gap on the right side for a 1/4" doubler, that gets welded on then I run a hot nasty pass of 6010 in deep on the gusset to doubler then fill out with 7018 probbaly 5 or 6 passes . The 6x6 joint to the upright will also get probbaly 4 passes of 7018
 

fiftyv8

Well-known member
Joined
Dec 29, 2018
Messages
237
Location
Perth
Keep up the good work, you are making good progress.
Albeit that this project seems to have become a welders delight.
Great weather for welding to boot...
 
OP
D

Dwerden

Well-known member
Joined
Dec 28, 2018
Messages
130
Location
Ontario
Keep up the good work, you are making good progress.
Albeit that this project seems to have become a welders delight.
Great weather for welding to boot...

Yup tommorow will be shield down welding pretty much all day
 

bullnerd

Well-known member
Joined
Sep 17, 2012
Messages
5,690
Location
Jersey
Whats the angle on your die?

Looks like 90 degrees from here.

I know you said you did a bunch of research, but its not 90 right?
 
OP
D

Dwerden

Well-known member
Joined
Dec 28, 2018
Messages
130
Location
Ontario
Is there any adjustment for level built in yet? Or do you need any?

I measured yesterday and the punch is out about an 1/8. Once i get the die bed on (hopefully today) I will zip the rod and shorten it until its level then re weld
 

dr_clyde

Well-known member
Joined
Jan 7, 2009
Messages
6,434
Location
Holland, MI
What is the die made of? I know a couple machinist, I'm sure I could talk one into cutting a die for me.

For a home shop, I imagine any steel would last a while IF you used it properly, and within the tonnage it can handle. Be smart about what you bend and where.

Commercial dies and punches are usually case hardened 4140 for a wear resistant outside, with a tough core. They are very hard on the business end, and reasonably soft up on the tongue that fits the ram.

From my experience, even commercial brake dies can and will deform if you use them enough. It will only be exaggerated on soft home-made dies. For example, on a soft punch, you run the risk of getting deformation and damage by bending metals smaller than full width. The narrower they are, the worse it will be. For example, attempting to bend a 2" wide strap of 1/4" steel on a nice full width acute die will leave a 2" wide spot that will be misshapen.

I would caution against using a nice full width soft punch to bend short things. Make some custom sacrificial tools for these jobs.
 
To avoid these ads, REGISTER NOW!
OP
D

Dwerden

Well-known member
Joined
Dec 28, 2018
Messages
130
Location
Ontario
For a home shop, I imagine any steel would last a while IF you used it properly, and within the tonnage it can handle. Be smart about what you bend and where.

Commercial dies and punches are usually case hardened 4140 for a wear resistant outside, with a tough core. They are very hard on the business end, and reasonably soft up on the tongue that fits the ram.

From my experience, even commercial brake dies can and will deform if you use them enough. It will only be exaggerated on soft home-made dies. For example, on a soft punch, you run the risk of getting deformation and damage by bending metals smaller than full width. The narrower they are, the worse it will be. For example, attempting to bend a 2" wide strap of 1/4" steel on a nice full width acute die will leave a 2" wide spot that will be misshapen.

I would caution against using a nice full width soft punch to bend short things. Make some custom sacrificial tools for these jobs.


That is good advice, I was going to cut this one up into fingers but maybe I will just get a piece of 1/2 flat bar and mill an edge on it.
 
OP
D

Dwerden

Well-known member
Joined
Dec 28, 2018
Messages
130
Location
Ontario
Got all the gussets welded up this morning. I was going to lay it down and flip flop but decided I would give it a shot in position, once I dialed in the heat they didnt turn out to bad


Then I went on a goose chase for some hydraulic gear, finally found the right couplers for my tractor


Once I get some legs on this thing and at the height I want ill mount the lever temporarily on the upright. eventually it will get switched to a foot petal of some sort
 
Last edited:

Bottlecapdigger

Well-known member
Joined
Dec 29, 2015
Messages
543
Location
Ontario
Got my punch plate cut out this afternoon, i turned a piece of 1 inch round stock to a point and clamped it where the torch usually goes in the plasma table in order to pick up the piece of plate.. it worked extremely well

[looking good! That's going too look great once it's painted. Is there going to be any adjustment from one arm to the other so it's parrallel when bending? And are you going to add the hinge points with grease fittings? /QUOTE]
Also where in Ontario are you situated? When you stated your a few hours from the plasma tech guy, that the same as me. BCD.
 
OP
D

Dwerden

Well-known member
Joined
Dec 28, 2018
Messages
130
Location
Ontario
Got my punch plate cut out this afternoon, i turned a piece of 1 inch round stock to a point and clamped it where the torch usually goes in the plasma table in order to pick up the piece of plate.. it worked extremely well

[looking good! That's going too look great once it's painted. Is there going to be any adjustment from one arm to the other so it's parrallel when bending? And are you going to add the hinge points with grease fittings? /QUOTE]
Also where in Ontario are you situated? When you stated your a few hours from the plasma tech guy, that the same as me. BCD.

I made the adjustment today, I cut the arm and shortened it about 3/8 so now its as close as I can get it with a tape. Im going to pull the pins 1 at a time when its all together and know it works and drill for grease *******. I'm in wyoming, between sarnia and london. Do you have a plasmatech table?
 
Last edited:
OP
D

Dwerden

Well-known member
Joined
Dec 28, 2018
Messages
130
Location
Ontario
Well today I made some good progress, I started by turning some wheels for the punch to roll up and down on


Then I started pounding rod to the punch, I was moving around but wasnt flipping it over because the thing weighs probably 100 pounds. I finished the one side buffed it all up and when I was flipping it over i just happened to look down while it was standing upright and the thing looked like a banana. I put a 4 ft level on it and there was about 1/4 in the middle...well no turning back now haha I cranked the heat up a bit and hussled on the back. I got lucky, it was only out about an 1/8 when I got done and thankfully my log splitter took care of most of that then i had to do a bit of grinding in the groove


Heres a shot of the punch all assembled, I drilled and tapped 8 holes and have some set screws holding the punch from falling out. I also welded a tab to keep the dog bones together, this was a huge ordeal also haha i was hoping to put it inside in the middle but because of the angle when the arms are up it just wouldnt work, im not crazy about it but it is what it is


Then I gave the clevis a little slice to get the punch sitting level


Starting to come together


Probably not going to work on it much tommorow but Monday i need to weld on the doubler strips where the wheels roll, then the die bed needs to get welded on, whip up a quick die out of angle and see if it folds in half. I need to make some legs too, I want to come up 7 inches. I might need to get the nieghbors skid steer to move the thing im not sure the baby tractor will handle it
 
OP
D

Dwerden

Well-known member
Joined
Dec 28, 2018
Messages
130
Location
Ontario
Also if ever you have an issue with your log splitter not firing, do not assume the cold is at fault and dribble gas into the carbureter for 20 minutes in an attempt to get the engine up to temp, just simply turn on the gas.. that is all
 

bad_idea

Well-known member
Joined
Jun 11, 2011
Messages
4,332
Location
Pasquotank, NC
Also if ever you have an issue with your log splitter not firing, do not assume the cold is at fault and dribble gas into the carbureter for 20 minutes in an attempt to get the engine up to temp, just simply turn on the gas.. that is all

I HATE it when that happens. Don't miss the complex issues, it's the simple things that elude us. :lol:
 
OP
D

Dwerden

Well-known member
Joined
Dec 28, 2018
Messages
130
Location
Ontario
Great strides were made today,I got the die bed on, the 1/2 plate on top, im out of 7018 so I ran a quick pass of 6010 on everything


This is the die i whipped up for now, has about a 3/4 opening, I lowered the press onto the angle to center it and also keep it from warping then tacked it up. Ill finish welding this week


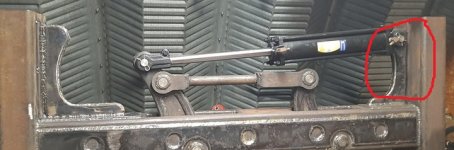
Heres the buisiness end of the whole deal


Here is my first bend, 4 ft of 16 ga. It did this at about 300 psi on the gauge. chart says 2.2 ton per foot


I was worried about not getting 90 because my punch was machined 90 not 85 like i asked for, it was free tho so we cant complain. Its showing right on 90 but well see with the thicker stuff


This is a 3 ft long piece of 10 gauge, it was building pressure and the punch was starting to deflect out because I dont have the roller guides installed yet. 3 ft of 10 ga in a 3/4 die should be 31 tons according to the chart


In conclusion I think Im getting a whole lot more mechanical advantage than I thought. My tractor is only putting out 1500 psi on a 3.5 inch cylinder thats only 7 ton l, that 10 ga should have required about 30 according to charts so its possible im getting more like 5:1 not the 3:1 I thought.

Tommorow I need to get some more 7018, weld up the bed solid then work on making some guides to keep everything nice and straight. Hopefully in the next few days well be in action
 
OP
D

Dwerden

Well-known member
Joined
Dec 28, 2018
Messages
130
Location
Ontario
My ram at 300 psi should put out about roughly 1.5 tons, 4 ft of 16 ga in a 3/4 die should require about 8 ton. So my 5:1 math adds up reasonably well
 
OP
D

Dwerden

Well-known member
Joined
Dec 28, 2018
Messages
130
Location
Ontario
Not sure if it’s been said before or not. I was just wondering what arc welder you are using. Your welds look top notch by the way.

jhn9840
John


Thanks John, It is a Lincoln Squarewave 175. I originally bought it to weld aluminum but then realized how well it burns rod, I had an ac buzzbox before this one and there is no comparason. I also have a lincoln 180 mig but theres no way that thing would weld all day like the squarewave, it would be on the thermal overload every 5 mins and thats if the gun didnt melt in your hand first
 
OP
D

Dwerden

Well-known member
Joined
Dec 28, 2018
Messages
130
Location
Ontario
Little design change this morning on the guides, I was originally going to just put flat bar on the sides of the rollers but there isnt much surface there so i put some plates on the outside what will run in a slot that i made from angle


These will get welded on the uprights


The tedious small hole tapping is not a thing I miss from my machinist days


This place is severely overdue for a cleanup

 
To avoid these ads, REGISTER NOW!
Top Bottom