To avoid these ads, REGISTER NOW!

Between 485 & 705 SQ/FT A Garage Rehabbed

Workspaces between 485 and 705 squarefeet.
OP
B

-Brent-

Well-known member
Joined
Dec 23, 2009
Messages
4,709
Location
Utah
Sunday:

The floor was 99% dry in the morning when I started working. I didn't take any pics because it's applying a chemical with a sprayer and there’s not much to see. However, I did learn a lot in a short time. Because, what would this whole weekend be without more errors? Or that is, more learning experience. How does the saying go, “What do you get when you don’t get what you want? Experience.”

I’m still undeterred.

When I bought the hardener (Liqui-Hard Ultra), I asked the sales associate lots of questions to be sure I did it right. The label had little-to-no instructions, so I was glad I did. He said don't put too much or you'll get white marks. And, he was right, kind-of; I have what looks like chalking (that doesn't rub off) on areas of the floor where there weren't puddles or anything. So, I was pretty miffed. He told me "to keep it wet for 20 minutes" and I think that's where some of the issues came from. I probably just applied it too long. That's my assumption.


Here’s an example, near the door. This area has a sloped transition and no puddling could take effect, here. I thought it was going to make the floor look bad but the floor still has plenty of blemishes earned over its long life. As I worked in there, last night, I came to the opinion that the floor looks better than it did, even with the new marks.

As I continued to work it, I grabbed a window squeegee and moved it around with that. Now, with a little experience I'd recommend that. I could keep the areas damp and work the material around and in all those spaces I avoided white residue.

I took the buffer and a new pad and went at some of the white marks. It removed some of them and spread out some others (the above pic, for example). I had to take a step back from my frustration and think about what it was that I originally wanted to accomplish. I wanted to end the dust-off. I think I've done that. Does the floor look like some of the beauties I see here? No. And, truthfully, I wasn't going for that but as I started seeing positive results I kept thinking I could do a little more to make it look better. And, I can do more but on Father’s day, that’s about all I was going to get.


Here’s a mark that was left by the buffer. When using this buffer, the floor must be wet. Of course some puddling occurred. The buffer removed the more concentrated white markings but I didn’t move out the residual water, which was whitish-clear, in time. As I squeegeed it away, this was left behind.

At the end of the day I started moving boxes back into the garage.


Everything was cleaned before being put back into place. I’ve never cleaned a toolbox so thoroughly; never mind a dozen of them. :lol: The missing top box is finally getting switched with a better one that I came across a while back. Before getting the replacement up, it needs cleaning inside and out. As the previous owner had a film of oil in half of the drawers along with a bunch of random garbage.


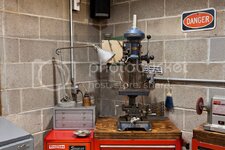
Along with the cleaning, I put the drill press back up.


I had to insert a threaded insert into the area I repaired. It was neat to look into the drilled hole and see my dowel repair and epoxy from the inside. Everything did what it was supposed to. The only issue was breaking to top 1/8” off the insert. So, I taped around it and sanded it flush. I didn’t really lose any threads as they don’t come all the way to the top.

By the end of Sunday, this is what was left over (except for some other stuff left in the driveway).


More to come… and Brett - another 3 am finish!
 
To avoid these ads, REGISTER NOW!

amkluttz

Well-known member
Joined
Sep 8, 2014
Messages
279
Location
Concord, NC
Brent,

I've been following along since the beginning and this has been one of my favorite threads! I know you've put this info out there but what are the dimensions of your garage? I went back to the first page to see if it was there but couldn't find it.

I also wrote a long-ish post about using lacquer on my trim work to reduce recoat time instead of polyurethane. I hit the wrong post button and it never went through. I typically could get 3-4 coats done in a day with sanding only once between coats (usually after 2nd coat to reduce grain) and a light finish sand.

Andy
 
OP
B

-Brent-

Well-known member
Joined
Dec 23, 2009
Messages
4,709
Location
Utah
Brent,

I've been following along since the beginning and this has been one of my favorite threads! I know you've put this info out there but what are the dimensions of your garage? I went back to the first page to see if it was there but couldn't find it.

I also wrote a long-ish post about using lacquer on my trim work to reduce recoat time instead of polyurethane. I hit the wrong post button and it never went through. I typically could get 3-4 coats done in a day with sanding only once between coats (usually after 2nd coat to reduce grain) and a light finish sand.

Andy

Hey Andy! Thanks for following and I appreciate the compliment. Truly.

I think it's pretty cool (and humbling) that folks like the garage and what's taken place over the year. A big part of this project was to try new things, use materials I've never used, etc. My goal was to try to be honest from day one. It's easy to be creative with pics and hide the "warts" but these old buildings and budget builds tend to have them.

The interior dimensions are 21.5 square. Exterior is 22.5 square. That's 506 sq ft with 462 sq ft inside.

I've managed to retain about 361 of floor space (19x19), which was great to see when I measured, last night.

The attic is around 250 sq ft, if I remember correctly. Having that is going to help keep things orderly. But, man-oh-man, it's a mess at the moment. :eyecrazy:

Thanks again, Andy!
 
OP
B

-Brent-

Well-known member
Joined
Dec 23, 2009
Messages
4,709
Location
Utah
Monday: 3 nights left.

It was at this point that I decided I’m tired of all this and called in a guy. He came and knocked down the garage. In the span of 45 minutes the whole year’s work was undone. He thought I was crazy for leaving all my tools in there but I just yelled to him “to keep his thoughts to himself!”


Thanks for following!


:lol:


While there’ve been times I’ve been frustrated, I’ve never been THAT frustrated. Hahaha.

It’s time to get it all back together. I’ve given up on making assumptions that this is going to go quickly. But, I did bring in some heavy hitters. This crew is known for using multiple cans of Sprayway on one job. Many would say it’s wasteful but the CEO of Sprayway would likely say they’re helping him buy a new boat.


The replacement box.


I told y’all it was grimy.


The third Sprayway can was for the rag can. For the first time in the rag can’s life, it was cleaned. I think they’re like me and just love the smell of that stuff.


No, they’re not using the acetone. That was for me as I was epoxying the floor cracks… and I’m messy!


They didn’t do the inside. I wouldn’t want them to. It was pretty nasty.


The box is cleaned and put in place.


Tools removed out of the old one.


More cleaning things I’ve never cleaned before, like a floor jack, jack stands, an oxy/acetylene set-up, and I even wiped down the compressor.


It seems like it took forever to get to this point.


As you can see, I still have my work cut out for me. But, good grief, it took quite a while to get to this point. That pile of towels was brand new, earlier this evening.


Here’s what’s left. I’m not sure about the Hazet cart, keep it or sell it? It seems like all I ever do is pile up stuff on it. I like the idea of having a cart but do I actually need it?

Since I’m a walking zombie, taking pics at 2:30 am, here’s the StrikeMaster II Pro and the door edge guard.


I need to find a home for the shot bag. At 50-ish pounds, it’s staying in the work-space. I’m not climbing up and down the ladder with that awkward thing.


The clearest shot of the floor:


There’s a local guy telling me to seal it with a penetrating siliconate sealer and that I’ll be happier when it’s sealed even if there’s maintenance in keeping it up. I’ve already tended to two oil marks left by the Model A engine. I’m just not sure I want to seal it. I’ve heard the pros and cons and I’m on the fence.

We’re now current!
 

Aroberson77

Well-known member
Joined
Nov 14, 2016
Messages
86
Location
Clemmons, NC
Shop is looking great!! I remember looking at this like 5 pages back. I have been toying with the idea of getting a cart but since I am cheap haven't bought one. It would be hard for me to keep it free of clutter anyway.
 

BoilermakerFan

Well-known member
Joined
Apr 17, 2006
Messages
2,188
Location
Indianapolis, Indiana
The debacle with the engine still pisses me off. There's nothing to do but get over it. But, man, I hate when I'm the cause.

Now that you mention it... haha, NO WAY! I'm really close to that first shop project where I sit in a chair and drink ALL the beer and if I somehow mess that up, I will start over and get it right. :lol:

I think doing half and half is smart as long as you're smarter than me and you cover up the stuff in that other half. <snip>

Thanks, BoilermakerFan, I appreciate you sticking with me.

I dropped a new old stock Suzuki GS550 gas tank on my garage floor. It was mint, perfect... was. And I rolled one of my engines off a dolly too. Bent a shifter that I plan to replace so I got away lucky on that one. I'm still pissed about the dented tank.

:lol: Cover up my stuff? Have you seen all the **** in my garage? It would take three rolls of vapor barrier and 2 cases of packing tape. :lol:

I'm going to use Denwood's trick of modifying a tote to fit over the floor polisher and attach it to my shop vac... might even rent the P-C drywall sanding vac from HD too. No sense in trashing my old shop vac.


<snip> That pile of towels was brand new, earlier this evening.

<snip> I’m not sure about the Hazet cart, keep it or sell it? It seems like all I ever do is pile up stuff on it. I like the idea of having a cart but do I actually need it?

Wow! Looks like they only average 4-5 rags per can of spray! How did you teach them to be so efficient at using rags? I would have used that many rags just on the oily rag bin.

Keep the cart, but you have to paint half of it red in a fade from the blue to red... then put it under the air prep next to the Quincy... so it transitions the colors from blue to red.
 

bj383ss

Well-known member
Joined
Sep 29, 2011
Messages
3,166
Location
TX
Brent your space is looking amazing. Your vision is truly coming to fulfillment. Can't wait to see it when you are completely done.

Bret
 

HSpencer

ALLIANCE MEMBER
Joined
Nov 28, 2010
Messages
2,854
Location
South Central US
Brent

I have to say you have a very cool shop and it looks a pleasure to work in. I like the way you have things arranged and wow you have a lot of tool boxes. I also really like your oxy/acetylene set up. Really compact and portable. I have an even smaller version that uses MAP gas and it comes in real handy. I don't do big welding or anything as living where I do there are many neighbors on farms with electric welders.

Your shop is fantastic, and I like it!!

Best Regards
Herb
 

taumac

Well-known member
Joined
Aug 30, 2011
Messages
8,104
Location
Brooksville, Fl
Brent, the place looks great. I think the door brackets would drive me crazy. I think that's a easy fix when to get some extra time. I think our place lends itself the a bare concrete floor. I have a epoxy and my FIL has gray paint and I think with your bare walls and floor looks right bare. What's up with top box change out? Looks to be same era box and both seem to look good. That extra 10D would look great as my toolbox cart I always wanted to do. Its like all your basic tool carts with drawers but uses a 6 or 10D chest for the center section. The Hazet cart it just plain cool. If you make the cart with 10D then maybe sell or store it away. They fetching a ridiculous price so I think I would empty it and store it away. I've done exactly what your doing working night and day. If I've learned one thing is that once I start making mistakes it's just time to call it a night. It just does downhill from there and end up causing myself more headaches than it's worth. I'm 43 and just can't do those nights like I used to.

Brent keep up good work.
 

driverinmyhead

Well-known member
Joined
Nov 29, 2011
Messages
108
Location
PacNW
Brent,

Fantastic job on your garage! I just finished reading the entire thread. I think what grabbed me the most was your sense of design. You have an artist's eye for things. Like Form over function, but in your case almost everything serves a function!

A few take aways:

I am in the process of buying an old (1940's) cinder block shop. Through my research I found that cinder blocks typically have an "R" value of 1 or less. Some suggestions have been along the lines of drilling holes and filling the cavities (inside the blocks) with foam, as well as rigid foam insulation. I will probably do the rigid foam.

Second,

Like you, I definitely buy and sell. A LOT. Early Ford, Motorcycles, Muscle Car stuff... Storage is ALWAYS at a premium. One idea I considered is a storage shed accessed through double man doors off the garage. Basically a shed alongside the garage with access from inside the shop. It could serve as extra storage as well as a workshop when cars are parked inside the garage. (also a shed would not require a slab or setbacks like an addition).

Just talking out loud (Take my comments with a grain of salt). I can definitely relate to your "Transformation". Many, MANY previous home garages I have had would serve as an advertisement for a storage unit company (including stuff PILED on top of back burner project cars). I too struggle with organization. Hats off to you as you seem to have mastered it!

Last thing,

Just wanted to thank you for this build thread! Taking the time to document your build gives me (I can only speak for myself) an example of someone else's struggle and triumph!!

Awesome garage and love the roadster! (any details on the build plans?)


*
 

amkluttz

Well-known member
Joined
Sep 8, 2014
Messages
279
Location
Concord, NC
The interior dimensions are 21.5 square. Exterior is 22.5 square. That's 506 sq ft with 462 sq ft inside.

I've managed to retain about 361 of floor space (19x19), which was great to see when I measured, last night.


Do you park anything with a decent length in the garage? I have a 12'x22' (exterior dimensions) enclosed garage with another 12'x22' pad next to it with deteriorating shop walls that sits 4"-6" lower so the floors aren't level. I'm wanting to put 24" base cabinets on the back wall and 18" floor cabinets along the side walls but am worried about space. My truck is almost 17' long and I would like to be able to at least work on it inside. I'm trying to decide if it's worth the effort and expense to rebuild both sides or if I would be happier waiting for something better.


This image is what had me asking for garage dimensions. Seeing it from this angle I didn't realize from other pictures that your garage wasn't very deep.

This was how far I kept the door open and I would hose out all the slurry into the driveway. I was worried the neighbors would hear me but the next day I asked and they said they didn’t hear a thing.

 
OP
B

-Brent-

Well-known member
Joined
Dec 23, 2009
Messages
4,709
Location
Utah
:lol: Cover up my stuff? Have you seen all the **** in my garage? It would take three rolls of vapor barrier and 2 cases of packing tape. :lol:

Ha! It may be a pain in the *** but it's worth it!

I'm going to use Denwood's trick of modifying a tote to fit over the floor polisher and attach it to my shop vac... might even rent the P-C drywall sanding vac from HD too. No sense in trashing my old shop vac.

I had a vac on hand but didn't need it/ The floor was wet to during both the cleaning and the grind. I did vacuum up the standing water that was left over after hosing the floor and blowing the junk out onto the driveway.... where the mess now resides. But, even with vacuuming up the standing water there was a lot of silt in the bottom of the vacuum.

Wow! Looks like they only average 4-5 rags per can of spray! How did you teach them to be so efficient at using rags? I would have used that many rags just on the oily rag bin.

:lol: Hmmm, are you the CEO of a rag company? Hahaha!

They did nearly go through the rest of the 20 pack. The probably use 15 rags between them... good eye.
 
OP
B

-Brent-

Well-known member
Joined
Dec 23, 2009
Messages
4,709
Location
Utah
Brent your space is looking amazing. Your vision is truly coming to fulfillment. Can't wait to see it when you are completely done.

Bret

Thanks, Bret, me too! Problem is, I keep finding little things I want to do. At some point I need to say it's done and move on. :willy_nil

Brent

I have to say you have a very cool shop and it looks a pleasure to work in. I like the way you have things arranged and wow you have a lot of tool boxes. I also really like your oxy/acetylene set up. Really compact and portable. I have an even smaller version that uses MAP gas and it comes in real handy. I don't do big welding or anything as living where I do there are many neighbors on farms with electric welders.

Your shop is fantastic, and I like it!!

Best Regards
Herb

Thanks a bunch, Herb. I appreciate it. If I didn't have so many tools I could reduce a stack. I'd like to but I like neat and orderly drawers. I used to hate when things were crammed and mixed up.

The three boxes used as bases for the drill press and grinders do contain things like consumables or wire as well. And, all the drawers aren't filled.

Brent, the place looks great. I think the door brackets would drive me crazy. I think that's a easy fix when to get some extra time. I think our place lends itself the a bare concrete floor. I have a epoxy and my FIL has gray paint and I think with your bare walls and floor looks right bare. What's up with top box change out? Looks to be same era box and both seem to look good. That extra 10D would look great as my toolbox cart I always wanted to do. Its like all your basic tool carts with drawers but uses a 6 or 10D chest for the center section. The Hazet cart it just plain cool. If you make the cart with 10D then maybe sell or store it away. They fetching a ridiculous price so I think I would empty it and store it away. I've done exactly what your doing working night and day. If I've learned one thing is that once I start making mistakes it's just time to call it a night. It just does downhill from there and end up causing myself more headaches than it's worth. I'm 43 and just can't do those nights like I used to.

Brent keep up good work.

Gerard, man YOU ARE OLD! :lol: Do you remember all those wild nights of working 15 hour days when you were forty, like me? :lol: I've never been good at doing them, I have always paid the price even when I was in my 20s. Hell, I even loved my sleep as a kid. I wasn't one of those kids waking folks up on Christmas morning to see what Santa left.

The top box (or 10D as you call it) got switched out for one that was cleaner and in better shape. Really, the only issue (and it wasn't all that much of an issue) was that someone put a hasp latch (for a padlock) at some point and there were 8 holes on the side.

I found the replacement for $25 and it sat in storage. I figured I might as well as use the nicest, cleanest stuff possible before I sell stuff off.

Brent,

Fantastic job on your garage! I just finished reading the entire thread. I think what grabbed me the most was your sense of design. You have an artist's eye for things. Like Form over function, but in your case almost everything serves a function!

A few take aways:

I am in the process of buying an old (1940's) cinder block shop. Through my research I found that cinder blocks typically have an "R" value of 1 or less. Some suggestions have been along the lines of drilling holes and filling the cavities (inside the blocks) with foam, as well as rigid foam insulation. I will probably do the rigid foam.

Second,

Like you, I definitely buy and sell. A LOT. Early Ford, Motorcycles, Muscle Car stuff... Storage is ALWAYS at a premium. One idea I considered is a storage shed accessed through double man doors off the garage. Basically a shed alongside the garage with access from inside the shop. It could serve as extra storage as well as a workshop when cars are parked inside the garage. (also a shed would not require a slab or setbacks like an addition).

Just talking out loud (Take my comments with a grain of salt). I can definitely relate to your "Transformation". Many, MANY previous home garages I have had would serve as an advertisement for a storage unit company (including stuff PILED on top of back burner project cars). I too struggle with organization. Hats off to you as you seem to have mastered it!

Last thing,

Just wanted to thank you for this build thread! Taking the time to document your build gives me (I can only speak for myself) an example of someone else's struggle and triumph!!

Awesome garage and love the roadster! (any details on the build plans?)


*

No, Driver, thank you! First thanks for "reading" what I wrote, that's very cool. It's also why I include so many pics because I feel like I can get wordy, at times. Secondly, thanks for sharing. I'll try my best to answer...

Function is most important to me BUT I love how function looked a few generations ago. I have always been inspired by those that pull off function with style. Thanks for seeing that in me because it's really a way I want to be.

You're right about the R value of block. You'll be money and time ahead if you run rigid foam.

As far as storage, I have a storage condo a few miles away. Now that's where all the parts are stored. It should've been like that from day one of having that place. But, live and learn. That place needs some attention. Last summer I really got it into shape but as I pulled stuff from shelves and such, things got messy. I'm paring down over there, too. Eventually, when the projects are done, I'd like to put in a 4 post lift and store a 2 vehicles and keep a project in the shop.

I also have a lean-to shed where all my lawn stuff and the kids' toys are. I have no control over the debacle of a mess that place is. BUT I like/love having that stuff outside of the garage. Maybe the best $ spent on the garage was the money spent to get stuff out of the garage. We really do need something just for the kids' stuff, though.

As far as your thanks for me showing my struggle and triumph... you are welcome on that front. But, even though I think I've done a bunch of good things organization-wise or even changes to help prevent some of my "bad habits," I'm not calling a triumph yet. I still want to toss things on the floor and I still don't own a trash can. :lol:

Lastly, the roadster is a 26 and will sit on a 1930 chassis. It will be banger powered (Model A 4cyl) and I'm not really using any parts beyond the early to mid-1940s. Though, there are a few odds and ends but nothing that stands out, terribly. We call it the Sugar House Special after its previous owners, Sugar House Lumber, a business that existed during the era of this car. They used this car as a little runabout for the Hardware Department.

Do you park anything with a decent length in the garage? I have a 12'x22' (exterior dimensions) enclosed garage with another 12'x22' pad next to it with deteriorating shop walls that sits 4"-6" lower so the floors aren't level. I'm wanting to put 24" base cabinets on the back wall and 18" floor cabinets along the side walls but am worried about space. My truck is almost 17' long and I would like to be able to at least work on it inside. I'm trying to decide if it's worth the effort and expense to rebuild both sides or if I would be happier waiting for something better.

I've never tried putting my Tundra in there. I don't even know the actual length of it, either. But, if it did fit (I'm doubting it does) it would make the space pretty unusable. My other vehicles are all pretty short. Now that I've made a workable space I should be able to work on them in there without too much trouble.

I'd love a bigger space but I'd rather have my space over waiting for a space. Actually, maybe that's not true. If I had to wait 2 years to have a building twice the size and with the same offerings, I'd do it. :lol:
 

BoilermakerFan

Well-known member
Joined
Apr 17, 2006
Messages
2,188
Location
Indianapolis, Indiana
Ha! It may be a pain in the *** but it's worth it!

I had a vac on hand but didn't need it/ The floor was wet to during both the cleaning and the grind. I did vacuum up the standing water that was left over after hosing the floor and blowing the junk out onto the driveway.... where the mess now resides. But, even with vacuuming up the standing water there was a lot of silt in the bottom of the vacuum.

:lol: Hmmm, are you the CEO of a rag company? Hahaha!

They did nearly go through the rest of the 20 pack. The probably use 15 rags between them... good eye.

We'll see... I'll probably just drape the vapor barrier/drop cloth over it. I was given a HUGE roll of it by a customer. They had commercial painters in and they left 3 rolls. After several calls they never came and picked it up. One roll went to the maintenance manager, one to the maintenance lead, and one to me since they know I do a lot of projects in my house and garage...

And I'm still planning to run the vacuum while grinding. I made the mistake of running my small RO sander with just the little dust bag on it instead of my shop vac w/HEPA filter. In one of my pics in my thread you can see the haze from the dust still hanging in the air a day after I sanded. :sad: I don't do that anymore. I'm still chasing that dust... I have the plans to build a ceiling mounted air filter that uses a squirrel cage blower in between house air filters. It's on the list to finally get built this summer since I have several more woodworking projects lined up before I even start building my little fishing boat.

I wish I was a CEO of a rag company! I buy rags by the box and burn through them! Of course, I tend to have more spills than the average Joe in my garage. :dunno:
 

krcoomer

Well-known member
Joined
Jul 22, 2016
Messages
379
Location
Bluegrass region
Brent,

Your shop is looking great and you are about to reap the benefits of having your act together. I have followed because I also have a block garage. It looks like you have 7' walls as mine are (I counted blocks).

I agree the blocks do not have much insulation value, but I believe they act as a sort of heat sink in the winter and don't seem to transfer too much heat in the summer. My father in law said back in the 70's they were pouring styrofoam pellets like bean bag chair "beans" into some block walls, but he didn't think they were very effective because of settling and moisture wicking through the blocks.

My kids were in their early double digits when the original Cars movie came out. I took an afternoon off and they 'took' me to see it for Father's Day and we went to a pizza buffet. Your kids may not remember that you saw it on Father's Day weekend, but you will even when you are older than Gerard.
 
OP
B

-Brent-

Well-known member
Joined
Dec 23, 2009
Messages
4,709
Location
Utah
We'll see... I'll probably just drape the vapor barrier/drop cloth over it. I was given a HUGE roll of it by a customer. They had commercial painters in and they left 3 rolls. After several calls they never came and picked it up. One roll went to the maintenance manager, one to the maintenance lead, and one to me since they know I do a lot of projects in my house and garage...

And I'm still planning to run the vacuum while grinding. I made the mistake of running my small RO sander with just the little dust bag on it instead of my shop vac w/HEPA filter. In one of my pics in my thread you can see the haze from the dust still hanging in the air a day after I sanded. :sad: I don't do that anymore. I'm still chasing that dust... I have the plans to build a ceiling mounted air filter that uses a squirrel cage blower in between house air filters. It's on the list to finally get built this summer since I have several more woodworking projects lined up before I even start building my little fishing boat.

I wish I was a CEO of a rag company! I buy rags by the box and burn through them! Of course, I tend to have more spills than the average Joe in my garage. :dunno:

That vapor barrier will do the trick, for sure... anything really.

I like the idea of the filter/fan. I'm going to follow along with that one. I should hook the sanders up to the vac, more. I have the reducer to go from the larger hose and such but I didn't do it all the time. Kind-of dumb not to.


Brent,

Your shop is looking great and you are about to reap the benefits of having your act together. I have followed because I also have a block garage. It looks like you have 7' walls as mine are (I counted blocks).

I agree the blocks do not have much insulation value, but I believe they act as a sort of heat sink in the winter and don't seem to transfer too much heat in the summer. My father in law said back in the 70's they were pouring styrofoam pellets like bean bag chair "beans" into some block walls, but he didn't think they were very effective because of settling and moisture wicking through the blocks.

My kids were in their early double digits when the original Cars movie came out. I took an afternoon off and they 'took' me to see it for Father's Day and we went to a pizza buffet. Your kids may not remember that you saw it on Father's Day weekend, but you will even when you are older than Gerard.

Thanks! I can't wait for the reaping! Haha! Tonight, I actually mocked up the roadster a bit (I'll post a few pics in a bit). Just playing around with the car a tiny bit was pure joy!

When I went into the garage, after work, it was 80* inside and coming off of 100* outside. I think a big part of that difference was insulating the garage door since it's west-facing. I need to get the upper end wall insulated, too.

I don't know, Kenny, the mind starts doing crazy things when you're an old man like Gerard. :lol: (I probably don't need to say this, but Gerard, I don't think you're old. You're older than me... but not old, well not THAT old. :D) I once heard (from where, I can't remember) that making memories is a two-way street. I think it was actually referring to a father's memory of his kids, like you mention. The saying stuck with me and it's something I try to live by with my family.
 
OP
B

-Brent-

Well-known member
Joined
Dec 23, 2009
Messages
4,709
Location
Utah
I mocked up the windshield stanchions, which are chopped in half, maybe 10" and the bottom windshield frame. As well, I put the radiator and shell and the headlight bar I fabbed. I'm shooting for that late 30s early 40s vibe. I love high-mounted headlights of that era.


Last edited:
OP
B

-Brent-

Well-known member
Joined
Dec 23, 2009
Messages
4,709
Location
Utah


Over the years the number of my standard, deep well 6 point sockets somehow shrunk. For the first time in my life, I upgrade to a higher priced (and far better reputation) set of sockets. I got these Protos from Zoro. I'm looking forward to using them.
 

BoilermakerFan

Well-known member
Joined
Apr 17, 2006
Messages
2,188
Location
Indianapolis, Indiana
Over the years the number of my standard, deep well 6 point sockets somehow shrunk. For the first time in my life, I upgrade to a higher priced (and far better reputation) set of sockets. I got these Protos from Zoro. I'm looking forward to using them.

Nice! It drives me crazy how so many of the socket sets today include more 12pt sockets instead of 6pt. On old machines like your Ford and my motorcycles, the 12pt sockets just round off the heads.

For a more budget friendly option, I have been extremely happy with my Kobalt sockets. IIRC, their made by the same company that makes Craftsman Pro sets, but the quality seems to be even a little higher. I have one mid-sized Husky set that I'm giving to my 11yo son and I'm going all Kobalt. I need two more metric only sets... One is under $25 and the other is $60. I really need a nicer, bigger tool chest, but I don't really have room for a 36" or 42" set.
 
OP
B

-Brent-

Well-known member
Joined
Dec 23, 2009
Messages
4,709
Location
Utah
With the 15% code I got these for $78 from Zoro. I was pretty happy with that.

I don't go into the Lowe's around here all that often so I'm glad to hear the Kobalt quality is good. I can imagine them lasting just as long as my Cman sets. Really, most of the times I've broken a socket, I could've pulled out a better socket for the job.

My metrics are all in mostly good condition. I've got a few that are worn but at least they're all there.

My 12pt SAE, they're probably due to get swapped out, too. But, for the exact reason you said, my 6pts are what I first turn to.
 
To avoid these ads, REGISTER NOW!

krcoomer

Well-known member
Joined
Jul 22, 2016
Messages
379
Location
Bluegrass region
Sorry to hijack your thread Brent, but with the discussion of sockets, whose ratchets are you all using? Most of my Craftsmans from 30+ years ago are still holding up, but the last time my 3/8 fouled up they gave me the plastic gear set so I know it's days are numbered. I have a Proto from at least 50 yrs ago that is probably as good as they come. I am going to have to check out Zoro, but would like opinions.
 

taumac

Well-known member
Joined
Aug 30, 2011
Messages
8,104
Location
Brooksville, Fl
LOL, I can't remember where I heard it ( probably because of old timers LOL) that there's those under 40 and all those OLD F@CKING SOB's over 40. LOL.

I'm one of those OLD F@CKING SOBs now!!! LMFAO. Actually, I can still do it! I work outside all day long in this Florida heat and last thing I wanna do is work in the garage when I get home these days. This heat will get best of you and sure make you feel older than you really are. LOL

Sent from my Venue7 3740 using Tapatalk
 

driverinmyhead

Well-known member
Joined
Nov 29, 2011
Messages
108
Location
PacNW
I also like the look of concrete block, but will probably insulate.

Have had a few decent shops, but **** at organization. In the Air Force we used foam shadow boxing in the flightline toolboxes. I still dream of doing that...

Roadster sounds cool. AWESOME back story. Love the Banger powered Hot Rods!
I have everything for a "T" Roadster except the body. Have been thinking about an Isky type long wheelbase 23-25 turtle deck roadster for a lot of years. Have an "A" frame and loads of suspension, steering, etc, parts. It needs to happen!

Fingers crossed, I will be closing on a Commercial building in a business district in July or so. Definitely digging your garage build, gets the juices flowing!

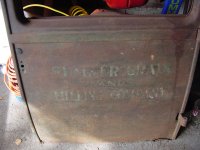
Here is a "T" door I had on my 1928 Model "A" pickup about 10+ years ago:
 

Attachments

  • ocs 214.jpg
    ocs 214.jpg
    71.2 KB · Views: 99
OP
B

-Brent-

Well-known member
Joined
Dec 23, 2009
Messages
4,709
Location
Utah
Sorry to hijack your thread Brent, but with the discussion of sockets, whose ratchets are you all using? Most of my Craftsmans from 30+ years ago are still holding up, but the last time my 3/8 fouled up they gave me the plastic gear set so I know it's days are numbered. I have a Proto from at least 50 yrs ago that is probably as good as they come. I am going to have to check out Zoro, but would like opinions.

I have an assortment from Armstrong 88t to Snap-On, Proto, a small Mac 1/4, a couple Cornwells (I got through an estate sale and really like them, one does need to be rebuilt), and even a Harbor Freight. Although I only bought the HFT to see what all the talk was about. I used them once and they sit. I should probably pass them on. I have a couple Craftsman but I never use them. I had a Cman in my junk yard bag but I blew that up the last time out there. I replaced it with a Proto in that I got from a military auction (it was one of the few things I kept from the lot). It doesn't feel all that nice in my hand but it's a beast.


The 1/4" drawer.


The 3/8" drawer.

Missing my Armstrong 88T, no clue where it went: it ***** when that happens.
 
OP
B

-Brent-

Well-known member
Joined
Dec 23, 2009
Messages
4,709
Location
Utah
I also like the look of concrete block, but will probably insulate.

Have had a few decent shops, but **** at organization. In the Air Force we used foam shadow boxing in the flightline toolboxes. I still dream of doing that...

Roadster sounds cool. AWESOME back story. Love the Banger powered Hot Rods!
I have everything for a "T" Roadster except the body. Have been thinking about an Isky type long wheelbase 23-25 turtle deck roadster for a lot of years. Have an "A" frame and loads of suspension, steering, etc, parts. It needs to happen!

Fingers crossed, I will be closing on a Commercial building in a business district in July or so. Definitely digging your garage build, gets the juices flowing!

Here is a "T" door I had on my 1928 Model "A" pickup about 10+ years ago:

Cool! I hope you get that building.

We need to talk Ts. I have a 1920 that I built, got real close to getting done and blew it apart to finish it and then it got shoved into storage over and it's sat over the years.

Thanks for the compliments on the garage. It's kind-of tough for me to take acknowledgment (I don't have a good reason why) but I super appreciate it.
 

burger

Well-known member
Joined
Jun 6, 2005
Messages
998
Location
Erf
Brent,

Your shop is coming along great! The Sugar House Special is looking good too! I like the headlight bar, the splash aprons, and the lettering.


Ed
 
OP
B

-Brent-

Well-known member
Joined
Dec 23, 2009
Messages
4,709
Location
Utah
Brent,

Your shop is coming along great! The Sugar House Special is looking good too! I like the headlight bar, the splash aprons, and the lettering.

Thanks, Ed! Messing around and mocking up the roadster, Wednesday night, ended up creating a really neat experience on Thursday.


As any of you that have been recently following along know, I set up a date to have a photographer come and shoot the shop. Since setting the date I've been working like a madman to get it ready. Last night was that night.

Jon Glover, whom seems to be a hell of a guy as well as an automotive and motorcycle photographer took time and did something out of his usual. It was neat to meet someone who is like-minded but also has so much different knowledge and experience.


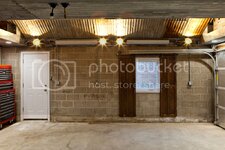
He took a pic from a similar angle as below... I can't wait to see whose is better. :lol:


He spent probably equal amounts of time with the shop and the car. I didn't know what to expect (I'm not around this stuff, really) but his ability and interest (passion) showed in the way he was working.


It was interesting to see a little bit of the process behind the product. I'm excited to see how it all turns out. I'll post up some of his work when the photos are finished.

After chatting with him and picking his brain a bit, the subject of this thread and, specifically, my Instagram page came up. I'm still chuckling because he picked up on something I had a blind spot about. When he was doing a little research on the shop he was looking at all my pics to get an idea of what he'd be working with. Well, I didn't help him all that much because I was doing something I wasn't aware I was doing. I take pictures of the details. I rarely step back and provide the whole story of what's going on. In fact, that actually frustrates me, at times, when I'm reading a thread. I've even called out Duker and Ned Norton on this very thing. I called him on it as I went to my phone to verify that I do step back and show the whole thing... except, damnit, he was right on! Hahaha. :lol: So, I'll back up more often and give a better perspective of things. See, habits are everywhere!
 

burger

Well-known member
Joined
Jun 6, 2005
Messages
998
Location
Erf
[...]After chatting with him and picking his brain a bit, the subject of this thread and, specifically, my Instagram page came up. I'm still chuckling because he picked up on something I had a blind spot about. When he was doing a little research on the shop he was looking at all my pics to get an idea of what he'd be working with. Well, I didn't help him all that much because I was doing something I wasn't aware I was doing. I take pictures of the details. I rarely step back and provide the whole story of what's going on. [...]

Too funny! Just above that bit of text, you posted three pictures of your roadster and I thought to myself, "Wow, I think that's the first time I've seen a picture of the whole garage." And then you post that! Haha!
 
OP
B

-Brent-

Well-known member
Joined
Dec 23, 2009
Messages
4,709
Location
Utah
Too funny! Just above that bit of text, you posted three pictures of your roadster and I thought to myself, "Wow, I think that's the first time I've seen a picture of the whole garage." And then you post that! Haha!

Ha! I blame you all (not really) for not making me take a step back! :lol: Lesson learned! My focus is so much on the details that it spills over into the pics I take. I'm going to make sure that I take a few steps back, in the future, and include overall pics with whatever I'm working on.
 
Last edited:

driverinmyhead

Well-known member
Joined
Nov 29, 2011
Messages
108
Location
PacNW
Brent,

Thanks! I hope i get it too. Commercial financing is like the ultimate "Proctology Exam"...LOL


We can talk about "T's" anytime. I have had all kinds of Early Ford stuff. Got lucky about 15+ years ago, anything Pre War that was stock was worthless (especially parts and bodies). That generation was passing on. Then the Traditional Hot Rod scene really started to peak and it all sky rocketed.


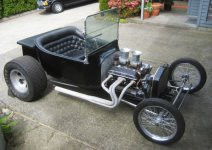
Here is something I generally am not a big fan of, but this one grabbed me...

It's a T-Bucket I had. Built between 1964 and 1967 by a guy, his drag racing buddies and a bunch of beer! Kellison body on 2x4 steel frame, 265 punched to around 301, 3 deuces, '39 top loader, Culver Halibrand, etc. The front wheels are '36 Harley and supposedly came out of Jerry Ruth's Dragster stash. Build quality was exceptional for the 1960's. Went into storage around '71, until I bought it in 2012.

I know what you mean about acknowledgement, I am not much of a trophy guy. If I get one it's awesome... then what? Polish my trophies? :dunno:
It usually goes with the car when I sell it...


Cool idea on the pro photos! All that hard work, you deserve it!


.
 

Attachments

  • Untitled-1b copy_1-1.jpg
    Untitled-1b copy_1-1.jpg
    144.2 KB · Views: 94
  • T bucket.jpg
    T bucket.jpg
    54.6 KB · Views: 94

klusenhusen

Member
Joined
May 20, 2014
Messages
13
Location
Southeast Norway
Brent, the garage is looking great, you and your little helpers have done a phenomenal job.
I am most impressed.

I get an update reminder once a week, and it is always a pleasure to see the progress, keep up the good work.

I really like the night time pictures of the Sugar House, I’m a sucker for the red spoke wheels with the chrome centers.


Jan
 
OP
B

-Brent-

Well-known member
Joined
Dec 23, 2009
Messages
4,709
Location
Utah
Here is something I generally am not a big fan of, but this one grabbed me...

It's a T-Bucket I had. Built between 1964 and 1967 by a guy, his drag racing buddies and a bunch of beer! Kellison body on 2x4 steel frame, 265 punched to around 301, 3 deuces, '39 top loader, Culver Halibrand, etc. The front wheels are '36 Harley and supposedly came out of Jerry Ruth's Dragster stash. Build quality was exceptional for the 1960's. Went into storage around '71, until I bought it in 2012.

I love it! It looks right. It's weird but it's hard to get it right for lots of folks. I'd drive the hell out of that thing.
 
OP
B

-Brent-

Well-known member
Joined
Dec 23, 2009
Messages
4,709
Location
Utah
Both the garage and your roadster are looking great, well done!

Thank you. It feels good to be at a spot in the build where I can do whatever I need to, now.

Brent, the garage is looking great, you and your little helpers have done a phenomenal job.
I am most impressed.

I get an update reminder once a week, and it is always a pleasure to see the progress, keep up the good work.

I really like the night time pictures of the Sugar House, I’m a sucker for the red spoke wheels with the chrome centers.


Jan

Thanks, Jan! The little helpers are happy the space is done, too. They spent a little time, yesterday, running around the roadster. They loved having the space to run and jump. They were jumping over the epoxied cracks because they thought it was still sticky but once they realized it wasn't the only walked on the epoxy pretending if they fell off they'd fall into lava. I love their imaginations.

I have a couple great pics of the car coming up. I got my photos back from the shoot and I haven't had time to post them.

I appreciate you following along, I hope all is well.
 
OP
B

-Brent-

Well-known member
Joined
Dec 23, 2009
Messages
4,709
Location
Utah
Here are some of the photos by Jon Glover:

5208_zps91sgpuar.jpg

5197_zpsiwuclbgx.jpg

5196_zpswwbjw4ag.jpg

5194_zpsjmdhitir.jpg

5177_zps5gxfczfd.jpg

5173-3_zpscdnxihg7.jpg

5188-2_zpsbrzslcsk.jpg

5170-2_zpsfitd6lkr.jpg

5166_zps95kft4eo.jpg

5161_zps2tnage7l.jpg

5168_zpsco0vh2ki.jpg

5211_zpsccv4pgmf.jpg

5163_zpsebgquh1n.jpg

5165_zpsh07gwrup.jpg

I'll post a couple of the car in a moment. Definite thanks goes out to Jon Glover. Also, thanks to many of you, as well. Without your comments, donations, advice, nitpicking :spit:, and overall enthusiasm to see work get done, it would've been a much different experience.
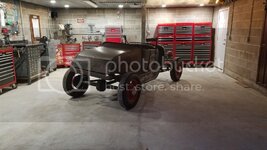
Still lots more to do. I'm not done, yet.
 
OP
B

-Brent-

Well-known member
Joined
Dec 23, 2009
Messages
4,709
Location
Utah
Sugar House Spl. pics:

Just to jog your memory, here's my pic:

20170622_212918_zpsys12nrm7.jpg

... and his:

SH_before_zps9pmh9goo.jpg

Sweet! I win! :lol:

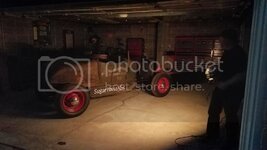
Wait, he does some sort of magic and I'm in the corner surfing Instagram or asking him dumb questions.

20170622_214254_zpsdbmxiufx.jpg

After taking a dozen photos in the dark, walking around with a lamp, he manipulates them with Photoshop. I'm relegated to IG filters.

SH_Layers_zpscbzbhkf7.png

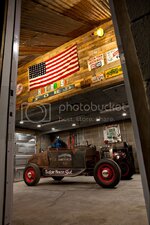
And after a little bit, he ends up with this!

SH_Spec_1_zpscfdqr7vj.jpg

Pretty damn cool! And, this is why I wanted a pro to come and shoot the shop. The pics of the car are bonus. So he wins - no doubt! But I reap the benefits of great photos.

Here's another shot I liked. This one also had a bunch of photos in the dark, with him walking around with the light.

SH_Spec_2_zpsj6xbpq8h.jpg

A couple late night shots:

5257_zpsakyfczib.jpg

5259_zpsfgix4j9k.jpg

And lastly, one of my favorites. It captures a lot of what I love about the place.

5265_zps12hdny8q.jpg

That's it, for now. I hope you enjoy the photos as much as I do.

I think everyone should have a pro come by and shoot their place. It was a neat experience. I'm glad to have these.
 

drivesitfar

Well-known member
Joined
Oct 23, 2013
Messages
36,046
Location
Pacific Northwest
Brent: how do you like it? i'm guessing when you said "I WIN" that almost says it all?

just curious how much the professional photo was cause he did a great job. your photo was pretty sweet though and told the story especially if you look back a few months ago to see where you were when you started.

now to put stuff in your wall of toolboxes so you can find things and might i suggest some painter's tape and a sharpie to start and then maybe some type of magnetic labels when you find your solution.

cheers and BIG CONGRATS cause it's looking good!!
 

njc41980

Well-known member
Joined
Jun 21, 2017
Messages
620
Location
Idaho Falls
Great Thread.

I'm jealous. Just started my own shop project (another thread), and I'm hoping to get here someday.
 
OP
B

-Brent-

Well-known member
Joined
Dec 23, 2009
Messages
4,709
Location
Utah
Brent, your garage looks incredible! Absolutely fantastic work!

Thanks! I appreciate it.

Brent: how do you like it? i'm guessing when you said "I WIN" that almost says it all?

I was just joking when I said, "I win." He sent me a few in-process shots after I had originally taken my phone pic as he was setting things up. I was joking with him that I was going to compare mine to his. Hence his original base photo.

just curious how much the professional photo was cause he did a great job. your photo was pretty sweet though and told the story especially if you look back a few months ago to see where you were when you started.

His prices were very reasonable. Actually too inexpensive in my opinion. So I threw in a bit of a tip. I'm hesitant to share because he may get a bigger job down the road or adjust his prices and I'd hate for him to have to justify what he charged me. Photographers can be expensive, this wasn't, at all. In fact it was very affordable for a regular wage earner like myself.

now to put stuff in your wall of toolboxes so you can find things and might i suggest some painter's tape and a sharpie to start and then maybe some type of magnetic labels when you find your solution.

Would you believe that I pretty much remember what's in nearly every drawer? I do have a system that keeps things simple based on which box gets what but in the over-100 drawers, I've gotten it remembered fairly well.

I'm going to avoid labels for as long as possible. It doesn't seem like a challenge, now, but maybe it will be in the future. I've got to keep the gray matter sharp, somehow.


cheers and BIG CONGRATS cause it's looking good!!

Thank you. I appreciate it.
 
To avoid these ads, REGISTER NOW!
Top Bottom