Sunday:
The floor was 99% dry in the morning when I started working. I didn't take any pics because it's applying a chemical with a sprayer and there’s not much to see. However, I did learn a lot in a short time. Because, what would this whole weekend be without more errors? Or that is, more learning experience. How does the saying go, “What do you get when you don’t get what you want? Experience.”
I’m still undeterred.
When I bought the hardener (Liqui-Hard Ultra), I asked the sales associate lots of questions to be sure I did it right. The label had little-to-no instructions, so I was glad I did. He said don't put too much or you'll get white marks. And, he was right, kind-of; I have what looks like chalking (that doesn't rub off) on areas of the floor where there weren't puddles or anything. So, I was pretty miffed. He told me "to keep it wet for 20 minutes" and I think that's where some of the issues came from. I probably just applied it too long. That's my assumption.

Here’s an example, near the door. This area has a sloped transition and no puddling could take effect, here. I thought it was going to make the floor look bad but the floor still has plenty of blemishes earned over its long life. As I worked in there, last night, I came to the opinion that the floor looks better than it did, even with the new marks.
As I continued to work it, I grabbed a window squeegee and moved it around with that. Now, with a little experience I'd recommend that. I could keep the areas damp and work the material around and in all those spaces I avoided white residue.
I took the buffer and a new pad and went at some of the white marks. It removed some of them and spread out some others (the above pic, for example). I had to take a step back from my frustration and think about what it was that I originally wanted to accomplish. I wanted to end the dust-off. I think I've done that. Does the floor look like some of the beauties I see here? No. And, truthfully, I wasn't going for that but as I started seeing positive results I kept thinking I could do a little more to make it look better. And, I can do more but on Father’s day, that’s about all I was going to get.

Here’s a mark that was left by the buffer. When using this buffer, the floor must be wet. Of course some puddling occurred. The buffer removed the more concentrated white markings but I didn’t move out the residual water, which was whitish-clear, in time. As I squeegeed it away, this was left behind.
At the end of the day I started moving boxes back into the garage.

Everything was cleaned before being put back into place. I’ve never cleaned a toolbox so thoroughly; never mind a dozen of them. The missing top box is finally getting switched with a better one that I came across a while back. Before getting the replacement up, it needs cleaning inside and out. As the previous owner had a film of oil in half of the drawers along with a bunch of random garbage.

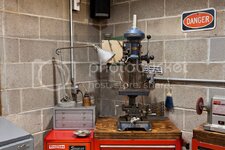
Along with the cleaning, I put the drill press back up.

I had to insert a threaded insert into the area I repaired. It was neat to look into the drilled hole and see my dowel repair and epoxy from the inside. Everything did what it was supposed to. The only issue was breaking to top 1/8” off the insert. So, I taped around it and sanded it flush. I didn’t really lose any threads as they don’t come all the way to the top.
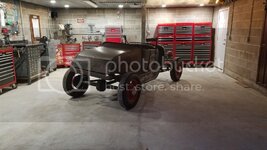
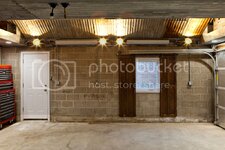
By the end of Sunday, this is what was left over (except for some other stuff left in the driveway).

More to come… and Brett - another 3 am finish!
The floor was 99% dry in the morning when I started working. I didn't take any pics because it's applying a chemical with a sprayer and there’s not much to see. However, I did learn a lot in a short time. Because, what would this whole weekend be without more errors? Or that is, more learning experience. How does the saying go, “What do you get when you don’t get what you want? Experience.”
I’m still undeterred.
When I bought the hardener (Liqui-Hard Ultra), I asked the sales associate lots of questions to be sure I did it right. The label had little-to-no instructions, so I was glad I did. He said don't put too much or you'll get white marks. And, he was right, kind-of; I have what looks like chalking (that doesn't rub off) on areas of the floor where there weren't puddles or anything. So, I was pretty miffed. He told me "to keep it wet for 20 minutes" and I think that's where some of the issues came from. I probably just applied it too long. That's my assumption.

Here’s an example, near the door. This area has a sloped transition and no puddling could take effect, here. I thought it was going to make the floor look bad but the floor still has plenty of blemishes earned over its long life. As I worked in there, last night, I came to the opinion that the floor looks better than it did, even with the new marks.
As I continued to work it, I grabbed a window squeegee and moved it around with that. Now, with a little experience I'd recommend that. I could keep the areas damp and work the material around and in all those spaces I avoided white residue.
I took the buffer and a new pad and went at some of the white marks. It removed some of them and spread out some others (the above pic, for example). I had to take a step back from my frustration and think about what it was that I originally wanted to accomplish. I wanted to end the dust-off. I think I've done that. Does the floor look like some of the beauties I see here? No. And, truthfully, I wasn't going for that but as I started seeing positive results I kept thinking I could do a little more to make it look better. And, I can do more but on Father’s day, that’s about all I was going to get.

Here’s a mark that was left by the buffer. When using this buffer, the floor must be wet. Of course some puddling occurred. The buffer removed the more concentrated white markings but I didn’t move out the residual water, which was whitish-clear, in time. As I squeegeed it away, this was left behind.
At the end of the day I started moving boxes back into the garage.

Everything was cleaned before being put back into place. I’ve never cleaned a toolbox so thoroughly; never mind a dozen of them.
The missing top box is finally getting switched with a better one that I came across a while back. Before getting the replacement up, it needs cleaning inside and out. As the previous owner had a film of oil in half of the drawers along with a bunch of random garbage.
Along with the cleaning, I put the drill press back up.

I had to insert a threaded insert into the area I repaired. It was neat to look into the drilled hole and see my dowel repair and epoxy from the inside. Everything did what it was supposed to. The only issue was breaking to top 1/8” off the insert. So, I taped around it and sanded it flush. I didn’t really lose any threads as they don’t come all the way to the top.
By the end of Sunday, this is what was left over (except for some other stuff left in the driveway).

More to come… and Brett - another 3 am finish!


 I don't do that anymore. I'm still chasing that dust... I have the plans to build a ceiling mounted air filter that uses a squirrel cage blower in between house air filters. It's on the list to finally get built this summer since I have several more woodworking projects lined up before I even start building my little fishing boat.
 ) I once heard (from where, I can't remember) that making memories is a two-way street. I think it was actually referring to a father's memory of his kids, like you mention. The saying stuck with me and it's something I try to live by with my family.











 , and overall enthusiasm to see work get done, it would've been a much different experience.