To avoid these ads, REGISTER NOW!

BEFORE & AFTER....A Tool Polisher's Haven

OP
J

JMLangford

Well-known member
Joined
Jun 25, 2014
Messages
1,122
Location
Upstate SC
First off I got the ole wire wheel fired up and removed the rust....
SOP8.jpg

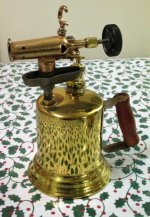
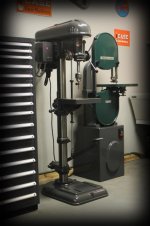
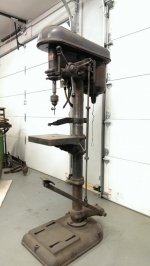
Then I chucked the bent 3/32" one up in my bench top drill press and gently nudged it back in shape (it had very little run-out when done!)
SOP9.jpg

One down....6 to go.....
SOP10.jpg

After a good wire brushing I blued the upper hex part with Birchwood-Casey Super Blue.....
SOP11.jpg

Then I would polish off the bluing on the face that had the name, part number, and size and also the other face that had the "warning-wear safety goggles".....
SOP12.jpg SOP13.jpg

I used a Dremel and a 3M plastic wheel to remove the bluing.....
SOP14.jpg

I cleaned up and reshaped the mushroomed striking end on my 1" X 30" belt sander.....(no pics :headshake)

To keep the rust at bay I wiped them down with a light coat of Outter's gun oil.


.
 
Last edited:
To avoid these ads, REGISTER NOW!
OP
J

JMLangford

Well-known member
Joined
Jun 25, 2014
Messages
1,122
Location
Upstate SC
And here is the end results......all nice and purdy.....
SOP15.jpg

Next I turned my attention to the dirty, ratty looking pouch.....
SOP16.jpg SOP17.jpg

And much to my surprise it came out looking pretty good with just a couple wear holes at the fold :thumbup: all the stitching was intact....
SOP18.jpg SOP19.jpg SOP20.jpg

Here's is it's new home.....with all the other well-loved Snap-On tools :rocker:...
SOP21.jpg


.
 
Last edited:

BobLon

ALLIANCE MEMBER
Joined
Apr 19, 2017
Messages
141
Location
Florida
There is some amazing resto work going on in this thread. Great work.

I'm really digging the step by step. Thanks so much for those.

BobL.
 

Motorman55

Well-known member
Joined
Apr 10, 2016
Messages
2,616
Location
South Jersey
Great stuff!

I've been looking for a decent early blow torch to clean and polish up for awhile now. Most the ones I've seen have either been too expensive or beat up/dented to justify buying them.

Well fast forward to a couple days ago and I found this guy sitting on a shelf at one of our favorite antique shops.

The hard work is done, now I just need to spiff it up some. :D
 

Attachments

  • IMG_1716 (2).jpg
    IMG_1716 (2).jpg
    126.1 KB · Views: 407
  • IMG_1715 (2).jpg
    IMG_1715 (2).jpg
    143.3 KB · Views: 412

Bears Fan

Well-known member
Joined
Jan 26, 2012
Messages
3,437
Location
Indiana
38984568312_41f325a11f_c.jpg


I don't think I have ever seen any of these doubled sided open end adjustable wrench's before :headscrat :thumbup:
 

Bears Fan

Well-known member
Joined
Jan 26, 2012
Messages
3,437
Location
Indiana
24209657697_35debe1eef_o.png


You guys need to be careful working with those vintage blow torches :lol_hitti

I just found this thread and I'm subscribing!!! Love it :thumbup:
 

drivesitfar

Well-known member
Joined
Oct 23, 2013
Messages
35,999
Location
Pacific Northwest
JM: some of us are not GUN guys so BLUING is new to us or maybe just me. anyway can you buy that in a bottle and how did you use it to make those chisel handles shine?

also nice work on the pouch and was that just Simple green and elbow grease or do tell cause i've got more than a few of those i'll need to clean up some day?

WELL DONE!!

Don: love the cleaned up tools and stuff you do so post them as often as you have time and care to.

MOTOR: nice work on the torch. WOW!!

ALL: if any of you have time to also maybe put some of your methods on a thread i started a couple years ago about buffing and shining our old tools it might get a few more views. thanks in advance and here's the link to BUFFING 101:

https://www.garagejournal.com/forum/showthread.php?t=346774&highlight=buffing+101

or maybe just take a look at that thread if you'd like to see a few more shiny things.

cheers and enjoy your FRIDAY
 
OP
J

JMLangford

Well-known member
Joined
Jun 25, 2014
Messages
1,122
Location
Upstate SC
JM: some of us are not GUN guys so BLUING is new to us or maybe just me. anyway can you buy that in a bottle and how did you use it to make those chisel handles shine?

also nice work on the pouch and was that just Simple green and elbow grease or do tell cause i've got more than a few of those i'll need to clean up some day?

WELL DONE!!

Drives: I buy the Birchwood-Casey Super Blue in the 3oz plastic bottle...
13425-super-blue-3oz-(1).jpg

It works great on clean, bare steel (not stainless).....I usually wire brush the item to bare metal then wipe it down with acetone then brush the bluing on with a small brush. (you can see the bottle of bluing and small brush on the workbench)
SOP14.jpg

Directions say to leave it on for 30-60 seconds (no longer) then rinse with cold water to neutralize the chemical reaction......but I've blued items and let them sit 10 mins or so before I get back to them.
Sometimes the bluing will look milky, but when that happens I just take a damp rag and wipe the item off....most of the time the item is fine, but if it look uneven you just simply brush on more of the bluing to even it out.
In fact the more layers of bluing you brush on the blacker the metal becomes.....on these punches I didn't care to much to really make them richly blue, I just wanted to protect the bare metal....afterwards I wiped a thin coat of gun oil on them.....


I cleaned the pouch with a toothbrush, WD40, and some acetone (and a little elbow-grease)......A lot depends on the type of material being cleaned, so test it in a small out-of-the-way spot to see how it will react.
The type of vinyl (?) this pouch is made of reacted well with the acetone but sometimes acetone will dull some materials......also be careful with acetone near painted or screen printed material.....If you notice in the pic I almost wiped away part of the Snap-On logo at the top of the pouch when I got carried away in my cleaning.....:eek:
SOP18.jpg

Hope this helped....


.
 
Last edited:

yaidunno

Well-known member
Joined
Feb 10, 2011
Messages
1,336
Location
WI
Hi. My name is Bryan, and I polish tools.

attachment.php


attachment.php


attachment.php


attachment.php


attachment.php


attachment.php


attachment.php
 

Attachments

  • IMAG0077_zps8f959d16.jpg
    IMAG0077_zps8f959d16.jpg
    71.2 KB · Views: 3,901
  • IMAG0055_zps1c0569ab.jpg
    IMAG0055_zps1c0569ab.jpg
    66.8 KB · Views: 3,886
  • IMAG0040_BURST004_zps6660f550.jpg
    IMAG0040_BURST004_zps6660f550.jpg
    64.4 KB · Views: 3,917
  • IMG_6667_zps673c144f.jpg
    IMG_6667_zps673c144f.jpg
    61.7 KB · Views: 3,897
  • T2eC16NHJF8E9nnC6IpVBRHWoVML-60_57_zps2ac5e530.jpg
    T2eC16NHJF8E9nnC6IpVBRHWoVML-60_57_zps2ac5e530.jpg
    102.2 KB · Views: 3,899
  • IMG_6668_zps24ddb004.JPG
    IMG_6668_zps24ddb004.JPG
    61.6 KB · Views: 3,903
  • IMAG0755_zps32360d9f.jpg
    IMAG0755_zps32360d9f.jpg
    56.6 KB · Views: 3,907

agrasyuk

Member
Joined
Sep 8, 2014
Messages
24
Brian, looks amazing.

JML, great job , those punches look new. Question though, why did you blue them if you polished the bluing later anyways? Just to enhance the lettering?
 

drivesitfar

Well-known member
Joined
Oct 23, 2013
Messages
35,999
Location
Pacific Northwest
JM: you bet it helped. THANK YOU and i'll be referring to that later when I have time to POLISH MY TOOLS cause i have more than a few and here's one I will once i practice on a few other things first.

YD: you sound like we are at an AA meeting. is it really only 12 steps to make that drill press or your tools SHINY? WELL DONE and if you might have some extra time i've got another DP for you that you can spiff up and you won't have to pay anything for cause i'm keeping it.


ALL: this Cannedy-Otto is just one of the old 1920's tools I own that i'd like to POLISH.

cheers
 

Attachments

  • 00w0w_ath21Zl4glY_600x450_zps8eb1860d.jpg
    00w0w_ath21Zl4glY_600x450_zps8eb1860d.jpg
    32.2 KB · Views: 3,649
OP
J

JMLangford

Well-known member
Joined
Jun 25, 2014
Messages
1,122
Location
Upstate SC
Brian, looks amazing.

JML, great job , those punches look new. Question though, why did you blue them if you polished the bluing later anyways? Just to enhance the lettering?

Great work Brian.....I've watched your restorations in the past on GJ....

agrasyuk: Thanks.... yeah, if you look at the first pics before I wire brushed the rust off, you can see that Snap-On originally has the punches blued (or parkerized?) so I was just trying to replicate what was origanal.....the shaft and the 2 flats that have the size etc. and the warning are polished.....

example:

.
 
Last edited:

bonneyman

Well-known member
Joined
Apr 22, 2010
Messages
8,767
Location
Desert SW
Oh my my! :eyecrazy:

There are some things I see guys do and I go out and do them.
There are other things that I see and I go out and try to do them.
Then I see the things that you guys are doing and they make me faint and fall off my chair!
 
Last edited:
To avoid these ads, REGISTER NOW!

drivesitfar

Well-known member
Joined
Oct 23, 2013
Messages
35,999
Location
Pacific Northwest
BEARS: thanks

ALL: i'm not sure if i'm ever going to finish this area, but i'm trying to have a little bench set up with just vintage tools. i already changed the letterpress cabinet to some AddressOgraph cabinets to store nuts and bolts, but the old WWII Liberty ship hatch is making a nice bench. i've got a 1920's Prentiss swivel jaw vise that came to me in almost pristine shape so removing the rust and maybe changing the leather belt on the Canedy-Otto is on the list.

so many tools and so little time, but i appreciate all the knowledge you all are sharing so when i do get some extra time i'll be able to do some quality work POLISHING UP MY TOOLS!!

one thing i have done to avoid so many of my old tools from rusting is i wipe BLO (boiled linseed oil) on them which seems to make them shine too. for quick rust relief you can use WD 40, but it dries up quickly or the yellow can of Johnson paste wax is another rust preventative. there are better ones like GIBBS and Corrosion X and a few others that i haven't tried yet.

for those of you that might want to make your own version of BLO without the harmful chemicals we were talking on the main vise thread about using this recipe:

real linseed oil
japan dryer
beeswax
turpentine

some other additives were mentioned, but these seem to be the ones most of the guys agreed on. i haven't mixed it up yet so i don't have the ratios so ask if you might want them and i'll try to dig up some old posts or let us know what you did and how it worked.

HAPPY HOLIDAYS EVERYBODY!!
 

Attachments

  • WP_20170702_006[36940].jpg
    WP_20170702_006[36940].jpg
    146.9 KB · Views: 388
  • WP_20170702_007[36941].jpg
    WP_20170702_007[36941].jpg
    143.4 KB · Views: 411
OP
J

JMLangford

Well-known member
Joined
Jun 25, 2014
Messages
1,122
Location
Upstate SC
Couple of quick Before & After......

10 in. - 710-S PROTO Los Angeles adjustable.....

BEFORE:
AW1.jpg AW2.jpg

AFTER:
AW3.jpg AW5.jpg AW4.jpg


.
 
Last edited:

Motorman55

Well-known member
Joined
Apr 10, 2016
Messages
2,616
Location
South Jersey
Motorman
That's a nice looking torch.
I collect them too. I like the flat body ones. there are so many different torches that you could fill a room with them.
This is my next project to clean up

2017-11-08 12.22.19 by don long, on Flickr

That looks different then any I've come across. Looks a lot bigger too. Is the flat top of the body brass? Looks like aluminum or steel in the photo.

I've seen others that appear to have steel bodies. There's one that I know of that's available for $15.00 that's painted red. I didn't have a magnet with me to test at the time. I'm probably going to pick it up mainly because it looked complete and has a different looking torch valve.
 

don long

Well-known member
Joined
Mar 31, 2012
Messages
8,841
Location
southern california
That looks different then any I've come across. Looks a lot bigger too. Is the flat top of the body brass? Looks like aluminum or steel in the photo.

I've seen others that appear to have steel bodies. There's one that I know of that's available for $15.00 that's painted red. I didn't have a magnet with me to test at the time. I'm probably going to pick it up mainly because it looked complete and has a different looking torch valve.

Hi Motorman
The torch is all brass and yes it's a bit taller.
I also have a shot of a few other torches begging for some attention

IMG_2266 by don long, on Flickr

IMG_2265 by don long, on Flickr
 

ALLFAST

Well-known member
Joined
Feb 20, 2017
Messages
1,233
Location
Northern California
DIF,

I wholeheartedly urge you to try GIBBS. I learned of it from the vintage hotrod/speed parts madman in SoCal. His website has great info on the damage done to priceless vintage magnesium wheels and speed parts by common spray lubes. After humming and strumming for some months I bought a can. I bought it for work. We have this 6,000 dollar air actuated brake ram that works the brake set mechanism on our headwinch. We have always used WD40 on it to keep it lubed up. The extended portion of this big ram is exposed to rain and salt water. The ram retracts into the body of the actuator and runs through a series of internal seals. I knew there was something better than WD, so I ordered the GIBBS with the intent of seeing if it helped our ram and seals. Ive been using the GIBBS on the ram for a few months now. It is OUTSTANDING. I spray the ram maybe twice in a 7 day shift. The actuator has never been so well behaved,smooth and quiet. Additionally, I wipe a good film on the exposed area of this shaft. The salt exposure doesn't penetrate below the gibbs. The gibbs stays put through rain and sea spray. The seals also seem more conditioned now. ...the WD was making them dry. This GIBBS is the Rolla Royce of lubes. I've even used it on wood, antique leather, and glass as suggested by the main distributor. It's awesome. I've also stared using it on my polished bare metal vise handle. Its great stuff. Barely any residue, no obnoxious odors, and a little goes a long way. That hatch you got is awesome ! Keep up the good work on the vintage work area.
 

drivesitfar

Well-known member
Joined
Oct 23, 2013
Messages
35,999
Location
Pacific Northwest
JM: any chance you want to elaborate on how you cleaned up your crescent wrenches cause i have more than a few that could look better with a little elbow grease?

Don: if you might still have the little tool in your vise set up to remove dents from the inside of those cans and torches you restored i thought it was a great trick/idea? also when you said you tape off a cast iron piece, sand off the tape covering the letters and then shoot the letters I thought that was GENIUS and i've mentioned it to a few other members that have loved lettering that way.

Allfast: I know you like GIBBS and any chance you might have a few of your projects to post pictures of when you've used it?

ALL: this thread is inspiring to say the least :bowdown:
 

jask

Well-known member
Joined
Jul 4, 2009
Messages
314
Location
Gods Country, B.C.
It sure is! keep them coming!!
Drives: Ever time I look at that cabinet under your drill press my back hurts!! ;) I also have a letterpress galley cabinet like that and I still remeber the last time we had to move it 8 years ago :)
 

drivesitfar

Well-known member
Joined
Oct 23, 2013
Messages
35,999
Location
Pacific Northwest
Jask: that Hamilton letterpress cabinet is stout, but honestly it's light compared to a few of the other cabinets I own from that time when things were made to last. it is a bit easier to move with the trays out of it though. i use an inversion table and hang 5 minutes a day that keeps my back SORT OF HAPPY.

this Lyon cabinet weighs 550 pounds according to the warehouse's scale i bought it at and this AddressOgraph might be a bit heavier. maybe the heaviest organizer is this 5 foot wide Lyon rotobin that holds 2000 pounds of stuff on each shelf.

yep i've got a few old vises in the Lyon cabinet to spiff up so watching and learning how all of you spiff up your stuff. i like owning old cabinets to hold my vintage tools.

cheers and hope you all have a very happy holiday season.

also keep those great shiny tools coming along with any detailed instructions on how you managed to spiff them up while some of us learn how so we can pass it on to our kids too.
 

Attachments

  • WP_20170501_002[30991].jpg
    WP_20170501_002[30991].jpg
    154.7 KB · Views: 394
  • WP_20170123_012.jpg
    WP_20170123_012.jpg
    131.1 KB · Views: 371
  • WP_20170317_005[25025].jpg
    WP_20170317_005[25025].jpg
    146.1 KB · Views: 355
Last edited:

don long

Well-known member
Joined
Mar 31, 2012
Messages
8,841
Location
southern california
Back on page 2 i posted this blow torch as a current project
I just got it back from the pin stripper today and love it so much that I have to post the progress

38905213201_8aaf81d14a_c.jpg1 by don long, on Flickr

I sand blasted the tank. I also polished the brass pieces

37037307654_ca9439caf3_c.jpgIMG_1466 by don long, on Flickr

I took the dents out of the tank, primed and painted it 2tone Blue and yellow and sent it over to a friend to logo and letter it.
Hope to get it back soon.

38869920712_7617a9a6f2_c.jpg2017-10-16 13.03.49 by don long, on Flickr

38018969085_0aeb608685_c.jpg2017-10-24 17.59.34 by don long, on Flickr


38462978164_276abbb726_c.jpgIMG_2274 by don long, on Flickr
 
OP
J

JMLangford

Well-known member
Joined
Jun 25, 2014
Messages
1,122
Location
Upstate SC
JM: any chance you want to elaborate on how you cleaned up your crescent wrenches cause i have more than a few that could look better with a little elbow grease?......:

Drives: If the adjustable is really rusty I'll start out with a fine wire wheel on a bench grinder then finish with the 3M discs.....if it's lightly rusty, stained, or mildly dirty I'll just use the 3M discs.....

Most people think I've bead-blasted the items I clean (and I sure would use one if I owned one....) but it's all man-u-well labor ;) a little labor intensive at times but it's very rewarding to see a often abused, rusty tool brought back to it's original shine

The 3M disc I refer to are called 3M Scotch-Brite Radial Bristle Disc and they come in nine different grits (colors).....I use mostly the yellow ones which are 80 grit and they clean/polish tool steel wonderfully.....it will remove fine scratches on smooth surfaces.
The disc are abrasive impregnated plastic and leave no residue like a felt wheel with polishing rouge....they are use a lot by jewelers.
I've got the brown (36 grit) dark green (50 grit) and the yellow (80 grit) and I would like to try the finer grits (pumice, 6 micron, and 1 micron)
Here are a couple of YouTube videos that demo their use.....I use mine in a Dremel tool although I also have a Foredom flex shaft tool.

https://www.youtube.com/watch?time_continue=57&v=uUBnN4j98Nc


:beer:

.
 

cybrdyke

Well-known member
Joined
Sep 9, 2014
Messages
3,442
Location
USA
The 3M disc I refer to are called 3M Scotch-Brite Radial Bristle Disc and they come in nine different grits (colors).....I use mostly the yellow ones which are 80 grit and they clean/polish tool steel wonderfully.....it will remove fine scratches on smooth surfaces.
The disc are abrasive impregnated plastic and leave no residue like a felt wheel with polishing rouge....they are use a lot by jewelers.
I've got the brown (36 grit) dark green (50 grit) and the yellow (80 grit) and I would like to try the finer grits (pumice, 6 micron, and 1 micron)
Here are a couple of YouTube videos that demo their use.....I use mine in a Dremel tool although I also have a Foredom flex shaft tool.

https://www.youtube.com/watch?time_continue=57&v=uUBnN4j98Nc


:beer:

.

JM, where do you get these 3M discs? I found some look-alikes on amazon and they are pretty expensive...
Thanks
CD
 
OP
J

JMLangford

Well-known member
Joined
Jun 25, 2014
Messages
1,122
Location
Upstate SC
JM, where do you get these 3M discs? I found some look-alikes on amazon and they are pretty expensive...
Thanks
CD

If you already have a mandrel this ebay seller seem to have the best price at roughly $1.12 ea......They normally run $1.89 - $2.00 ea. on up.....
https://www.ebay.com/p/3m-Scotch-Br...-Diameter-80-Grit/1301536201?iid=221286235083

If you aren't aggressive with them they last a long time.....they are kind of a finesse tool
The videos I posted for Drivesitfar said to use them in 3's but I use them in 2's......I've even used one at a time for delicate spots....


.
 

drivesitfar

Well-known member
Joined
Oct 23, 2013
Messages
35,999
Location
Pacific Northwest
JM: thanks for the link cause i wasn't sure which type of 3M pads you were using. if you'd like to take a few pictures of the dremel or tools you are using it on that would be great for some of us. i might have a drawer full of that kind of stuff i picked up at a sale a few years ago and knew some day they'd come in handy.

i also have those 3m wheels that are a spongy product and i can't think of what they are called at the moment that i'm going to put on my Baldor buffer. hopefully that will be a good method for shining a few things up.

thanks
 

2oolhound

Well-known member
Joined
Dec 18, 2010
Messages
5,918
Location
BC Canada
Nice work Guys! Don, your restorations are spectacular!

I'll confess to being a bit of a tool polisher too. When I buy a new (used or affordable) piece of equipment or tool I'll often spend a bit of time going over it to get it to function properly and to make it look good to if I have time and don't need to put it into service immediately. A lot of this stuff isn't collectable, I just needed it. Here's a recent bandsaw I cleaned up for use.

Before:
It works but has a broken nut to adjust the dynamic jaw of the vise
All wiring gang connectors are broken
Dynamic jaw crank is an old pot metal pulley that's wobbly.
Wheels stick out so far in the back you need a football field to park it
Motor needs a bearing
No belt guard
Blade guides are shot, it can't be adjusted to cut straight.
Did I mention rust?

attachment.php


attachment.php


The motor was cleaned inside out and new bearing installed.
Made a new threaded rod and crank assembly for the dynamic jaw
Made a belt guard with quick access.
Rewired everything and longer cord.
Rebuilt the blade guides with all new guide bearings
Added 2 front casters and moved the back wheels in so it takes less space and is easy to manoeuvre.
Added tray in bottom section between existing straps previous owner installed.
Added chip tray under cutting slot
Made a material stop rail for repeat cuts of the same size. (seen in lower tray)
Sanded rust off and painted.

attachment.php


attachment.php


It all seems to work great but I need to round up some 140 wt oil for the gear box before actually using it.
 

Attachments

  • BusyBeeBS9398.jpg
    BusyBeeBS9398.jpg
    89.7 KB · Views: 3,545
  • BusyBeeBS7485.jpg
    BusyBeeBS7485.jpg
    95.4 KB · Views: 3,518
  • BusyBeeBS9400.jpg
    BusyBeeBS9400.jpg
    93.8 KB · Views: 3,548
  • BusyBeeBS7483.jpg
    BusyBeeBS7483.jpg
    88.8 KB · Views: 3,532
OP
J

JMLangford

Well-known member
Joined
Jun 25, 2014
Messages
1,122
Location
Upstate SC
Nice work Guys!......I'll confess to being a bit of a tool polisher too. When I buy a new (used or affordable) piece of equipment or tool I'll often spend a bit of time going over it to get it to function properly and to make it look good to if I have time and don't need to put it into service immediately. A lot of this stuff isn't collectable, I just needed it. Here's a recent bandsaw I cleaned up for use.

Before:
It works but has a broken nut to adjust the dynamic jaw of the vise
All wiring gang connectors are broken
Dynamic jaw crank is an old pot metal pulley that's wobbly.
Wheels stick out so far in the back you need a football field to park it
Motor needs a bearing
No belt guard
Blade guides are shot, it can't be adjusted to cut straight.
Did I mention rust?

attachment.php


attachment.php


The motor was cleaned inside out and new bearing installed.
Made a new threaded rod and crank assembly for the dynamic jaw
Made a belt guard with quick access.
Rewired everything and longer cord.
Rebuilt the blade guides with all new guide bearings
Added 2 front casters and moved the back wheels in so it takes less space and is easy to manoeuvre.
Added tray in bottom section between existing straps previous owner installed.
Added chip tray under cutting slot
Made a material stop rail for repeat cuts of the same size. (seen in lower tray)
Sanded rust off and painted......

attachment.php


attachment.php


It all seems to work great but I need to round up some 140 wt oil for the gear box before actually using it.[/QUOTE]
_______________________________________________________________________________________________________________

Super job reconditioning your saw!! :rocker: it's now ready for many more years of service and it looks good too.....


.
 
Last edited:
To avoid these ads, REGISTER NOW!
Top Bottom