To avoid these ads, REGISTER NOW!

Best outdoor electrical splicing method?

RedOak

Well-known member
Joined
Feb 6, 2010
Messages
97
In the past, I've employed non-insulated parallel connectors and solder - that I would cover with polyolefin heat shrink (after the soldering is completed) - for extending and/or connecting to small wires (12 AWG to 18 AWG).

At the moment, I'm trying to come up with a "modern" method for extending the wiring on a skidsteer loader to accept a prewired bulkhead connector that will stay in place on one of its loader arms. The bulkhead connector I'm referring to is a round aluminum Deutsch HD34-18-14PN connector, which is shown (in its raw/empty form) below.

Deutsch HD30-Series Bulkhead Conn
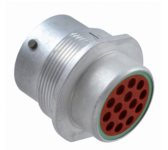
Deutsch HD34-18-14PN Female Bulkhead Conn - JPG - 021125 .png

As I mentioned earlier, the connector we're trying to install is already wired up, so there's no need, in this case, to crimp wires into pins and insert them into the bulkhead connector. The question is how are folks making a simple connection between two separate wires these days?

I've seen video showing rings covered in clear heat shrink that accept wires from each end and, after crimping, a heat gun is used to shrink the insulation and to melt some pre-applied/tinned solder. My old method seems antiquated compared to what I saw in the video, but I'm asking questions here to see what actually works for people.
 
Last edited:
To avoid these ads, REGISTER NOW!

PCustoms

Well-known member
Joined
Jul 23, 2011
Messages
23,486
Location
VT
I'm confused, are you cutting an existing harness in half to add length?

Why not just make a correct length harness?
 
OP
R

RedOak

Well-known member
Joined
Feb 6, 2010
Messages
97
My apologies for any confusion, but the harness is another subject altogether.

The project that I'm working on now is to simply connect wires coming from a hole in one of the skid-steer's loader arms to wires on the pre-wired bulkhead connector. Once all of the wiring is connected together, the wiring will be pushed back into the loader arm and the bulkhead connector will be mounted - via a metal bracket - to the loader arm. This will allow us the connect the wiring harness on an attachment to the skid-steer.

I probably made this a bit too complicated, but I've always appreciated knowing what people are trying to accomplish, so I went into some extra details.
 

rooster59

Well-known member
Joined
Nov 16, 2014
Messages
976
Location
Land of the Pines
Slide a piece of heat shrink on one wire, then Western Union splice, solder with rosin core solder and a clean tinned tip. Slide on the heat shrink, then heat gun. Very quick when you get some practice. Heat shrink **** splice crimped on as 2nd choice. Waxed linen cable lacing after if you want.
 
Last edited:

PCustoms

Well-known member
Joined
Jul 23, 2011
Messages
23,486
Location
VT
My apologies for any confusion, but the harness is another subject altogether.

The project that I'm working on now is to simply connect wires coming from a hole in one of the skid-steer's loader arms to wires on the pre-wired bulkhead connector. Once all of the wiring is connected together, the wiring will be pushed back into the loader arm and the bulkhead connector will be mounted - via a metal bracket - to the loader arm. This will allow us the connect the wiring harness on an attachment to the skid-steer.

If there was enough length to the wires I'd consider crimping or soldering a new connector, straight at the pins. Less joints means less opportunities for failure.

If I were to do it as you described I'd use marine grade shrink/waterproof **** connectors. Stagger the joints. You could solder and heat shrink too. I've seen (and done) it both ways, the good **** terminals are my current preference due to less time and tooling needed to fix something.
 

rlitman

Well-known member
Joined
Oct 18, 2010
Messages
24,665
Location
Long Island
...If I were to do it as you described I'd use marine grade shrink/waterproof **** connectors. Stagger the joints. You could solder and heat shrink too. I've seen (and done) it both ways, the good **** terminals are my current preference due to less time and tooling needed to fix something.
I used to be afraid of the heat shrink **** crimp connectors, so I would either crimp an uninsulated barrel and then use adhesive lined heat shrink over it, or solder and cover in adhesive lined heat shrink. But I started using the adhesive lined heat shrink crimp connectors a few years back on less critical stuff, and have had several of them in service on 12V wires that supply a hydroponics pump that sits submerged continuously for years on end. If it works for that, I've got no rational reason to not trust them, as much as I worry about the crimping damaging the insulation.

That being said, if you're expecting significant current through the connectors, I'd still heat shrink uninsulated crimps. You can get an acceptable crimp in an insulated connector, but you will get better cold flow of the copper when you don't have plastic squishing away from the crimp jaws.
 
OP
R

RedOak

Well-known member
Joined
Feb 6, 2010
Messages
97
I forgot to mention it in the original post, but one of the reasons that I'm looking for something quicker is because it's very cold here and my hands are getting pretty sensitive to the winter temps. I was just looking at a product on Amazon that seems pretty quick to use. You slip the connector "sleeve" over one wire, twist the multi-stranded copper wire together (Western Union style), pull the metal ring over the twisted wire and, finally, heat the tubing with a heat gun. Judging by the video, the solder ring melts and the heat shrink seals the connection. Amazon is describing them as "Solder Seal Wire Connectors."

Has anyone used this type of connector?

Solderless Wire Connectors - JPG - 021125 .png
 

PCustoms

Well-known member
Joined
Jul 23, 2011
Messages
23,486
Location
VT
I forgot to mention it in the original post, but one of the reasons that I'm looking for something quicker is because it's very cold here and my hands are getting pretty sensitive to the winter temps. I was just looking at a product on Amazon that seems pretty quick to use. You slip the connector "sleeve" over one wire, twist the multi-stranded copper wire together (Western Union style), pull the metal ring over the twisted wire and, finally, heat the tubing with a heat gun. Judging by the video, the solder ring melts and the heat shrink seals the connection. Amazon is describing them as "Solder Seal Wire Connectors."

Has anyone used this type of connector?

Solderless Wire Connectors - JPG - 021125 .png

Gimmicky garbage IMHO.

Stick to name brand crimps (i.e. tyco, TE, ancor) or solder.
 

BrandonV

Well-known member
Joined
Jun 9, 2023
Messages
4,030
Location
Arizona
I forgot to mention it in the original post, but one of the reasons that I'm looking for something quicker is because it's very cold here and my hands are getting pretty sensitive to the winter temps. I was just looking at a product on Amazon that seems pretty quick to use. You slip the connector "sleeve" over one wire, twist the multi-stranded copper wire together (Western Union style), pull the metal ring over the twisted wire and, finally, heat the tubing with a heat gun. Judging by the video, the solder ring melts and the heat shrink seals the connection. Amazon is describing them as "Solder Seal Wire Connectors."

Has anyone used this type of connector?

Solderless Wire Connectors - JPG - 021125 .png

They work well. Just not the ones you'll buy off Amazon.

TE SolderSleeve is what you want for that.

I'd look at a Raychem **** Splice first however.
 

dscheidt

Well-known member
Joined
Apr 26, 2017
Messages
2,909
I use uninsulated **** connectors and adhesive filled shrink tube. I've got a good quality kit of connectors and splices and a ratcheting crimper for it. (If you can remember which side to crimp, a regular crimp plier works fine.)

ONe thing you may want to do is stagger the splices so theat you dont' have a big lump.
 

adsinnott1

Well-known member
Joined
Feb 16, 2021
Messages
136
Location
Kentucky
I have switched to open barrel crimp connectors and Raychem SCL heat shrink for all automotive splicing. I am convinced there is not a stronger splice. The wire will pull apart and break before the crimp. The heat shrink with potting compound forms a weatherproof seal to the splice.
 
Last edited:

manwithtools

ALLIANCE MEMBER
Joined
Aug 24, 2015
Messages
14,113
Location
Lebanon, TN
Waxed linen cable lacing after if you want.
Is there even anyone alive that even knows how to cable lace anymore? I can think of no compelling reason to attempt that archaic solution (in a piece of construction equipment specifically) vs. any modern wire management system.
 

rlitman

Well-known member
Joined
Oct 18, 2010
Messages
24,665
Location
Long Island
Is there even anyone alive that even knows how to cable lace anymore? I can think of no compelling reason to attempt that archaic solution (in a piece of construction equipment specifically) vs. any modern wire management system.
There's a whole thread here on the topic. Lacing and fish paper are still alive and well in the telecom industry.
 

theoldwizard1

Well-known member
Joined
Feb 22, 2011
Messages
43,270
Location
SE MI
I was just looking at a product on Amazon that seems pretty quick to use. You slip the connector "sleeve" over one wire, twist the multi-stranded copper wire together (Western Union style), pull the metal ring over the twisted wire and, finally, heat the tubing with a heat gun. Judging by the video, the solder ring melts and the heat shrink seals the connection. Amazon is describing them as "Solder Seal Wire Connectors."

Has anyone used this type of connector?
Those are kind of "hit and miss". Some people say the solder they use inside will crack after a few months.
 

theoldwizard1

Well-known member
Joined
Feb 22, 2011
Messages
43,270
Location
SE MI
I have switched to open barrel crimp connectors and Raychem SCL heat shrink for all automotive splicing. I am convinced there is not a stronger splice.
"open barrel" = non-insulated ?

I love TE Solistrand non-insulated terminals. Many sizes. They accept small orders and last time there was no shipping ! I have a wide range "in stock" 20AWG down to 6AWG.

I always use marine/dual wall heat shrink.
 
To avoid these ads, REGISTER NOW!

Steve_P

Well-known member
Joined
Sep 15, 2010
Messages
5,188
I forgot to mention it in the original post, but one of the reasons that I'm looking for something quicker is because it's very cold here and my hands are getting pretty sensitive to the winter temps. I was just looking at a product on Amazon that seems pretty quick to use. You slip the connector "sleeve" over one wire, twist the multi-stranded copper wire together (Western Union style), pull the metal ring over the twisted wire and, finally, heat the tubing with a heat gun. Judging by the video, the solder ring melts and the heat shrink seals the connection. Amazon is describing them as "Solder Seal Wire Connectors."

Has anyone used this type of connector?

Solderless Wire Connectors - JPG - 021125 .png


In a SMA video I watched, probably over a year ago, Eric was doing a wiring repair and said that he both solders and uses crimp connectors and never had a failure with either. He then said that this is the only type of repair method/connector that he's had many failures with. He said that he used them for a short time, and they repeatedly failed after a few years in use, so he stopped using them.
 

rlitman

Well-known member
Joined
Oct 18, 2010
Messages
24,665
Location
Long Island
"open barrel" = non-insulated ?
No, and I'm not a fan of open barrel crimps. With open barrel, the finished crimp barrel has a split, so it relies completely on the spring temper of the brass to maintain pressure, and that can become a problem with any sort of heat present. With a closed barrel, the perimeter of the crimp is continuous, so much of that pressure is maintained by the tensile strength of the brass.

If you're talking about insulated terminals, open barrel is complete trash. End of story.
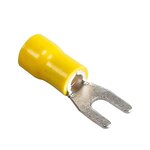
61G2awAm45L._SL400_.jpg
The open seam at 12 o'clock is going to lead to issues with the above bargain basement fork terminal. Quality insulated terminals (still not as good as uninsulated) braze that seam closed. When you indent crimp an uninsulated closed barrel terminal, you put the indenter over the braze, because that's the annealed section. You don't indent crimp insulated terminals, and pressing the above open barrel from above and below just allows the barrel to open, leaving you with a terrible confined crimp (not an issue with a closed barrel).

Open barrel can work acceptably with pin connectors, when the proper calibrated crimping tool is used in an F crimp (end result shaped like a B), but it's very unforgiving, and you need to especially beware of an industry awash in counterfeit products, because it's difficult to make a closed barrel that will perform badly, but it's also very difficult to make an open barrel that will perform well, and it's damned near impossible to know whether or not critical steps were skipped in the forming of that open barrel part from a visual inspection.
 

adsinnott1

Well-known member
Joined
Feb 16, 2021
Messages
136
Location
Kentucky
This is the type of open barrel crimp I am referring to.
1739476659103.png


Essentially the same crimp that is on most all of the connector pins in these applications.
1739476750848.png

Then weather seal with raychem SCL heat shrink.
 

rlitman

Well-known member
Joined
Oct 18, 2010
Messages
24,665
Location
Long Island
This is the type of open barrel crimp I am referring to.
1739476659103.png
Yep. Those two grooves and the flare towards the ends is put in in the stamping to work harden the material, so that it has more backbone to hold the crimp closed when it's formed. And the end product is entirely dependent on these details, which in turn are dependent on a real quality control system. That's great if you KNOW your parts are legit, but downright scary if there's a chance they're counterfeit (I'm not throwing out accusations, just explaining my reasoning why I avoid these, largely since I'm not installing them in bulk, so I can't buy them from an ISO9000 source).
 

Leaflessshadetree

Well-known member
Joined
Aug 1, 2013
Messages
7,176
Location
Don't ask.
Caterpillar sells a premade ultrasonic splices for applications like this. They are a Y with 2 pins and 1 socket (or 2 sockets and 1 pin).
I believe these are the part numbers
207-3814: 18 AWG Splice Wire Two socket (two 18 AWG yellow wires) to one pin (18 AWG yellow wire)
199-9785: 18- Wire Gauge Splice Wire Two pin (two 18 AWG yellow wires) to one (18 AWG yellow wire)
 
Last edited:
OP
R

RedOak

Well-known member
Joined
Feb 6, 2010
Messages
97
Thanks to everyone who has taken the time to help with this.

As I'm still awaiting a lock washer and a retaining nut for the prewired Deutsch HD34-18-14PN (male) bulkhead connector that I mentioned in the original post, I'm still looking for a good connection method that we can afford. In the meantime, I found some of these in one of our electrical supply totes:

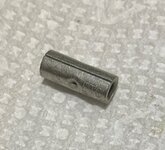
Parallel 12-10 AWG Connector - 021425-3 - JPG .JPG

Although the markings on the uninsulated Parallel Connector shown in this photo identify it as an "ETC 12-10" - which makes it a bit too large for the 16 AWG and 14 AWG copper leads attached to the subject prewired bulkhead connector - I want to make sure that I'm clear about the shortcomings of this type of connection.

Does the fact the it has a seam in it make it a poor choice for a permanent parallel wiring connection?

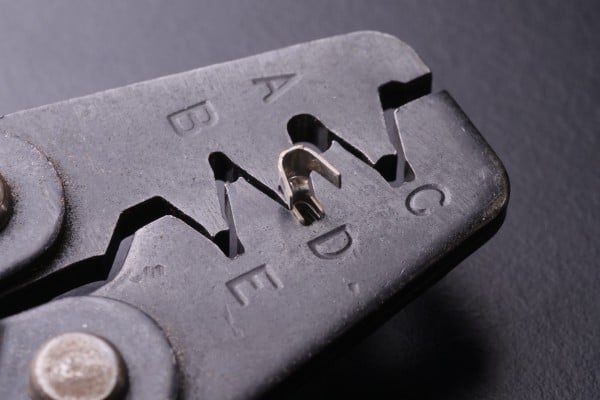
I'd also like to get some suggestions on the best type of crimping tool for this type of uninsulated parallel connector (seam or no seam)?

By the way, I'm certainly no expert, but the connector shown in the photo above is literally tubular. It has nothing in the middle that stops wires from passing completely through to the opposite end.
 

Higgins

Well-known member
Joined
Dec 25, 2009
Messages
1,944
Location
Shepheardsville, KY
I forgot to mention it in the original post, but one of the reasons that I'm looking for something quicker is because it's very cold here and my hands are getting pretty sensitive to the winter temps. I was just looking at a product on Amazon that seems pretty quick to use. You slip the connector "sleeve" over one wire, twist the multi-stranded copper wire together (Western Union style), pull the metal ring over the twisted wire and, finally, heat the tubing with a heat gun. Judging by the video, the solder ring melts and the heat shrink seals the connection. Amazon is describing them as "Solder Seal Wire Connectors."

Has anyone used this type of connector?

Solderless Wire Connectors - JPG - 021125 .png
Junk!
We thru all of our away!
 

rlitman

Well-known member
Joined
Oct 18, 2010
Messages
24,665
Location
Long Island
... I found some of these in one of our electrical supply totes:

Parallel 12-10 AWG Connector - 021425-3 - JPG .JPG

Although the markings on the uninsulated Parallel Connector shown in this photo identify it as an "ETC 12-10" - which makes it a bit too large for the 16 AWG and 14 AWG copper leads attached to the subject prewired bulkhead connector - I want to make sure that I'm clear about the shortcomings of this type of connection.

Does the fact the it has a seam in it make it a poor choice for a permanent parallel wiring connection?

I'd also like to get some suggestions on the best type of crimping tool for this type of uninsulated parallel connector (seam or no seam)?

By the way, I'm certainly no expert, but the connector shown in the photo above is literally tubular. It has nothing in the middle that stops wires from passing completely through to the opposite end.
The round dimple in the middle is the stop.
Your picture isn't clear enough for me, but I suspect that has a brazed seam, so it could still be a closed barrel. If the seam is brazed, then it's a good connector for an indented crimp that I would crimp on the inner die of a T&B WT110M (indent opposite the "seam"). The outer die is only for the "A" series (red when insulated), while the inner is for B and C (blue and yellow when insulated, but you don't indent an insulated crimp). If it's actually an open seam, just throw it out.
 

whateg01

Well-known member
Joined
Mar 13, 2006
Messages
11,501
Location
doo dah, kansas, usa
Gimmicky garbage IMHO.

Stick to name brand crimps (i.e. tyco, TE, ancor) or solder.
I've used them. I still don't have enough faith in them to use them on critical connections. Obviously, the solder melts at a very low temp. I don't know how the conductivity compares to tin-lead or RoHS compliant solders either. I'm not scared of them anymore though.

Funny how this changes from discussion to discussion. In the last "how to splice wires" thread I recall, there seemed to be a lot of comments that solder connections are to be avoided at all costs because they always fail. Interesting to have not seen any comments in this thread so far saying the same.
 
Last edited:

captaindiode

Well-known member
Joined
Jul 8, 2013
Messages
372
Location
NC
I like the crimp and solder heat shrink **** splice. NAPA has them and they are spendy, but they work really well. You need the correct crimper for them,about $30 on Amazon.
 
OP
R

RedOak

Well-known member
Joined
Feb 6, 2010
Messages
97
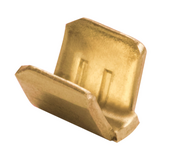
Thanks to everyone who's contributed to this thread. I'm still waiting for the 16/9 SOOW Multiconductor Cable to arrive, so I thought that I'd ask the board a question about the connector depicted below. I've never see anything like this before, but it appears to be a connection made between what's shown here and a straight blade that gets pushed into the terminal "pocket."

Is this a fair assessment of how this design works or am I off somehow? TE Solistrand calls it a "Knife Disconnect Terminal," but I'd really like to read some words from someone who's familiar with this type of connection. Thank you for your time.

Screen Shot 2025-02-20 at 3.05.01 PM.png
 

PCustoms

Well-known member
Joined
Jul 23, 2011
Messages
23,486
Location
VT
Thanks to everyone who's contributed to this thread. I'm still waiting for the 16/9 SOOW Multiconductor Cable to arrive, so I thought that I'd ask the board a question about the connector depicted below. I've never see anything like this before, but it appears to be a connection made between what's shown here and a straight blade that gets pushed into the terminal "pocket."

Is this a fair assessment of how this design works or am I off somehow? TE Solistrand calls it a "Knife Disconnect Terminal," but I'd really like to read some words from someone who's familiar with this type of connection. Thank you for your time.

Screen Shot 2025-02-20 at 3.05.01 PM.png

I believe the connection is formed from 2 of the connectors you show. They get overlapped in an "x" pattern and then rotated straight to interlock.

Can't seem to find the installed image, but this is close

1740082794987.jpeg
 

BrandonV

Well-known member
Joined
Jun 9, 2023
Messages
4,030
Location
Arizona
Thanks to everyone who's contributed to this thread. I'm still waiting for the 16/9 SOOW Multiconductor Cable to arrive, so I thought that I'd ask the board a question about the connector depicted below. I've never see anything like this before, but it appears to be a connection made between what's shown here and a straight blade that gets pushed into the terminal "pocket."

Is this a fair assessment of how this design works or am I off somehow? TE Solistrand calls it a "Knife Disconnect Terminal," but I'd really like to read some words from someone who's familiar with this type of connection. Thank you for your time.

Screen Shot 2025-02-20 at 3.05.01 PM.png

Yup. These work like this. You put them together at a 45 degree angle and lock them into place. Pretty vibration resistant.

1740082744820.png
 
OP
R

RedOak

Well-known member
Joined
Feb 6, 2010
Messages
97
Not that we can afford them, but I financed the Wirefy 11-pcs crimping tool set. I also purchased a Wirefy crimp connector set and a set of 4:1 precut pieces of polyolefin heat shrink. Unless I totally missed the mark here, I think that this should get the job done.

By the way, I've also received a 20' length of 16/9 SOOW and both Deutsch HD30 Series connectors to not only replace the bulkhead connector but to create a new harness for our 85" hydraulic snow thrower.

Many thanks for the very kind responses! (y)
 
To avoid these ads, REGISTER NOW!
Top Bottom