To avoid these ads, REGISTER NOW!

CBacres ex horse barn shop

To avoid these ads, REGISTER NOW!
OP
C

cbacres

Well-known member
Joined
May 28, 2010
Messages
5,998
Location
SW Florida
Hope everyone had a great Christmas.


Nothing new to really report on except a new idea for a welding table.


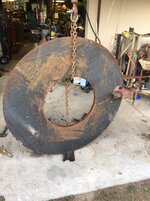
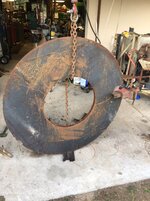
I posted on a 51" disc of 1-3/4" plate couple weeks ago. Got to thinking and collaborating with a memeber and I'm thinking I'm going to make that into my new smaller table.


I currently have a 4' x 8' x 3/4" table, but it's just a little too big for my space, and it's just a flat surface magnet.


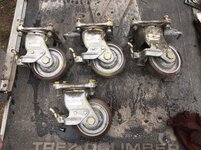
Then I was planning on a 3'x5' table, which is fine, but the round piece has been tugging at me, so I pretty sure that's the way I'm going. It's about the same surface area as the 3'x5'. I'll use the Aero casters I picked up last week since they have very positive wheel brake and swivel locks on them.


Here’s the casters I’ll be using.
f004e7ed45ca9e2a141cb4fee3000b21.jpg

Here's the problem I'm stuck on: Which corner do I mount the vise on?
 

Attachments

  • f004e7ed45ca9e2a141cb4fee3000b21.jpg
    f004e7ed45ca9e2a141cb4fee3000b21.jpg
    888.3 KB · Views: 0
Last edited:

Craptain

Well-known member
Joined
Apr 18, 2013
Messages
4,029
Location
Tampa Bay FL
I mount the vise for right handed operation. So just right of center should work. Just keep moving it right until it feels right and that's it. [emoji106][emoji849][emoji41]

I'll be back in January to see how you're doing with that. [emoji12][emoji1787]

Sent from my SM-G930T using Tapatalk
 

shortykorte

Well-known member

Joined
Sep 1, 2014
Messages
8,039
Location
Tallahassee, Fl
I was going to say the same but go left to each corner. Position it for clamping long items.


Shorty Korte
Always remember quality in QST

Sent from my iPhone using Garage Journal
 
OP
C

cbacres

Well-known member
Joined
May 28, 2010
Messages
5,998
Location
SW Florida
I mount the vise for right handed operation. So just right of center should work. Just keep moving it right until it feels right and that's it. [emoji106][emoji849][emoji41]


I'll be back in January to see how you're doing with that. [emoji12][emoji1787]


Sent from my SM-G930T using Tapatalk


Andrew, here’s just right of center, but it don’t feel right enough. Guess I’ll keep to the right some more.[emoji481]

7cbdb049a8df7402592cf37903feac18.jpg
 

Attachments

  • 7cbdb049a8df7402592cf37903feac18.jpg
    7cbdb049a8df7402592cf37903feac18.jpg
    759.7 KB · Views: 0
OP
C

cbacres

Well-known member
Joined
May 28, 2010
Messages
5,998
Location
SW Florida
OK, think I found the right spot.
Here’s a little vise clamped to table for illustration, I wasn’t going wrangle a 80 lb vise to clamp it.
dca34c85f37c955c36f9792a21817285.jpg

I lied, it’s 54” OD with a 23” hole in the middle. This is 1-1/2” thick plate. I’m thinking the having the center open will be handy for inboard clamping.
That gives me 15” from the outside to inside ID.
I can fit a cover plate in the middle if the hole messes me up.

At least I won’t be able to stack none welding **** on the center 23” .


Sent from my iPhone using The Garage Journal mobile app
 

Attachments

  • dca34c85f37c955c36f9792a21817285.jpg
    dca34c85f37c955c36f9792a21817285.jpg
    684.7 KB · Views: 0
OP
C

cbacres

Well-known member
Joined
May 28, 2010
Messages
5,998
Location
SW Florida
You can stand in the middle and weld all around yourself.

But you know how that’d go, soon as I crawled under and stood up, I’d forget something, I’d knock stuff off the other side, the freaking lead would come loose.......:lol_hitti

Could also make a hell of a welding rotator!
 

Duker

Well-known member
Joined
Sep 25, 2010
Messages
10,861
Location
Livingston, TX
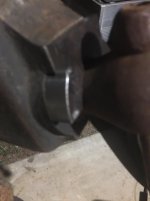
Damn... I would hate to see the the bolt and nut that went with that washer... I can see it now... a giant lazy Susan for the middle is coming.... as for the vise location I might actually have some useful information ( not really just pontificating...) the machine shops here that do a lot of pumps, valves etc have circular tables and they have a drop in vise mount either inside the leg or just to the side of a square leg base table for using the leg for clamping. Just a thought...

I think that will definitely work for welding!


Sent from my iPhone using Tapatalk Pro
 

taumac

Well-known member
Joined
Aug 30, 2011
Messages
8,104
Location
Brooksville, Fl
I wonder what size coffee comes with that doughnut? Only Craig can find a doughnut shop that comes with a side order that’s a vise.
 
OP
C

cbacres

Well-known member
Joined
May 28, 2010
Messages
5,998
Location
SW Florida
I got to thinking (unharnessed daydreaming about semi fantasy shop stuff) today another use for the holy weld table. I could rig up trash can under the center of table and then we could just push the empty beer bottles to the center of the table, maybe even set up a little bowling alley with bottles being the pins.:lol_hitti:lol_hitti:beer::beer:
 
OP
C

cbacres

Well-known member
Joined
May 28, 2010
Messages
5,998
Location
SW Florida
Ok, I really got it this time.
I have a platform lift.
I have a decent size hole in middle of table.
( see where I’m going with this?)
The hole is big enough for a slender girl to come through while dancing on the rising lift!!
No Fab Four sizes, besides Gerard has them!
I think I’m going to build these to sell, that way the wife won’t be suspicious of a dance table in the shop!!!!
 
OP
C

cbacres

Well-known member
Joined
May 28, 2010
Messages
5,998
Location
SW Florida
Did some work in the annex this weekend.
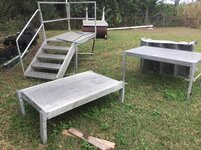
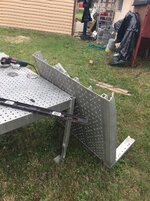
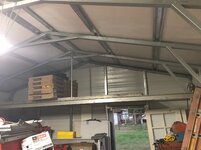
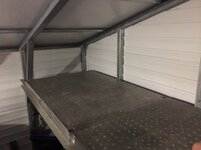
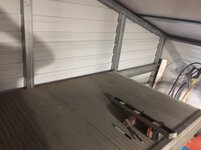
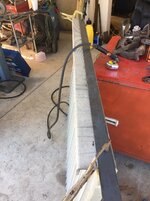
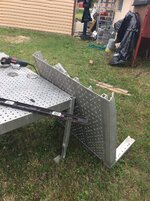
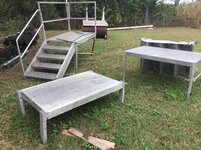
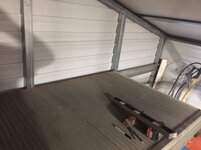
I repurposed some aluminum construction trailer stair landings into a loft.

Each landing is 40”x5’. One is a ******* to the other two and I cut the two to match the the ******* because the two were a sturdier construction.

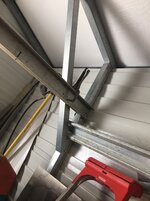
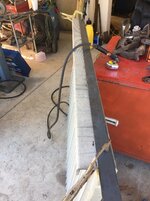
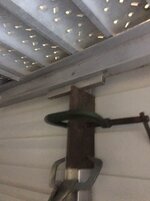
I started by mounting a 4” aluminum channel across the width of the shed, through bolting into the sheds 2.5” sq tube uprights.71a15e50b05cad9ffc1f248245de7df2.jpg

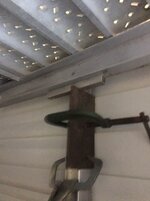
Once I figured out how I was going to use the landings, one was a thicker assembly than the others, I attached a ledger using the same size channel. Twice.

720e775e4533220647c380ff908ff782.jpg

I attached using 3– 1/4” self drilling screws to each square upright.
188996134b52c6ab03c6427cbeb54f79.jpg

OK, you may of noticed I said twice. I should of wrote down my design thoughts because my mental notes from one day to the next seem to disappear. The ledger was intended to be higher than the beam as the landing ribs would sit on ledger, the front “fasicia” was ripped to size to match the ******* landing.

Of course I didn’t notice this screw up until I had all three sections of decking up in place. I wasn’t taking it down as I already had one nut residing in my boot. So did a little rigging to temporary hold ledger up so I could adjust the height.
40d14599faf7f7e330e46f173d473603.jpg
The square tube is the shim used to raise and hold in place while I reattached ledger to the wall.
Here is the landings before I whacked them apart.
04f24057d6e487a3fd877531a2f2c947.jpg

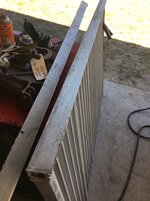
First one cut to size. Note the ribs I mentioned.
664e786fe3e7432ff496d1fd9d04c6ee.jpg

Fascia marked to be trimmed to size.
27c73e5ac93df952b741eb9c78d6761b.jpg
I cut those with a 6” cutoff wheel on my angle grinder.
Today I broke out the plasma machine, which went a lot quicker on the fascia cut.
041a9161e6718fe5bc1a2ded61f7e605.jpg
4824af35181a8c193384cfa7185407b4.jpg
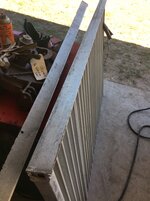
I wanted to beef up the support on the outside channel, so one of the steel handrails became a pipe support from the roof framing.
b747de3c59588d26b3ec8136b4fbf9b7.jpg
Cut rail to size and using a 6 lb sledge, convinced the round to be flat on the ends.
cd1ccfcb630d202db35c64718467b13e.jpg
I bent 90 tabs on each end, one end hooks over the roof frame, the other end is bolted to the channel.
c58043f5984f6dcb08a514f3fcf80a1e.jpg
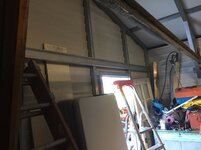
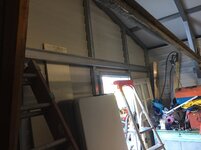
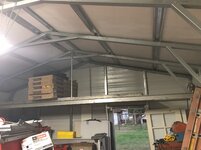
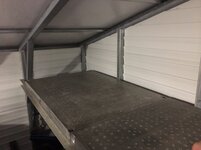
And the finished loft.
12db2016f51f5ed22744d4ed921812c1.jpg
0f74bbc338e6af1a31a4bc6e27aaf9d7.jpg
62144b743cc25fcf4fb9a7e1614d9187.jpg


Sent from my iPhone using The Garage Journal mobile app
 

Attachments

  • 71a15e50b05cad9ffc1f248245de7df2.jpg
    71a15e50b05cad9ffc1f248245de7df2.jpg
    474.1 KB · Views: 0
  • c58043f5984f6dcb08a514f3fcf80a1e.jpg
    c58043f5984f6dcb08a514f3fcf80a1e.jpg
    412.6 KB · Views: 0
  • cd1ccfcb630d202db35c64718467b13e.jpg
    cd1ccfcb630d202db35c64718467b13e.jpg
    637.2 KB · Views: 0
  • b747de3c59588d26b3ec8136b4fbf9b7.jpg
    b747de3c59588d26b3ec8136b4fbf9b7.jpg
    627.6 KB · Views: 0
  • 4824af35181a8c193384cfa7185407b4.jpg
    4824af35181a8c193384cfa7185407b4.jpg
    596.2 KB · Views: 0
  • 041a9161e6718fe5bc1a2ded61f7e605.jpg
    041a9161e6718fe5bc1a2ded61f7e605.jpg
    600.5 KB · Views: 0
  • 27c73e5ac93df952b741eb9c78d6761b.jpg
    27c73e5ac93df952b741eb9c78d6761b.jpg
    897.6 KB · Views: 0
  • 664e786fe3e7432ff496d1fd9d04c6ee.jpg
    664e786fe3e7432ff496d1fd9d04c6ee.jpg
    910.7 KB · Views: 0
  • 04f24057d6e487a3fd877531a2f2c947.jpg
    04f24057d6e487a3fd877531a2f2c947.jpg
    938.3 KB · Views: 0
  • 40d14599faf7f7e330e46f173d473603.jpg
    40d14599faf7f7e330e46f173d473603.jpg
    489.3 KB · Views: 0
  • 188996134b52c6ab03c6427cbeb54f79.jpg
    188996134b52c6ab03c6427cbeb54f79.jpg
    457.2 KB · Views: 0
  • 720e775e4533220647c380ff908ff782.jpg
    720e775e4533220647c380ff908ff782.jpg
    431.9 KB · Views: 0
  • 12db2016f51f5ed22744d4ed921812c1.jpg
    12db2016f51f5ed22744d4ed921812c1.jpg
    433.7 KB · Views: 0
  • 0f74bbc338e6af1a31a4bc6e27aaf9d7.jpg
    0f74bbc338e6af1a31a4bc6e27aaf9d7.jpg
    413.8 KB · Views: 0
  • 62144b743cc25fcf4fb9a7e1614d9187.jpg
    62144b743cc25fcf4fb9a7e1614d9187.jpg
    432.3 KB · Views: 0
To avoid these ads, REGISTER NOW!

Craptain

Well-known member
Joined
Apr 18, 2013
Messages
4,029
Location
Tampa Bay FL
Nice job on the loft.
That flat surface your angle clamp is sitting on looks familiar. [emoji16]

Sent from my SM-G930T using Tapatalk
 
OP
C

cbacres

Well-known member
Joined
May 28, 2010
Messages
5,998
Location
SW Florida
Nice job on the loft.
That flat surface your angle clamp is sitting on looks familiar. [emoji16]

Sent from my SM-G930T using Tapatalk

Andrew, I’m glad I bought that red surface, I ran out of my other flat surface tops.:lol_hitti

Nice clamp

Mac, been wanting at least one of these heavy clamps, since I sold some stuff, I didn’t feel as bad on just going and getting one. This one has 4.5” capacity on stock size.

With some of the planned fab projects coming up, should be handy.
 
OP
C

cbacres

Well-known member
Joined
May 28, 2010
Messages
5,998
Location
SW Florida
Some doings going on that involve steel, cussing, beer, head scratching , steel slivers, more beer.

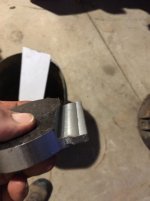
I have a old Parker vise that is missing the thick collar on the from of the vise that retains the screw .

Could of bought one from a guy that casts then for about $60. Why would I spend that kind of money when I have a mill?

So off I go to make one up.

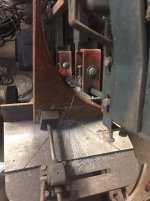
Cutting a piece of 3/4” plate.
IMG_5390.jpg
IMG_5391.jpg

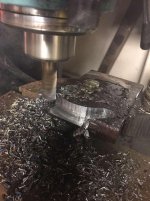
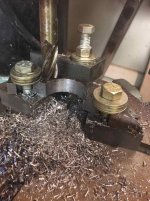
Set up in the mill on the rotary table
IMG_5392.jpg

This is the first time I’ve done much of anything on a mill, much less cutting a radius using a rotary table. Took me a little, asking machine friends and surfing through the millions of utubes to find one that applied to what o was doing.

First cut
IMG_5395.jpg

Kinda rough, but I oversized the cut to allow for any fukkups.kinda surprised myself. I drilled a hole in the center of the piece and it worked pretty good on helping me set up.
Next time I’ll make sure to do better layout, with hard marks cause after I lost the center, kinda a pain to remeasure.

It’s taking shape, the little ears get cut off.
IMG_5494.jpg

Cut the step to match casting on vise.
IMG_5500.jpg

Test fitting
IMG_5499.jpg


Sent from my iPhone using The Garage Journal mobile app
 
OP
C

cbacres

Well-known member
Joined
May 28, 2010
Messages
5,998
Location
SW Florida
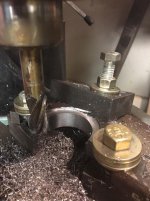
Here it is reset to cut inside radius, this will fit over the meatball of the screw.
IMG_5574.jpg
60350750536__3277802B-A85E-4245-B9E8-BAED53FCE9FD.jpg

Then I cut a bigger radius about 1/8” deep to fit over the flange on the meatball.
IMG_5579.jpg

I’m amazed and proud of myself that I managed to keep the hold downs far enough out for the last cut. With all the tweaking I went through to it right, if the washers or bolts were in the way, they were just going to get trimmed.

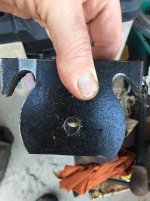
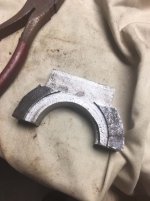
Here is the almost complete part.
IMG_5582.jpg
IMG_5583.jpg

Test fitting on vise.
IMG_5580.jpg

I need to locate and drill the mounting hole and bevel the part by the meatball, as it has a little bit of a taper.

A little visit to the belt grinder and it’ll be ready to go.


Sent from my iPhone using The Garage Journal mobile app
 
Last edited:
OP
C

cbacres

Well-known member
Joined
May 28, 2010
Messages
5,998
Location
SW Florida
I learned a lot in this crash run of mill project.

Next time I’ll layout the entire piece with scriped line and more punch marks.

Setup is the key.
 

shortykorte

Well-known member
Joined
Sep 1, 2014
Messages
8,039
Location
Tallahassee, Fl
Nice job on your maiden mill voyage. Look forward to seeing it Wednesday.


Shorty Korte
Always remember quality in QST

Sent from my iPhone using Garage Journal
 

Strouty

Well-known member
Joined
Mar 21, 2010
Messages
38,222
Location
Southern Maine
Amateur, the first thing I machined on my mill, I decided to make things more interesting and used the cutter spinning backwards, once you master that, then you are a true machinist. ;)
 

Grumblebum

Well-known member
Joined
Aug 10, 2015
Messages
1,940
Location
Wollongong Australia
Score after score CB. :bowdown:

I'm all caught up again now.

Those corner clamps are great, I need to get 3 more.

Hope you have more than shorty's florida issue footwear on with all the heavy handling lately.

I also read "hooters" somewhere too in the last 10 pages but don't think the photos uploaded for you.

GB.
 
OP
C

cbacres

Well-known member
Joined
May 28, 2010
Messages
5,998
Location
SW Florida
Score after score CB. :bowdown:


I'm all caught up again now.


Those corner clamps are great, I need to get 3 more.


Hope you have more than shorty's florida issue footwear on with all the heavy handling lately.


I also read "hooters" somewhere too in the last 10 pages but don't think the photos uploaded for you.


GB.


GB, good to hear from you and thanks for stopping in.

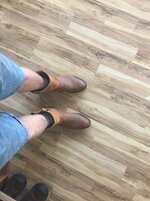
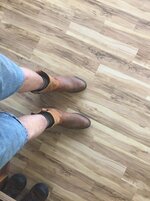
Here’s my footwear.
c6083b54fd6a11237368ae8dc707b0ed.jpg

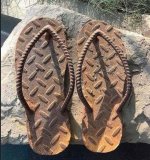
I tried to Shorty to let me make a pair of these for him but he backed out when I said I was just going to trace his foot with a cutting torch instead of soapstone. We’re good friends, but sorry, it’s a long handle torch or nothing, don’t want to give you all the wrong idea!!

IMG_5586.jpg

Sent from my iPhone using The Garage Journal mobile app
 

Attachments

  • IMG_5586.jpg
    IMG_5586.jpg
    151.8 KB · Views: 34
  • c6083b54fd6a11237368ae8dc707b0ed.jpg
    c6083b54fd6a11237368ae8dc707b0ed.jpg
    195.8 KB · Views: 4
Last edited:

Craptain

Well-known member
Joined
Apr 18, 2013
Messages
4,029
Location
Tampa Bay FL
Them shoes are no good for Shorty. He would be able to kick them off when he goes swimming.

Sent from my SM-G930T using Tapatalk
 

shortykorte

Well-known member
Joined
Sep 1, 2014
Messages
8,039
Location
Tallahassee, Fl
Now those rebar flops are a hot idea. You bringing them to Flywheelers Wednesday right?

Andrew, I have a couple of concrete blocks I’ll let you try next time we’re out on the boat. [emoji12]


Shorty Korte
Always remember quality in QST

Sent from my iPhone using Garage Journal
 
OP
C

cbacres

Well-known member
Joined
May 28, 2010
Messages
5,998
Location
SW Florida
It’s been a while, figured I’d post to at least get my thread out of the bottom of the barrel.

Been busy, took advantage of the discounts and bought a new truck, so I needed to prep the old one to sell.

Anyway, here’s a little action in the shop today.

Resumed working on my generator. Seeing the National Hurricane Center started tracking some disturbances, figured that’s my signal to finish up the generator.

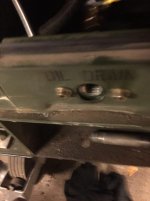
It’s a 10KW military surplus unit. Somewhere a forklift operator missed the fork tube and bent the enclosure frame, of course the section where the engine oil drain is. They have a section of hose between engine and the frame, it was kinked and I wanted to get it straight.
Unbolted the flange from the frame, jacked the frame back into shape, reconnected hose.
Couple of weeks later I see the hose is leaking.
Took it apart, picked up a piece for the local hydraulic shop and putting it back together.

IMG_7615.jpg
Hose and drain valve assembly.

IMG_7616.jpg
Fittings for drain on engine.

IMG_7617.jpg
IMG_7618.jpg

This set up makes draining the oil a breeze.

Another step towards getting this unit in the shop annex where it’ll live and will be tied into a sub panel. It’ll be where my wife can flip the main at the meter, plug in the generator and power up the house.

It’ll be able to run during a hurricane out of the weather.


Sent from my iPhone using The Garage Journal mobile app
 
To avoid these ads, REGISTER NOW!
Top Bottom