To avoid these ads, REGISTER NOW!

CBacres ex horse barn shop

shortykorte

Well-known member
Joined
Sep 1, 2014
Messages
8,039
Location
Tallahassee, Fl
Love the caster board. You even sloped it for Shorty with those unequal casters... should be more comfortable for him before the ER visit!

I watched a video on the Tapmatic... I NEED ONE! I tap so many holes, I think I can justify the cost. Thanks for mentioning it.

Anxious to see the next steps on the hoisting system.


Hold on, I have a deal for you on a nice Tapmatic 700U. Don’t let Craig sucker you into a spare.


Sent from my iPhone using Garage Journal
 
To avoid these ads, REGISTER NOW!
OP
C

cbacres

Well-known member
Joined
May 28, 2010
Messages
5,998
Location
SW Florida
Lunch today.
8b26c77dd7ad9ef5390d9c30870beda3.jpg
Some places have variations of the sand which.
I had the Midnite sandwich today.
d961e2d3bb860e269d219e7803fa6a1e.jpg
Along with some fried plantains.
Good stuff.


Sent from my iPad using Garage Journal
 

Attachments

  • d961e2d3bb860e269d219e7803fa6a1e.jpg
    d961e2d3bb860e269d219e7803fa6a1e.jpg
    179.8 KB · Views: 0
  • 8b26c77dd7ad9ef5390d9c30870beda3.jpg
    8b26c77dd7ad9ef5390d9c30870beda3.jpg
    206.3 KB · Views: 1
OP
C

cbacres

Well-known member
Joined
May 28, 2010
Messages
5,998
Location
SW Florida
Another piece of my million piece puzzle.
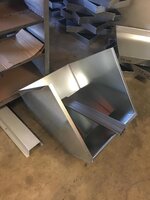
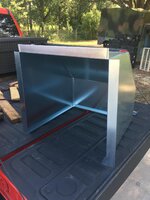
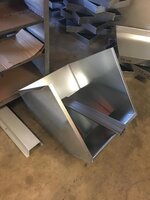
I had a rain hood built at a local sheet metal shop for a 24” exhaust fan that’s going in the shed annex. I bought a dampener vent for the fan, but got to thinking a strong wind would probably blow it open and drive all that Florida rain into shed.
So, a 90 degree hood should help keep that to a minimum.
4a3884f2d4e7991940c60ed95a0e467c.jpg
I had 2” flanges built into it for mounting on shed wall. The flanges will also help with diverting water away.
5301261a94a70e3fe358ae9b18d3e0b0.jpg
9e1a6e04d386ff5982c5a57e3d6b439f.jpg
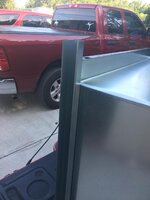
I had some j- trim made to trim out the metal siding.
5149c30d3039fcd6ebdaae42669c2f44.jpg

The shed Is one of the carport style buildings built with 2-1/2” sq. Tubing. I need to frame a opening for the fan, cut the siding and install all of the above.

But need to take fan down from shop first.

Then run electric in shed.

One bite at a time.

I’m moving my 10k generator into shed and it will run inside. The fan is a main part to keep heat down both while generator runs and just from the regular Florida heat. I’ll wire up fan with a temp controlled switch that will have a manual bypass.

I will run the exhaust outside shed.


Sent from my iPad using Garage Journal
 

Attachments

  • 5149c30d3039fcd6ebdaae42669c2f44.jpg
    5149c30d3039fcd6ebdaae42669c2f44.jpg
    161.8 KB · Views: 0
  • 9e1a6e04d386ff5982c5a57e3d6b439f.jpg
    9e1a6e04d386ff5982c5a57e3d6b439f.jpg
    234.8 KB · Views: 0
  • 5301261a94a70e3fe358ae9b18d3e0b0.jpg
    5301261a94a70e3fe358ae9b18d3e0b0.jpg
    193.9 KB · Views: 0
  • 4a3884f2d4e7991940c60ed95a0e467c.jpg
    4a3884f2d4e7991940c60ed95a0e467c.jpg
    149.2 KB · Views: 1
OP
C

cbacres

Well-known member
Joined
May 28, 2010
Messages
5,998
Location
SW Florida
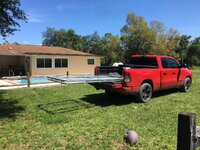
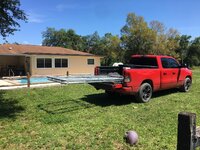
Been needing to pick up two new gates for the property, stopped at a local feed store and they were low on stock so we decided to grab them right now.

Couldn’t remember if the allowable distance that a load could stick out 4’ past the truck or 4’ past tailgate, so I just exceeded the the max whichever way it was.

0526388cb45b9b644996dfac655631db.jpg

The feed store is just a mile or so from my road, so we tied em down, tied a fluorescent shirt to it and went on. The wife offered to take off her red tshirt for a flag, but then I’d been too distracted.

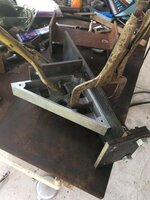
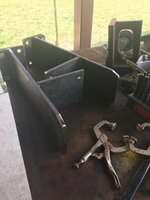
Continuing on with the fab of the connections and base plates for the I beam.
I’m glad I decided to build the flat bar that will connect the 4” tube to the I beam now, turns out the beam is ever so slightly tweaked that if the flat bar was welded up dead square, it wouldn’t of fit very well.
I wanted a all bolted connection for the beam so didn’t spend a lot of time welding up in the air and the subsequent painting.

Making use of the Fireball angles.
c10db0710d25b6198ea362dfba0977ce.jpg
8fa4edca32efa2eb40b4557fc735d8c1.jpg

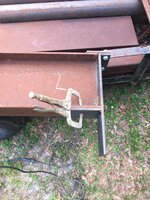
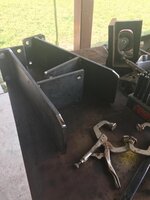
Here’s how it’ll mate to I beam. The post will attach where the clamp is, the flat bar welded to top and the side of post. The top bracket is just to brace beam from any twisting.
a808f8f8245cceadb7f4290800553664.jpg

Making use of the 2”x72” belt grinder to round corners and such.
fb00864130153f7caa684f6e60deee7c.jpg
1f7f6c8fc3daad06e366fddf4edc8e5a.jpg

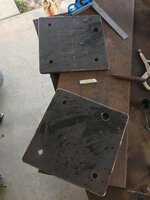
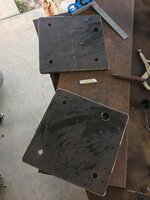
Base plates. No, it’s not a layout screwup, the one hole is bigger and not in line with the others on purpose. The one hole is so I can utilize a 3/4” bolt that was cast into the concrete slab, it’s main purpose is for wind hold down of the porch roof at front of the shop. The shop is a pole barn and I didn’t want to add this big wing trying to potentially rip the front wall loose.
675152fd6a84e01be51e7c2d62bc3d46.jpg

Thanks for stopping by.

Overkill, hell yes, but I sat there and watched Irma blow the **** out it for hours.

The 4” square will be replacing a 2” sq that’s there now, I’ll add some 1/2” anchors in the rest of the holes.


Sent from my iPad using Garage Journal
 

Attachments

  • 8fa4edca32efa2eb40b4557fc735d8c1.jpg
    8fa4edca32efa2eb40b4557fc735d8c1.jpg
    269.2 KB · Views: 2
  • a808f8f8245cceadb7f4290800553664.jpg
    a808f8f8245cceadb7f4290800553664.jpg
    375.6 KB · Views: 1
  • fb00864130153f7caa684f6e60deee7c.jpg
    fb00864130153f7caa684f6e60deee7c.jpg
    249 KB · Views: 1
  • 0526388cb45b9b644996dfac655631db.jpg
    0526388cb45b9b644996dfac655631db.jpg
    475.5 KB · Views: 1
  • 675152fd6a84e01be51e7c2d62bc3d46.jpg
    675152fd6a84e01be51e7c2d62bc3d46.jpg
    227.3 KB · Views: 1
  • 1f7f6c8fc3daad06e366fddf4edc8e5a.jpg
    1f7f6c8fc3daad06e366fddf4edc8e5a.jpg
    182.2 KB · Views: 1
  • c10db0710d25b6198ea362dfba0977ce.jpg
    c10db0710d25b6198ea362dfba0977ce.jpg
    198.3 KB · Views: 1

shopnut

Well-known member
Joined
Feb 22, 2006
Messages
4,237
Location
Florida
I often worry about my exhaust fan flaps coming open in a strong storm and allowing rain to come in. A hood would give piece of mind, for sure.

I'm looking forward to seeing the I-beam go up. Your brackets look beefy, and that's exactly what I would want for the application.
 
OP
C

cbacres

Well-known member
Joined
May 28, 2010
Messages
5,998
Location
SW Florida
I just want my steaks and hamburgers to be beefy.

Look forward to using the trolley as a ride.


Sent from my iPhone using Garage Journal

It’ll be a short ride and the stop on the end can be a *****:lol_hitti

At least the height is easy to adjust so you don’t drag your feet in the steel safety sandles on my concrete.:D
 
OP
C

cbacres

Well-known member
Joined
May 28, 2010
Messages
5,998
Location
SW Florida
Is there going to be Chapter gathering to get the I-beam up ?


Only if Shorty wears his safety shoes on his head!
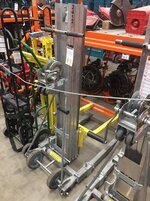
After much alcohol induced thinking (sitting in chair with beer looking up at frame) I decided to just rent one of these for a 1/2 day or so.
f7fd4fd94aa04359693742395d570181.jpg
There’s really no way to rig a lifting point as I’m going to be right against the roof.
I have scaffolding, your offer of rounding up the guys, but I’m going the easy route.


Sent from my iPhone using Garage Journal
 

Attachments

  • f7fd4fd94aa04359693742395d570181.jpg
    f7fd4fd94aa04359693742395d570181.jpg
    258.3 KB · Views: 2

rmack898

Well-known member
Joined
Jan 23, 2007
Messages
3,196
Location
Honu Grove NE Florida
your offer of rounding up the guys

I didn't see that as an offer for John to round up the guys to help you but more of a suggestion that you pony up some Cubans from that local eatery to entice the gang to come and watch you put the I beam up with the rental gizmo. I love work, I could watch people do it all day long.
 
OP
C

cbacres

Well-known member
Joined
May 28, 2010
Messages
5,998
Location
SW Florida
I didn't see that as an offer for John to round up the guys to help you but more of a suggestion that you pony up some Cubans from that local eatery to entice the gang to come and watch you put the I beam up with the rental gizmo. I love work, I could watch people do it all day long.

I took it as a offer!:lol_hitti

Cubans, no problem, go great with beer.

I had to go back and look, thought you were Shorty at first:bounce:

I heard my neighbor is letting a photographer use his back pasture, the one right next to my shop, for a **** cowgirl photo shoot the same weekend I’m setting the beams.
 

shortykorte

Well-known member
Joined
Sep 1, 2014
Messages
8,039
Location
Tallahassee, Fl
There you go, a lot of work eating a good Cuban and holding frosty brews. And I’m sure some constructive comments and chuckles would keep Craig properly motivated and on track.

Speaking of photo shoot, I’ll be interviewing these nice ladies for a spot on the meet up crew.aac1a4028489b08dc71818e5eb850b63.jpg
 

Attachments

  • aac1a4028489b08dc71818e5eb850b63.jpg
    aac1a4028489b08dc71818e5eb850b63.jpg
    42.1 KB · Views: 2
To avoid these ads, REGISTER NOW!
OP
C

cbacres

Well-known member
Joined
May 28, 2010
Messages
5,998
Location
SW Florida
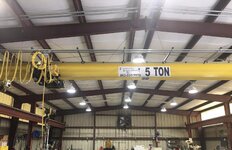
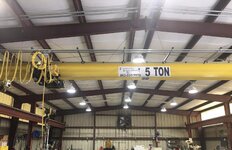
Got beam and hoist up!
688b86d2a1c2dbe6848f17452d203def.jpg
🤣🤣🤣

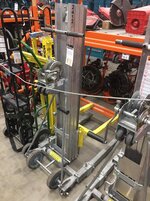
I wish! Gantry at one of my work suppliers.

Seen this too-
f1206b915c6950f7ee7b032e8fbb70d7.jpg

Enjoy and drool, I was.


Sent from my iPhone using Garage Journal
 

Attachments

  • 688b86d2a1c2dbe6848f17452d203def.jpg
    688b86d2a1c2dbe6848f17452d203def.jpg
    193.3 KB · Views: 1
  • f1206b915c6950f7ee7b032e8fbb70d7.jpg
    f1206b915c6950f7ee7b032e8fbb70d7.jpg
    199.6 KB · Views: 1
OP
C

cbacres

Well-known member
Joined
May 28, 2010
Messages
5,998
Location
SW Florida
Here’s where I’ve been spending my time, on a couple house repairs.
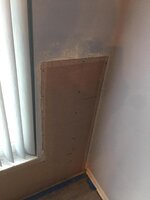
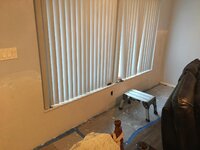
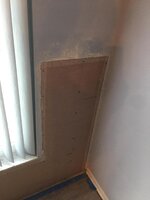
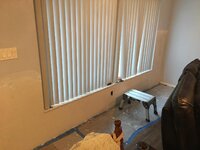
Our big window in the LR had leaked into the inside of the wall. The house is CBS (concrete block and stucco). I notice the base board was water damaged when we did the floor last year. So I tore out the drywall to see what I was up against.
ed014fabfe56134699f6e633ad3fb51f.jpg
Water tested the window to make sure all leaks were found, no more leaks!
f7c15f7b497fc864da44c05cb46b2d37.jpg
I replaced a couple furring strips just because the wood was a little of. Sprayed all the area with a disinfectant.
Replace insulation with foam board.
New drywall and mesh tape. The interior walls are plastered with a veneer plaster.
0769e678212a17bdfd730215f82db1f8.jpg
c78f4e08e0701bf9d900cc06c38df1ee.jpg
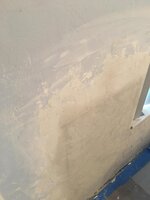
I sanded the paint and some of the existing plaster to help with blending the new and to knock down some of the texture.
c6018292cc6c3bfce534085c323602d2.jpg
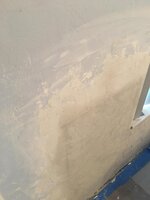
I haven’t plastered with this product in about 20 years and was planning to practice on a scrap of drywall. Once you mix this, you only have about a hour to use it.
73e3e2c2bcdb5a8f4f08768f1129849c.jpg
7c7fd5726206dad0023002f3d7cffc5c.jpg
Area that I had to match up to.
5799167c15a6cea7c3dcfa78c2cbd7b2.jpg

Now to just pick up the 15 trips worth of tools, install baseboard and I’m done.

Finish my fascia board repair and I’m done with house stuff for a little.


Sent from my iPad using Garage Journal
 

Attachments

  • f7c15f7b497fc864da44c05cb46b2d37.jpg
    f7c15f7b497fc864da44c05cb46b2d37.jpg
    208.7 KB · Views: 1
  • ed014fabfe56134699f6e633ad3fb51f.jpg
    ed014fabfe56134699f6e633ad3fb51f.jpg
    164.6 KB · Views: 1
  • 0769e678212a17bdfd730215f82db1f8.jpg
    0769e678212a17bdfd730215f82db1f8.jpg
    168.7 KB · Views: 1
  • c6018292cc6c3bfce534085c323602d2.jpg
    c6018292cc6c3bfce534085c323602d2.jpg
    134.6 KB · Views: 1
  • 73e3e2c2bcdb5a8f4f08768f1129849c.jpg
    73e3e2c2bcdb5a8f4f08768f1129849c.jpg
    134.1 KB · Views: 1
  • 7c7fd5726206dad0023002f3d7cffc5c.jpg
    7c7fd5726206dad0023002f3d7cffc5c.jpg
    159.9 KB · Views: 2
  • 5799167c15a6cea7c3dcfa78c2cbd7b2.jpg
    5799167c15a6cea7c3dcfa78c2cbd7b2.jpg
    100.8 KB · Views: 2
  • c78f4e08e0701bf9d900cc06c38df1ee.jpg
    c78f4e08e0701bf9d900cc06c38df1ee.jpg
    180.6 KB · Views: 2

Strouty

Well-known member
Joined
Mar 21, 2010
Messages
38,223
Location
Southern Maine
Looks like a good repair, always satisfying.

Have you figured out how you are going to sneak the yellow bridge crane out yet???
 

shopnut

Well-known member
Joined
Feb 22, 2006
Messages
4,237
Location
Florida
I hate when those house repairs get in the way of shop time. But sometimes it has to be done, especially when water is involved. Looks like a great repair. I find it hard to blend texture, so I would probably be seeking out furniture to hide it about now! LOL I'm sure you'll do much better than I would.

Good luck with wrapping it all up.
 
OP
C

cbacres

Well-known member
Joined
May 28, 2010
Messages
5,998
Location
SW Florida
Looks like a good repair, always satisfying.

Have you figured out how you are going to sneak the yellow bridge crane out yet???

If I got that gantry, I’d have to set it up first and build the shop off of it.

I hate when those house repairs get in the way of shop time. But sometimes it has to be done, especially when water is involved. Looks like a great repair. I find it hard to blend texture, so I would probably be seeking out furniture to hide it about now! LOL I'm sure you'll do much better than I would.

Good luck with wrapping it all up.

I used to do plastering in the 80s for a living, but duplicating someone’s texture pattern is tough. I just learned how to blend so only someone who really knew could see the difference. I’m real happy it all came back to me like it did.
Another note, I have a Bostik T nailer, shoot the hardened nails to attach wood to concrete, after not using it for decades, it still fired, I thought for sure the seals would of been shot. I have oiled and fired through the years, guess it did the trick.

I just need to get base on, the wife will takeover from there and get it painted:beer:
 
OP
C

cbacres

Well-known member
Joined
May 28, 2010
Messages
5,998
Location
SW Florida
IMG_7815.jpg

Hmmmmm , went and took the plunge again.

Hate it when stuff comes in and I’m on the other side of state. Story at 11


Sent from my iPhone using Garage Journal
 

Attachments

  • IMG_7815.jpg
    IMG_7815.jpg
    85.9 KB · Views: 24
OP
C

cbacres

Well-known member
Joined
May 28, 2010
Messages
5,998
Location
SW Florida
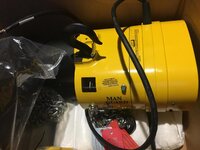
In my beam trolley project, I was looking through a parts drawing on the electric hoist. The one I have is 32’ per minute, kinda fast with heavier stuff and real touchy in setting stuff down without it landing hard.

The parts list had 16’ per min gears, so I call around to see if I can just change out gears, well I never got a answer as they couldn’t find my lift in their records due to its age, and the price for one set of gears was $500. Never mind.

Talking with the parts guy that gave me that info, I just asked if they had any scratch and dent, used etc. He said they were clearing out some lifts and quoted me $2075 on a new 1 ton.

I figured I’d just keep a eye out for one. Average used was $750 to $1200, and these were about same era as mine, just slower.

I called the guy back and asked what the best price would be and he came back with$1,524 with free shipping! As I had sold a fair amount of stuff last month or so, the proceeds would cover a chunk of this purchase.Were do I sign?

So I had it shipped to my place of work as it came freight, and of course I was on the other side of the state when it came in.I picked up tonight.
d5ad42dd6ffb0137e2f133f49b1c6bec.jpg

It’s 139 lbs of box and lift, I loaded by hand at work, wasn’t doing again at home, so I used the lift to lift the lift out of the truck.

Oh the irony.
5a4e46e4a6f78d48d27b20ff31a74da7.jpg

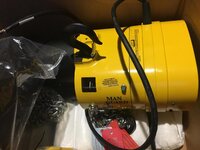
Wanted to do a quick look over to make sure no shipping damage.
a93f28f6c4d673758e7f56cf844cc7ed.jpg
0d7dc9318992b9584a8150f8916b8d64.jpg

Now I need to get my house projects done so I can get back to the beams.

It’s a pricey purchase for my home shop, but I use the lift I have now quite a bit and the only thing I’d change is the speed. It didn’t make sense to buy a $800 used lift, possibly taking a chance of it having issues.

So, I wonder how my lift feels lifting it’s replacement?

If anyone is interested,
I bought from Ace Industries in Norcross Ga. Ask for Craig C.
800-733-2231


Sent from my iPad using Garage Journal
 

Attachments

  • 0d7dc9318992b9584a8150f8916b8d64.jpg
    0d7dc9318992b9584a8150f8916b8d64.jpg
    154.7 KB · Views: 2
  • a93f28f6c4d673758e7f56cf844cc7ed.jpg
    a93f28f6c4d673758e7f56cf844cc7ed.jpg
    173.5 KB · Views: 2
  • 5a4e46e4a6f78d48d27b20ff31a74da7.jpg
    5a4e46e4a6f78d48d27b20ff31a74da7.jpg
    211 KB · Views: 2
  • d5ad42dd6ffb0137e2f133f49b1c6bec.jpg
    d5ad42dd6ffb0137e2f133f49b1c6bec.jpg
    217 KB · Views: 2

shortykorte

Well-known member
Joined
Sep 1, 2014
Messages
8,039
Location
Tallahassee, Fl
Uh, I think that was suppose to go to the Asylum.

Nice looking. Has to lift your spirits some. With two lifts, should be able to get the beams in place in no time.


Sent from my iPhone using Garage Journal
 

shopnut

Well-known member
Joined
Feb 22, 2006
Messages
4,237
Location
Florida
Uh, I think that was suppose to go to the Asylum.
Well, the color is correct!! LOL

Craig - that's a great new toy, and sure to be a real workhorse at the same time. Congrats!!

If you want to slow your existing one down to use as a second/backup hoist, you might check into adding a chain block if you have plenty of chain length. It will cut the lift speed in half while doubling your lift capacity. My Dayton (which is nearly identical to the popular models sold by Yale/Coffing/Little Mule/Milwaukee etc) has provisions for anchoring the chain back to itself. A chain block matching your chain size might not be too hard to find. Note how the top hook also moves as the lift chain position changes below it to keep the hoist housing hanging level. Just a thought.

attachment.php
 

Attachments

  • Hoist-Chain-Block.JPG
    Hoist-Chain-Block.JPG
    42.9 KB · Views: 235
OP
C

cbacres

Well-known member
Joined
May 28, 2010
Messages
5,998
Location
SW Florida
Now you tell me!:lol_hitti:lol_hitti

I had started looking into this and kinda lost track of it.

I’m sure finding a block for the chain is pretty easy. I’d have to look to see if there a second anchor point on the hoist.

Man, you almost intercepted my ordering of a new toy!
 
OP
C

cbacres

Well-known member
Joined
May 28, 2010
Messages
5,998
Location
SW Florida
Well, the color is correct!! LOL

Craig - that's a great new toy, and sure to be a real workhorse at the same time. Congrats!!

If you want to slow your existing one down to use as a second/backup hoist, you might check into adding a chain block if you have plenty of chain length. It will cut the lift speed in half while doubling your lift capacity. My Dayton (which is nearly identical to the popular models sold by Yale/Coffing/Little Mule/Milwaukee etc) has provisions for anchoring the chain back to itself. A chain block matching your chain size might not be too hard to find. Note how the top hook also moves as the lift chain position changes below it to keep the hoist housing hanging level. Just a thought.

attachment.php

Mark, I did a quick search on chain blocks , only ones I could find were on a parts list that came with a particular chain hoist. Not a issue as long as you match to correct chain.
Those jokers were $500 and above!

Looking through eBay, but really havnt come across
 
OP
C

cbacres

Well-known member
Joined
May 28, 2010
Messages
5,998
Location
SW Florida
YES!!! You need that!!!! Buy!!!!


Sent from my iPhone using Garage Journal

Good try Shorty!:lol_hitti:lol_hitti

I’m done, I spent my slush fund!

I need to sell more.

At least I sold off some bulky concrete floor space sucking items and replacing with useful stuff that hand from ceiling!
 
OP
C

cbacres

Well-known member
Joined
May 28, 2010
Messages
5,998
Location
SW Florida
Here’s my Monday morning.
5350b89c18d7caebe3bfa82bcd8f1318.jpg

Was fixing to leave for work when I heard some distressful sounding yelping.
A neighborhood dog was in my neighbors pasture and decided it wanted to jump fence into ours, we’ve seen her jump the neighbors fence like a deer.

Her back leg got tangled in the fence openings, leg was over top wire and paw was behind the lower wire, it was tight and I was concerned her leg would break trying to get it out, it came loose, but she was still stuck.

I thought the barb wire had her, but no it was the vertical wire that had looped around leg and up against the top wire. No matter how I pulled, pushed tried to get her weight off it, I couldn’t get it off, and for my efforts, she clamps down on my leg!

I calmed her down to where she would stay still when I let go.

Now that I have two hands, I was able to squeeze the square together to get enough slack to let her go. She seemed OK, I now have holy jeans and two good scrapes on my leg.

I’m just glad I was there to get her loose.


Sent from my iPad using Garage Journal
 

Attachments

  • 5350b89c18d7caebe3bfa82bcd8f1318.jpg
    5350b89c18d7caebe3bfa82bcd8f1318.jpg
    477.7 KB · Views: 6
To avoid these ads, REGISTER NOW!
Top Bottom