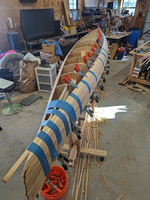
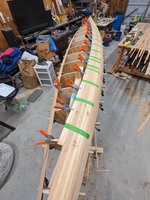
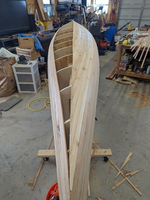
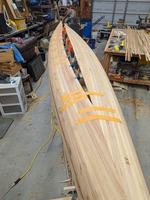
To avoid these ads, REGISTER NOW!

Cedar Stripped Kayak build

niget2002

Well-known member
Joined
Oct 2, 2012
Messages
11,177
Location
Josephine, TX
This will be a build thread for the cedar stripped kayak I've been working on. I've been posting updates in the 'What did you do in the garage' thread, but thought this project might deserve it's own space. This is my first kayak build. I've read the book by Nick Schade called 'The Strip-Built Sea Kayak' and have watched quite a few of his build videos. I've also watched a few other build videos.

The boat design I picked out is Schade's MicroBootlegger design. It is a a 2 person kayak. The design only has a single shared cockpit. I picked this design because I liked the looks. I also know that a lot of times I may be paddling by myself. With the single larger cockpit, I will be able to move the front seat back behind the centerline of the boat for a more balanced kayak. It will also give me more cockpit room for carrying a small cooler or some gear if I decide to take it out fishing. The boat is 17.5' long and ~28" wide ( I think ).
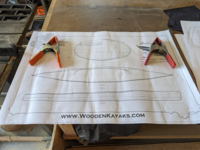
design.png

My background is in amature woodworking and my dad and I built a plywood sailboat design by Glen-L when I was in high school.

This is by far the longest running project I've worked on for woodworking. Most other projects have been 1-2 weekends at most.

Without further ado... I'll start from the beginning. I brought home lumber and dove into the strongback on September 16, 2023.

The strongback is made from a ripped 1/2" sheet of plywood. I plan on re-using this on future builds, so I made a boxed 2"x4" structure. I could have just used a 2x4. The frames have 2x4 rectangles cut in them and are slid over this boxed tube. The holes in the frames are oversized so you can adjust them up/down/left/right/rotationally to line up the vertical and horizontal centerlines.
strongback.png

Then I made a rolling cart to put the kayak on while I work on it. It's a 2x12@12' long. I made it just a tad too tall I think, but It's not horrible. The cart was later modified to add some 2x4 shelves to put tools while I worked.

cart.png

I then spent a few days cutting out the frames. First tracing and rough cutting with a jigsaw/bandsaw. Then cleaning them up on my disk sander.

PXL_20230917_230751826.jpg.smaller.jpg.png

The strongback is rested on risers to lift it off of the build platform to clear the frames.

PXL_20231003_003913008.jpg.smaller.jpg.png

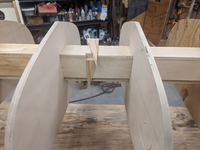
The frames are held apart by small U-shaped pieces of plywood. Then two wedges are used to put pressure and hold everything in place. I didn't do the best with designing these pieces. The Wedges 'work', but could have been cut different so they didn't overlap.
PXL_20231003_003918214.jpg.smaller.jpg.png

That gets us to the frame ready to accept strips. Looking at date stamps of the photos, this took until October 3rd.
 
To avoid these ads, REGISTER NOW!

Firebrick43

Well-known member
Joined
May 12, 2015
Messages
14,144
Location
West central Indiana
I have that book and that is my visually favorite design in the book.

Wife and I can’t paddle together in a double boat unless we are on big open lakes like the boundary waters however so we paddle in solo boats.

Our canoe club we call doubles divorce boats.

My oldest son is 10 years old and I would like to start making some strippers for him and the other kids
 
OP
N

niget2002

Well-known member
Joined
Oct 2, 2012
Messages
11,177
Location
Josephine, TX
For the strips, I decided to go with a rolling-bevel. The alternative is to use a router and cut a bead on one side of the strips and a cove on the other. I'm a glutton for punishment, so I went with the harder option.

The cedar I chose is just the cheap construction Western Red cedar from Home Depot. If you poke around enough, you can find some with a few less knots than the others. Then I brought them home and planed them with the planer to get rid of the rough faces. Then I ran them through the table saw to get 1/4" x 3/4" strips. The first time I did this, I made a few mistakes and ended up with quite a bit of scrap. I also didn't do the best job of picking the lumber and had quite a few knots I had to work around.

PXL_20231012_000521336.jpg.smaller.jpg.png

Laying the first strip was one of the trickier parts of the build so far. I had to choose whether to lay it straight across the boat, or to have it follow the chine. The chine is the widest part of the boat. I chose to follow the chine.

PXL_20231015_220245537.jpg.smaller.jpg.png

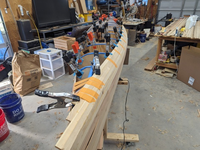
Then it was just a matter of continuing adding strips. Lots of clamps were needed.

PXL_20231102_233917675.jpg.smaller.jpg.png

When I had enough strips on the boat, I wanted to cut a flat, straight waterline where the boat will sit in the water. I used a string to make a straight line down the boat, then drew a line with pencil and followed it with the saw.

PXL_20231104_002516956.jpg.smaller.jpg.png

The bow and stern look real rough on the ends. It will be sanded smooth before putting on the fiberglass. This boat's design has a solid outer stem on both ends of the boat, so the rougher looking cedar will get cut off and replaced at the end of the build. No need to spend a lot of time making the strips line up perfect.

PXL_20231104_004604491.jpg.smaller.jpg.png

I averaged a few strips each day when I could get out to the shop. I chose to build my boat without using staples, so there is quite a bit of 'waiting for glue to dry' between each strip.

PXL_20231107_010841207.jpg.smaller.jpg.png
PXL_20231126_211850570.jpg.smaller.jpg.png
PXL_20231202_012023403.jpg.smaller.jpg.png

When I finished one side of the boat, I had to cut a straight line down the keel. Then I could start stripping from the other side.

PXL_20231208_194322609.jpg.smaller.jpg.png
 
OP
N

niget2002

Well-known member
Joined
Oct 2, 2012
Messages
11,177
Location
Josephine, TX
I have that book and that is my visually favorite design in the book.

Wife and I can’t paddle together in a double boat unless we are on big open lakes like the boundary waters however so we paddle in solo boats.

Our canoe club we call doubles divorce boats.

My oldest son is 10 years old and I would like to start making some strippers for him and the other kids
My wife likes to paddle on top of the paddle board. She also doesn't like to go very far. The kayak will be more for the kids and me to take out. I hoping to get one of them to start taking day trips with me.
 
OP
N

niget2002

Well-known member
Joined
Oct 2, 2012
Messages
11,177
Location
Josephine, TX
One of the things I did for this build was I designed and 3d printed a scarfing jig. The jig clamps onto my disc sander and makes it really easy for me to put an 8:1 scarf on the end of each strip.

PXL_20231015_221205169.jpg.smaller.jpg.png

Once I had the keel cut straight, it was back to running strips up the other side of the boat. These took longer as I had to fit each strip up against the previous one.


PXL_20231218_020551282.jpg.smaller.jpg.png

Then I did some initial sanding to smooth out the bumps. I'll do final sanding right before I get ready to add fiberglass.

PXL_20231218_020600658.jpg.smaller.jpg.png

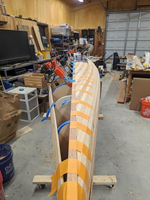
I had a neighbor come over and help me flip the boat over so I could start on the deck. More clamps were used. I think I have over 100 of the little 3" clamps now.

PXL_20240120_231842269.jpg.smaller.jpg.png

PXL_20240128_192418097.jpg.smaller.jpg.png

Just like the bottom of the boat, I'm doing one side, cutting it straight, then doing the other side.
PXL_20240131_004815239.jpg.smaller.jpg.png

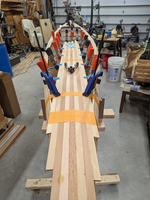
The rear deck is different than the front. Instead of curing the strips up over the edge, I cut it flat and I'm running the strips straight front to back.

PXL_20240207_024045236.jpg.smaller.jpg.png

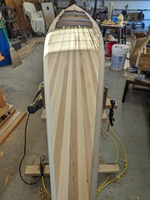
Over the weekend, I got the last strip glued onto the boat and I started sanding the top deck.

PXL_20240212_232041475.jpg.smaller.jpg.png
 
OP
N

niget2002

Well-known member
Joined
Oct 2, 2012
Messages
11,177
Location
Josephine, TX
I also made some test pieces over the weekend. I plan on dying the top of the boat. The bottom will have a coat of graphite enfused epoxy, so it will be a grey color.

The dye I'm using is powder based from Keda. You use 1/4-1/2tsp of powder in 4 oz of liquid. The liquid I chose to go with is denatured alcohol.

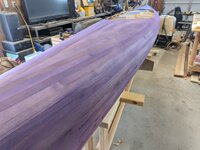
I'm leaning towards the purple color. It's just light enough that you can still see the different grains in the wood and somewhat tell that there's Mahogany accent strips on the boat. Although, the mahogany and the cedar are really close in color, so it's not by much. What you really see when you get up close is the much tighter wood grain in the Mahogany vs the cedar.

PXL_20240212_224323332.jpg.smaller.jpg.png

Close up of the purple.

PXL_20240210_231808965.jpg.smaller.jpg.png

And that's pretty much where I'm at at this point. I have a lot of sanding to do on the top deck down to the waterline. When I have it somewhat smooth, I'll trace out the cockpit and cut it out. Then it's more sanding.

Once I have it sanded all the way to 120 grit, I'll squirt it with water to raise the grain. Then I'll sand at 120 again prior to dying the boat. I'm not going to bother taping off the waterline as the graphite will cover any dye that goes past it.

After the boat is dyed, I'll separate the top deck from the bottom hull, flip the bottom over and finish sanding the hull to 120. Then it will be time to start fiberglassing.

Future updates in this thread will be more in line with when the work is done.

I do have a youtube playlist with updates of the boat during the build process. Most of it is just commentary. Some of them have actual 'action' shots.

 
OP
N

niget2002

Well-known member
Joined
Oct 2, 2012
Messages
11,177
Location
Josephine, TX
60 grit RO to level the strips
60, 80, 120 on a fairing strip to smooth everything out
120 on a soft pad on the RO to get rid of sanding marks from fairing strip.

Just need to squirt water on it to raise grain, sand with 120 soft pad again, then it's ready for stain.

1000002223.jpg
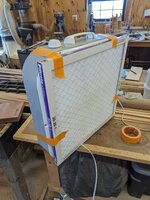
Made an air filter to help with dust. I also had an adapter on the RO for the shop vac.

1000002224.jpg
 
OP
N

niget2002

Well-known member
Joined
Oct 2, 2012
Messages
11,177
Location
Josephine, TX
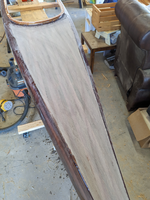
In the last picture, you can see a few dark splotches in the dye. Those splotches are where I had to add wood filler to fill gaps between strips. I must not have done the best sanding after adding the filler and where there was still glue on the surface the dye came out darker.

I ended up having to re-sand quite a bit of the boat to get all the filler off.

I then mixed up a fresh batch of dye and did my best to blend it in with the rest of the boat. I went back and forth with adding dye, and then thinning it back out with straight alcohol to blend it in.

The final dye came out pretty good. It's darker in person than what the camera picks up, but not by much. There's one or two places where there's still a touch of filler showing, but you don't notice it unless you're looking right at it.

Last night my neighbor came over. I pulled the deck of the kayak back off and set it aside. Then my neighbor helped me flip the boat back over and put it back on the original stands. Tonight I'll go out there and fill all the cracks in the bottom of the boat and sand the hull.

Tomorrow morning I'll get up bright and early to apply fiberglass to the hull. My understanding is that 4oz cloth should only take two coats of epoxy to fill the weave. Hopefully that's true. I'll use the heater in the shop to raise the temperature to 70f and to help pull any humidity out of the shop. If it really only takes two coats to fill the weave, then I should be done around lunch time. If I need to add a 3rd coat for some reason, then it will be dinner before I'm done.

I'm looking forward to seeing what the dye looks like under the glass. It may make it a little darker, but the epoxy I'm using is 'clear' so it shouldn't affect it much.
 

ALinCarolina

Well-known member
Joined
Dec 29, 2014
Messages
758
Location
NC Piedmont
Looks fantastic. It brings back memories. I built an 18 ft strip canoe in the late 70s and still have it. It was easier to get clear western cedar back then. I had a good friend get 20 footers from his BIL who owned a wholesale lumber business.
 
To avoid these ads, REGISTER NOW!

Skiff Builder

Well-known member
Joined
Jun 7, 2016
Messages
1,782
Location
Southern NJ Coast
Here's a video of all the fun I had today. It's a long one. I didn't want to speed up the video so everyone got a full idea of how long this really took.

Cloth wet out is looking good man!

Was that your first experience glassing?

Will you do the graphite in resin on the fill coat?

" There is a certain kind of pressure one feels , when glassing a hull"
 
OP
N

niget2002

Well-known member
Joined
Oct 2, 2012
Messages
11,177
Location
Josephine, TX
Cloth wet out is looking good man!

Was that your first experience glassing?

Will you do the graphite in resin on the fill coat?

" There is a certain kind of pressure one feels , when glassing a hull"
Dad and I built a wooden sailboat when I was a teenager. I remember helping with the glasswork, but it was long enough ago that I don't remember what all we did. I have used fiberglass on other projects, but that was usually mat.

I will add the graphite to the final coat of epoxy on the bottom of the hull.

Any other part of the hull that isn't quite filled will be done when I add the fiberglass seam on the outside.

I'll probably do 2 fill coats on the deck when I do it next Saturday. 1 fill coat almost completely filled the weave. 2 definitely will.
 

Skiff Builder

Well-known member
Joined
Jun 7, 2016
Messages
1,782
Location
Southern NJ Coast
Dad and I built a wooden sailboat when I was a teenager. I remember helping with the glasswork, but it was long enough ago that I don't remember what all we did. I have used fiberglass on other projects, but that was usually mat.

I will add the graphite to the final coat of epoxy on the bottom of the hull.

Any other part of the hull that isn't quite filled will be done when I add the fiberglass seam on the outside.

I'll probably do 2 fill coats on the deck when I do it next Saturday. 1 fill coat almost completely filled the weave. 2 definitely will.
I've found most times ,needed two coats of graphited resin to get a fairly even color on the bottom.

Cutting 1/3 to 1/2 the length of the bristles off your chip brush, may move resin more effectively. Definitely helps if your ever taping over fillets or to "tap" any puckered cloth down.

I'm at about 60 gallons in on my project now. Watch your exposure, especially when sanding fresh stuff ( I like my carbide scraper for green resin). Sensitivity builds over time.

Have fun and enjoy!!
 
OP
N

niget2002

Well-known member
Joined
Oct 2, 2012
Messages
11,177
Location
Josephine, TX
The last few weeks of work have all been around working on the coaming of the kayak. I had to cut a bunch of 1/8" by 3/8" strips out of mahogany. I ended up using my bandsaw to make these cuts. My table saw doesn't have a very good guard on it and the blade was pulling the strips into the machine.

Hindsight being what it is, I should have used the bandsaw to cut all of my strips. It made for a much easier process. I had to pull the bandsaw farther out into the shop so that the lumber would clear some other machines I have in that corner, but I got it to work.

The mahogany couldn't make the bends on the bow and stern of the boat. I picked up a steamer and built a steam box to help get the strips to curve around some forms. Once they dried, I was able to glue the strips onto the boat.

I glued the strips on one at a time. I've watched others add glue to all the strips and do them all at once, but I didn't want to try to do that. As it was, I was able to do 1 strip every 2-3 hours as the glue set enough for me to pull clamps off and put more strips on.

I didn't video the entire process, but I did make a little video of me steaming strips for the first time.


Firebrick43

Well-known member
Joined
May 12, 2015
Messages
14,144
Location
West central Indiana
The last few weeks of work have all been around working on the coaming of the kayak. I had to cut a bunch of 1/8" by 3/8" strips out of mahogany. I ended up using my bandsaw to make these cuts. My table saw doesn't have a very good guard on it and the blade was pulling the strips into the machine.

Hindsight being what it is, I should have used the bandsaw to cut all of my strips. It made for a much easier process. I had to pull the bandsaw farther out into the shop so that the lumber would clear some other machines I have in that corner, but I got it to work.

The mahogany couldn't make the bends on the bow and stern of the boat. I picked up a steamer and built a steam box to help get the strips to curve around some forms. Once they dried, I was able to glue the strips onto the boat.

I glued the strips on one at a time. I've watched others add glue to all the strips and do them all at once, but I didn't want to try to do that. As it was, I was able to do 1 strip every 2-3 hours as the glue set enough for me to pull clamps off and put more strips on.

I didn't video the entire process, but I did make a little video of me steaming strips for the first time.

I like the idea to put dowels down the length of the steam chamber pipe to hold the sticks off the bottom. I will have to do that next time.


I have also in the past had to drill holes on two sides of a pipe and your jig solution is one of those head smacking moments.
 
OP
N

niget2002

Well-known member
Joined
Oct 2, 2012
Messages
11,177
Location
Josephine, TX
New video posted. I keep going through different sanding methods trying to figure out what works best for me. I ended up using a combination of a sanding block, scraper, and angled die grinder with a sanding disk.

The interior of the boat is taking a while.

I'm also going to 3d print some of the deck fittings.


MoonRise

Well-known member
Joined
Nov 5, 2010
Messages
4,031
Location
NJ
👍

The usual woodworker's statement of "you can never have too many clamps" really applies here, eh? :lol2:

And using all the clamps when you were doing the bent laminations for the coaming showed that you are right-handed. :lol: Amazing how tiring putting all those spring clamps in place can get on your grip.

Speaking of the steam-bent laminations, yeah PVC pipe might not have been the best choice for steam-level temperatures. PVC has a service-limit temperature and it starts to soften enough to bend at ~140F. But as long as it lasted long enough for you to get the job/task done, then that's all that mattered.

For the scraping, have you tried a "cabinet scraper" or "card scraper" instead of the chunky 'paint' scrapers? The cabinet scraper usually is much more forgiving of grain direction compared to the coarser 'bite' of a paint scraper, mostly because they take a smaller scraping bite.

cabinet scraper examples:


example of prep and use of a cabinet scraper, from Stumpy Nubs: File the edge square, then burnish the edge to roll over a burr/hook that does the scraping. Done right, the tool takes off controlled wisps of shavings.


And there are also "scraper planes", which are a scraper blade with a plane or spokeshave type of body/handle.

Just some possible different tool/technique options.

:beer:
 
OP
N

niget2002

Well-known member
Joined
Oct 2, 2012
Messages
11,177
Location
Josephine, TX
👍

The usual woodworker's statement of "you can never have too many clamps" really applies here, eh? :lol2:

And using all the clamps when you were doing the bent laminations for the coaming showed that you are right-handed. :lol: Amazing how tiring putting all those spring clamps in place can get on your grip.

Speaking of the steam-bent laminations, yeah PVC pipe might not have been the best choice for steam-level temperatures. PVC has a service-limit temperature and it starts to soften enough to bend at ~140F. But as long as it lasted long enough for you to get the job/task done, then that's all that mattered.

For the scraping, have you tried a "cabinet scraper" or "card scraper" instead of the chunky 'paint' scrapers? The cabinet scraper usually is much more forgiving of grain direction compared to the coarser 'bite' of a paint scraper, mostly because they take a smaller scraping bite.

cabinet scraper examples:


example of prep and use of a cabinet scraper, from Stumpy Nubs: File the edge square, then burnish the edge to roll over a burr/hook that does the scraping. Done right, the tool takes off controlled wisps of shavings.


And there are also "scraper planes", which are a scraper blade with a plane or spokeshave type of body/handle.

Just some possible different tool/technique options.

:beer:
Great information. Sorry I didn't see this until now.

I was able to get the sanding done. Today I got the interior of the deck glassed.

I need to install a bunch of hardware next. Then I'll be ready to glue the halves together.

1000002687.jpg
 
OP
N

niget2002

Well-known member
Joined
Oct 2, 2012
Messages
11,177
Location
Josephine, TX
Today I flipped the deck back right side up and trimmed all the excess fiberglass off of the coaming lip and around the edge of the deck. Then I went after it with some 60 grit sand paper and sanded off all the rough edges. The edge of the fiberglass is very very sharp and easily cuts you while you're handling the boat. I don't have enough band aides for that, so thought it'd be better if I got rid of the sharp edges.

three.png

While I had the sandpaper in my hand, I thought it'd be nice to sand off some of the epoxy drips. Some sanding led to a lot of sanding and the next thing I knew, I had the top of the rear deck all sanded smooth. I started with 60 grit and sanded down to 120. The reminded me a lot like sanding the motorcycle parts on the bike I painted last year. Lots of back and forth with a sanding block until everything's the same shade of white. At least with the motorcycle, I was usually using wet sandpaper so it didn't load up with dust as quickly. I cheated a bit here and used the shop vac a few times to **** all the dust off the sand paper so it'd last a little longer. There's still a few dimples where it's not sanded perfect. But it will do for now.

one.png

After doing all that work with the sanding, I decided I wanted to see what the rear deck might look like 'finished'. I thinned out some epoxy with acetone at ~10% and used a brush to brush a thin coat of epoxy on the rear deck. The epoxy produces a bit of small orange peel as it dries, but that will get sanded out prior to final finish.

two.png

I'll let this cure until this evening.

Next up in the order of 'things to do' is start installing the hardware that goes inside the boat. The deck line hardware I'm using is 3d printed. You drill two holes in the deck and then the fitting gets epoxied in from the inside of the boat. I'll put some fiberglass over the top of it even though the designer says that's optional. I have some other hardware for foot braces coming in early this week. That gets epoxied into the hull.

These are the deck fittings I'm going to use.


I also have some through-hull eye bolts that I'm going to see if I can make mounting blocks for it for inside the hull. I'm hoping this will work for the clips for the seats.

I need to get a tape measure and measure the foot braces on the plastic kayak I have and start laying out where all of this needs to go inside the hull.

After getting the hardware installed comes the hard part. Taping and fiber glassing the two halves together.
 
OP
N

niget2002

Well-known member
Joined
Oct 2, 2012
Messages
11,177
Location
Josephine, TX
Today I drilled 1/2" holes in a perfectly good deck today. To say I was nervous would be an understatement. These are the 3d printed fittings I think I mentioned previously.

1000002706.jpg

But things came out pretty good. The holes are for the deck rigging.

1000002710.jpg

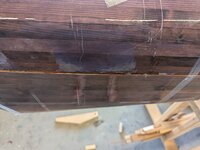
I tried to dye the epoxy purple because it's going to squish through to the top. It came out more black than purple, but it should still disappear.

1000002709.jpg
Once the epoxy dries, I'll give it a light sanding and then put a layer of fiberglass over them.
 
OP
N

niget2002

Well-known member
Joined
Oct 2, 2012
Messages
11,177
Location
Josephine, TX
This morning was rough, but I somehow managed to get the halves taped together. I'm afraid of removing the straps and having it pop apart. I used some thick CA to glue the halves in places.

I don't have the time to put the glass cloth on the inside seam today, so it will sit like this until Friday. Then I'll remove the straps and glue the two inside seams that day. I'm hoping Sunday afternoon I can remove the tape and start sanding the outside seam area.

1000002876.jpg
 
OP
N

niget2002

Well-known member
Joined
Oct 2, 2012
Messages
11,177
Location
Josephine, TX
Got one inside seam done and then ran out of hardener. I waited a few hours for it to cure and pulled the tape off. It's starting to look like a boat.

1000002888.jpg
My seam wasn't as good as I thought, so I'll need to apply some dye to this exposed wood to blend it into the rest of the purple on the boat before I do the outer seam.
1000002889.jpg
 

RivennHewn

Well-known member
Joined
Jun 4, 2011
Messages
10,378
Location
PNW
Just did the deep dive on your thread.

Nice work. 👍

I’m thinking I’ll do a SUP this winter, probably start with the frame kit from Jarvis
 
To avoid these ads, REGISTER NOW!
Top Bottom