To avoid these ads, REGISTER NOW!

Citrogarage

To avoid these ads, REGISTER NOW!
OP
L

lucajack2cv

Well-known member
Joined
May 21, 2009
Messages
169
Location
Italy N/W
I am finally able to document the whole epic of the paving of the main floor of citroresidence with a parquet of cedar wood spreadings the home with his inebriant parfume. The cedar of Lebanon usually lives in Lebanon but being a very decorative tree is usual to see it standing out in public parks or private Italian villas. It also happens that should eventually be torn down and sold. And bought by those who fall in love with it ;-D The choice to use this kind of wood for the flooring will be only partially successful: it is true that the underfloor heating it gives off a distinctive aroma, but unfortunately its texture will result too tender and will oblige me, in order to avoid premature wear, to choose an hard finishing paint with the results not very natural.

Anyway, we begin with citrotransport of cedar planks, dating from about 2 years ago, from a stack of seasoning (this is actually a game at old lumber that had at least 10 years of storage) to a huge mill that will transform:

legnam.jpg


legnam1.jpg


legnam3.jpg


In order to avoid to waste the return trip, the HY Tube is loaded with various scrap wood for home heating ..

legnam4.jpg


Et voilà!

legnam5.jpg


A terrible machine-trunks reduces the cedar boards into planks of 2 cm in thickness:

normal_legnam6.JPG


normal_legnam8.JPG


normal_legnam9.JPG


My father checks everything's right..

normal_legnam7.JPG


normal_legnam10.JPG


normal_legnam12.JPG


normal_legnam13.JPG


Subsequent operations are the signature of the tables with the wide definition of three standards (which will be 13, 19 and 23 cm) such that in the tables that present the "heart" of the plant that would be inevitable due to warping. After that the tables will take the path of the woodwork where them will be planed to a thickness of 1.6 cm and maled.

One fine evening, it's time to bring them home..

normal_legnam14.JPG
 
OP
L

lucajack2cv

Well-known member
Joined
May 21, 2009
Messages
169
Location
Italy N/W
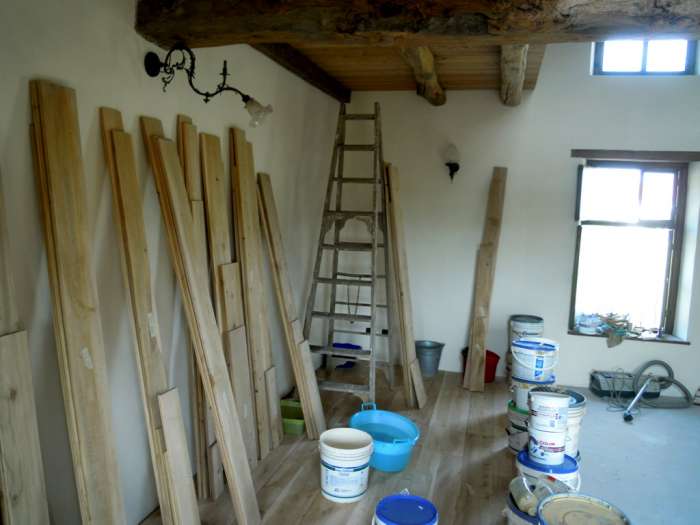
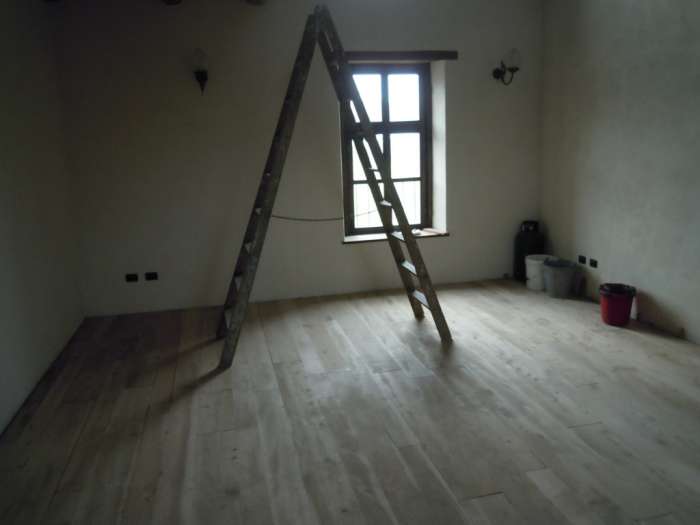
The beginning of the installation is deferred until the arrival of bad weather that stops any kind of outside work. Secondly, because the court is also the fear of not being really able to do a good job and wasting time, money and material. My only experience goes back 10 years ago when I helped an expert to lay a floor similar (but planks of larch) in the house where I lived then.

I try to remember exactly the procedure (my task was limited to mix the glue ..), I pick up other tips: the boards will be glued to a slab of cement and sand (which is completely dry, which is controlled by a dispositive wich detects the moisture content) using a 2-components glue rather expensive (with a drum stick that costs 50 € approximately 10 square meters of parquet flooring) to be spread with a notched trowel. I need to have the weights available to make sure the bonding of the parts.


normal_pav7.JPG


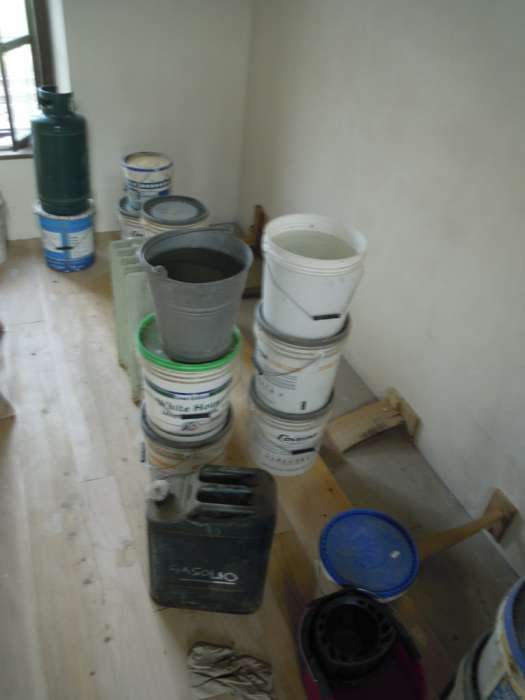
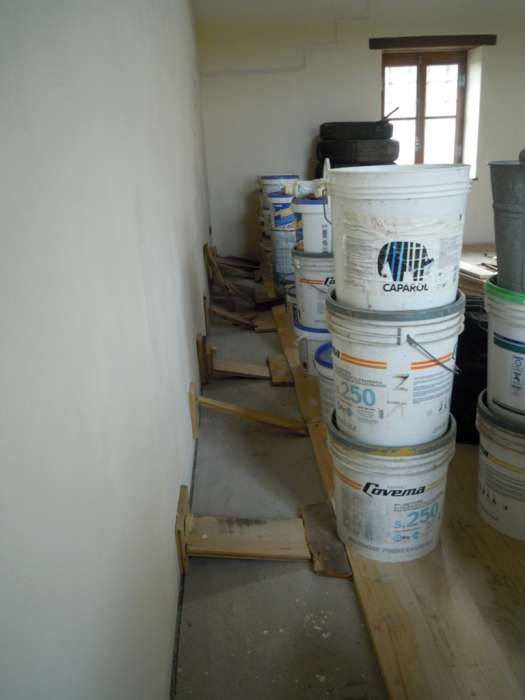
I remember that it maintained a separation of at least 1 cm from the walls that will be hidden by the skirting board. The screed should be washed thoroughly and then clean with a vacuum cleaner, I know you must be prepared a series of small wooden wedges, which serve to compress the last board against the other when it comes to the end of the room.

The three assorted sizes of boards should overlap about 1/3 of their length and not in half to avoid their tendency to bend genres leaves open cracks or bulges.

normal_pav3.JPG


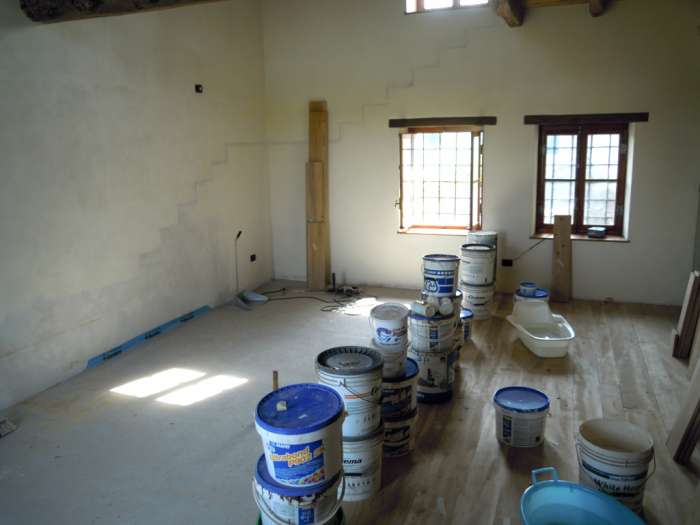
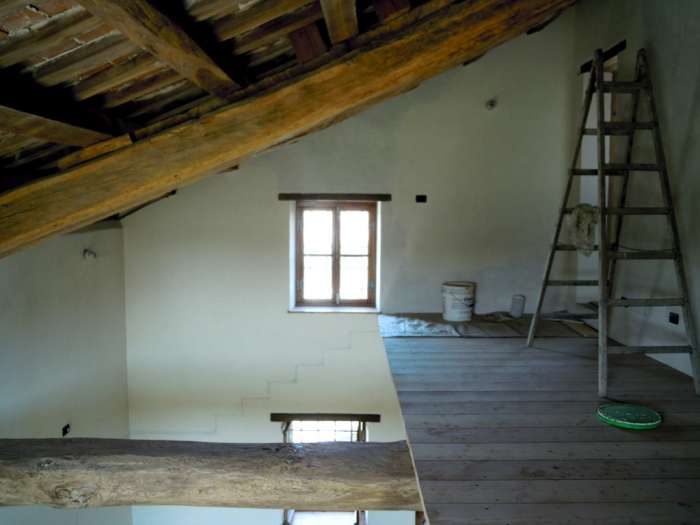
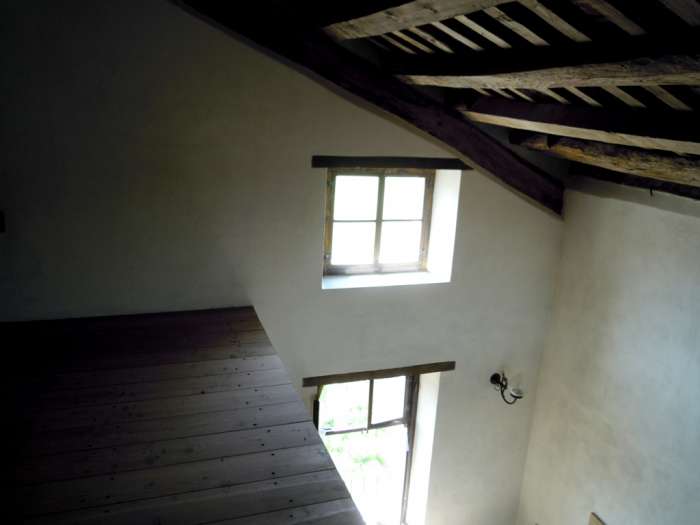
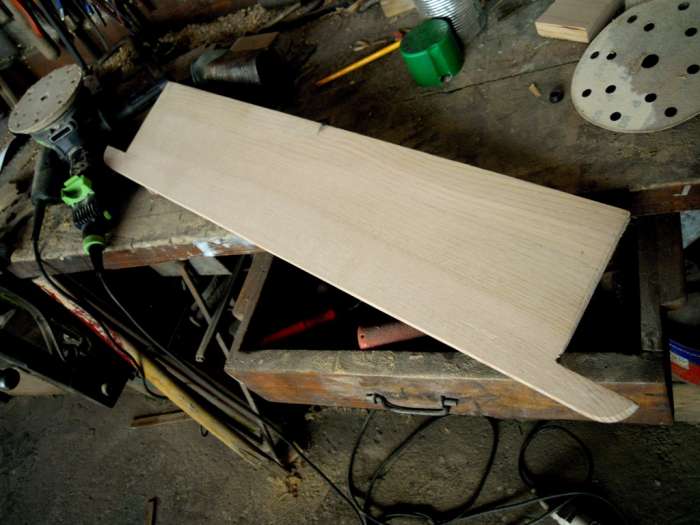
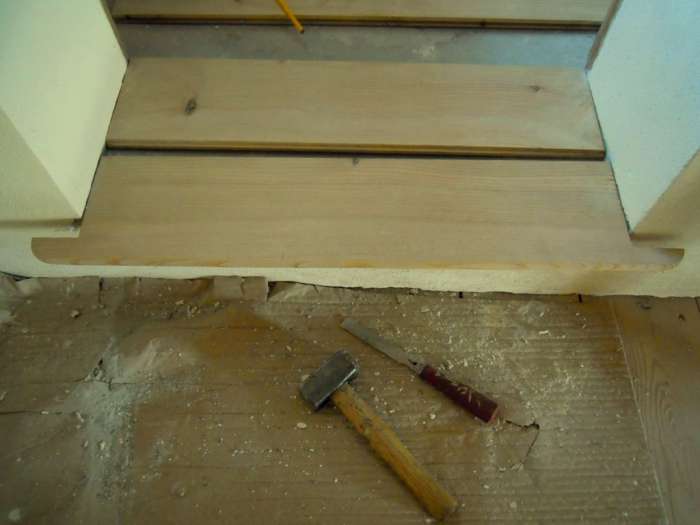
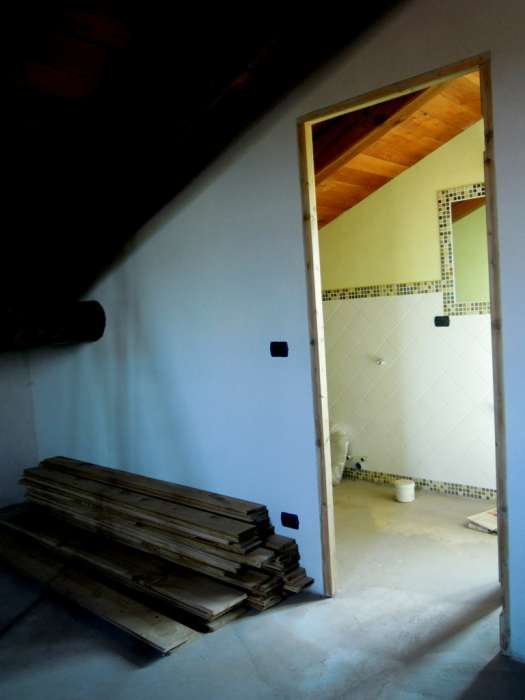
And then of course you have to choose which side to go, which of course can only be the ultimate in control and more in view, in my case the beginning of the corridor that also includes a step, a further complication. How scary .. Okay let's start, and the start will be far from easy!

normal_pav1.JPG


normal_pav10.JPG


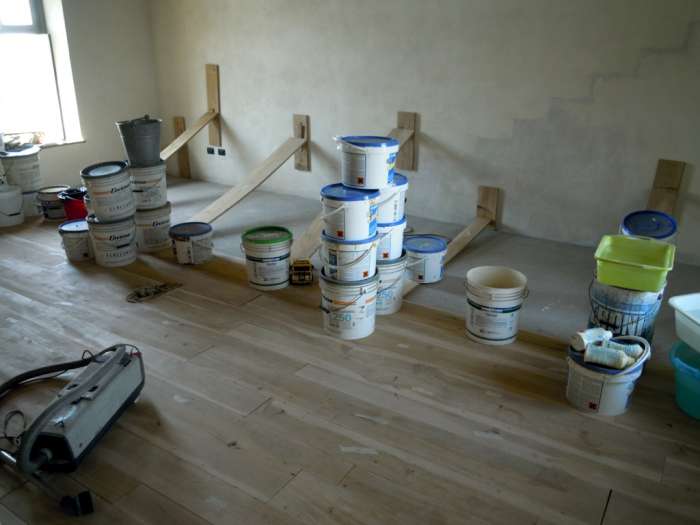
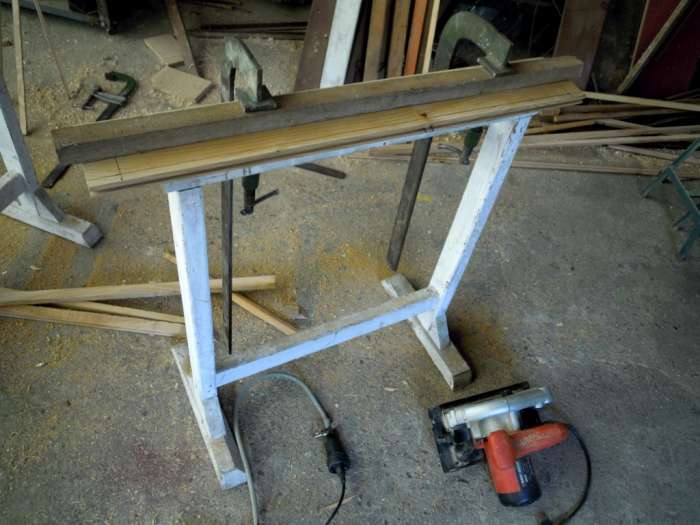
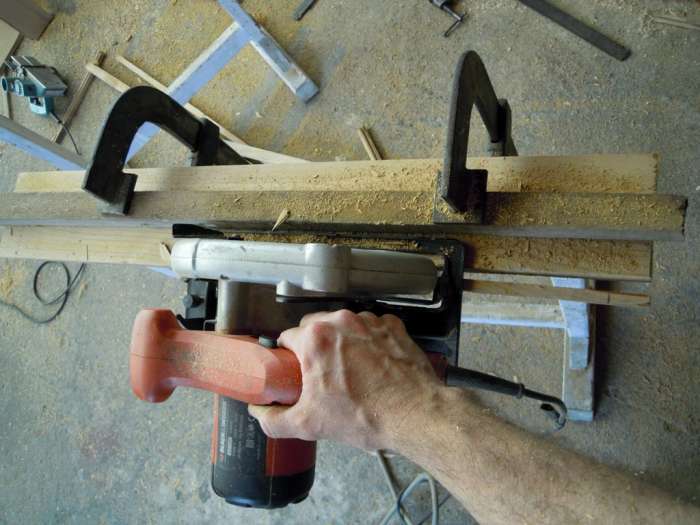
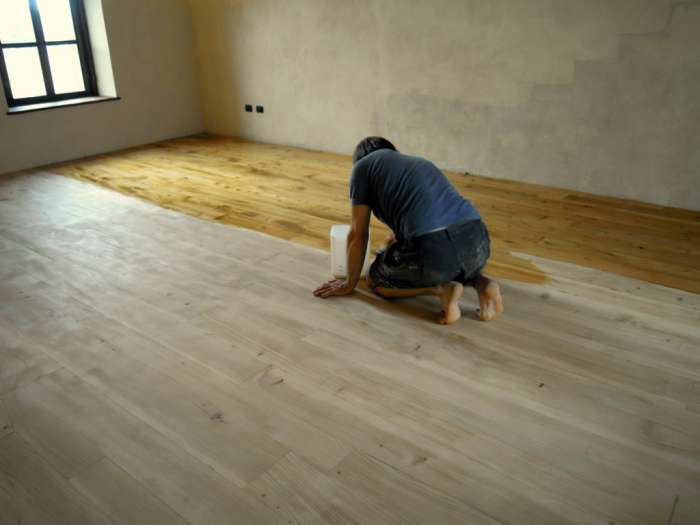
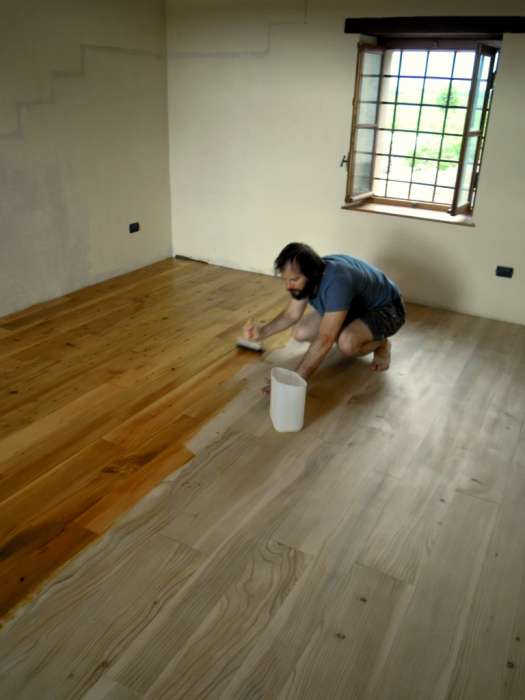
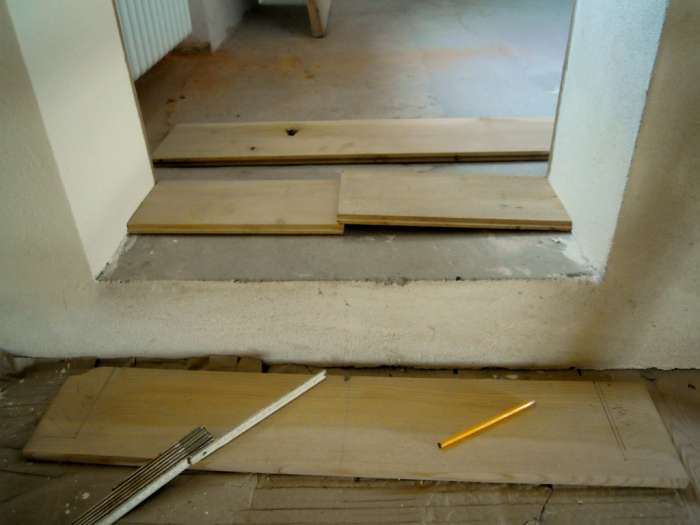
I still plan to trim the ends of tables and begin to arrange them along the corridor, from the first shaped to the required step. Then number them 1a, 1b, 1c, 2a, 2b, 2c.. before removing so as to have them ready at the disposal once the glue is cured and will start to straighten. Now I really start..

normal_pav4.JPG


normal_pav6.JPG


normal_pav5.JPG


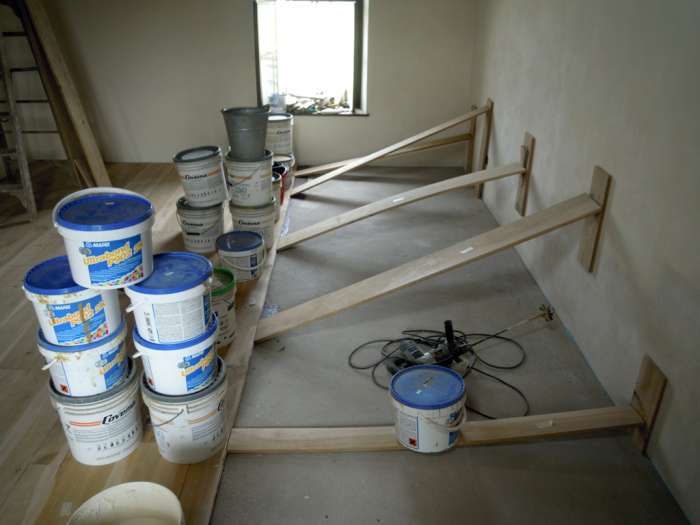
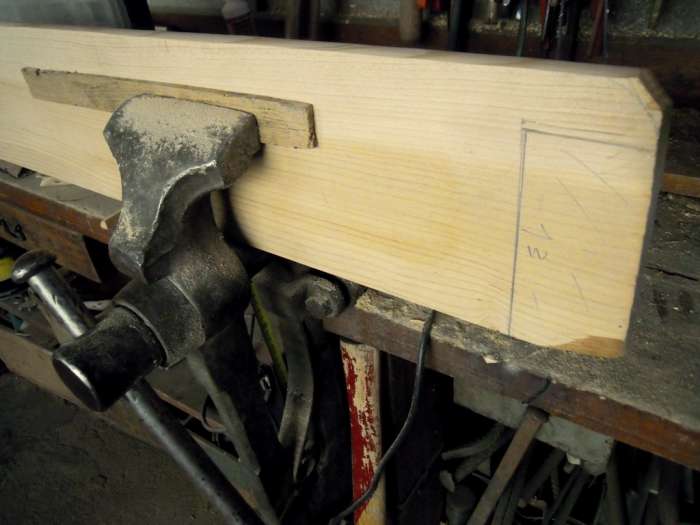
Ok started. Glue catalyzed and spread. But how to stop taking the first table while it engages the second one? And how to fit this second one !?!?! It's two meters long .. how do I let the male-female for the entire length? How to beat it without ruining it? Take it off, put it back .. I remove also the first, join them together , then put them back on the floor.. I stops them with wedges against the railing and try to get us to hand us by beating the third row of the table with a cutout .. no, not go in, take it off and try to plane a little better come because tapping, pointing and without chipping ..

normal_pav11.JPG


Ok better go.. even better if I use a tablet made of hardwood and a powerful hammer with short handle for the most stubborn..

normal_pav26a.JPG


normal_pav26.JPG


Oufff .. pant.. pant ..ok it's done, you just have to load this file first with heavy weights and leave everything there one night .. Tomorrow we will see what kind of disaster it turned out!

normal_pav8.JPG
 
OP
L

lucajack2cv

Well-known member
Joined
May 21, 2009
Messages
169
Location
Italy N/W
The result is sufficiently encouraging to continue: the bonding is strong, the imperfections of matching planks are very small and simply to close, nothing affects us to continue the work which must necessarily follow through to the bedroom, before recovering across the width of the corridor and in the same chamber. Then we complete the bathroom and the cabinet pompously called wardrobe-room. We go back to entusiastical work!

normal_pav12.JPG


normal_pav15.JPG


normal_pav16.JPG


normal_pav17.JPG


normal_pav13.JPG


normal_pav14.JPG


The completion of the floor of the room will trim the lower side of the balcony door and refine the vintage hardware (hinges, latches of the fixed and lock) operation that will be entrusted to a specialized technician..

normal_porrrrrr~2.JPG


normal_porrrrr~2.JPG


normal_porrrr~2.JPG


normal_por~2.JPG


normal_porr~2.JPG


Et voilà!

normal_porrrrrrr~1.JPG
 

bams50

Well-known member
Joined
Feb 23, 2012
Messages
2,784
Location
Central NY State
I am new to the garage forum but not new to the love of garages and old cars! Loved this thread, thanks for being here!
 
OP
L

lucajack2cv

Well-known member
Joined
May 21, 2009
Messages
169
Location
Italy N/W
Strips for the new utility room and bathroom are selected, prepared, presented and numbered, ready-to use:

normal_pav29.JPG


normal_pav30.JPG


normal_pav18.JPG


normal_pav19.JPG


normal_pav20.JPG


normal_pav21.JPG


Refined techniques of installation and approach, always slightly smoothing the joints between the planks, you gain in quality and speed and even the sleeping-room you start to completion:

normal_pav22.JPG


normal_pav24.JPG


normal_pav25.JPG


normal_pav23.JPG


And here is the final phase in which the lists need to trim or scrap them and paste using the small wedges prepared in advance, to ensure on the one hand the good aesthetic result also of the latter portion and at the same time compliance with the prescribed distance from the perimeter of masonry:

normal_pav27.JPG


normal_pav28.JPG
 
OP
L

lucajack2cv

Well-known member
Joined
May 21, 2009
Messages
169
Location
Italy N/W
Finally it remains to prepare the item that is present in view of the scale is properly trimmed a couple of lists, refine the flange side a bit '"Bombé" as the steps and ensure optimum bond strength by applying for a pai hate days and nights guaranteed by a suitable pressure wedges that contrast against the railing. A special putty "colored parquet" will finish the points of contact with the wall:

normal_pav31.JPG


normal_pav32.JPG


Waste processing is intended to supplement home heating, even burning the cedar scent the environment and free from respiratory illness of the winter season!

normal_cascam.JPG


normal_cascami.JPG
 
OP
L

lucajack2cv

Well-known member
Joined
May 21, 2009
Messages
169
Location
Italy N/W
The last performance for the last floor, the small first-floor landing, allows us to illustrate quite well the various stages of perfect installation:

normal_es1.JPG


normal_es2.JPG


normal_es3.JPG


normal_es4.JPG


.. and finally the execution of the step into the salon:

normal_bat12.JPG


I said last floor you expected? It will not be exactly like that, but avery thing at right time!
 
OP
L

lucajack2cv

Well-known member
Joined
May 21, 2009
Messages
169
Location
Italy N/W
Here are the three stages of patient 1) filling 2) "rabottatura" (I mean sanding the surface) and 3) installation / sanding / filling of the skirting board (whose function is to conceal accessory centimeter left between the floor and walls). For filling I found a two-component filler whose work and whose behavior is completely analogous to that of the body (except wood color, unfortunatly too light or too dark compared to the cedar).

For grinding, than ks the softness of the type of wood I avoid the hiring of a professional grinder allowing me to use the Festo sander. Discs from 60 to eliminate (being careful) the differences in height between a rail and the other and from 120 to homogenize and clean the surface. Other useful tools, a belt sander lent by a friend and a hobbistical B&D "finger" for the most critical points:

normal_lev4.JPG


Most useful of all, a powerful industrial vacuum cleaner manufacturing Danish sixties whose only fault lies in the power cord that is exactly nno with safety in mind ..

normal_lev3.JPG


normal_lev15.JPG


normal_lev16.JPG


normal_lev17.JPG


normal_lev18.JPG
 
OP
L

lucajack2cv

Well-known member
Joined
May 21, 2009
Messages
169
Location
Italy N/W
The vacuum cleaner is a remnant of an old firm headed by a senior plant engineer in my town, active since 1946 in the late 90's. Was included in a stock of equipment of yesteryear that I bought then including drill and bench grinder in my shop. Was a great help in smoothing the final sanding between coats of paint. But we get to painting after a brief overview on the installation of skirting and related improvements ..


normal_bat0.JPG


normal_bat1.JPG


normal_bat13.JPG


normal_bat14.JPG


normal_bat2.JPG


normal_bat4.JPG


normal_bat3.JPG


normal_bat5.JPG
 
OP
L

lucajack2cv

Well-known member
Joined
May 21, 2009
Messages
169
Location
Italy N/W
I took the opportunity to "stretch" the uprights of the door of the bathroom that are a bit 'scarce (the 40'-50' doors overlooking the corridor are a recovery and were placed with the upper beam at the same altitude, below someone is long someone too short..)

normal_lev8.JPG


normal_lev9.JPG


normal_lev13.JPG


normal_lev10.JPG


normal_lev14.JPG


Here instead the fine finishing at the railing ..

normal_bat6.JPG


normal_bat7.JPG


normal_bat8.JPG


normal_bat11.JPG


last sanding and last vacum cleaning to remove the last traces of plastering, taping of parts of the wall to be protected and you are ready for the final attack:

normal_lev2.JPG


normal_lev.JPG


normal_lev1.JPG


normal_ver1.JPG


normal_ver~1.JPG


normal_lev5.JPG


normal_ver2.JPG
 
Last edited:
OP
L

lucajack2cv

Well-known member
Joined
May 21, 2009
Messages
169
Location
Italy N/W
As I mentioned the softness of the wood has low resistance to the floor. Species in the presence of children (yes, they will be two soon! ) and taking these two steps that would use too quickly. This will affect the choice of paint, favoring a polyurethane resin catalyzed instade of more natural water finishes. It 'not a small compromise (the poetry of the cedar scent fades away even if I only hope to evaporation of the solvent), but the robustness should be strond as a bowling alley!

normal_ver3.JPG


At catalysed bottom insulation paint, followed (after two days) sanding (280 or 320 gr disc) and washing with a damp cloth and subsequent solvent polyurethane interspersed with three coats of paint polishing and cleaning of fine dust that is generated:

normal_ver4.JPG


normal_ver5.JPG


normal_ver6.JPG


normal_ver10.JPG


normal_ver11.JPG
 
OP
L

lucajack2cv

Well-known member
Joined
May 21, 2009
Messages
169
Location
Italy N/W
And here is the final result, semigloss and already usable, although someone said me the polyurethane varnish takes almost a year to reach maximum hardness. If in the meantime had scratched a little ', it should be possible to sand and put another veil without problems (This resin seems to be structural up to a big thickness, something likes 3 millimeters..)

normal_ver18.JPG


normal_ver17.JPG


normal_ver15.JPG


normal_ver12.JPG


normal_ver8.JPG


normal_ver9.JPG


En passant, the first experiments seem to guarantee good results is that of adhesion of finishing for the use of this substance in the recovery of floors of recovered concrete elements, as in these tiles intended for the floor of the ground floor:

normal_cement.JPG


normal_cementt.JPG


Also in this case, the polyurethane can be sanded and re-stretched almost indefinitely, allowing different levels of gloss finish and especially a more civil (I mean washable) of these marvelous decorative flooring that come us from the recent past.
 
OP
L

lucajack2cv

Well-known member
Joined
May 21, 2009
Messages
169
Location
Italy N/W
Finally, taking advantage of a sunny Sunday in early spring, was extracted from three years of storage room in an old-style navy which appeared in the catalog of "ameublement international" in the early Eighties. Here's the previous owner patiently removeing from the doors the pictures of musical idols of her youth ;)

normal_cam.JPG


normal_cam2.JPG


normal_cam1.JPG


Rised on the upper floors, the "emeublement" is entrusted to the cares of a dickensian young sailor polishing the brass..

normal_cam3.JPG


normal_cam5.JPG


normal_cam6.JPG


normal_cam4.JPG


normal_cam7.JPG


normal_cam8.JPG
 
OP
L

lucajack2cv

Well-known member
Joined
May 21, 2009
Messages
169
Location
Italy N/W
I spoke about remaining floors.. Something like this enormous living room!

normal_sal~0.JPG


normal_sall.JPG


.. There's a time for everything!
 

Wingnut65

Well-known member
Joined
Apr 21, 2010
Messages
3,170
Location
Tampa Bay, FL
Wow, what an enormous undertaking! Those floors look Awesome! :thumbup: And that you started from timbers that you had cut down is just amazing. This really shows what you've been up to over the past few months. It might not be actually in the 'garage' but this really shows the talent that you have for woodworking. Amazing. Congrats Luca on a beautiful floor.

And congrats on your upcoming family expansion! :thumbup: Your son will enjoy having someone to grow up with.
 
OP
L

lucajack2cv

Well-known member
Joined
May 21, 2009
Messages
169
Location
Italy N/W
Thanks Wingnut, in facts little sailor André will have probably a little sister in may :D

...It might not be actually in the 'garage' but ...

It's true, it's not really "in the garage" but home-works have absolute prority in this times, may is so close!! Garage-activities are a little frozen..

normal_giorno~0.JPG


normal_alaska.JPG


But not completely! I've great plans (and news) also on that side, now they're top-secret for several reasons but I will show you everything as soon as possible!
 
Last edited:

BevoZ06

Well-known member
Joined
Nov 30, 2011
Messages
165
Location
Austin Texas
Luca,

You continue to amaze me. Is there any limit to your skills? This thread is one of the most interesting on the forum.

Congratulations also on the baby girl due in May.
 
To avoid these ads, REGISTER NOW!

Kanticoy

Active member
Joined
Aug 19, 2011
Messages
40
Location
Moody, AL
Absolutely wonderful. I am proud of you and do not even know you less the bits and pieces on this forum. Beautiful and inspiring work. Congratulations on your new child who is on the way! Beautiful news!
 

ct71rr

Well-known member
Joined
May 19, 2009
Messages
478
Location
Massachusetts
Luca, the floors came out beautifully! I can't wait to see what you have planned for your garage. Congrats on the soon to be addition to your family!
 
OP
L

lucajack2cv

Well-known member
Joined
May 21, 2009
Messages
169
Location
Italy N/W
Hallo everybody, months has passed and here's some news from Citrogarage. New delay in garage works but several improvements in the housing situation: Here's a sleeping room now ready for receiving seafaring not one but two little sailors..

normal_arred.JPG


normal_arredd.JPG


normal_arreddddddddddddddd.JPG


Among the furnishings theme stands out a superkitch rudder-thermometer-souvenir in real-golden-plastic made -in-italy with a slice of Parisian postcard ;) The parvis of Notre Dame, in the sixties still a public parking, contains at least three 2cv, a Saviem bus, a Renault Fregate etc...

normal_arreddd.JPG


normal_arredddd.JPG


normal_arreddddd.JPG


Probably this kind of souvenir brought some aunt in the sixties, when half the family of Rosanna was living in Paris. A pretty little tray for coffee, with the inevitable "Sacre Coeur" postcard, was probably part of the series...

normal_arredddddd.JPG
 
OP
L

lucajack2cv

Well-known member
Joined
May 21, 2009
Messages
169
Location
Italy N/W
Finally the room receive a light touch of "Nautilus" style. One morning I proceed to the purchase of two copper tubes from 5 yards and four bends "only" 76 € and I walk home with a load attached diagonally on the top of my 2cv..

normal_arreddddddd.JPG


And now.. at work:

normal_arredddddddd.JPG


normal_arreddddddddddddd.JPG


I just had a pair of old brass nautic lights we call "turtles" ;)

normal_arreddddddddd.JPG


normal_arredddddddddddddd.JPG


Ahhh... Not bad, I think:

normal_arredddddddddd.JPG


Just in time.. in may André little sister Nina arrives :)


576252_3623177791813_1645036129_2927341_262919322_n.jpg


301725_3615555641264_1645036129_2924728_258921300_n.jpg


405103_3552231097549_1625806809_2815494_1742195048_n.jpg


.. just in time to take part to our annual 2CV Club meeting in June!

normal_AUTO1.JPG


normal_AUTO3.JPG


normal_salaaa.JPG


normal_asinoooo.JPG


normal_salaaaa.JPG


normal_salaa.JPG


While little man Andrè is now intertested in mechanical culture and activities of the meeting..

normal_sala.JPG


normal_salaaaaa.JPG
 
Last edited:
OP
L

lucajack2cv

Well-known member
Joined
May 21, 2009
Messages
169
Location
Italy N/W
Back home, is time to lay the boards of the living floor..

normal_sal1.JPG


normal_sal2.JPG


As usual work goes on with sessions of several days, taking advantage of a holiday period. With a can of special glue proceed approximately one meter of deck at day (the room is almost seven meters wide) then you need to load the boards bonded with all the burdens that you have available (water-filled drums, barrels of carburant, cement, anvils, truck wheels, radiators ..) as well as provide a shoring up against the opposite wall because the joints are forced as much as possible in its final position, compensating for the slight longitudinal deformation of the plates. The next day they take off weights and props and the jail continues..

normal_sal4.JPG


normal_sal3.JPG


normal_sal6.JPG


normal_sal5.JPG


It seems it took a few minutes, no t days.. However, we are closing ranks to prepare a custom shaped element retaining the usual distance of 1 cm from the wall:

normal_sal11.JPG


normal_sal12.JPG


normal_sal10.JPG


normal_sal9.JPG


Following milling, filling and priming..

normal_sal13.JPG


normal_sal14.JPG


Et voilà .. now eyes turn up to the gallery that will provides access to a room in the attic..

normal_sal16.JPG


normal_sal15.JPG


You will notice that we still lack the scale, barely visible sketched on the wall and immediately postponed. We are already "calibrated" on the floor function, best to proceed in a rush to the bedroom. Here the step of accessing elegantly rounded:

normal_cam10.JPG


normal_cam11.JPG


normal_cam12.JPG


normal_cam13.JPG


The attic room, accompanied by a small rest room tiled "Tunisian style", will also be paved with planks of cedar wood, even if combined with larch planking of the roof is likely a little effect "wooden box"...

normal_cam3~0.JPG


normal_cam4~0.JPG


normal_cam14.JPG


A portion of the floor has been laid but the boards, I drew for another project, were not enough! .. While waiting for the carpenter cuts somenews, we spend time consulting some old books in search of examples for the wooden staircase and studying the color of the room, starting with a can of enamel of yesteryear Swedish Rosantik with which we decide to paint the door ..

normal_cam1~0.JPG


normal_cam2~0.JPG


Said .. done :)

normal_cam5~0.JPG


normal_cam7~0.JPG


From an old box comes up a complete "d'antàn" lock! ;) brushed, oiled and greased..

normal_cam6~0.JPG


normal_cam8~0.JPG


normal_cam9.JPG


It's true.. Everything, little by little, finally find it's right place.
 

Thruxton

Well-known member
Joined
Dec 30, 2010
Messages
767
Location
Virginia
And everything, little by little, not only finds its right place, but seems to fit there perfectly, in every sense of the word! Thanks for sharing all this with us, including the great pictures of your family!
 

BRIANBB

Well-known member
Joined
Aug 27, 2010
Messages
394
Location
Katy Texas
Wow its looking great. I didnt think you were supposed to glue solid wood flooring down on top of concrete?
 

widerberg

Well-known member
Joined
Feb 15, 2007
Messages
245
Location
Down South
Amazing work, Luca. Your project is going far beyond just renovating the garage. It's an amazing bit of architectural restoration all around. It's a beautiful house, for sure! Well done, and I can't wait to see how it develops even further.
 

BUGTHUG

Well-known member
Joined
Nov 12, 2010
Messages
2,960
Location
Kansas
Very nice, I like the small car on top of the closet in first picture. Lots of talent, you have. Very creative, if you lived in the U.S. they would give you a tv show on HGTV.
 

Skyline

Well-known member
Joined
Nov 11, 2008
Messages
3,586
Luca,

Congratulations on the new addition to the family. The house is looking great. The floors look teriffic.

I have one suggestion for the living room. If you build the stair to the loft as sketched on the walls, you will give up as much space in the living room as you are gaining in the loft. Have you considered a circular stair? An old fashioned wrought iron stair would fit very nicely in the character of your home. Perhaps you can find an old one in distressed condition needing restoration. If not, they certainly make new models that look old. I would put it to the left of the windows with a landing leading to the loft.
 

magnusk750

Well-known member
Joined
Nov 6, 2010
Messages
501
Location
Estonia
My curiosity wakes up, how did a can of swedish Beckers färg (paint) approx 1980s, maybe 90s end up in your place?
 

bidouchon

Active member
Joined
Jul 2, 2012
Messages
33
Location
France, Burgundy
hello from a new member in France.
my daughter's name is Nina too. I can imagine that the other Garage members don't know that André is also the first name of Mister Citroen, chairman of the Citroen Company. Is it an "hommage" ?

i like 2CV, it's a very reliable car, not expensive at all, it can run with a poor gasoline, and you can go everywhere with it. like beetles it's a vented engine , so you don't need water.
a famous French people (he as a advertisement company) said he replaced oil lube with bananas when he was in the desert in Africa.
when Mr Citroen created the 2cv just before WW2, is definition of the car was:
" a car for 4 persons, under an umbrella, which can go on the countryside roads, with a dozen of eggs, and don't break them..."
 
To avoid these ads, REGISTER NOW!
Top Bottom