ConCretin
Well-known member
Looking great!


")
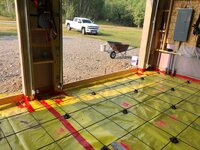
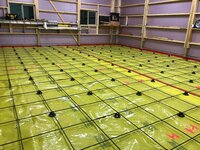
What I find interesting is my “concrete buddy”, an old friend who works doing architectural and decorative concrete, was “vocal” about my decision to use a vapor barrier and rebar chairs. “Not necessary.....just going to be in the way....”
In the end he’s doing my concrete work, so I’ve been trying to listen, learn, and maintain our friendship. He likes to ***** and moan a bit, so I expected this. He’s a bit of perfectionist too as it regards to this sort of thing, so his reaction was interesting to me
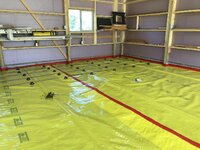
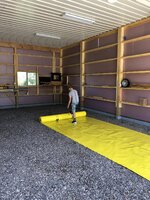
Well we live in a narrow valley with a creek on both sides, and we’re essentially in the lowlands. Our 20 acres has plenty of marshy spots, and the water “pumps up” each spring to ground level in certain spots. I built the shop on the highest ground we have, and brought in 650+ yards of 4-5” gravel to mitigate moisture concerns.
Beyond that I do want a floor coating. So, in the end I get the best vapor barrier I could find.
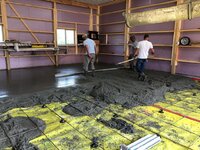
In regards to the bleed. Any tips or tricks to make sure I don’t end up with a piss poor finish. Is it just time and patience by the finishing crew?

.....and more


Nope. I decided against in floor heat this go around. Do some folks still insulate under the slab even without in floor heat? I’ll likely end up with an overhead radiant tube heater set to about 45 in the winter months.
That sounds perfect. Yes on the extra bars. I'd thicken the edge to 8" or so and install a couple bars in the bottom.


In regards to the bleed. Any tips or tricks to make sure I don’t end up with a piss poor finish. Is it just time and patience by the finishing crew?


Is Sika Polyurethane Gray acceptable to use to fill in my saw cuts? Just looking to keep those voids clean / free of debris.