To avoid these ads, REGISTER NOW!

Craftsman Drill Press

endangeredspecies

Well-known member
Joined
Apr 11, 2022
Messages
264
Location
SF Bay Area
To avoid these ads, REGISTER NOW!

BJWTech

Member
Joined
Aug 13, 2024
Messages
21
Yeah, it's pretty big. I'm not sure that it's a Craftsman motor. I can't make out anything on the badge. Is there any other info printed somewhere else?
I think I narrowed it down to the manufacturer. It seems to be made by Marathon Electric. I was looking at a Bandsaw listing, and the casing and mounts are an exact match.

Screenshot_20240822-193357.pngScreenshot_20240822-194433.png
 
Last edited:
OP
F

FrankLee

Well-known member
Joined
Sep 13, 2010
Messages
3,563
Location
seMI, 48317
I think I narrowed it down to the manufacturer. It seems to be made by Marathon Electric. I was looking at a Bandsaw listing, and the casing and mounts are an exact match.
It's quite possible. There are several features in common, but a couple differences. Perhaps a different Marathon model.
 

BJWTech

Member
Joined
Aug 13, 2024
Messages
21
It's quite possible. There are several features in common, but a couple differences. Perhaps a different Marathon model.
Ya, probably. The only differences I see are the pulley and the fact that mine has a plate for the manufacturer info and the other one is stamped on the casing directly.

Are you seeing any other differences?

Thanks!
 
OP
F

FrankLee

Well-known member
Joined
Sep 13, 2010
Messages
3,563
Location
seMI, 48317
I just got home with this 150 (DP#144), model 103.24531. This is one of the last charcoal gray King-Seeley models with the external spring tension knob; likely the tail end of '59-'63 production years.
461024920_7714478675319542_40176761887159423_n.jpg

I knew the motor was missing, but asked the seller if he still had the pulley. He said he threw the motor away. When I got there, I asked him what the problem was with the motor. He said "nothing". Sigh!

Regardless, everything else is there and the price was right. It looks like a can of red spray paint exploded up from below the head casting. I'm hoping that I can clean that off.

461190570_1044239040341183_2341390392736449143_n.jpg
 
OP
F

FrankLee

Well-known member
Joined
Sep 13, 2010
Messages
3,563
Location
seMI, 48317
Has anyone seen an Emerson badged dp? I have not until I saw this on ebay today...

s-l1600 (17).jpgs-l1600 (19).jpgs-l1600 (18).jpg

Heads Up

just spotted another rare Emerson-branded drill press; same as Emerson's Craftsman-branded commercial model. Too far for my liking, but an awesome deal for $50!

461837106_355745160862748_6677610878432972120_n.jpg 461945367_900200644821873_5017896978961431653_n.jpg 461981575_1047974166710966_7279699023503370940_n.jpg emerson.JPG
 
Last edited:
OP
F

FrankLee

Well-known member
Joined
Sep 13, 2010
Messages
3,563
Location
seMI, 48317
Model Number Badge Hack

I think most of us have had model number badges where the original black printing was in poor condition or accidentally removed.

IMG_5978.JPG

I've had many scrapped or parted-out machines and usually removed and kept all the original badges. Many of the model number badges were in great shape.

I once had a lathe that had two badges that were stuck together, stacked and installed at the factory. The badge underneath was obviously in pristine condition. That double badge triggered this idea.

I cut a window in a nice badge removing the unneeded model number and overlaid it onto a naked badge. I think it turned out really good.

IMG_5975.JPG


IMG_5976.JPG
 

y'sguy

Well-known member
Joined
May 1, 2010
Messages
1,310
Location
Tulsa, Oklahoma
That looks good!
There used to be a company here in town that produced all kinds of badges and labels such as these. They may be gone now with time, but this reminds me that I need to check it out.

OK, so I did find the companies website. It looks as though things may have sold or changed hands over the years. But in any case they still are in the same location and have tremendous capabilities for all sorts of nameplates, tags, etc. Probably NOT very cheap on a small quantiy basis I would predict.

 
Last edited:
OP
F

FrankLee

Well-known member
Joined
Sep 13, 2010
Messages
3,563
Location
seMI, 48317
Random Tidbits I've Gleaned from Craftsman Catalogs

Power Tool Benches

Angled legs - 1951-1952
IMG_6406.JPG

Waterfall legs - 1953-1954
IMG_6408.JPG

Straight legs - 1955-1968
IMG_6411.JPG


Powr-Panls & Power Paks

Long-underline "C" - 1952
1751979448942.jpeg

Decal version - 1953-1956
1751979576889.jpeg

Power Pak - 1959-1966
 
Last edited:
OP
F

FrankLee

Well-known member
Joined
Sep 13, 2010
Messages
3,563
Location
seMI, 48317
I brought this 100 home today DP#146 model number 103.23130. It has the Jacobs Safe-Lock chuck, the early zamac lock cylinders and head trim attached with drive screws. My swag is that it's a '51 model.

I knew it was missing the feed stop assembly and I figured the quill return spring tension needed adjusting. The motor seemed to run ok.

When I got it home, I discovered that the tang on the spring was broken off. I think I can bend a new one on the last half turn.

The motor is the typical model 115.6962 with a date code of A2 51. I discovered that the rotor has too much horizontal slop. I suspect a po installed incorrect new bearings and didn't use the extended race. I'll get to that soon.

The good news is that run-out is under 0.002". The milled table surface is in vgc. I bought this mainly for the motor and I'm not sure yet whether it's a quick flip, a refurb or a part-out.

Regardless of the issues, I thought it was a pretty good deal for $30.
 

Attachments

  • 462509876_1574176493178098_8609559620055293066_n.jpg
    462509876_1574176493178098_8609559620055293066_n.jpg
    147.1 KB · Views: 23
  • 462676799_1069093801374970_219116207306461134_n.jpg
    462676799_1069093801374970_219116207306461134_n.jpg
    141.8 KB · Views: 19
  • 462654442_2006743819763378_6872886186307929141_n.jpg
    462654442_2006743819763378_6872886186307929141_n.jpg
    170 KB · Views: 21
Last edited:
OP
F

FrankLee

Well-known member
Joined
Sep 13, 2010
Messages
3,563
Location
seMI, 48317
(Dammit, I reached the edit limit AGAIN!)

I prefer the fan side up when installed on a drill press, so I flipped the base and band around. When the motor is installed on a drill press, the switch is on the right side and OFF is down.
 
Last edited:

aalligood

Member
Joined
Feb 27, 2024
Messages
11
Location
GA
I just finished refurbishing my Craftsman 103.23141 drill press. It has an MSA. After installing new belts and starting it up, it’s loud. I can’t really tell where the noise is from. After running a few minutes, the belt between the quill and MSA is warm. The MSA is warm also. The belts aren’t tight.

This is my first rebuild. Any advice on where to start looking?IMG_4699.jpegIMG_4696.jpegIMG_4698.jpegIMG_4697.jpeg
 
OP
F

FrankLee

Well-known member
Joined
Sep 13, 2010
Messages
3,563
Location
seMI, 48317
I just finished refurbishing my Craftsman 103.23141 drill press. It has an MSA. After installing new belts and starting it up, it’s loud. I can’t really tell where the noise is from. After running a few minutes, the belt between the quill and MSA is warm. The MSA is warm also. The belts aren’t tight.

This is my first rebuild. Any advice on where to start looking?
Several things...

First of all, very nice job on the refurb!

Your motor pulley is a Craftsman pulley, but not an oem drill press pulley. It will and does work, but what size is each step? Is it 2,3,4,5" ?

I noticed that the motor mount is very close to the head frame. The AX25 (27") belt is in the correct location, but the MSA looks to be closest to the spindle pulley. What size is the front belt?


The way your belts are set-up is wicked fast for the spindle; somewhere around 7800 rpm. Higher speeds will amplify noise and vibration. I keep my belts set for the slowest speed; top step on motor and bottom step on spindle pulley.

Did you tighten the column set screw in the MSA? If that set screw is loose, the MSA will rattle. But don't tighten it too hard.
 
Last edited:
To avoid these ads, REGISTER NOW!

aalligood

Member
Joined
Feb 27, 2024
Messages
11
Location
GA
@aalligood,

One more observation...

Your feed stop bracket is not fully seated onto the quill.

Check this post and a few posts following. Then, watch Jeff's video in one of those posts.
Several things...

First of all, very nice job on the refurb!

Your motor pulley is a Craftsman pulley, but not an oem drill press pulley. It will and does work, but what size is each step? Is it 2,3,4,5" ?

I noticed that the motor mount is very close to the head frame. The AX25 (27") belt is in the correct location, but the MSA looks to be closest to the spindle pulley. What size is the front belt?


The way your belts are set-up is wicked fast for the spindle; somewhere around 7800 rpm. Higher speeds will amplify noise and vibration. I keep my belts set for the slowest speed; top step on motor and bottom step on spindle pulley.

Did you tighten the column set screw in the MSA? If that set screw is loose, the MSA will rattle. But don't tighten it too hard.
To be honest, I was just so glad to be done with restoration, I slapped some belts on with out much thought.

The front belt is an AX27 and the back is an AX25. The motor pulley, measuring from the inside groove is 1”, 2”,3” & 4”.

I moved the motor belt to the top and the quill belt to next to the bottom. My MSA pulley rides really low. I tighten the MSA, ran it again and it’s much quieter.

I ran it with just the motor belt and I believe the noise is from the MSA. I rebuilt it with NSK bearings but I may not have it exactly right.IMG_4701.jpeg
 
OP
F

FrankLee

Well-known member
Joined
Sep 13, 2010
Messages
3,563
Location
seMI, 48317
To be honest, I was just so glad to be done with restoration, I slapped some belts on with out much thought. The front belt is an AX27 and the back is an AX25.
Belts are correct.
The motor pulley, measuring from the inside groove is 1”, 2”,3” & 4”.
Pulleys are measured from the od of each sheave. So yours is likely 2,3,4,5". The smallest step on the oem drill press pulley is closer to 1-3/4" od. That's what is likely causing your motor mount to be pulled closer to the head frame.

I moved the motor belt to the top and the quill belt to next to the bottom.
You'll like that better, imo.

My MSA pulley rides really low.
I had the same issue. Check the last two pages in the link below to see why and how I addressed it.

I tighten the MSA, ran it again and it’s much quieter.

I ran it with just the motor belt and I believe the noise is from the MSA. I rebuilt it with NSK bearings but I may not have it exactly right.
There's really not much to it. Bearings are 6204 with 20mm bore.
 
Last edited:
OP
F

FrankLee

Well-known member
Joined
Sep 13, 2010
Messages
3,563
Location
seMI, 48317
WTF?

This is not a mirror image, but an ultra-rare left-handed Dunlap 12-1/4" drill press. LoL!

I've seen many custom DP modifications. This was not terrible idea, but it is one of the most unusual. The oem spring would not work correctly. This was the only photo from a CL or FBMP ad I saw a couple years ago. I would have liked to see a picture of the other side too.

307001687_8350772178329847_7692635912389760800_n4.jpg
 
Last edited:
OP
F

FrankLee

Well-known member
Joined
Sep 13, 2010
Messages
3,563
Location
seMI, 48317
I did some experimenting with a 100 casting, and yes, the feed handle assembly will work on the left side of the head casting.
However, the oem spring will not work. A spring with a left-hand wind is required for automatic feed return. In addition, an anchor for the spring must also be fabricated.

IMG_6455.JPG

 
OP
F

FrankLee

Well-known member
Joined
Sep 13, 2010
Messages
3,563
Location
seMI, 48317
Heads Up

Damn. A '56 100 with the rare belt cover and lots of extras. Marshall, MI. $200.

467290953_865108512455506_2604489133127572738_n.jpg
 
OP
F

FrankLee

Well-known member
Joined
Sep 13, 2010
Messages
3,563
Location
seMI, 48317
How much play is acceptable between the quill and the main casting? I'm measuring .0045" front to back and .0035" side to side/
That seems like a lot, but I've never measured. How are you measuring?


11/22/2024

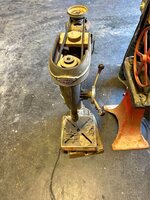
I saw this photo in an estate sale ad. I saw that the left guard was broken off and went to check it out. It's a great parts machine if the price is right.
ba00c09a-9f74-46ca-98a3-d4a44300c8f0.jpg
It was marked $30, but was day 2 of the sale and I snagged it for $20. This is a model 115.7575 (#4). I did find the broken left-side guard with a good left cover and discovered that the Vimco lamp shade was fubar.

I walked around some more and found the grinder pedestal stand. Ah... it's a no-brainer that the grinder broke when it fell over on the stand. It was very obvious that it was a long time since the grinder was on that stand. The stand came home with me too.

This will likely be a parts machine soon.

More pics after I got them home. It runs good and the rotor/arbor shaft is straight.
IMG_6487.JPG IMG_6498.JPG IMG_6491.JPG
IMG_6494.JPG IMG_6488.JPG

IMG_6489.JPG IMG_6499.JPGIMG_6490.JPG


11/23/2024

I bought another 115.7575 (#5) today. This one has a couple issues, but with parts from yesterday's buy, I'll have a very nice refurb.

464370972_1628185291440988_4351376077163600243_n.jpg


Removing grinder flange nuts

By far, the easiest, cheapest and safest way to remove grinder flange nuts is to use a jam nut on the right side.
  • use a wrench on each arbor nut
  • remove the right side nut first
  • remove the outer flange and stone
  • thread the jam nut and the original nut back onto the right side arbor and tighten them against each other
  • use wrenches on the right side outer jam nut and on the left side nut
  • remove the left side nut
  • remove the left outer flange and stone
  • loosen and remove the jam nuts from the right side arbor
 
Last edited:

frugalguido

Active member
Joined
Oct 14, 2007
Messages
36
Location
Northern Nevada
Dial indicator mounted to the main casting, pushing the quill to in one direction then to the other direction. This is with the quill totally inserted with about a 1/4" sticking out from the casting for the indicator to measure off of.
 
OP
F

FrankLee

Well-known member
Joined
Sep 13, 2010
Messages
3,563
Location
seMI, 48317
It's been a very long time since I had any Craftsman power tool pedestals. I've never really been a fan of them at all, but I'll pick them up to flip if they're cheap.

I bought this grinder stand yesterday and noticed that the column wall seemed unusually thick. Is 0.209" standard?

IMG_6491.JPG IMG_6492_80.jpg
IMG_6503.JPG IMG_6502.JPG

IMG_6506.JPG IMG_6507.JPG
 
Last edited:
OP
F

FrankLee

Well-known member
Joined
Sep 13, 2010
Messages
3,563
Location
seMI, 48317
It's been a very long time since I had any Craftsman power tool pedestals. I've never really been a fan of them at all, but I'll pick them up to flip if they're cheap.

I bought this grinder stand yesterday and noticed that the column wall seemed unusually thick. Is 0.209" standard?

IMG_6491.JPG IMG_6492_80.jpg
IMG_6503.JPG IMG_6502.JPG

IMG_6506.JPG IMG_6507.JPG
So this morning, I did a bit of research regarding the grinder pedestals and answered my own question.

The bench grinder pedestal stand was first shown in the 1954 catalog. They were available until at least 1982-83. It was not shown or mentioned in the '70 or '71 catalogs, but it did reappear in the '72/'73 catalog.

The shipping weights in the '54 to '56 catalogs were 43 pounds. The shipping weights from '57 to '83 fluctuated between 31 and 34 pounds.

I think it's safe to deduce that the wall thickness of the pedestal column was reduced in the 1957 model year. The fluctuation in weights between '57 and '83 may be attributed to shipping and packing materials.

It's also probable that other power tool pedestals had the same change.
 
Last edited:

y'sguy

Well-known member
Joined
May 1, 2010
Messages
1,310
Location
Tulsa, Oklahoma
I ditched my previous lighting and converted to an internal light setup. Thanks to FrankLee, I've wanted to do this for a long time and finally had some spare time for it.

I also welded up a bracket for the column mount pulley-setup and used about a 12" section of 2" exhaust pipe, and filled it with lead. Cabled it to the table for a much easier way to raise and lower. It was nearly impossible to budge before this. Both the light and lift assist work smooth as butter now.

Thanks again for the tips!
IMG_2623.JPGIMG_2622.JPG
 

BSWS

Well-known member
Joined
Jun 2, 2019
Messages
354
Location
Tucson AZ
I ditched my previous lighting and converted to an internal light setup. Thanks to FrankLee, I've wanted to do this for a long time and finally had some spare time for it.

I also welded up a bracket for the column mount pulley-setup and used about a 12" section of 2" exhaust pipe, and filled it with lead. Cabled it to the table for a much easier way to raise and lower. It was nearly impossible to budge before this. Both the light and lift assist work smooth as butter now.

Thanks again for the tips!
IMG_2623.JPGIMG_2622.JPG

I was seriously thinking about exhaust pipe too but I was in the steel mill area of NW Indiana this summer and found a piece of 2" round bar that worked great.
 

y'sguy

Well-known member
Joined
May 1, 2010
Messages
1,310
Location
Tulsa, Oklahoma
It is remarkable to me that the 2" pipe x 12"-14" filled with solid lead Juussst gets the job done. I know I should have weighed it. But it has to be around 20-22 pounds. I was relieved that it did work, as I didn't feel good about what a good weight would be. I'm no rocket surgeon.
 
OP
F

FrankLee

Well-known member
Joined
Sep 13, 2010
Messages
3,563
Location
seMI, 48317
Powr-Kraft Motor 84 DP 4551

A few weeks ago, I picked up this small Craftsman power tool bench with a Powr-Kraft motor. The seller said that, at times, the motor would not start and would need a spin by hand to get it going. This is a classic symptom of a bad capacitor. For $20 for the pair, it was well worth the risk.

The motor is 1/2 hp, 1725 rpm with an oem forward/reverse switch. The date code is "J 48"; September, 1948. The long spin-down time dictated that the bearings were very dry.

464528960_787485733443041_3389153060071507179_n.jpg 464590101_1081210710297505_8927180127300040096_n.jpg

I cleaned the bench and flipped it for $30, so I was already ahead. My attention now turned to the motor.


The fan-side end cap came off with no problem.
IMG_6201.JPG IMG_6211.JPG IMG_6212.JPG IMG_6213.JPG IMG_6214.JPG
 
To avoid these ads, REGISTER NOW!
Top Bottom