To avoid these ads, REGISTER NOW!

Craftsman Drill Press

Hoorn

Well-known member
Joined
May 19, 2020
Messages
1,140
Location
Glendora, CA
@Outlawmws I'll let Frank speak for himself, I know he's had a couple vari-slo's as I have had, both solid bar and I-beam type models. The kindest word I can come up with for the vari-slo is finicky. Others may have better experiences, but the MSA is so much more practical and low maintenance. I found the VS maddening.
 
To avoid these ads, REGISTER NOW!

Outlawmws

Well-known member
Joined
Aug 9, 2011
Messages
39,110
Location
The Badlands
I wasn't criticizing, Just commenting.

Personally I'm sold on Treadmill motors. Infinite speeds, and with the right controller, constant speed even under load. I haven't, changed a belt position in years.
 
OP
F

FrankLee

Well-known member
Joined
Sep 13, 2010
Messages
3,548
Location
seMI, 48317
Thread Lockers and Retaining Compounds

I am a big fan of using thread lockers and retaining compounds when reassembling these drill presses.
 
Last edited:

11b30b4

Well-known member
Joined
Jul 16, 2020
Messages
1,028
Location
GA
Frank I always assumed the fibre washer for the pinion lock screw was used to gap the dog point so it did not bottom out in the groove on the pinion. I never considered that it was used to lock the screw in place or possibly for both purposes. I forgot to mention this after your previous writeup about the The Pinion Shaft Retaining Screw and our discussion about the pinion tooth deformation. good writeup about the thread locker. You saved my bacon on my first 100 when the spindle pulley assembly bearings were loose. That LOCTITE 680 High Strength Bearing Mount stuff works great.
 
OP
F

FrankLee

Well-known member
Joined
Sep 13, 2010
Messages
3,548
Location
seMI, 48317
Frank I always assumed the fibre washer for the pinion lock screw was used to gap the dog point so it did not bottom out in the groove on the pinion. I never considered that it was used to lock the screw in place or possibly for both purposes. I forgot to mention this after your previous writeup about the The Pinion Shaft Retaining Screw and our discussion about the pinion tooth deformation.
Yeah, it could very well have been used for both purposes.
 
Last edited:

11b30b4

Well-known member
Joined
Jul 16, 2020
Messages
1,028
Location
GA
So I did a search for how to replace the bearings on an MSA and (no surprise) this thread had the majority of comments. Page 123 had an interesting exchange so I thought I would answer a question that came up and at the same time “shamelessly” plug my newest acquisition.

By completely happen stance I was scrolling through Craftsman Drill Press items on ebay when I found this listing. Holy ****! A complete MSA with the box and paperwork selling for $20.00.

full


I immediately clicked the buy it now and this image was taken after I completed the purchase. With a $13.75 shipping cost I snagged this MSA for $33.75. On average I see MSAs going for $200-$500. Down here in the South I have never seen them for sale alone. In fact I have only seen them for sale twice and both times they were installed on drill presses where the seller was selling the DP for about $500.

Anyway, the MSA arrived and I decided to disassembly and clean it and install new bearings on it. The original Norma 204PP bearings were in good shape but I wanted to clean up the shaft so I pulled it all apart.

Someone on page 123 asked if the bearings could be replaced on an OEM MSA.

Back and forth in the discussion I believe Frank recommended pushing the bearings off rather than pulling them off. I found a piece of steel pipe that fit over the shaft and rested on the inner race. Placed the pipe and shaft in my Reed vise and pushed the bearings off.

There are no markings on the shaft or steps for the bearings to rest. There is nothing between the two bearings. They are simply pushed up against each other. I did find this interesting (talking about paired bearings) in a technical document from Nachi.

full


In case anyone is interested in replacing the bearings, on my MSA the distance from the bottom of the shaft to the bottom of the bottom bearing was 2 and 3/16”. This is important because there are no reference markings on the shaft and nothing to tell you where the bearings should be. Also, as Hoorn has pointed out, one of the issues he has seen has been where the pulley bottom sheave rides on the cast iron. This is most often caused by the set screw that locks the shaft in place is either not located in the groove or it backs out enough for the shaft to drop. However, If someone has removed the bearings, it would be possible to install them too low and have a similar result. I replaced the bearings with a 2-pack Timken 6204-2Z (made in Japan) set of bearings. They are 20mmx47mmx14mm. I will keep the Norma bearings in case I ever decide to part with the MSA and want to restore it to OEM. I was going to paint the cast iron but decided to leave it alone and coat with a light coat of oil. I did polish the pulley and the shaft. Here are the final pics.

full


full


I really did not have a “need” for this MSA. I have been running JZiggy’s Slow Speed Pulleys on my 100 and my 150 but the deal was too good to pass up.

Anyway, I hope this helps anyone looking to replace the bearings on a MSA.
 
Last edited:
OP
F

FrankLee

Well-known member
Joined
Sep 13, 2010
Messages
3,548
Location
seMI, 48317
Here's an interesting(?) modification I discovered on the 2-knob feed handle rod on DP#128, a 13-1/2" Craftsman 80.

I presume the previous owner ground a bevel on the shaft to make it easier to insert the handle into the pinion shaft.

IMG_1123 cropped.JPG
 
Last edited:

gleman

Well-known member
Joined
Jun 24, 2019
Messages
2,976
Location
Michigan And Florida too!
Jeff, You **** for that $20 MSA!

I had a question about Head locks. I was putting the head back on my DP and noticed one side sticks out farther then the other. Frank spotted that when I posted a picture in the garage sale thread a few years ago. I figured it was misaligned and didn't think much of it.

Today I stuck the head back on!


IMG20230927121033.jpg

IMG20230927121041.jpg


IMG20230927113106.jpg

Do I have mismatched locks?
 
OP
F

FrankLee

Well-known member
Joined
Sep 13, 2010
Messages
3,548
Location
seMI, 48317
Jeff, You **** for that $20 MSA!

I had a question about Head locks. I was putting the head back on my DP and noticed one side sticks out farther then the other. Frank spotted that when I posted a picture in the garage sale thread a few years ago. I figured it was misaligned and didn't think much of it.

Today I stuck the head back on!

Do I have mismatched locks?
I've never noticed a difference like that before, but it doesn't mean they're mis-matched.

Look down inside the head at the locks. If both bevels are contacting the column, you're GTG. If not, rotate the cylinder until it does.
 
Last edited:

11b30b4

Well-known member
Joined
Jul 16, 2020
Messages
1,028
Location
GA
Thanks all you for telling me how much I ****. It was a once in a lifetime deal and I feel very lucky to have snagged it up. Also, I am working on an upcoming video series on the Vari-slow. Complete breakdown, assembly, installation, and operation. Another GJ member sent me his near perfect condition Vari-slow to do some videos on it since there really is not anything on YT about them.

FrankLee, glad to see your increased presence here on GJ. I hope all is well.
Jeff
 

RHJO51

Well-known member
Joined
Feb 27, 2015
Messages
242
Location
Red Hook, NY 12571
Hi All, I recently picked up a Craftsman 100 series drill press because it had a Vari-Slo but also the table lift. Full disclosure, the ower told me one of the gears in the lift gearbox and he wasn"t kidding. Regardless they are difficult to find around here so I bought it knowing I'd need to repair it. I know there are some threads on these repairs but was wondering if there are any new methods being used. Since the remaing gear is the pot metal gear, has anyone CAD 3D printing to make replacement gears? Or are steel replacemnt gears the only option? I'm not a welder... Thanks for your help. - Jim
 

Attachments

  • IMG_4799.JPG
    IMG_4799.JPG
    541.6 KB · Views: 35
  • IMG_4800.JPG
    IMG_4800.JPG
    553.8 KB · Views: 34
  • IMG_4801.JPG
    IMG_4801.JPG
    670.5 KB · Views: 65

11b30b4

Well-known member
Joined
Jul 16, 2020
Messages
1,028
Location
GA
RHJ051, was this drill press for sale in NJ? If so, you beat one of my subscribers to it. Congratulations on the accusation. As for the gear, Hoorn did a complete gear replacement with one of his lifts several years ago. This is the thread:


RHJO51

Well-known member
Joined
Feb 27, 2015
Messages
242
Location
Red Hook, NY 12571
Yep, I got this in NJ a few days ago. The DP itself is in OK condition and the Vari-Slo is very good. Other than the broken gear the lift is nice too. I did see Horns write up and will reach out to him directly with my many questions. Thanks for reaching out. - Jim
 
OP
F

FrankLee

Well-known member
Joined
Sep 13, 2010
Messages
3,548
Location
seMI, 48317
This morning, I discovered an outstanding paint color match for the mid '40s to late '50s King-Seeley and Packard Electric Craftsman gray.

Krylon #2937 Matte Dark Pearl and is the closest off-the-shelf match I've ever come across. I have a Head and Table Lift that will get this color.

IMG_2236.JPGIMG_3012.JPG

IMG_3021.JPG IMG_4477.JPG IMG_4977.JPG

IMG_5278.JPG IMG_5654.JPG

IMG_3293.JPG IMG_2327b.JPG

Table saw motor mount. Left side is sprayed with Krylon MDP
IMG_6772.JPG


Also, I recently learned that if sprayed too heavy or re-coated too soon, the Matte Dark Pearl will be too glossy. The can says to re-coat within 6 hours or after 24 hours.

I sprayed these a week ago... primer and three coats each about an hour apart.
IMG_6762.JPG

I re-sprayed them lightly this morning.
IMG_6767.JPG

IMG_6820.JPG


1/6/2024

This morning, I finished (almost) assembling the 115.7575 grinder...

IMG_0141_80.JPG

and a 115.6962 motor.
IMG_0138.JPG


IMG_0493.JPG Powr-Panl #2a.jpg


full
full


full
full
 
Last edited:
OP
F

FrankLee

Well-known member
Joined
Sep 13, 2010
Messages
3,548
Location
seMI, 48317
The Head & Table Lift #8 from DP#133 is complete.

Modifications to this H&TL:
  • repainted with Krylon #2937 Matte Dark Pearl over Rustoleum Rusty Metal primer
  • steel lock cylinders replaced the zamac lock cylinders
  • 4-40 machine screws replaced the panel screws securing the patent badge
  • socket set screws replaced the slotted set screws
  • roll pin replaced the taper pin on the crank handle
  • thrust bearing moved to outside of gear housing
IMG_2327b.JPG
 
Last edited:
To avoid these ads, REGISTER NOW!

blakeab

New member
Joined
Oct 24, 2023
Messages
3
Hi everyone! New user here. Thanks to FrankLee I got some information about a drill press that belonged to my mother's late uncle that we have in our garage since we built the house 31 years ago. It's 13-1/2" mid-size model made in March 1949.

I'm in the Chicagoland area and am debating about what price to sell it for. It still works and has the original paint. Any ideas/thoughts?
 

Attachments

  • IMG-3857.JPG
    IMG-3857.JPG
    576.1 KB · Views: 41
  • IMG-3856.JPG
    IMG-3856.JPG
    1.1 MB · Views: 36
  • IMG-3855.JPG
    IMG-3855.JPG
    672.7 KB · Views: 34
  • IMG-3859.JPG
    IMG-3859.JPG
    719.4 KB · Views: 37
  • IMG-3858.JPG
    IMG-3858.JPG
    679.7 KB · Views: 34

shibertus

Well-known member
Joined
Nov 13, 2018
Messages
275
After reading through a couple threads on here and that other machine site, I believe there is a misconception regarding the spindle thrust nut vs. the chuck safety collar.
@FrankLee My Atlas 1060 drill press has a thrust nut. The parts diagram shows the thrust nut, a chuck without safety collar, and a set of wedges to remove the chuck. Do you know if I can I use a chuck with safety collar on this setup?
 

Attachments

  • Parts.jpg
    Parts.jpg
    90.8 KB · Views: 31
  • DSC_6943.jpg
    DSC_6943.jpg
    206.6 KB · Views: 31
OP
F

FrankLee

Well-known member
Joined
Sep 13, 2010
Messages
3,548
Location
seMI, 48317
Coincidentally, last Friday (10/13/2023), I picked up one of these 12-1/4" machines, model 103.23621.

View attachment 1974134
I started tearing down this dp this morning.

I created this photo album to document my process and progress.
https://www.amazon.com/photos/share...g.js-6ancPAAQY1iwuwU-t3G?tag=atomicindus08-20

103.23620, 103.23621, 103.23622. 103.23100
I finished the Dunlap this morning and think it turned out very ok. There are 752 photos, and counting, of the refurb in the link in the quote above.
 
Last edited:
OP
F

FrankLee

Well-known member
Joined
Sep 13, 2010
Messages
3,548
Location
seMI, 48317
Quite a while back, I discovered and posted that the spring/pinion/feed-handle assemblies are interchangeable between the 12¼", 13½", and 15½" drill presses.

Because my pictures went fubar and I currently have all three machines, here are some new photos of all three assemblies installed in a 12¼" head casting. That separate collar in the last photo is a standard hardware item from Amazon and was used on the 80 and 100 assemblies in the second and third photos.

IMG_3321.JPG IMG_3322.JPG IMG_3323.JPG IMG_3325.JPG
 
Last edited:
OP
F

FrankLee

Well-known member
Joined
Sep 13, 2010
Messages
3,548
Location
seMI, 48317
I finished the Dunlap this morning and think it turned out very ok. There are 752 photos, and counting, of the refurb in the link in the quote above.
I was very pleased with how this drill press DP#137 cleaned up, but there were two things that bothered me.

386613889_10084441031597889_7840343370072376200_n.jpg 387321827_6664639510291176_6593892745153783840_n2.jpg

00F0F_lFOPVWE6Dcs_0t20CI_1200x900.jpg

First was the feed return. It would stick and be sluggish half-way up. I finally determined that the spring was pressing the pinion shaft against the pinion retaining screw. There was enough spring tension to return the quill half-way up, but then stop due to the pressure of the pinion against the dog point of the retaining screw.

I've had several severely worn retaining screws across all three sizes of these early Craftsman drill presses. So, a similar fix may apply to the larger machines.

IMG_2473.JPG


When tensioning the spring CCW, the spring increases in length by the diameter of the spring wire for each full rotation of the tension knob. That is generally two revolutions of the tension knob for a properly tensioned spring. In addition, during quill feed, another one to two revolutions are added. That will increase the length of the spring by at least 1/4".

There are probably six versions of tension knob. Most of the time on any machine with the version of knob pictured, the tangs on the end of the springs make indentations on the prongs. Once spring tension is started, the tang stays put in the indentation. This forces the spring away from the knob toward the pinion retaining screw on every revolution of the knob. This is what was causing my issue.
IMG_3364.JPG

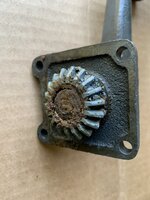
On the 12-1/4" drill press, the spring is secured to the pinion shaft with a 3/16" roll pin.
IMG_2893.JPG

The loop of the spring is much larger than the roll pin. I believe that, at rest, the loop is centered over the roll pin; below left. Ideally, the spring should be against the roll pin to move as far left as possible in the prongs of the knob.
spring & roll pin.jpg


How I addressed this...

The fix was actually quite simple. The roll pin also acts as an anchor for the rod tension parts.
The photo below left is how I initially assembled the parts. The circumference of the rod spring was pressing on the roll pin.
The photo below right is how I rearranged the parts so the rod spring is pressing against the washer and the washer is now pressing on the return spring loop. This pushes the return spring to the left further into the knob prongs. You can see new smaller indentations to the left of the original indentations on the prongs in the photo above.

This was enough to correct the sluggish quill return.

rod tension assembly.jpg

Note: I replaced the original rod tension spring with a shorter, but firmer spring. The washers act as spacers to make up the difference in spring length.
 
Last edited:
OP
F

FrankLee

Well-known member
Joined
Sep 13, 2010
Messages
3,548
Location
seMI, 48317
The second issue was the quill stop after feed return and is specific to the 12¼" drill press.

The photo below shows the correctly assembled parts at the top of the quill. After the quill is installed on the spindle, there's a fiber washer, a collar with set screw, a rubber washer and another fiber washer.
IMG_3219.JPG

During quill return, that assembly is designed to bump up against the bottom of the spindle pulley drive sleeve. If you're familiar with the larger Craftsman 80 and Craftsman 100, you know this is not good for the spindle pulley retaining screws. Likewise, I don't believe this is good for the spindle pulley bushing on the 12-1/4" drill presses.
IMG_3334.JPG

Earlier this year, member @ShadowRuleZ posted about his 12¼" dp. The bushing on his machine was moving in the head casting. It should be a press fit and not move. I believe the repetitive bumping up in the bushing caused his problem. It's also probable that an over-tensioned spring compounded the issue.
shadowrulez bushing.jpeg


My solution to this was to add a 1¼" id collar with cone-point set screw and an o-ring bumper to the bottom of the quill. I drilled a shallow divot near the bottom of the quill and installed the parts. This is very similar to the larger machines with the feed stop bracket and, IMO, works much better than OE design.
IMG_3352.JPG IMG_3356.JPG IMG_3360.JPG

IMG_3370.JPG IMG_3365.JPG IMG_3369.JPG
 
Last edited:

11b30b4

Well-known member
Joined
Jul 16, 2020
Messages
1,028
Location
GA
Frank, outstanding diagnosis of the issues and how you went about fixing them. As always, you are a marvel with these machines.
 

Bacon!

Well-known member
Joined
Jul 16, 2016
Messages
402
Hate to ****-in with a less than classic CM drill press, but I've been having a time trying to figure out a replacement chuck key. The original key had the safety eject pin so a hollow tube for that, and over time that made it weak and it has failed, bent and cracked.

I looked around, searched around the forum and maybe missed it, but can't seem to find a decent quality replacement, esp. one that is solid, no safety pin. The thing about it is, no markings on chuck and the key has 12 teeth instead of the more common 11 or less.

Anyone have a lead on something compatible? Thanks!


CM Chuck Key.png
 
OP
F

FrankLee

Well-known member
Joined
Sep 13, 2010
Messages
3,548
Location
seMI, 48317
Hate to ****-in with a less than classic CM drill press, but I've been having a time trying to figure out a replacement chuck key. The original key had the safety eject pin so a hollow tube for that, and over time that made it weak and it has failed, bent and cracked.

I looked around, searched around the forum and maybe missed it, but can't seem to find a decent quality replacement, esp. one that is solid, no safety pin. The thing about it is, no markings on chuck and the key has 12 teeth instead of the more common 11 or less.

Anyone have a lead on something compatible? Thanks!
Not sure if I can help much, but have you tried a key with 11 teeth? Jacobs doesn't offer a key with a 1/4" pilot and 12 teeth. That's the only quality brand I'm aware of... Ridgid Supreme maybe?
 

endangeredspecies

Well-known member
Joined
Apr 11, 2022
Messages
264
Location
SF Bay Area
Hate to ****-in with a less than classic CM drill press, but I've been having a time trying to figure out a replacement chuck key. The original key had the safety eject pin so a hollow tube for that, and over time that made it weak and it has failed, bent and cracked.

I looked around, searched around the forum and maybe missed it, but can't seem to find a decent quality replacement, esp. one that is solid, no safety pin. The thing about it is, no markings on chuck and the key has 12 teeth instead of the more common 11 or less.

Anyone have a lead on something compatible? Thanks!


CM Chuck Key.png
I don't have your press, and don't want to lead you down the wrong path. But the 12-tooth ones I see on the "river" site are metric - 13mm chuck, with 6mm pilot. Is it possible that's the standard Craftsman was using in 2005? May be worth looking into?
 
To avoid these ads, REGISTER NOW!
Top Bottom