To avoid these ads, REGISTER NOW!

Above 1200 Sq/FT Craig's Colorado Car Condo

Wokspaces above 1200 squarefeet.

78SC4X4

Well-known member
Joined
Apr 21, 2018
Messages
370
Location
Port Orchard Wa
I have a similar situation where the build-up of material to level the site will put a couple of feet of soil around existing big Doug Firs. I would really like to keep the trees, but I am worried that the extra soil on top of the roots will kill them. Have you gotten and advice regarding this issue?
 
To avoid these ads, REGISTER NOW!
OP
C

Craig Balzer

Well-known member
Joined
Sep 21, 2005
Messages
867
Location
Colorado Springs
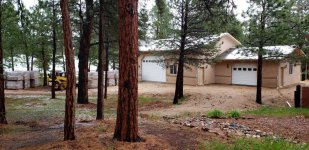
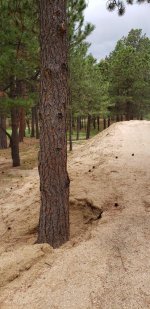
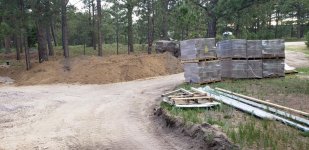
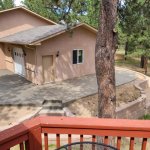
I was told the same thing -- that extra soil stacked up around the trunk would eventually kill the tree. That is why you'll note in the first photo I posted on my previous post, I dug around the base of that large tree.

It may not look like much, but I removed dirt 15-18" from around the trunk and I dug down to virgin dirt. The plan for the retaining walls goes around the tree -- theoretically saving it. Time will tell . . .
 
Last edited:
OP
C

Craig Balzer

Well-known member
Joined
Sep 21, 2005
Messages
867
Location
Colorado Springs
Not much to add today aside from a truly unusual weather delay.

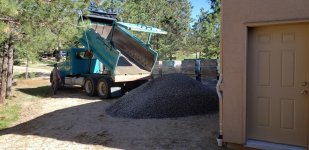
The contractor who's building my retaining wall was supposed to begin on Monday, 08JUN20, but was held up a day finishing his previous project. All my material had been delivered to my site last week so I felt comfortable his just a bit off schedule.

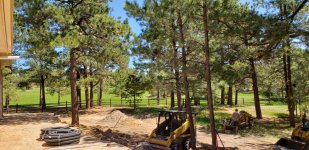
He pulled into my drive at 0730 this AM (09JUN20), saw the conditions he was expecting to see, and called off his crew. They coulda worked without issue except the truck bringing in tons of rock fill would have been slipping and sliding on the dirt road I live on and their small Cats would have chewed up yard pretty badly.

He'll start at 0730 tomorrow morning -- sharp.

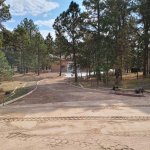
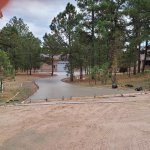
Yup -- that's snow in meadow beyond my lot and on the roof of my garage. Temp at 0730 today was 31° -- in June. Gotta love CO.
 

Attachments

  • 20200609_094727.jpg
    20200609_094727.jpg
    149.5 KB · Views: 275
  • 20200609_094755.jpg
    20200609_094755.jpg
    150.8 KB · Views: 285
Last edited:

shortykorte

Well-known member
Joined
Sep 1, 2014
Messages
8,039
Location
Tallahassee, Fl
31° in June means no bikinis in June. I’m going to the beach, white sand beach. Check you later. 🤣


Sent from my iPhone using Garage Journal
 
OP
C

Craig Balzer

Well-known member
Joined
Sep 21, 2005
Messages
867
Location
Colorado Springs
At 0730 on Wednesday 10JUN20, and the contractor arrives on schedule.

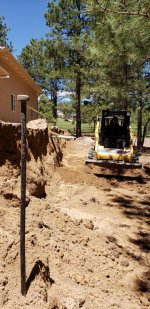
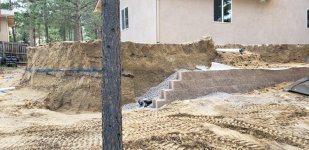
Day 1 turns out to involve moving a lot of dirt. Contractor estimates I'll have 35-50 tons in excess after retaining walls are complete.

The main effort was on the longest wall along east side of pad; a bit of work on the south wall.
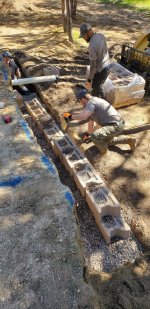
Expect tomorrow to finish dressing the short wall on south of the pad and maybe even start laying some blocks. The titles of each photo carries more details.

Craig
 

Attachments

  • 6 SOUTH WALL - AFTER.jpg
    6 SOUTH WALL - AFTER.jpg
    152 KB · Views: 248
  • 5 SOUTH WALL - BEFORE.jpg
    5 SOUTH WALL - BEFORE.jpg
    141.7 KB · Views: 231
  • 4 LOOKING SOUTH ALONG BACK WALL.jpg
    4 LOOKING SOUTH ALONG BACK WALL.jpg
    149.1 KB · Views: 248
  • 4A LOOKING SOUTH ALONG BACK WALL.jpg
    4A LOOKING SOUTH ALONG BACK WALL.jpg
    134.6 KB · Views: 235
  • 3 THE STRING MARKS FRONT EDGE OF WALL; BLUE PAINT MARKS THICKNESS OF BLOCK PLUS 1 FOOT FOR BACKF.jpg
    3 THE STRING MARKS FRONT EDGE OF WALL; BLUE PAINT MARKS THICKNESS OF BLOCK PLUS 1 FOOT FOR BACKF.jpg
    147.1 KB · Views: 236
  • 2 FIRST OF FOURS LOADS OF ROCK.jpg
    2 FIRST OF FOURS LOADS OF ROCK.jpg
    148.7 KB · Views: 242
  • 1 THREE CATS MOVING DIRT.jpg
    1 THREE CATS MOVING DIRT.jpg
    149.5 KB · Views: 246
Last edited:
OP
C

Craig Balzer

Well-known member
Joined
Sep 21, 2005
Messages
867
Location
Colorado Springs
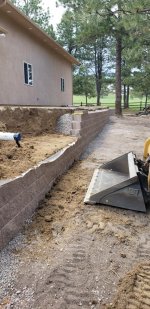
Day 2 of the Great Wall Build

Pictures tell the story -- more info in photo titles
 

Attachments

  • The first course is key to a level and straight wall.jpg
    The first course is key to a level and straight wall.jpg
    146.9 KB · Views: 259
  • Nearing final height - the 1st to 2nd course is underg round level.jpg
    Nearing final height - the 1st to 2nd course is underg round level.jpg
    136 KB · Views: 263
  • 20200611_155909.jpg
    20200611_155909.jpg
    127.5 KB · Views: 259
  • A view to the southeast.jpg
    A view to the southeast.jpg
    149.5 KB · Views: 246
  • A View to the northeast - no more snow in the meadow (82°).jpg
    A View to the northeast - no more snow in the meadow (82°).jpg
    152.9 KB · Views: 228

Jayman17

Well-known member
Joined
Feb 6, 2017
Messages
3,812
Location
Seattle, Wa
Looks like it's coming along nicely, you're right about the first course. If you get it done right the rest is a lot easier. Looks like they are doing it right. :thumbup:
It sure is scenic around your place, I like all the pine trees and greenery.

Jay
 
OP
C

Craig Balzer

Well-known member
Joined
Sep 21, 2005
Messages
867
Location
Colorado Springs
Jayman ("It sure is scenic around your place, I like all the pine trees and greenery.") -- I agree! It is so quiet and tranquil here that I needed to read the news last Monday (08JUN20) to learn of storm that came thru packing 60-80 MPH wind gusts.


Some more progress -- FRI 12JUN20.
Caption of Photo gives details
 

Attachments

  • A Preview of the Finished Product -- just needs 4 inch high Capstones.jpg
    A Preview of the Finished Product -- just needs 4 inch high Capstones.jpg
    147 KB · Views: 222
  • Site Prep to make Corner to South Wall.jpg
    Site Prep to make Corner to South Wall.jpg
    145.4 KB · Views: 202
  • Curving Wall Around Big Tree.jpg
    Curving Wall Around Big Tree.jpg
    131.7 KB · Views: 209
OP
C

Craig Balzer

Well-known member
Joined
Sep 21, 2005
Messages
867
Location
Colorado Springs
End of Week 1 -- About Half Way to Completion.

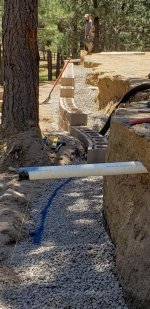
About all I can add to the story told by the photos (see captions) is that the down-spout under ground drain at the SE corner of the garage (the long white tube "hanging" in mid-air) will be turned 180° at the base of the down-spout to follow the south edge of the garage to tie into the buried drain of the SW down-spout. This will eliminate the challenge of what to do with that drain vis-a-vis the two-tiered wall.

The contractor thinks that his crew has made sufficient progress that he ~may~ finish a day early.

Craig
 

Attachments

  • Z) Relocated Backfill (45-50 Tons) Looking for a Home and Dwindling Materiels.jpg
    Z) Relocated Backfill (45-50 Tons) Looking for a Home and Dwindling Materiels.jpg
    148.2 KB · Views: 216
  • Position of Staircase Between Garage and House.jpg
    Position of Staircase Between Garage and House.jpg
    144 KB · Views: 213
  • Paint Marking Cut Into Backfill for Second Tier Wall B.jpg
    Paint Marking Cut Into Backfill for Second Tier Wall B.jpg
    149.5 KB · Views: 222
  • Paint Marking Cut Into Backfill for Second Tier Wall A.jpg
    Paint Marking Cut Into Backfill for Second Tier Wall A.jpg
    147.6 KB · Views: 221
  • Curve Around Tree Complete and Starting Cut-Out for Wall 2 at SE of Retaining Wall.jpg
    Curve Around Tree Complete and Starting Cut-Out for Wall 2 at SE of Retaining Wall.jpg
    133.2 KB · Views: 224
  • Curve Around Tree Complete and Starting Curve Around North Side Wall A.jpg
    Curve Around Tree Complete and Starting Curve Around North Side Wall A.jpg
    114.2 KB · Views: 229
  • A) Wall to End at Right Side of Ramp - North Side of Garage.jpg
    A) Wall to End at Right Side of Ramp - North Side of Garage.jpg
    147.6 KB · Views: 230
OP
C

Craig Balzer

Well-known member
Joined
Sep 21, 2005
Messages
867
Location
Colorado Springs
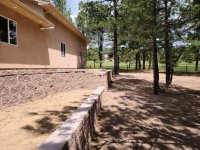
I didn't post any updates for the last week plus cuz they all looked alike: taking care to lay the first course of blocks and then stacking more blocks on top.

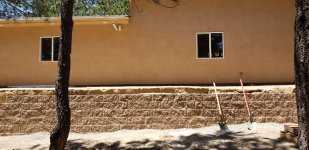
Here's the finished product. Captions on each photo gives details:

GC was on-site today. Says I may get concrete sidewalk/apron poured in 2-3 weeks.

Starting to get impatient; previously there was enough to do that multiple things happened simultaneously. Now, I'm at the stage that the last few items in construction must happen sequentially.

Guys -- sorry photos didn't load. Got a new phone and the recent photos are really pixel heavy. Working on figuring out how to reduce KBs per photo . . .
 
Last edited:
OP
C

Craig Balzer

Well-known member
Joined
Sep 21, 2005
Messages
867
Location
Colorado Springs
Retry on Posting Recent Photos of Retaining Wall
 

Attachments

  • North Wall Looking east.jpg
    North Wall Looking east.jpg
    61.5 KB · Views: 227
  • East Wall Looking South.jpg
    East Wall Looking South.jpg
    66 KB · Views: 238
  • East Wall Looking  North.jpg
    East Wall Looking North.jpg
    79.5 KB · Views: 233
  • rsz_1rsz_south_wall_looking_north.jpg
    rsz_1rsz_south_wall_looking_north.jpg
    141.3 KB · Views: 250
  • rsz_1rsz_1south_wall_looking_east.jpg
    rsz_1rsz_1south_wall_looking_east.jpg
    55.7 KB · Views: 246
  • rsz_rsz_steps_at_southwest_corner_1.jpg
    rsz_rsz_steps_at_southwest_corner_1.jpg
    146.4 KB · Views: 244
  • Overview.jpg
    Overview.jpg
    89.3 KB · Views: 241
Last edited:
OP
C

Craig Balzer

Well-known member
Joined
Sep 21, 2005
Messages
867
Location
Colorado Springs
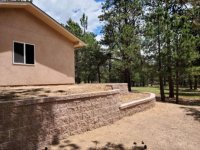
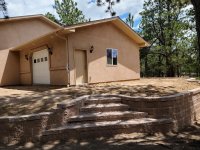
ODIS -- I couldn't agree more! I am very pleased with the outcome. I was expecting 90° corners and a simple staircase. They relished the challenge of the curves outlining the steps. I really like the way the two walls diverge and rejoin - classy look. They don't look that big in the photos, but each block is 76 pounds.

Landscaping is gonna take a back seat to a 2-post, air compressor, air-lines, blast cabinet, and workbenches. The contractor did spread and rake in 50 lbs of grass seed. Once the grass takes root, the places will have less of a construction zone look.
 

ODIS

Well-known member
Joined
Apr 30, 2012
Messages
2,110
Location
Pacific Northwest
What you have planned for your shop equipments will give you a lot of flexibility in the projects you choose to work on. Lots of good times to come and I’m sure, your friends will like your shop as well.

BTW, have read your bio. Thank you for your many years of service!
 

Jayman17

Well-known member
Joined
Feb 6, 2017
Messages
3,812
Location
Seattle, Wa
Very nice results on the wall, looks fantastic. I agree, I like the radius corners as opposed to 90* corners.

Jay
 
To avoid these ads, REGISTER NOW!
OP
C

Craig Balzer

Well-known member
Joined
Sep 21, 2005
Messages
867
Location
Colorado Springs
What you have planned for your shop equipments will give you a lot of flexibility in the projects you choose to work on. Lots of good times to come and I’m sure, your friends will like your shop as well.

ODIS -- thanks.

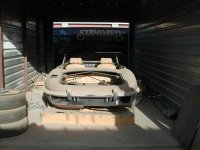
The first patient is a 72 Jaguar XKE V12 convertible I bought with months-in-grade as a Captain (in 1979) and orders in hand for an assignment in Munich Germany (see below). Had to have a sports car in Europe; sold my 68 Oldsmobile Cutlass Supreme, conv.

In 1990 I had orders for Korea and that's when the body work was done with plans for new paint. Time passed: marriage, 3x back-to-back assignments to Germany, divorce, retirement, and Gov't contract work in AFG . Paint never happened. But that will start this fall -- after I dismantle the Jag and trailer the body to a shop for the work.

I'm figuring 20-24 months for restoration. ha -- I can dream . . .
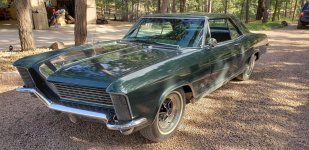
Then -- start in on my 65 Riviera Gran Sport. (see second attached)
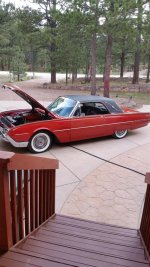
The 62 T-Bird is about done
Clearly being a confirmed masochist, I am currently looking for a 71 Gran Sport Stage 1
 

Attachments

  • Waitin.jpg
    Waitin.jpg
    55.1 KB · Views: 291
  • 20190901_165924.jpg
    20190901_165924.jpg
    157 KB · Views: 259
  • T-Bird - new tires.jpg
    T-Bird - new tires.jpg
    105 KB · Views: 247
Last edited:
OP
C

Craig Balzer

Well-known member
Joined
Sep 21, 2005
Messages
867
Location
Colorado Springs
They got that wall done pretty quick. Looks good.

Very nice results on the wall, looks fantastic. I agree, I like the radius corners as opposed to 90* corners. -- Jay


Thanx GLTHFJ60 and Jayman17 -- I know I found the right contractor for this job! The owner was on-site all day, everyday. Superb communicator and explained his decisions and his crew' actions.
 
Last edited:

ODIS

Well-known member
Joined
Apr 30, 2012
Messages
2,110
Location
Pacific Northwest
ODIS -- thanks.

The first patient is a 72 Jaguar XKE V12 convertible I bought with months-in-grade as a Captain (in 1979) and orders in hand for an assignment in Munich Germany (see below). Had to have a sports car in Europe; sold my 68 Oldsmobile Cutlass Supreme, conv.

In 1990 I had orders for Korea and that's when the body work was done with plans for new paint. Time passed: marriage, 3x back-to-back assignments to Germany, divorce, retirement, and Gov't contract work in AFG . Paint never happened. But that will start this fall -- after I dismantle the Jag and trailer the body to a shop for the work.

I'm figuring 20-24 months for restoration. ha -- I can dream . . .
Then -- start in on my 65 Riviera Gran Sport. (see second attached)
The 62 T-Bird is about done
Clearly being a confirmed masochist, I am currently looking for a 71 Gran Sport Stage 1

All worthy candidates for your collection and to invest your time into. Have a ‘63 Porsche that was obsessed over during it’s restoration process. You will probably lose a few nights sleep over the Jag, but will be worth it down the road.

I’ve fond memories of my duty time in Germany and of my work at Drake-Edwards and then at the 97th General Hospital, Frankfurt.
 

shortykorte

Well-known member
Joined
Sep 1, 2014
Messages
8,039
Location
Tallahassee, Fl
Wall definitely looks great!

Trade an Olds convertible for a Jag? No way. [emoji1]. Love the XKE until I sit in it and my view is the upper window frame.[emoji53] look forward to the resto.
Where you were at Osan? Me, 85-86. Nope, just read bio, you were probably on the DMZ.


Sent from my iPhone using Garage Journal
 
Last edited:
OP
C

Craig Balzer

Well-known member
Joined
Sep 21, 2005
Messages
867
Location
Colorado Springs
Thanx Shorty

Trade the Jag? Nope -- but thanx for offer. I bought it in 1979 as third owner. Too much B$ & Ts in it.

You're correct -- I was never near Osan
1990-91: Camp Casey
1991-93: Camp Hovey
Neither were on the DMZ, but both were within artillery range NK Arty.
 
OP
C

Craig Balzer

Well-known member
Joined
Sep 21, 2005
Messages
867
Location
Colorado Springs
Well -- the GC and concrete contractor are supposed to come by this week to check the lay of the land and get on the calendar to pour the pad.

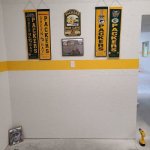
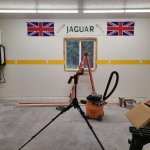
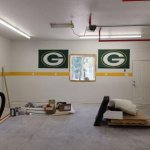
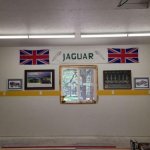
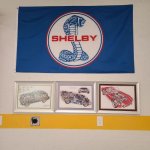
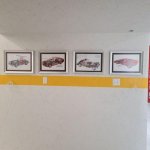
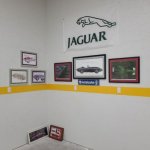
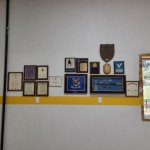
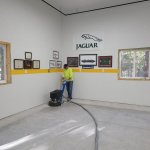
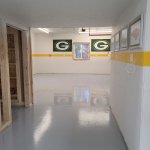
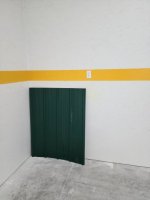
Meanwhile, I started basic decorations on the interior of my garage.

After the floor is epoxied I'll be adding metal sheeting on the lower 4' of the interior wall. That sheeting will be Green and I've painted a stripe in Gold - Packer's color.

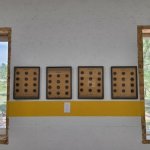
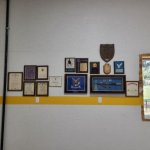
I also added some I-Love-Me stuff on the walls and garage art.

Photos tell the story -- more to follow; cell phone is charging
 

Attachments

  • Gold Stripe with Green Metal Wall Protector.jpg
    Gold Stripe with Green Metal Wall Protector.jpg
    18 KB · Views: 184
  • I Love Me Corner - 50 Ft 4-Position State Record.jpg
    I Love Me Corner - 50 Ft 4-Position State Record.jpg
    26.1 KB · Views: 205
  • I Love Me Corner - Military.jpg
    I Love Me Corner - Military.jpg
    23.8 KB · Views: 198
  • Green Bay Packers Corner - I.jpg
    Green Bay Packers Corner - I.jpg
    36 KB · Views: 203
  • Jaguar Banner.jpg
    Jaguar Banner.jpg
    124.3 KB · Views: 197
Last edited:

Jayman17

Well-known member
Joined
Feb 6, 2017
Messages
3,812
Location
Seattle, Wa
Uh-oh, I see a color clash in your future. I think I remember you painting your OH door tracks red, right? Looks like you should have went with yellow. :evil:

Jay
 
OP
C

Craig Balzer

Well-known member
Joined
Sep 21, 2005
Messages
867
Location
Colorado Springs
Jayman -- Good Memory! Thanks for stopping by again.

Yeah -- the hardware and support struts on my 2 garage doors were powder coated in red.
I think I will live with the clash (complimenting??) colors.
 
Last edited:
OP
C

Craig Balzer

Well-known member
Joined
Sep 21, 2005
Messages
867
Location
Colorado Springs
Nahh Shorty, I can't do that. I'm an owner of the Packers.
Me and a few others:

Fans have supported the Packers financially through five stock sales: 1923, 1935, 1950, 1997 and 2011. Today, 361,311 people (representing 5,009,518 shares) are owners of the iconic franchise.

So I own 1/5,009,518th of an NFL team.
 
OP
C

Craig Balzer

Well-known member
Joined
Sep 21, 2005
Messages
867
Location
Colorado Springs
Took some more photos of garage art & I-love-me stuff.
Most are new.
I tried to post the photos moving from N to S in my garage.

Still have ~8 traffic signs to hang -- with 5-8 more coming from eBay purchases -- as well some licence plated. Oh -- and a traffic light I packed up from Craig's List. These all will go in the loft . . .
 

Attachments

  • South Corner - Packers.jpg
    South Corner - Packers.jpg
    28.3 KB · Views: 134
  • East Wall - Small - Jaguar & Bugatti - Overall.jpg
    East Wall - Small - Jaguar & Bugatti - Overall.jpg
    28.8 KB · Views: 126
  • Northwest Corner - Packers.jpg
    Northwest Corner - Packers.jpg
    30.9 KB · Views: 118
  • West Wall Small Room - Shelby.jpg
    West Wall Small Room - Shelby.jpg
    36.1 KB · Views: 119
  • Walk Through.jpg
    Walk Through.jpg
    20.9 KB · Views: 116
  • Northeast Corner - Jaguar Corner.jpg
    Northeast Corner - Jaguar Corner.jpg
    21.9 KB · Views: 120
  • Northwest Corner - Military I-Love-Me.jpg
    Northwest Corner - Military I-Love-Me.jpg
    23.8 KB · Views: 140
OP
C

Craig Balzer

Well-known member
Joined
Sep 21, 2005
Messages
867
Location
Colorado Springs
I made some major strides yesterday and today (10-11AUG20)

Monday 10 AUG the crew laid the forms to pour the 4' wide sidewalk along the north and east walls, the small patio on the south side, and the apron in front of the garage (west side)

Also poured the 8' x 8' bathroom floor and a pad at the bottom of the staircase of the rear deck.

Tues 11 AUG the first of 5 concrete trucks arrived to pump/pour the North, east and South part of the pour. Two trucks (20 yards) for this pour. From 0700 to 1045 was pour, level, finish and apply control cuts
After lunch, three trucks (** yards) brought the concrete for the apron.
All was 4000 PSI in 4" pad.
More details in captions of photos.

NEXT:
Allow concrete in bathroom 30 days to cure and then epoxy entire garage floor.
Once epoxy dries, install staircase to loft; apply green, metal siding on bottom 4' of interior OSB walls; install fixtures and power in bathroom, turn on water; and fianlly enclose bathroom walls.
Frame windows and doors
DONE
 

Attachments

  • 14 - Finished II.jpg
    14 - Finished II.jpg
    75.1 KB · Views: 233
  • 13 - Finished I.jpg
    13 - Finished I.jpg
    68.1 KB · Views: 250
  • 9 - Finally Have a Bathroom Floor.jpg
    9 - Finally Have a Bathroom Floor.jpg
    47.3 KB · Views: 243
  • 7 - Also Poured Landing Pad for Deck Staircase.jpg
    7 - Also Poured Landing Pad for Deck Staircase.jpg
    93.2 KB · Views: 233
  • 5 - Sidewalk Complete - Pouring Small Patio.jpg
    5 - Sidewalk Complete - Pouring Small Patio.jpg
    80.5 KB · Views: 242
  • 3 - Forms for Staircase.jpg
    3 - Forms for Staircase.jpg
    70.9 KB · Views: 226
  • 1 - Laying Forms.jpg
    1 - Laying Forms.jpg
    66.9 KB · Views: 249
Last edited:
OP
C

Craig Balzer

Well-known member
Joined
Sep 21, 2005
Messages
867
Location
Colorado Springs
Concrete is going to be really nice. Having a working bathroom even better.
Sent from my iPhone using Garage Journal

Shorty -- at my age and with my peanut-sized bladder, a bathroom is essential

That concrete looks great! I'll bet that makes you happy...

Jay

Jay -- I am ecstatic!
The owner of the concrete business was on site for 90% of the day of the pour, even tho he has 4 other sites in various stages of being poured.
I just completed the second misting and don't have any puddles. Great job.

Craig
 
OP
C

Craig Balzer

Well-known member
Joined
Sep 21, 2005
Messages
867
Location
Colorado Springs
Its been a month or more since my last update. Made a bit of progress, some not really visible, on Thursday 24SEP20.

On the same day the contractor showed to seal the exterior concrete (after curing for 30 days), his crew set the framing to extend the driveway from the stub on the apron out to the road.

On that same day, the propane company unhooked the 500-gallon propane tank off my house, replaced it with a 1,000-gallon and relocated the 500-gallon tank onto the hobby shop.

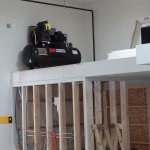
On that same day I took delivery of my 80-gallon Campbell Hausfeld air compressor and hoisted it onto the loft above the bathroom. It is a 5 HP, 16.6 CFM @ 175 PSI, 230 Volt Single Phase compressor, Model# CE7052
Busy day.

Earlier that week, I paid for the LE10 Challenger 2-post $ymmetric/a$ymmetric lift. It $hould to be delivered $ome time around mid-October.
 

Attachments

  • 20200923_100957.jpg
    20200923_100957.jpg
    147.3 KB · Views: 175
  • 20200923_120741.jpg
    20200923_120741.jpg
    146.8 KB · Views: 189
  • 20200924_105249.jpg
    20200924_105249.jpg
    92.1 KB · Views: 191
OP
C

Craig Balzer

Well-known member
Joined
Sep 21, 2005
Messages
867
Location
Colorado Springs
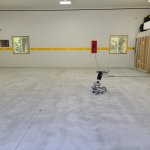
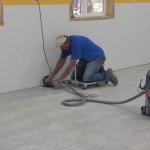
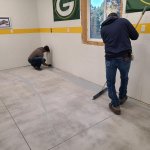
The day after the driveway pour was complete, that same contractor prepped the interior floor for epoxy.

The prep was so good that the color soaked in deeply resulting in streaks (according to the epoxy company rep who was on site). He carried away an estimated 80 pounds of concrete powder (2300 sq ft hobby shop).
Second color coat resulted in super appearance.

The Top Coat (not clear) included a very fine aluminum oxide powder for anti-slip and a strong finish. The epoxy company (rep on site for the first coat) said this stuff repels all automotive fluids -- to include battery acid. Ya can't let it sit, but if I wipe it up straight-away, shouldn't leave a stain. Result is a matt finish compared to the highly reflective mirror-like shine after the second color coat was added.

Pictures tell the tale - details in captions
 

Attachments

  • 20200925_125051.jpg
    20200925_125051.jpg
    81.1 KB · Views: 211
  • 2 - Hand Grinding the Border.jpg
    2 - Hand Grinding the Border.jpg
    62.9 KB · Views: 214
  • 1 - Grinding Begins.jpg
    1 - Grinding Begins.jpg
    100.8 KB · Views: 217
  • 2 - Spreading the Ribbons with Squegee.jpg
    2 - Spreading the Ribbons with Squegee.jpg
    122.4 KB · Views: 224
  • 5 - First Coat Complete in Small Room.jpg
    5 - First Coat Complete in Small Room.jpg
    106.8 KB · Views: 233
  • 4 - Excellent Prep resulted in deep penetration.jpg
    4 - Excellent Prep resulted in deep penetration.jpg
    66.1 KB · Views: 259
  • 5 - Top Coat Applied to Small Room, Moving on to High Bay.jpg
    5 - Top Coat Applied to Small Room, Moving on to High Bay.jpg
    72.3 KB · Views: 240
Last edited:

shortykorte

Well-known member
Joined
Sep 1, 2014
Messages
8,039
Location
Tallahassee, Fl
Thanks for posting. I was wondering where you went. Great progress and what a place to hang out.


Sent from my iPhone using Garage Journal
 
Last edited:
To avoid these ads, REGISTER NOW!
Top Bottom