To avoid these ads, REGISTER NOW!

Above 1200 Sq/FT Craig's Colorado Car Condo

Wokspaces above 1200 squarefeet.
OP
C

Craig Balzer

Well-known member
Joined
Sep 21, 2005
Messages
868
Location
Colorado Springs
Took a break from restoring and did some fire mitigation on my lot. That entailed renting a scissors lift (got one that was all-terrain with out-riggers) that also worked well to reach my 14’ ceiling to install some piping to distribute compressed air. Got about 80% of it done; 100% of the piping in the14’ high room.

Between the trimming of limbs and installing piping, I spent three days climbing that scissors lift.

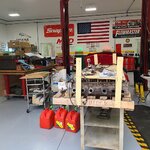
To make maneuver room in the garage for the scissors lift and not bump into things, I moves benches, tables, engine stand, etc to one side of the garage
c2ccf7812d7fa5e46ddab0da9a361f3db0c4832c_2_500x500.jpg
1 - Pushed tables and benches to middle of garage1920×1920 443 KB

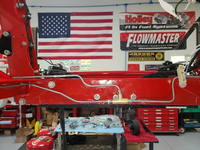
I not only installed piping, but hung some banners
203e35eda4dd29dad96fe93e2dcd498a50bebd4c_2_500x500.jpg
2- to have room to hang some Banners . . .1920×1920 297 KB

That fitting in the above photo is open – haven’t decided if I’m gotta cap it there or install another drop around the corner on the left of the photo

The kit I bought was easy to hang and connect. Of course, I haven’t pressure tested the system, yet.
48b337d4f77643529c9131ec6b1cdb4456acac2d_2_500x500.jpg
3 - and installed distributed air pipes and walls . . .1920×1920 308 KB

Also installed a leg to bring compressed air above my lift. The one section got a little crooked. The open end of the pipe in this photo will lead to the compressor (just out of frame to the right of the traffic light) and then to the small room (with 10" ceilings) and the dirty – none of these elements require a scissors lift
6289084c4010a5444b900a44619d5a8ff652373f_2_500x500.jpg
4 - and ceilings1920×1920 372 KB

Took advantage of the open floor to sweep/mop
e40b25a415bed3e8def84b53ea17d75b86c88915_2_500x500.jpg
5 - took advantage of empty floor to sweep and mop the floor1920×1920 283 KB

c8a51610c716f77d51d4c040c4a85a60d9676a04_2_500x500.jpg
20220516_1652111920×1920 462 KB

776c4fcf64e945a38279587e21f2873f7437f5e6_2_500x500.jpg
 
To avoid these ads, REGISTER NOW!

fouckhest

Well-known member
Joined
Jul 24, 2013
Messages
1,871
Location
Greer, SC
Looking great, I really need to get my air hooked up in my shop, been debating how to make it look nice, but still be functional.....
 
OP
C

Craig Balzer

Well-known member
Joined
Sep 21, 2005
Messages
868
Location
Colorado Springs
Fouckhest
Don't feel like the lone ranger on that score: I think I had that tubing and the boxes of fittings laying around my shop for 7-9 months.
The real trick is that I still have about 6 lengths of the tubing -- at 19' 2" each.
Go ahead and try to store those -- even in a shop with 14' ceiling; that'll really be an incentive for me to finish up the install
Craig
 

fouckhest

Well-known member
Joined
Jul 24, 2013
Messages
1,871
Location
Greer, SC
LOL! Thanks of the reinforcement!!

I would really like to find a way to run a 3/4" header/hoop around the shop in the attic, then drop down at certain spots, i.e., near my welding table, by the lift for a hose reel, by the work table, etc....

Sorry, won't clutter your thread anymore, keep up the good work :beer:
 
OP
C

Craig Balzer

Well-known member
Joined
Sep 21, 2005
Messages
868
Location
Colorado Springs
3/4" header/hoop around the shop in the attic, then drop down at certain spots,

I think such an approach would be very clean - but also pretty pricy.
I don't know which kit you are considering, but with my kit I needed to order a special fitting to pass the tubing through a wall.
I imagine you'd need one such kit for every drop coming through the ceiling. How close is your roofline to the walls in your attic where the vertical lines will run -- do you have enough clearance to get close enough to the wall?

Your comments do not clutter any thread -- all comments are more than welcome.
 

fouckhest

Well-known member
Joined
Jul 24, 2013
Messages
1,871
Location
Greer, SC
I think such an approach would be very clean - but also pretty pricy.

Yeah, which is a big reason that I haven't started down any given path.

I don't know which kit you are considering, but with my kit I needed to order a special fitting to pass the tubing through a wall.
I imagine you'd need one such kit for every drop coming through the ceiling. How close is your roofline to the walls in your attic where the vertical lines will run -- do you have enough clearance to get close enough to the wall?

I really haven't looked at any specific kits, I have some sort of 1/2" line kit that I got when I purchased my compressor from a buddy years ago, its a blue flex tube (coil) with push to connect fittings. Unfortunately seeing that line, between color and not being straight would drive me nuts....

Good question on the wall clearance, I will need to get up there an look. My thought was always run the hoop/header in the attic, then drop down into the garage with black iron pipe....but we shall see what other options I may be able to come up with.

At this point, I am in the middle of a master bed/bath remodel, in the final wedding planning stages, so it will likely be the fall before this becomes a priority; post wedding.

Your comments do not clutter any thread -- all comments are more than welcome.

Thanks, appreciate that and the advice.
 
OP
C

Craig Balzer

Well-known member
Joined
Sep 21, 2005
Messages
868
Location
Colorado Springs
, I have some sort of 1/2" line kit that I got when I purchased my compressor from a buddy years ago, its a blue flex tube (coil) with push to connect fittings
It sounds like your kit may be Rapidair MaxLine -- while this kit from Northern tool is 3/4",
and they also carry 1/2" lines.

I share your aversion the coils looking like **** UNLESS you can straighten out the tube perfectly. Hard to do.
I used the Rapidair FastLine aluminum tubing.


fouckhest

Well-known member
Joined
Jul 24, 2013
Messages
1,871
Location
Greer, SC
It sounds like your kit may be Rapidair MaxLine -- while this kit from Northern tool is 3/4",


I share your aversion the coils looking like **** UNLESS you can straighten out the tube perfectly. Hard to do.
I used the Rapidair FastLine aluminum tubing.

Thats exactly what I have today. I do like that they make a 3/4" version, that might be a good option for my supply hoop.

I will certainly look into the fastline tubing kit, that would be great b/c it could then be painted, thanks for the heads up!
 
OP
C

Craig Balzer

Well-known member
Joined
Sep 21, 2005
Messages
868
Location
Colorado Springs
I used this last week to deal with several errands: picked up my re-newed header tank (re-soldered, pressure tested and painted a non-runny black), finally linked up with the guy who owns and is chief mechanic at The Differential Shop re timing for him to rebuild the innards, and a few other items/issues.

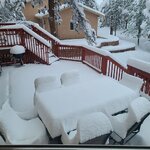
Then I got a weather-imposed work delay. All last week the temps were mild (upper 50’s to mid-60’s – 1 or 2 days even reached the 70’s and low 80’s. Then Friday the high was low 30’s and light snow mixed with sleet greeted the morning – it didn’t get better throughout the day.

Three photos follow -
5PM on Friday
6:30PM on Friday
8AM on Saturday (this AM)

ea3443e6e2e9d97483d82eb5cf45101430ef9a57_2_500x500.jpg
5PM Friday 20 May 221920×1920 779 KB

9c83d4eaee16dbe23c797afc16b561aa2ff2b149_2_500x500.jpg
630PM Friday 20 May 221920×1920 508 KB

ac4960a21d8de44a381a545c8b9bfca167f97899_2_500x500.jpg
830AM Fridsaturay 21 May 221920×1920 371 KB
HO HO HO - MERRY CHRISTMAS

Power went out twice last night – I assumed downed power lines
  • 2.5 hours from 0200-0430
  • 1 hour from 0830 - 0930
About the only good news from the last few days is I finally received notice that the parts I need to repair the boiler in my hobby shop (heats both domestic water and the coolant in the in-floor heating tubes) were shipped. Ought to have them earlier on next week. Just in time for the temps to return to the 70’s and 80’s.
 
Last edited:
OP
C

Craig Balzer

Well-known member
Joined
Sep 21, 2005
Messages
868
Location
Colorado Springs
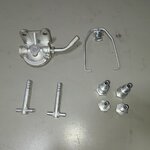
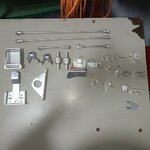
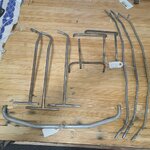
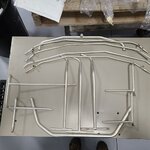
I spent the last few days unpacking and cross-checking the inventory of the items I sent out for cad plating compared to what I received back.

Good News: a 100% match. No missing bits.
Bad News: some of the items have less than satisfactory finish. Exchanged several calls with the owner and I am expecting a positive result.

The following photos provide a few BEFORE/AFTER comparisons.
Overall, I am happy with the results. Sparkly stuff – not as sparkly as chrome, but pretty nice, nonetheless

Bonnet stuff
eedc2e8f2da737670857c8be77bc0fd3c7f3b901_2_500x500.jpg
20220105_1312151920×1920 464 KB
5e5b01052647d7541a1844892139c12d9c5e24e1_2_500x500.jpg
20220606_1739591920×1920 319 KB

A/C Stuff
fee5fb462be5e903a67301429338ce180449be45_2_500x500.jpg
20220105_1317441920×1920 472 KB
ff1f3958d6a7b08011df4091ad987fae317045df_2_500x500.jpg
20220606_1746321920×1920 218 KB

Door Stuff (plus)
352f8fe571ef9cf742a3e22cb0f3541434bbdffa_2_500x500.jpg
20220105_1325031920×1920 518 KB
1da01def850f48cb40fd7a3a25512c9658f3b6d1_2_500x500.jpg
20220606_1800231920×1920 307 KB

Fuel Stuff
1692fddcfe84d79c0b5eadd31d30f891747c7e08_2_500x500.jpg
20220105_1326341920×1920 495 KB
8a4df47e2c980a13838be66d058a4c729ddb5bb6_2_500x500.jpg
20220606_1804001920×1920 191 KB

Misc
f557e13e1c66d86235c5b9e20a25b3480fb1e4a7_2_500x500.jpg
20220105_1351541920×1920 529 KB
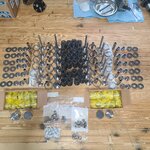
The above photo shows 52 Belleview Washers (BW) – I kept finding more and more of them but didn’t retake the photo – just updated my notes for the plater

62f158c1ee4fe96ae1f1365d03342bf51cb8f2cc_2_500x500.jpg
20220606_1825571920×1920 207 KB
I ended up sending 171 x BWs for Yellow Cad – today I found 5 more that missed the boat. There are plenty of places the BWs are used that are out of site. I’ll just clean them and use them.
d70ceb3567164ebef51be72f8e07db55b2220920_2_500x500.jpg
20220607_1701541920×1920 654 KB

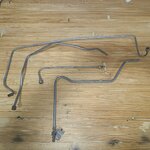
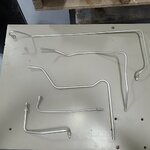
Tubing
dfbad885a555dfa72a239500b0396c442061de25_2_500x500.jpg
20220107_1629501920×1920 462 KB
e26e319f70617c9c1ad5877a0ac0ebab4ece5168_2_500x500.jpg
20220606_1655431920×1920 236 KB
Some of these are going back for a re-do

More Tubing
93a681c5273a3b56ff250c146fc2ccbfcf138894_2_500x500.jpg
20220107_1633501920×1920 450 KB
c05c3e107f0413fd30285fcea9d055acf76e6b55_2_500x500.jpg
20220606_1705051920×1920 161 KB
 
OP
C

Craig Balzer

Well-known member
Joined
Sep 21, 2005
Messages
868
Location
Colorado Springs
Sorry for the long time-spacing in updates.
Lots of small trip-wires that combined to form some long and irritating delays.
Here's some quick updates of smaller and small successes - culminating in prepped pieces waiting to be installed in/or the chassis

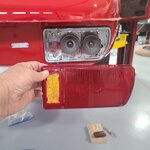
  • Removed separate Reverse Lamps and installed LED brake/tail lamps with integrated reverse light
  • Received polished stainless exhaust system
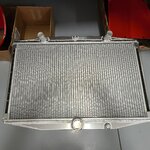
  • Ordered and Received new Radiator
  • Had machine work done on both heads
  • Had heads rebuilt with ALL new components (valves, valve springs, keepers, collets, valve seats, etc)

This kept me busy in June and July this past summer.

NOTE - this is a truly irritating aspect of this site. For the next half dozen postings I carefully ordered the photos with the bulletized comment(s). You know, so they followed in order and made sense and all.
Despite that, all the photos were loaded in apparently random order confusing comments and the related photo(s).
A real pain in the tookus.
 

Attachments

  • 20220701_142224.jpg
    20220701_142224.jpg
    1.4 MB · Views: 54
  • 20220705_110556.jpg
    20220705_110556.jpg
    1.1 MB · Views: 47
  • 20220623_113429.jpg
    20220623_113429.jpg
    1.8 MB · Views: 27
  • 20220714_131019.jpg
    20220714_131019.jpg
    1.5 MB · Views: 26
  • 20220620_174525.jpg
    20220620_174525.jpg
    800.3 KB · Views: 24
  • 20220620_174510.jpg
    20220620_174510.jpg
    836.6 KB · Views: 25
  • 20220622_113211.jpg
    20220622_113211.jpg
    853.2 KB · Views: 25
  • 20220713_092853.jpg
    20220713_092853.jpg
    1.1 MB · Views: 25
Last edited:
OP
C

Craig Balzer

Well-known member
Joined
Sep 21, 2005
Messages
868
Location
Colorado Springs
July and August focused on

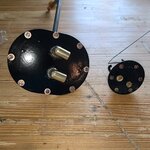
  • Restoring fuel sender assembly and such on fuel tank
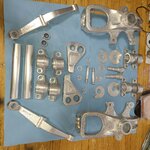
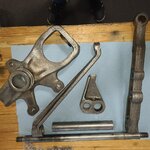
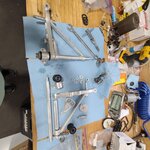
  • Removing and Disassembly of front suspension pieces for cadmium plating - some Before /Afters
 

Attachments

  • 20221006_143748.jpg
    20221006_143748.jpg
    1.2 MB · Views: 20
  • 20220815_141338.jpg
    20220815_141338.jpg
    1.2 MB · Views: 17
  • 20220804_143451.jpg
    20220804_143451.jpg
    1.1 MB · Views: 18
  • 20220804_134915.jpg
    20220804_134915.jpg
    1.2 MB · Views: 17
  • 20220801_125913.jpg
    20220801_125913.jpg
    1 MB · Views: 14
  • 20220715_123622.jpg
    20220715_123622.jpg
    869.8 KB · Views: 14
  • 20220715_123119.jpg
    20220715_123119.jpg
    933.8 KB · Views: 12
  • 20220628_184003.jpg
    20220628_184003.jpg
    1.2 MB · Views: 13
OP
C

Craig Balzer

Well-known member
Joined
Sep 21, 2005
Messages
868
Location
Colorado Springs
August/September kept me busy recerving more part$ and laying out interior kit by prepping the interior

  • Receiving replace windscreen
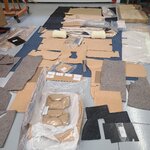
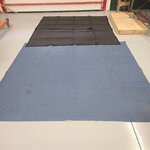
  • Laid out new boot under-pads foe gluing down - in prep to install fuel tank
  • Media-Blasted block for cleanliness
  • Cleaned / Vapor blasted Cam Covered in prep for customized Powder Coating by @CudaChick1968
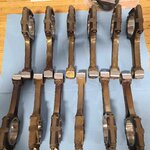
  • Had connecting rods balanced as well as crankshank polished
 

Attachments

  • 20220915_173315.jpg
    20220915_173315.jpg
    1 MB · Views: 14
  • 20220915_171149.jpg
    20220915_171149.jpg
    1.2 MB · Views: 14
  • 20220815_131605.jpg
    20220815_131605.jpg
    981 KB · Views: 14
  • 20220815_131412.jpg
    20220815_131412.jpg
    1,019.7 KB · Views: 13
  • 20220811_162531.jpg
    20220811_162531.jpg
    1.4 MB · Views: 11
  • 20220826_143240.jpg
    20220826_143240.jpg
    692.3 KB · Views: 11
  • 20220805_142024.jpg
    20220805_142024.jpg
    1 MB · Views: 10
  • 20220805_140238.jpg
    20220805_140238.jpg
    562.5 KB · Views: 11
Last edited:
OP
C

Craig Balzer

Well-known member
Joined
Sep 21, 2005
Messages
868
Location
Colorado Springs
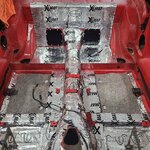
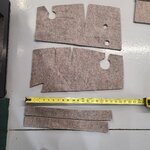
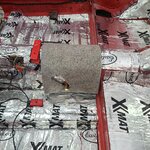
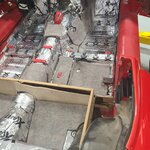
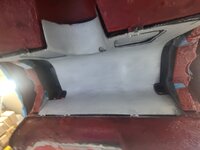
Time intensive parts was inventorying complete interior kit and X-matting interior floor for heat reflection and noise/vibration reduction
The hard part was placing the under pads - no layout plan, no directions, no labels
 

Attachments

  • 20221004_145906.jpg
    20221004_145906.jpg
    1.3 MB · Views: 11
  • 20221004_144922.jpg
    20221004_144922.jpg
    1 MB · Views: 11
  • 20221004_143523.jpg
    20221004_143523.jpg
    1.1 MB · Views: 10
  • 20221005_142506.jpg
    20221005_142506.jpg
    1.8 MB · Views: 11
  • 20220919_141937.jpg
    20220919_141937.jpg
    1.1 MB · Views: 12
  • 20220919_124421.jpg
    20220919_124421.jpg
    1.6 MB · Views: 12
  • 20221004_162215.jpg
    20221004_162215.jpg
    1.5 MB · Views: 10
  • 20221006_144216.jpg
    20221006_144216.jpg
    1.6 MB · Views: 11
  • 20221008_140055.jpg
    20221008_140055.jpg
    1.3 MB · Views: 12
Last edited:
OP
C

Craig Balzer

Well-known member
Joined
Sep 21, 2005
Messages
868
Location
Colorado Springs
Then laid out all the new engine components to ensure when a friend (retired Jag mechanic) travels to my place from Denver for the technical aspects of laying the crank and installing the timing chain with guides and tensioners that I have everything at hand

  • Pistons with wrist pins, circlips, and rings
  • Cylinder Sleeves
  • Rear Main Seals / Crankshaft spacer and cone
  • Main Saddles and Connecting Rods
  • Oil Pump and Oil Cooler
  • Crankshaft Pulley, balanced Harmonic balancer, bits and pieces
  • Timing Chain, Cam Shaft Gears, chain guides and tensioner
  • Pressure Plate and Clutch
  • Light Weight Flywheel
  • Large and Small Bearing sets
 

Attachments

  • 20221007_160227.jpg
    20221007_160227.jpg
    980 KB · Views: 12
  • 20221007_160149.jpg
    20221007_160149.jpg
    1.1 MB · Views: 9
  • 20221007_160051.jpg
    20221007_160051.jpg
    2 MB · Views: 8
  • 20221007_160040.jpg
    20221007_160040.jpg
    2 MB · Views: 8
  • 20221007_155958.jpg
    20221007_155958.jpg
    1.5 MB · Views: 8
  • 20221007_155949.jpg
    20221007_155949.jpg
    1,012.1 KB · Views: 8
  • 20221007_155922.jpg
    20221007_155922.jpg
    878.1 KB · Views: 8
  • 20221007_155856.jpg
    20221007_155856.jpg
    1.4 MB · Views: 8
  • 20221007_155836.jpg
    20221007_155836.jpg
    951.4 KB · Views: 8
  • 20221007_155831.jpg
    20221007_155831.jpg
    818.8 KB · Views: 11
Last edited:
OP
C

Craig Balzer

Well-known member
Joined
Sep 21, 2005
Messages
868
Location
Colorado Springs
Some bits and pieces

Assembling front suspension; struggling with pressing new bushings into housing
Applied ACF-50 anti-corrosion to blasted aluminum bits to seal porous surface to help shed grease and grime
Built-in oil cooler (I have two so one photo captures both sides) - routes coolant through zig-zag oil passages. Cools oil by 20° C while only raising coolant temp by 2° C
 

Attachments

  • 20221031_143904.jpg
    20221031_143904.jpg
    978.5 KB · Views: 12
  • 20221013_150955.jpg
    20221013_150955.jpg
    833.4 KB · Views: 12
  • 20221011_153723.jpg
    20221011_153723.jpg
    799.5 KB · Views: 11
  • 20221011_153659.jpg
    20221011_153659.jpg
    821.2 KB · Views: 11
  • 20221031_143947.jpg
    20221031_143947.jpg
    1,012.3 KB · Views: 12
  • 20221031_144002.jpg
    20221031_144002.jpg
    1.1 MB · Views: 25
OP
C

Craig Balzer

Well-known member
Joined
Sep 21, 2005
Messages
868
Location
Colorado Springs
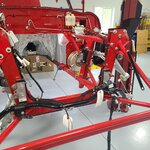
Took time out to nearly check off Bucket List Item
  • Bucket List Item: attend Packer's home game at Lambeau and tour stadium
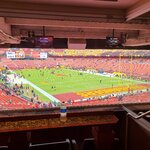
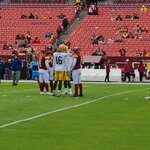
  • Near Hit - flew to DC on the 23OCT22 weekend that Washington Commanders were hosting the Packers. Closest friend works for a company whose CEO has an Execute Box at FEDEX Field. Watched Packers lose game in pampered comfort, Box included parking pass and pre-game field pass
 

Attachments

  • 20221023_104726.jpg
    20221023_104726.jpg
    953.4 KB · Views: 51
  • 20221023_111436.jpg
    20221023_111436.jpg
    1.2 MB · Views: 28
  • 20221023_111720.jpg
    20221023_111720.jpg
    1,002.5 KB · Views: 29
  • 20221023_111713.jpg
    20221023_111713.jpg
    1 MB · Views: 32
  • 20221023_114917.jpg
    20221023_114917.jpg
    926.2 KB · Views: 32
To avoid these ads, REGISTER NOW!
OP
C

Craig Balzer

Well-known member
Joined
Sep 21, 2005
Messages
868
Location
Colorado Springs
Can't believe I missed the MOST striking change I made in the last 6 months (that's what I get for trying to cram 6-7 months into posting over several minutes)

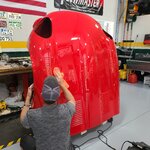
Back in July, I decided to go with Ceramic Coating (not a wrap). It's hydrophobic, defeats sun fade, provides another layer of paint protection AND looks like fresh, wet paint for years.

I was, at first, a bit apprehensive when the guy said he was gonna start by cutting the paint. My painter used 3,000 grit on his final pass. I didn't want all that work undone. The ceramic guy said his pad was rated at 30,000.
Then a final polish to remove any/all swirls, and such

The guy had never
  • worked on a car that was in pieces (I had him ceramic coat the underside of the bonnet as well as some of the engine side frames that would be visible when I am done)
  • worked at a private residence (usually requires the car to be brought to him)

First, some befores (3). (IF they stay in order)
Mind you - the paint is only 6 months old and has (obviously) never exposed to road, stones, or sun. So there was no corrective work needed.

Then some During and Afters (6 more)

TMI
This outfit offers 4 levels of ceramic coating, based on length of the guarantee: 1, 3, 5, and 7 years and the cost of each depends on the size of the vehicle: small (mine), medium, large, and suburban assault vehicle
The five and seven year applications requires professional application. Not that applying ceramic is hard (as easy as waxing a car). The pro level is to ensure the substrata is polished and flaw free before "locking" it in under the ceramic coating.

Five and seven include two bottles of stuff
  • the first is chemically configured to adhere to paint
  • the second is chemically configured to adhere to the first ceramic layer
The clear liquid is applied with a 5" circular sponge pad on a 2x2 foot area and allowed to haze over (2 minutes).
The haze is polished away using a microfibre towel.
Can not let the car get wet for 24 hrs; fully sets up in 2-3 days

EDIT - YUP!!! - scrambled order AGAIN!
 

Attachments

  • Alex working the Underside of the Bonnet I.jpg
    Alex working the Underside of the Bonnet I.jpg
    1,008.8 KB · Views: 41
  • Alex Working the Rear Deck.jpg
    Alex Working the Rear Deck.jpg
    972 KB · Views: 41
  • 20220730_182322.jpg
    20220730_182322.jpg
    745.4 KB · Views: 39
  • Alex Polishing the  Bonnet II.jpg
    Alex Polishing the Bonnet II.jpg
    992.6 KB · Views: 39
  • Alex Polishing the  Bonnet III.jpg
    Alex Polishing the Bonnet III.jpg
    958.2 KB · Views: 47
  • 8 - From Above.jpg
    8 - From Above.jpg
    887 KB · Views: 48
  • 20211211_143342.jpg
    20211211_143342.jpg
    710.3 KB · Views: 46
  • 5a -The Reflection Lines are Nice and Straight.jpg
    5a -The Reflection Lines are Nice and Straight.jpg
    800 KB · Views: 40
Last edited:
OP
C

Craig Balzer

Well-known member
Joined
Sep 21, 2005
Messages
868
Location
Colorado Springs
Well Guys --

It has been just over a year since my last posting regarding the restoration of my 72 Jaguar XKE V12 Convertible.

The first few months of the past year I moved forward apace. That is -- until I hit a stumbling block I was unprepared to overcome on my own. When my retired-Jaguar-mechanic friend came to COS from Denver to lay the crankshaft, he also placed the heads in place. May sound easy but each head is secured by 26 studs so getting each head in place requires some finesse.

He had to leave to take care of some errands back home so that left it to me to torque down the heads. Easy-Peasy.

1703885328428.jpeg

One a Jag V12 block there are 14 major studs placed quite closely to the cylinder holes; they are inserted into the block inside the water jacket. Fortunately, all those took the 52 lb/fts of torque without issue.

The other 14 studs thread into the flange of the block interface with the oil pan (see photo). Two of the adjacent small studs spun in their holes while I applied the torque - both on the same head. SH!T. That was in mid-summer

That resulted in a series of delays and such preventing my buddy from returning to help and several aborted efforts to affect the repair without removing the head.

It is late December and I sill have been unable to link up with my buddy.

So I embarked on a series of efforts to make a pile of bits and pieces into a sub-assembly. In no particular order these are the small assemblies that were assembled. Once the engine / head studs are corrected, the engine can be further assembled, and installed. Once installed, these sub-assemblies can be placed on the car.
 
Last edited:
OP
C

Craig Balzer

Well-known member
Joined
Sep 21, 2005
Messages
868
Location
Colorado Springs
As shown on a previous posting, I had the suspension bits cadmium plated.

I installed the front suspension - less the uprights. With the uprights still on the bench I can flex the arms out of my way to gain easier access to the engine bay. Obviously, new bushings were used.

The second photo shows angle of the system once mounted - shows the anti-dive geometry
 

Attachments

  • 20230204_151915.jpg
    20230204_151915.jpg
    1,001.8 KB · Views: 25
  • 20230513_123043.jpg
    20230513_123043.jpg
    794.1 KB · Views: 23
Last edited:
OP
C

Craig Balzer

Well-known member
Joined
Sep 21, 2005
Messages
868
Location
Colorado Springs
I installed the trunk (AKA - boot) sound-deadening mats, the rebuilt and newly cadmium plated latch mechanism and the fuel tank.
Installing the fuel tank was only possible by invoking several Old English curses and invectives.
Just need to install the new fuel lines and the electric fuel pump
 

Attachments

  • 20230412_145119.jpg
    20230412_145119.jpg
    1 MB · Views: 18
  • 20230416_123205.jpg
    20230416_123205.jpg
    986.8 KB · Views: 17
  • 20230810_145941.jpg
    20230810_145941.jpg
    743.2 KB · Views: 20
OP
C

Craig Balzer

Well-known member
Joined
Sep 21, 2005
Messages
868
Location
Colorado Springs
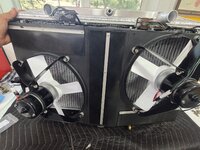
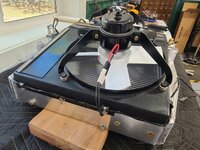
I rebuilt the radiator frame with the new aluminum radiator and rebuilt twin electric cooling fans (controlled by 2x relays) with new fan blades
 

Attachments

  • 20230921_142505.jpg
    20230921_142505.jpg
    757.3 KB · Views: 19
  • 20230921_142545.jpg
    20230921_142545.jpg
    783.1 KB · Views: 15
  • 20230921_142726.jpg
    20230921_142726.jpg
    849 KB · Views: 15
  • 20230921_142747.jpg
    20230921_142747.jpg
    763 KB · Views: 14
  • 20220714_131009.jpg
    20220714_131009.jpg
    1.6 MB · Views: 13
  • 20220714_131033.jpg
    20220714_131033.jpg
    875.5 KB · Views: 13
  • 20220714_131041.jpg
    20220714_131041.jpg
    1 MB · Views: 13
  • 20221130_135938.jpg
    20221130_135938.jpg
    1.2 MB · Views: 18
OP
C

Craig Balzer

Well-known member
Joined
Sep 21, 2005
Messages
868
Location
Colorado Springs
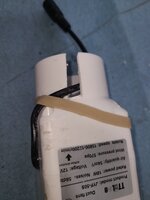
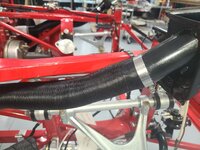
The V12 XKE has a basic fresh-air ducting that funnels air from the radiator opening through a duct hose into the passenger cabin.
First photo shows the 2" opening on the firewall (just above the brake booster).

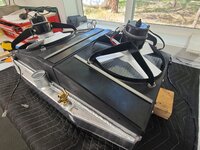
I found a 2" duct fan that I plumbed into the hose and will wire it to an unused switch on then dash board. cut a slit in the fan housing to route the power lead into the opening and then to the fuse block. Doesn't push much air but will help in stop/go traffic and when stopped/idling.
 

Attachments

  • 20230420_130730.jpg
    20230420_130730.jpg
    1 MB · Views: 18
  • 20230508_141956.jpg
    20230508_141956.jpg
    352.8 KB · Views: 18
  • 20230513_122941.jpg
    20230513_122941.jpg
    756.3 KB · Views: 18
  • 20230513_122924.jpg
    20230513_122924.jpg
    937.3 KB · Views: 17
  • 20230513_122934.jpg
    20230513_122934.jpg
    702.4 KB · Views: 17
Last edited:
OP
C

Craig Balzer

Well-known member
Joined
Sep 21, 2005
Messages
868
Location
Colorado Springs
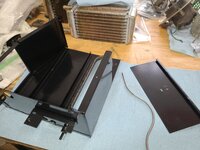
I rebuilt the heater core and housing.
Won't attach it until very near the end of the restoration process
 

Attachments

  • 20230417_150620.jpg
    20230417_150620.jpg
    1.2 MB · Views: 14
  • 20230417_150633.jpg
    20230417_150633.jpg
    1.1 MB · Views: 14
  • 20230524_151038.jpg
    20230524_151038.jpg
    490.4 KB · Views: 13
  • 20230521_144654.jpg
    20230521_144654.jpg
    696.2 KB · Views: 12
  • 20230521_132203.jpg
    20230521_132203.jpg
    623.6 KB · Views: 10
  • 20230521_132241.jpg
    20230521_132241.jpg
    786.6 KB · Views: 18
OP
C

Craig Balzer

Well-known member
Joined
Sep 21, 2005
Messages
868
Location
Colorado Springs
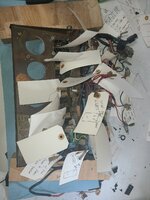
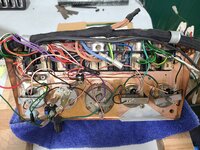
I had sent out the four small gauges (fuel, water temp, oil pressure, and volt meter) and the 2 large gauges (speedo and tach) to be rebuilt by West Valley Instruments. Time to install them along with new wiring harness.

After doing the Gauge Panel, I did same to the Tach/speedo panel.
Then knocked it over onto a bolt. Oooops. Time for a redo.

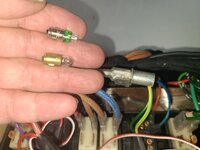
Also replaced 90% of the old incandescent bulbs with LEDs
 

Attachments

  • 20230602_145605.jpg
    20230602_145605.jpg
    686.9 KB · Views: 20
  • Old Harness Removed.jpg
    Old Harness Removed.jpg
    599 KB · Views: 20
  • New Harness Installed on Gauges.jpg
    New Harness Installed on Gauges.jpg
    1.1 MB · Views: 19
  • New Harness Installed on Switch Panel.jpg
    New Harness Installed on Switch Panel.jpg
    1.1 MB · Views: 22
  • 20230615_144238.jpg
    20230615_144238.jpg
    1.2 MB · Views: 23
  • 20230622_151838.jpg
    20230622_151838.jpg
    762.9 KB · Views: 23
  • 20230702_130641.jpg
    20230702_130641.jpg
    531.2 KB · Views: 23
OP
C

Craig Balzer

Well-known member
Joined
Sep 21, 2005
Messages
868
Location
Colorado Springs
The most frustrating operation (aside from the head stud debacle) was getting the window regulators to operate quietly and smoothly,
The passenger side was too easy -- it doesn't get much use.
It took 11 tries to get the driver side regulator to operate quietly. Turns out the rust and years-old grease on the lifting coil spring was the source of the noise.
Too many photos of the during.
Just a video of the before and after -- on YouTube:

Before:

After:
 
OP
C

Craig Balzer

Well-known member
Joined
Sep 21, 2005
Messages
868
Location
Colorado Springs
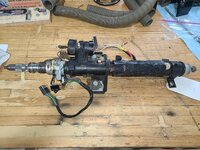
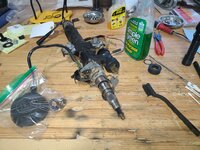
I opened a can of worms when I took apart the steering column for cleaning and restoration.
The problem is I am having issues on reassembly - hoping my retired Jag-Mechanic can fix this issue too.
The last photo shows my issue - I don't believe there is supposed to be an air-gap above the white plastic spacer
 

Attachments

  • 20230811_134611.jpg
    20230811_134611.jpg
    1 MB · Views: 19
  • 20230824_142219.jpg
    20230824_142219.jpg
    818.9 KB · Views: 13
  • 20230628_175337.jpg
    20230628_175337.jpg
    950.5 KB · Views: 9
  • 20230629_142410.jpg
    20230629_142410.jpg
    812.9 KB · Views: 8
  • 20230821_152329.jpg
    20230821_152329.jpg
    473.9 KB · Views: 7
  • 20231019_160119.jpg
    20231019_160119.jpg
    457.5 KB · Views: 9
OP
C

Craig Balzer

Well-known member
Joined
Sep 21, 2005
Messages
868
Location
Colorado Springs
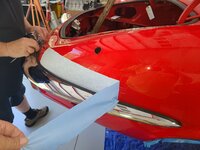
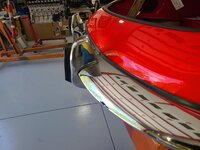
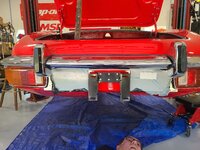
Installed the newly chromed rear bumper with a new body seal
 

Attachments

  • 20230810_101036.jpg
    20230810_101036.jpg
    597.7 KB · Views: 9
  • 20230810_110736.jpg
    20230810_110736.jpg
    525.2 KB · Views: 8
  • 20230810_110812.jpg
    20230810_110812.jpg
    452.1 KB · Views: 8
  • 20230810_110757.jpg
    20230810_110757.jpg
    367.6 KB · Views: 8
  • 20230810_104416.jpg
    20230810_104416.jpg
    792.8 KB · Views: 12
OP
C

Craig Balzer

Well-known member
Joined
Sep 21, 2005
Messages
868
Location
Colorado Springs
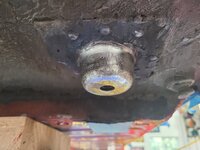
I dropped the Independent Rear Suspension (IRS) -- actually my Jag-Mech-Buddy did 99% of he work.
I watched and provide tools and encouragement.
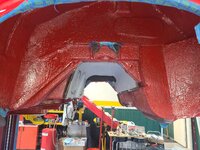
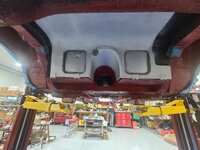
I then pulled the mounting bushing that needs to be replaced and cleaned up and painted the undercarriage where the IRS sits.
Still need to source the bearings and bushings and stuff to rebuilt the cage and then have the pumpkin rebuilt.
There is a heat shield that I left in place (doubt I could remove in one piece) but I cleaned it up and painted with heat-resistant paint
 

Attachments

  • 20230723_112932.jpg
    20230723_112932.jpg
    752.5 KB · Views: 12
  • 20230919_113129.jpg
    20230919_113129.jpg
    799.6 KB · Views: 10
  • 20230920_163921.jpg
    20230920_163921.jpg
    602.6 KB · Views: 10
  • 20231009_153405.jpg
    20231009_153405.jpg
    1,003 KB · Views: 12
  • 20231009_153452.jpg
    20231009_153452.jpg
    729.4 KB · Views: 13
  • 20231009_153525.jpg
    20231009_153525.jpg
    481.3 KB · Views: 14
OP
C

Craig Balzer

Well-known member
Joined
Sep 21, 2005
Messages
868
Location
Colorado Springs
Sooo -- there is one year of progress condensed into a handful of postings. There were other minor accomplishments but these cover the major efforts.

I am very much looking forward to over coming the head stud issue and determining if I am correct regarding the steering column.
My goal is to get my car back on the road and functional sometime the summer of 2024 🤞
 
Last edited:

Cris B

Well-known member
Joined
Mar 21, 2011
Messages
416
Location
Lancashire, UK
Amazing garage space, really enjoyed reading about that.

Appreciate you attention to detail on the E Type restoration. It will be really special when you finish it. Great workmanship 👍
 
OP
C

Craig Balzer

Well-known member
Joined
Sep 21, 2005
Messages
868
Location
Colorado Springs
Amazing garage space, really enjoyed reading about that.

Appreciate you attention to detail on the E Type restoration. It will be really special when you finish it. Great workmanship 👍
Thanks Chris

I really enjoy working in there - lots of space.
I haven't even come close to inadvertently scratching any newly painted surfaces.

I look forward to actually driving it again. Last ride was in September of 1990
 
OP
C

Craig Balzer

Well-known member
Joined
Sep 21, 2005
Messages
868
Location
Colorado Springs
Time for an update. Gonna condense a year+ into a handful of photos

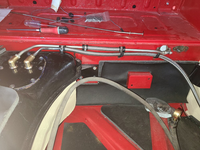
I ordered fuel line kits from SNG Barratt for the boot and engine compartment. I was expecting rubber fuel lines with the original red stripe running along them. Got this (partially installed):

1746209201367.jpeg
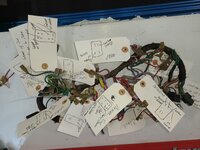
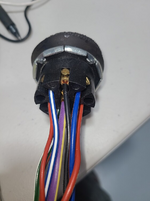
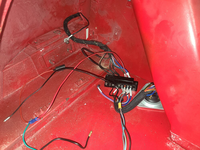
Next step was on the opposite side of the car. I had to familiarize myself with the 7 wires coming out of the 8-pin connecter beside the driver's headlight and the dozen (+/-) wires leading into and out of the 16-pin multi-connector that is bolted behind the US drover’s headlight. These wires power the headlights, turn signals, side lights -- that sort of thing
Here is the 16-pin multi-connector with 135,000+ miles with of grime and grit.

1746208253563.png
/
/
During that procedure I also compared the original 8-pin plug and 16-pin connector to the new ones I am installing.
Everything matched up with one exception.
The original 8-pin has 7 wires on it
After a couple hours over several days, this is what I had with new connector block and wiring. After drawing a schematic and checking it 4-5 times (OCD + **** Compulsivity) and laying the original on the bench, I aligned the new wires onto the terminal block
New 8-pin barrel plug
1746208372852.png

and new 16-pin connector (only for the truly over-the-top example of OCD + **** Compulsivity)
1746208494759.png
/
/
1746208514165.png
/
/
Also spent some time chasing wiring and deciphering schematics - even less photo-relevant. I still have 6-8 wire ends that to meet their mate/terminus. After getting as far as I could, I decided that perhaps a change of perspective may help. This is just a fitment test as I figure these panels will be in/out a few times.
1746208634358.png
 

Attachments

  • 1746208055134.png
    1746208055134.png
    1.6 MB · Views: 0
OP
C

Craig Balzer

Well-known member
Joined
Sep 21, 2005
Messages
868
Location
Colorado Springs
Next I had success in reattaching the driver side and passenger side demister control cables.

The driver side would have been much easier IF I had taken the time weeks ago to clean up the receiver and cable end on the bench rather than under the dash board. Also - test fitting the proper roll pin on the bench would have been how a smart guy would have done it. But the vent was installed under the dash and I didn't wanna go backwards.

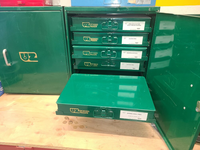
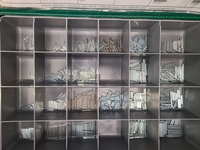
I needed a teeny, tiny roll-pin to secure the cable end in the receiver on the vent (I did NOT lose the original but it was mangled during extraction). That is when I thanked myself again for the Craig's List purchase made years ago. I bought 4x of these hardware storage tray racks - complete with a stock of pieces.

Here's two of them,
1746209474977.png
/
/
Did I say I was looking for a particular pim? Seems I have a selection:
1746210129995.png
/
/
A lifetime supply:
I one I needed was in the upper left corner of this drawer
1746210192203.png
/
/
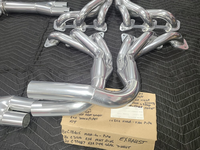
On 23APR24, I received 2x boxes from Jet-Hot. My exhaust system pieces are back after the coating being applied inside and out. The mufflers were NOT coated inside - just on the outside for obvious reasons.

The headers (from Moss Motors) were packaged so well when I received, I simply sent them on without opening the box. Due to the co$t of Jet-Hot coating, I did NOT $end the resonator a$$embly.I reasoned that that assembly was behind the cabin and far enough down stream that NOT coating it would have minimal effect.

Happy Snap Time - captions
1746210313805.png
/
/
1746210331010.png
/
/
I was reassembling the window regulator and bits on both doors. This is what happens when you install the regulator and glass with greasy/slippery hands. The guillotine effect is to be avoided:
1746210491549.png
Note the “missing segment” of the reflection of the line in the cut in the concrete floor (right in the middle of the photo). It still smarts to look at it.
/
/
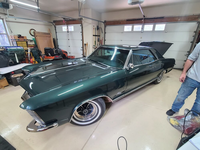
I took a break from destroying my Jag and the paint on my 65 Buick Riviera Gran Sport buffed and ceramic coated
1746210592057.png
/


/
/
Back to work on the Jag (we are now in mid-April 2024). I have been adding pieces to the bonnet and discovered an area that I failed to capture any photos of. The harness in question splits power from the 8-pin plug to the passenger side.

Here is an overview of the pieces
1746210746238.png

I determined the wiring harness is fed through the tunnel in the bottom of the bonnet nose to the passenger side.
1746210859993.png
/
/
and comes out near the passenger headlight
1746210935927.png
 
OP
C

Craig Balzer

Well-known member
Joined
Sep 21, 2005
Messages
868
Location
Colorado Springs
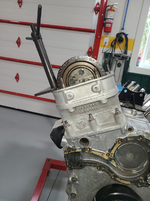
In May 2024 I started installing small pieces that were easier to do with the engine out of the way. I’ll be the first to admit this photo doesn’t look like much. After all, all it shows is three brake lines attached to the 3-way.

1746211198561.png
/
The truly observant among you noticed the sliver of black plastic under the horseshoe. I put that in there as reinforcement for a potential jacking location (couldn’t source a really hard wood). It is a piece of Delrin Acetal Plastic that is 17" long, 1" wide (fits snugly in the recess at the bottom of the horseshoe) and is 1.5" up into the horseshoe.
I notched the Delrin to clear the three bolts securing the hold down bracket. The notch removed 1/2" of material leaving ~1 inch bridging the bolts.
I used steel "zip ties" as a suspenders and belt" approach to keep the Delrin piece place
1746212488439.jpeg

/
/
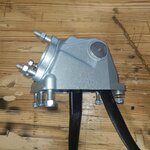
A Jag Lovers thread regarding the V12 oil pressure relief valve reminded me I had previously tried unsuccessfully to remove mine. It takes a 1-1/2" socket/wrench to open it; I didn’t have one. Amazon!
1746211700643.png
/
The oil pressure relief valve threads into the opening at 4 o’clock in the above photo. I wanted to see if there was any crud in there and check the status of the o-ring. Cleaned out the crud and soaked the relief valve in rust remover to clear up the innards. It appears the relief valve may be frozen and needs to be freed up. If the rust remover doesn’t free it, I’m hoping a bath in my sonic ******** gets the job done.

After only 2 hours, the solution is already working. The aluminum (?) washer needs to be renewed. However, I am pretty sure the o-ring may also need replacing.
1746211788516.png
/
/
On Monday 24JUN24, Jeff’s (a Jag V12 mechanic friend) visit was to conduct a main frontal attack on the two recalcitrant stud holes. I tried chemically bonding the replacement studs in the holes. The bond didn’t hold the torque (27.5 lb/t).

Jeff wanted to buy grade 8 bolts and fashion them into the replacement studs. NOTE: Jeff measured the new replacement stud cuz with his calibrated eyeballs he saw it was thinner than the original. Hmm. So we stripped the identical stud from my eBay spare block and took it and the micrometer to buy the hardware.

It took 90 minutes to visit ACE, select the items, and return. We got back only to discover the grade 8 bolt was too thick. How the hell did that happen?? Rather than waste another 90 minutes going to/returning from ACE, we opted to use the proper tools (that Jeff brought along) to do the job properly.

Captions = details
1746211925607.png
/
/
Used a pair of zip ties to secure cam gear to chain
1746211965278.png
Some good news (to counter-balance the bad which I am about to post). When Jeff removed the head, he figured out which sized Time-Serts were needed to make the proper repair.

The 10x 1.00" deep Time-Serts arrived in the mail (smallest amount I could order)
Along with the Time-Sert Installation Kit ($100 - ouch)
1746212048722.png
/
The Oil Pressure Relief Valve is pictured cuz when we removed it from the housing it was dirty and stuck (what else is new).
I soaked in it Blaster rust remover and after 2-3 days the internal plunger was freed. Just gonna take a while to source the proper O-Ring.

The bad news will be on the next posting - bumping against the 10-photo limit
 

Attachments

  • 1746212086675.png
    1746212086675.png
    910.9 KB · Views: 0
  • 1746212095754.png
    1746212095754.png
    910.9 KB · Views: 3
To avoid these ads, REGISTER NOW!
Top Bottom