To avoid these ads, REGISTER NOW!

Above 1200 Sq/FT Craig's Colorado Car Condo

Wokspaces above 1200 squarefeet.
To avoid these ads, REGISTER NOW!
OP
C

Craig Balzer

Well-known member
Joined
Sep 21, 2005
Messages
867
Location
Colorado Springs
I somehow managed not to post one of my favorite hidden modifications. It allows future electrical updates without tearing apart walls.

I installed a 2-3" PVC pipe in the upper left-hand corner of the circuit breaker box that terminates in the attic with another sweeping 90° curve. This easily allows fishing a new line (or two) into the circuit box. (See photo) The girts needed to be notched so the OSB would lay flat -- you can see the metal straps holding the pipe in place.

In the off chance I need to add more significant wiring (hmmm -- like in 10 years I'll need a charging station for my floating car) the stack of OSB above/below the circuit breaker box is screwed in placed -- easy to remove. All the other OSB panels are either nailed or stapled to the frame.

HTH
 

Attachments

  • Installing PVC Pipe to Circuit Breaker Box.jpg
    Installing PVC Pipe to Circuit Breaker Box.jpg
    87.5 KB · Views: 174
  • PVC Pipe to Circuit Breaker Box.jpg
    PVC Pipe to Circuit Breaker Box.jpg
    135.7 KB · Views: 179
Last edited:
OP
C

Craig Balzer

Well-known member
Joined
Sep 21, 2005
Messages
867
Location
Colorado Springs
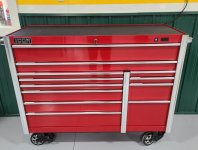
Getting to the end of building/populating my hobby shop and am about to begin actually working on my cars. I bought a small Snap-On tool chest in the late '80s. It served me well for decades, but I out-grew it a few years ago.

I shopped around for a replacement for months. I considered Snap-On again by they are pretty pricy. I really wanted matching Lista's for the ends of my work bench but the price of them and shipping is prohibitive as well.

I shopped Home Depot, Lowe's, Harbor Freight and a few others. I nearly went for a US General -- every one talks them up so much. That's where I spotted the Icon -- in Harbor Freight. The features that attracted me were the 25" depth, the two full-width top drawers, the two drawers dedicated to battery powered tools, and the two power strips.

It was delivered on Friday 19MAR21. It took nearly all day to cross load my tools from three small tool chests and various drawers and shelves in the attached garage into the new Icon.

A tool chest tour follows:
 

Attachments

  • 20210321_122746.jpg
    20210321_122746.jpg
    143.6 KB · Views: 194
  • 20210321_122557.jpg
    20210321_122557.jpg
    136.9 KB · Views: 190
Last edited:
OP
C

Craig Balzer

Well-known member
Joined
Sep 21, 2005
Messages
867
Location
Colorado Springs
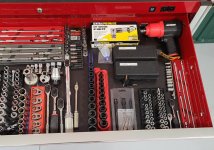
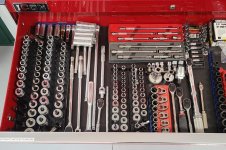
The top two drawers are full width -- the uppermost is deep enough to hold sockets in vertical racks. Note the 2x 110V outlets and 2x USB ports above right side of top drawer.

The first two photos are of the top drawer. Yeah -- prolly more sockets than I need.
Left 1/3 of the drawer is 1/2" drive. The rack of sockets are deep and shallow 12-point and then are deep and shallow 6-point with extensions, ratchets and breaker bars laid out.

The middle third is the same arrangement of 3/8" drive. Some specialty items here: wobble extensions, a set of crow's foot, torx sockets, u-joint sockets, torque wrench.

The right third is the same arrangement of 1/4" drive.

Also on the right side is impact sockets and pneumatic drivers; and manual impact drivers.

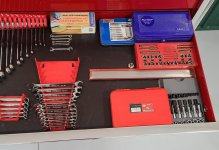
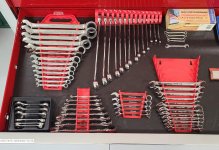
The second drawer is for wrenches, taps/dies, and easy-outs.

These are all SAE. None of the cars I wrench on have any metric fittings.
 

Attachments

  • 20210321_122920.jpg
    20210321_122920.jpg
    154 KB · Views: 167
  • 20210321_122915.jpg
    20210321_122915.jpg
    158.2 KB · Views: 147
  • 20210321_122845.jpg
    20210321_122845.jpg
    160.2 KB · Views: 150
  • 20210321_122851.jpg
    20210321_122851.jpg
    164.2 KB · Views: 161
Last edited:
OP
C

Craig Balzer

Well-known member
Joined
Sep 21, 2005
Messages
867
Location
Colorado Springs
The next drawers are self-evident
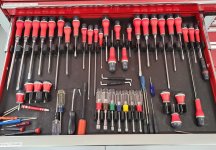
Drawer 3 -- Screwdrivers and Nut Drivers. I really like Facom's Ergotwist screwdrivers. They are no longer made.
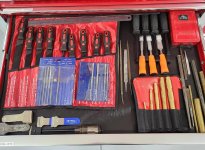
Drawer 4 - Files, Drifts and Gasket Scrapers
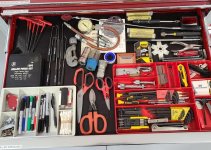
Drawer 5 - Allen Wrenches, blades/sharps, miscellaneous stuff.
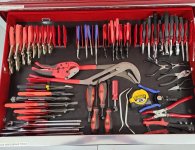
Drawer 6 - Pliers and Vice Grips
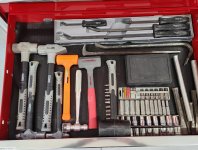
Drawer 7 - Hammers, Pry Bars, and Cold Chisels (the cluster of sockets here are all metric)
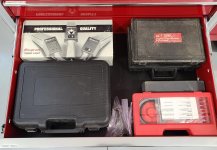
Drawer 8 - Cased Tools: timing light, digital thermometer, Stant tester, etc
 

Attachments

  • 20210321_123114.jpg
    20210321_123114.jpg
    149.9 KB · Views: 126
  • 20210321_123101.jpg
    20210321_123101.jpg
    154.7 KB · Views: 131
  • 20210321_123049.jpg
    20210321_123049.jpg
    157.3 KB · Views: 136
  • 20210321_123028.jpg
    20210321_123028.jpg
    162.9 KB · Views: 136
  • 20210321_123014.jpg
    20210321_123014.jpg
    157.8 KB · Views: 135
  • 20210321_122954.jpg
    20210321_122954.jpg
    158.6 KB · Views: 146
Last edited:
OP
C

Craig Balzer

Well-known member
Joined
Sep 21, 2005
Messages
867
Location
Colorado Springs
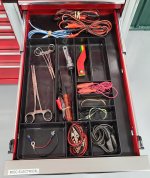
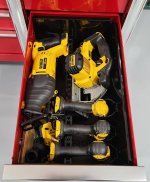
The drawers on the right bank are smaller.
I dedicated them to electronics.

First - misc electrical stuff

Second - multi-meters, analog tach/dwell meter, etc. Also note power strip along right side of the drawer. It is designed to plug in chargers for battery powered tool.

Third - a deep drawer with built-in racks to hold drills, flashlight, and I lay some of the larger tools on the bottom of drawer once I removed half the plastic cups.

BOTTOM LINE - I have a tool problem. I can't turn my back on a new, shiny tool.
I admit it -- -- I have a monkey (wrench) on my back
 

Attachments

  • 20210321_123157.jpg
    20210321_123157.jpg
    147.1 KB · Views: 112
  • 20210321_123223.jpg
    20210321_123223.jpg
    133.5 KB · Views: 108
  • 20210321_123243.jpg
    20210321_123243.jpg
    115.5 KB · Views: 132
Last edited:
OP
C

Craig Balzer

Well-known member
Joined
Sep 21, 2005
Messages
867
Location
Colorado Springs
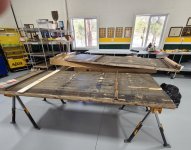
The day prior to the delivery of my new Icon tool chest, the weather cooperated and I made the 90 minute trip to an outfit in Denver that salvages items for repurposing: ginormous wooden wire spools, snow fencing, wine barrels, bowling alleys, . . . . ah ....... bowling alleys? . . . . . . um - can't those be used for a thick, hardwood work bench top? (The lane segment on saw horses is pine and the one on the table is pine/maple.)

These are each a touch longer than 8 feet; alleys are 42 inches wide. A bit wide (deep) for a bench top. A quick review of the attached shows some of the boards have loosened and are pulling apart. I'll for sure remove one board (about 1" wide) from each -- they both are about falling off. I just need to figure out if I just remove the loose boards or keep both lanes the same dimensions to ease construction of the legs and bracing.

I didn't realize the lane was held together underneath with that angle-iron looking brace. Without it -- I don't think the wood (even though it is 1.75" thick) would hold up under the stress of being dismantled.

Legs of each bench (3 pairs on each lane) will be 4x4s, on casters, with 2x4s providing the frame/bracing.

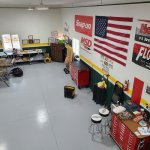
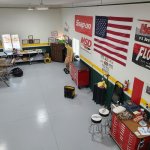
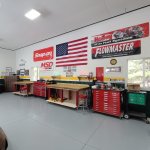
The overhead view of the garage shows where the two benches will be placed: one between the library card catalog and the tool chest; the other will be placed on the other side of the tool chest.
 

Attachments

  • Splitting section of maple lane.jpg
    Splitting section of maple lane.jpg
    150.2 KB · Views: 164
  • Splitting elements on pine lane.jpg
    Splitting elements on pine lane.jpg
    148 KB · Views: 168
  • 20210321_122557.jpg
    20210321_122557.jpg
    136.9 KB · Views: 155
  • Bowling Lanes on edge.jpg
    Bowling Lanes on edge.jpg
    151.7 KB · Views: 160

Jayman17

Well-known member
Joined
Feb 6, 2017
Messages
3,812
Location
Seattle, Wa
Craig, nice choice on the Icon toolbox. I’ve seen them at my local HF and they are very stout imo. Those bowling lanes will make a nice workbench top.
Your tool arrangement in that icon is :pimpflash

Jay
 
OP
C

Craig Balzer

Well-known member
Joined
Sep 21, 2005
Messages
867
Location
Colorado Springs
Jayman17 -- Thanx for the compliments.

I ended up pulling the trigger on the Icon quicker than I expected. Harbor Freight had a 10% sale on all tool chests the last weekend of February. For $40 I joined their Insider Club for a year -- unpublished sales, increased discounts on announced sale items, etc. It also gave me another 10% discount on that weekend sale. So I paid 80% of the sticker price; free delivery occurred three weeks later.
 

GoldCar

Well-known member
Joined
Jul 26, 2015
Messages
109
Location
Alsace, France
Hi Craig,

Always so interesting to follow the progress of your work.

Beautiful toolbox, and what a joy to see French brand tools in your box...:thumbup::thumbup::thumbup:

Nice organization of the drawers,

I'm going to get started soon and you'll hallucinate when you discover what Santa Claus brought me 3 months ago... but shh ... everything in its time... :bounce:
 
OP
C

Craig Balzer
Well-known member
Joined
Sep 21, 2005
Messages
867
Location
Colorado Springs
In the excitement of stocking the Icon Tool Chest and fussing with the bowling lane segments, I overlooked posting a small improvement.

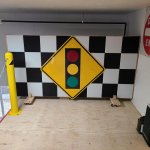
I really don't know the impact of this but I wanted to try to attenuate the noise from the air compressor in my loft. I bought 64 sound-proofing 1'x1' black and white squares. I covered the front and back of the 8'x4' piece of plywood I had placed in front of the compressor.

Then attached the last road sign.
 

Attachments

  • 20210228_161830 - 1.jpg
    20210228_161830 - 1.jpg
    75.8 KB · Views: 134
  • 20210321_122342.jpg
    20210321_122342.jpg
    108.3 KB · Views: 161
OP
C

Craig Balzer
Well-known member
Joined
Sep 21, 2005
Messages
867
Location
Colorado Springs
BIG DAY TODAY - 28MAR21​

Webster's defines a "garage" as "a building or part of a building where vehicles are kept when not in use. 2 : a shop where vehicles are repaired".

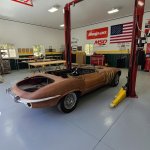
Today my hobby shop officially became a garage. The weather cooperated - temps were in the low 60's.

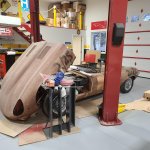
I placed several major items in the loft (just as it was intended): both bucket seats, convertible top frame, trunk lid, windshield glass, several other items.

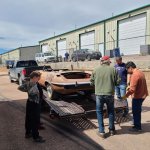
We put an 8 year old son of one of my buddies behind the wheel and the four of us pushed in place.

LET THE FUN BEGIN
 

Attachments

  • 20210328_132419.jpg
    20210328_132419.jpg
    147.8 KB · Views: 197
  • 20210328_145252.jpg
    20210328_145252.jpg
    116.8 KB · Views: 210

ZRX61

Well-known member
Joined
Aug 15, 2006
Messages
28,716
Location
Solar Blight Valley, SoCal
To stabilize the bowling lane wood I'd probably remove the angle iron, hose a **** ton of wood glue on the bottom of it, throw a sheet of 3/4ply on there, clamp it tight & then stuff a bunch of screws into it :)
 
OP
C

Craig Balzer
Well-known member
Joined
Sep 21, 2005
Messages
867
Location
Colorado Springs
To stabilize the bowling lane wood I'd probably remove the angle iron, hose a **** ton of wood glue on the bottom of it, throw a sheet of 3/4ply on there, clamp it tight & then stuff a bunch of screws into it :)

ZRX61 -- after looking at this thing for a few days, I'm taking a combination of your ideas and mine. I removed the angle iron today (it was in the way of the frame), will build the frame and then -- rather than glue/screw a sheet of plywood -- I will re-attach the angle iron at a 45 degree angle inside the perimeter of the frame. That oughta hold it.
Thanx for taking the time to reply.
 
To avoid these ads, REGISTER NOW!

purediesel

Well-known member
Joined
Apr 17, 2016
Messages
193
Location
Ada Oh
The drawers on the right bank are smaller.
I dedicated them to electronics.

First - misc electrical stuff

Second - multi-meters, analog tach/dwell meter, etc. Also note power strip along right side of the drawer. It is designed to plug in chargers for battery powered tool.

Third - a deep drawer with built-in racks to hold drills, flashlight, and I lay some of the larger tools on the bottom of drawer once I removed half the plastic cups.

BOTTOM LINE - I have a tool problem. I can't turn my back on a new, shiny tool.
I admit it -- -- I have a monkey (wrench) on my back


Where did you get the drawer organizer from?
 
OP
C

Craig Balzer

Well-known member
Joined
Sep 21, 2005
Messages
867
Location
Colorado Springs
The last pieces of the garage are pretty much in place.

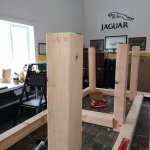
Got a buddy who is a retired master carpenter who's helping me true the legs on the bowling alley benches and get them all the same length. The photo shows the laser level (green line) laying right at the edge of the leg. Ought to finish the work benches later this week.

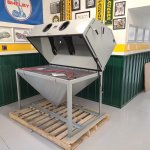
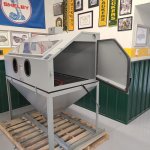
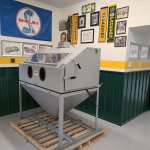
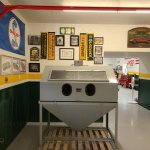
On Friday 08APR21 I received the last major piece. Placing it caused some new planning and moving to Plan E. The model of blast cabinet I wanted was no longer available when I went to order it. Got the next closest model. Just one problem: the smallest dimension on it is 37", the door of the dirty room (where I planned to place it) is 35.5". Hmmmm; tear out the door jamb or relocate to cabinet.
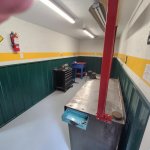
I placed it in the corner of the small room.

Yeah -- it's a big'un. I wanted to fit about any car part in it with out fussin'.
The blast area of the cabinet is 3' x 5' and about 28-30" tall at the rear of the cabinet. Just gotta plumb some air to it and buy two light bulbs.
 

Attachments

  • 20210409_140304.jpg
    20210409_140304.jpg
    140.6 KB · Views: 166
  • 20210409_140240.jpg
    20210409_140240.jpg
    142.3 KB · Views: 149
  • 20210409_140226 (1).jpg
    20210409_140226 (1).jpg
    140.3 KB · Views: 148
  • 20210409_140213 (1).jpg
    20210409_140213 (1).jpg
    124.7 KB · Views: 155
  • LaserLevel to get legs the same length 08APR21.jpg
    LaserLevel to get legs the same length 08APR21.jpg
    125.2 KB · Views: 182
Last edited:

straightcut

Well-known member
Joined
Jan 24, 2013
Messages
340
Location
Phoenix, Arizona
First time visitor to your thread - First off, congratulations on your excellent new shop! I wish you many enjoyable years working/playing in that!

Last summer, I purchased a small piece of maple bowling lane. Mine is 33" x 42" that I plan to use to replace a laminated top on a powered workstation. Mine is mostly glued (though there are some nails, so beware) and also lacks stability. The workstation has a steel, square tube frame with a cross brace, so the top will be supported once installed. Still, I plan to cut the loose edge - end of the maple top, so I can attach a full length piece of 2" angle iron. I want to cut in on (or miter) the bottom and side edge, so the angle iron fits flush to the wood - hope that explanation makes sense. I figured framing the entire perimeter would be a bit of overkill for my application.

You're going to have some beautiful benches!
 
OP
C

Craig Balzer

Well-known member
Joined
Sep 21, 2005
Messages
867
Location
Colorado Springs
StraightCut

Your word picture was easy to follow and is exactly what my retired master carpenter buddy discussed with me to secure the two ends. as you saw in previous photos, my lane segment each came with 42" long steel braces; I plan to reinstall them about 4" from the ends to secure them while still allowing room to use clamps if needs be.

Not sure mine are gonna real pretty -- there are several "plugs" in the lanes that were filled with a white substance. I plan to coat the tops with polyurethane -- we'll see how it all turns out soon enough.

Craig
 

straightcut

Well-known member
Joined
Jan 24, 2013
Messages
340
Location
Phoenix, Arizona
Craig, we had similar maple butcher block tables in our junior high and high school shop. One of our student labor jobs in junior high was to refinish the benches. We used hand held belt sanders to remove the old finish and take out some of the imperfections that the students had inflicted upon them. Following the sanding, we gave them a coat of polyurethane. They came out surprisingly well! Now, I would definitely use a mask when sanding that old finish off, but back in the day, that was not a problem!

I plan to refinish the top of mine with a couple coats of satin polyurethane after some of the ball-drop dents!:lol_hitti
 
OP
C

Craig Balzer

Well-known member
Joined
Sep 21, 2005
Messages
867
Location
Colorado Springs
My retired-carpenter neighbor really came through this week. His 2 grandsons (mid-20's) are living with him and are both handy with tools. Just as importantly, they have two friends both of whom are in construction.

Long story short, these 4 young studs showed up on Wednesday evening after work and for the cost 4x pizzas and a pair of 6-packs, they did in a few hours what would have taken me at least a week and a half of concerted effort to accomplish. Just as importantly, they manhandled the 200 lb bowling ally segments like they were TV trays.

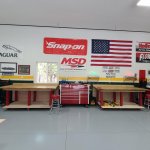
I still need to do final sanding the benches and coat them with polyurethane but I have 2x heavy-duty benches.

They also made short work of lifting the 400 lb blast cabinet so I could extract the pallet.

Now I can turn my focus to my V-12 E-Type. Up first is to remove the 30+ year old adhesive tape that was used to hold down the bonnet. What a PITA.
 

Attachments

  • 20210416_190101.jpg
    20210416_190101.jpg
    147.4 KB · Views: 185
  • 20210416_190114.jpg
    20210416_190114.jpg
    149.4 KB · Views: 183
  • 20210416_190035 (1).jpg
    20210416_190035 (1).jpg
    139.1 KB · Views: 194
  • 20210416_190019.jpg
    20210416_190019.jpg
    123.1 KB · Views: 218
  • 20210416_190013 (1).jpg
    20210416_190013 (1).jpg
    117.6 KB · Views: 202
OP
C

Craig Balzer

Well-known member
Joined
Sep 21, 2005
Messages
867
Location
Colorado Springs
Well -- I still have some ankle-biters to deal with in finishing the hobby shop itself (some are not so ankle-biter-ish: still gotta plumb compressed air around the shop) but in the main I can fit those in here and there.

With the bowling alley benches built, I applied three coats of polyurethane and called it good enough. With the alleys and frame assembled, I have lot of room back under my control.

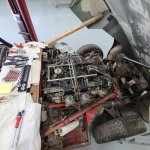
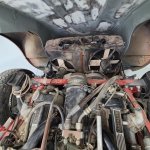
So -- I have started the process of dismantling the Jag. First up is to pull the engine. Shouldn't be that hard but I'll need to put it all back together on my own, and that'll be months (like 18-20 of them) from now. So I'm going slow and taking lots of photos and taking lots of notes. It doesn't look like much, but it's a start.
 

Attachments

  • 20210425_153152.jpg
    20210425_153152.jpg
    150.2 KB · Views: 150
  • 20210425_151429.jpg
    20210425_151429.jpg
    83.7 KB · Views: 131
  • 20210425_143814.jpg
    20210425_143814.jpg
    118.7 KB · Views: 125
  • 20210425_153157.jpg
    20210425_153157.jpg
    152.6 KB · Views: 145
  • 20210425_153144.jpg
    20210425_153144.jpg
    121.3 KB · Views: 145
  • 20210425_153126.jpg
    20210425_153126.jpg
    100.6 KB · Views: 161
OP
C

Craig Balzer

Well-known member
Joined
Sep 21, 2005
Messages
867
Location
Colorado Springs
I made progress on two fronts.

I have stocked the Dirty Room with about 2/3s of my toys: welding table, parts washer, buffer and grinder are in. My20-ton press and drill press to go.

Tomorrow I'm picking up used frig, range (powder coating) and microwave.

I am about half way through the 53-step procedure in the Repair Manual to pull the V12. I'm going slowly and deliberately.
Lots of notes -- especially as regards the wiring harnesses and hook ups
Lots of photos -- 100's already.
I'm figuring late next week to pull it.
 

Attachments

  • 20210427_165601.jpg
    20210427_165601.jpg
    90.7 KB · Views: 179
  • 20210430_165225.jpg
    20210430_165225.jpg
    153.4 KB · Views: 174
  • 20210430_165207.jpg
    20210430_165207.jpg
    154 KB · Views: 176

shortykorte

Well-known member
Joined
Sep 1, 2014
Messages
8,039
Location
Tallahassee, Fl
Dirty room needs some dirt. Lol.
Note on fire extinguisher. I believe you want it by a door so if there is a fire. You’ll be between the fire and an egress.
Beautiful shot of car and driveway. Looks like a beautiful day for QST. Shop looks like it has a some natural light.


Sent from my iPhone using Garage Journal
 
OP
C

Craig Balzer

Well-known member
Joined
Sep 21, 2005
Messages
867
Location
Colorado Springs
Note on fire extinguisher. I believe you want it by a door so if there is a fire. You’ll be between the fire and an egress.

Shorty -- the best way to reply to your comment about the placement of my extinguishers is on the attached diagram. The one you focused is about 7 feet from one exit and 2 feet from another.

Its all good
 

Attachments

  • EXTINGUISHER PLACEMENT.pdf
    117 KB · Views: 30
OP
C

Craig Balzer

Well-known member
Joined
Sep 21, 2005
Messages
867
Location
Colorado Springs
Beautiful shot of car and driveway. Looks like a beautiful day for QST. Shop looks like it has a some natural light.

Craig, I would love to have that view out of my garage door. Dirty room is looking good. -- Jay

I am real happy with my lot and the neighborhood.
Very peaceful and tranquil. Of course -- all that pleasantness comes with an annual mountain of pine cones and pine needles. A small price to pay

Craig
 
OP
C

Craig Balzer

Well-known member
Joined
Sep 21, 2005
Messages
867
Location
Colorado Springs
Accomplished a little on both the Jag and finishing up the hobby shop

The majority of action in the hobby was populating the Dirty Room: added wall mounted peg board, stand for drill press (just need to get it running -- motor hums but no action), rewired and installed powder coating oven, and hung a rack from the ceiling from which I'll hang powder coated items that are fresh from the oven and need to cool.

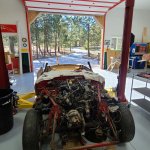
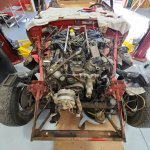
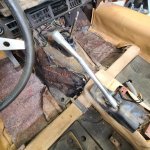
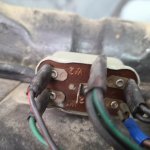
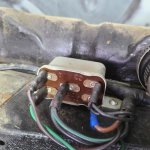
On the Jag, I have everything ready to pull the engine except for removing the rear engine mount (which sits under the transmission) and then detaching the front u-joint from the propeller shaft.

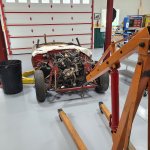
I will borrow and cherry picker with levelizer from a buddy and buy a heavy duty engine stand from other friend.

Then I tackle the dash board and steering column . . .
 

Attachments

  • Trans Tunnel - drivers side - Overbiew.jpg
    Trans Tunnel - drivers side - Overbiew.jpg
    151.9 KB · Views: 122
  • 20210508_131217.jpg
    20210508_131217.jpg
    104.3 KB · Views: 108
  • 20210508_131143[1].jpg
    20210508_131143[1].jpg
    98.7 KB · Views: 120
OP
C

Craig Balzer

Well-known member
Joined
Sep 21, 2005
Messages
867
Location
Colorado Springs
Finally got my dirty room put together. When I had to place the media cabinet in the small room rather than in the dirty room (the cabinet wouldn't fit through the door) I was disappointed. It is clear to me now that there is no way I could fit it in the dirty room without displacing a bunch of other machines. I guess it was fated to happen the way it did.

Meanwhile, I am all set to pull the engine tomorrow. I borrowed the cherry picker; I bought the engine stand from a friend just outside Denver (about 90 minutes away). Never seen one like it -- it is stout as hell.
 

Attachments

  • 20210525_145851.jpg
    20210525_145851.jpg
    2.5 MB · Views: 91
  • 20210525_145858.jpg
    20210525_145858.jpg
    2.3 MB · Views: 91
  • 20210525_145906.jpg
    20210525_145906.jpg
    2.5 MB · Views: 78
  • 20210525_145935.jpg
    20210525_145935.jpg
    2.6 MB · Views: 83
  • 20210525_145951.jpg
    20210525_145951.jpg
    2.4 MB · Views: 101
To avoid these ads, REGISTER NOW!
Top Bottom