
To avoid these ads, REGISTER NOW!

Delta Rockwell Drill Press Restore 1957

Davefr

Well-known member
Joined
Jan 7, 2010
Messages
11,836
Location
OR
I ordered the paint and some new course wire brushes. I will have to research electrolysis. Living California I need to be careful how to dispose of the byproducts.
How do I get the quill apart? There is a snap ring on the top that looks preloaded and some kind of hard to get to split ring on the bottom.


Worked on the pole last night.


You're doing some great work!!!! It'll look better then new when you're done!!
 
To avoid these ads, REGISTER NOW!
OP
A

Alexbn921

Well-known member
Joined
Aug 22, 2013
Messages
579
Location
East Bay Nor Cal
Baby steps. I've been work on other projects and the DP has been idle. Tonight I cleaned and lubed up the switch. I'll polish the faces after the paint drys.
 
OP
A

Alexbn921

Well-known member
Joined
Aug 22, 2013
Messages
579
Location
East Bay Nor Cal
Made some more progress with the DP. I picked up a wire wheel and cone for the angle grinder. It made short work of the oil and rust on the table/base. I used my drill and Dremel to get to the nooks and crannies. Then hit the whole thing with acetone. All prepped and ready for paint.


I also made a tool that Outlaw had suggested in another thread. It worked perfect for getting the name plate off.


I need to get a pressure washer just to get the grime/grease out of the head casing.
 
Last edited:
OP
A

Alexbn921

Well-known member
Joined
Aug 22, 2013
Messages
579
Location
East Bay Nor Cal
Thanks Nine.
More Progress. Holy hell there is a lot of sheet metal on the belt cover. Took forever to get the paint off and cleaned up. I don't know how people do a whole car. Main body is scraped clean on the inside, but needs some brake clean to get the last little bit of grease out. All the big pieces are clean and almost ready for paint.:bounce:


Last edited:
OP
A

Alexbn921

Well-known member
Joined
Aug 22, 2013
Messages
579
Location
East Bay Nor Cal
Man its been a busy week. I don't think I sat down one time all weekend. Anyway I was able to get a coat of primmer on the base/table. It used a lot more than I though it would. I will have to order another can. Primmer laid down easy and I'm going to prep the top for paint sometime this week.
 
OP
A

Alexbn921

Well-known member
Joined
Aug 22, 2013
Messages
579
Location
East Bay Nor Cal
More progress:D. Painted and painted and ran out of primer. Everything but the main body of the PD is painted and drying. Most of the little parts are cleaned and polished. I still need to clean the threads on all the bolts and paint the motor.
 
OP
A

Alexbn921

Well-known member
Joined
Aug 22, 2013
Messages
579
Location
East Bay Nor Cal
Those badges look great (so does everything else) What did you clean the badges with?

Fantastic job on the badges, could you give us the details of how you got these results?

Thanks Guys.
Badges where a four set process.
First soaked them in WD40 and scrubbed them with a rag. Took awhile and some of the imperfections are oxidation.
Once they where free of grim I hit them with a Meguiar's 3 step paint cleaner, polish and finally wax. Works wonders on cars and motorcycles. I also waxed the back to protect them.
 

Attachments

  • detailing_27.jpg
    detailing_27.jpg
    49.3 KB · Views: 50
OP
A

Alexbn921

Well-known member
Joined
Aug 22, 2013
Messages
579
Location
East Bay Nor Cal
Looking good!

So what is the difference between Delta Rockwell and Delta Milwaukee? I have a Band Saw about this same age that I am using and may refurbish.

Hey dude.:D
Don't really know the difference between the two brands, but if it is the same vintage it should be a stout machine. I will have to follow along on your restoration. Take lots of pictures and get a ton of the magnetic parts holders from harbor freight. They really come in handy for remembering what things go together.
 
OP
A

Alexbn921

Well-known member
Joined
Aug 22, 2013
Messages
579
Location
East Bay Nor Cal
Well after tearing apart everything, its finally time to put it back together. Now where did that screw go?:D Good thing I took lots of pictures.
The base painted waxed and threads chased.

Main deck painted waxed and threads chased. The screw that holds it to the poll is new because they welded a new end on the old one. The area that captures the nut is bigger than it needs to be a adds a little slop.:confused:

Glamer shots


Wingnut65

Well-known member
Joined
Apr 21, 2010
Messages
3,170
Location
Tampa Bay, FL
The refurb looks amazing, Alex. Thanks for the detailed reports.

And I agree, those badges look great!

I'm interested if you have found any info on resetting the quill spring. I just picked up a C'man 100 and the spring is too loose, allowing the quill to sit on the bottom. I'd think the process to reset the spring should all be the same.
 

WWIIjeep

Well-known member
Joined
May 30, 2012
Messages
1,240
Location
Arizona
So what is the difference between Delta Rockwell and Delta Milwaukee? I have a Band Saw about this same age that I am using and may refurbish.

Same company, different vintage.

Delta (original) from 1919-1941.

Delta Milwaukee from 1942-1952.

Delta Rockwell from 1953-1973 (Rockwell bought Delta in 1945).

Rockwell International from 1974-1984 (Rockwell sold Delta in 1984).

Delta International from 1984-2010.

Delta Power Equipment from 2010-present.
 

jakemac

Well-known member
Joined
May 21, 2013
Messages
9,035
Location
New England
To add to that -
The Rockwell that you see today (oscillating tools) isn't the same Rockwell from the past. It is a new company that licensed the name from the holders in the mid-2000's in order to capitalize on the name recognition.
 
OP
A

Alexbn921

Well-known member
Joined
Aug 22, 2013
Messages
579
Location
East Bay Nor Cal
The refurb looks amazing, Alex. Thanks for the detailed reports.

And I agree, those badges look great!

I'm interested if you have found any info on resetting the quill spring. I just picked up a C'man 100 and the spring is too loose, allowing the quill to sit on the bottom. I'd think the process to reset the spring should all be the same.
On my DP there is a screw that you turn to pre-load the spring. I have cleaned up the parts and will post a picture when I put the main unit back together early next week.

Same company, different vintage.

Delta (original) from 1919-1941.

Delta Milwaukee from 1942-1952.

Delta Rockwell from 1953-1973 (Rockwell bought Delta in 1945).

Rockwell International from 1974-1984 (Rockwell sold Delta in 1984).

Delta International from 1984-2010.

Delta Power Equipment from 2010-present.

Nice information. thanks Jeep.:thumbup:

To add to that -
The Rockwell that you see today (oscillating tools) isn't the same Rockwell from the past. It is a new company that licensed the name from the holders in the mid-2000's in order to capitalize on the name recognition.

It seams like all the "old names" are being reused with the **** quality.:(
 

PT Doc

Well-known member
Joined
Nov 12, 2010
Messages
3,197
You could use jb weld on the table that was drilled. It should make the boohoo go away almost without sign it was there.
 
To avoid these ads, REGISTER NOW!
OP
A

Alexbn921

Well-known member
Joined
Aug 22, 2013
Messages
579
Location
East Bay Nor Cal
You could use jb weld on the table that was drilled. It should make the boohoo go away almost without sign it was there.

I have some jb weld I will have to try out. Painted the head unit last night and instaled my vise to use as a hanger so it could dry inside.:D
 
OP
A

Alexbn921

Well-known member
Joined
Aug 22, 2013
Messages
579
Location
East Bay Nor Cal
It was a productive weekend in the garage. I wanted to take more pictures of the parts all laid out, but space and time was limited. So I power through and got the whole head unit built, adjusted. I also tested the motor before I tore it down for paint.
Chuck assembly.

New wiring for the switch. I ended up shorting and forming the wires better after test fitting it.


With the spring set and the head bolts tighten down there is no perceivable slop in any direction.:thumbup:

Does anyone know what piece would go in the hole on the handle? I think it is most likely another ball end bolt to hold the handle at a set point.
 

zkling

Well-known member
Joined
Jan 23, 2007
Messages
16,939
Does anyone know what piece would go in the hole on the handle? I think it is most likely another ball end bolt to hold the handle at a set point.

You are missing a small knurled head knob, similar to the one on the end of that shaft. It keeps the handle in place at a specific length. The one on the end should adjust angular position of the handle hub. If you can't find an example on line, let me know and I can take a pic of mine.
 
OP
A

Alexbn921

Well-known member
Joined
Aug 22, 2013
Messages
579
Location
East Bay Nor Cal
You are missing a small knurled head knob, similar to the one on the end of that shaft. It keeps the handle in place at a specific length. The one on the end should adjust angular position of the handle hub. If you can't find an example on line, let me know and I can take a pic of mine.
I found a picture online, but finding one is going to be hard.:sad: I was trying to track down the part number with no luck.
This is an awesome resto.
Thanks. I'm enjoying the process and trying not to stress out about it.

Pulleys are mounted, cover and belts are installed. Just waiting on the motivation to prep/paint the motor.


Checked run out on the chuck. It was under +-.001 of an inch.:bounce::rocker:
 

zkling

Well-known member
Joined
Jan 23, 2007
Messages
16,939
According to the parts manual I have for mine (floor version, production table, but same head). The part you are looking for is "DP-887, Lock Knob". I doubt if that number will be of any help though.

Don't measure runout on the external features of the chuck. Also it appears you are missing the contact tip on your indicator?
 
OP
A

Alexbn921

Well-known member
Joined
Aug 22, 2013
Messages
579
Location
East Bay Nor Cal
According to the parts manual I have for mine (floor version, production table, but same head). The part you are looking for is "DP-887, Lock Knob". I doubt if that number will be of any help though.

Don't measure runout on the external features of the chuck. Also it appears you are missing the contact tip on your indicator?

Thanks for the number.
It was a quick and dirt check.:lol_hitti I removed the tip because it is my bicycle rim/rotor tip and it was to big. What tip should I use and where should I measure? I'm trying to find a steel rod to chuck up. I really need to get a mag base with arm for my dial gauge. I used the bike setup with magnets and it was less the optimal.
Still should of showed it something was wrong.:dunno:
 

ksierens

Member
Joined
Jan 12, 2012
Messages
19
Location
S.E. Michigan
Very nice! Though I am partial to 50's Delta's :)

dp-220.png
 
OP
A

Alexbn921

Well-known member
Joined
Aug 22, 2013
Messages
579
Location
East Bay Nor Cal
Very nice! Though I am partial to 50's Delta's :)

dp-220.png

Wow. Nice DP. Did you do the restore? I would love to have a link to the rebuild.

I'm picking up a Palmgren X-Y rotary table tonight and wanted to get thoughts on the table. It's old and looks in great condition. It will need paint and I want to pick up a holding kit for it. Any tips would be appreciated.


I also need a vise for general use. Searching craigslist almost everyday for a 4-6 inch medium duty DP vise.
 

Mr. 360

Well-known member
Joined
Nov 23, 2012
Messages
662
Location
Bowmanville, Ontario
Very, very nice job on that DP. I've been wanting a vintage one for as long as I can remember, now you've got me REALLY wanting to find one and give it a good going through. I replied to someone with a nice looking 1940's Beaver DP on Kijiji for $70, but so far no reply (im guessing it's sold and he just hasn't taken the ad down, it's been a week since I replied). Great job on this unit, hope you get years of close-tolerance use out of it.
 

John Timmins

Well-known member
Joined
Sep 1, 2008
Messages
861
Location
Flagler Beach, FL
I enjoyed seeing your project ! Here is my 1959 model : http://www.garagejournal.com/forum/showthread.php?t=158422

The name tag is on the other side on mine. I can take some more pictures if you want to see more features. I bought it from a guy who brought it down to Daytona from Wisconsin. The upright pole still has cosmolene on it and there are no drill bit dimples in the bed. there is no idler gear. I raised the entire head of the drill up to the top of the pole so the belts didn't rub. I have the same on-off buttons.

The name plates are attached with drive screws...nasty case hardened little buggers that hold on the name plates of the vintage Mercury outboard motors I restore. SOMETIMES there is a hole on the back side where you can hit the base of it with a pin punch to drive them out. Most of my projects get the name plate masked off. I don't have much luck getting them out.


The nut and bolt supply place I use has 4 sizes. This size and one larger are about the only choices you have since the others are smaller. I bought a box of 100 for $3.25 for an outboard restorer parts guy.

Back to your drill press, I am wondering if my drill press was the basic model and yours is a Deluxe model with the belt cover and idler pulley arrangement ?
 
Last edited:
OP
A

Alexbn921

Well-known member
Joined
Aug 22, 2013
Messages
579
Location
East Bay Nor Cal
Very, very nice job on that DP. I've been wanting a vintage one for as long as I can remember, now you've got me REALLY wanting to find one and give it a good going through. I replied to someone with a nice looking 1940's Beaver DP on Kijiji for $70, but so far no reply (im guessing it's sold and he just hasn't taken the ad down, it's been a week since I replied). Great job on this unit, hope you get years of close-tolerance use out of it.

There is definitely something about an old cast iron tool. I was working on a fixing up an old bike I picked up last week so the motor is still in pieces, but I'm hoping to get it done by the end of the week. Keep looking.:bounce:
 
OP
A

Alexbn921

Well-known member
Joined
Aug 22, 2013
Messages
579
Location
East Bay Nor Cal
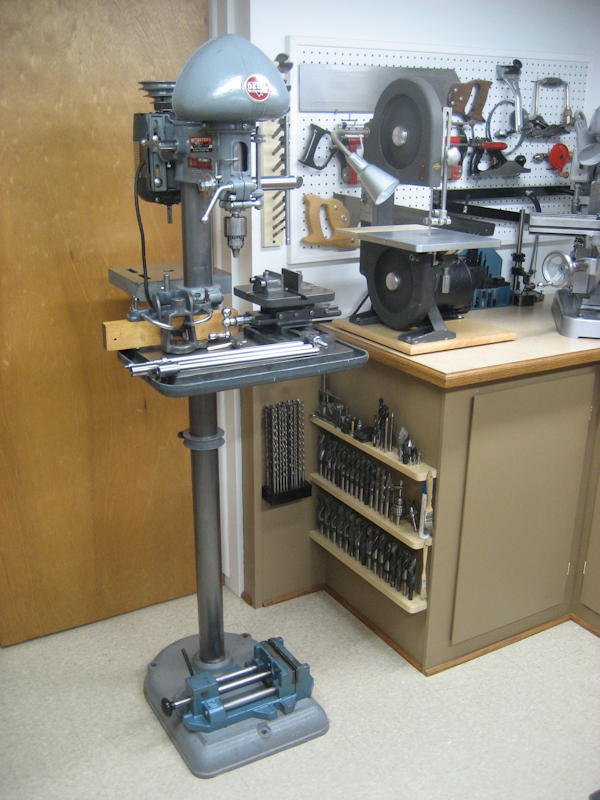
Well it only took 6 months for me to complete the Drill press.:lol_hitti It's finally done and running beautifully.
I've had so time off work for the holidays so I got the motor all painted and back together. It runs super quiet with almost no vibration. If I tighten the motor tension screw all the way down it does get louder, so I just left it finger tight. The spring holds it in place for the most part anyways.
Glamour shots of the motor.:D
torn apart

Painted


I love the polished look of the end cap.

Soldered the wires and used the original covers.


Ready for action.
 

383 240z

Well-known member
Joined
Dec 4, 2006
Messages
4,295
Location
Findley Twp. Allegheny Co.
Very nice well documented restore. Thanks for taking the time. I'm doing a Thor 7" bench grinder right now. Your info on restoring the trim ID tags was most helpful. After the grinder is complete I'm going to start on my 1939 Delta 17" drill press. I hope it turns out 1/2 as good as your did. Keith
 
To avoid these ads, REGISTER NOW!
Top Bottom