2012 Honda Civic VTI-L Detail
This Honda was recently bought by my boss for his newly licensed son. The young lad is nowhere close to being interested in cars, so his only two requirements for his first car were it had to be white and had to be an automatic. The father on the other hand wanted to spend as little as possible, it taking a while to realise that a clean, roadworthy small first car doesn’t exist at $5000 like it would have when he was a boy.
A stream of possibilities were considered. Several of the previous-gen Ford Focus’s were put under my nose for opinion, but in no way would I recommend buying a Powershift Focus and that the low asking prices reflected that. Same for the Holden Cruze, yeah run don’t walk. There were of coarse high-milage Toyota Corolla’s doing the rounds, naturally carrying high Toyota tax. In the end, this relatively low km Honda Civic hatch surfaced at the local Ford dealer. With only 112,000 km (70,000 miles) on the clock, the car was owned by the proverbial little old lady and overall looked very tidy. Initially disliking the “bucket seats” as being uncomfortable, I showed him the lumbar adjustment that was pumped all the way forward, and once wound back, he gave it the tick of approval and bought the car on the spot. Hardly an exciting first car, but that’s what he wanted, a car is merely a way of going from A to B to most of that generation. What a contrast to me at that age!


As mentioned, this car is relatively clean and tidy, save for a couple of marks on the rear bumper, curbed wheels (please explain to me why older females always have a habit of curbing wheels?), a collection of stone chips and the usual wear and tear on the interior. And while it was clearly detailed prior to hitting the forecourt, my job today was to take it to the next level. I dare say some of the things I did today were the first for the car.


 Wheels & Tyres –
Despite not often using them on my own cars, there is a reason why I keep a product like NV Purge in the cabinet. I’ve tried a few similar products, but I keep coming back to Purge for its superior performance and lower stench factor. Tyre cleaner of choice being Wise Guy. Due to the buildup on the barrels, I applied the chemicals to dry wheels and allowed them to soak for a few minutes. I then rinsed, which removed the bulk of the build up with ease, then went back in with another hit with the chemicals and agitation. You'll notice these brand-new tyres didn't have any brown blooming.


The barrels were putrid! For wheels like this, I keep a selection of older wheel brushes so that I don't ruin my good stuff. For heavily contaminated wheels, I've found my old Wheel Woolies cut through brake dust better than microfiber.

I also decided to try Carpro TriX, which is a combined tar and iron remover, in an attempt to remove what looked like tar deposits. Turned out those spots were pitting in the wheel finish. At least I tried.

 Decontamination and Washing –
Because I wasn’t going to polish or ceramic coat the vehicle, getting the paint contaminant free will maximize what I put on the car in terms of protection. Clean, uncontaminated and smooth paint will always look better, no matter what ends up being applied.
Starting off the exterior wash, I applied Gyeon Iron to the whole car from dry. This would be the strongest display of iron contamination I have come across, the white paint clearly highlighting the reaction of the chemical. Again, the car would likely have never seen such a chemical in its 12 years on the road.


Some question the importance of using an iron remover, stating that a clay bar is more effective. Well, imagine trying to mow through that with a clay bar, and the additional marring it would bring to the table.
As always, I follow the iron remover with a high-pH soap to continue the reaction and attack dirt and oily contamination. This was my first use of Armour Detail Supply Decon Soap, which foams nice and thick and has a long dwell time.
ARMOUR Detail Supply Decon Soap High pH Pre wash stage (detailingshed.com.au)
Decon Soap – Armour Detail Supply


After another dwell period, the iron remover/soap residue was rinsed thoroughly from the car. I then foamed with Carpro Descale and commenced the contact wash. The Descale helps remove any embedded mineral content.
The multi-step decon process helps reduce the amount of contamination I need to plough through with clay media. In this case, I used a Waxit Clay mitt and a cocktail of left-over quick detailers for lubricant. This allowed me to say goodbye (and good riddance) to Stjarnagloss Silke and Gtechniq Quick Detailer, both ok but not stellar products. I also laid into the remainder of my supply or Megs Last Touch. This took the nearly smooth paint and glass to fully smooth. I then went around and spot treated any remaining stubborn tar deposits with KCx TEA.
 Further Exterior Details –
After the final rinse, the whole car sprayed down with Carpro Hydr02 Lite, wheels included. I then moved into the garage and dried using the EGO and a large drying towel. Door jambs wiped down with DIY Waterless Wash.
Noticing some decent water-spots on the glass, I bit the bullet and gave all of the exterior glass a quick hand polish using P&S Clarity Creme.

With the residue removed and wiped down with ADS Panel Prep, I then decided to use up a product that has since been discontinued, NV Glass Lite. This product is very similar to Gyeon Quick View, just without the novel squeeze applicator. I get the feeling NV nixed this product due to having issues with it destroying spray heads, in my case I had to use a pipet to dispense it.

Once Glass Lite was applied, I left it to cure while taking care of the next step. To remove the residue, use a damp towel, then follow with some glass cleaner to leave a streak free finish.
After spot treating a couple of love marks here and there using Rupes DA fine on a microfiber towel, it was time to add something to the paint. For the Civic, I chose Armour Detail Supply Ceramic Spray Sealant.
ARMOUR Detail Supply Ceramic Spray Sealant 6 months Durability (detailingshed.com.au)
Ceramic Spray Sealant – Armour Detail Supply
I’ve had this product sitting on the shelf for a few weeks now waiting for a suitable candidate to use it on, the Civic being an obvious test subject. ADS Ceramic Spray Sealant has a claimed durability of up to 6-months, which sounds pretty good for such a simple application.

This would have to be one of the quickest and easiest ceramic spray sealants I have used so far, sitting right alongside the brilliant KCx S0.02. No streaking, you could almost get away using a single towel to apply it. I would say S0.02 is slicker, but this ADS product is not far behind. Another winner from ADS.
Interior Detailing –
The interior wasn't too bad, just needing a little finessing. First off, I vacuumed the whole car. The floor mats were remarkably clean, I still hit them with the Tornador to loosen up embedded sand, sprayed with a small amount of KCx Pol Star, agitated with a carpet brush, then using the turbo attachment on the vacuum to finish them off.
I then grabbed Griot's Interior Cleaner and a scrub pad to treat a few isolated areas like the door sills, pedals and the gear level that was covered in makeup residue. A small stain on the rear seat was treated with Pol Star, agitated then vacuumed to remove the residue. To finish off, I wiped everything down with P&S Swift.
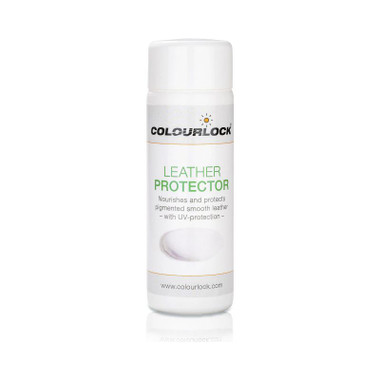
The steering wheel was pretty nasty, far too shiny and slick. Whenever you see a glossy leather steering wheel, that's a very strong indicator of how mucky the surface is. After unsuccessfully attempting to clean it with the Griots, it was ColourLock Strong Leather Cleaner to rescue, the best on the market. Once quick pass with the ColourLock brush and the steering wheel was back to a natural matte finish. ColourLock Leather Shield was then used to lock in that newly clean finish.

Finishing off the interior, I cleaned the glass using P&S True Vue and spritzed the carpet mats with Angelwax Eden.
Final Touches –
For the tyres, today I decided to use Carpro Darkside, which should last a bit longer for him than a water-based dressing like Onyx or Perl. Darkside does need some additional work time to apply, it being quite sticky and reluctant to spread evenly. It also needs a final wipe after 15 minutes to avoid sling. The result is a deep, dark finish that should last for a month.


This particular Civic also has unpainted black wheel arch trims, which I decided to dress with Mothers Back to Black in aerosol form. I also treated the large plastic windshield trim that cuts into the bonnet.
The final exterior step, a quick wipe down with ADS Amplify.
 Final Result -
Ready for its return.....................


Upon arrival, the smile on the boy's face said it all!

The young lad in question actually does some weekend work with us at the nursery. I can see a lot of character traits that we share in common; somewhat shy and socially awkward, liking routine and order, very procedural. Also like me, I have seen him become more confident, if still a little unsure of himself. He is dreaming big too, next year he will be off to study medicine. His first car will take him a long way and I'm glad to have been part of that journey.
Fun Fact - my mother's first car was a Honda Civic, the original generation. Hers was relatively new at the time, in the same baby blue pictured below. She famously reversed it into my grandparent's garden tap and caused quite the stir. :lol