To avoid these ads, REGISTER NOW!

Above 1200 Sq/FT DFB's Garage

Wokspaces above 1200 squarefeet.
OP
D

D.F.B

Well-known member
Joined
Aug 2, 2023
Messages
1,555
Location
Australia
The Victa 18's replacement choke/air filter housing arrived today. I paid a handsome price to get this, which is always a risk on secondhand parts, especially considering this thing is nearly 70-years old. This particular one has had a pretty decent repair made at some point, but functions as it should and looks just fine.

IMG-4292.jpg

For reference, mine was missing the choke switch and had a broken tab. With the broken tab, the two remaining tabs weren't holding the top piece down, and therefore the air filter. The choke switch didn't prevent the engine from starting and running, and I tried rigging something up, but that still didn't solve the broken holding tab. My OCD tendencies meant I wouldn't be happy until I got both problems sorted.

IMG_3898.jpg

IMG_3899.jpg

IMG_3900.jpg

IMG-3904.jpg

I've found having the intake choked isn't really needed to start the engine, on mine at least, it will fire off within one or two pulls. However, the choke block-off (last pic above) also forms part of the intake restriction needed for the engine to run properly at high throttle/high revs. I actually decided to remove the choke insert out of the housing after fitting the new air filter, it then wouldn't start properly or rev up either. The lower piece of this filter pod in conjunction with the choke block-off forms just the right amount of intake restriction to allow the engine to start easier and then run properly when the throttle is open beyond halfway.

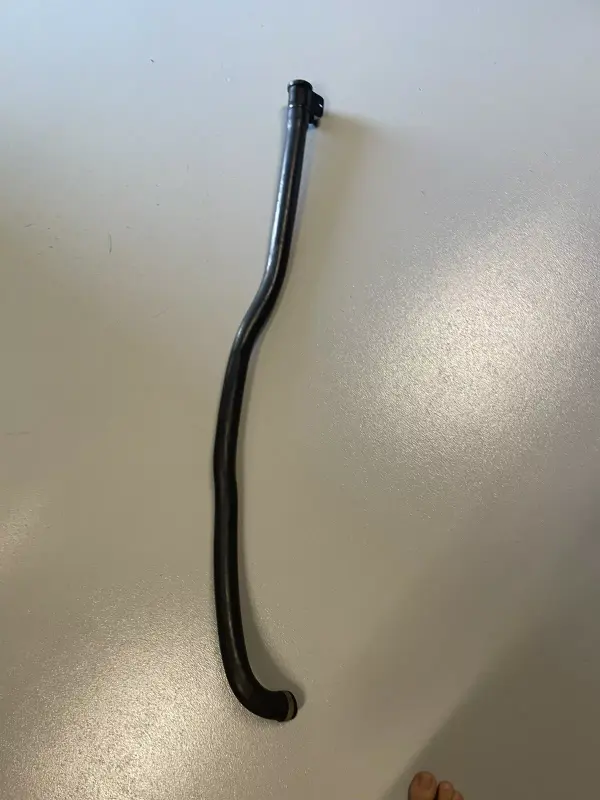
The same applied with the high mount setup that I briefly had on the mower. The plastic "filter" has a much smaller inner opening compared to the rubber tubing, in turn providing the correct restriction. I verified that by removing it while the engine was running, which promptly caused it to backfire up the tube, in turn giving me a fright. :oops: The drawback with this setup is you can't use an air filter in that housing, the only filtration is the wire gauze which wouldn't stop dust entering the engine.

v18chokehm.jpg


The "new" housing doesn't have the Victa lettering on it, so I'm not sure it's older or newer than the original that came with the machine. The installation included swapping the new air filter over. After a quick test run, I note you have to be quick moving the switch to the run position once the engine fires, it will quickly die out otherwise. I do wonder if only using half choke would be sufficient. The test run also verified the engine will run properly at full throttle. I keep meaning to measure the revs with my tacho, it certainly sounds super strong at full throttle. :D

IMG-4299.jpg

IMG-4297.jpg

So, apart from regular maintenance, this sort of concludes the Victa 18 project. The starter mechanism will need attention at some point as it's not always retracting, and I might look into clear coating it to lock in the patina. Maybe one day I'll strip it down and completely restore it. For now, I'm content getting it out every now and then to mow the front lawns, purely for entertainment purposes..............which is exactly why I bought it in the first place.

Now, if I could only find one of those elusive Victa Twin's............................;)
 
To avoid these ads, REGISTER NOW!
OP
D

D.F.B

Well-known member
Joined
Aug 2, 2023
Messages
1,555
Location
Australia
@D.F.B I find the wheel arch flares on my Hilux accumulate a lot of grit and plant debris when driving in wet weather.

More specifically, I'm referring to the underside edge of each flare that is in the direct path of debris being flung off the tyre. After driving in the wet, the surface feels like sandpaper and once it dries it's really on there. I worry about transfer of said grit when washing the Hilux.

I get this stuff off by running a finger nail across the surface like a gentle scraper but this takes ages.

Do you have any pro tips?

In these situations, I take care of that while cleaning wheels, in turn getting rid of it before washing the painted surfaces.

This grime should mostly come off during the rinse process, although success would be limited if using a garden hose instead of a pressure washer. If this isn't doing the job for you, then I'd be pre-treating those areas with an alkaline soap, APC or wheel cleaner. You would do this prior to rinsing, in theory allowing the product to penetrate/dissolve the grime and in turn making it easier to rinse off.

Chemical Suggestions -

- If you want to use a soap solution, I'd mix up something like Carpro Lift or NV Snow+ at a very heavy rate in a dedicated spray bottle.

- For an APC, I like KCx Green Star (mixed 6:1) or Bilt Hamber Surfex (mixed at 5:1). Actually, you could also look at Koch Chemie VB, which is a sprayable pre-cleaner, use at 25:1 to 30:1.

- For an alkaline wheel cleaner, I'd use P&S Brake Buster (preferably undiluted).

The other method you could try would be using Bilt Hamber Touchless, either by foaming the whole car as a pre-cleaner, or mixed in a spray bottle to spot treat these areas. Touch-less is pretty unique in that its based on sugar and is one of the very soaps that can truly achieve touch free washing. That doesn't mean it will remove everything, but it helps get dirt off the surface of the vehicle before the bucket wash, in turn making the contact wash safer. You do need to calculate the panel impact ratio (PIR) so that you achieve its full potential and reduce the risk of from using too much. The PIR is dependent on a variety of variables, so if you want to go this route, let me know and I'll explain it further.

IMG-9963.jpg

I know its pretty expensive on paper, but Touch-less is now highly concentrated and will go a long way.

On this vehicle, it was completely filthy, covered in road grime, mud and bugs. You can see how it covers the vehicle in a thin film which as it breaks down, takes the grime with it. Note the dirt in the puddles of foam...............................

IMG-9956.jpg

IMG-9953.jpg

IMG-9959.jpg

Hope that helps.
 
OP
D

D.F.B

Well-known member
Joined
Aug 2, 2023
Messages
1,555
Location
Australia
Koch Chemie Fresh Up FU

I wonder if the Germans knew what they were doing when they gave this product it's abbreviated name? Anyway....................

Koch Chemie Fresh Up is a product designed to refresh the smell of vehicle interiors. It would be easy to assume that Fresh Up is simply an air freshener, and in that regard, it certainly instills a pleasant, fruity aroma. What separates Fresh Up from a basic interior scent is how it targets odors by neutralizes them instead of just covering them up.

Koch Chemie suggest Fresh Up "encapsulates odor molecules", in turn "eliminating them and making them ineffective". In other words, its a deodorant for your car. Fresh Up is said to eliminate unpleasant smells caused by pets, cigarettes or anything leaving an unusual odor behind (spilled food and beverage). In addition to car interiors, it can also be used on caravans, boats and household areas.

Koch Chemie (FU) Fresh Up | Odour Eliminator – Waxit Car Care
Koch-Chemie - Fresh Up | The Rag Company

kcxfreshup.jpg

How To Use -

Fresh Up is intended to be used after cleaning as a final step. Sometimes despite extensive cleaning, an odor will remain because the chemicals haven't broken down certain bacteria molecules. Fresh Up in turn helps neutralize what remains.

1. Clean the interior or affected areas.

2. Fresh Up is typically sprayed directly onto affected surfaces, be that carpet, fabric or plastic surfaces. Mist Fresh Up across the area, aiming for a consistent light coverage, no need to soak things down with it.

3. Allow to dry.

freshup.jpg

Usage Notes -

- Fresh Up is ready to use and dilution is not recommended, you need full strength to do its job effectively.

- Know that sometimes an odor will remain due to a lack of product coverage. This would apply to odors coming from the HVAC system or other hard to reach areas. In those situations, you may need an ozone machine.

- Fresh Up is not supplied with a spray head, common to the white bottle Koch Chemie line. This is because the brand was/is primarily focused on the professional user who would have a stock of spray heads and/or bottles to use with these products with.

mar21912.jpg

- I've found this is another product that kills spray heads. The KCx canyon sprayer will work, but I'd purge the chemical out of the spray head after each use, or be prepared to swap spray heads as needed.

- Great to have on hand if you have children or pets.

- Usually, interior odors will reside in the carpets and fabric seats. I like to reset an interior by misting Fresh Up on the carpets and floor mats after vacuuming and cleaning the interior.

- You would also use Fresh Up after removing stains caused by food or drink. Clean with Pol Star, blot dry with a towel or vacuum, then mist Fresh Up to kill any remaining odor-causing residue.

IMG-4302.jpg

Final Thoughts -

This is not a product I use often, mainly on the occasional customer car. But if you have pets and children (the same thing really) or use your car as a mobile cafe, then Fresh Up will inevitably prove its worth.
 
OP
D

D.F.B

Well-known member
Joined
Aug 2, 2023
Messages
1,555
Location
Australia
With such lovely cool weather at the moment, I'm feeling more motivated. So, I dragged the XR8 out from under its cover for the first time in about a month.

z3.jpg

IMG-E1964.jpg

Interesting to note that the 6-speed ZF gearbox in this car responds much, much quicker to manual inputs than the 10R80 10-speed in the Mustang. Let's just put this into perspective, this is a 10-year-old vehicle with a transmission that dates back to 2005 in the Falcon platform, and then back to 2002 for its debut in the E65 BMW 7-Series. It's also nice not having to keep track of so many gears!

On the flipside, the ZF 6-speed in this application doesn't rev-match downshift, despite it being a feature on other vehicles that used the same transmission. And I always wanted to have paddle shifters, something Holden gave their customers. The paddle shifters were missing due to a wiring loom thing that prevented Ford adding this feature. It was a one or the other situation, Ford decided to stick with volume and cruise control functions on the wheel rather than a feature 98% of customers would never use. However, I never did find out why Ford didn't include rev-matched manual downshifts.

Apart from the lack of paddle shifters and rev matching, the ZF does so much right, such as not downshifting or up shifting on its own in manual mode. You can give it full throttle in any gear and it won't shift down unless you pump the kick down switch. It will also allow you to bang the rev limiter for as long as you want. And the manual shifter lever is correctly orientated, forward for a downshift, back for an upshift.

If Ford would stop being so conservative with shift speed and response time to manual inputs, the 10R80 would be close to perfect. I can understand this conservatism in an F-Series or Explorer, and in some ways the calibration prevents it from becoming "busy". But it kinda ***** having a performance car like the Mustang that doesn't respond like you'd hope, or even ignores your inputs. Obviously, the solution would be to buy the manual, but there are plenty of high-performance cars on the market with torque converter autos that can serve dual roles.

This isn't a complaint, rather my observations.
 

Geoff289

Well-known member
Joined
Nov 10, 2013
Messages
1,207
Location
Melbourne, Australia
With such lovely cool weather at the moment, I'm feeling more motivated. So, I dragged the XR8 out from under its cover for the first time in about a month.

z3.jpg

IMG-E1964.jpg

Interesting to note that the 6-speed ZF gearbox in this car responds much, much quicker to manual inputs than the 10R80 10-speed in the Mustang. Let's just put this into perspective, this is a 10-year-old vehicle with a transmission that dates back to 2005 in the Falcon platform, and then back to 2002 for its debut in the E65 BMW 7-Series. It's also nice not having to keep track of so many gears!

On the flipside, the ZF 6-speed in this application doesn't rev-match downshift, despite it being a feature on other vehicles that used the same transmission. And I always wanted to have paddle shifters, something Holden gave their customers. The paddle shifters were missing due to a wiring loom thing that prevented Ford adding this feature. It was a one or the other situation, Ford decided to stick with volume and cruise control functions on the wheel rather than a feature 98% of customers would never use. However, I never did find out why Ford didn't include rev-matched manual downshifts.

Apart from the lack of paddle shifters and rev matching, the ZF does so much right, such as not downshifting or up shifting on its own in manual mode. You can give it full throttle in any gear and it won't shift down unless you pump the kick down switch. It will also allow you to bang the rev limiter for as long as you want. And the manual shifter lever is correctly orientated, forward for a downshift, back for an upshift.

If Ford would stop being so conservative with shift speed and response time to manual inputs, the 10R80 would be close to perfect. I can understand this conservatism in an F-Series or Explorer, and in some ways the calibration prevents it from becoming "busy". But it kinda ***** having a performance car like the Mustang that doesn't respond like you'd hope, or even ignores your inputs. Obviously, the solution would be to buy the manual, but there are plenty of high-performance cars on the market with torque converter autos that can serve dual roles.

This isn't a complaint, rather my observations.
I guess you know there are aftermarket paddle shift options available?

E.g. https://kayhanaudio.com.au/product/paddle-shifters-for-ford-falcon-fg/

(I'm getting an "invalid response" when I try to go to that website which I think is an issue with my firewall so you may not get it. The next link has gear from kayan)

https://247parts.com.au/product/paddle-shifters-for-ford-falcon-fg/

https://www.pvsautomotive.com.au/products/paddle-shift-kit-to-suit-ford-fg-fgx-zf

No idea if they're any good.
 
OP
D

D.F.B

Well-known member
Joined
Aug 2, 2023
Messages
1,555
Location
Australia
OP
D

D.F.B

Well-known member
Joined
Aug 2, 2023
Messages
1,555
Location
Australia
The following are two of the many solvent products Koch Chemie make. One is powerful but safe, one is powerful and should be used with care.................

Koch Chemie Teerwasche-A TEA

Removing tar and adhesive residue would have to be one the most tedious and annoying detailing tasks there is. It's also a task that poses significant risk to your paintwork, especially if its been on the car for extended periods. So, having the assistance of an effective chemical is vital.

Koch Chemie TEA is very similar to Carpro's TarX, both in how it works and how it smells. I tried looking for the TarX SDS to compares, but Capro really don't want you to do this because I simply can't find it. So, you are just going to have to take my word for it, both products have that citrus-like aroma and quickly soften tar deposits for easy removal. In addition to tar removal, TEA and TarX will assist in the removal of stubborn adhesive residue.

Koch Chemie (TEA) Teerwasche A | Special Tar & Bitumen Remover – Waxit Car Care
Koch-Chemie - Teerwäsche A - Tea | The Rag Company

Price wise, a 1-litre bottle of TEA will set you back $29.95, the same size bottle of TarX will cost $44.95. I've found both about the same in terms of cleaning power, perhaps with an edge towards TarX.

tea01.jpg

How To Use -

My tar removal process takes place after cleaning the vehicle and while still wet. This is because if you need to agitate the affected areas with the tar remover, you aren't rubbing dirt into your paint, and while still wet so you can rinse off and neutralize the chemical. Having said that, the sooner you remove tar, the better, so at the very least wipe down the area before and after with a water-less/rinse-less wash.

1. Clean vehicle as usual.

2. Working small sections, spray the affected areas with TEA and allow to dwell. You will see the tar spot start to bleed, which is your clue to rinse or agitate. I've found a strong pressure washer blast will remove most tar deposits using this method, but if they remain, repeat the process and agitate with a microfiber towel.

3. After treatment, rinse the surrounding areas thoroughly to remove any remaining chemical residue.

The same process would apply to adhesive removal.

Usage Notes -

- TEA is ready to use, no dilution required.

- TEA can be sprayed direct or into a towel. You will need to purchase the spray head separately though.

- This is a solvent, so be careful when using it, and where possible avoid using in direct sunlight or on hot surfaces. Never let it dry on the treated surface.

- Keep in mind these products are a last resort, as in use the least aggressive method first (pre-soak, washing). And yes, they can affect waxes and sealants.

- For stubborn stains, I've found the TRC Jersey Bug Scrubber to help the situation.

- If removing adhesive, chose your towel wisely as you will be throwing it away when you are done.

IMG-2995.jpg

Koch Chemie Eulex EU

This is a last resort product used for removal of extremely stubborn tar, sap and adhesive deposits. There is no getting around this, Eulex is an extreme duty sledgehammer! It also has a very high evaporation rate, meaning you need to work a little quicker and treat smaller areas. If that reads like its dangerous to use..............well, that's because it is to a certain extent. So, why use it?

Koch Chemie (EU) Eulex | Powerful Adhesive & Stain Remover 1L – Waxit Car Care
Koch-Chemie - Eulex | The Rag Company

IMG-2014.jpg

The biggest drawcard of using Eulex is how quickly and easily it will dissolve contamination. There is a risk to that, but then there is also a risk of using a less capable product and having to hammer down on the paint for it to do the desired job. Eulex can be used on painted, glass and metal surfaces to remove the following -

- Adhesives
- Tree sap
- Rubber residue (good for all you tire-fryers)
- Paint overspray mist
- Ink stains
- Oil and grease
- Tar

IMG-7654.jpg

How To Use -

While Eulex is a powerful product, it's safe when used correctly.

1. Wash the vehicle or spot clean before using Eulex.

2. Apply a small amount of Eulex to a towel or microfiber sponge, then lightly dab the affected area to help soften the deposit. Reapply and retreat as needed.

3. Once the contaminant is removed, rinse or neutralize the treated and surrounding areas after use.

Like TEA, I would be using Eulex while the car is still wet and able to be properly rinsed after use.

IMG-7780.jpg

Usage Notes -

- Be careful with Eulex! It's a strong solvent that won't tolerate fools, so use common sense and work small areas in a well-ventilated space.

- Eulex can be sprayed, but I don't recommend it. I much prefer to apply it to a towel or applicator for more precise control. Like other KCx products, its not supplied with a sprayer, rather a dispensing cap.

IMG_3556.jpg

- Do not use Eulex on matte wheels or finishes, you will need Eulex M for that.

IMG-2581.jpg

- I've removed paint overspray using Eulex to great success.

- Any towel you use with Eulex is going to be destroyed, so choose wisely. TRC Rip-n-Rags excel here.

IMG-2016.jpg

IMG-2583.jpg

Final Thoughts -

I think there is value in having both of these. TEA will have you sorted in most situations, but Eulex can be a life saver on those really stubborn tar and adhesive deposits.
 

Mark_17

Well-known member
Joined
Jun 27, 2018
Messages
742
Location
NJ
With such lovely cool weather at the moment, I'm feeling more motivated. So, I dragged the XR8 out from under its cover for the first time in about a month.

z3.jpg

IMG-E1964.jpg

Interesting to note that the 6-speed ZF gearbox in this car responds much, much quicker to manual inputs than the 10R80 10-speed in the Mustang. Let's just put this into perspective, this is a 10-year-old vehicle with a transmission that dates back to 2005 in the Falcon platform, and then back to 2002 for its debut in the E65 BMW 7-Series. It's also nice not having to keep track of so many gears!

On the flipside, the ZF 6-speed in this application doesn't rev-match downshift, despite it being a feature on other vehicles that used the same transmission. And I always wanted to have paddle shifters, something Holden gave their customers. The paddle shifters were missing due to a wiring loom thing that prevented Ford adding this feature. It was a one or the other situation, Ford decided to stick with volume and cruise control functions on the wheel rather than a feature 98% of customers would never use. However, I never did find out why Ford didn't include rev-matched manual downshifts.

Apart from the lack of paddle shifters and rev matching, the ZF does so much right, such as not downshifting or up shifting on its own in manual mode. You can give it full throttle in any gear and it won't shift down unless you pump the kick down switch. It will also allow you to bang the rev limiter for as long as you want. And the manual shifter lever is correctly orientated, forward for a downshift, back for an upshift.

If Ford would stop being so conservative with shift speed and response time to manual inputs, the 10R80 would be close to perfect. I can understand this conservatism in an F-Series or Explorer, and in some ways the calibration prevents it from becoming "busy". But it kinda ***** having a performance car like the Mustang that doesn't respond like you'd hope, or even ignores your inputs. Obviously, the solution would be to buy the manual, but there are plenty of high-performance cars on the market with torque converter autos that can serve dual roles.

This isn't a complaint, rather my observations.
If I were a betting man, I'd bet the ECU in your XR8 could handle the downshift rev match. (Maybe called Autoblip?) You'd just have to find a competent tuner that could activate or upload it to your ECU.
 
OP
D

D.F.B

Well-known member
Joined
Aug 2, 2023
Messages
1,555
Location
Australia
Doing some seasonal cooking today.

Cooking? Well, it's that time of the year to make tomato sauce. A large box of gorgeous red, ripe Roma tomatoes are being turned into home-made sauce from a recipe that spans several generations. It's actually been a few years since I've made it. (For the record, "sauce" is what American's call ketchup)

IMG-1211.jpg

s1.jpg

s2.jpg

IMG-1247.jpg

s4.jpg

That is my grandmothers recipe book, something I treasure as it still smells like her kitchen. I grew up in that kitchen, helping her cook and eating her country cooking. Nan was never a gourmet cook, everything was roughly chopped and mess everywhere, but her saying "it'll eat all right" was always the truth. I especially loved her zucchini slice and vegetable soup served up for lunch nearly every Saturday during winter. Her apple pie was a stunner as well. When I got diabetes, she made it her mission to cook without sugar, sometimes with success, sometimes without............those rock cakes could break glass! :ROFLMAO:

This was my grandmother on my mum's side, the same who mentored me during my early years in horticulture. I lost nan just as I entered adulthood, I would dearly love to have had her around as I grew out of that boyish stupidity we all have. It took me a very long time to come to terms with her loss, I keep thinking of things I'd want to ask her only to snap back to reality. It's one of the reasons why I continue making that tomato sauce because it takes me back to helping her make in her kitchen.

After saying all that, I most take after my grandmother on dad's side. She was always immaculately dressed and presented, always the pretty lady. And that particularness flowed through to just about everything, from her precisely made food to her spotlessly clean home where there was a place for everything and everything in its place. Sound familiar? ;) My father used to play a game where he would move an ornament or two on a shelf, then wait to see how long before she noticed and moved it back into place. She only had one child, so my sister and I were her world. I lost her to cancer while I was only 11-years old, and again, it hit me hard and still does as I never got to know her as an adult.

I find it fascinating that a basic human need in the form of food brings with it memories of the past. It's one of the reasons why I love listening to the Table Manners podcast, which recounts people's memory of food and family.

Table Manners with Jessie & Lennie Ware
Table Manners with Jessie and Lennie Ware Podcast - Apple Podcasts
Table Manners with Jessie and Lennie Ware | Podcast on Spotify

tmpc1.jpg
 
OP
D

D.F.B

Well-known member
Joined
Aug 2, 2023
Messages
1,555
Location
Australia
While the sauced simmered, I got on with a couple of mower projects.

First up, the Victa Corvette 400. When I put new rings in the engine last year, I noticed the breather tube wasn't screwed into the block. For some reason, the threads were all worn off. Probably not a major problem, but I decided to order a new one.

Briggs and Stratton - 692145

IMG-4307.jpg

These breather tubes come from an era when everything was made of actual metal and not plastic. I'm fairly sure they used that same part since day dot and only disappeared when Briggs stopped making the old side-valve engines. I'd say they made billions of those things over the years.

Old breather tube, the black splatter on the left is paint overspray from the factory...............

IMG-4308.jpg

To replace the breather, which makes a connection between the valve cover to the carburetor, the recoil cover needs to be removed. The tube threads into the block and is connected to the carburetor with a rubber elbow.

This job ended being a "while you're in there" situation. I noticed there was some oil/dirt build on and around the muffler, valve cover and a blower shroud. So....................

IMG-4311.jpg

With the muffler removed, I then cleaned around the valve cover before removing it and the blower shroud. Both were cleaned, and old gasket material removed from the valve cover. The valve cover also doubles as the crankcase breather.

IMG-4313.jpg

While I had the "muffkin" off, I decided to give a bit of a facelift. First, a wire brush, then sand paper to remove some burnt-in plastic deposits (don't ask), then wet/dry paper, then Autosol metal polish.

IMG-4315.jpg

I then reinstalled the valve cover with a new gasket I had left over from the set I used last year, reinstalled the blower shroud and muffler, then the recoil. So, one job turned into three. :lol

IMG-4317.jpg

I then turned my attention to the VC Mustang. I had this unit out recently to see if I could fix the ignition cut-out, I was having to choke the intake tube to shut the engine off. It had been doing that ever since I was given the mower back in the early 2000's. In the end, I found someone had installed the ignition wires incorrectly and the rubber boot and plug were damaged. Wires reversed with a new boot and plug, problem solved. :bounce:

However, I noticed it had been leaking fuel from the tap, which was today's task.

IMG-4320.jpg

With the engine shroud/recoil removed, the tank simply rests on a bracket hanging from the engine. After disconnecting the hose leading to the carb, the fuel was emptied from the tank and the old screw-in tap removed. I decided to replace both tap and fuel line, then cleaned the outside of the tank and around where it had leaked onto the deck. I then refueled and checked for leaks, none, before putting it all back together.

The old tap was red, new one yellow.

IMG-4322.jpg

IMG-4326.jpg

I haven't cut grass with this mower in about 15-years! Well, that changed today, which had me using it to mow the front and back lawns. It still smells exactly the same while running as it did when I used to watch my Pa mow his own lawns with it. He never ran it this hard though, always just putting along just above idle.................

 
OP
D

D.F.B

Well-known member
Joined
Aug 2, 2023
Messages
1,555
Location
Australia
Koch Chemie Plast Star PSS

Koch Chemie Plast Star is an exterior dressing designed for unpainted plastic and rubber surfaces. Unlike a lot of water-based exterior dressings, Plast Star's ability to bond to the treated surface means it will last "months, not weeks". The protective layer left behind will then protect old and new surfaces from UV damage and fading.

Koch Chemie (PSS) Plast Star Silliconolfrei | Exterior Plastic Care – Waxit Car Care

plaststar.jpg

Plast Star can be used to enhance and protect new plastic and rubber trim, preventing premature discoloration. It also has the ability to revive older, faded surfaces. I've found treated areas take on a darker, satin sheen. Plast Star can be used on the following areas -

- Rubber/plastic window and door trims
- Unpainted bumpers, bumper inserts and diffusers
- Unpainted side skirts
- Unpainted wing mirrors
- Door seals
- Engine bay plastics
- Wheel arch liners
- Tyres

Early on, my initial uses for PSS were on tyres and rubber window trims. I have also used it on side steps, although just be mindful that it will add some slickness to those surfaces.

IMG-4469.jpg

How To Use -

As with any protective layer, the success or otherwise lies in the preparation before application. PSS is not different.

1. No matter the surface, start by cleaning the areas to be treated. For tyres, use a strong tyre cleaner, on trim you may want to use a strong APC and wipe down with an IPA prep spray.

2. Ensure the areas for treatment are fully dry before application.

3. Add PSS to a sponge or microfiber applicator and work it over the surface. The product will go on quite wet and runny, but as it bonds and flashes, it will turn sticky............that is your clue that it's been worked sufficiently. Sometimes, you may need to apply a second layer on faded surfaces.

4. Allow the product to dry and fully bond.

IMG-4297.jpg

Usage Notes -

- On plastic and rubber trim, you may find using a prep spray will help evaporate any remaining moisture before application.

- For trim and plastics, PSS is best applied with a microfiber applicator. On tyres, I've found those ultra-dense cosmetic-style brushes to be the pick.

CARPRO DarkSide Brush | Tyre & Rim Brush – Waxit Car Care
Economax Super Soft Detailing Brush – Waxit Car Care

CARPRO DarkSide Tire Applicator Brush - Skys The Limit Car Care
Amazon.com: Amrules 2PCS Car Interior Detailing Brush, Auto Car Detailing Brush Dusting Brush, Soft Bristles Car Interior Cleaning Tool for Dashboard Interior, Exterior, Skylight, Leather, Dust Brush (Black) : Automotive

IMG-3804.jpg

IMG-3809.jpg

- You will find PSS a little grabby on tyres, especially as it begins flashing.

- Once bonded, PSS is dry to the touch and won't accumulate dust and dirt.

- PSS is a ready to use product and should not be diluted or used on wet surfaces like, say, 303 or Hyper Dressing.

- PSS doesn't come with a spray head, rather the signature KCx dispenser.

- Koch Chemie suggests PSS will leave a "semi-matte appearance". If used on tyres, you may find it a little glossier, tyre dependent though.

IMG-4470.jpg

Final Thoughts -

The biggest drawcard of Plast Star is its durability compared to other trim dressings. No, it won't approach the longevity of a trim dye such as Solution Finish, or a ceramic trim coating. But it will easily outlive a water-based dressing that will disappear at the next wash. In other words, PSS is a happy middle ground, both in application ease and overall longevity.
 
OP
D

D.F.B

Well-known member
Joined
Aug 2, 2023
Messages
1,555
Location
Australia
Koch Chemie S0.02

In typical German fashion, Koch Chemie have a very structured product name and code system. In some ways, the colour coding helps group similar products together. However, the abbreviated numbers and letters probably only makes sense to the Germans as it often says nothing about what the products are used for. It certainly takes time to know your way around the Koch Chemie lineup.

kcxpl303.jpg

I mention all this because S0.02 doesn't exactly say what this product is. The nondescript name and the fact the product previously listed $91.95 (AUD) for a 500ml bottle, I'm guessing many people simply kept on scrolling. I'll admit, I never really considered S0.02 because of that price, even after someone in the industry told me how good it was. In actual fact, I only sampled it after I won a bottle in a monthly give-away.

Koch Chemie Spray Sealant S0.02 | High Gloss Hydrophobic Spray – Waxit Car Care
Koch-Chemie - Spray Sealant | The Rag Company

s002.jpg

What Is S0.02?

Despite the same suggesting its ceramic based (Si02), Koch Chemie S0.02 is actually a siloxane-based polymer spray sealant. That formulation makes it supremely slick, glossy and hydrophobic. S0.02 will also deepen painted finishes, adding depth and saturation. It's also supremely easy to apply, probably one of the easiest of its type I have come across.

It can be used across most exterior surfaces, either as a standalone or topper to an existing sealant or ceramic coating. Expect S0.02 to last up to and beyond 12-weeks/3-months depending on vehicle usage, maintenance and storage.

S0.02 can be applied to multiple surfaces, including -

- Painted surfaces
- Unpainted plastic
- Rubber trim
- Glass
- Chrome
- Wheels

IMG-8133.jpg

How To Apply -

As I said earlier, S0.02 is supremely easy to work with. Compared to something like Bead Maker, it requires far less product and far less towel work to get a streak-free finish. I'd say S0.02 is on par with Armour Detail Supply Spray Sealant and the improved Carpro Reload 2.0 for application ease, but with more gloss and slickness.

1. Clean the vehicle prior to application. If using as a topper, you can skip step two.

2. For standalone protection, you may want to decontaminate the vehicle with an iron remover and clay treatments. Then follow with an IPA prep spray.

3. To apply, prime a towel with 3 - 4 sprays of S0.02. Working panel to panel, apply 2 - 3 sprays directly on the panel, wipe with your towel, then flip and buff to streak free. I tend to use a single towel to do this, but you can also have a second/dry towel for the final buff.

4. Avoid washing the vehicle within the first 24-hours to allow S0.02 to fully cure.

IMG-9144.jpg

The paint on this Range Rover was absolutely hammered, full of swirls from using a car wash broom. S0.02 made is so dam glossy that it helped to disguise the true condition of the paint..........................

IMG-9133.jpg

Usage Notes -

- Gently shake the bottle prior to application.

- S0.02 is so supremely easy to use that I have never had it streak, which is not something I can say for a lot of the spray sealants on the market.

- Koch Chemie recommend breaking up large surfaces, but I've found S0.02 to be very forgiving in this regard. Just don't apply in the sun or on hot panels.

- I've found this product to pressurize the bottle in hot weather, so close off the spray head after each use or you have it leaking.

- S0.02 is excellent on unpainted trims and bumpers, it gives these surfaces a darker, richer appearance.

- S0.02 is ready to use, no dilution required/recommended.

IMG-8907.jpg

Final Thoughts -

S0.02 is one of those products that instantly won me over, a surprise winner that I had originally dismissed due to the price. Now that it's about half the price, and the fact a bottle will go a very long way, S0.02 is yet another KCx product worth looking at.
 

Dixie_Flatline

Well-known member
Joined
Oct 30, 2024
Messages
387
Location
Tennessee
Is their periodic table of detailing products arranged similarly to the actual periodic table? Such as the items on the left being more harsh or flashes away quickly while those on the right are heavier and longer lasting but less harsh? Then again I could see it being merely color coded with like products having the same color. Regardless I do enjoy their approach!
 
OP
D

D.F.B

Well-known member
Joined
Aug 2, 2023
Messages
1,555
Location
Australia
For this post, I'm focusing on two similar soaps offered by Koch Chemie, Ceramic Effect Shampoo (CES) and Nano Magic Shampoo (NMS). I always assumed Nano Magic was a ceramic wash-n-wax, but then they recently introduced CES, so its hard to know what the difference is between the two is. So, this post is as much for my own curiosity as it is for those reading.

Koch Chemie Nano Magic Shampoo

This product is sold in both the white bottle professional range, as well as the blue bottle consumer line. The pro version has only been sold in 5- and 10-litre drums, so for most, you will be looking at the 750ml blue bottle. (1-litre bottles of the white bottle are available in the US)

Koch Chemie Nano Magic Shampoo | Protective Shampoo – Waxit Car Care
Koch-Chemie - NanoMagic Shampoo | The Rag Company

Like all of these soaps, Nano Magic is a combined shampoo and protectant, killing two birds with one stone. I can't determine what KCx are using in this soap to provide that protection, only that it leaves "a long-lasting, hydrophobic nanolayer". The best way I can describe it would be to think of Nano Magic as the polymer-based S0.02 spray sealant, while Ceramic Effect Shampoo would be like an Si02 spray sealant such as Carpro Reload.

Spec wise, Nano Magic has a pH of 5.0 and said to "preserve" existing waxes, sealants and coatings". Occasional use will in theory extend the life of those protectants, or it can be used on vehicles without protection to improve hydrophobics and gloss. I always say with these soaps to not expect miracles, if your paint is heavily neglected, the use of Nano Magic is not going to transform the car into a concours winner. But, with occasional use they can certainly boost gloss, slickness and protection.

nanomagic202.jpg

How To Use -

Nano Magic can be used in a foam cannon or bucket, just don't expect shaving cream-like foam. I've always foamed it on, then contact washed while still on the paint.

1. Shake the bottle well before dispensing.

2. For foam cannons, add 900ml of water and 100ml of Nano Magic to the cannister. For bucket washing, add 100ml to 10-litres of water. (See notes below)

3. Foam the entire vehicle and/or commence the contact wash. If washing in the sun or on a hot day, I'd probably break the vehicle into sections.

4. Rinse thoroughly then dry.

IMG-9222.jpg

Usage Notes -

- From experience, I've found Koch Chemie's dilution ratios very lean when it comes to soaps. For example, they recommend a 200:1 bucket or foam cannon dilution ratio, which works out at 50ml to a 10-litre bucket or 5ml to 995ml of water in a foam cannon, which is just not going to do anything. I would double that to 100ml in both cases.

- Like most products of this type, you will find Nano Magic to be a low foaming, low suds soap. The foam quality is a runny film.

- While still slick, you will notice a slight "stickiness" underneath the wash media.

- If your vehicle is ultra dirty, this probably isn't going to be your best choice. I'd at least pre-soak with something like Bilt Hamber Touch-less or Koch Chemie Active Foam first.

- While its a relatively mild shampoo, the "protection" in it means you would avoid allowing it to dry on the surface.

- Suitable for matte surfaces/paint

- KCx suggest Nano Magic will last approximately two weeks.

IMG-9229.jpg

Koch Chemie Ceramic Effect Shampoo

This is one of Koch Chemie's latest products and has only just made its debut in Australia. The concept of CES is the same as Nano Magic, however it uses a more modern Si02 formula. With a slightly higher pH of 6.0 instead of 5.0, CES won't strip existing protection and is safe on paint, glass and plastic. It can therefore be used to maintain existing protection, or add hydrophobic properties to bare surfaces. In both cases, it will also create some nice gloss and slickness.

Koch Chemie (CES) Ceramic Effect Shampoo | Wash & Wax – Waxit Car Care
Ceramic Effect Shampoo 1L – Koch-Chemie USA

Note - KCx suggest CES will leave "behind a temporary SiO2 based protective layer". Take note of the word "temporary", like all of these wash-n-wax type soaps, the longevity of that boost to gloss, slickness and protection is limited. As long as you know this up front, you won't end up buying these products expecting to ceramic-coat your vehicle using a bottle of soap. Koch Chemie also suggest it provides UV protection, I'd question that to be honest.

ces03.jpg

How To Use -

This is basically the same to use as Nano Magic, although its suggested you don't use CES in a foam cannon. Not sure why, but I'm told it foams ok.

1. Shake the bottle well before dispensing.

2. Add 100ml to 10-litres of water. (See notes below)

3. Start by washing sections at a time, rinsing between sections.

4. Follow with a final rinse, then dry the vehicle.

IMG-4245.jpg

Usage Notes -

- KCx seem insistent on not using CES in the sun or on hot surfaces, or letting it dry, more so than Nano Magic.

- KCx suggest a 200:1 dilution ratio, 50ml to 10-litres of water. Again, I double that to 100ml.

- Again, if the vehicle is very dirty, then you would use a pre-wash foam such as Bilt Hamber Touch-less or Koch Chemie Active Foam first.

- The scent is described as "berry-almond".

- I've found CES to offer a decent before and after difference when compared to others of this type. Gloss and slickness gains are quite noticeable.

IMG-4261.jpg

Final Thoughts -

I only occasionally use this style of soap, and even then, I have to pick my mark. As a novelty though, it's fun to see and feel the difference they've made afterwards. Of the two, I'd probably favor the newer CES as it seems to offer more pronounced results.
 
OP
D

D.F.B

Well-known member
Joined
Aug 2, 2023
Messages
1,555
Location
Australia
Is their periodic table of detailing products arranged similarly to the actual periodic table? Such as the items on the left being more harsh or flashes away quickly while those on the right are heavier and longer lasting but less harsh? Then again I could see it being merely color coded with like products having the same color. Regardless I do enjoy their approach!

There is a connection with the periodic table, but it's more in line with a philosophical/marketing connection as the colors don't correlate between the two.


"Koch‑Chemie is a system provider with perfectly coordinated products. Our ProductSystem groups and sorts our portfolio of chemical products. The design of the system is based on the periodic table of the elements and thus emphasizes the core of the company: chemistry. The periodic table represents all known chemical elements, so that it serves as a comprehensive system that conveys multi-layered information. This is exactly what our ProductSystem pursues as well.

Each product name is assigned an abbreviation, which is displayed in the ProductSystem. In combination with the color codes, it allows easy and quick orientation when working. The individual elements or abbreviations appear not only on the packaging but also in other media and are a further feature of our Koch‑Chemie language. As with the periodic table, the elements are equipped with additional information that describes further core properties of the product.

The superscript with the reference to the ph‑value is used for the quick classification of a product, especially with our cleaners. In the field of paint treatment our products are supplemented by other information. The subscripts 01, 02 etc. are the version numbers of the polishes and sealing products. They are consecutive and chronological. The superscript indicates the degree of abrasiveness of a product, the subscript indicates the degree of gloss. This information in the ProductSystem alone clarifies many product characteristics and allows products to be easily compared with each other."


kochpo102.jpg

For me, I like the logic behind the color-coding..............................................and I like how it looks! ;)
 
OP
D

D.F.B

Well-known member
Joined
Aug 2, 2023
Messages
1,555
Location
Australia
@D.F.B I see Car Care Products has released clear buckets and other goodies.

CCP Clear Buckets, Dolleys etc. No. 2.png

Car Care Products buckets etc.

I do like the concept of clear buckets, but from what I have read, they aren't very durable. Same with all the clear bottle foam cannons, the material is prone to cracking. Although having said that, I see they are Australian made..............................

"Made in Australia this is a very high quality, tough and dense plastic with a strong handle."

I'd also like to see them offer different color bucket dollies and gamma seals so that it can all match in nicely.

IMG-0254.jpg

IMG-1245.jpg
 
OP
D

D.F.B

Well-known member
Joined
Aug 2, 2023
Messages
1,555
Location
Australia
Koch Chemie Panel Preparation Spray PPS

A few years ago, I tested a variety of IPA-based panel-prep sprays back to back. Products like Carpro Eraser and Gyeon Prep were my benchmarks, so I was interested to test some of the other options on the market, Koch Chemie PPS was included. The funny thing was, Koch Chemie PPS both won and lost that shootout.

Point blank, this is the best product here. And it would want to be for the price. The lubrication is a standout, the feel under the towel is more like one of their spray sealants, and the evaporation rate the best here. If it had the scent of Eraser or Prep, it would easily run away with this test, at least the IPA-ness of the scent is subdued.

Scent – 1/10 (None/IPA/Subdued)
Feel – 10/10
Value – 1/10
Overall – 10/10

IMG-E8215.jpg

So why didn't it come in first place? PPS was priced at $45.95 for a 500ml bottle, which was just ridicules on a product that is used heavily during the correction and protection stages. There is no way a professional is going to pay that premium when the equally good Carpro Eraser starts at $19.95 for 500ml. And even now, PPS carries a $10 premium over Eraser in the 500ml bottle, although the extra $10 in the bulk size will buy you 5 instead of 4-litres for the Carpro product.

If you hadn't guessed by now, Koch Chemie PPS is used prior, during and after polishing to remove product and chemical residue, therefore giving you better indication of paint condition and improve the bonding of your chosen protection. Like most of these products, its based on isopropanol alcohol and is bottled ready to use. Unlike Eraser, KCx don't make mention of any lubricating properties, but I found it nicely slick, unlike some in the test.

Koch Chemie (PPS) Panel Preparation Spray | Control Spray – Waxit Car Care
Koch-Chemie - Panel Prep Spray | The Rag Company

IMG-3151.jpg

How To Use -

Use PPS before paint correction to remove any lingering chemical residue from the decon wash. Use it again after you finish polishing a section to properly inspect your outcome, then use it again prior to the application of protection.

1. Spray PPS onto the area

2. Allow the product to dwell for 30+ seconds.

3. Wipe off using a towel, swapping to a new towel as it becomes saturated.

pps2.jpg

Usage Tips -

I've come to the following points after doing this stuff myself and watching/reading what others have done or complained about...................

- These products WILL NOT completely remove protection, be that a wax or sealant, and certainly not a ceramic coating. This is a common misconception. Unless you submerge the car in the solution and soak for an extended period, or the wax/sealant is on its last legs, you are not completely stripping protection from a spray-wipe application.

- Having said that, most people don't allow these products to dwell long enough, as well as not using enough product. You want to apply these products heavily, allow to dwell for 20 - 30 seconds, then wipe. A quick mist and wipe won't do anything.

- These products have two main roles. Firstly, to remove chemical residue prior to polishing, then again after polishing..............basically a truth serum to give you a better gauge of the paint condition. Secondly, its to remove any lingering polishing oils to allow your protection to bond properly. That first role is often ignored.

- The reason why you would use a product like this over mixing your own IPA/water blend is the way they are designed to evaporate and flash in a more controlled manner. Traditional IPA/water blends flash too quickly and therefore don't break down the residue you are trying to remove. This comes back to allowing the product to dwell before wiping.

IMG-3158.jpg

Final Thoughts -

So, is Koch Chemie PPS worth the price premium? This is a hard one for me to answer because of how much I adore using the transcendently scented Carpro Eraser. That product is the complete package, a fantastic blend price, performance and user experience. That is a hard act to follow. To me, the only thing lacking with PPS is a scent, but that might be a positive for some users. For those looking to try something new, PPS is one of the best in this category.
 
To avoid these ads, REGISTER NOW!
OP
D

D.F.B

Well-known member
Joined
Aug 2, 2023
Messages
1,555
Location
Australia
Gave the Mustang it's weekly wash this morning, followed by fitting its new cover.

2023-2025 Ford Mustang Coupe GT + aerial 2 mirrors (no wing) Purfit In – purfitcovers.com

I've had this for a while but delayed using it as the S550 version also fits S650. I'm not using the S550 version of another car (Jaguar XE).

IMG-4341.jpg

IMG-4343.jpg

IMG-4346.jpg

IMG-4348.jpg

IMG-4352.jpg

I've had a few of these CoverCraft/PureFit covers now. They all start out super form fitting but stretch a little with use and washing. I run these through the washing machine on a regular basis using the same detergent as my microfiber towels, P&S Rags-to-Riches.
 
OP
D

D.F.B

Well-known member
Joined
Aug 2, 2023
Messages
1,555
Location
Australia
This Stihl BG86 I've had set up in vac mode for longer than I can remember. It's also had a broken kill switch for about the same period of time, I've been having to twist the choke switch to shut the engine off. I did make an attempt to fix the problem a few years ago but failed and ended up dealing with it. Considering my newfound confidence in repairing my own machines, I decided to give it another try.

IMG-4362.jpg

I was fairly sure the problem was the cheap switch hidden within the upper handle. On the older BG 55, 65 and 85, as well as the later BG 56, that switch was situated on top of the handle and activated directly by the user.

bg5556.jpg

These switches were a known failure due to dust entry, so Stihl started encasing them in a rubber shroud. With that, I assumed dust had killed the switch on this unit.

On the later BG86 models, that switch is hidden within the handle and is activated by pushing down on the throttle lock, which in turn presses on the ignition rocker switch.

IMG-4279.jpg

IMG-4278.jpg

I've previously tried fixing the switch by cleaning the connections and lightly blowing with compressed air. From memory, that fixed the problem, but only intermittently before it stopped working again. So, I went ahead and ordered an aftermarket switch from Amazon.

To gain access to the switch, you need to remove the four T27 screws from upper handle cover, separate the handle, then lift out the throttle/stop rocker. You can do this with the throttle trigger in place, but its easier with it out of the way and just slides off a peg moulded into the case.

IMG-4284.jpg

IMG-4283.jpg

IMG-4285.jpg

From here, slide out the switch and disconnect the wires, keeping track which is which. The new switch takes its place.

IMG-4282.jpg

Where possible, I prefer to use OEM parts, but it's hard to find them for sale on Australian webstores. No doubt these companies would prefer you to go to your local dealer, but with the problems I've had in that arena, I don't have the time or patience to deal with those clowns. I remember spending 20-minutes at the local Stihl shop trying to buy a very basic chainsaw fuel filter, in the end they gave up and said they'd order me one and call me when it was in.....................I'm still waiting for that call 4-months later. An aftermarket Amazon special it was then..........................

Firmusparts 4229 430 0203 On Off Switch 42294300203 Compatible with Stihl Trimmers FS38 FS45 FS46 FS55 FS56 BT45 BG45 BG46 BG55 BG56 BG65 BG66 BG85 BG86 SH55 SH56 SH85 SH86 4229 430 0202 : Amazon.com.au: Garden

Stihl - 4229 430 0203

IMG-4290.jpg

With the cover reinstalled, I fired it up and..........................it still wouldn't turn off without the choke. :cautious:

After some more research, it seems these blowers have two know ignition-cut problems. So, I removed the handle cover again and found the problem..................broken kill wires. I assume age and heat cycling causes the wire to crack, then separate. So, I went online and found the OEM replacement kill wires. A week later, it was time for attempt three................

Wiring Harness for STIHL BG56, BG86, SH56, SH86 - 4241 440 3000 | eBay

Stihl - 4241 440 3000

IMG-4353.jpg

For this repair, you also need to remove the recoil cover, which is held in place with three T27's and the spark plug boot. The function of these wires is to provide a ground, then link the kill switch to the coil.

IMG-4356.jpg

To keep track, I started with the ground wire, which is mounted on the upper handle, then traced back to the kill switch, disconnected old and connected new, then traced back to the coil making sure to hook it up the right way around. The wires were then tucked into place and the covers reinstalled.

IMG-4358.jpg

This is the old loom, which had severed where it makes the 90-degree turn towards the coil, it shouldn't be in too pieces.

IMG-4361.jpg

IMG-4358e.jpg

Everything back together, I fired it up and was rewarded for efforts, the engine now shuts off with the kill lever. Probably a waste of time and money on a clearly aged machine, but I at least know how to do this job. ;)
 
OP
D

D.F.B

Well-known member
Joined
Aug 2, 2023
Messages
1,555
Location
Australia
That must be very satisfying sorting out problems like that. Well done.
Certainly is. There are two benefits of doing this stuff myself now -

1. I don't have to deal with incompetence, poor workmanship or attitude from the supposed "experts". So, the job gets done right, and I save some money.

2. I'm enjoying the process, especially the hunt for parts.
 
OP
D

D.F.B

Well-known member
Joined
Aug 2, 2023
Messages
1,555
Location
Australia
Koch Chemie Magic Wheel Cleaner MWC

I'm not a big wheel cleaner user, mainly because I find them unnecessary for well maintained and coated wheels. My go to for wheel cleaning is a slug of soap into my wheel bucket, then whatever shampoo I have chosen on the day and applied with my foam cannon. Every few months, I switch things up by grabbing a dedicated wheel cleaner for the occasional deep clean. This is where I would use NV Purge (for iron removal) or P&S Brake Buster (high pH).

But there are times when I'm faced with someone else's neglected vehicle, in which case I both WANT and NEED a powerful wheel cleaner. In these situations, I find attacking neglected wheels with an iron-removing type wheel cleaner, followed by an alkaline product to be more effective. The theory here being the iron remover type goes on first, is allowed to soak before being rinsed away. Quite often, this step removes the bulk of the contamination, meaning the following contact washing with the alkaline cleaner to be vastly more effective. Typically, this combination will be NV Purge, followed by Shine Supply Wise Guy. So, how would Koch Chemie fit into this procedure?

At the moment, the only dedicated wheel cleaner offered here by Koch Chemie is Magic Wheel Cleaner. They also have Alkali Wheel Cleaner, which is like their version of Wise Guy or Brake Buster, however it still hasn't arrived in Australia, hopefully its on the way soon.

Koch Chemie (MWC) Magic Wheel Cleaner | Acid Free Rim Cleaner – Waxit Car Care
Koch-Chemie - Magic Wheel Cleaner | The Rag Company

mwc400.jpg

Magic Wheel Cleaner is termed an "acid-free" wheel cleaner, although the published pH value is 5.5, which to me is slightly acid leaning. That doesn't mean it HAS acid in it though. This is an iron-remover type product, so it does have a very potent stench, in that regard I find NV Purge to be the least offensive. There are a couple of areas that MWC holds an advantage -

- The thicker, viscous consistency clings to the surface of the wheel. I'm not a big fan of that, I'd prefer more consistent coverage. However, it does mean you extend the working time of the product.

- Contamination is encapsulated within the cleaner and prevents it from drying on the surface as you work, again prolonging your working time.

mwc20.jpg

How To Use -

Always use these products on cool surfaces, and out of direct sunlight where possible.

1. Shake the bottle well before use.

2. You can use MWC as a pre-treatment and/or with agitation. For best results, I like to apply onto a dry wheel and allow to dwell for 2 - 5 min.

2. Once you have seen sufficient red colour-change reaction, rinse the wheel. A pressure washer will be most effective here.

3. Reapply or switch to your alkaline wheel cleaner, then agitate with brushes.

4. Rinse, then dry.

IMG-4048.jpg

Usage Notes -

- I've found this product to produce bubbles when spraying, so be mindful of wind direction and probably wear eye protection too.

- MWC is a ready to use product, no dilution required.

- Safe for alloy, steel and chrome wheels.

- If you have ultra dirty wheel barrels, I've found the wool type brushes to be more effective than the microfiber and bristle type brushes here.

- Not as pertinent for this product as some of the others of its type, but if you find its drying too quickly, you can lightly mist the surface of the wheel to continue the iron reaction.

- These iron-remover type wheel cleaners aren't very effective at cleaning tyres, so you would need to carry a separate product for that.

- Close off the spray head after use to prevent leakage.

IMG-8976.jpg

Final Thoughts -

For me personally, Magic Wheel Cleaner is not a product I use very often, I just don't need it. But I do see why it's so popular. If you are dealing with heavy brake dust from a European or high-performance vehicle, then the added bite of MWC could be up your alley.
 
OP
D

D.F.B

Well-known member
Joined
Aug 2, 2023
Messages
1,555
Location
Australia
Koch Chemie Speed Glass and Glass Cleaner Pro

Koch Chemie have a couple of glass cleaners in their lineup. Glas Star GLA is a concentrate alcohol-based product aimed at the professional user and sold in 10-litre drums. For this post, I’m focusing on Speed Glass in the blue bottle range and Glass Cleaner Pro GC in the white bottle range. Reading the MSDS, these two products are the same, just packaged differently.

Koch Chemie Speed Glass Cleaner | Streak Free Cleaner 750ml – Waxit Car Care
Koch Chemie (GC) Glass Cleaner | Glass Cleaner Pro – Waxit Car Care

Speed Glass Cleaner – Koch-Chemie USA
Glass Cleaner 500 ML – Koch-Chemie USA

Something that caught my attention was the fact Speed Glass and GC are NOT alcohol based. Looking at the MSDS, it contains the same ingredient used in Quick & Shine, which is said to be a “smoothness additive” and gloss enhancer. This is not surprising as I’ve found Speed Glass to have a highly lubricated feel, producing a very slick and glossy surface afterwards. These two will also leave behind some very minor protection, but not to the extent ClarifyPhobic would. Having said that, I’ve had the odd occasion where Speed Glass has left some mild residue, no doubt due to the lack of IPA to flash properly.

Both Speed Glass and GC are ready to use and have that classic KCx “fresh raspberry” fragrance. They can be used on interior and exterior glass, and are tint safe. KCx also suggests these products are safe to be used on screens, buttons and glossy surfaces such as piano black.

kcxglass.jpg

How To Use –

Speed Glass and GC are used like any other glass cleaner.

1. Prime your towel with product.

2. Apply one to two sprays per section, wipe with your towel, flip or switch to a dry towel and wipe till streak free.

speedglass101.jpg

Usage Notes -

The key to success when it comes to glass is the method, so here are a few steps to consider –

- Don’t bother attempting to clean glass that has been in the sun or is warm/hot to touch. The product will flash too quickly and leave behind streaks and witness marks. Took me ages to figure that one out.

- Towel selection is crucial! You want short nap, high density towels for glass, otherwise you will be dealing with streaks and linting issues. Aim for waffle weave or pearl weave towels such as the TRC Dry Me A River or FTW. I've tried dedicated glass towels, and while they work well, I find those TRC waffle weaves to be the best (pictured below).

- For interior glass, I never spray directly like I would for exterior glass. Most automotive glass cleaners are interior safe, but I think you want to avoid dousing your interior plastics with glass cleaner. Instead, spray liberally into the towel.

- For neglected interior glass, you may need to clean twice. The first round is your mow-down, the goal is to cut back as much grime as possible. For the second round, you then swap to clean towels, the aim to remove anything left behind in the first pass and deliver a streak free finish. This method limits transferring grime from window to window, which in effect will get you a clean and clear finish. This method is why I recommend having at least 4 glass towels per vehicle.

IMG-5825.jpg

Final Thoughts –

Personally, I think these two products are best for well-maintained glass. While I do love the slick feel and glossy look, I find the more basic the glass cleaner, the better they perform in ALL situations. That’s why I’m grabbing Stoner Invisible Glass the most often, it contains no dyes and no scents, its just a glass cleaner.
 
OP
D

D.F.B

Well-known member
Joined
Aug 2, 2023
Messages
1,555
Location
Australia
More product testing today, mainly to compare and verify.

Test Subject - The Wildtrak

Like last time, I decided to use Koch Chemie Active Foam, again used to clean the wheels and tyres. The ADS Ghost is doing very well on these tyres, they stay cleaner and are easier to clean, the Active Foam was all I needed here. I then used the Active Foam as a pre-wash.

For the contact wash, I decided to use Koch Chemie Nano Magic, mainly to compare with the Ceramic Effect Shampoo CES I used last time.

Koch Chemie Nano Magic Shampoo | Protective Shampoo – Waxit Car Care
Koch-Chemie - NanoMagic Shampoo | The Rag Company

A few things to note here -

- Nano Magic feels slicker than CES.

- The hydrophobic properties left behind after using CES last time are extremely impressive. Not just the water beading, but how fast it sheds those beads.

- Nano Magic on the other hand has a more pronounced water sheeting effect.

Overall, I think I still prefer CES, mainly because of the scent but also the impressive hydrophobic characteristics.

IMG-9222.jpg

For the drying aid, I went with Koch Chemie Quick Finish. This product is similar in concept to the Quick & Shine I used last time, but is free from silicone oil, presumably to make it body-shop safe. Comparing the two, Quick & Shine has more lubrication, more gloss and more slickness, which kinda makes sense. Very easy to use, but I prefer the feel and finish of Quick & Shine better.

Koch Chemie (QF) Quick Finish | Allround Finish Spray – Waxit Car Care
Koch-Chemie - Quick Finish | The Rag Company

IMG-4389.jpg

During the pre-wash phase, I also deep cleaned the rubber window trims to hopefully address a long-term annoyance. These have been discolored for a long time now, taking on a grey to white appearance instead of dark black natural rubber. This is a common Ranger/Everest/BT-50 issue, one that I've tried a few things to improve but with limited success. These can't be disguised with a trim dressing as the white still shows through, and while I have seen where the right polishing compound can strip away the oxidation, the results are short lived. So, I decided to see what a trim dye like Solution Finish would do for them.

Cleaning involved hitting the trims with Nexzett Plastic Deep Cleaner and a boars hair brush, then a hit with a magic eraser. Prior to application of Solution Finish, I went around with IPA to remove any lingering chemical residue, taped along the painted edge and dropped all of the windows to prevent residue getting on the glass.

From here, I applied the Solution Finish using a folded towel. On a material like this, you tend to apply it thickly with several passes to get a consistent finish. If you do end up getting some on the paint or glass, it easily wipes off with a towel. After letting sit for 10-minutes, you then follow with a separate towel to level any high spots. The TRC Rip-n-Rag were made for jobs like this!

IMG-4393.jpg

Solution Finish is termed a "semi-permanent" product. From here, you can apply a spray sealant or even a ceramic coating to lock in the finish.

It took a few applications and plenty of product to get them decent, but I'm not totally happy. Having said that, this is the best they have looked in years, it will be interesting to see how long it will last like this. I'm suspecting the only real solution will be to replace with new items and ceramic coat them from brand new. With how quickly these trims and the headlights oxidized, its a shame spending so much money on one of these doesn't buy you quality parts to last beyond 2 - 3 years. But this is Ford we are talking about............

I also finished off a few bottles today, Gyeon Interior Detailer (smells nice, underwhelming to use) and Gyeon Prep (great product). It's always satisfying finishing off a bottle, not sure why though.

IMG-4398.jpg
 

ajohno

Well-known member
Joined
Mar 25, 2014
Messages
1,359
Location
Sydney Australia
After I wash my car I use Meguiars x-press spray wax. I don’t know if you have used it before but I’m getting low and wanted to now if there is much difference in OG drying aid before I make a new order.

Thanks mate.
 
OP
D

D.F.B

Well-known member
Joined
Aug 2, 2023
Messages
1,555
Location
Australia
After I wash my car I use Meguiars x-press spray wax. I don’t know if you have used it before but I’m getting low and wanted to now if there is much difference in OG drying aid before I make a new order.

Thanks mate.

From memory, Matt also used X-press Spray Wax D156 as a drying aid, before moving to Optimum Spray Wax, then Bead Maker, then OG Drying Aid, which is a blended for him by B&B Blending.

With any spray wax, you need a deliberate, methodical technique to ensure a streak free finish. What you will find with OG Drying Aid is a much easier application, far less towel work to deliver the same result. Quite often, you don't need a second dry towel for the final wipe as OG Drying Aid flashes and finishes out so nicely. Because it's a polymer sealant, you will still have the look and feel of a spray wax, although without the ultimate durability of a Si02-based product. That last point is not worth worrying about, the lack of durability means nothing if you are using it as a regular drying aid.


IMG-0888.jpg

IMG-0893.jpg

I have it in a Pressol with his label.

IMG-2875.jpg

The other product I think you should look at is ADS Amplify, which is a Si02 product. This would have to be the easiest drying aid currently on the market, even easier than OG Drying Aid. Gloss and slickness are excellent, if not to the same warm glow of a spray wax or OG Drying Aid. It smells amazing too.


IMG-3457.jpg

IMG-2413.jpg

IMG-1483.jpg

Look forward to hearing what you chose.
 

ajohno

Well-known member
Joined
Mar 25, 2014
Messages
1,359
Location
Sydney Australia
Thanks. I might try the Amplify.

On another note tomorrow I’m picking up a 2010 FG6E 50th anniversary turbo. 1 elderly owner always garage with 45000 km. I know you are more interested in the colour so it is SEDUCE.
 
OP
D

D.F.B

Well-known member
Joined
Aug 2, 2023
Messages
1,555
Location
Australia
For this post, I'm covering two alkaline-leaning soaps within the Koch Chemie lineup. One is simply stunning, one is somewhat underwhelming.

Koch Chemie Auto Shampoo AS

I tried Auto Shampoo a few years ago when the brilliant GSF had been out of stock for several months. My thinking was, if GSF was so good, then AS would surely follow suit. Wrong.

Koch Chemie (AS) AutoShampoo | Vehicle Shampoo – Waxit Car Care
Autoshampoo 5L – Koch-Chemie USA

Auto Shampoo is a mild alkaline soap with a pH of 9.0, which sits in the middle of the neutral GSF and the pH 12.0 Super Foam. This higher pH means it will clean better than GSF, but without the stripping ability of something like Super Foam. Despite claims otherwise, this is not a high foaming soap, no matter the dilution.

In use, while slick and offering good cleaning ability, Auto Shampoo is not a WOW product. The subdued lemon scent is pretty forgettable, slickness is fine, suds are fine, overall...................it's just fine. I get the feeling that the original intent for this soap was for use in commercial car washes applied via the spray gun. The higher pH and cleaning ability, and the low foaming ability support this belief.


How To Use -

Auto Shampoo can be foamed or used in a bucket, but its far better used for bucket washing.

1. Fill you bucket with water, then add 100ml of AS, then agitate with a blast from your hose to foam it up.

2. Wash the vehicle as usual, working top to bottom and rinsing out your wash media in the bucket between sections.

3. Rinse thoroughly.

IMG-1670.jpg

Usage Tips -

- Koch Chemie Suggest a 150:1 dilution for bucket washing.

- If you are going to foam Auto Shampoo, skip straight to the 5:1 ratio, which would be about 160ml of soap to 840ml of water.

- Auto Shampoo will produce a very thin film when foamed.

- I've found it a great soap for your wheel bucket, the higher alkalinity certainly helps.

- Avoid using in direct sunlight, or on hot surfaces. Avoid letting it dry on the surface.

IMG-2200.jpg

Koch Chemie Active Foam AF

Like Auto Shampoo, Active Foam at pH 9.5 is a nice middle ground in terms of pH and cleaning ability. Unlike Auto Foam, this soap actually foams, it would want to considering the name.

Koch Chemie (AF) Active Foam | Mild Alkaline Snow Foam – Waxit Car Care
Koch Chemie - Active Foam | The Rag Company

Active Foam can be used as a pre-wash snow foam or used for contact washing. It's strong enough to deal with road grime and bugs, but without being a sledgehammer. However, unlike Auto Shampoo, it can put a dent in your wax or sealant. On a coating, it will act as a deep cleanser and rejuvenator.

Active Foam is one of those products that instantly proved to be a winner. Foam quality is excellent, as is its cleaning ability on wheels and as a pre-soak prior to contact washing. And the scent, ooohhhh the scent. A quick whiff of the bottle reveals a somewhat strange, but pleasant aroma. But once you start foaming it, the sandalwood scent spices the air and lingers for hours after use. It's so addictive! And the scent makes Active Foam somewhat unique, most decon/high pH soaps are unscented. I know fragrance doesn't have any practical benefit, but it certainly adds to the overall user experience and makes you enjoy the task more.

IMG_4243.jpg

How To Use -

I've been using Active Foam as a mid-strength wheel cleaner and as a pre-wash snow foam. The following is for use as a pre-wash...............

1. For foam cannons, add 100ml of Active Foam to 900ml of water.

2. Foam the vehicle, allow to soak for as long as possible to break down dirt, grime and bugs.

3. Rinse thoroughly.

4a. Re-foam with a pH neutral soap for the contact wash. Or.............

4b. Re-foam with Active Foam for a deeper clean/decon wash.

5. Rinse, then dry.

IMG_4258.jpg

Usage Notes -

- Koch Chemie recommend a 300:1 ratio for bucket washing, which would be 50ml to 15-litres of water.

- For foam cannons, KCx suggest a dilution ratio between 20:1 down to 7:1. I've found it very capable at 10:1.

- Don't allow this product to dry on the surface and preferably avoid direct sunlight.

- I've been mixing Active Foam to make a 500ml solution (50ml to 450ml of water). This is enough soap to clean four wheels/tyres/wheel arches, then enough to foam a dual-cab Ranger. This way you aren't left with soap sitting in your foam cannon and losing its foaming ability.

- If you want to mix up a full foam cannon, consider using demineralized water to ensure stability while stored.

IMG_4254.jpg

Final Thoughts -

As mentioned at the beginning, one of these soaps is a winner, and one is a midfield contender.

Auto Shampoo does nothing wrong, other than not foaming well, but it doesn't excel at anything either. Active Foam on the other hand is a winner across the board. It's a product that nails the job title while providing an exceptional user experience. Highly recommended!
 
OP
D

D.F.B

Well-known member
Joined
Aug 2, 2023
Messages
1,555
Location
Australia
Thanks. I might try the Amplify.

On another note tomorrow I’m picking up a 2010 FG6E 50th anniversary turbo. 1 elderly owner always garage with 45000 km. I know you are more interested in the colour so it is SEDUCE.

The 50th Anniversary cars were a great package. In seduce with the 19-inch dark accent wheels, a very nice combination!
 
OP
D

D.F.B

Well-known member
Joined
Aug 2, 2023
Messages
1,555
Location
Australia
Messing with the MAGNUM today! I love that word! :D

Last week I had this out and noticed the purge bulb was deteriorating and wasn't pumping properly. Once these perforate, you will end up drawing unfiltered air into the system, not good. No problem, I can sort that. Of course, to remove the old bulb, you have to dismantle the whole front of the unit. Then I ruined one of the fuel lines, so I had to replace that as well. :rolleyes:

IMG-4399.jpg

IMG-4404.jpg

There are at least three different versions of this primer bulb assembly, the one that came on the machine must have been a very early example as its smaller and doesn't have a supporting spring inside. The replacement wasn't the correct item, but I got it to fit just fine.

I found it easier to remove the airbox and carb from the machine, then fed the hoses through the outlet, connecting everything up, then play the game of holding everything just so to get it all lined up and secured with the T27 screws. I've actually gone and ordered a long reach T27 socket and driver bits for this sort of thing.

IMG-4407.jpg

Everything back in place, the main cover needs some fettling to hoist it over the two lower anti-vibe pegs before securing with four T27's.

IMG-4410.jpg

IMG-4412.jpg

A very quick test run to verify my work, and the MAGNUM is ready for more blow jobbing.
 
OP
D

D.F.B

Well-known member
Joined
Aug 2, 2023
Messages
1,555
Location
Australia
Because of the dry and windy conditions this summer, it doesn't take long for the cars to be covered in film of dust. Throw a light shower into the mix, which happed to the Ranger while I was cleaning the Mustang last week, well the car was looking filthy.

Today, I decided on an Ethos theme. These products are made by B&B Blending for Ethos, which is under the same umbrella as Adam's. I'm a big fan of Adam's products, they just seem to work with my methods and our climate. No wonder I find Ethos products so agreeable.

After cleaning the wheels and tyres with Brake Buster, I started the Ethos theme by using their Ceramic Shampoo.......................

Ethos Ceramic Shampoo | Enhance Your Detailing | Detailing Shed
Car Shampoo | Ceramic Car Shampoo - Ceramic Car Wash Soap

IMG-4414.jpg

After the wash, I used Ethos Pro Shine (Finish Shine) for the paint, door jambs and tray. I've said this before, but they need to back off on the colorant as it's a little too rich and has the potential to stain. It's otherwise simple to use and produces some nice gloss and slickness.

Ethos Pro Shine Ceramic Detail Spray | Detailing Shed
Ceramic Detail Spray - Quick Detailer, Streak Free Formula!

IMG-4419.jpg

For the interior, I went with Ethos Interior Detailer. This product is closer to P&S Swift in that it offers more dressing potential when compared to something like InnerQD or Pilot. I really like the coconut scent too.

Ethos Interior Detailer for Leather, Plastic & Vinyl Detailing Shed
Car Interior Detailer Cleaner & Conditioner - Protect + Preserve

IMG-4422.jpg

From there, I finished off a bottle of Gyeon Q2M Glass, then dressed the tyres with the excellent 3D Ceramic Matte Tire.
 
OP
D

D.F.B

Well-known member
Joined
Aug 2, 2023
Messages
1,555
Location
Australia
Koch Chemie Insect & Dirt Remover

Koch Chemie Insect & Dirt Remover is a ready-to-use product for the safe and effective removal of bugs and baked on road film. Designed to penetrate and break down contamination, it can used on all exterior surfaces. With a pH of about 10.5, it's certainly got some kick to it, but not as harsh as some degreasers and all-purpose cleaners. Koch Chemie also suggest it can be used to remove oil and grease build up on engine bays.


I'm gonna be honest here, of all the bug removers I've tried, they're all mostly the same. This refers to both the chemical aroma and how they function. I know this doesn't apply to the chemical itself, but I've found the bottle and sprayer KCx supply with this product to be vastly superior to most on the market, which in effect makes it easier to use. I don't use a lot of bug remover, so I haven't put one in a fancy spray bottle, meaning I use what is supplied.

Screenshot-344.png

How To Use -

Like any product being used to deal with a tough job, let the chemical do the work.................that's why you are using it.

1. Spray affected areas generously.

2. Allow product to soak for as long as possible without drying on the surface.

3. Rinse thoroughly, a pressure washer is your friend here.

In most cases, if you have healthy protection on the vehicle, most bugs will be removed using the above. However, if some have remained, you may want to reapply and agitate with a towel or bug sponge.

IMG-9048.jpg

Usage Notes -

- I tend to use these products as a pre-soak, allowing them to dwell for a short period before foaming over the top with a pre-wash soap. These two combined usually remove all bug remnants, making the following contact wash safer and easier.

- Avoid using in strong sunlight or on hot surfaces.

- Being an alkaline product, it can degrade waxes and sealants. You would ideally follow with an appropriate drying aid to top up the protection removed.

- These products are generally designed to work safely within the pH tolerances of a ceramic coating.

kcxiadr.jpg

Final Thoughts -

As I said earlier, bug removers are a much of a muchness.................to an extent. Any of the offerings from the likes of Carpro, Gyeon, Gtechniq and Koch Chemie are going to be well worth having on hand, especially in summer. I've found these pro-grade products far more effective than the rubbish sold at Supercheap, which I found no better than soapy water.
 
OP
D

D.F.B

Well-known member
Joined
Aug 2, 2023
Messages
1,555
Location
Australia
In the box seat today, the mighty XR8!

A question I've been asked a few times over the years, how do I clean the intricate grills on a modern vehicle? Front end designs have only gotten more and more complex over the years, to the point where they can be a nightmare to clean properly. I'd say this is even worse when car companies fill in the front grills to improve aero properties, meaning these fake grills allow bugs and grime to accumulate rather than passing through.

IMG-6869.jpg

jan21261.jpg

Compounding the issue, these areas are hard to apply protection to...............unless you get off on using a Q-Tip to coat each and every grill opening. Despite what you might thing, even I wouldn't find that a fun time. ;)

Now in the XR8's case, I wasn't needing to remove bugs or caked on road grime, rather a light buildup created over time. However, the treatment would be the same. After an initial rinse, I applied Koch Chemie Green Star APC mixed at 6:1, which is a relatively strong dilution. You could also use something like Koch Chemie Insect & Dirt Remover or Carpro Bug Out as these do a similar job but better target bug enzymes.

IMG-4424.jpg

From here, agitate with a brush. In this case, the XR8 has a matte finish on the grills surrounded with a gloss accent. You could use either a boars hair or synthetic brush here, but I went with the gentler synthetic version. If your grill has a gloss finish, I'd stick with the synthetic to be on the safe side. What I like about Green Star is how it lathers up beautifully when agitated with a brush.

IMG-4429.jpg

After a rinse, you have a few options in terms of enhancement and protection. Obviously, the best solution would be to use a spray sealant or ceramic coating, but that will be extremely time consuming. In the past, I've used Autoglym Instant Show Shine, which is an aerosol product that can be used on matte, painted and glossy plastics.

sep18.jpg

Another option would be an aerosol trim dressing such as P&S No Rub or 3D Instant Shine. However, you would only use these on unpainted plastics.

P&S No Rub Aerosol Coating | Car Supplies Warehouse – Car Supplies Warehouse
Instant Shine Trim, Vinyl and Plastic Spray | 3D Car Care


However, today I simply used Carpro Hydr02 to quickly and effortlessly coat and dress the grills. Spray on, rinse off, job done!

IMG-4433.jpg

IMG-4472.jpg

I also decided to give Armour Detail Supply Ghost a try on the XR8's tyres. This meant some deep cleaning to prepare the sidewalls, starting with Capro ReTyre during the wash.

ARMOUR Detail Supply Ghost Tire Sealant -Durability up to 3 months - Detailing Shed
Armour Detail - Ghost - Tire Sealant | The Rag Company

IMG-4438.jpg

Once the wheel and tyres were blown dry, I grabbed one of my favorite products to ensure the sidewalls were totally clean of any remaining dressing and chemical residue. You can also use mineral spirits to do this job, but I like the unorthodox use of Tarminator.

Stoner Tarminator Tar & Sap Remover 295ml
Stoner Tarminator - 10oz (Aerosol) | Car Supplies Warehouse – Car Supplies Warehouse

IMG-4440.jpg

IMG-4446.jpg

IMG-4448.jpg

IMG-4450.jpg

The traditional advice when deep cleaning tyres has been to repeatedly apply, scrub and rinse with a tyre cleaner until the product no longer turns brown. However, even with the use of a powerful tyre cleaner and the product not turning brown, there will often be something still on the sidewalls, as shown above. Although I will say that this is very dependent on the tyre brand and tyre model.

With the sidewalls totally clean, I then applied ADS Ghost using a foam applicator pad. In this case, I only applied a single layer, but you can add additional layers 10-minutes apart if desired.

IMG-4453.jpg

You can see some of the blue tracer in this image, which quickly dissipates as the product cures.

IMG-4457.jpg

IMG-4461.jpg

IMG-4464.jpg

I've been extremely impressed with this product. It can be a little glossy on certain tyres, but on these Dunlop's, the finish is simply perfect with juuuust the right amount of enhancement. Over the longer term, Ghost is proving to be quite capable of repelling dust and grime, which means subsequent cleaning is simply a case of rinsing and giving a light scrub with car soap. Afterwards a wash, I've been giving the tyres a very light wipe over with Tire+ to refresh the finish.
 
OP
D

D.F.B

Well-known member
Joined
Aug 2, 2023
Messages
1,555
Location
Australia
Koch Chemie All-round Quick Shine, Quick & Shine, Quick Finish and Finish Spray Exterior

Koch Chemie offers four different quick detailers in their current lineup, of which it’s hard to know what the difference between them is. From the product descriptions, they all sound identical, but digging deeper reveals where each one sits.

All-round Quick Shine, Quick & Shine QS –

These two are the same product, verified by the MSDS. All-round Quick Shine is from the blue bottle consumer range, while QS is from the white bottle professional range. You would expect the larger 1-litre pro bottle to cost more, but it's actually $5 cheaper. Go figure.

Koch-Chemie - Quick & Shine | The Rag Company
Allround Quick Detailer – Koch-Chemie USA

This is another product I had overlooked, mainly because I was already stocked with quick detailers and happy with my selection, Meguiar’s Last Touch and P&S Paint Gloss. All-round Quick Shine was a product I won in a monthly giveaway and ended up pleasantly surprised by it. Most quick detailers are idiot proof to use, All-round Quick Shine is no different, just spray on and wipe off, job done. The great thing about this type of product is how they boost gloss and slickness without overdosing the paint with protection. It took me a while, but I’ve become quite fond of its scent, one used across many KCx products.

IMG_4262.jpg

Quick Finish –

This is the silicone-oil free version of All-round Quick Shine and QS. I’m guessing this would be aimed at the body shop industry, a competitor to Meguiar’s Final Inspection of P&S Paint Gloss C51. Like the two above, Quick Finish will leave behind some very mild protection, most likely removed at the next wash.

Koch Chemie (QF) Quick Finish | Allround Finish Spray – Waxit Car Care
Koch-Chemie - Quick Finish | The Rag Company

I found Quick Finish to just as easy to use, but it doesn't quite reach the same slickness and gloss as QS.

IMG_4389.jpg

Finish Spray Exterior FSE –

This version is somewhat unique in that it’s a combination quick detailer and mineral remover. I really have no use for this so have never bothered to order it. From what I can tell, you’d use this as a drying aid to neutralize high TDS water after washing.

Koch Chemie (FSE) Finish Spray Exterior | Limescale Remover – Waxit Car Care
Koch-Chemie - Finish Spray Exterior | The Rag Company

fse01.jpg

How To Use –

All three of these are used like any quick detailer, so I’ll let the following cover each product.

1. Wash the vehicle as usual.

2. You can apply prior to towel drying, or after using a blower to remove the bulk of the water. Three to four sprays per panel.

3. Wipe with the panel with a drying towel, flip or use a second towel and wipe till streak free.

IMG-3104.jpg

Usage Notes –

- You will need to order a sprayer for each of these, except the blue bottle All-round Quick Shine.

- All four can be used on ceramic coatings.

- With the exception of FSE, you can use these as interior detailers as well. In this regard, they are excellent on glossy trims.

- Avoid using on hot surfaces, especially FSE.

IMG-4477.jpg

Final Thoughts -

Unless you are dealing with hard water, I'd probably rule out FSE from this quartet. I'd also rule out the silicone-oil free Quick Finish as doesn't reach the same gloss and slickness levels of the All-round Quick & Shine and Quick Shine. Choosing between those two, the 1-litre bottle of Quick Shine makes the most sense.

--------------------------------------------------------------------------------------

And that finishes the review of the Koch Chemie product line I have sampled so far. I haven't used any of the pad and polishing compound range, of which some are highly regarded. Despite Waxit (and others) offering a healthy selection of the KCx lineup, they are only the tip of the iceberg. The KCx range is massive, with a lot of similar products that can do similar things, I'm sure there is some Germanic logic behind it all. They have also recently introduced a marine and RV line.

In the near future, I'm looking forward to use RRW rinse-less wash, and will get a chance to use Reactivation Shampoo when I get around to coating the Wildtrak in the Autumn. I also want to try the relatively new Alkali Wheel Cleaner.

kcxpl303.jpg
 
To avoid these ads, REGISTER NOW!
Top Bottom