To avoid these ads, REGISTER NOW!

Between 705 & 1200 SQ/FT DIY Shop

Workspaces between 705 and 1200 squarefeet.

turbowoodworker

Well-known member
Joined
Mar 18, 2012
Messages
3,519
Location
Apex NC
Hey Jeff,
I thought it was about time I show you how I handled the top on my router table. I salvaged an old base cabinet, put on some wheels with brakes, then topped it with the Rockler double table. I really like the double because I am often doing cope and stick. Once you get those bits dialed in, you would rather not have to switch back and forth, hence the double set up.
The table is stout enough to support two 3 HP Hitachis. The top is hinged with two heavy salvaged door hinges and I hold the top up with a scrap wood stick screwed to the side when adjusting. (I don't have lifts for any of my routers).

Hope this helps.
Rick
 

Attachments

  • DSC00596.jpg
    DSC00596.jpg
    96.8 KB · Views: 82
  • DSC00600.jpg
    DSC00600.jpg
    64.5 KB · Views: 65
  • DSC00598.jpg
    DSC00598.jpg
    79.3 KB · Views: 65
  • DSC00599.jpg
    DSC00599.jpg
    130.6 KB · Views: 59
To avoid these ads, REGISTER NOW!

Jayman17

Well-known member
Joined
Feb 6, 2017
Messages
3,793
Location
Seattle, Wa
Hey Jeff,
I thought it was about time I show you how I handled the top on my router table. I salvaged an old base cabinet, put on some wheels with brakes, then topped it with the Rockler double table. I really like the double because I am often doing cope and stick. Once you get those bits dialed in, you would rather not have to switch back and forth, hence the double set up.
The table is stout enough to support two 3 HP Hitachis. The top is hinged with two heavy salvaged door hinges and I hold the top up with a scrap wood stick screwed to the side when adjusting. (I don't have lifts for any of my routers).

Hope this helps.
Rick

Hey Rick, that is a pretty slick router table with 2 routers. I've only done a couple projects with cope and stick and I can see where that would be handy for that.

Jay
 
OP
J

Jeff Ivers

Well-known member
Joined
Apr 9, 2010
Messages
2,552
Location
Oklahoma
Hey Jeff,
I thought it was about time I show you how I handled the top on my router table. I salvaged an old base cabinet, put on some wheels with brakes, then topped it with the Rockler double table. I really like the double because I am often doing cope and stick. Once you get those bits dialed in, you would rather not have to switch back and forth, hence the double set up.
The table is stout enough to support two 3 HP Hitachis. The top is hinged with two heavy salvaged door hinges and I hold the top up with a scrap wood stick screwed to the side when adjusting. (I don't have lifts for any of my routers).

Hope this helps.
Rick

Rick,

You are obviously a far more advanced word-worker than I. Thank you for the education moment of the day - had to look up what cove and stick meant! Due to the dimensions of the inside of my cabinet, I think a lift is going to be necessary - can't raise the top with the router attached to the top plate - which also means that I will be attaching the lift assembly to the cabinet and not the top plate which is backwards of what I have seen others doing. - Hope it works.

Jeff
 

turbowoodworker

Well-known member
Joined
Mar 18, 2012
Messages
3,519
Location
Apex NC
Hey Jeff, One other thought before you spend 200+ bucks on a lift, if you look closely, both of my routers have a "poor man's lift" that I bought years ago. They were cheap ($0?) but are just metal tubes with a nut or threaded bushing at one end and a knob on the other.
The lifts allow you to raise/lower without taking the router out of the table. If you have a door or access point you can reach in and rotate the knob. Just a thought.
If needed, I can get a better picture later tonight.
 

turbowoodworker

Well-known member
Joined
Mar 18, 2012
Messages
3,519
Location
Apex NC
By "access point" I was thinking that center section where the "vent" is was open or doored, but that is where your switch is, sorry.
 
OP
J

Jeff Ivers

Well-known member
Joined
Apr 9, 2010
Messages
2,552
Location
Oklahoma
Hey Jeff, One other thought before you spend 200+ bucks on a lift, if you look closely, both of my routers have a "poor man's lift" that I bought years ago. They were cheap ($0?) but are just metal tubes with a nut or threaded bushing at one end and a knob on the other.
The lifts allow you to raise/lower without taking the router out of the table. If you have a door or access point you can reach in and rotate the knob. Just a thought.
If needed, I can get a better picture later tonight.

Trust me, I won't be doing $200 or more for a lift. This is the DIY shop. I am still working on the design of my lift - getting close.
 

bdbecker

ALLIANCE MEMBER
Joined
Nov 18, 2015
Messages
5,544
Location
Iowa
RE: Kobota weld failure
From the pics, it looks like the base material tore in the HAZ, which would indicate to me that it isn't really a weld failure but more a design flaw. I wonder why they didn't have the bushing welded down the sides as well as the top on that bracket? If it is welded down the sides and I just can't see it in the pics, then it is definitely a weld failure. I'm sure whatever fix you made will take care of that issue for good.

RE: Router Tables
I'm taking notes... good stuff guys! Discussions like this are exactly why I love GJ so much.
 
OP
J

Jeff Ivers

Well-known member
Joined
Apr 9, 2010
Messages
2,552
Location
Oklahoma
RE: Kobota weld failure
From the pics, it looks like the base material tore in the HAZ, which would indicate to me that it isn't really a weld failure but more a design flaw. I wonder why they didn't have the bushing welded down the sides as well as the top on that bracket? If it is welded down the sides and I just can't see it in the pics, then it is definitely a weld failure. I'm sure whatever fix you made will take care of that issue for good.

RE: Router Tables
I'm taking notes... good stuff guys! Discussions like this are exactly why I love GJ so much.

With regards to the Kubota, what do you mean by HAZ? If you are talking about along the top edge where the tear is kind of V shaped, then yes, the base material did tear. The tube is "welded" down both sides and I believe the right side weld broke and then the wheel caught and pulled sideways, tearing that top. On the right side, the weld only went about halfway through the thickness of the bracket material. There was no attempt to weld from the back side.

On router tables, there are many great plans available via the web and there are advantages to working from a plan. But, this being the DIY shop, I rather enjoy borrowing ideas from others plans and then going my own way. This design started from an effort to use up saved/salvaged materials to build cabinets to mount tools on and provide storage for other tools. I ended up in an evolutionary design phase as the 40 year old router I had planned to use gave up and had to be replaced during this build. Originally, I thought I would be mounting the router to the plate and removing the plate when I needed to replace a bit or adjust height.
 
OP
J

Jeff Ivers

Well-known member
Joined
Apr 9, 2010
Messages
2,552
Location
Oklahoma
Today, I continued planning the lift for my router table.
router cabinet 38 r.jpg
This is the router plate I am using.
router cabinet 39 r.jpg
Made a cardboard template of the plate so that I could mark it up and visualize the parameters I need to work within.
router cabinet 40 r.jpg
Then I cut a plywood drilling template to use to verify hole locations and act as drilling guide on actual pieces of the assembly. Determining the router clamp hole needed to be centered around the same center as the big hole in the plate and determining it was centered on the plate, I marked the center lines and intersection and drilled a 3.5 inch hole (larger than the opening in the plate). I laid the plate on the board and marked the mounting holes and the hole for the lift adjustment screw and drilled them.
router cabinet 41 r.jpg
Then, I calculated and drew in the areas that have to be removed to allow the lift part to enter the cutout in the tabletop. If the clamped router does not go all the way to the bottom of the plate, I will not be able to install bits from the top.
router cabinet 42 r.jpg
I then cut off the strips on the side to get to an assembly size that will go through the table opening and all the way to the bottom of the cabinet. If I can make the entire lift assembly stay in the non-hatched area, I will be able to attach the lift to the plate and remove the entire assembly from the top.
router cabinet 43 r.jpg
router cabinet 44 r.jpg
These pics show the fit of the router body in the opening. When this is split, It will clamp the router nicely.

Next up is to figure out the guide assembly to keep the router centered in the opening.
 
OP
J

Jeff Ivers

Well-known member
Joined
Apr 9, 2010
Messages
2,552
Location
Oklahoma
When I left off, I was trying to deduce how I would assemble the internals of the lift.
router cabinet 45 r.jpg
I realized I was going to have to rotate the plate 180 degrees, so I would have room at the rear of the cabinet to insert my hand to plug in router, tighten clamp, etc.
router cabinet 47 r.jpg
This shows my template with the hole for the lift adjuster at the top of the template.
router cabinet 48 r.jpg
I rotated the template and then indicated where the plug and switch will be located when the router is inserted in the clamp. This template is being used for top/bottom boards and the clamp boards.
router cabinet 46 r.jpg
I put the template in the cabinet setting on top of the router body with a 1/2 inch pipe chucked into the router, closed the lid and checked my positioning.
I then removed the template and trimmed a bit off to get the router centered.
router cabinet 49 r.jpg
Then I cut a base for the assembly, located the hole for the lift rod bushing, and drilled a stepped hole - 3/4 for 1/8 depth followed by 5/8.
router cabinet 50 r.jpg
Then I inserted the bushing.
 
OP
J

Jeff Ivers

Well-known member
Joined
Apr 9, 2010
Messages
2,552
Location
Oklahoma
I had thought about trying to use some aluminum tubing as guides in the lift. I thought the tubing was .75 inch, so used my .75 forstner bit to drill a test hole in some scrap. The tubing would not go into the hole. So, I ordered a 20 mm and a 13/16" forstner bits. Drilled test hoes with them.
router cabinet 53 r.jpg
My .75 forstner bit drilled a .736 hole.
My 20 mm forstner bit drilled a .8 hole (should be .787)
My 13/16 forstner bit drilled a .811 hole (should be .8125)
I wonder why I sometimes have trouble getting things to fit together?
router cabinet 51 r.jpg
I cut 4 pieces to glue together for the clamp assembly. Since I do not have a band saw, I clamped the 4 pieces together square, then drilled through planned waste space and screwed the four pieces together. Then I used my 3.5" hole saw and 3/4" forstner bit to drill holes through all four pieces. I tooke the screws out, glued up all 4 pieces, clamped them square, reinserted the screws, then chucked the assembly in the vice with some supplemental clamps till it sets up.
 

Attachments

  • router cabinet 52 r.jpg
    router cabinet 52 r.jpg
    146.3 KB · Views: 45

bdbecker

ALLIANCE MEMBER
Joined
Nov 18, 2015
Messages
5,544
Location
Iowa
With regards to the Kubota, what do you mean by HAZ? If you are talking about along the top edge where the tear is kind of V shaped, then yes, the base material did tear. The tube is "welded" down both sides and I believe the right side weld broke and then the wheel caught and pulled sideways, tearing that top. On the right side, the weld only went about halfway through the thickness of the bracket material. There was no attempt to weld from the back side...

Sorry, I don't like when people use acronyms and assume that everyone else knows what they mean, I shouldn't do it either. HAZ is an acronym for Heat Affected Zone. The HAZ is the area around the weld where the material was heated up, causing the properties of the material to change. When damage occurs around a welded area, if the base material fails, its more often than not in the HAZ. Failure of the material in the HAZ doesn't mean it was a bad weld, it means the design wasn't able to handle the load that was placed on it.

It sounds like you did in fact have a weld failure if the welds down the sides gave way.

...On router tables, there are many great plans available via the web and there are advantages to working from a plan. But, this being the DIY shop, I rather enjoy borrowing ideas from others plans and then going my own way...

I'm not a coloring book person either - give me a blank sheet of paper and let me draw the picture instead.
 
OP
J

Jeff Ivers

Well-known member
Joined
Apr 9, 2010
Messages
2,552
Location
Oklahoma
Sorry, I don't like when people use acronyms and assume that everyone else knows what they mean, I shouldn't do it either. HAZ is an acronym for Heat Affected Zone. The HAZ is the area around the weld where the material was heated up, causing the properties of the material to change. When damage occurs around a welded area, if the base material fails, its more often than not in the HAZ. Failure of the material in the HAZ doesn't mean it was a bad weld, it means the design wasn't able to handle the load that was placed on it.

It sounds like you did in fact have a weld failure if the welds down the sides gave way.


I'm not a coloring book person either - give me a blank sheet of paper and let me draw the picture instead.

Thanks for clarifying that! I have not had any formal welding training and the education is appreciated. I am sorry I did not take better pictures of the failure area - there was so much stuff in the way (the rest of the tractor), I just got lazy and snapped a couple of photos. It may well be both weld failure and bad design.

Had a bit of a setback on the router cabinet - more on that later.
 
OP
J

Jeff Ivers

Well-known member
Joined
Apr 9, 2010
Messages
2,552
Location
Oklahoma
router cabinet 55 r.jpg
After I glued up my router clamp, I marked some excess that could be removed and a parting line and then called a friend with a band saw.
router cabinet 56 r.jpg
I drilled the assembly for carriage bolts to hold the clamp together. I used 1/4" bolts but should have used 5/16" or else over-drilled the part of the assembly that I intend to remove to insert/remove the router body.
router cabinet 57 r.jpg
After a visit to my friend.

Then I started the process of trying to figure out how to get the lift assembly properly positioned and how to create "glides" that will keep the lift moving straight up and down with no slop. During this process, I managed to let the hinged top get away from me and it fell, ripping the hinges out of the back frame of the cabinet.
router cabinet 58 r.jpg
So, I had to remove that cross rail and replace it. Thank goodness for a reciprocating saw!
router cabinet 60 r.jpg
I had originally thought I might be able to use some aluminum tubing for glides, till I discovered the difficulty I was going to have getting a snug fit with no slop with the bits I have. Plan B is to attach these aluminum angles to each side of the router clamp and then create some wood glides to clamp up against them.
 
OP
J

Jeff Ivers

Well-known member
Joined
Apr 9, 2010
Messages
2,552
Location
Oklahoma
My router cabinet is one of those projects that has been challenging. It seems that I take one step forward and two back. I had let the top fall back and tear out the hinges and the rear rail. Got the rear rail replaced and then it was time to mortise for the hinges.
router cabinet 64 r.jpg
This is what happens when you forget to install the bushing on the router.
router cabinet 66 r.jpg
Patch panel glued in place.
router cabinet 67 r.jpg
Hinge mortised (before final cleanup).
router cabinet 65 r.jpg
Meanwhile, I started on the fence for the table.
router cabinet 63 r.jpg
I attached the back of the lift assembly to the base.
router cabinet 68 r.jpg
I assembled the lift assembly, except for the lift rod. It appears my aluminum angles will work fine as the glides. Next, I have to get the lift rod alignment correct.
 
OP
J

Jeff Ivers

Well-known member
Joined
Apr 9, 2010
Messages
2,552
Location
Oklahoma
I spent about 6 hours today trying to finish my router lift. I ended up having to drill the couple nut out of the clamps assembly and replace it with more attention to alignment. I also had to remove the bushing from the bottom and relocate it about 1/8 inch.
router cabinet 69 r.jpg
Picture of the lift screwed into place in the cabinet with the router clamped into place.
router cabinet 70 r.jpg
Picture of the router lowered. The lower left hole has the lift rod with the T30 torx head in it.
router cabinet 71 r.jpg
Picture of the router in the up -bit change - position.

Still some cleanup bits, but this project is almost done. Sorry about the blurred pics.
 
OP
J

Jeff Ivers

Well-known member
Joined
Apr 9, 2010
Messages
2,552
Location
Oklahoma
Router cabinet has been more or less on hold for a while, waiting on some bits to come in for dust collection and fence.

So, back to another project I had started.

parts cab 6 r.jpg
Made some drawers - 28 of them.
parts cab 9 r.jpg
Built a pair of cabinets. Thought it would be best to stain and finish the inside and outside of the cabinet, install drawer slides, then install the back and then finish the inside and outside of the back. I thought it would be easier to get the drawer slides installed with the back off, even though I was going to use my new Kreg jig. Yes, I installed the slides with the cabinet on its side.
parts cab 12 r.jpg
Because of the expected weight, I placed the cabinets in position before installing the drawers.
parts cab 13 r.jpg
Discovered the Kreg jig really works best if you install drawers and slides from the top down. Ended up temporarily screwing cleats to the front of the cabinet to have something to clamp the jig to.
parts cab 17 r.jpg
To install the deeper drawers, it was much easier to cut some stock to clamp between the slides instead of using the Kreg jig.
parts cab 18 r.jpg
Now, I just need to make false fronts and drawer pulls.
parts cab 16 r.jpg
If i calculated right, Everything on top this table (except the cabinets) will go into the new parts cabinet.
 
OP
J

Jeff Ivers

Well-known member
Joined
Apr 9, 2010
Messages
2,552
Location
Oklahoma
I have historically not gone to very many garage sales or estate sales. Thursday, I noticed an ad for a sale a couple of miles from me that showed lots of tools. Since I have spent so much time in the shop lately, I decided I would take a few minutes to check it out. I am glad I did.
08272020 estate sale r.jpg
1 - 36" Rockler dual track
2 - 36" Rockler miter bars
7 - 48" Rockler T-tracks
5 - bags of t-bolts and knobs
1 - jewelers screwdriver
All are brand new items - total cost $15

Of course, this is going to mean another delay on my router cabinet as I am going to replace the T-track on it with this dual track.
 
To avoid these ads, REGISTER NOW!

bdbecker

ALLIANCE MEMBER
Joined
Nov 18, 2015
Messages
5,544
Location
Iowa
08272020 estate sale r.jpg
1 - 36" Rockler dual track
2 - 36" Rockler miter bars
7 - 48" Rockler T-tracks
5 - bags of t-bolts and knobs
1 - jewelers screwdriver
All are brand new items - total cost $15

That's a "you ****" deal for sure! Nice find!
 

BUGTHUG

Well-known member
Joined
Nov 12, 2010
Messages
2,960
Location
Kansas
That's why my barn is full of good stuff. Between garage sales and auctions, makes my knees weak
 
OP
J

Jeff Ivers

Well-known member
Joined
Apr 9, 2010
Messages
2,552
Location
Oklahoma
Wow Jeff that is an awesome score for $15!

Bret

Thanks, Bret. I think this may be the best deal I ever found.

That's a "you ****" deal for sure! Nice find!

ooooOH, this may be my first ever "you ****". Thank you, kind sir!

That's why my barn is full of good stuff. Between garage sales and auctions, makes my knees weak

I can see where one good find could soon lead to addiction. I've tried a few auctions, but don't have the patience for all the waiting.
 
OP
J

Jeff Ivers

Well-known member
Joined
Apr 9, 2010
Messages
2,552
Location
Oklahoma
For years, one side of the workbench bay in my shop has been my "hardware store".
hardware shop 1 r.jpg
This is how it looked while I have been working on all the "covid" projects since March. One day, while going back and forth getting hardware out, it dawned on me there might be a way, to reclaim some bench top space if I redid my hardware storage. I have admired those who were able to acquire Vidmar cabinets, but have never found a local opportunity. I have also admired those who created roll-around storage for parts trays. After measuring and reviewing what I have to store, I decided to build a pair of parts cabinets.
parts cab 19 r.jpg
As of last week, this is how the cabinets look. Since last week, I have been sorting and moving hardware to the new cabinets. I realized my initial purchase of Schaller bins was way inadequate and since I was far enough into the move to have a better idea of what I needed I ordered more. They are supposed to me here today. In the meantime, I am somewhat stalled on this project - hoping for an early UPS delivery.
 
OP
J

Jeff Ivers

Well-known member
Joined
Apr 9, 2010
Messages
2,552
Location
Oklahoma
That's quite an improvement Jeff, looks great!

Thank you, bd.

Big improvement + smaller footprint = success! Great job.

Thank you, Jay.

Jay

Jeff,
Fantastic job on the hardware storage. looks great.
Rick

Thank you, Rick.

I feel a bit like I have been trying to work on a five dimensional puzzle for weeks. We all know the first 3 dimensions are width, length and height. The 4th dimension is space, as in where on that table (or elsewhere in the shop) are the like bits that should be stored together. The fifth dimension is destination optimization as in what size bin is needed for the collection of bits to go together.

When I started this project, I measured the square inches of storage space in existing drawers, etc and the height of the storage. That led me to the desire to build 1", 1.5", and 2" deep drawers. I chose to use .5 inch drawer bottoms, so my target drawer heights became 1.5, 2, and 2.5. But since the drawer slides are about 1.75 inches, my final drawer heights became 1.75, 2 and 2.5.

I think I am far enough along that I can see success.

I started with this to move:
parts cab 16 r.jpg

As of yesterday, I was down to what is left on the table:
parts cab 21 r.jpg
and on my "staging" area:
parts cab 22 r.jpg

Last night, I ordered another 239 Schaller bins to add to the 405 I had already ordered.

The inside dimensions of my drawers are 17.5 by 13 for 227.5 square inches per drawer and with 28 drawers, the cabinets have a total of 6370 square inches of storage.

It has been really hard to anticipate the needed bin sizes. I hope this will be my final order without too much surplus.
 
OP
J

Jeff Ivers

Well-known member
Joined
Apr 9, 2010
Messages
2,552
Location
Oklahoma
On my parts cabinet project, on July 11, I was here:
parts cab 6 r.jpg
At that time I had completed the 28 drawers. Since then, this project has eaten my lunch. I am almost done - currently working on sorting and labeling the screws.

Some projects, I set out to save money and use free or recycled materials. Some projects I just set out to do and buy what I need as I go. This project fell in the latter category. Had absolutely no way to know how to accurately estimate materials because of the Schaller bins I planned to use.

I don't normally discuss project cost on here, but I am going to make an exception here in case someone else is thinking of heading down this path.
Wood - $231
Slides - $267
Schaller bins - $499

I just received my 5th (and hopefully final) Schaller shipment. I have now purchased 747 bins that cover a total of 4656 square inches. Total cabinet space is 6370 square inches. I am storing some stuff in original packaging such as pocket screws. I also have a few parts container holding things like pop rivets that are going in the drawers as is for the convenience of taking the entire case to where I am working.

Along the way, I decided to build a jig for straightening lumber.
Straightening jig 1 r.jpg
Straightening jig 2 r.jpg
and then another jig for holding small Schaller bins that I wanted to shorten.
Bin cutting jig 5 r.jpg
Most of my parts cabinets and containers have made it to the house for cleaning and posting on CL. I decided to keep one that had no drawers or bins and add drawers to it:
Hillman cab 1 r.jpg
Hillman cab 2 r.jpg
 
OP
J

Jeff Ivers

Well-known member
Joined
Apr 9, 2010
Messages
2,552
Location
Oklahoma
Sunday, I ordered another 47 Schaller bins, bringing me to a total of 794. This is my 6th and last order, really it is, I swear it. I have been moving and sorting hardware for over a month. While I wait on my last order, I finished converting the one Hillman parts cabinet I am retaining.
Hillman cab 3 r.jpg
Hillman cab 4 r.jpg
Hillman cab 5 r.jpg
Decided I needed some spots for things over 2" tall and this will reside to the right of my big cabinet.
 

Unruh

Well-known member
Joined
Aug 12, 2017
Messages
1,431
Location
Silverdale, Washington
Jeff, I just bought a router lift and to be honest, I never thought about building my own. You are amazing. Also that deal at the estate sale was just right! I don’t go to many sales either, but I don’t ever think I’ve been that lucky!
 
OP
J

Jeff Ivers

Well-known member
Joined
Apr 9, 2010
Messages
2,552
Location
Oklahoma
Jeff, I just bought a router lift and to be honest, I never thought about building my own. You are amazing. Also that deal at the estate sale was just right! I don’t go to many sales either, but I don’t ever think I’ve been that lucky!

Thank you Unruh! If I have been reading your thread correctly, you acquired a wee bit more than a router lift. Looked liked a real nice tool haul! Anxious to see it all assembled and the first products of the new equipment. I had hoped to post the final pic of my parts storage by now, but instead I am waiting on my 8th Schaller bin order. I have actually finished sorting and moving all the hardware, but took another look and decided I could improve the organization with a few more bins and fill some empty space for future use.
 
OP
J

Jeff Ivers

Well-known member
Joined
Apr 9, 2010
Messages
2,552
Location
Oklahoma
When I started my parts cabinet project, the hardware portion of my shop looked like this:
hardware shop 1 r.jpg
As of today:
parts cab 24 r.jpg
A wider view of the entire workbench area:
parts cab 23 r.jpg
I did a good job of estimating how many drawers I would need. All of the hardware that was in this area in the hodgepodge of parts cabinets I had, plus hardware from elsewhere in the shop and the house has now been moved into the new cabinet. Unfortunately, I am not calling this done until my 8th order of Shaller bins arrives this Friday and is incorporated.
An example of one of my done drawers:
parts cab 27 r.jpg
One of the reasons I have more bins on order:
parts cab 28 r.jpg
Some drawers are housing parts cases for items that I like to take, as a collection, to where I am working.
parts cab 50 r.jpg
 

loganb

ALLIANCE MEMBER
Joined
Dec 29, 2011
Messages
5,502
Location
Omaha, NE
Looks awesome! Well done and enjoy everything in one spot!

Question as I'm working on a similar project but using some of the old 5 drawer metal "paper cabinets" instead of making wood cabinets... what was your thought process on grouping like parts together instead of like sizes? Realize with Schaller bins they're easy to move, but i noticed you had all washers together instead of a drawer for all 1/4 & 3/8, etc. I'm debating which way to start so would love to hear your reasoning

Sent from The Garage Journal mobile app
 

Unruh

Well-known member
Joined
Aug 12, 2017
Messages
1,431
Location
Silverdale, Washington
Jeff that is a huge difference! My Dad kept every nail he pulled and would use a hammer to try to straighten them. He usually kept them in some kind of jar or old coffee can. Seemed like everything was mixed together. I kind of started doing that when I got my own place but quickly learned the importance of some kind of organization. Those new drawers of yours does that and they look fantastic!
 
OP
J

Jeff Ivers

Well-known member
Joined
Apr 9, 2010
Messages
2,552
Location
Oklahoma
Looks awesome! Well done and enjoy everything in one spot!

Question as I'm working on a similar project but using some of the old 5 drawer metal "paper cabinets" instead of making wood cabinets... what was your thought process on grouping like parts together instead of like sizes? Realize with Schaller bins they're easy to move, but i noticed you had all washers together instead of a drawer for all 1/4 & 3/8, etc. I'm debating which way to start so would love to hear your reasoning

Sent from The Garage Journal mobile app

Thank you. You pose an excellent question! I wish I had some very deep philosophical answer for you, but alas, I don't. I remember thinking about how to organize things and wondering if I should organize by size. I don't remember actually making the decision to not do it that way. My previous hodgepodge of organizers had led to a scattered deployment of like items - several small drawers of 1/4 bolts, long bolts (regardless of size) in another cabinet and, worst of all, peanut tubs containing washers, nuts, screws, and bolts that had not been sorted by size. So, in order to avoid constantly re-arranging bins, I just kinda fell into trying to gather together like items and sort them till I was done with all washers, etc. The biggest problem I see with this setup is when I suddenly acquire some new size of something that I don't already have a slot for - of course that is the same issue that led to the hodgepodge I had before.

The hardest items to sort were bolts because of the different sized bins required - they did not lend themselves to a nice neat progression of sizes and I had to resort to putting some items out of sequence in order to not waste a ton of space.
parts cab 39 r.jpg
 
OP
J

Jeff Ivers

Well-known member
Joined
Apr 9, 2010
Messages
2,552
Location
Oklahoma
Jeff that is a huge difference! My Dad kept every nail he pulled and would use a hammer to try to straighten them. He usually kept them in some kind of jar or old coffee can. Seemed like everything was mixed together. I kind of started doing that when I got my own place but quickly learned the importance of some kind of organization. Those new drawers of yours does that and they look fantastic!

Thank you. My dad was the same way. I can remember dumping 1 pound coffee cans of nails looking for something appropriate for the task and sometimes having to straighten the nail. I still have 9 peanut canisters in the metal cabinet on the wall to the left of the new parts cabinet. Two contain multiple pounds of roofing nails. Two contain 5/16 t-bolts and knobs that I acquired at an estate sale. The quantity and volume of these items did not lend themselves to the new drawers. Organization is a never-ending challenge. Even if you have the space to set up and the dollars to stock every known size/item of known hardware, next month some engineer will design a new type of bolt or nut, etc.
 
OP
J

Jeff Ivers

Well-known member
Joined
Apr 9, 2010
Messages
2,552
Location
Oklahoma
After all the work sorting hardware into my new parts cabinet, I have vowed to myself not to end up with any piles of unsorted hardware in the future (yeah, we'll see how long that lasts!). To assist in that goal, I hung all my hardware gauges on the side of the cabinet:
hardware gauges r.jpg

I have been working, once again, on the finishing touches to my router cabinet. Several items I had made but not finished. Today, I reinstalled the finished bracket for the dust hose:
router cabinet 72 r.jpg

Yesterday, I drug this home:
Jet SFX 1 r.jpg
Bora mobile base 1 r.jpg
bandsaw blades r.jpg
 
OP
J

Jeff Ivers

Well-known member
Joined
Apr 9, 2010
Messages
2,552
Location
Oklahoma
I have been looking for a band saw for some time now. Wanted to wait till I had cleared out my old radial arm saw, which happened several months ago. No joy on CL. Started researching new saws and was sort of zeroed in on the Jet DX-Pro or SFX. Had checked online and the saws seemed to be all back ordered, so I went and checked out the local Woodcraft. They did not have either saw, but did have a comparable Rikon - the model I looked at was very similar to the SFX. They checked the back room and said they had 2 in stock. Went home to think it over and then take the trailer back if I decided to buy. Decided I liked the Rikon well enough to purchase instead of waiting on the Jet. Called and told them to put my name on one to pick up the next day. Store called back in a few minutes and told me the ones in stock were not the model I looked at, but rather a cheaper model with an open stand.

The next day was free trash day for the community, so I hauled a trailer load of stuff to the dump and then went by Woodcraft to look at the model available. After a close examination, I decided I would rather wait on ordering the higher model. Talked to the salesman and was about to place an order when one of the other salesman spoke up and said we got in a Jet SFX just after you left the other day. After determining that it was not spoken for, I drove off with it and ended up with the model I preferred.
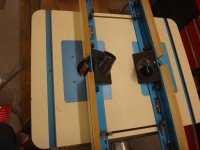
Assembled the base:
Jet SFX 3 r.jpg
Partially assembled the mobile and placed it upside down on the upside down base, clamped, then marked the holes that existed on the Jet base on the mobile base to drill it. If I am going to drill something, might as well drill the relative inexpensive mobile base, rather than the Jet base.
Jet SFX 4 r.jpg
Finished assembling the mobile base and bolted to the Jet base.
Jet SFX 5 r.jpg
This is what I had setting on the floor after removing all the components I could. This weighs in around 350 pounds and I found myself (working alone) feeling somewhat intimidated. How was I going to attach the base to this and get the assembly upright without getting hurt or damaging the saw? There have been a number of GJ posts lately about injuries and I did not want to add to those numbers.
Jet SFX 6 r.jpg

Cut the sides of the box away and cleared enough foam that I could bolt the base in place.
Jet SFX 7 r.jpg

Strapped the upper packing material to the pallet and the saw, connected a strap from my engine hoist to the pallet and lifted the top of the saw off the ground enough that I could easily finish up righting the saw with no strain. This is just after removing the strap from the hoist to the pallet.
Jet SFX 8 r.jpg

This is how I left things when I came in a while ago:
Jet SFX 9 r.jpg
 
To avoid these ads, REGISTER NOW!
Top Bottom