To avoid these ads, REGISTER NOW!

Between 705 & 1200 SQ/FT DIY Shop

Workspaces between 705 and 1200 squarefeet.

BUGTHUG

Well-known member
Joined
Nov 12, 2010
Messages
2,960
Location
Kansas
Here’s mine after 5 years of moving stuff from one side of the barn to the other. I bought the nuts and bolts from a old part store that closed its doors after 60 years. Bought a bunch of stuff I’ll probably never use.
I’m not quite as organized as you Jeff.
 

Attachments

  • C4539D9C-22F8-4A55-B534-209F7288F32A.jpg
    C4539D9C-22F8-4A55-B534-209F7288F32A.jpg
    143 KB · Views: 158
  • A56C2F0F-0E96-4C96-A062-89A8F88B519E.jpg
    A56C2F0F-0E96-4C96-A062-89A8F88B519E.jpg
    139.7 KB · Views: 153
  • 9F95010D-AE7A-4009-A5B9-B1B5BC8D6720.jpg
    9F95010D-AE7A-4009-A5B9-B1B5BC8D6720.jpg
    137 KB · Views: 157
To avoid these ads, REGISTER NOW!

Jayman17

Well-known member
Joined
Feb 6, 2017
Messages
3,793
Location
Seattle, Wa
Jeff, that's a nice addition to your shop. Glad you got it put together by yourself safely. Now go make some sawdust! :3gears:

Jay
 

Unruh

Well-known member
Joined
Aug 12, 2017
Messages
1,431
Location
Silverdale, Washington
Great purchase! I have a similar Jet (I have the older model) and love it. Those Timber Wolf blades are what I use as well. Looking forward to seeing what you make with it!
 
OP
J

Jeff Ivers

Well-known member
Joined
Apr 9, 2010
Messages
2,552
Location
Oklahoma
Here’s mine after 5 years of moving stuff from one side of the barn to the other. I bought the nuts and bolts from a old part store that closed its doors after 60 years. Bought a bunch of stuff I’ll probably never use.
I’m not quite as organized as you Jeff.

Considering the volume you have, you may be more organized. How long has it been since you had to make a trip to the hardware store?

Congratulations on the new saw! That thing looks like it'll cut some wood!

Thank you. I hope it will do what I hope to do, which includes trying to harvest some lumber from a Walnut tree I cut down on my property.

Jeff, that's a nice addition to your shop. Glad you got it put together by yourself safely. Now go make some sawdust! :3gears:

Jay

Soon, on the sawdust. I completed all the setup steps today except the fence. Have to order some dust collection bits also.

Great purchase! I have a similar Jet (I have the older model) and love it. Those Timber Wolf blades are what I use as well. Looking forward to seeing what you make with it!

Your advice is some of what I considered in selecting the Jet. Thank you for the help.

Congrats on the saw...that should serve you well for years!


Thank you. I certainly hope this is a long term investment.
 
OP
J

Jeff Ivers

Well-known member
Joined
Apr 9, 2010
Messages
2,552
Location
Oklahoma
Managed to hit another estate sale yesterday.
Craftsman tool cabinet r.jpg
I admired this old boy priced at $64. Passed on it because I have absolutely no place to put it and most, if not all, the tools would duplicate what I already have. Thought it was neat that it included a 1/4" drive set in its original box (upper right).
shopmate maxiclamp r.jpg
I did pick up this set which appears to be complete and in its original box for $20. I haven't been able to find out anything about the set such as age and original selling price. I picked it up because "one can never have enough clamps" and the knobs are the type that can be slid almost all the way onto a threaded rod and just tightened the last turn or so. Can anybody out there shed some light on the Shop Mate Maxi-clamp?
 
OP
J

Jeff Ivers

Well-known member
Joined
Apr 9, 2010
Messages
2,552
Location
Oklahoma
While I have been assembling and setting up my bandsaw, I have gone back to work on my router cabinet.
router cabinet 73 r.jpg
Finished the dust collection assembly.
router cabinet 74 r.jpg
I had a couple of cutoffs from the tabletop that are going to form the lower portion of my fence. I drilled holes part way thru, inserted some threaded inserts, cut some 1/4-20 rod and epoxied the rod into the insert.
router cabinet 75 r.jpg
Added some slots to the router fence. The rods will go thru these slots and be held in place by threaded knobs to allow the fence pieces to be open or closed.
router cabinet 76 r.jpg
I kept trying to come up with a fancy way to hold the Y fitting to my bracket, but finally said "screw it" and went simple. Screwed a screw-eye into the bracket, then used a cable tie thru the eye and around the Y.
router cabinet 79 r.jpg
Completed fence with closed face.
router cabinet 80 r.jpg
Complet6ed fence with open face.
 

Rich M.

Well-known member
Joined
Jun 18, 2013
Messages
286
Location
Timonium, Maryland
Here’s mine after 5 years of moving stuff from one side of the barn to the other. I bought the nuts and bolts from a old part store that closed its doors after 60 years. Bought a bunch of stuff I’ll probably never use.
I’m not quite as organized as you Jeff.

You have a large selection of hardware and organizers. My guess is you are not just a weekend DIYer.
 
OP
J

Jeff Ivers

Well-known member
Joined
Apr 9, 2010
Messages
2,552
Location
Oklahoma
I've been playing with the new Jet, mostly trying to reclaim some lumber from the fire wood pile as a way to get used to using the saw. Also been working on the final tasks to complete my router cabinet.
router cabinet 81 r.jpg
Added some pieces of walnut to wrap the cord around.
router cabinet 82 r.jpg
Pulled the T-track out to install part of my estate sale find.
router cabinet 83 r.jpg
Put some double tape on the ends to temporarily hold some cleats till I could get some clamps on them.
router cabinet 84 r.jpg
Cleats clamped in place.
router cabinet 85 r.jpg
Clamped additional cleats across the others (using screws) as router guides.
router cabinet 86 r.jpg
New wide track (double track) or whatever it is called, installed.
 

Jayman17

Well-known member
Joined
Feb 6, 2017
Messages
3,793
Location
Seattle, Wa
Table is looking good. Just curious if you had a reason why you didn't install laminate to that tabletop and fence first? I might be worried about moisture.

Jay
 
OP
J

Jeff Ivers

Well-known member
Joined
Apr 9, 2010
Messages
2,552
Location
Oklahoma
Table is looking good. Just curious if you had a reason why you didn't install laminate to that tabletop and fence first? I might be worried about moisture.

Jay

The top is made from a piece of 3/4 inch formica laminated press board glued to a 3/4 inch piece of baltic birch plywood, so I don't understand the question. The bottom part of the fence is the same material. The remainder of the fence is 3/4 inch baltic birch finished with BLO followed by polyurethane.
 
Last edited:
OP
J

Jeff Ivers

Well-known member
Joined
Apr 9, 2010
Messages
2,552
Location
Oklahoma
Table is looking good. Just curious if you had a reason why you didn't install laminate to that tabletop and fence first? I might be worried about moisture.

Jay

The top is made from a piece of 3/4 inch formica laminated press board glued to a 3/4 inch piece of baltic birch plywood, so I don't understand the question. The bottom part of the fence is the same material. The remainder of the fence is 3/4 inch baltic birch finished with BLO followed by polyurethane.

Nice router table!

Thank you.
 
Last edited:

Jayman17

Well-known member
Joined
Feb 6, 2017
Messages
3,793
Location
Seattle, Wa
Jeff, sorry, I see now that the tabletop is laminate. The pattern on the laminate looked like particle board the first time I looked at the photo. :eek:
:beer:

Jay
 
OP
J

Jeff Ivers

Well-known member
Joined
Apr 9, 2010
Messages
2,552
Location
Oklahoma
Jeff, sorry, I see now that the tabletop is laminate. The pattern on the laminate looked like particle board the first time I looked at the photo. :eek:
:beer:

Jay

Jay, not a problem at all. When I went back and looked at the photos, I realized how much like particle board the laminate looks. Maybe why I got that section of countertop cheap?

For all those checking in on this thread, I was having a rough time with the forum last night and ended up with duplicated posts. I am sorry - still don't know what I did wrong.
 
OP
J

Jeff Ivers

Well-known member
Joined
Apr 9, 2010
Messages
2,552
Location
Oklahoma
Had some Bradford Pear cut to firewood length that I wanted to experiment with on the new bandsaw and some red oak salvaged from a pallet.
PB220002 r.jpg
My first attempt at a joiner's mallet.
 

turbowoodworker

Well-known member
Joined
Mar 18, 2012
Messages
3,519
Location
Apex NC
Mallets are fun projects and yours turned out nice. I never thought of Bradford pear. Every ice storm here results in lots of firewood. Maybe I’ll try some for a project.
Rick
 
To avoid these ads, REGISTER NOW!
OP
J

Jeff Ivers

Well-known member
Joined
Apr 9, 2010
Messages
2,552
Location
Oklahoma
Mallets are fun projects and yours turned out nice. I never thought of Bradford pear. Every ice storm here results in lots of firewood. Maybe I’ll try some for a project.
Rick

Thank you. I used to have 14 bradford pears lining my drive. Lost 5 in an ice storm in 2007 and had the remainder taken down about 3 years ago. Due to the ice damage, I always thought of the wood as brittle. Was watching the Woodwright Shop on PBS and saw all the woods he was using for projects, so I decided for a first attempt I would try the pear. I like the way it looks and the grain is really straight. Now, if it doesn't split the first time I wack something with it, I'll be good to go.

Jeff, nice mallet, I will have to add that to my project list.

Jay

Thank you. This may see more use applied to the side of my head than to woodworking projects, as in why did I not think of that - wack! The top of the handle on this is a wedge and is inserted from the top of the head into a wedge-shaped cutout in the head. It looked a lot easier on a 30 minute show than it was for me!
 

turbowoodworker

Well-known member
Joined
Mar 18, 2012
Messages
3,519
Location
Apex NC
Bradford pear has the built in flaw that makes them so vulnerable to damage during ice or wet heavy snow storms. It’s not the character of the wood but rather, the multiple branches all emanating from the same place. Those branches get heavy and the whole tree splits at the juncture.
A couple of years ago, a guy here had lined his long drive with about ten of them. I think eight of them are gone now.
 
OP
J

Jeff Ivers

Well-known member
Joined
Apr 9, 2010
Messages
2,552
Location
Oklahoma
Bradford pear has the built in flaw that makes them so vulnerable to damage during ice or wet heavy snow storms. It’s not the character of the wood but rather, the multiple branches all emanating from the same place. Those branches get heavy and the whole tree splits at the juncture.
A couple of years ago, a guy here had lined his long drive with about ten of them. I think eight of them are gone now.

You are correct. I have been amazed with the wood as I have been experimenting with it on some small projects. With all the UT videos I have watched and the forums I monitor, I find it amazing that I have never seen anyone post about using Bradford Pear in a project.
 
OP
J

Jeff Ivers

Well-known member
Joined
Apr 9, 2010
Messages
2,552
Location
Oklahoma
Since completing the mallet, my shop time has been disrupted by Xmas related tasks. I have managed some shop time in small increments and have continued experimenting with the bandsaw and wood harvested on the property.
salad server 2 r.jpg
salad server 4 r.jpg
Used the bandsaw and my belt sander to sculpt this pair of salad forks/spoons/servers and a stand from Bradford Pear. Somewhat reminiscent of Oral Roberts praying hands.

bandsaw wrench rack r.jpg
Got some of those super-duper magnets and made this allen key holder for the bandsaw from a scrap of walnut.
 

bdbecker

ALLIANCE MEMBER
Joined
Nov 18, 2015
Messages
5,543
Location
Iowa
Those turned out great! How did you get the handles so consistent/round? Did you turn them on a lathe or was that all done by hand? Either way, nice work!
 
OP
J

Jeff Ivers

Well-known member
Joined
Apr 9, 2010
Messages
2,552
Location
Oklahoma
Those turned out great! How did you get the handles so consistent/round? Did you turn them on a lathe or was that all done by hand? Either way, nice work!

By not taking a closeup shot with the camera! Thanks for the complement, but the servers did not come out well enough to give as a gift. I rotated the handles while holding them against the belt sander to shape them. They came out slightly different in size and not as round as I wanted. I also would like to have the handles thicker. For those reasons and because there are some small cracks in the business end, I am keeping these to utilize at the home and determine if the handles will break off or hold up to use. Then, I will try to make a set for gifting.
 
OP
J

Jeff Ivers

Well-known member
Joined
Apr 9, 2010
Messages
2,552
Location
Oklahoma
Today, I finished a project that I plan to give as a gift.
Paper clip 1 r.jpg
paper clip 2 r.jpg
As I mentioned previously, I have been experimenting with some super-duper magnets.
 
OP
J

Jeff Ivers

Well-known member
Joined
Apr 9, 2010
Messages
2,552
Location
Oklahoma
I just finished my daily review of all the great threads on GJ. It is hard to describe how much joy and knowledge I have found by reading about others projects. Wish I had come up with some clever artwork or something else entertaining to say Merry Christmas to all, but I didn't. So, please settle for this:

Merry Christmas to all you GJers and your Families!

May your new year be a whole lot better than this COVID disaster of a year!
 
OP
J

Jeff Ivers

Well-known member
Joined
Apr 9, 2010
Messages
2,552
Location
Oklahoma
Here in Broken Arrow, OK, a couple of weeks ago we had 6.5 inches of snow - the most we have seen at one time in 7 years. I thought those interested in fluid dynamics might be interested in a couple of photos:
winter overhang 1 r.jpg
winter overhang 2 r.jpg
I have mostly been working on small projects. Made a second deep reach clamp from recycled pallet oak. Then I needed a rack to hang the 2 clamps from.
deep clamp rack 2 r.jpg
deep clamp rack 3 r.jpg
Used some more of that oak and some neodymium magnets to make a countersink rack:
countersink rack r.jpg
Then my daughter said she needed a shelf to go inside a kitchen cabinet. I lucked into another bed frame to recycle and came up with this.
kitchen cabinet shelf 1 r.jpg
kitchen cabinet shelf 2 r.jpg
 

bj383ss

Well-known member
Joined
Sep 29, 2011
Messages
3,166
Location
TX
Jeff your snow looks as crazy as ours was. Really like that deep reach clamp.

Bret
 
OP
J

Jeff Ivers

Well-known member
Joined
Apr 9, 2010
Messages
2,552
Location
Oklahoma
When working on my parts drawer cabinets, I decided I needed more long bar clamps than I had - of course, this was after I had built a bar clamp rack to hold the clamps I already had that took up all the available space I had to work with on one section of wall. Temporarily I had been hanging those clamps where one of my Workmates stores.

bar clamp rack 3 1 r.jpg
bar clamp rack 3 2 r.jpg
bar clamp rack 3 3 r.jpg

Scavenged some scraps of metal and made this new rack for the 4 new clamps.

kubota throttle r.jpg

My Kubota came with an orange plastic cover on the throttle handle. I had noticed that it tended to slide up on the handle and kept pushing it back on - until the day that I didn't notice it and it was suddenly gone. I suppose I mowed over it and sent the pieces onto the neighbors property. So, I turned to some more of the recycled oak pallet wood and came up with a replacement.
 

Trapps

ALLIANCE MEMBER
Joined
Feb 10, 2017
Messages
1,992
Location
The Detroit Zoo
I am currently seeking clamp storage ideas. I like the simplicity.
Like the Porsche 917s of yore, your tractor is lighter now and therefore will be faster.

:beer:
 
OP
J

Jeff Ivers

Well-known member
Joined
Apr 9, 2010
Messages
2,552
Location
Oklahoma
I am currently seeking clamp storage ideas. I like the simplicity.
Like the Porsche 917s of yore, your tractor is lighter now and therefore will be faster.

:beer:

I have done three different clamp racks now. Wish I could come up with a design that was easily expandable - either that or I need to quit buying more clamps.

As for the tractor speed, I wonder what it would take to measure the difference?

I am now working on some rehab and upgrade of my blast cabinet.
 
OP
J

Jeff Ivers

Well-known member
Joined
Apr 9, 2010
Messages
2,552
Location
Oklahoma
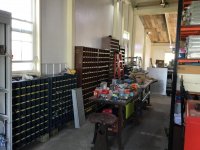
About a week and a half ago, I decided my blast cabinet needed some love. So, I took it all apart and began the process of repairing and enhancing. I am documenting the progress at
https://www.garagejournal.com/forum/showthread.php?t=310730 starting at post 6.
I had also ordered an air filtration system for the shop.

Of course that is when one of the light fixtures in the shop failed and while I was waiting on the bits to convert that fixture to LED, the air filtration arrived with so much stuff scattered on the shop floor that I cannot attempt to install that. And, that is when my dishwasher decided to quit on me.

I really can't complain about the dishwasher, as it is over 28 years old. I opened it up to unload the clean dishes to discover water standing in the bottom. I figured the pump had probably failed. I bailed the water out, came back a while later and discovered even more water standing in it. Okay, maybe the fill shutoff valve has failed. Either way, at that age, I will replace the unit instead of trying to repair.

So, lets shut off the water under the sink so I can bail it out and remove the unit in preparation of a replacement. So bail out, come back later and even more standing water. OK the cheap 28 year old sink shutoff is leaking.

Two new shutoffs purchased (no point in replacing just one). Ideally just unbolt the compression fitting, install the new valve and tighten the old nut onto the valve. No, that won't work because the old valves allowed the pipe to insert into the valve further than the new valves, meaning the ferrule is too far from the end of the pipe to allow it to seal. There is very little pipe sticking above the bottom of the cabinet, so get out the dremel and cut off the old ferrule, so the pipe cutter will work in a way that allows removing the minimum amount of old pipe.

I am sure this type of thing has never occurred to anyone else, right? Any way , I have 2 new shutoff valves installed, the old dishwasher removed to the shop and disassembled for recycling and I am waiting on a new dishwasher.

Anybody tried to buy a new major appliance lately? Availability is a joke.

The good news is that tomorrow, I should be able to get back to work on the LED conversion and then the blast cabinet.
 
OP
J

Jeff Ivers

Well-known member
Joined
Apr 9, 2010
Messages
2,552
Location
Oklahoma
Yesterday, I finished installing the new dishwasher.
dishwasher r.jpg
Today, I finished converting my first 8' T12 fluorescent to LED. As my ballasts burn out, I will continue this process. I have 8 T12 and 3 T8 fixtures in the shop (all 8' units).
LED conversion 1 r.jpg
 

bdbecker

ALLIANCE MEMBER
Joined
Nov 18, 2015
Messages
5,543
Location
Iowa
Funny... I helped my Dad install that same dishwasher last spring. I'm sure you're already enjoying how quiet it is. Also, don't be afraid to skip rinsing the dishes before loading - apparently that thing really does a good job of cleaning.
 
To avoid these ads, REGISTER NOW!
Top Bottom